-
Announcement
Welcome to the forums!
If you are a newly-approved member, make sure you check out the New Member Checklist!
If you are a Detachment member and can't see the member-only area, post here for access.
-DV
Leaderboard


.thumb.jpg.6767538d6131650e3b411b09ff9e4989.jpg)
Popular Content
Showing content with the highest reputation since 04/26/2023 in all areas
-
Just a quick update on what's going on with the detachment stuff since it's been a quiet period (not always a bad thing!). 1. We're actively designing merch for a racing shirt, patch, and coin themed for KOTOR 20th based on votes. These will come in the next few months. It is slow due to lack of artists available and, well, life. 2. We're working on 3 New to the Legion CRLs/costumes currently that we're hoping to be released before the end of the term in Feb after updates to the costumes are finished. 3. We were told by LMOs that we had to wait until the end of the season of Ahsoka before submitting requests for assignment of the costumes. But, after the short, "please don't spoil the episode for us" request time, we're submitting for Shin, Baylan, Morgan, Marrok, and all 3 Great Mothers to be assigned to TFE. 4. We're still looking for artists and a new Programs Officer if you're interested/able to assist the Detachment! If you have any other requests or ideas, please feel free to comment or message me!5 points
-
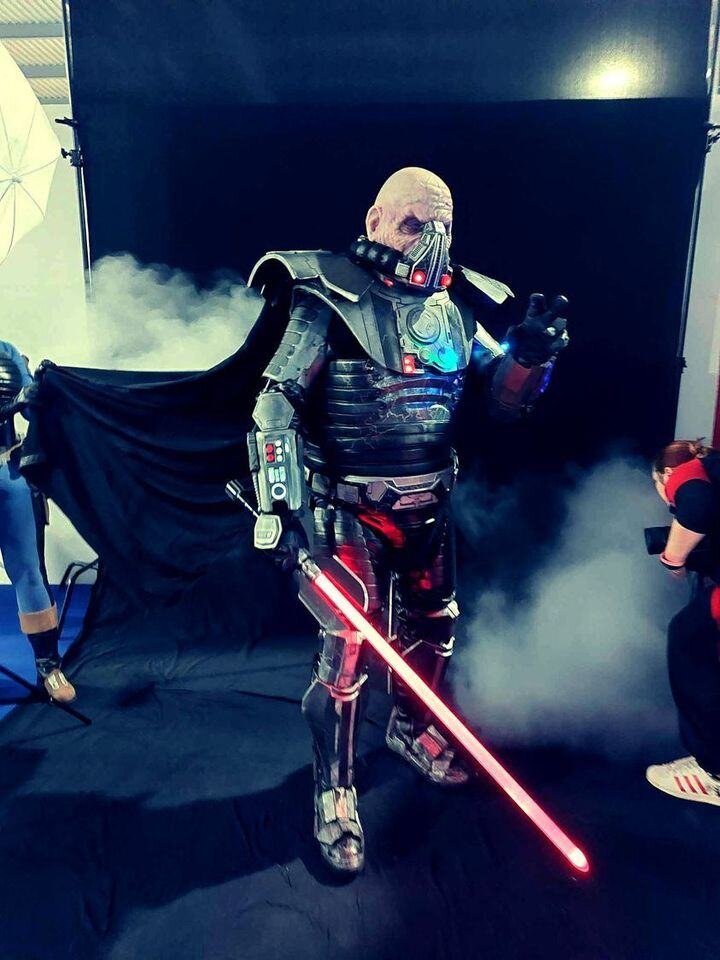
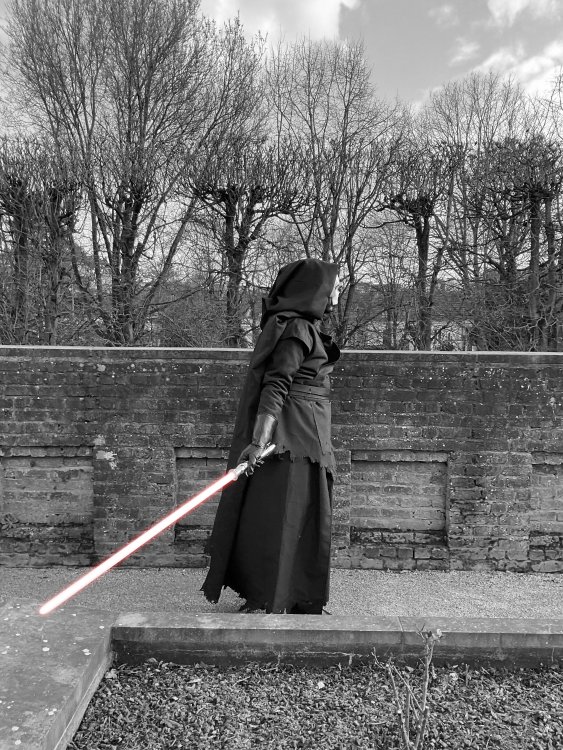
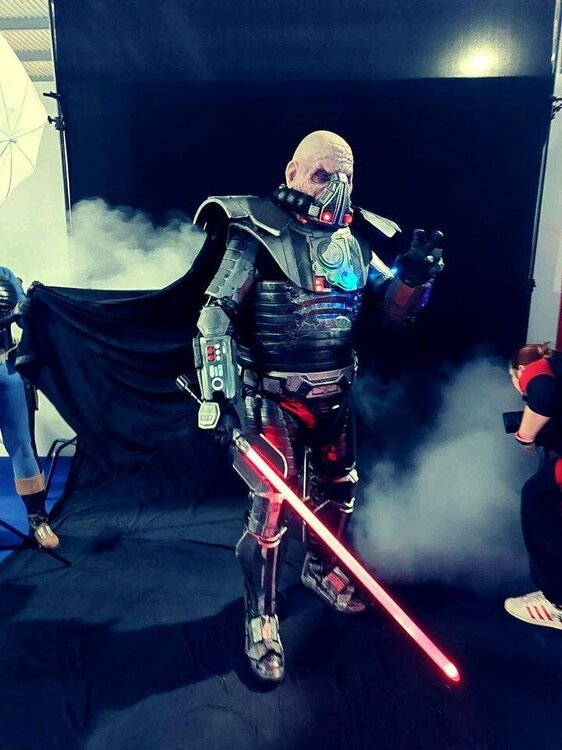
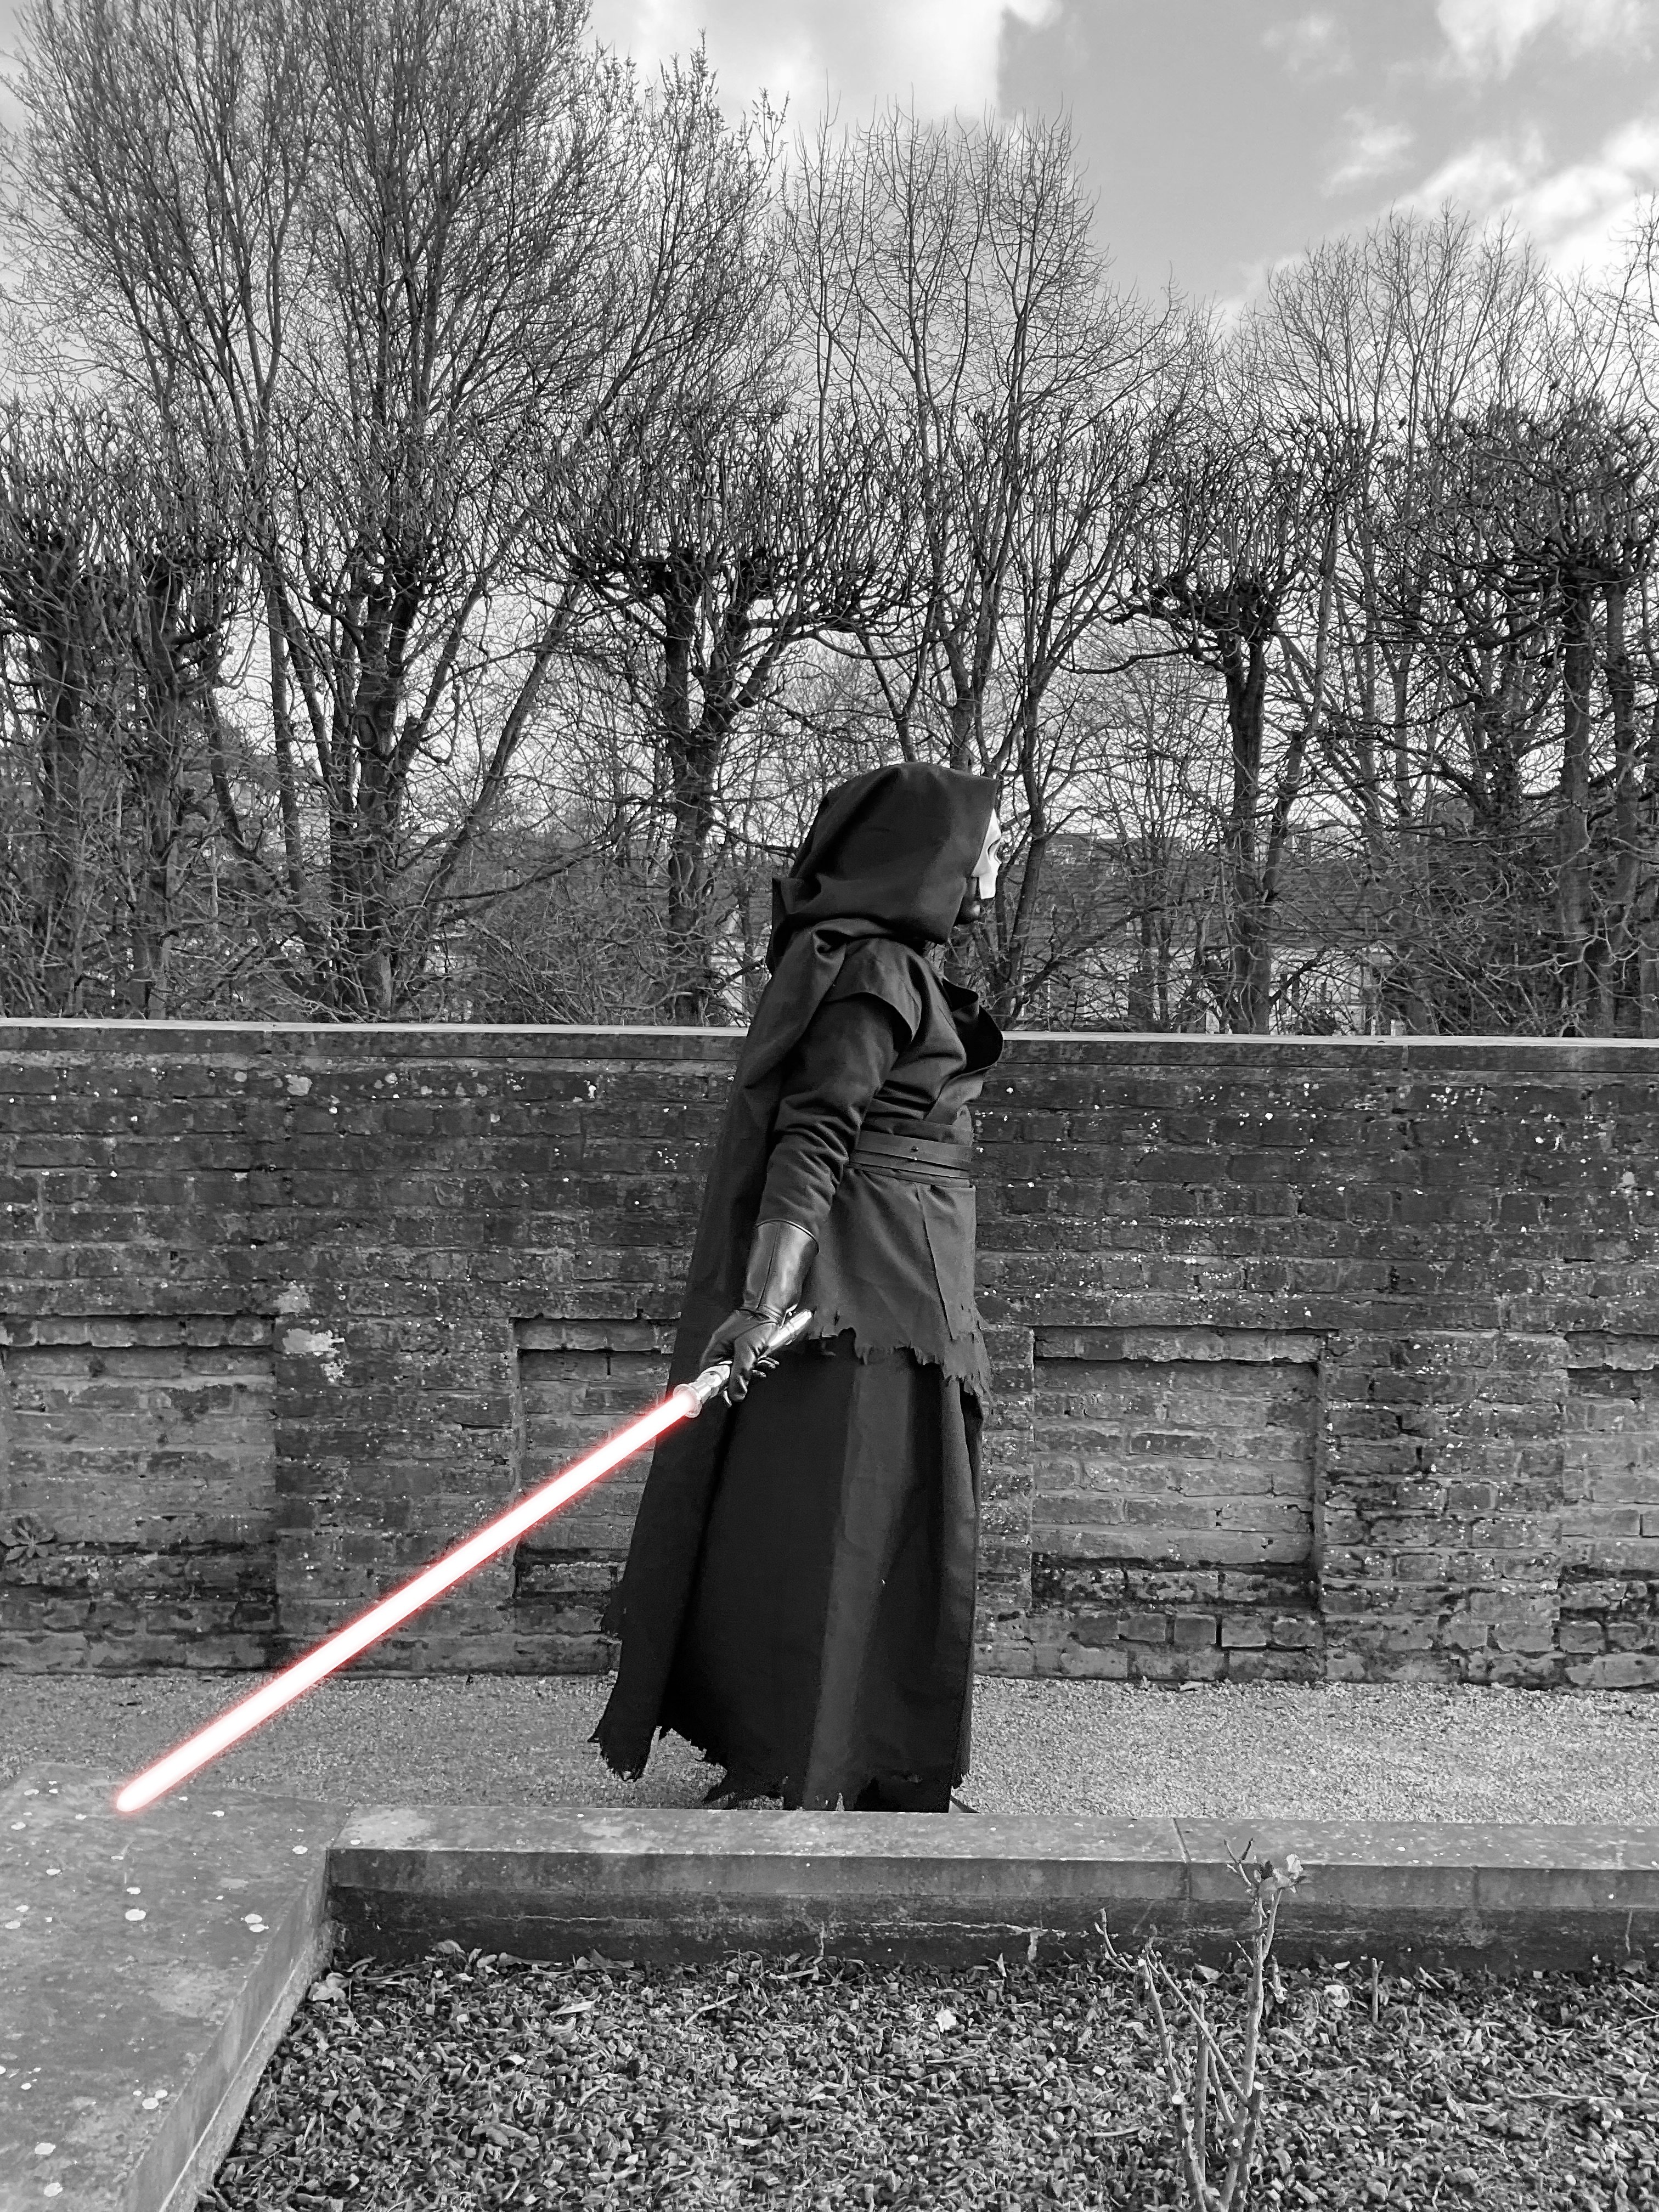
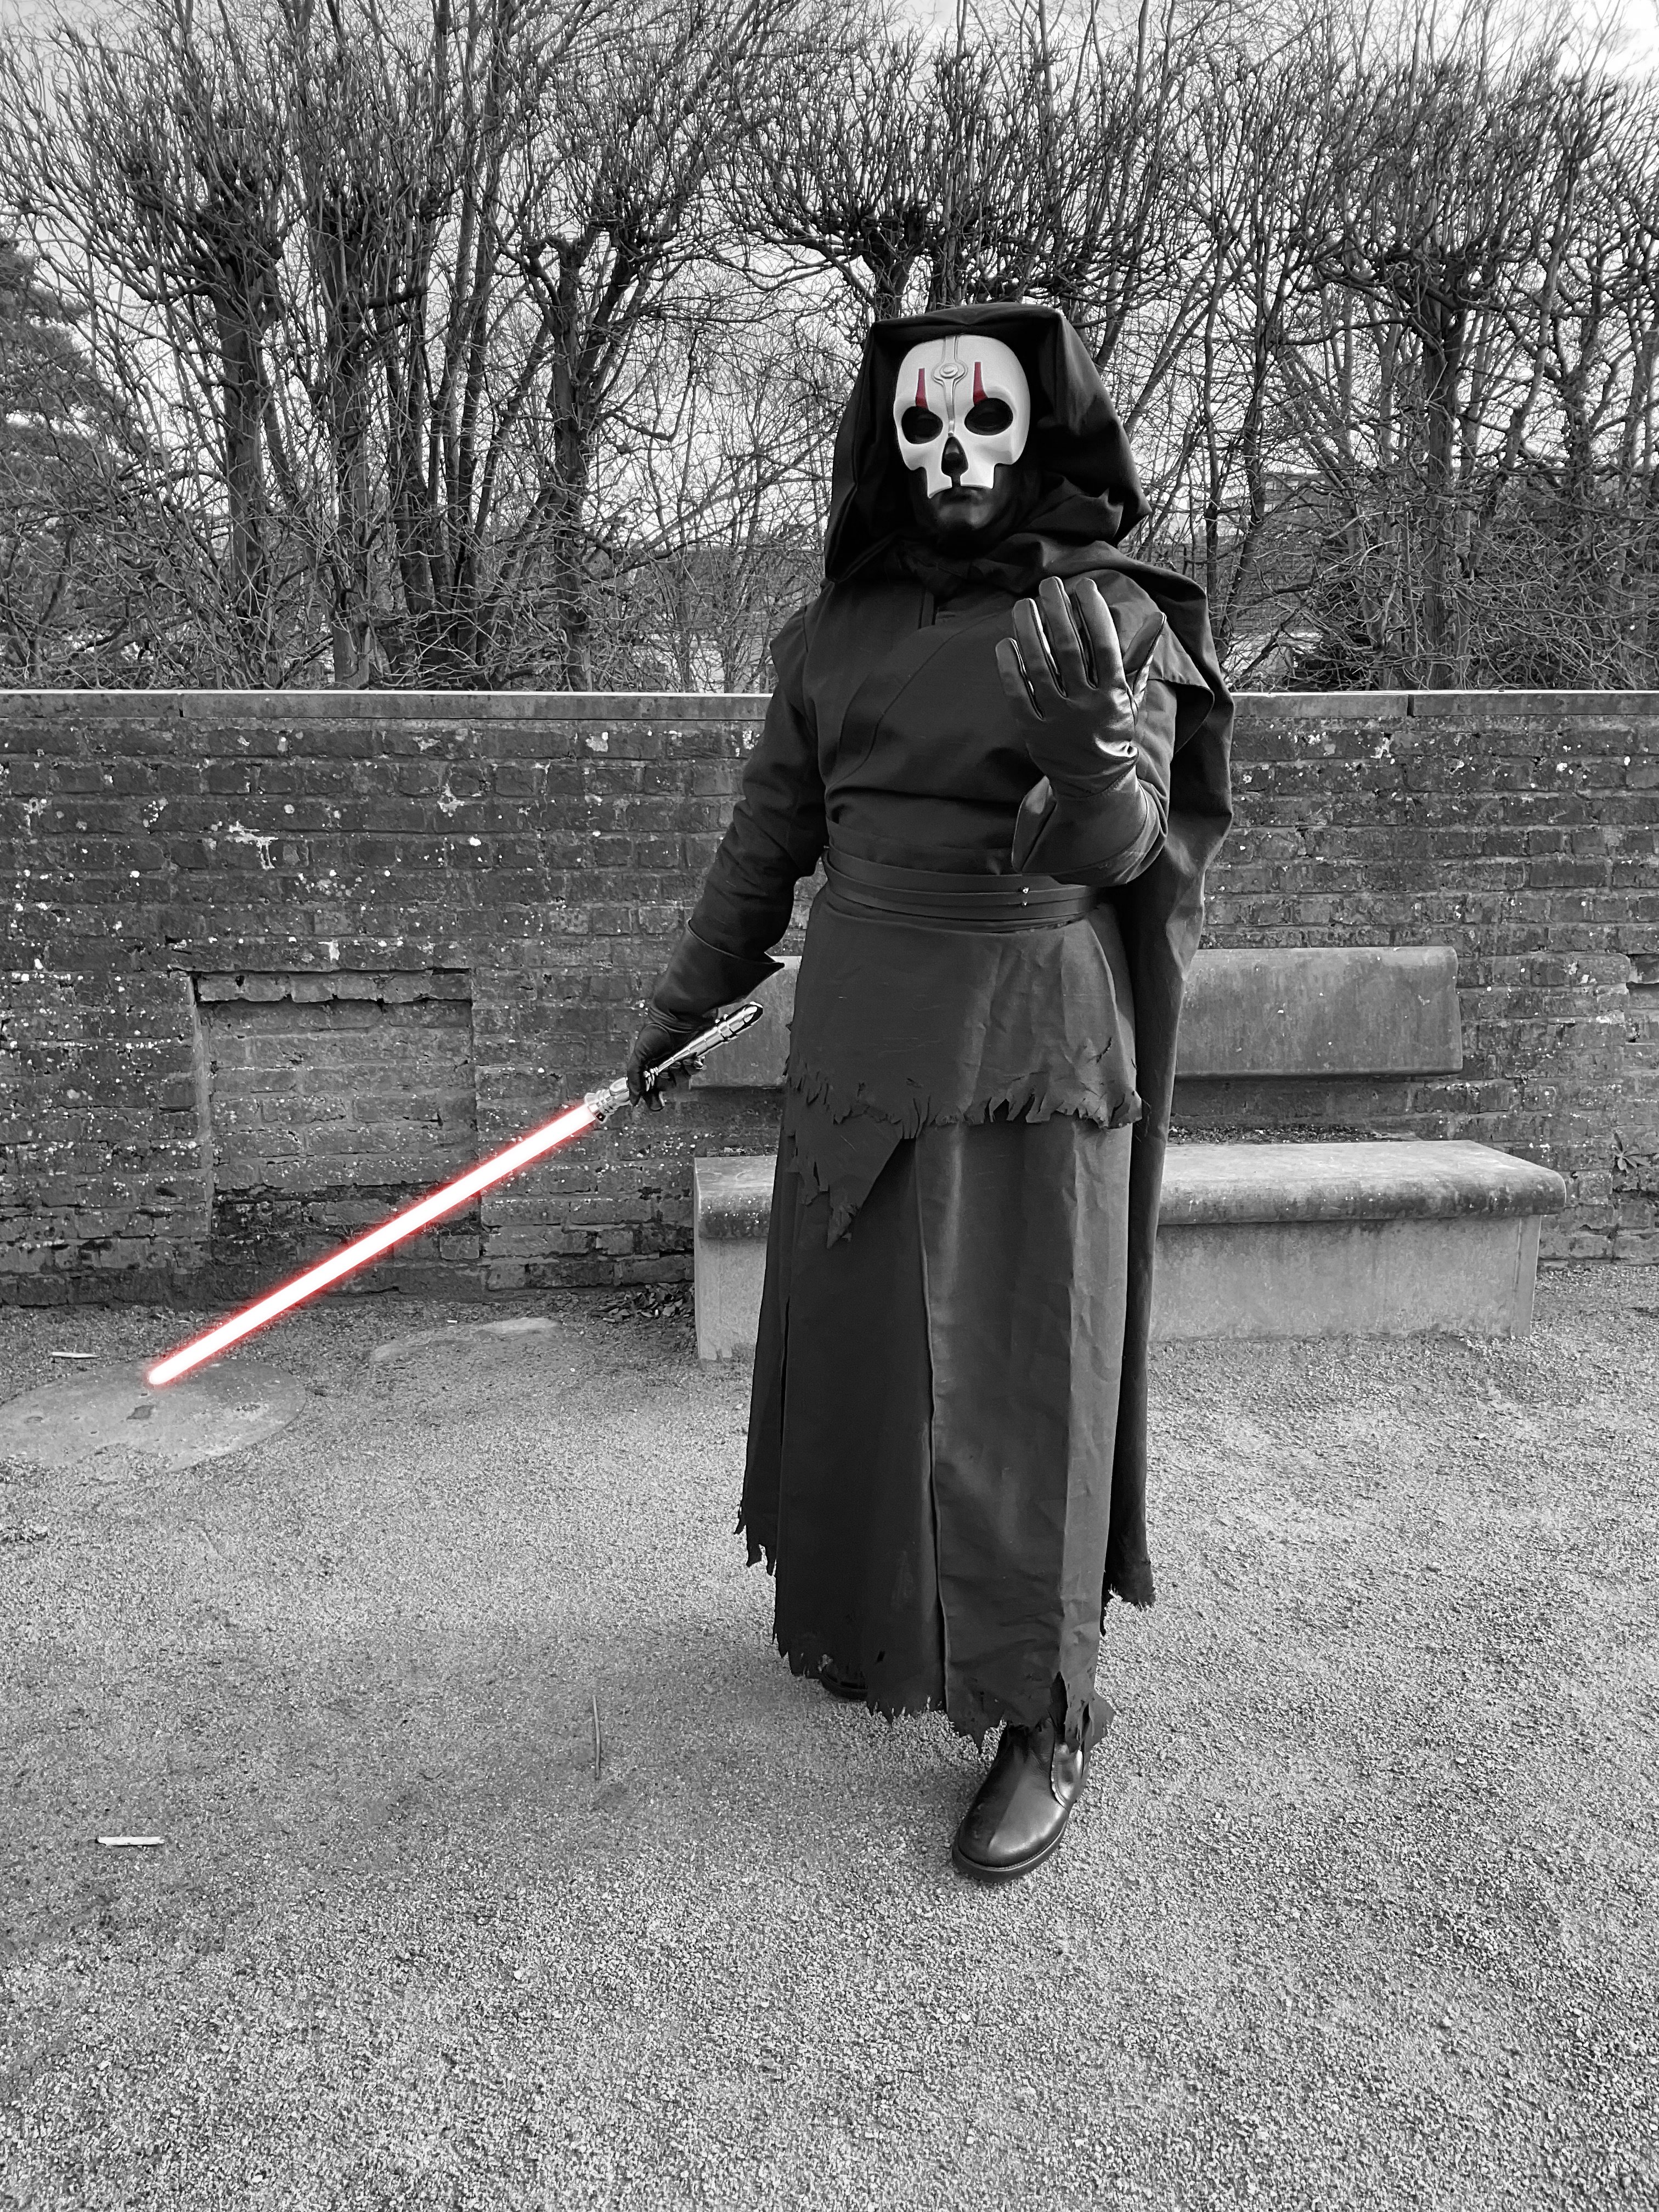
Hi folks, I just wanted to share some of the pics I took during my shooting at the Georges Henri park in Brussels

 3 points
 -
Korbanth has a Savage hilt for sale: https://korbanth.com/empty-double-sided-staff-the-oppressor3 points
-
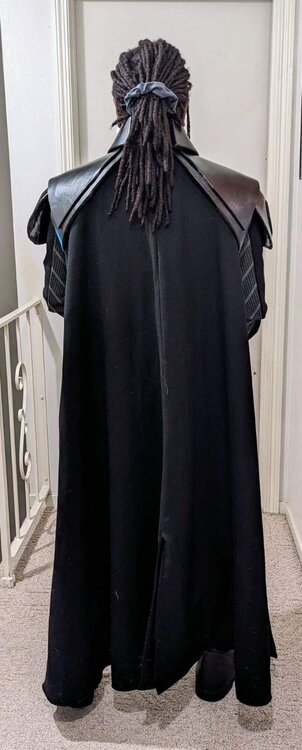
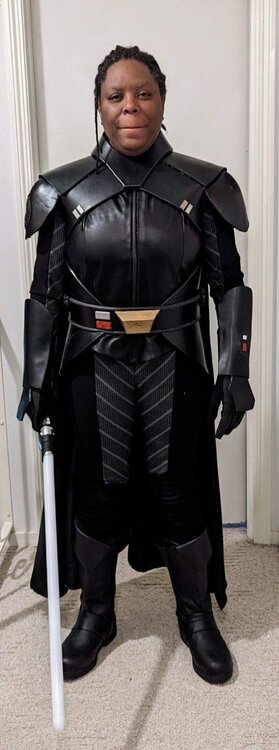
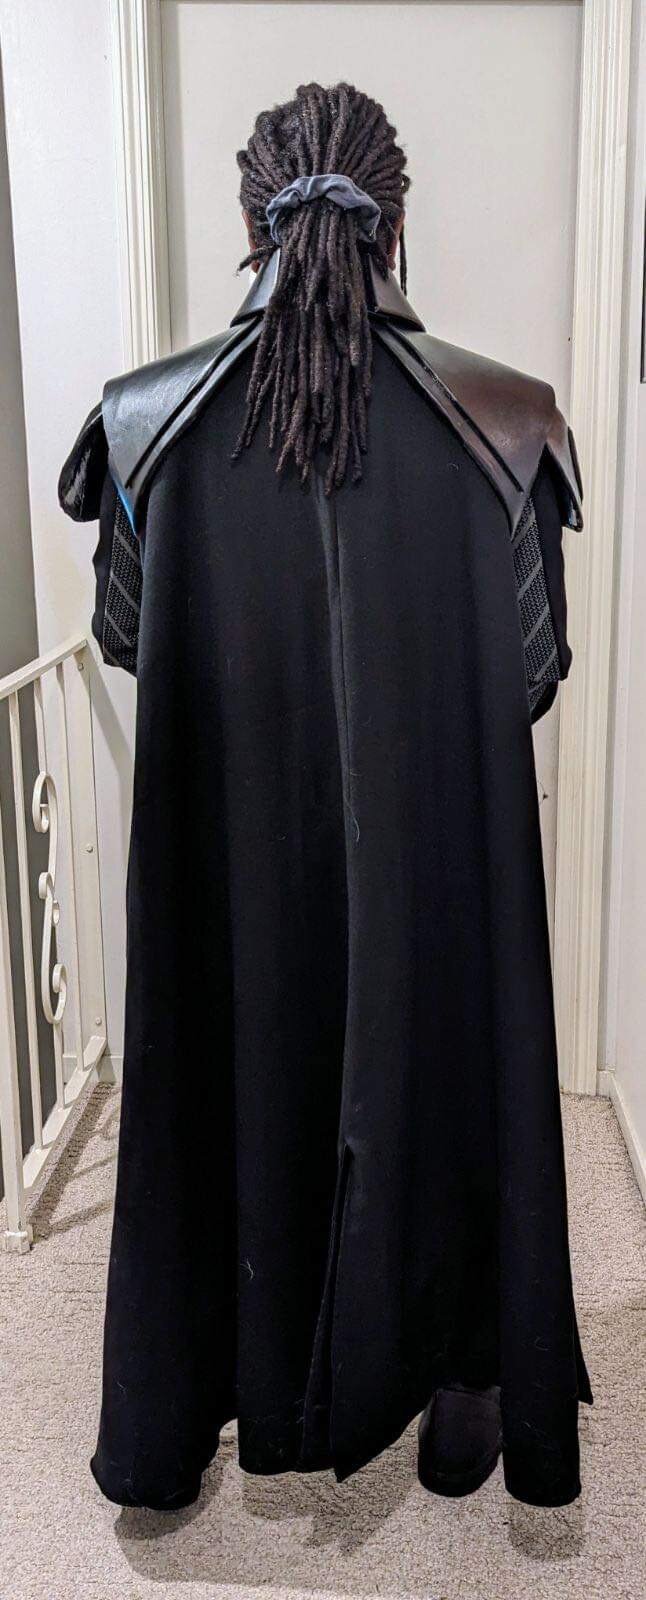
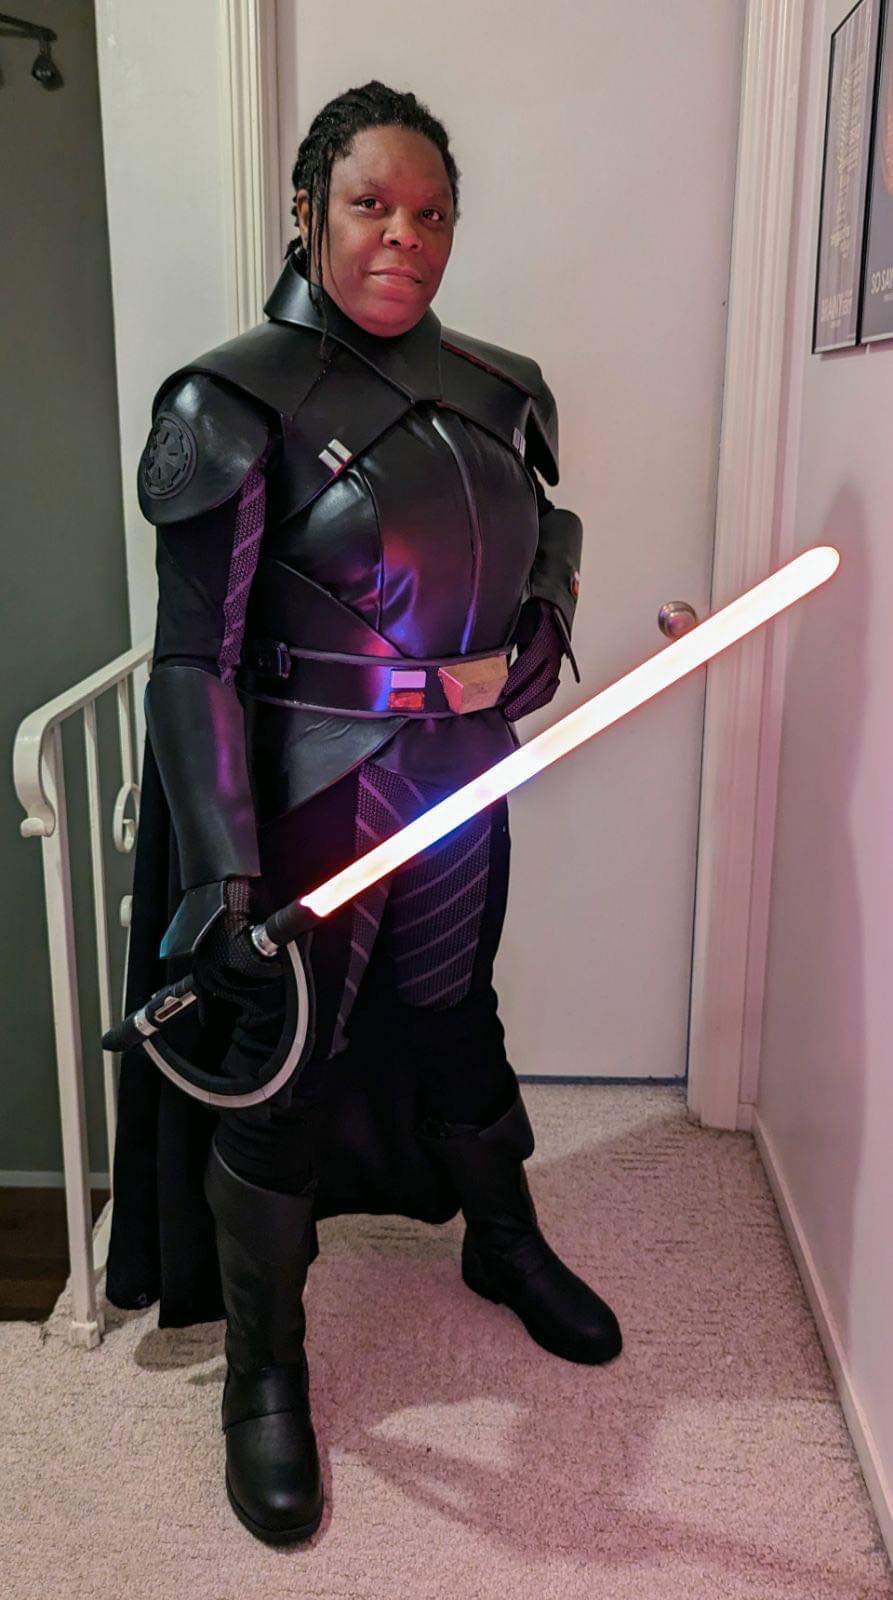
So close to being done. I need to redo the arm guards and chest armor and shorten the bottom corset pieces.
 3 points
 -
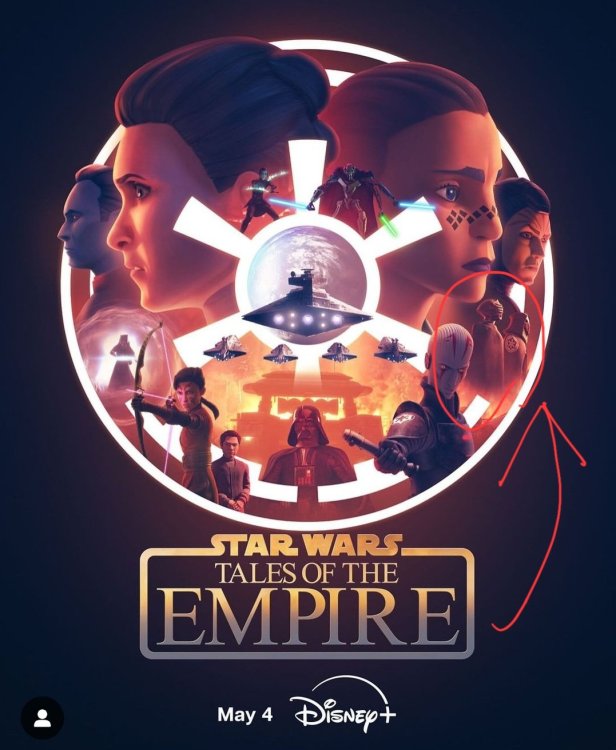
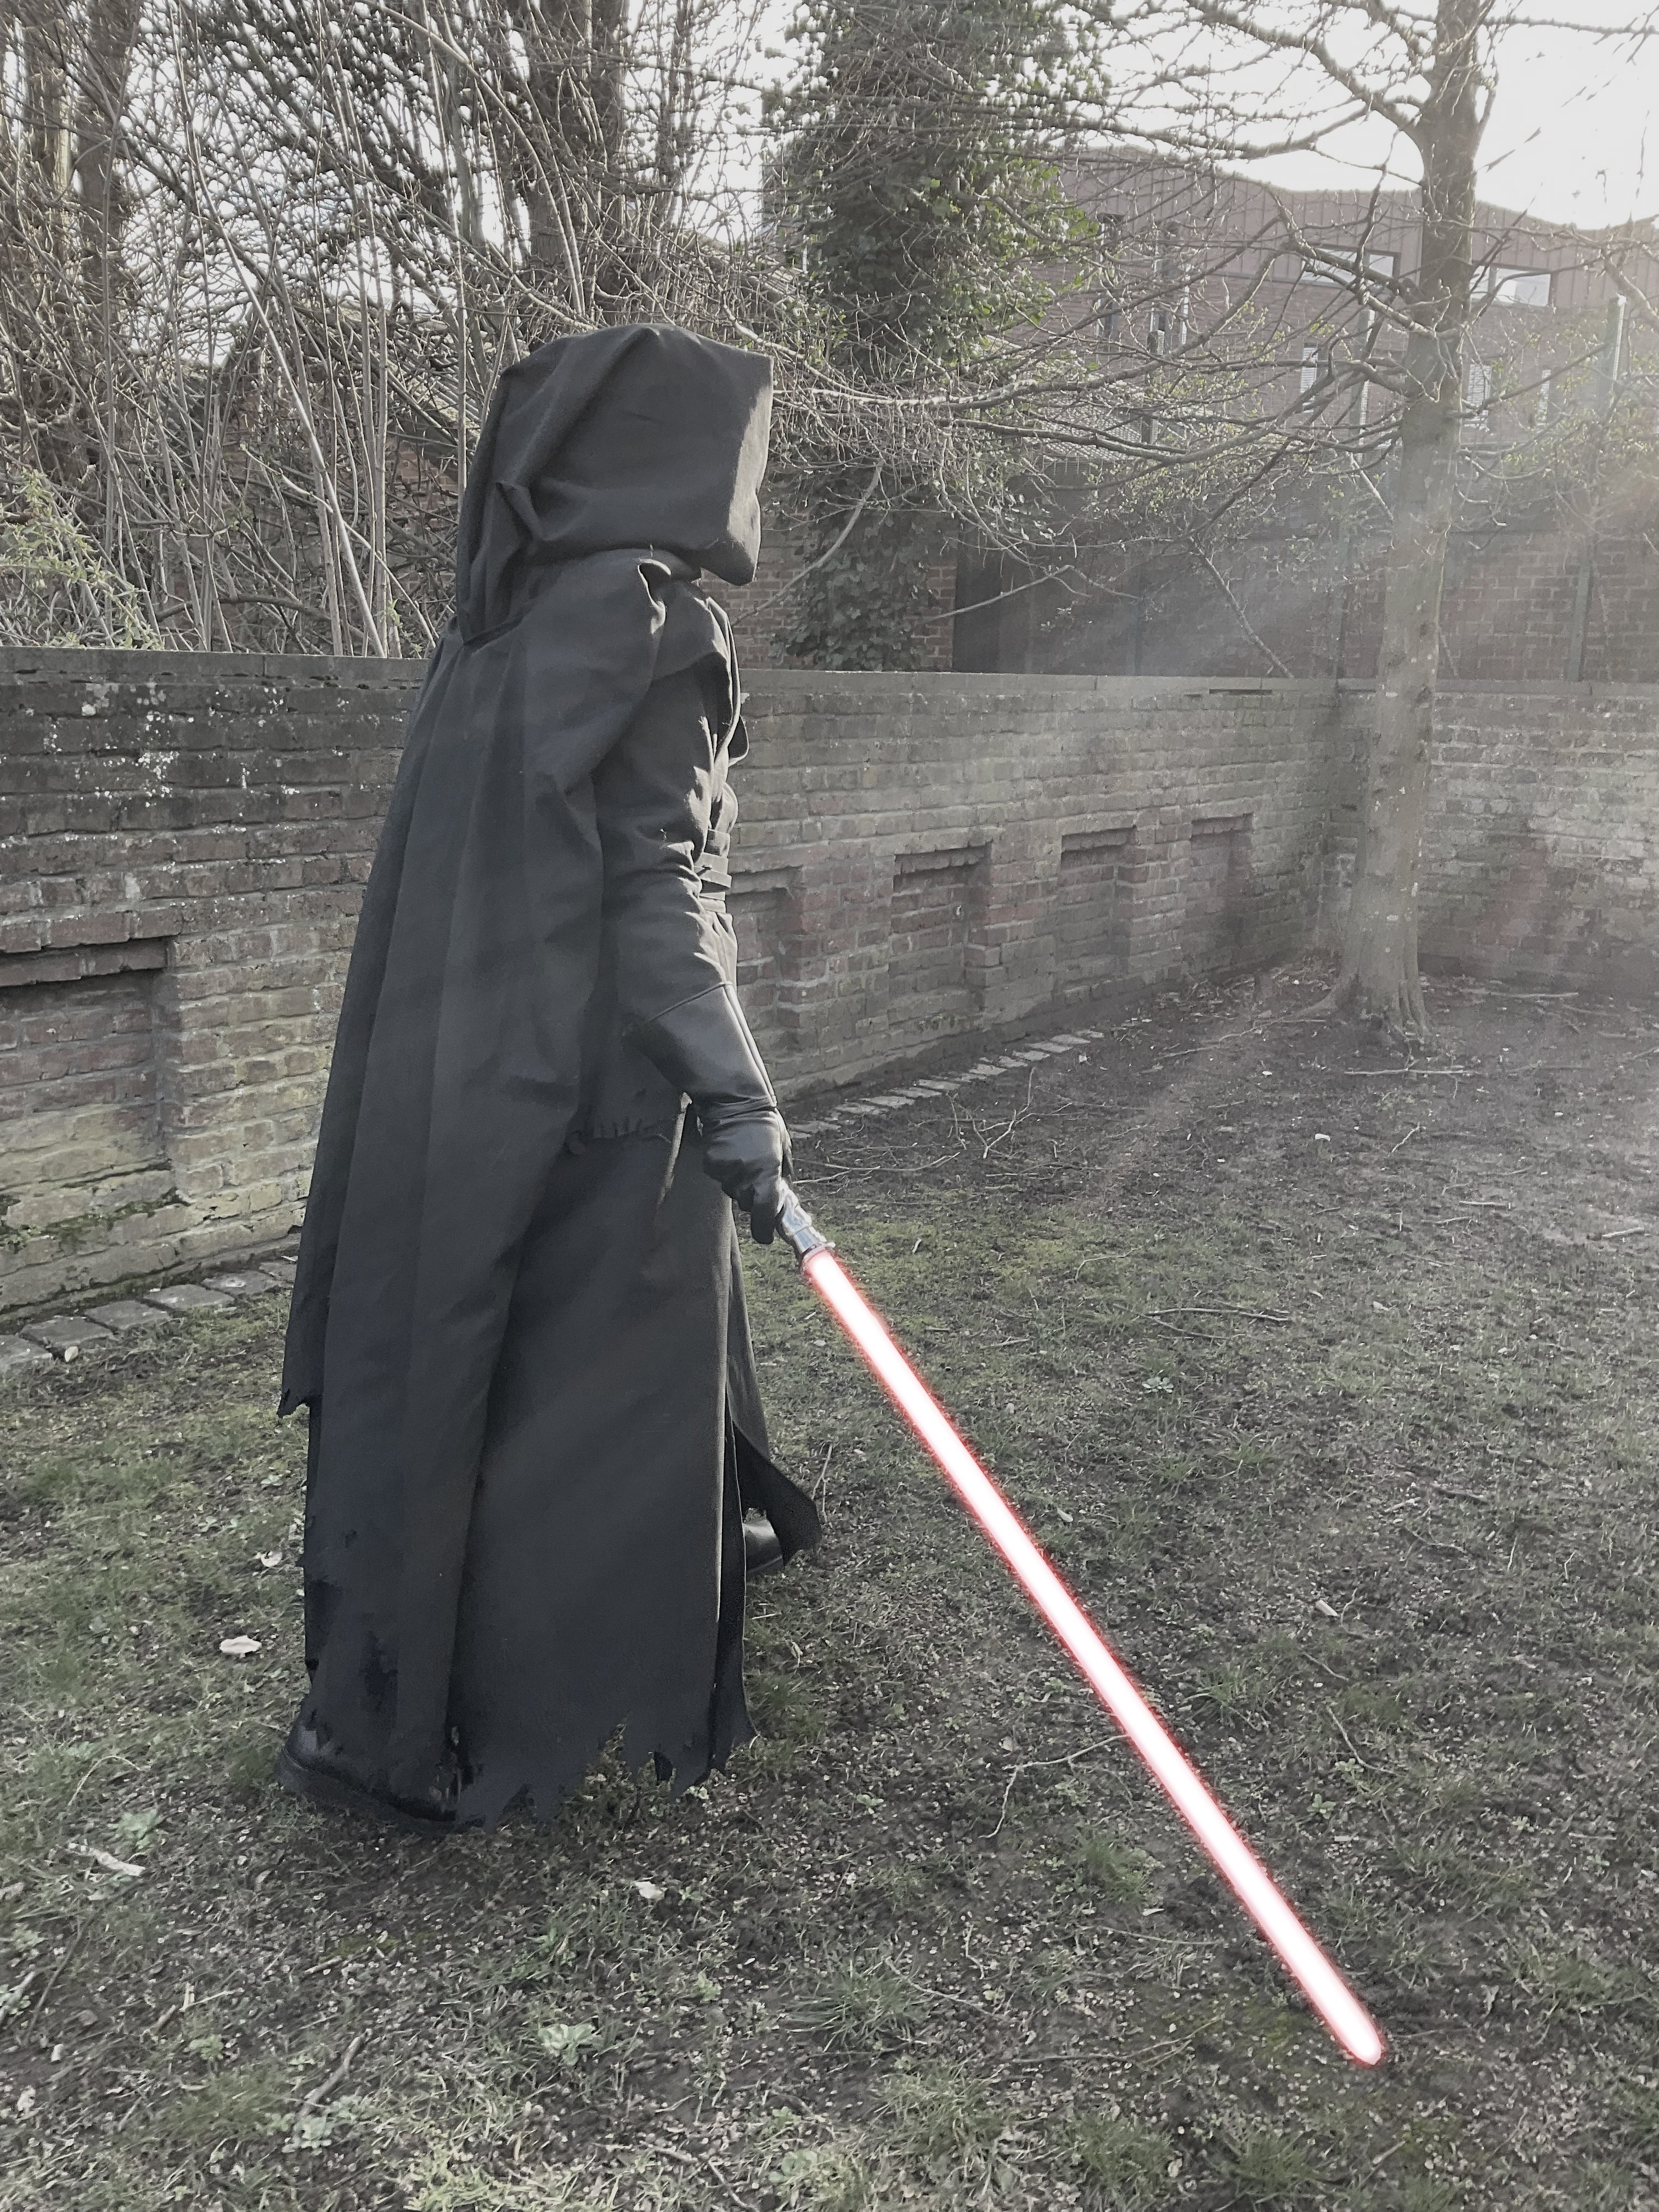
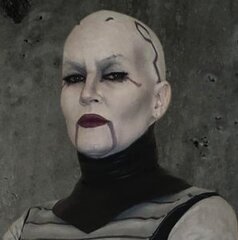
Hi Kyle, When I started doing some research into this costume, I messaged @Cookiedala for some advice, she mentioned this about color: " I would really go for a charcoal grey (almost black!) color and weather slightly on that." I would agree that a dark grey is the way to go with the capes and suit and leave the boots, gloves, and forearm bracers to be black. I know we will be getting some additional looks at this character in Tales of the Empire which releases May 4 and I just learned that there will be a limited series of comic books on the Inquisitors releasing in July! I am hoping we can get some additional images and hopefully a name/number for this Inquisitor in the comics. I am holding off starting my own Research/WIP thread until after those two new resources come out. I am excited to see that you are working on this costume!2 points
-
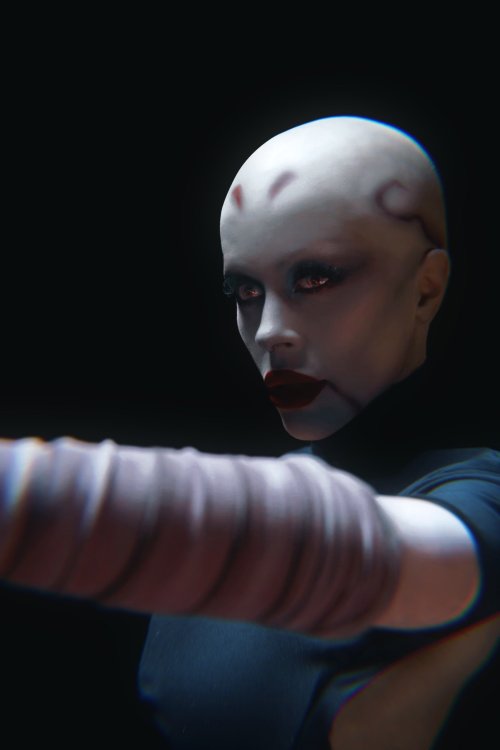
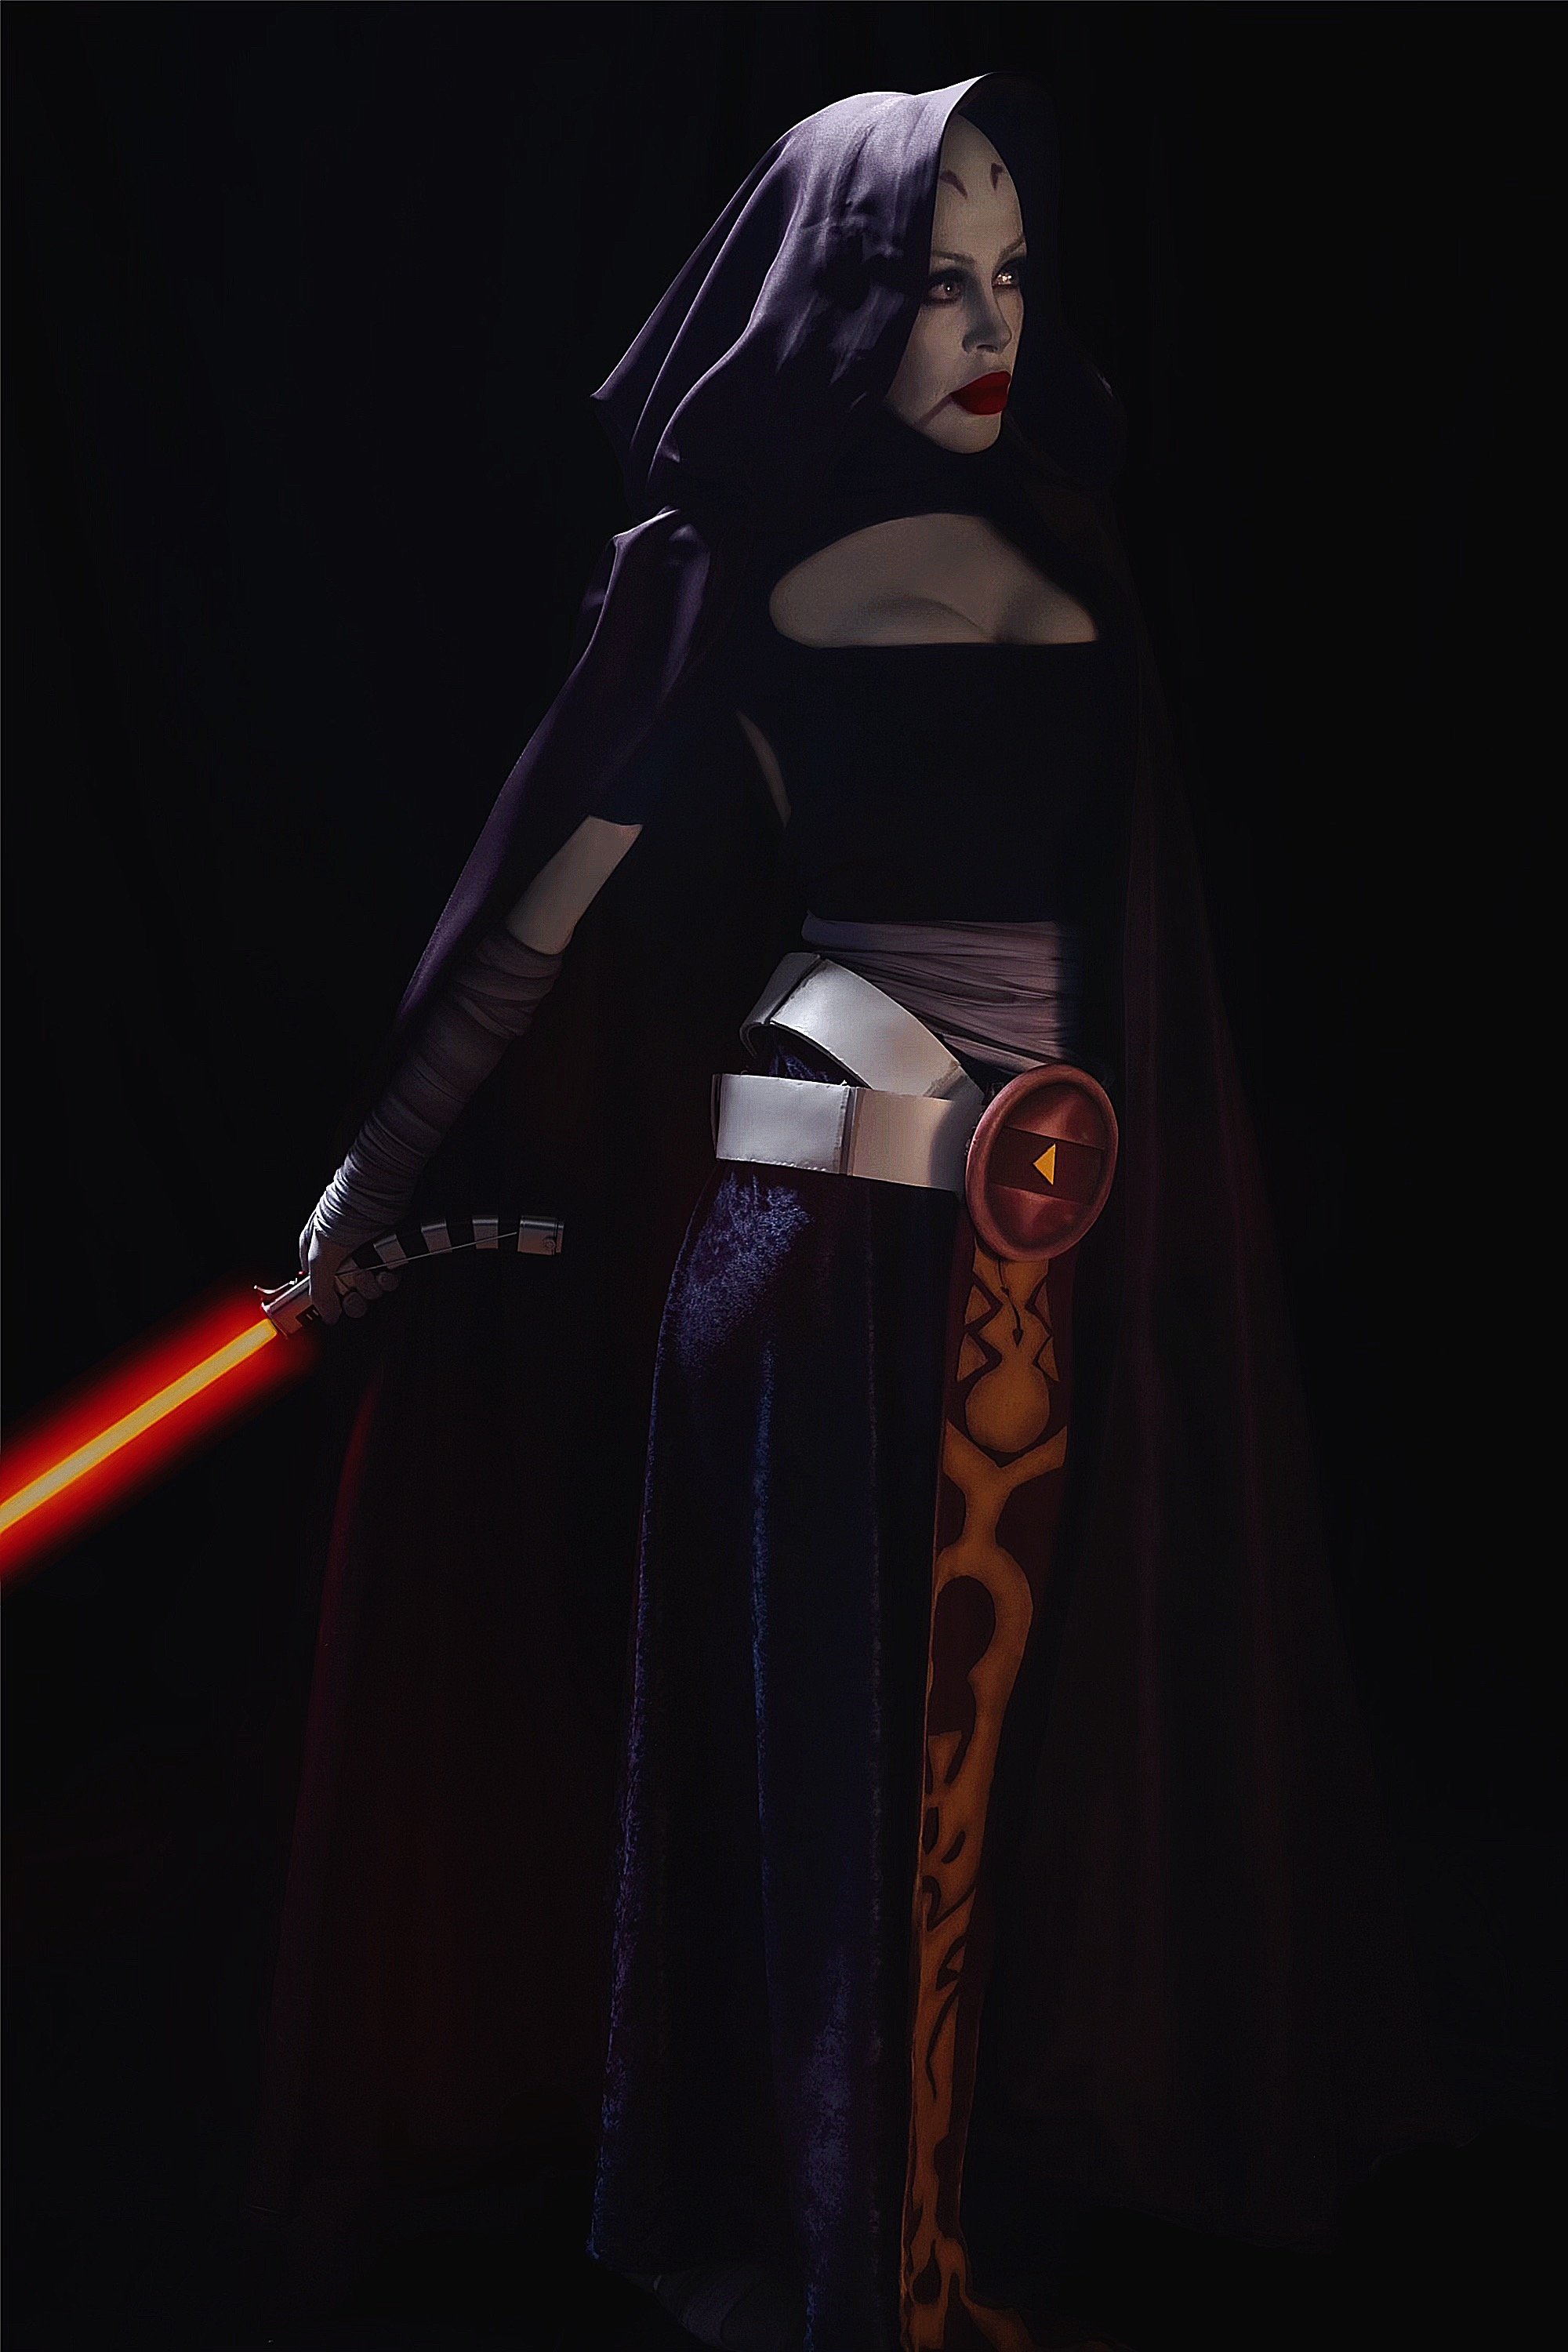
Hi everyone! Finally got my butt in gear and got my clone wars asajj approved and hopefully the first of many asajj approvals for me. I made every single aspect (except my lightsaber) from scratch without much experience before so I’m really proud of this one 😊🥰 I’m a brand new member of the pikes peak squad and the mountain garrison! Excited for all the new experiences to come 💕


 2 points
 -
Hey people, LucasFilm and Disney just announced a new show coming named "Tales of the Empire"! And the unknown inquisitor is also in it! Hopefully this will help everybody to make the costume perfect
 2 points
 -
We're about 1.5 weeks away from all 501st elections! This means Legion level, Detachments, Garrisons, Squads, and Outposts! Make sure you are prepared for TFE Detachment elections by ensuring you are listed as the correct Detachment Member rank. Also check with each Detachment to ensure that you fulfill their specific requirements if they are different! For TFE directions, please see here: I will be doing the final update to the 501st roster for TFE on Jan 28th, so please make sure you are correctly listed (your name should be in orange if you are not part of command). Cheers and long live democracy!2 points
-
Started fitting this afternoon. Found this image incredibly helpful. Thanks for posting @DarthValkyria2 points
-
Racing shirt is in the works!2 points
-
There is no embargo on making a costume - if you can provide the reference pictures of the costume from all sides incl. details and such, it should be good to go. You can also message our DL @DarthValkyria and ask on how to2 points
-
@Derek 1) I personally used EVA foam clay and shaped and painted the horns the way I liked. Then I attached the dried foam horns to resin bases using Aves Apoxie Sculpt. 2) The CRL says "made of leather or a material that resembles leather". I'd ask your local GML about this. 3) The silver piping on my vest isn't even piping at all. It's simply leather folded in half and stitched onto the vest. 4) Lightsaber is optional, but so long as the length is believable, I don't think anyone is going to be busting out a measuring tape to call you out. If you have any questions, feel free to DM me or hit me up on Instagram @ozark_maul2 points
-
New forum member here and not yet 501st approved but building the clone wars CRL. I made this on a whim because I was so obsessed with the figure! Figured you might like to see. Would be so cool to have this approved. I even got a shout out from the guys who sculpted it!2 points
-
Thanks LordZedel for clarification - verification. For mine - I use the Etsy neck seal combined with a vest with a v-neck shape to it. Similar look to the bottom pict you reference.2 points
-
If a costume that you want to build is not currently in the Legion roster, you'll be coordinating directly with the Detachment. The order is operations for the process is as such: 1. Contact me with all the references you are able to grab to validate the details of the costume, and an excerpt describing why the character should be included into the Legion. The references will be tossed into a Google drive that we send the link to. 2. I'll take all of that and submit to the assigned TFE LMOs, who will take the info to the main LMO group for a 7 day vote on legitimacy. 3. If the vote passes, you'll want to start a build thread here and keep us in the loop as you build to the references. We do not do pre approval CRLs because we don't want you building to words, but to the actual references. 4. Once built, you will let us know so we can get everything uploaded into the drive folder to go through analysis by TFE DCAs. 5. If it passes DCA approval, it will move to LMO approval. Again, another 7-day vote will occur. 6. If approved, we will begin final work on the CRL, including getting CRL photos from you. If not approved, changes will be relayed and then start again at step 4. 7. Final CRL will go through LMO confirmation and approval, and then once published, we'll work with you to get the information with your GML to assign the costume to your profile. If there are any questions, please ask!2 points
-
I’m skipping way ahead. I got a little hyper focused and just didn’t follow up with documentation. I have been taking pictures as I go. I have a photoshoot next Sunday and had to step up my game. Finished the bodysuit (sort of) and took some pics. The cape clips on to my shoulders. still to do: Place Velcro to hold armor in key locations Belt - cut to length, finish painting greeblies, wire LED Armor - apply Velcro, repattern collar, model greeblie for guantlets Boots - A friend is working on them for me cape - hem and shorten clip straps saber - all the things

 2 points
 -
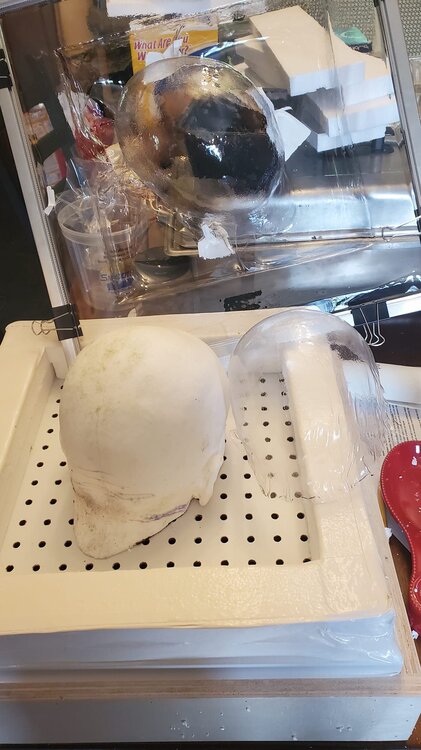
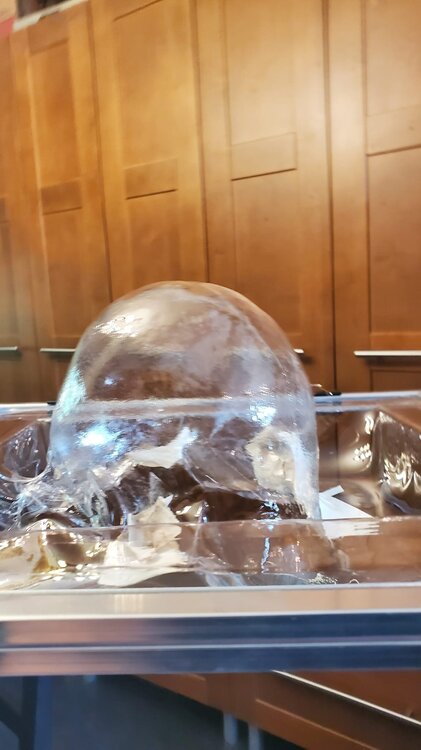
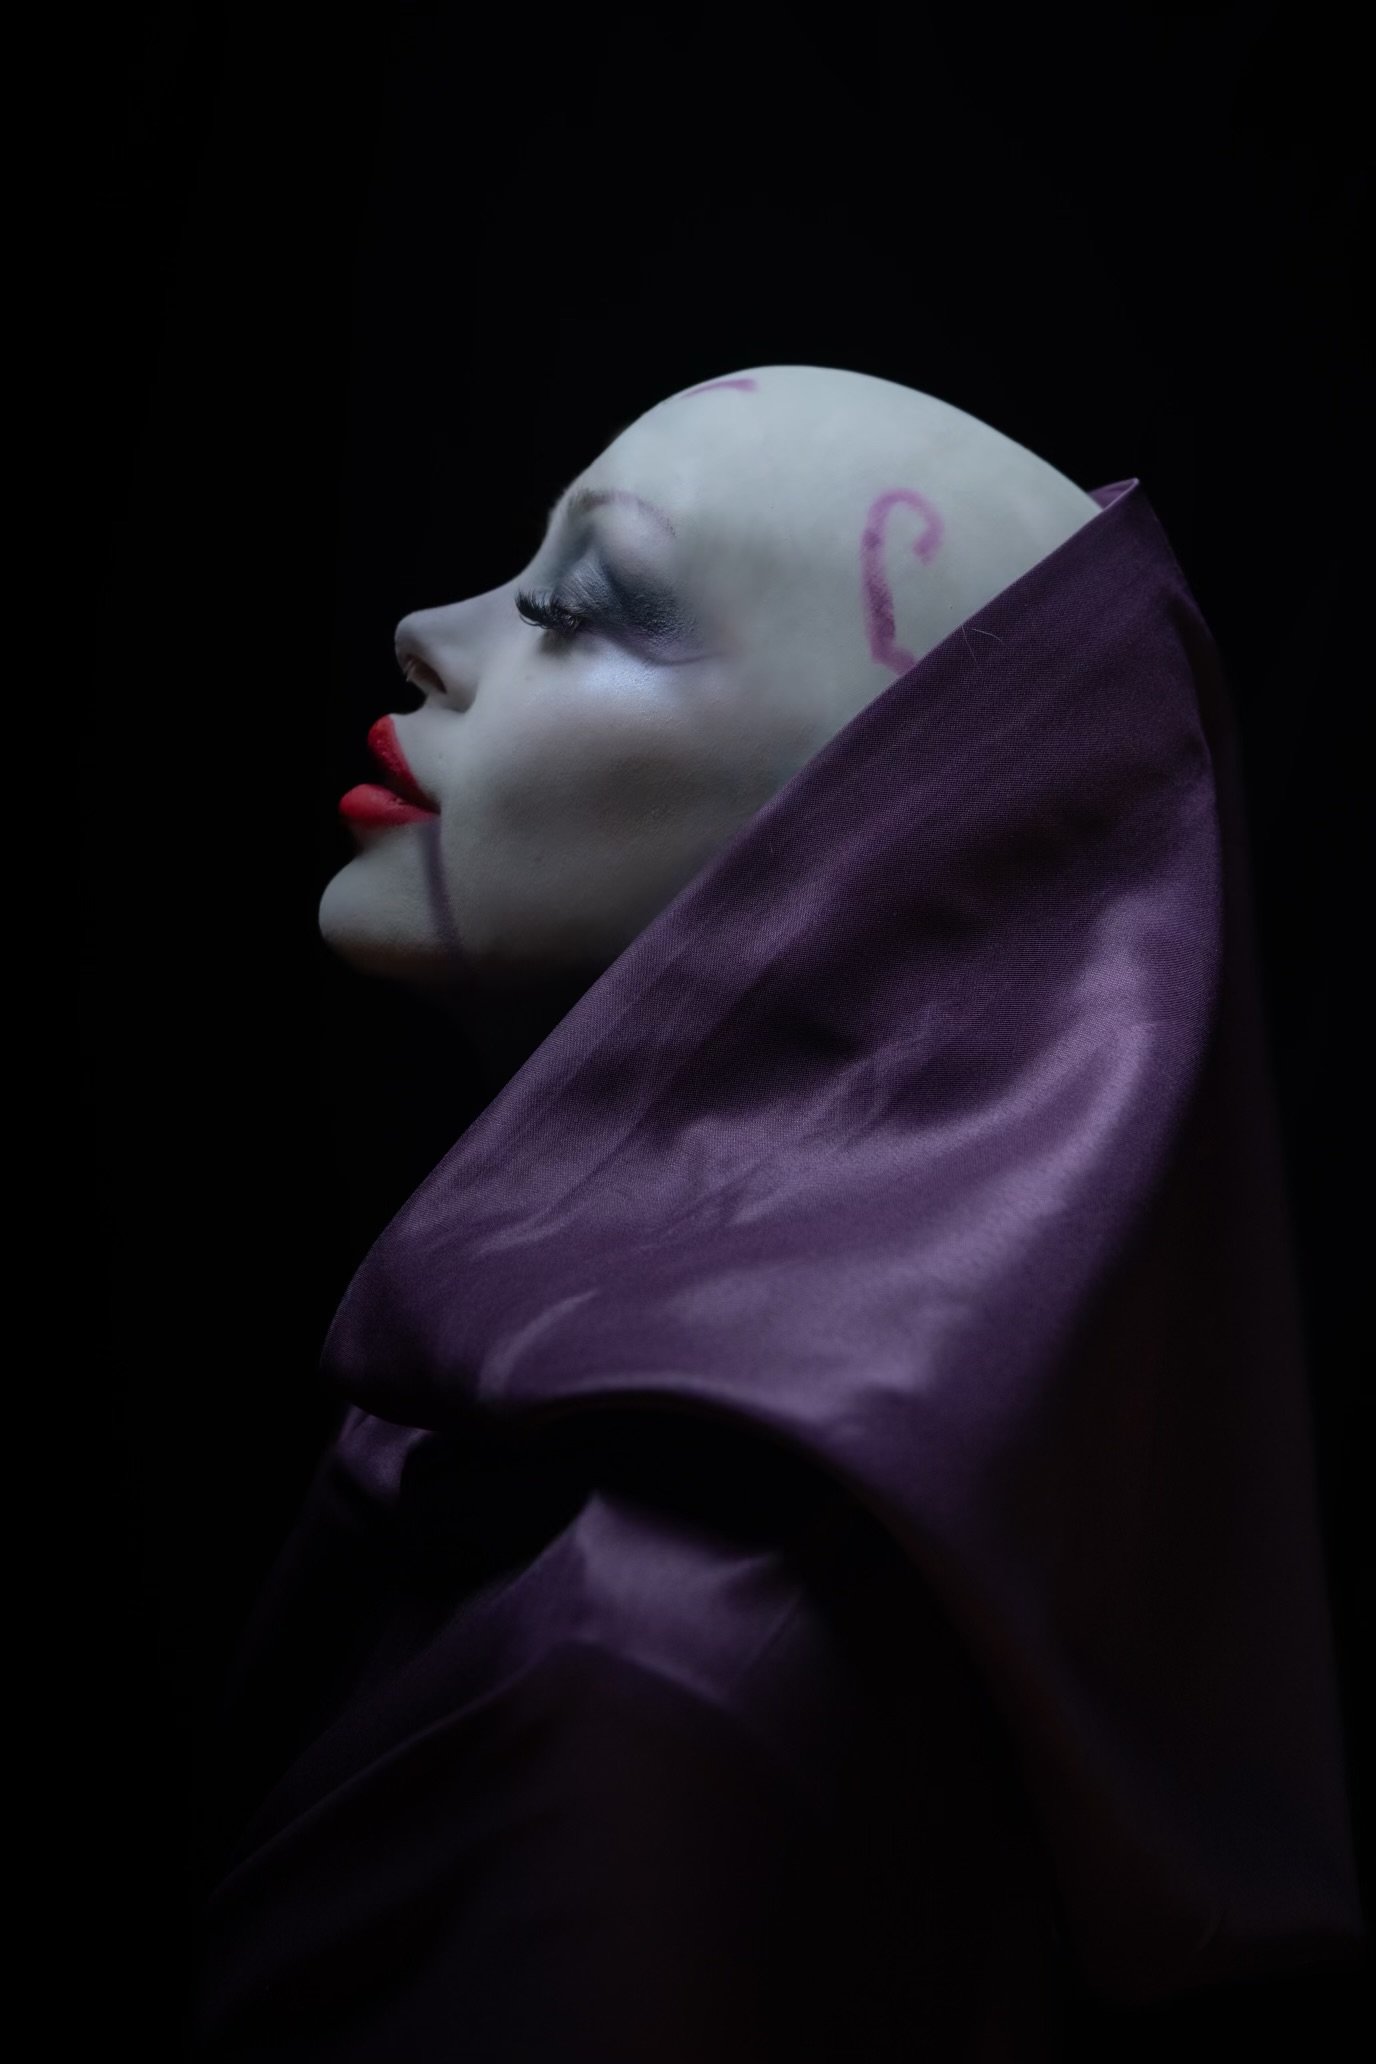
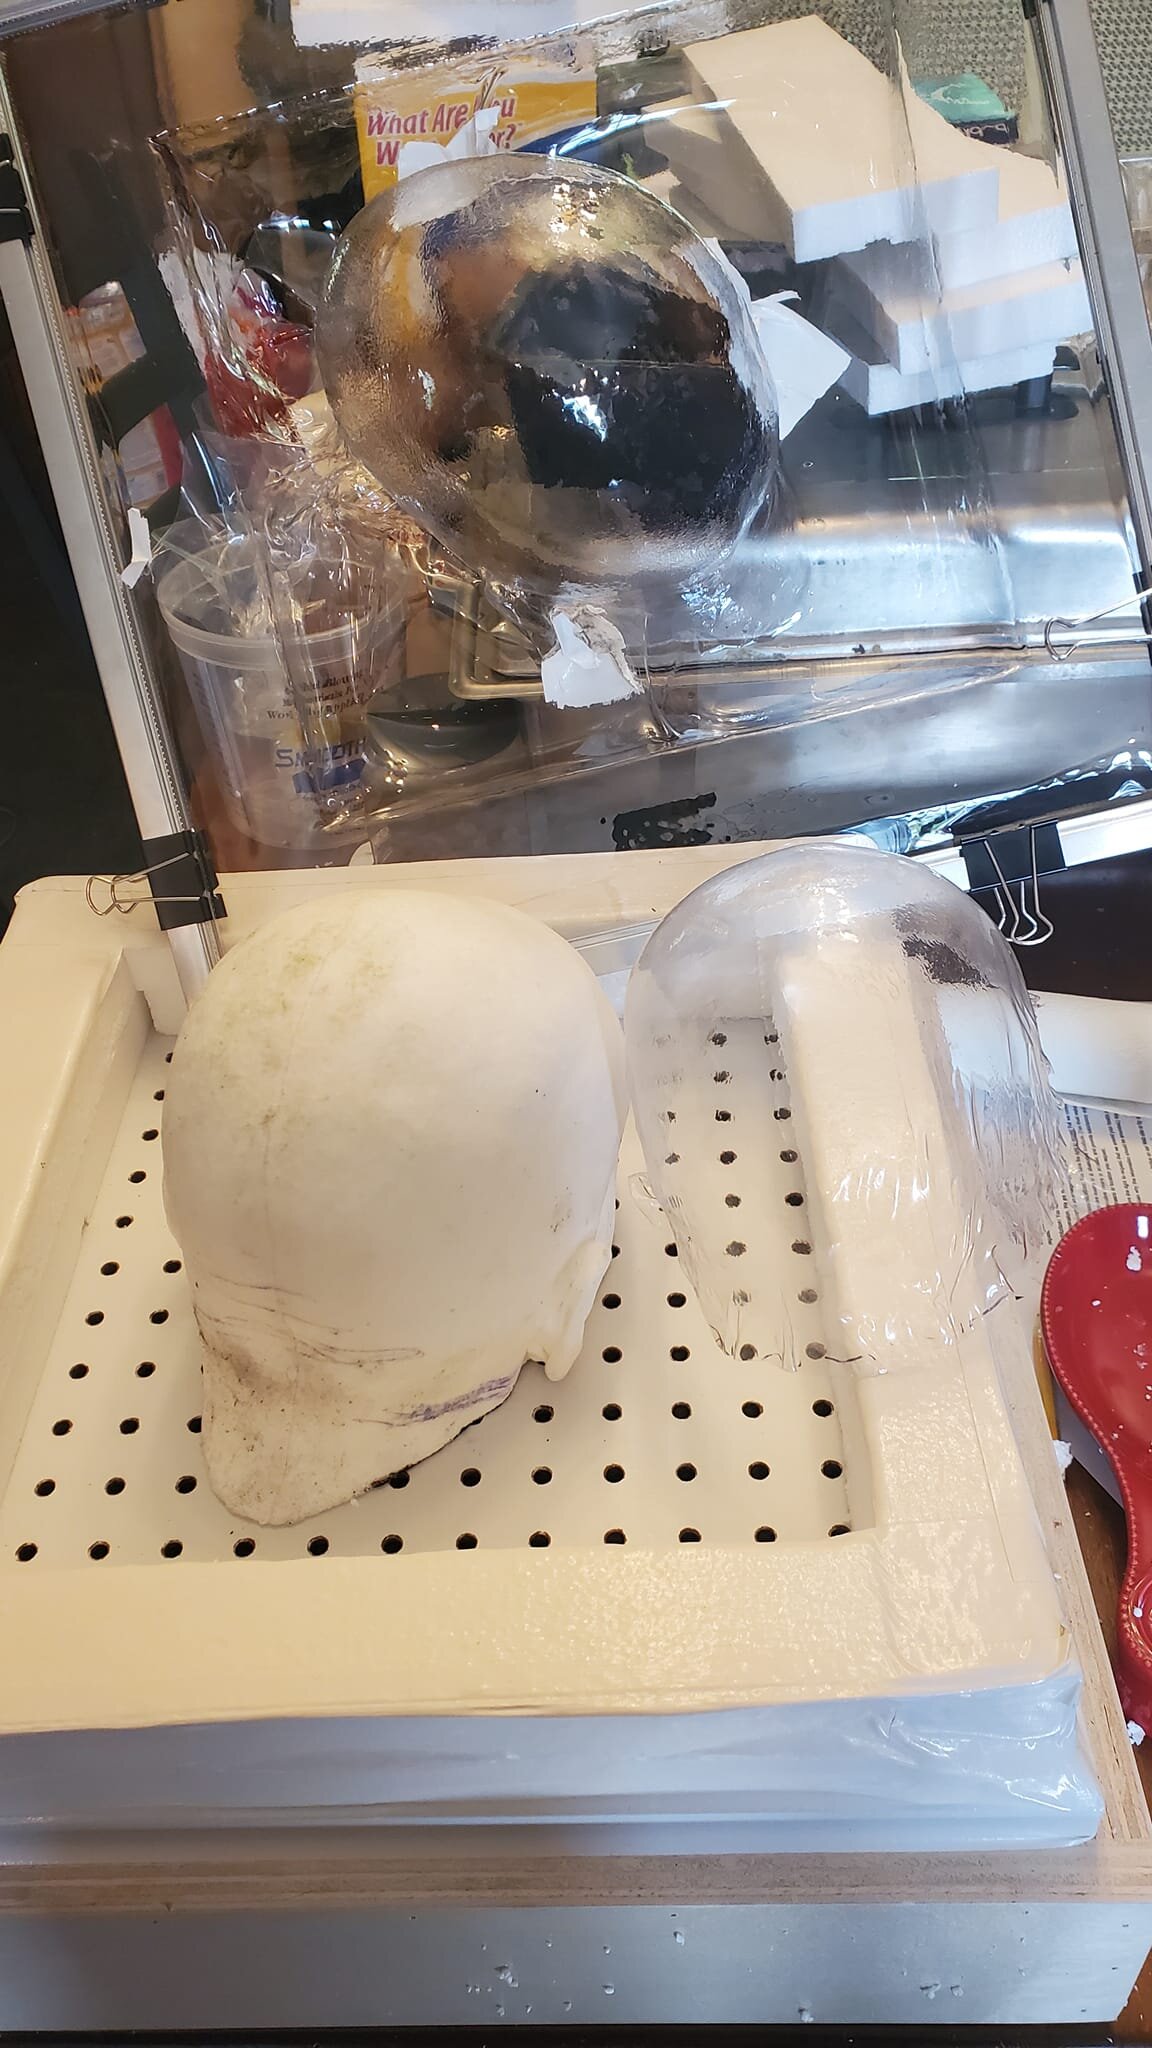
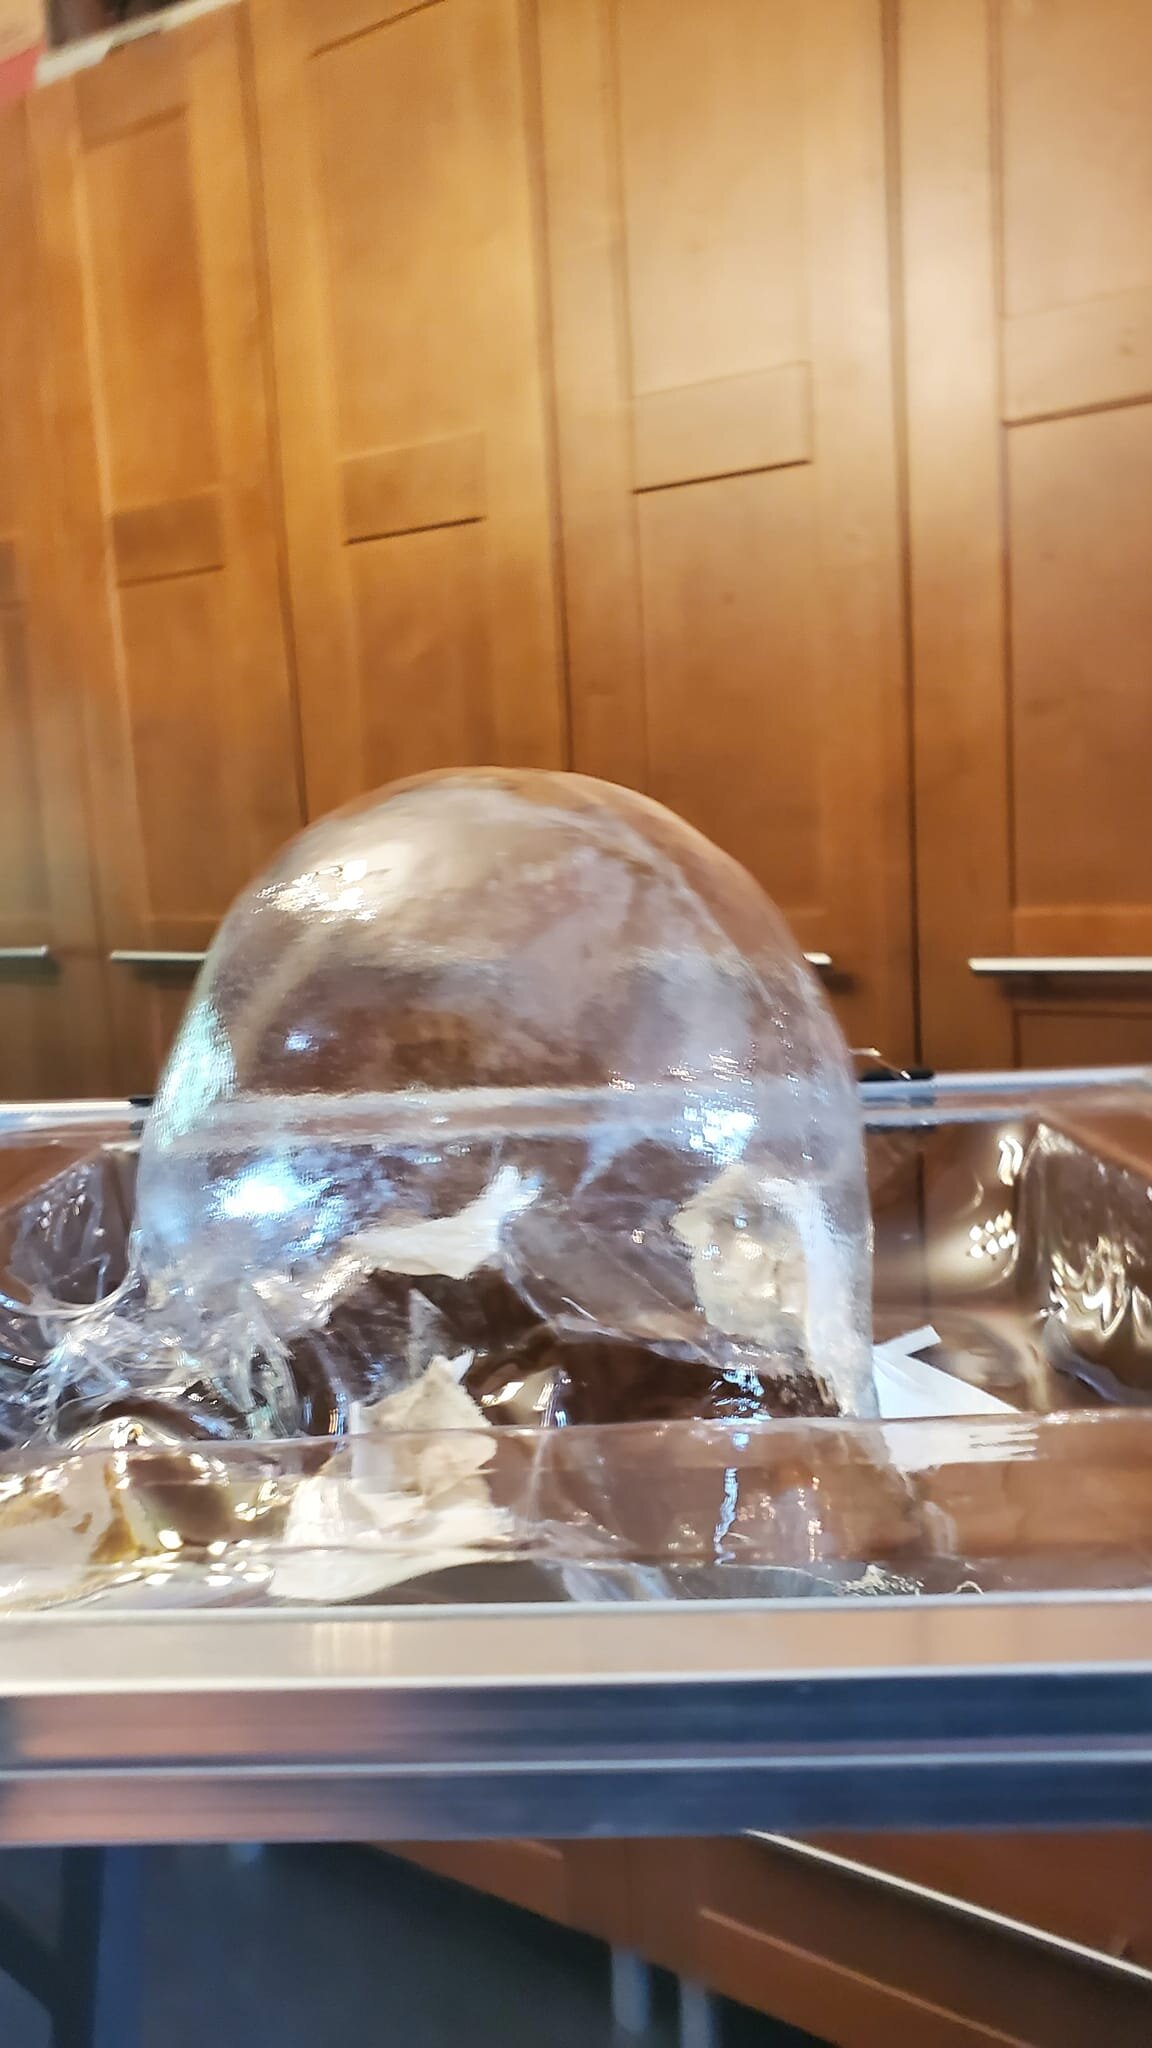
I will do a better write up of this in the next month or so. I will write more about how to make a casting of your head and such, but for now this is how to make the actual hard plastic re-usable stencil. Okay so this is going to be a bit of a long post. For my Ventress I have been planning trying to make a hard plastic stencil to use for airbrushing my Asajj Ventress tattoos on the scalp part of the head. I wanted something that is pretty much a continuous shape that doesn't have to have sections that need to be created every couple of inches. And would fit my head without large gaps. I have been using a Halloween bald cap that I tried to modify to fit my head, but because the material is flimsy the stencil shapes have to be cut into sections and then have to be connected when the bald cap is removed. I had my head cast. Which I did but I had to go to a place to get it done. Mind you I plan on doing other things with my head mold. The process for making this stencil can be done with just casting the scalp and ear area and doesn't have to include the face. I purchased a small (16"x16") Vacuum forming table. Got it on Etsy. Pm me if you want a link. You can also go on Youtube to learn how to make one. I used my house vacuum to create the suction. I also purchased a sheet of PETG from Amazon. .020" thickness. I also had a heat gun for this process. I made a cast from the mold of my head using Smooth-Cast 305 from Reynolds Advanced Materials. I made it a little bigger (deeper) than I had planned on. But I figured out a workaround without having to cut the head shape down. You can learn more about casting at the Smooth-On website. or you can search Youtube. I used the metal frame that came with the vacuform table and secured the plastic sheet I had cut down to the same size as the frame. I then put it in the over, raised a few inches above the metal wire shelf under my broiler (around 3-4") and let it sit for around 30-45 seconds. I pulled it out and pushed it down over the head form. My first try at molding the head stencil failed (mostly). When I first pulled the hot sheet down over the head form, it wouldn't stretch far enough down over the head form to reach the edges of the table to suction down the plastic. I tried using a heat gun while putting pressure on the plastic pulling it down, however this really didn't work very well. So, I tried again. This time I remedied the suction issue by building up walls of the vacuform table with Styrofoam I had in the house and then using duct tape to attach them to the table and seal the edges. This would allow the plastic sheet to come down onto the surface edge of the table to allow the suction of the vacuum to work on pulling down the extra plastic to the table. I repeated the steps like I did the first time with heating the sheet of plastic in the oven. I then pushed the sheet down over the head form onto the wall edges where it then started to suction down the plastic. The plastic cools quickly. When it does it will not stretch anymore. It still needed to form a bit more, so I used a heat gun (550 deg) in spots around the head form while the vacuum was on. Some spots I melted the surface and created holes where I had the heat gun to close to the plastic, so I patched them up with duct tape to create the suction again. I kept going around the head till I was happy with the results. I have cut the head shape out and will be drawing and cutting out the shapes of the tattoos that go on Ventress' head. The only thing I would like to do again differently is using a bit of a thicker sheet of PETG. I feel it would hold up better for future stenciling. For now, I will use this. But I am also currently ordering more PETG in a thicker sheet. I will be posting more pictures of the head stencil being cut tout and being used with the airbrush when I get there later today. If you do not know about Vacuum forming I suggest googling it to learn more. The first image is showing the vacuform table with the failed stencil to the right of the head form and the successful one still clamped to the frame for the vacuform table standing upright (you are looking at the top of the head). The second image shows how deep the forming of the plastic was made. You can also see the pieces of white duct tape I used to seal the holes where needed.
 2 points
 -
Thanks! Finished now!2 points
-
Hi everyone, My name is Angélique and I’m located in France. My current 501st approved costumes are Reserv Pilot and Gunner. I loved playing Jedi Fallen Order,and I couldn't miss making the Second Sister costume, even though I know it's a long journey. I've already studied the CRL and the costume from A to Z, and I've spent days browsing the Second Sister Build group on Facebook, which is really helpful. I learned a lot from all Approved Second Sister's experiences. I thank all the ladies who answered my questions (big thank to Jenny, not sure if she is on this forum). I wanted to create this post to show the progress of my project and maybe provide useful information for people who want to embark on this costume. The complete costume will only be available in early 2024, and yes, it seems so far away, but I wanted a custom-made and high-quality costume. Costume details: Helmet / pauldron / bracers: ordered from Cillytek3Dprinting (French propmaker) - delivery: January-March 2024. This propmaker is really nice and very responsive. I could meet them at a convention to discuss my project and I'm very confident about their work. Hard parts will be custom made. I asked to have some room for a fan and the jaw will be removable. For bracers, there will be a fastening system that will allow them to be easily put on. Neckseal: ordered from The Cave: Creature Workshop (in Colombia), RECEIVED The seller was very responsive and shipped the item on the day of the order because they had it in stock. It seems to be one-size-fits-all. Second option is Parallel Life Studios in France, and their neckseal is actually featured in the CRL photo. The price is similar for both neckseals (160€). I preferred The Cave's neckseal based on videos I've seen of both neckseals and feedback from people who say that The Cave's neckseal is more comfortable + Parallel Life is not very responsive (no response to my messenger since end of April so I just gave up). Jacket + pants + cape: ordered from Francesca at PinkingShearsCostume in Italy. Delivery in February 2024. Francesca is really nice, fast response, she makes videos of her work on her Insta page and she posted many videos of her Second Sister work in progress so we can see all details on the fabric. With the armor pieces, I would say this is the part that required the most research. I preferred to order from a seamstress in Europe to avoid duty taxes and because she seemed highly qualified (she has already made 6 Second Sister 501st approved costumes, with great feedback from some validated ladies). The production time is long, but everything is custom-made, and she specializes in Star Wars costumes. Gloves: RECEIVED --> I ordered 2 pairs: 1 pair from Crowprops (South America) (but it's free with the boots+gloves combo). 1 pair from Keeptrooping (formerly Imperial Boots): i ordered by email because the gloves are no longer available in the store. Be careful when ordering, as there were only 4 pairs of size L left. The size should fit because they run small, but they won't be making more! It will be safer to have them in case the ones from Crowprops aren't great (according to 1 or 2 people). For some reasons, communication with Keeptrooping is not very easy (take time to respond and I have to send reminders...). Boots: RECEIVED --> ordered from Crowprops. It only took 10 days between order and shipping, that was super fast ! I hesitated a lot with the Keeptrooping boots, which seem to be of better quality, but the ones from Crowprops are custom-made, and the ones from Keeptrooping seem a bit too wide around the calf compared to my morphology. I have very small calf. Rank bars and buckle: ordered from Cillytek3Dprinting at the same time as the hard parts. Belt: I bought the leather part (I will assemble it myself once the buckle is received). There's also Paul from PHProps in the US who makes the belt with the buckle already assembled. The feedback from validated Second Sisters is very positive for this prop maker, but he told me to wait until I have the jacket to order the belt because the size to provide must be precise with the costume worn (no holes or attachment systems). So I'll try to make it myself to have it perfectly sized but I may also order the fully assembled belt later to PhProps. OPTIONAL: Lightsaber: ordered from Ultimate Works (that will be my birthday present in July from my boyfriend)☺️ If any Second Sisters see this post, I would be interested in having your feedback on your costume, your story about this build. I will update this post as I receive each item. And if you have any questions, please ask1 point
-
Added Asajj Ventress as featured in the Bad Batch S3 Trailer.1 point
-
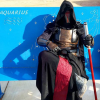
Updated photos will be posted in End of April / May for 2024. These are some pre pics from last year in Milan Italy Cartoomix 2023.
.thumb.jpg.090e48bdbb4ab9a03c0d868de1119bd1.jpg)
 1 point
 -
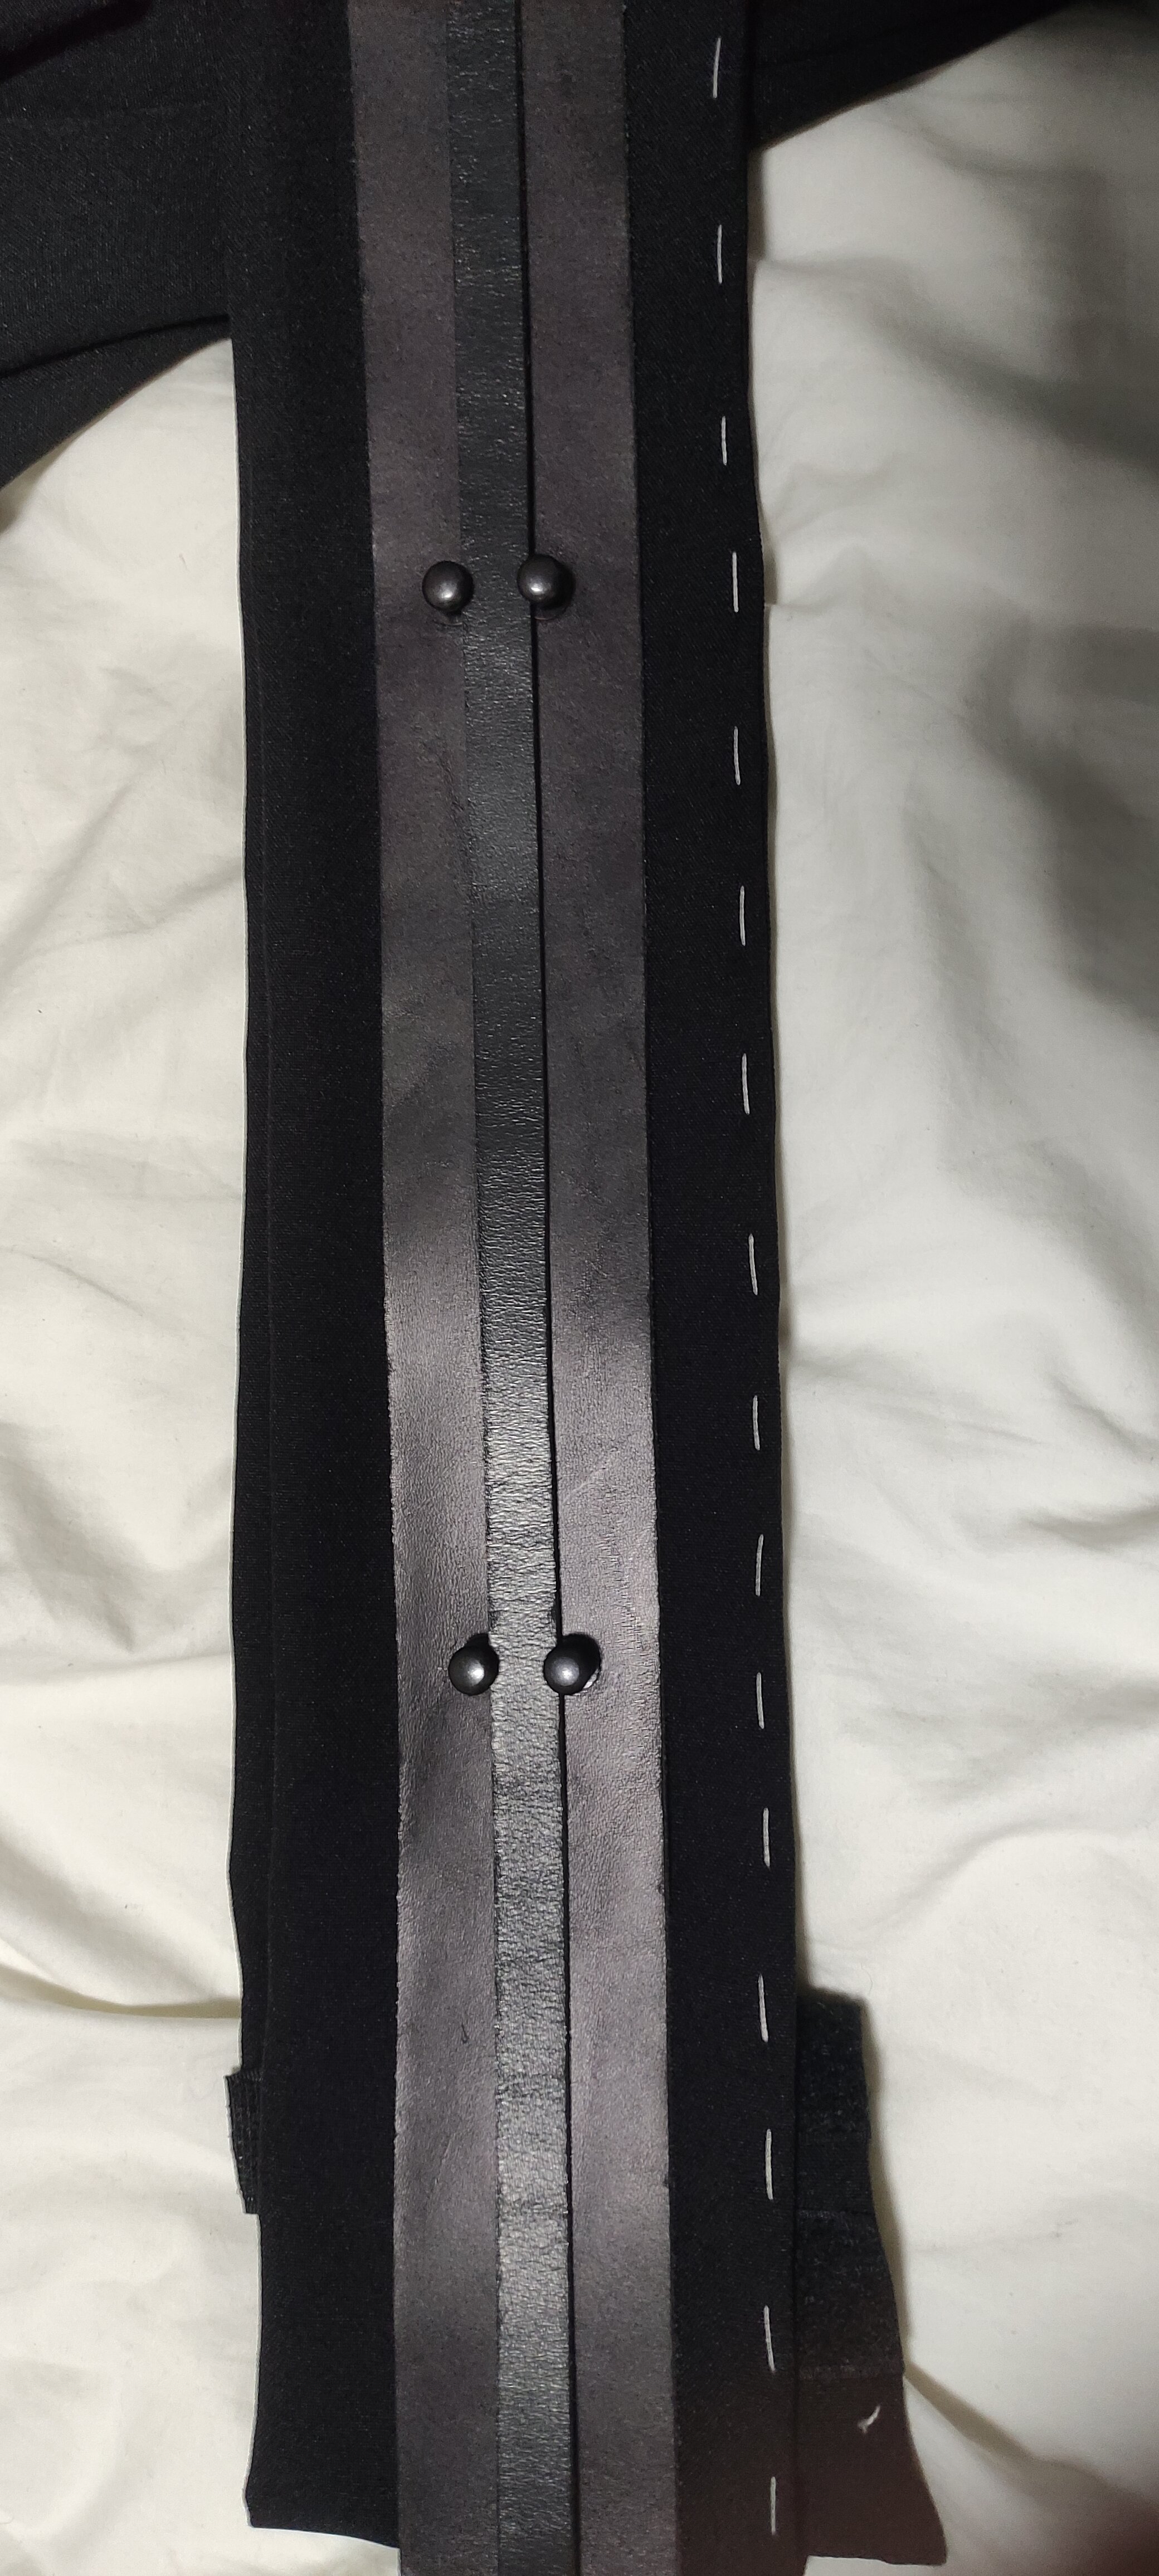
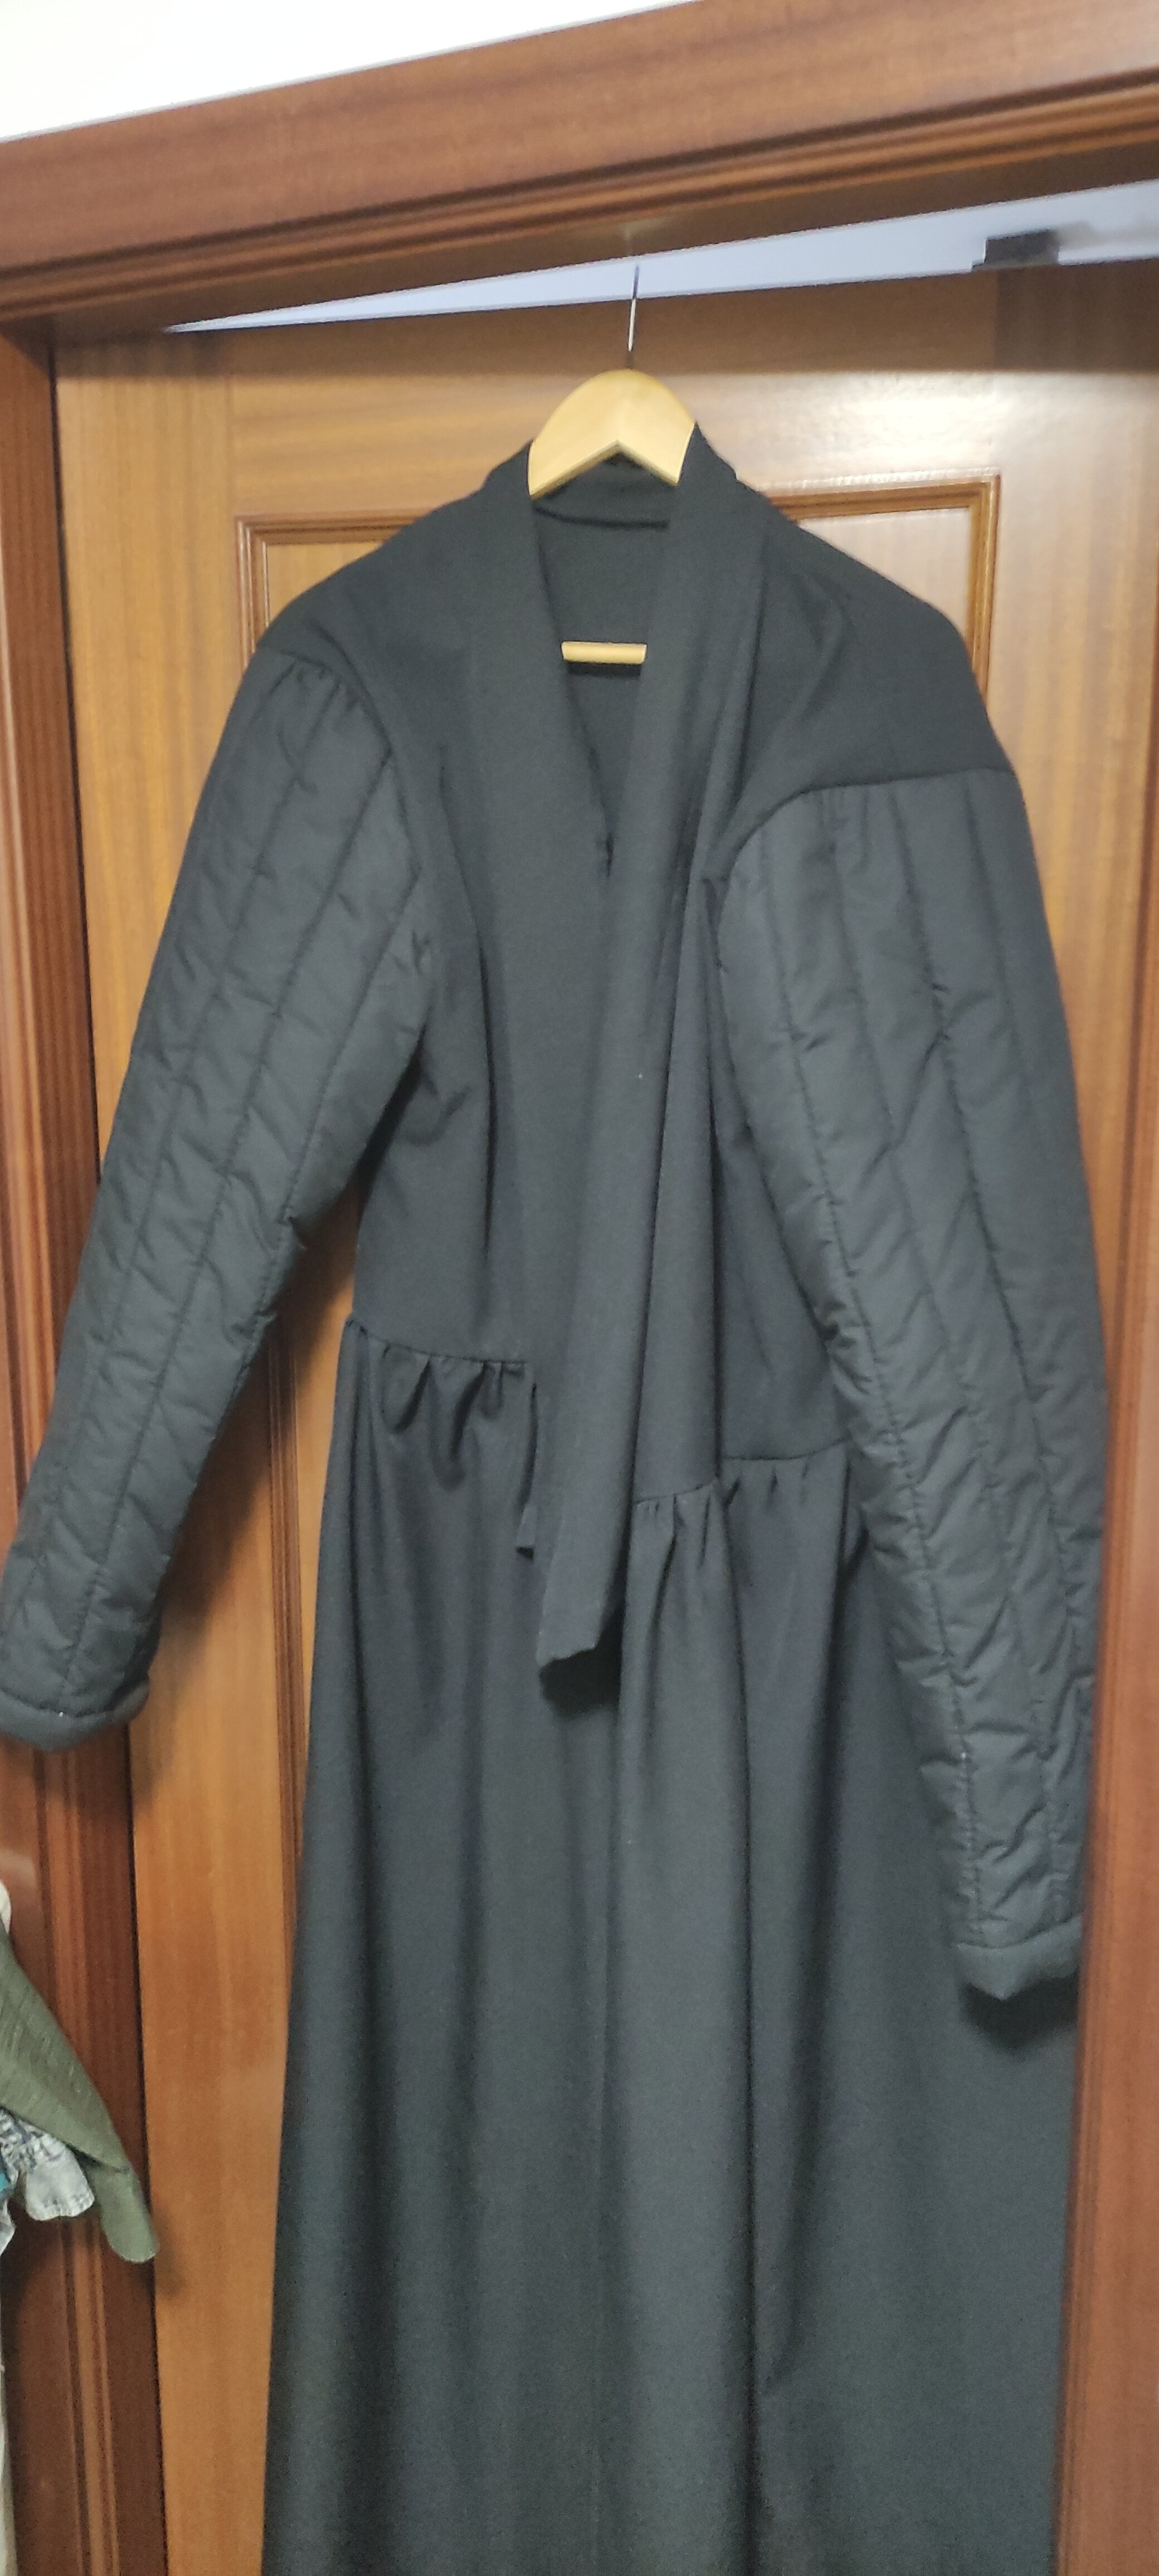
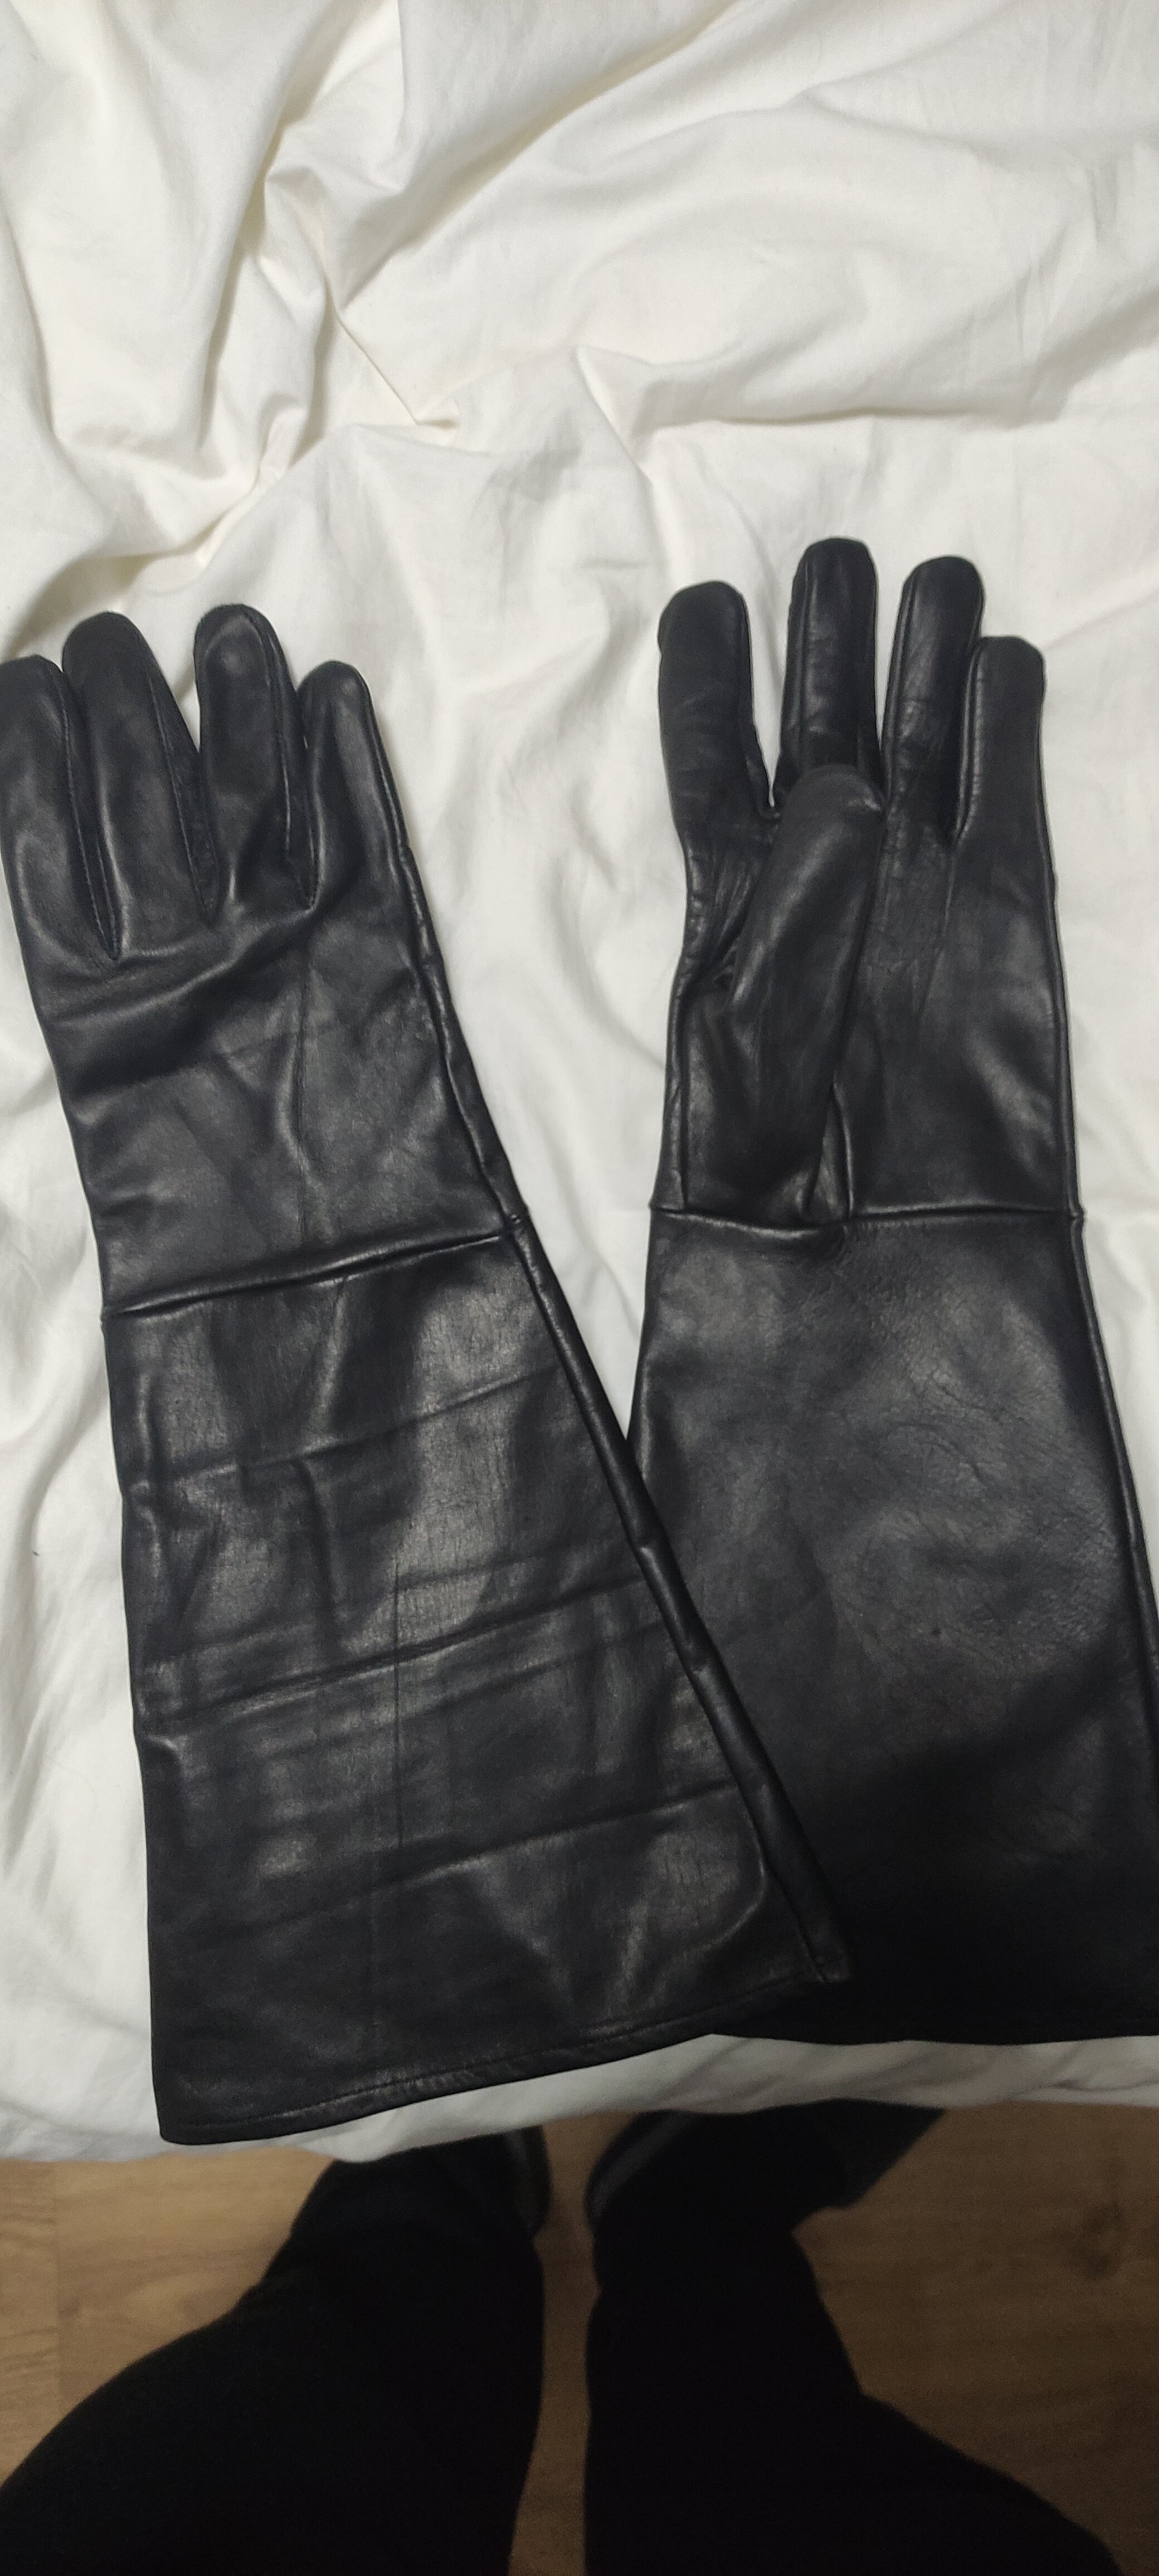
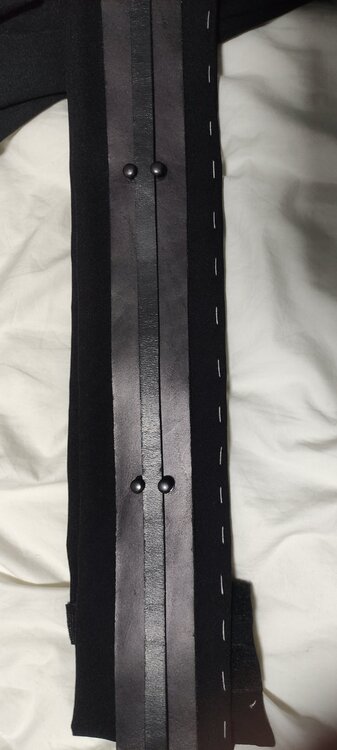
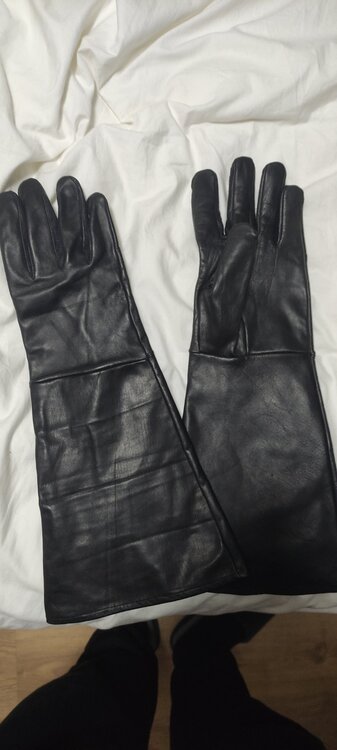
Hi again! As I promised here I show you the different parts of my costume: The leather gloves I bought were recommended by my friend: The leather belt with the right measure and those little black metal pieces: Here you can see the belt on the obi which is almost finished: And the inner robe with the skirt attached and the sleeves finished as the CRL details: Finally the outer shirt on the inner robe: And that's all for now, in a few days I will show you the skirt and the awesome boots, the same for my royal guard costume.

 1 point
 -
Working on a Level 1 Darth Revan (KOTOR I & II) Looking forward to your feedback! Component source is Wicked Armor unless otherwise specified. Ordered 5/23/23 - Received 8/31/23 ✅ Hood and Capelet Images - https://imgur.com/a/J3l3XN1 ✅ Cape Images - https://imgur.com/a/8JLI6ua ✅ Mask Images - https://imgur.com/a/wAydI5q ✅ Shirt Images - https://imgur.com/a/wP8NyAY ✅ Vambraces Images - https://imgur.com/a/fwuqXp2 ✅ Hand Plates Images - https://imgur.com/a/LesZZ8x ✅ Gloves Images - https://imgur.com/a/boWlP0r ✅ Cuirass | Chest Armor Bridge | Abdomen Armor | Belt with O-Ring Images - https://imgur.com/a/LrirOwk ✅ Fabric Drapes Images - https://imgur.com/a/5QgPOpo ✅ Back Armor | Back Armor Bridge | Kidney Armor Images - https://imgur.com/a/xI3RQwE ✅ Split Skirt Single Hole Cord Lock Ordered 11/15/23 - Received 11/17/23 Images - https://imgur.com/a/33R2vP5 ✅ Pants Amazon Ordered 5/11/23 - Received 5/13/23 Images - https://imgur.com/a/CO9UxZh ✅ Boots CrowProps Ordered 5/16/23- Received 6/9/23 Images - https://imgur.com/a/lBESk6N ✅ Lightsabers Vader's Vault REV-N Elite Ordered 07/21/23 - Received 08/22/23 Images - https://imgur.com/a/CJHBouu Vader's Vault Revanchist RTS Ordered 07/21/23 - Received 08/22/23 Images - https://imgur.com/a/CJHBouu ✅ Undergarments Balaclava Compression Short-Sleeve T-Shirt Compression Socks 12-inch Tummy Trimming Belt ============= Purchased but will not submit Korbanth RevanV2 "Dark" Ordered 08/01/22 - Received 08/03/22 Korbanth / Vader's Vault comparison images - https://imgur.com/a/jmD2Guk Korbanth RevanV2 "Light" Ordered 08/01/22 - Received 08/03/22 Korbanth / Vader's Vault comparison images - https://imgur.com/a/JiAaSzT Wicked Armor Resin Saber Hilt Ordered 5/23/23 - Received 8/31/23 Images - https://imgur.com/a/e8dgYge1 point
-
Attach to the front permanently and use the back as a secure point like Velcro or whatnot.1 point
-
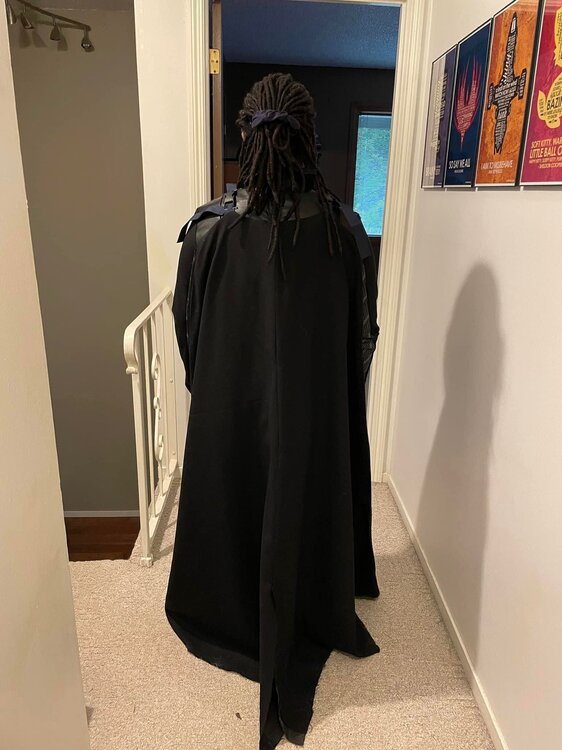
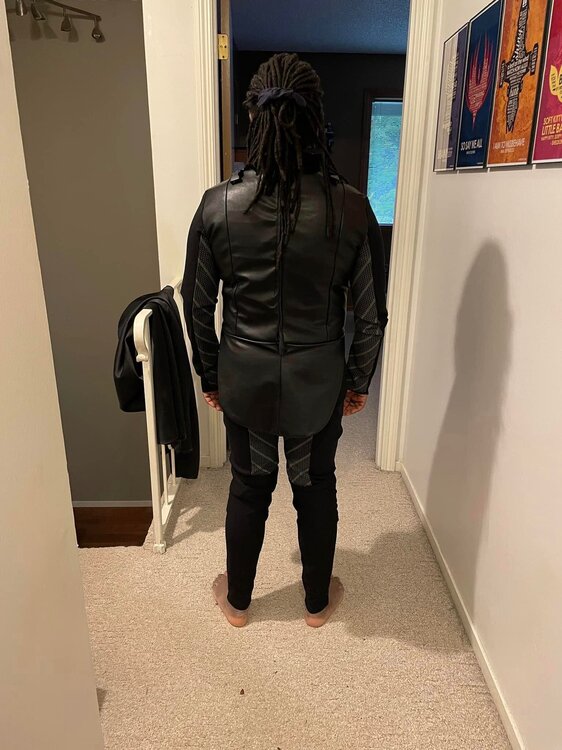
Your GML team is where you will need to send your application, and they will make sure to send it to the Legion for final approval. From what I can see, your cape is to long it shall not touch the floor, and you need to gather it more at the shoulders, it shouldn´t go out over your arms like yours do, but up over your shoulders and down the back. If you look at the CRL model, you will get an idea on, how it should look. Do you have padding on the chest area ? Your skirt also need to have a more gathered look like the CRL model, yours do not have any and shorten the lenght as it also shall not touch the floor. And I am a bit worried about the large opening on your hood, but it can be a dressing issue ? All in all you have done a great job, just the last finishing touches and you´re good to go1 point
-
That’s exciting to hear. I was going to offer to help, if there was more that needed to be done. I am looking forward seeing the end result. If there is anything I can do to assist, let me know.1 point
-
For folks interested in the racing shirts: https://docs.google.com/forms/d/e/1FAIpQLSftQjCpTpwdv5rFwIxYS5yhUYW5L_7lkqQTrI71RSzPE2OXWg/viewform1 point
-
The shin guards/knee pads do not need to exactly match the CRL image, as we are given another option: "The shin and knee guards may be custom sculpted to match the designs used in the comics, or they may be based on the police style shin and knee pads used in the Decipher image of Mara." Here is the Decipher image: It's not possible to find this exact pair anymore (believe me, I tried), so something pretty close in a similar style will typically be approvable. Shannon McRandle said the guards in the Decipher image were hockey ones, but many of us use the police/SWAT style shown in the post above.1 point
-
Per the LMOs, we have to wait until the end of the season at least before the assignments are made.1 point
-
I bought these: https://www.amazon.com/gp/product/B08BYFXMKV/ref=ppx_yo_dt_b_asin_title_o04_s00?ie=UTF8&th=1 If i remember right, I put the two hole one on, but it wasn't holding tight enough so I put a single hole one on after the two hole one.. holds pretty good now1 point
-
Great, more people involved the better. I know of at least one other costume club that that is not entertaining crls until after the end of the series,I have threads in a number of places but dont have time to update them individualy, as they all want it done differently. Fingers crossed1 point
-
Hello there, my husband is also in love with the costume of Baylan Skoll. He just finished the CRL as model and got approved for Jayhold Beehaz from „Andor“, so we can move to the next new CRL. ;-). Is anyone already writing on the CRL and will it be Flagship eclipse? I’m happy to help, would be the third development after Jayhold and Fennec Shand for me.1 point
-
Ive completed my second model of rhe main vest structure in suedette, so worjed out construction method and sewing method, and been working on the painting of the armour pieces. Looking to start on the undershirt this week, finer detsil on the gsuntlets as some of the printed buttons are not correct on my print. https://www.facebook.com/profile.php?id=1000921594932641 point
-
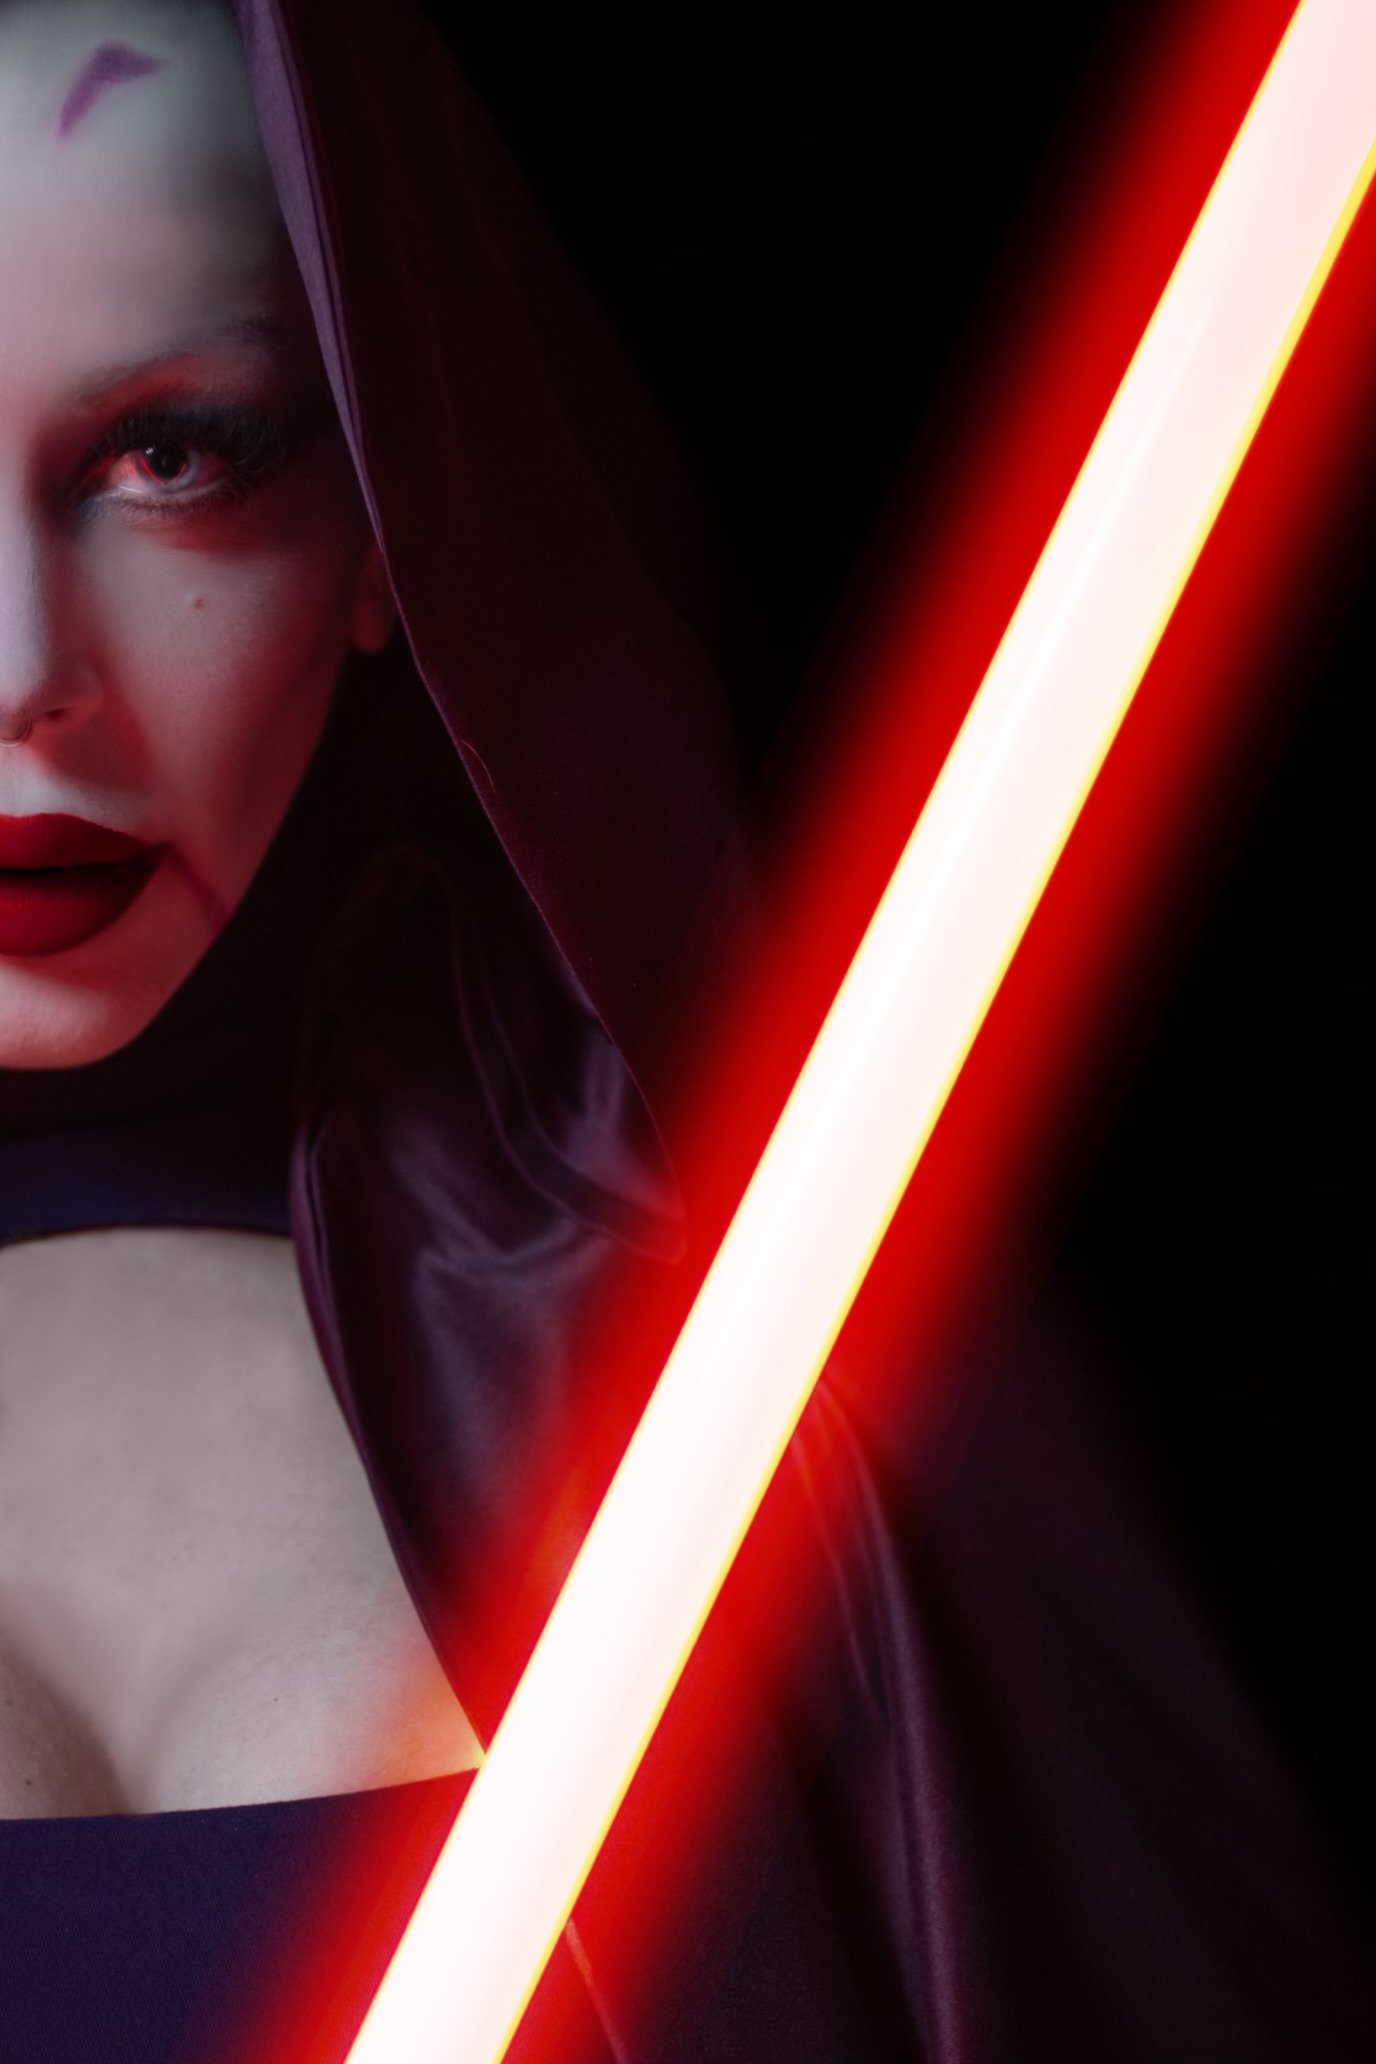
Oh this is absolutely stunning. You just have peak Asajj vibes.1 point
-
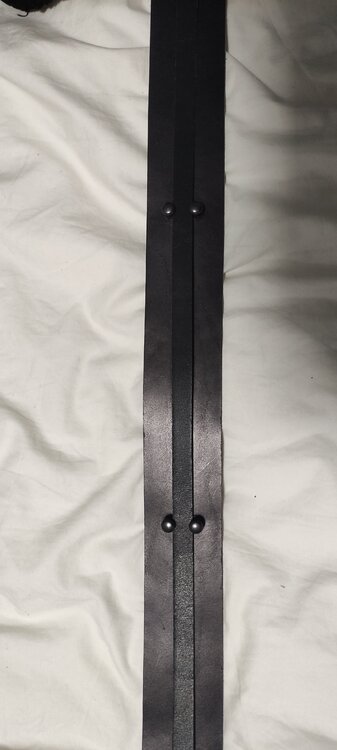
I bought the Deluxe Revan from My Wicked Armor. I wanted the back armor as described in "optional accessories" in the costume standard. The commissioned armor pieces have straps attached on the front and back armor that are designed to tie together over the shoulders. I added Dritz 3/4" parachute buckles with contour shape to the straps to hold my armor adjustment and to make dressing easier. http://www.mywickedarmor.com/ After determining my placement, I pinned the straps in place. I placed two clothing clips on the straps to hold them and then placed two more to mark approximately where I wanted to connect the buckles so that they would be hidden from view. The two higher clips sit where I wanted the buckles to connect. (Note-shirt in photos is not my costume shirt.) With the armor not secured at the sides, I lifted the armor off, keeping the clips in place. I then determined the length I needed for the straps, considering the added 2" length of the buckles. I ended up increasing the front length to 7" instead of 5" of strap length. I kept the back lengths at 2". Before sewing, I made sure the contour of the buckles faced the correct way. I put in some stitches by hand to keep the buckles in place, then used the sewing machine. I won't need to pull the fabric of the straps through to make adjustments since I measured where I want them. I can now easily clip the buckles to hold the armor together and slip both front and back armor pieces on over my head.1 point
-
Late to it, but CONGRATS!1 point
-
You don't need a professional photographer. Newer iPhone/Android cameras are great and anyone can use them.1 point
-
A little update as I received some pieces of the costume: CROWPROPS BOOTS: PHOTO 1 PHOTO 2 CROWPROPS AND KEEPTROOPING GLOVES : photo 1 photo 2 photo 3 small comparison between Crowprops and Keeptrooping gloves: Crowprops: comfort ok, leather quality (ok but way less comfortable than KP) but keep in mind that these gloves are offered when you buy the Second Sister boots. Keeptrooping: size small (size L is exactly my size whereas I usually wear M), the quality of the leather is superior to Crowprops, they are more comfortable. The color difference of the red is not shocking because on the Second Sister reference images the red of the Crowprops gloves seems to be closer to Crowprops's gloves but the KP gloves are much more comfortable and v isually beautiful. I think the Crowprops gloves will be my backup gloves.1 point
-
No mention of how to wear the saber in CRL. What is everyone using, Covertec Wheel or D Ring? If Covertec what color and how are you placing the clip on your costume?1 point
-
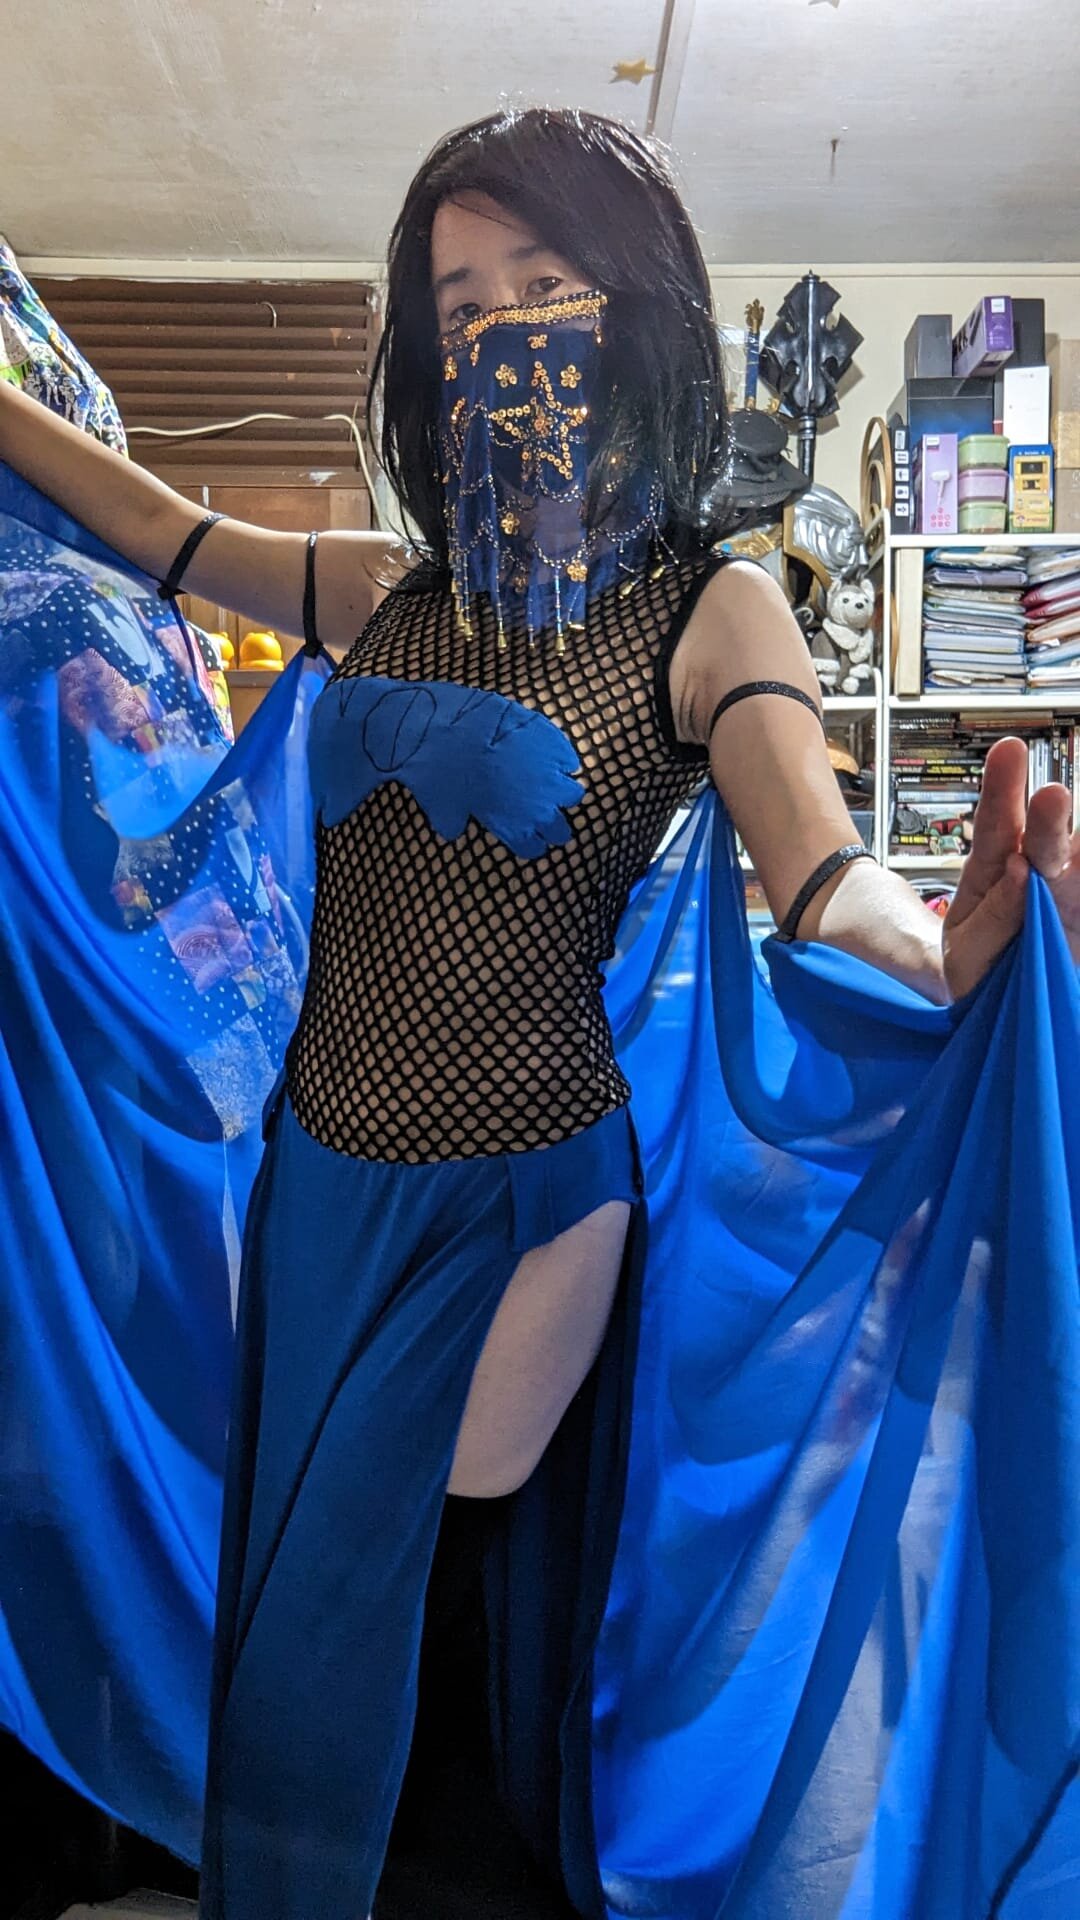
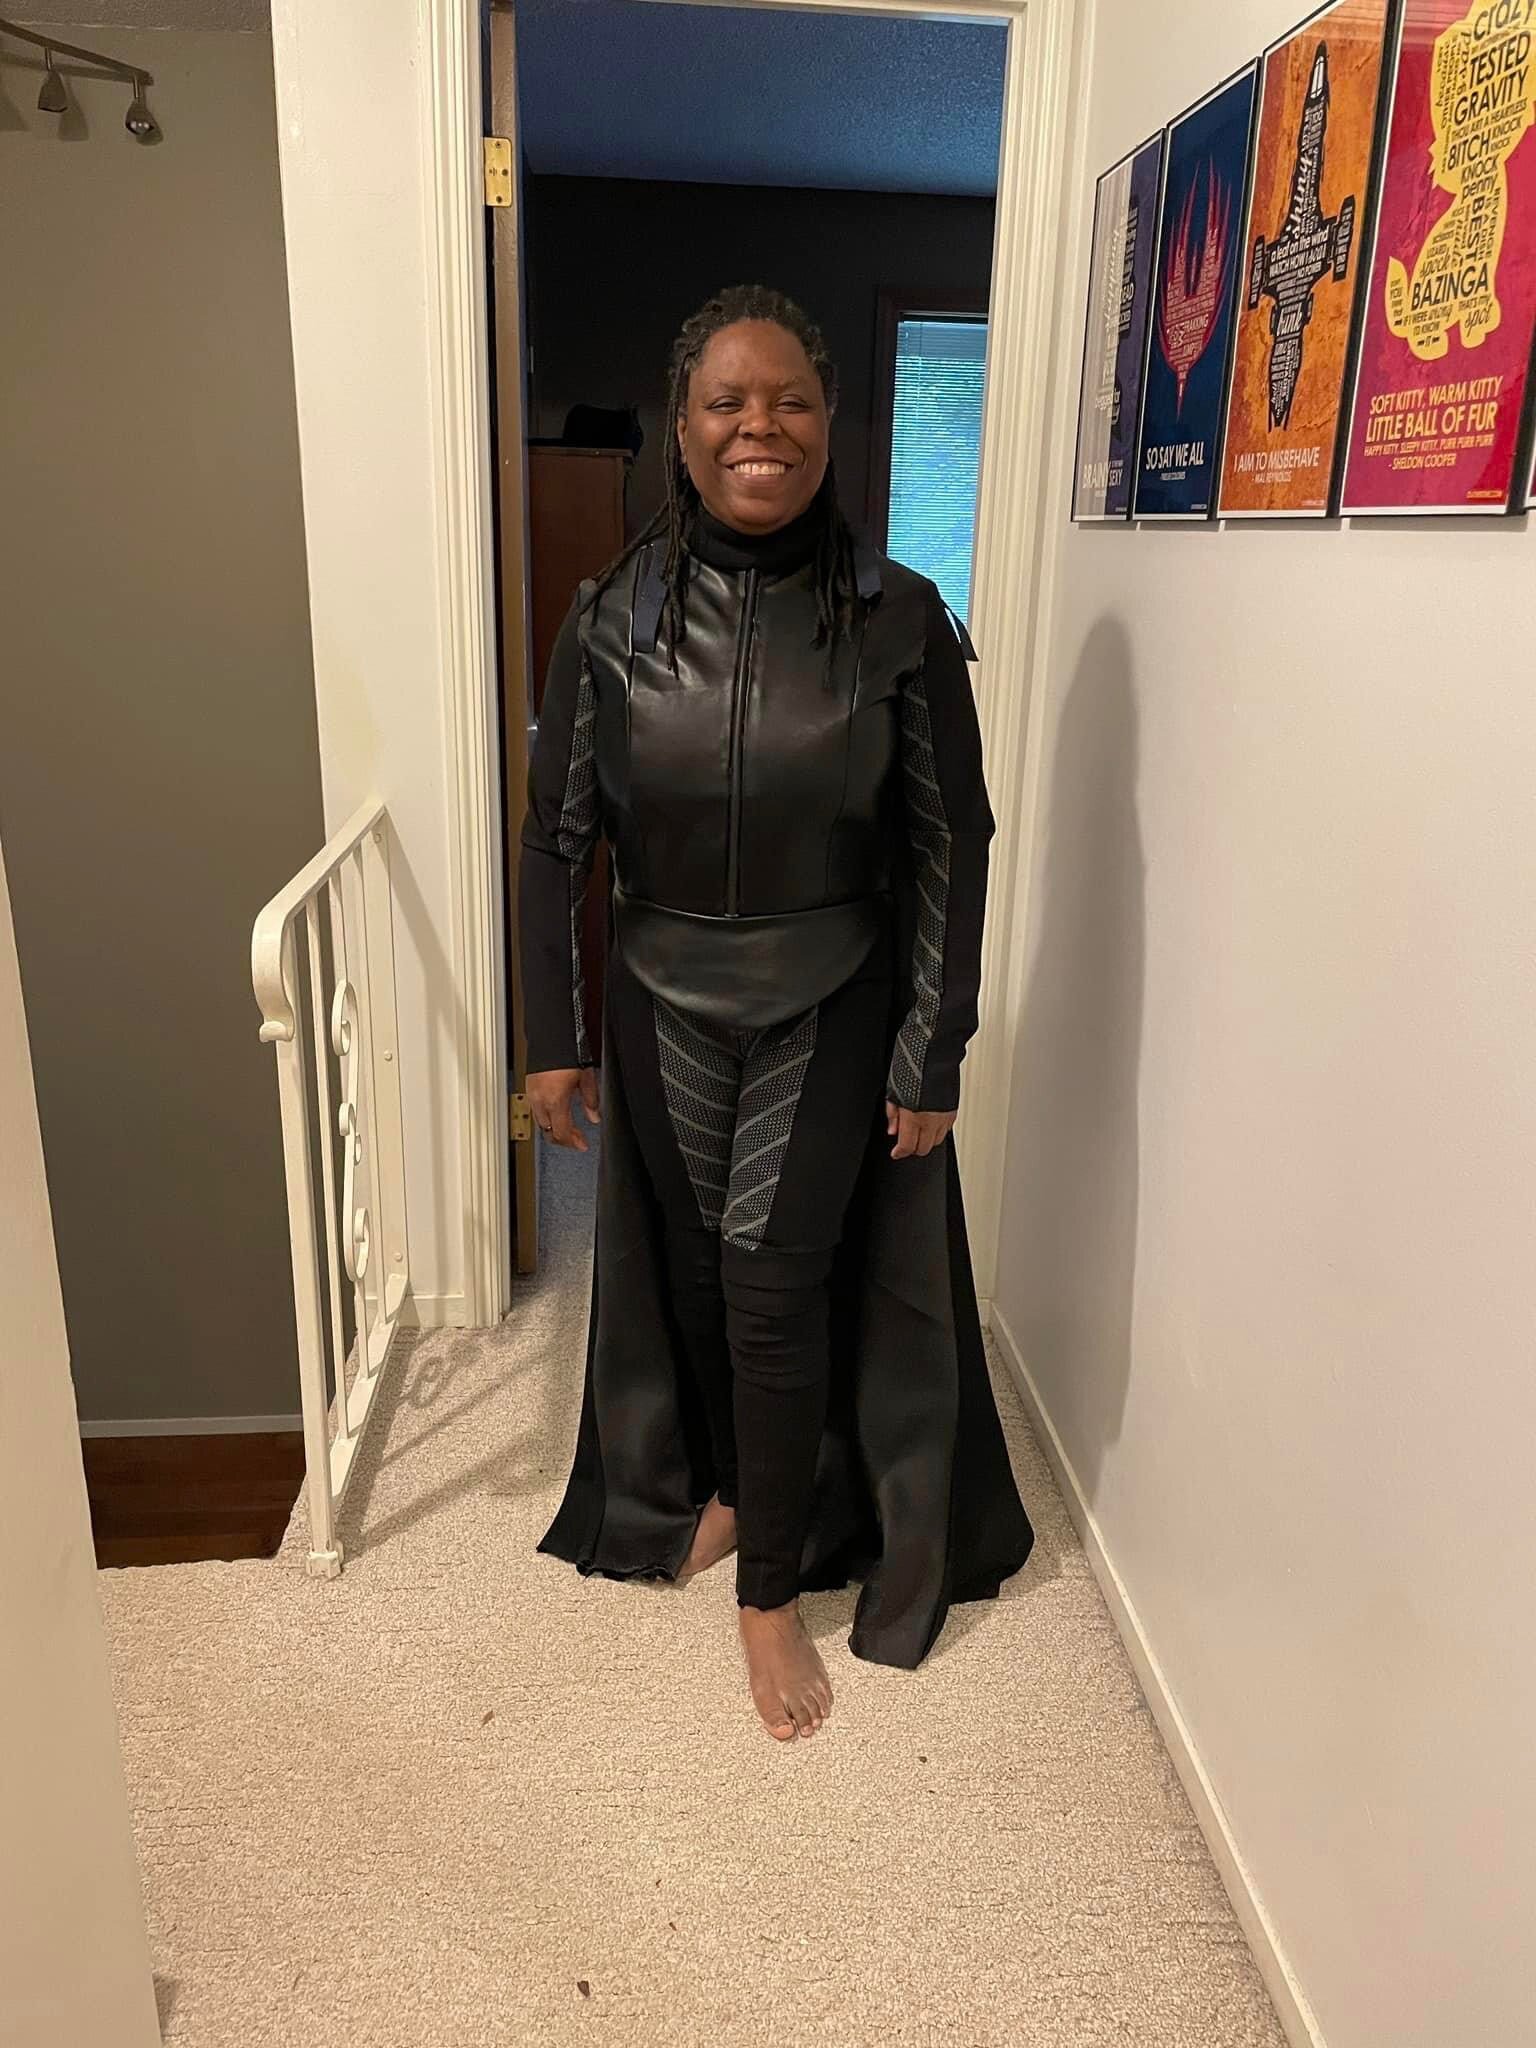
ok. I got my butt to redo after I saw this fishnet shirt on a online store. So I order it in and cut it to fit my body and I added a skin tone mash fabric on it. LOL And along the way saw this belly dancing mask to add to the outfit when I feel like having a bad makeup day XD
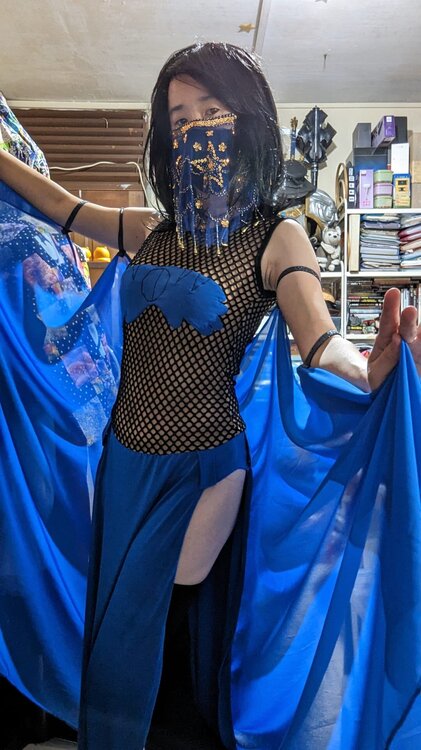 1 point
 -
WOW! You look fantastic! Your makeup looks great and I love your horns! Wish you lived closer! I'd be all about trooping with you! Great job!1 point
-
Alright, I think today is a good day for me to stop where I'm at due to the warm weathering making it difficult to work in the garage. Gloves and extra velcro just arrived and sure enough I should had ordered a size smaller, I freaking hate sizing charts with a passion. Originally the instructions called for you to hot glue the armor bits onto the gloves....and I hated it! I said to myself, "Man I got a lot of extra velcro here so why don't I use that instead?!" Yeah that actually worked really well and I think I might rip out the parts from the other glove to do the same method...they feel way more secure using my method.... I of course had to do a test shot! This is of course my Mara Jade 2.0 saber I got from Saberforge about 7 years ago or so. It's honestly the only sith saber I got besides Malgus. Which brings me to an important question. Do I HAVE TO get the Vader's Vault Acolyte saber https://vadersvault.com/acolyte/, or can I go with whatever I have that has a red blade and realistic looking? Or can I go with Saberfoge's Acolyte https://saberforge.com/collections/apprentice-sabers/products/acolyte which costs way less? Personally I'd rather go with what I got cause I got it, it's Sith looking and highly functional.1 point
-
That's looking nice!1 point
-
small bump, im going to be out near the store again this weekend, any insights would be appreciated to potentially save myself a trip back out there1 point
-
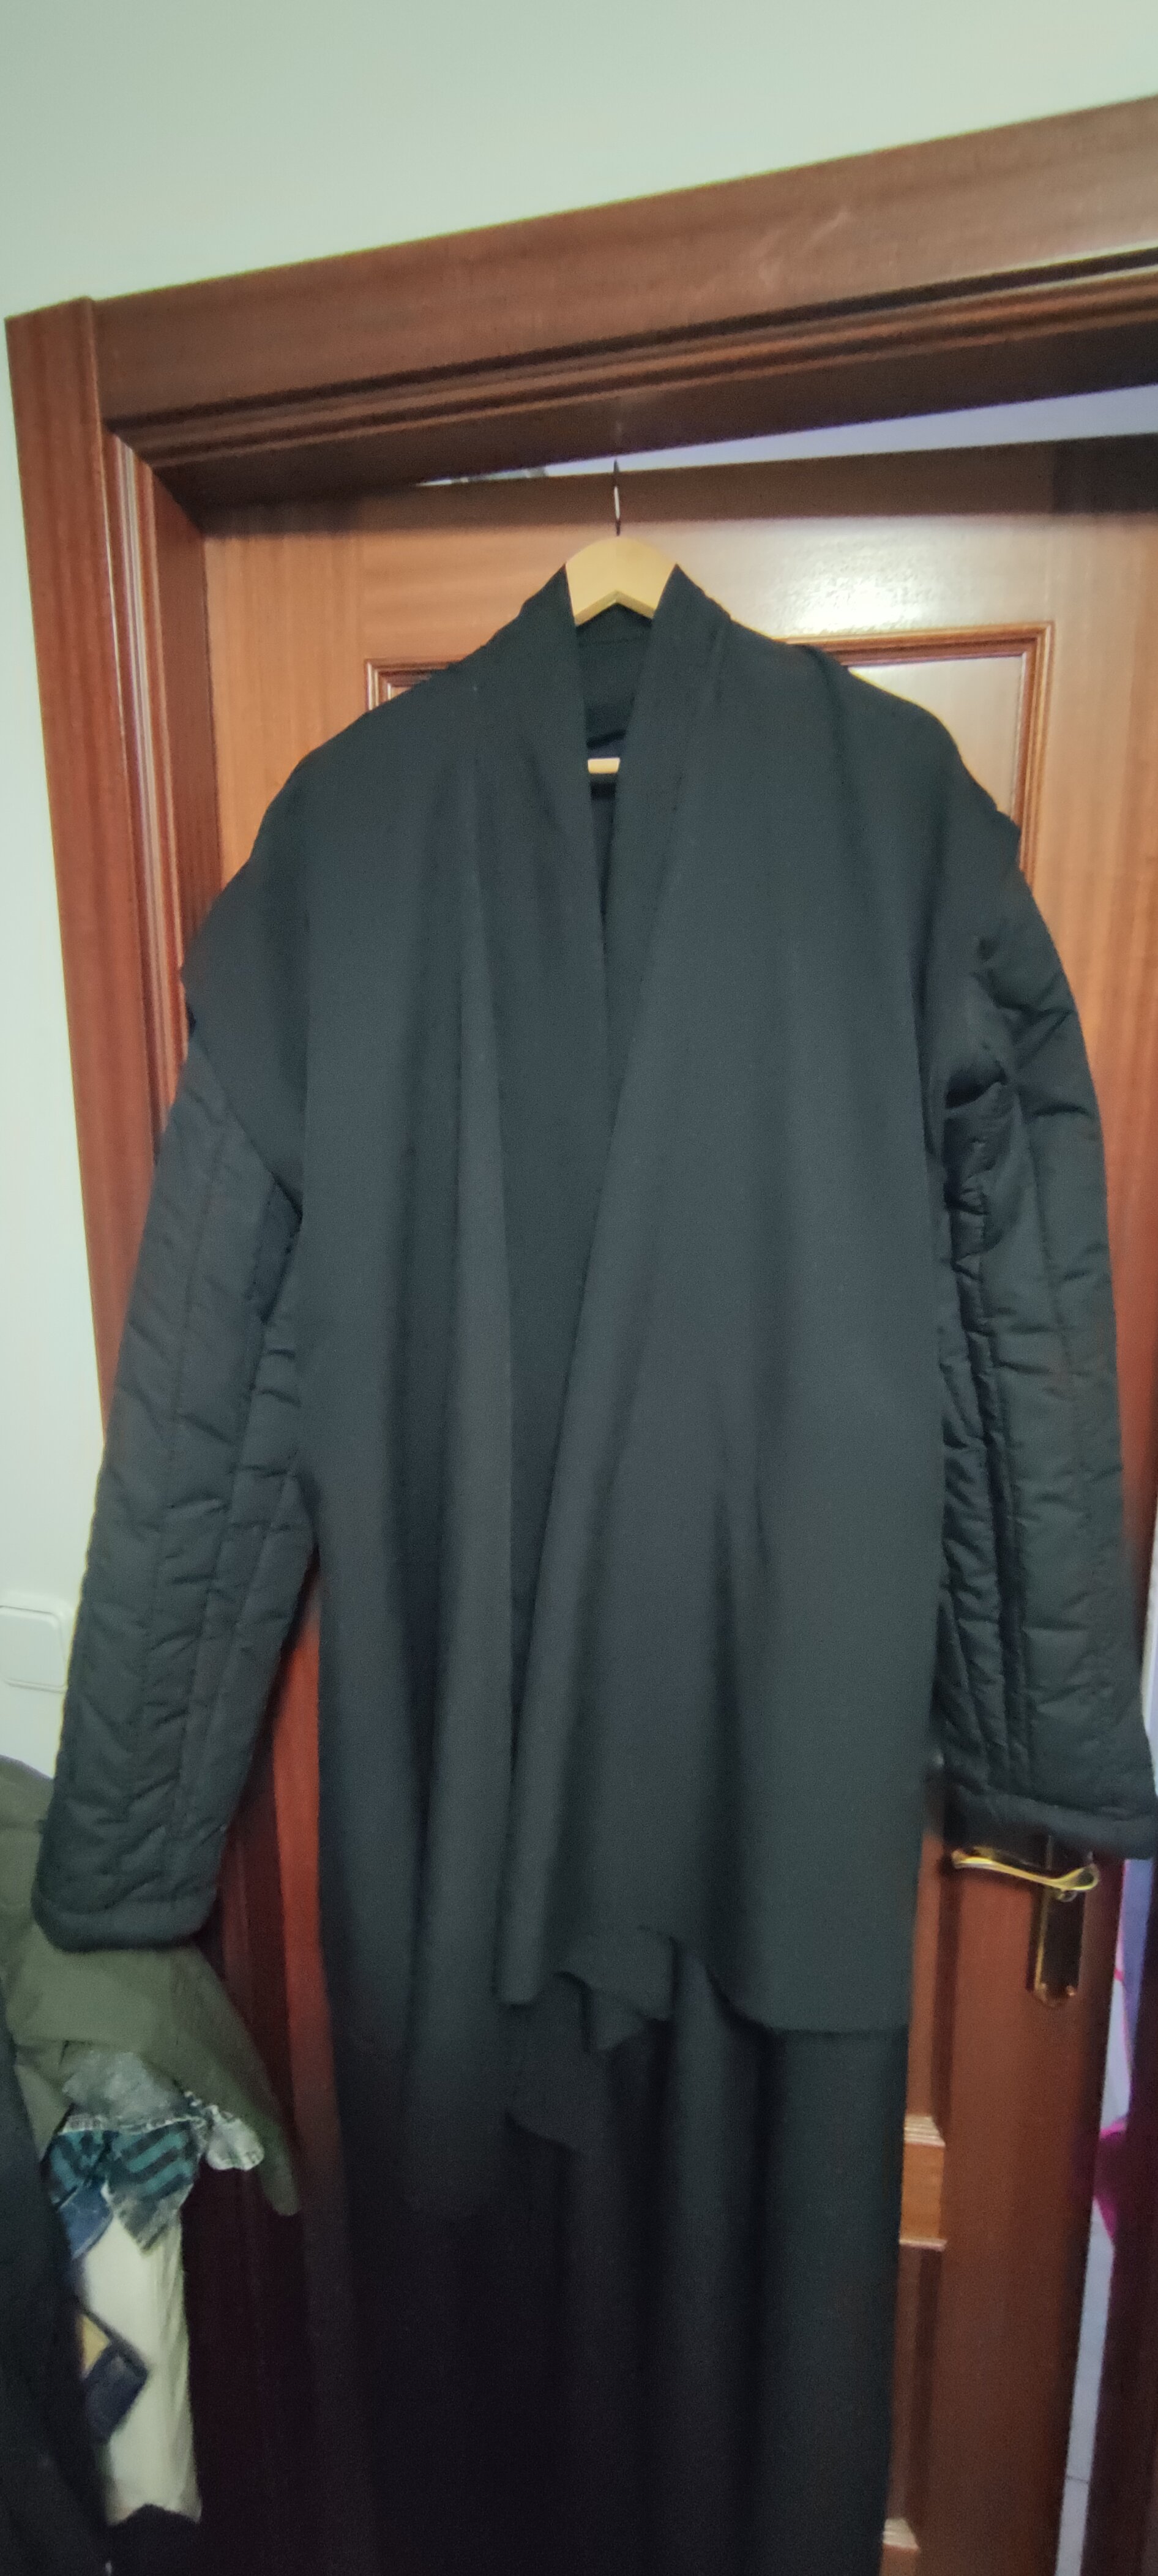
Observations part1: Both Baylon and Shin have cloaks, doublets, armor, and the whole dark Jedi aesthetic with both similarities and differences. Cloaks: Shin has a greyish olive or very dark brown (taupe?) cloak depending on the lighting she is seen in. It is a crinkle-style fabric with at least 2 plies or more in the hood but the cape portion is sheer enough for light to be seen behind it. A seam can also be seen right under her armpit on the cape. This leads me to believe her cloak at least has 3 panels for the cape portion. I believe the hood is in 2 pieces based on this image showing a seam going down the center. It is very easy to miss. The cape also gathers in the shoulder area (also note the seam line of a cape panel I totally just noticed now) It's very possible that the gather could be a sewn-in elastic chord that simply pulls the cape a bit as it kind of disappears as she moves forward and swings her lightsaber. Take note also that she has what looks like to be some kind of opera straps or something underneath her cloak on top of the doublet. It's visible in this image but it is not there when she is missing the cloak during the Starfighter scene in the Ahsoka Trailer. She also has these Kylo ren type sleeves though I recall the costume designer mentioning that they preferred to purchase already pleated fabrics than make them. Possibly accordion style which would explain the strange double seam on her arms to keep the pleats in place. The pleats make up just about less than half of the sleeves also:1 point
-
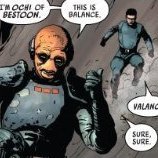
You should make a lightsaber to go with the costume! This image recently came out1 point
-
Congrats on being newly approved with a TFE costume! Now, there is a list of things that you'll want to make sure that you complete to get the most out of the Detachment and Legion. 1. Make sure you are properly registered here for correct permissions and access to member-exclusive stuff! you'll want to make sure you have your TKID and 501st forum profile in your TFE forum profile (this forum). You can find directions on how to do so HERE. 2. While you're there, make sure your rank is listed as, "Detachment Member". If it isn't you can post HERE and we'll get you the proper rank for access. You won't be able to participate in Member-only programs, participate in Detachment elections, or buy merch without the proper permissions, so don't forget to check! 3. You can see the different TFE subgroups for the Garrison/Squad units that have been approved HERE, or you can go HERE to create a new one in your area if there isn't one already there. 4. You can also request to join the TFE member group on Facebook HERE. Make sure you have an approved TFE costume and that you answer ALL the questions, or your request won't be approved. 5. As always, make sure you take a bit of time to check out the Legion Charter and Operations Protocols. These are the bread and butter of standards and regulations of the Legion and being a member.1 point
-
FANTASTIC!!!!! Thank you so much! I will need help with this fantastic adventure!1 point
-
Hi everyone, my wife is looking to make a first in legion costume of Mother Talzin from the Clone Wars, and I need guidance. desperately. We want to incorporate the flowing arched robes that sprout from her back, maybe have them move on their own when she troops.....but I don't know much about fabric work, and this looks like a tough costume to build...HELP! I will post the build from start to finish here but could use as much wisdom as you guys can spare. Thanks, Andy Romero DZ-7244 Garrison Membership Liaison Dune Sea Garrison1 point


.thumb.jpg.0d1684095db527b839cf5a8a14c59585.jpg)


.thumb.jpg.71ffc70ada245148c97a2dd358072cec.jpg)
.jpg.191f8c449edb4fd9b34c22814ad44df9.jpg)