-
Announcement
Welcome to the forums!
If you are a newly-approved member, make sure you check out the New Member Checklist!
If you are a Detachment member and can't see the member-only area, post here for access.
-DV
Leaderboard

Popular Content
Showing content with the highest reputation since 06/18/2025 in all areas
-
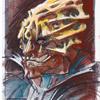
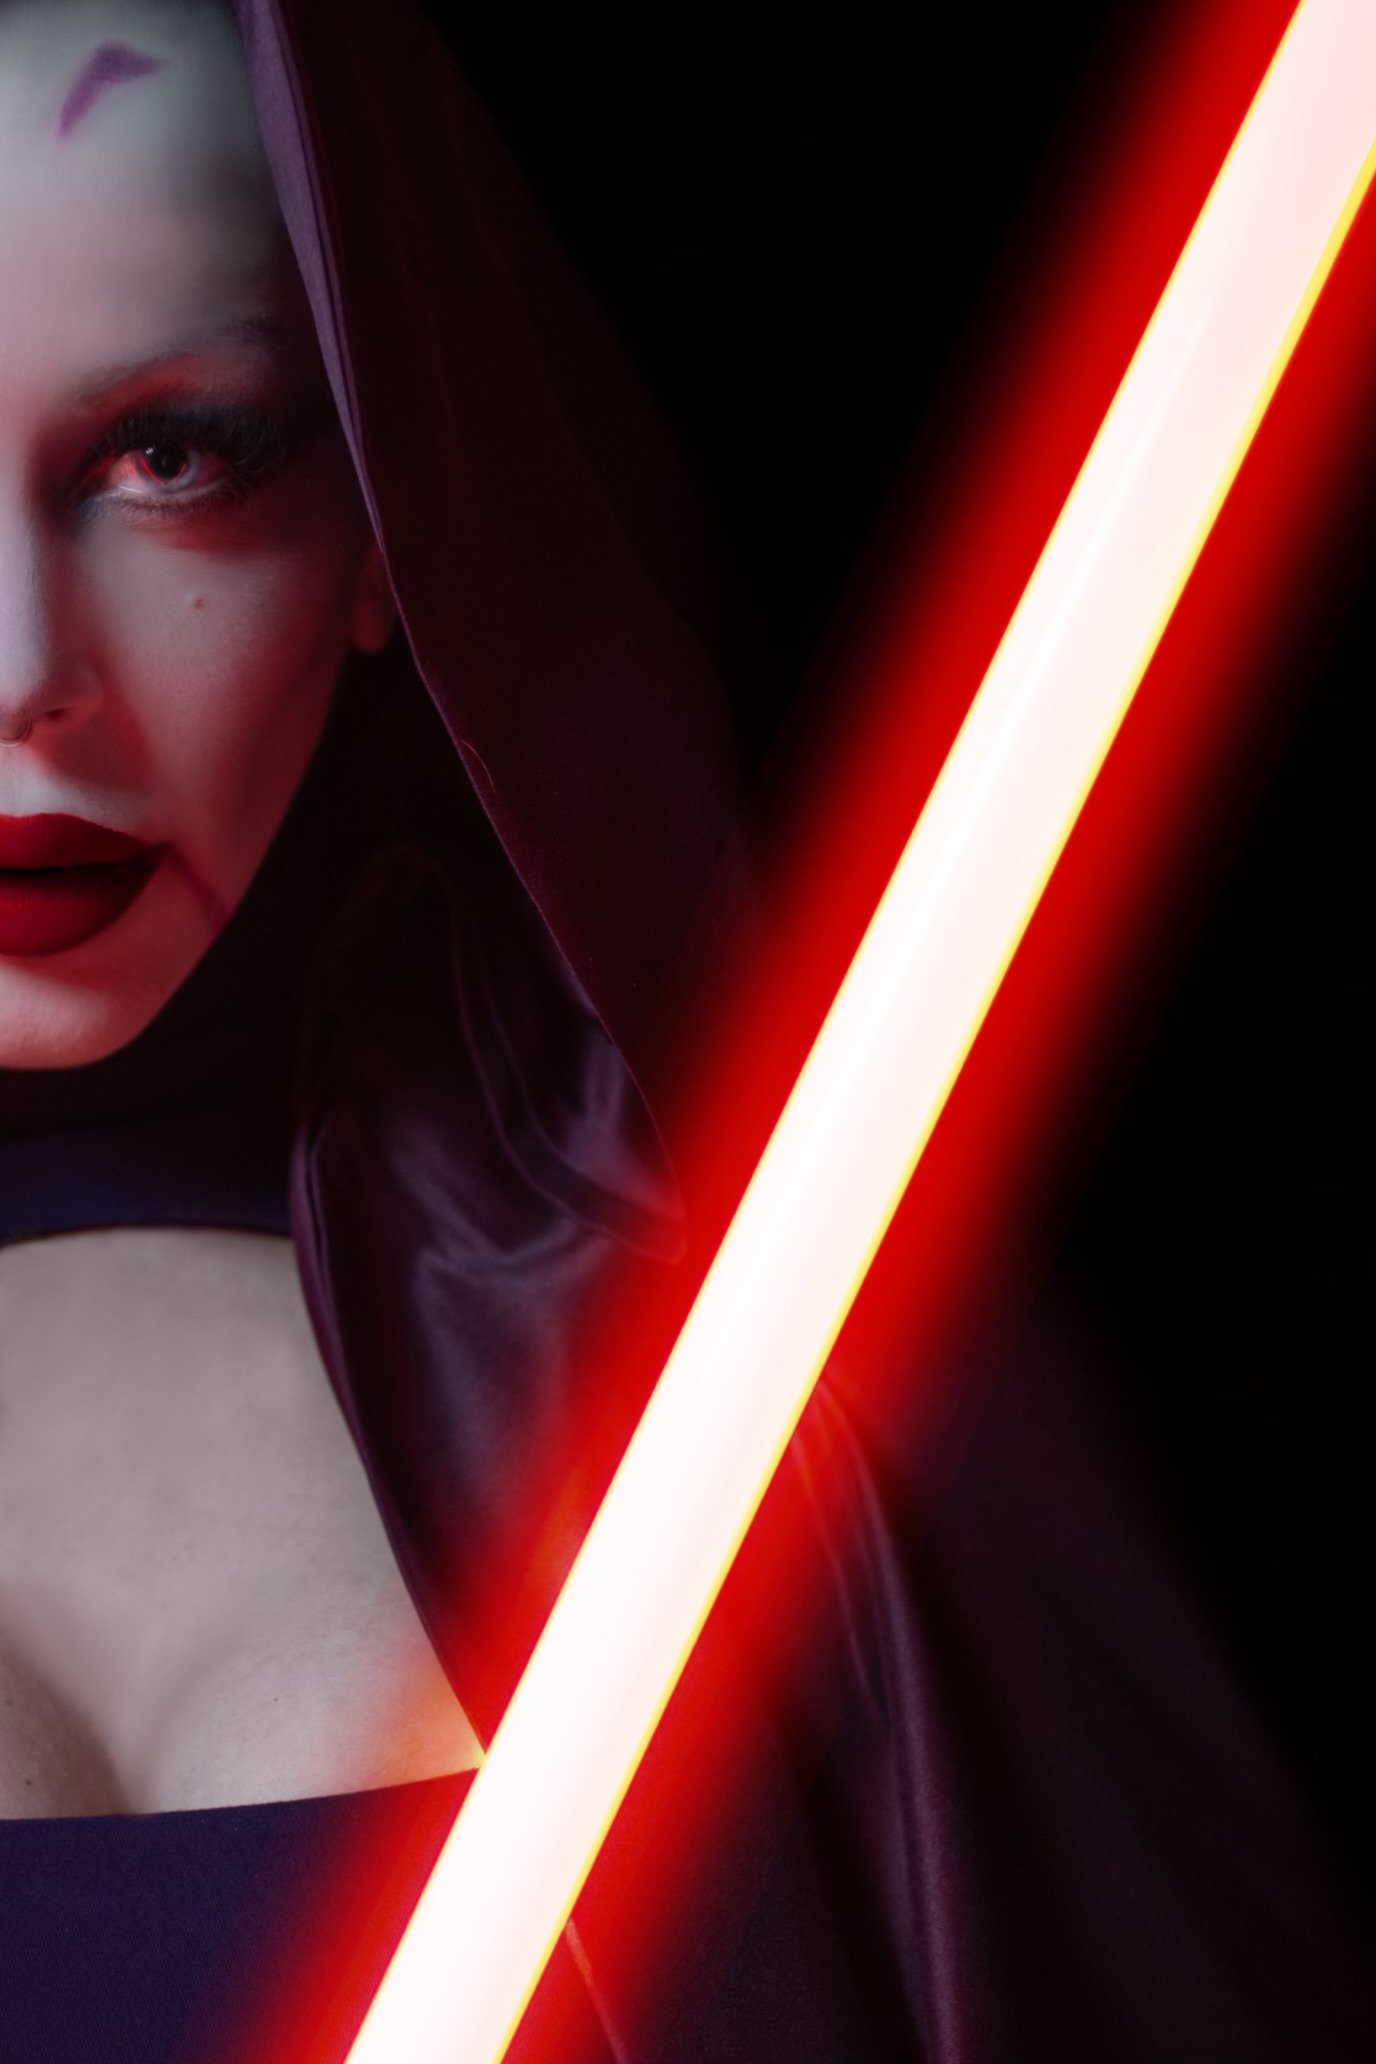
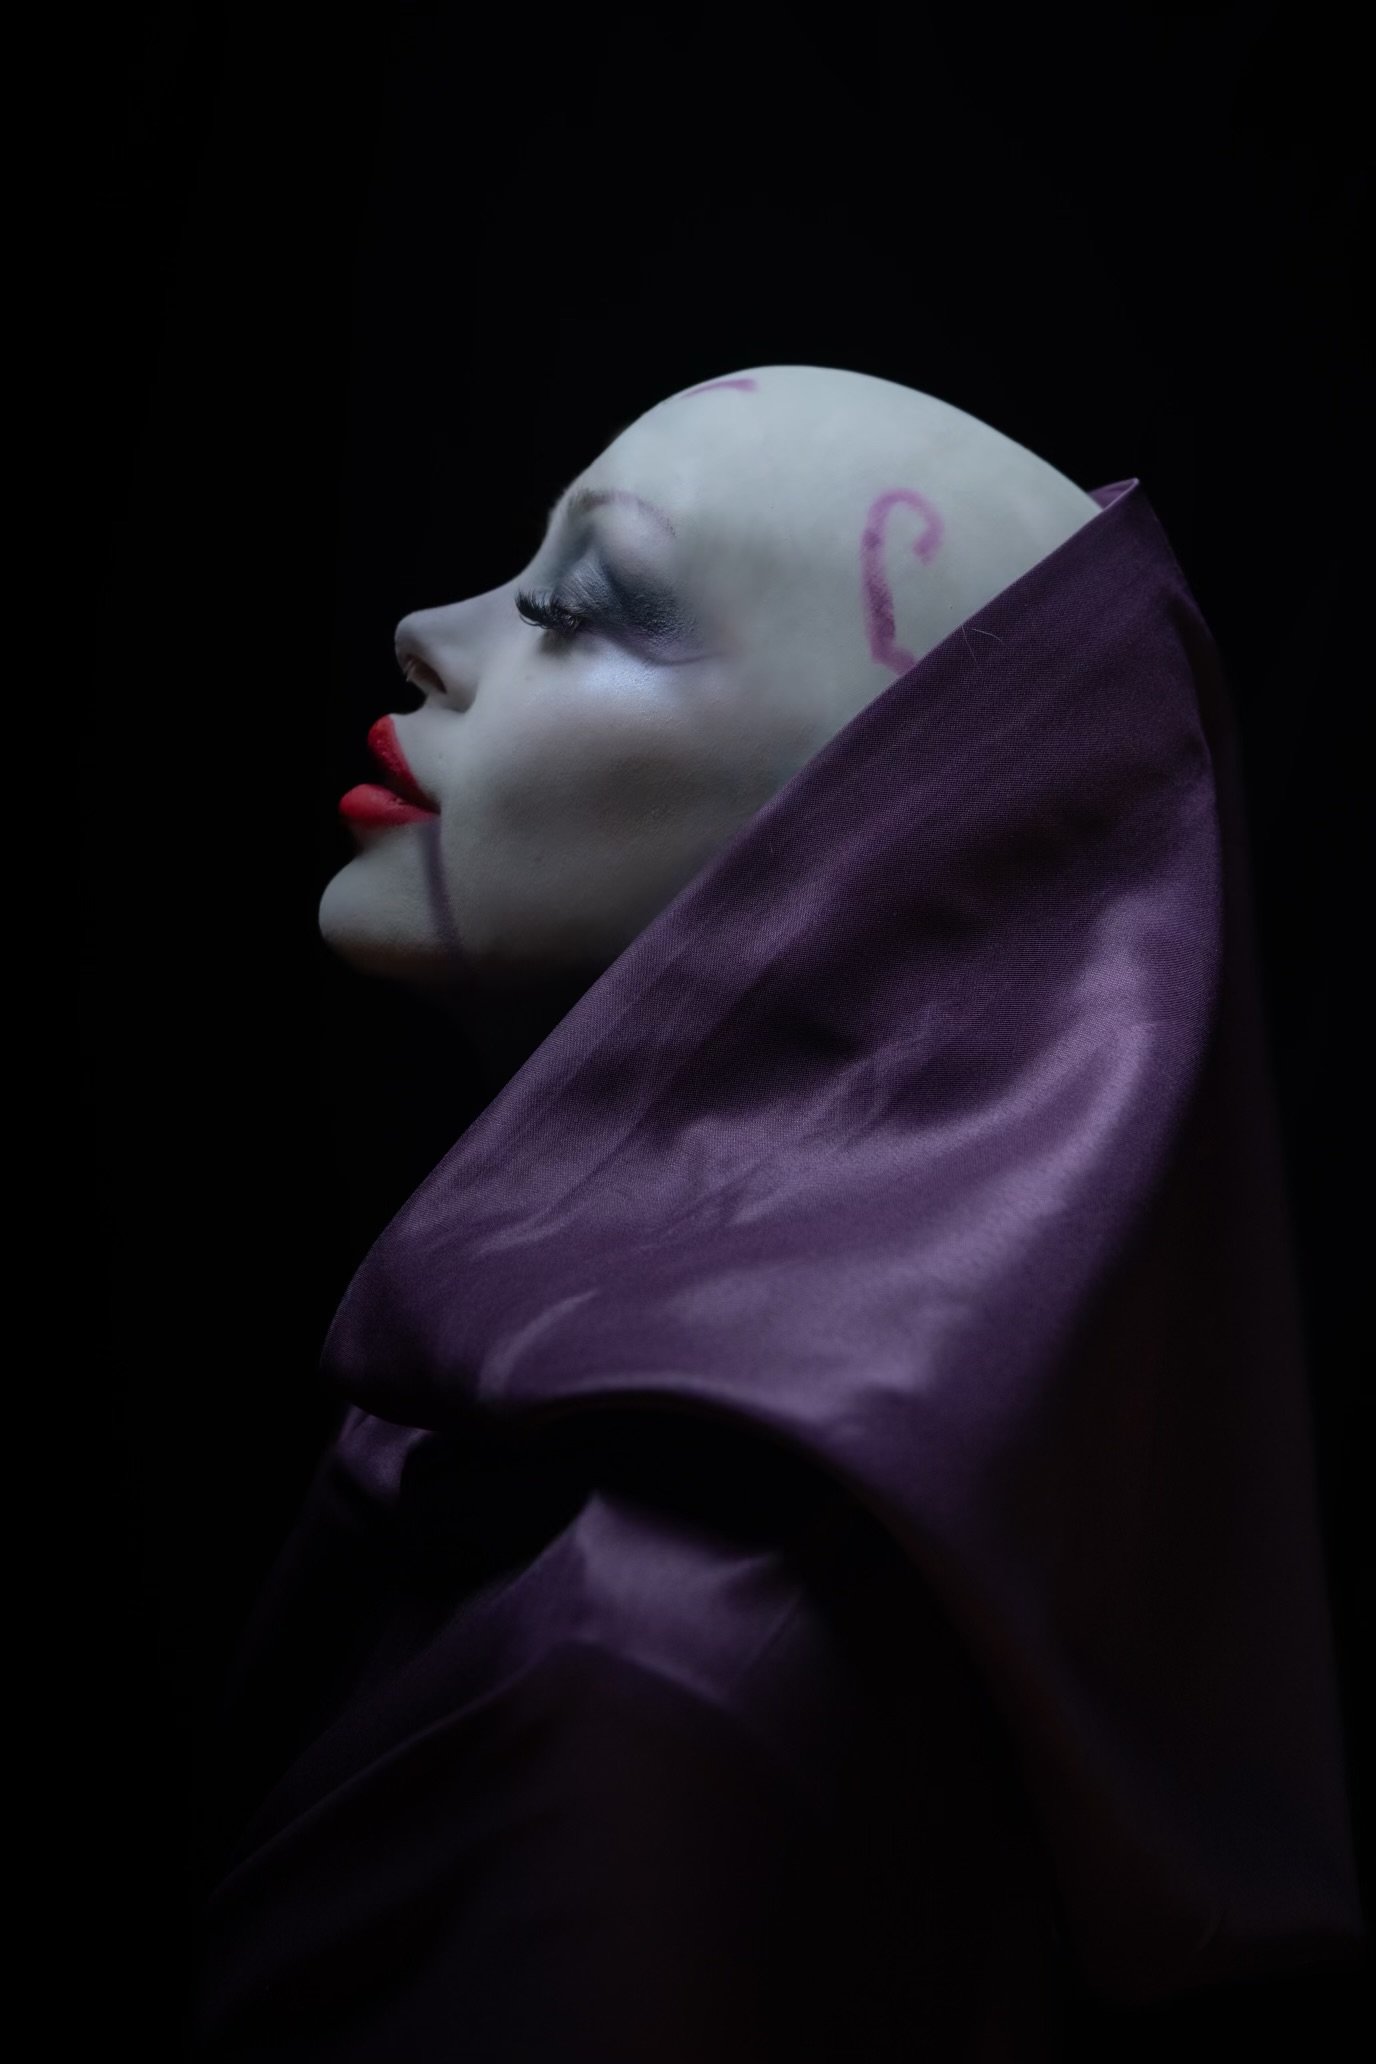
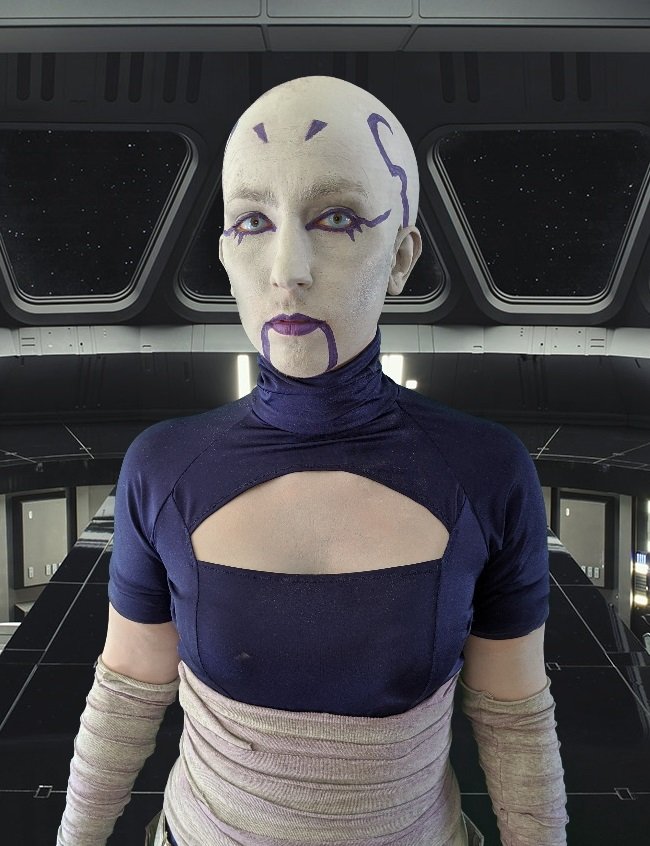
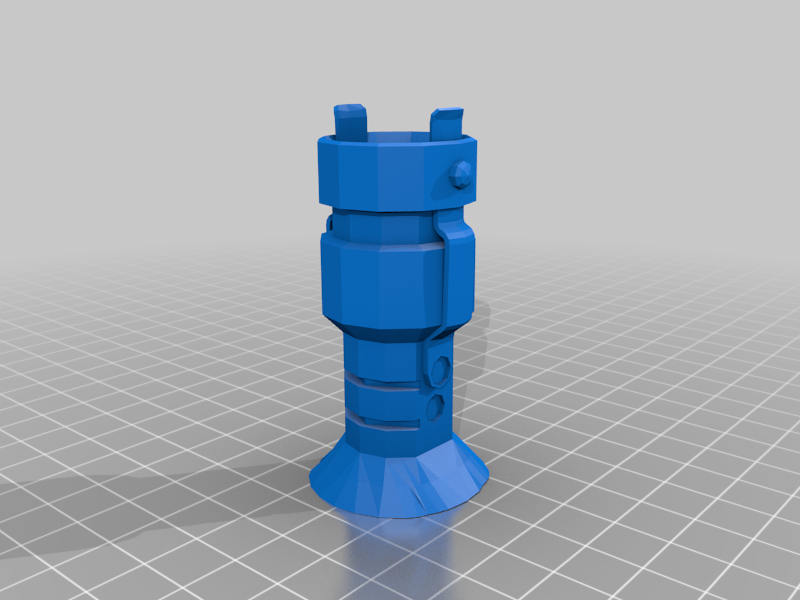
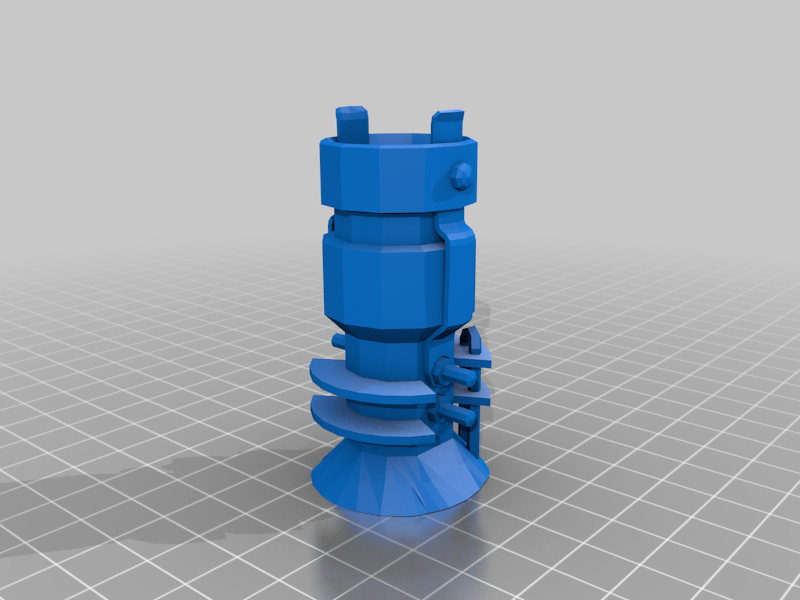
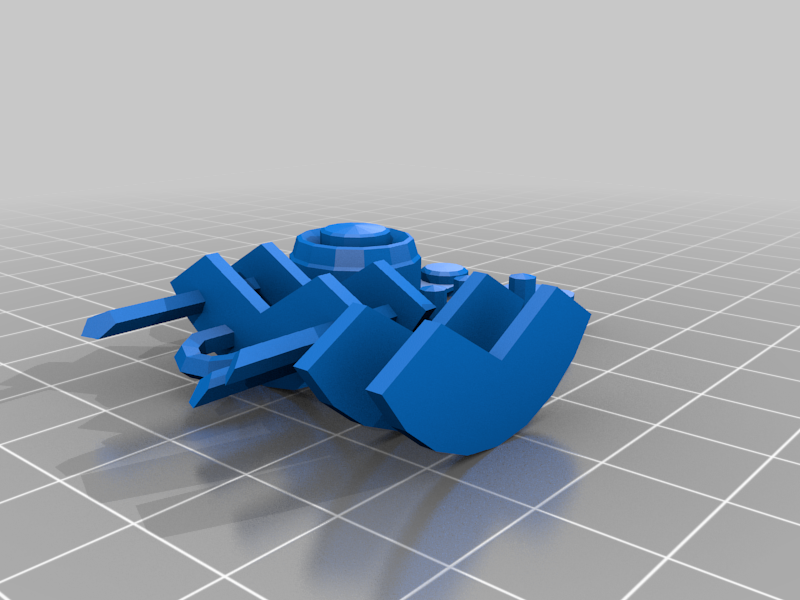
Finished product!
 3 points
 -
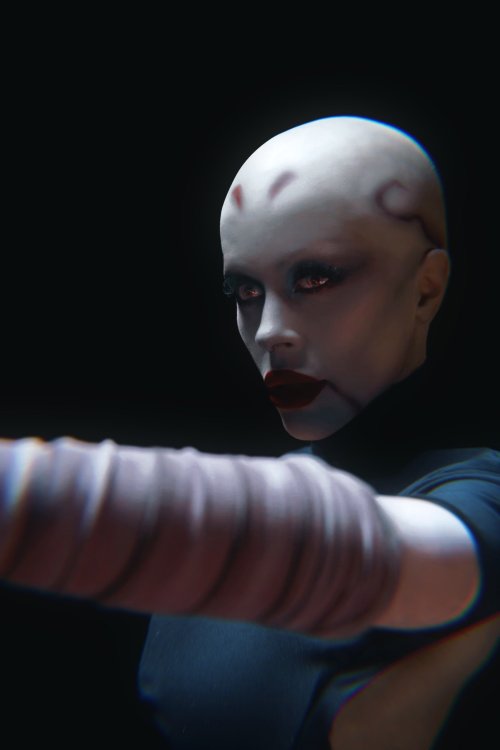
Barry, this is absolutely amazing! I am constantly in awe of your hard work and the amount of details and energy you put into anything Asajj. They're currently updating how CRL's are stored as they were taking up too much room on the website and it needed a good ole overhaul because of just how many new costumes were being created. Hopefully that should be done soon and this will be released into the world. You should be so, so proud of yourself.2 points
-
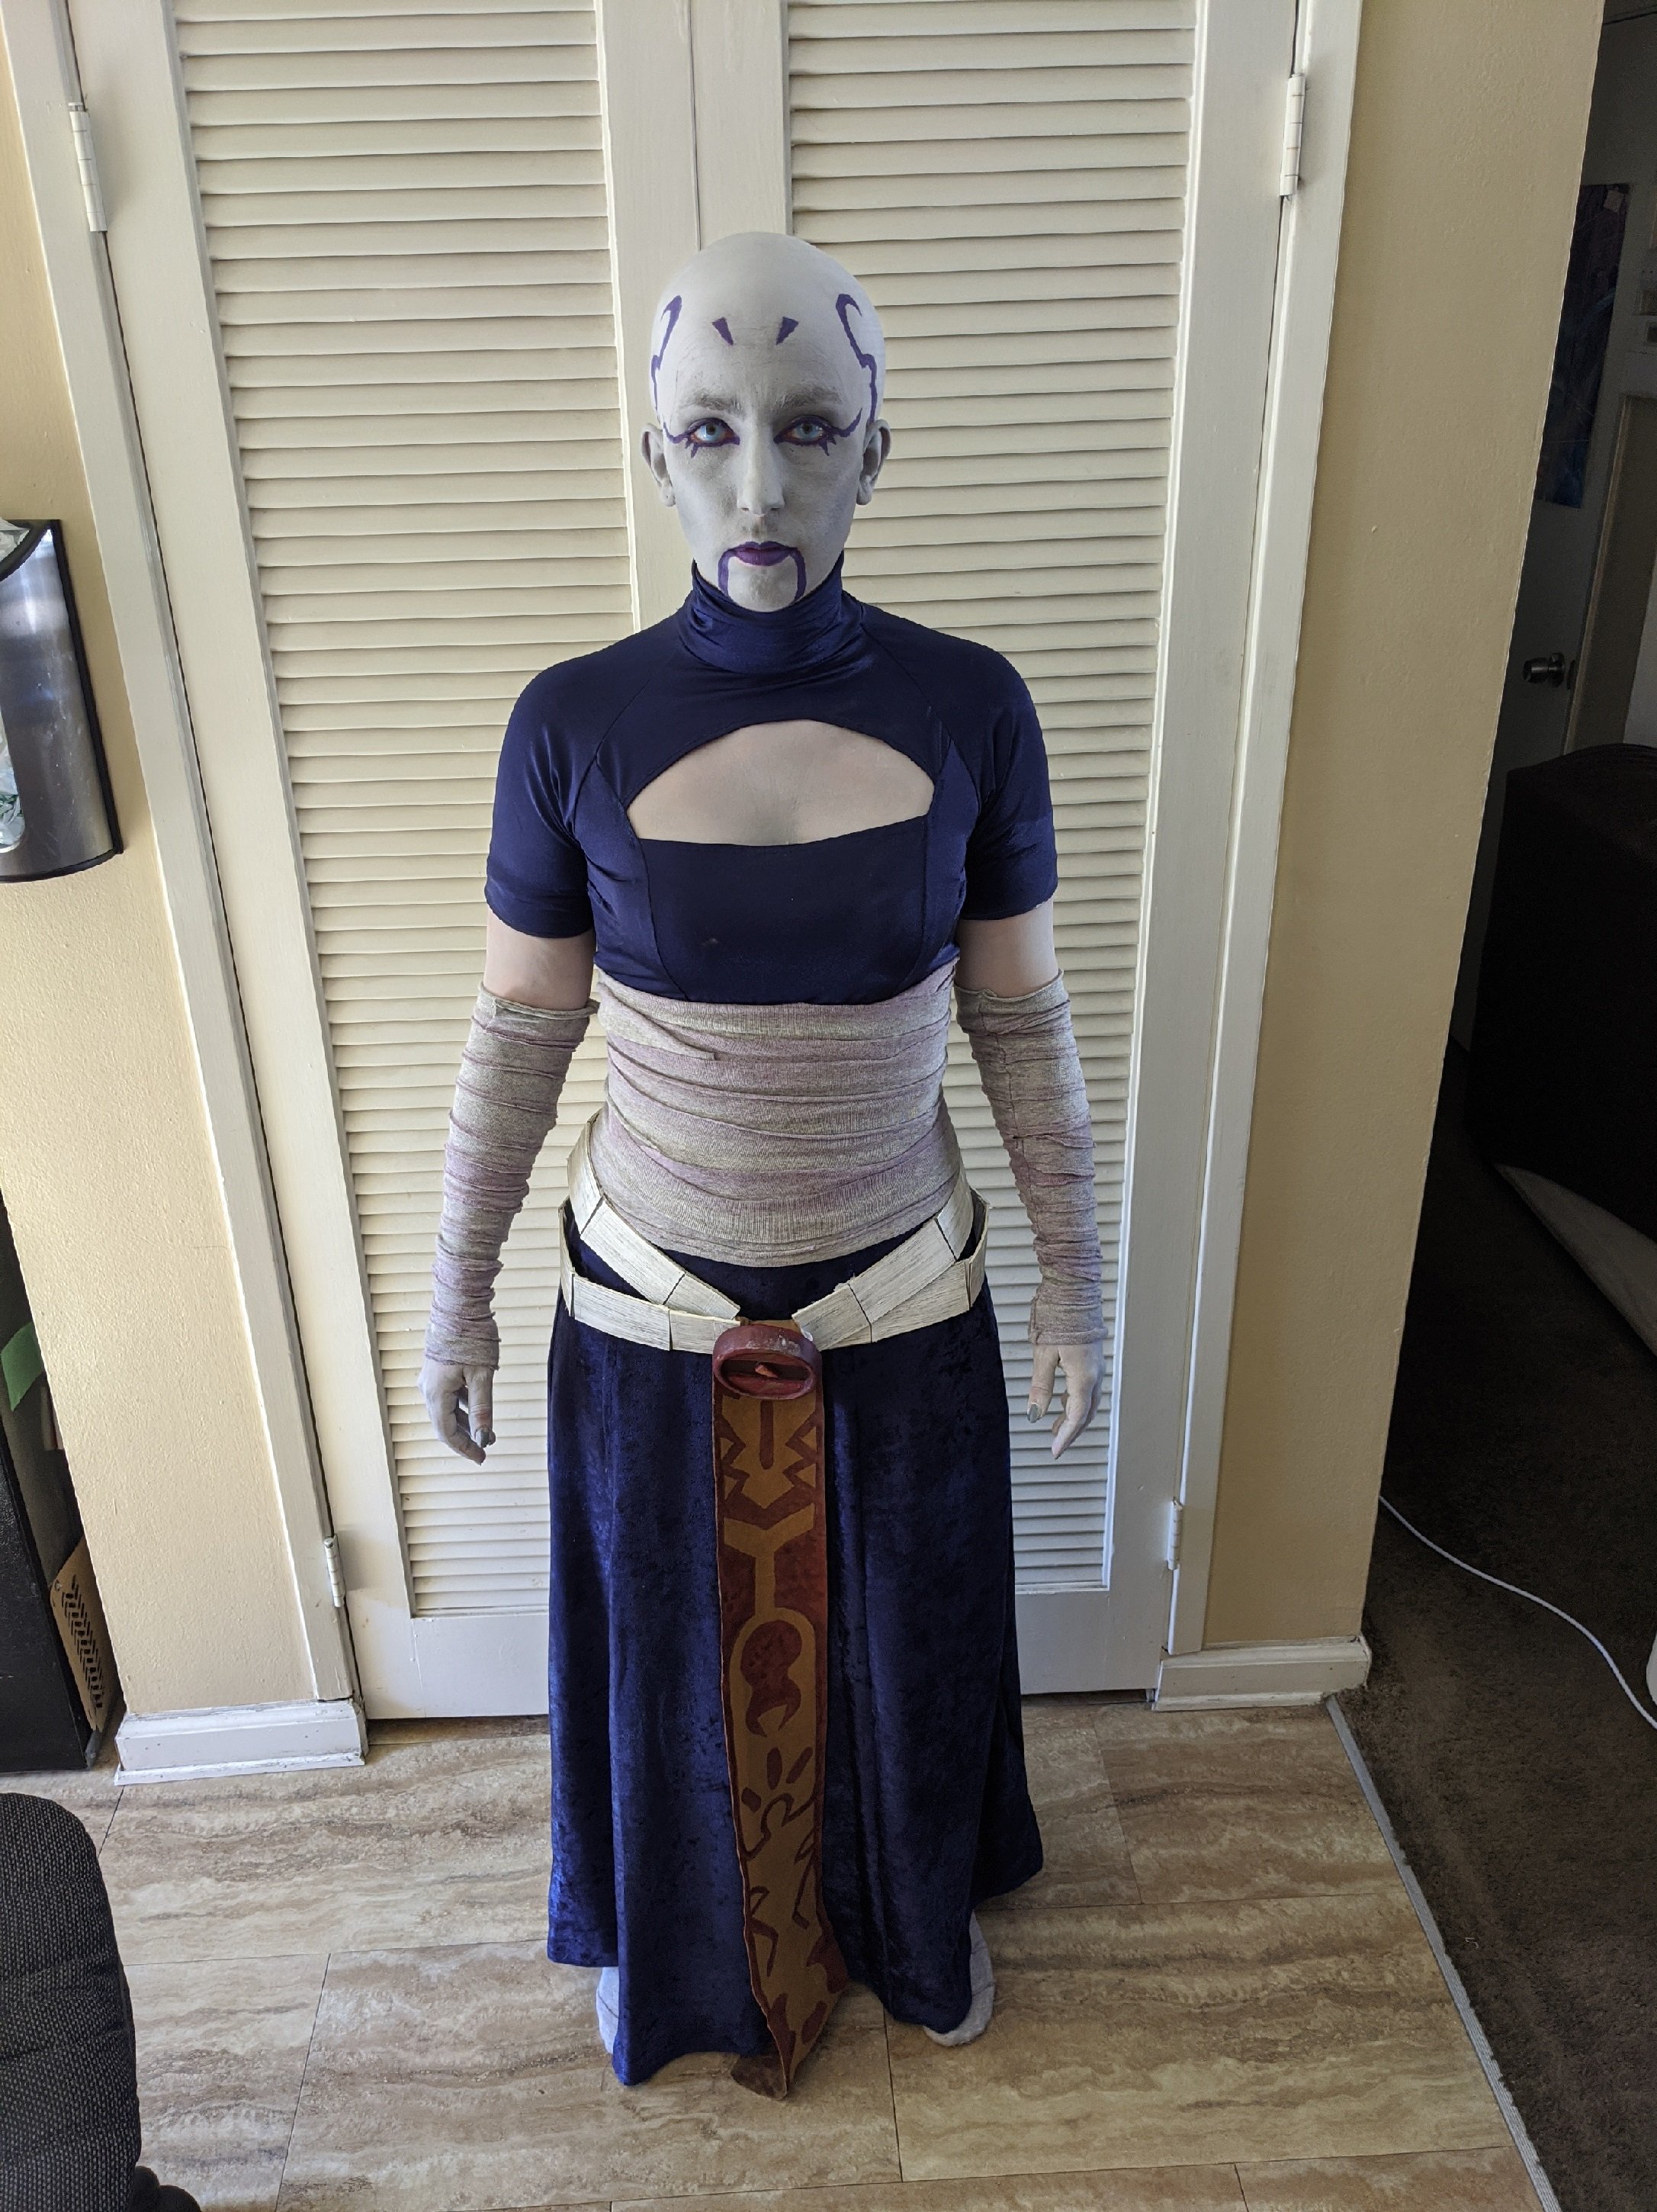
The CRL isn't on hold btw. I'm currently working on doing the initial writeup. This is my test of final items. I'm getting fully kitted and makeup (etc.) for photos tomorrow. And I will hopefully have a pre-edited CRL by the end of this week, or by latest Monday next week. I'm the person holding stuff up. I'm just being fabulously late to the ball darling! 😜2 points
-
This is super well done! I loved seeing this look from Asajj in the show and you captured it perfectly. Heres hoping the whatever is putting new CRLs on hold is finished soon so this can be made official hopefully. I don’t know how much longer I can calibrate my enthusiasm haha2 points
-
Hi ! I am DS 40013 and would like to apply for the “Moraband Academy”
 1 point
 -
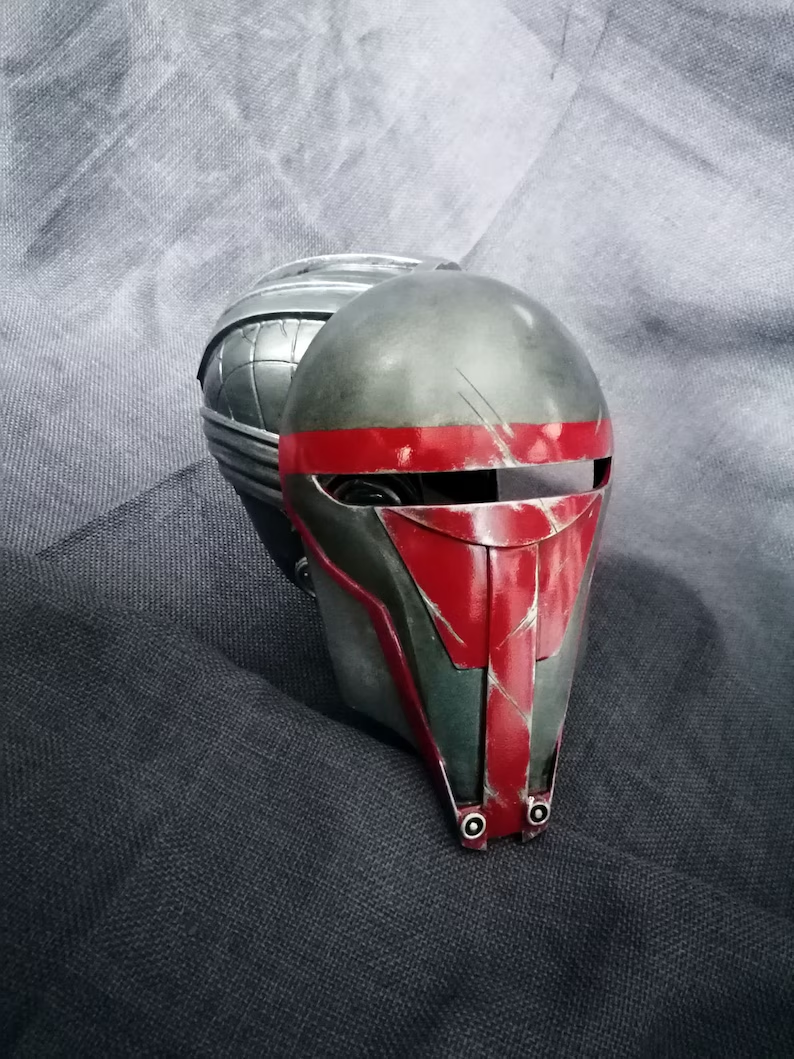
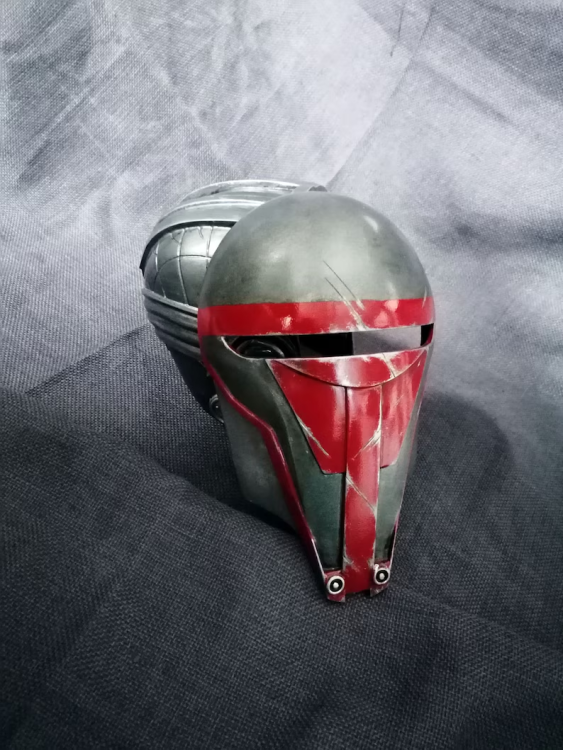
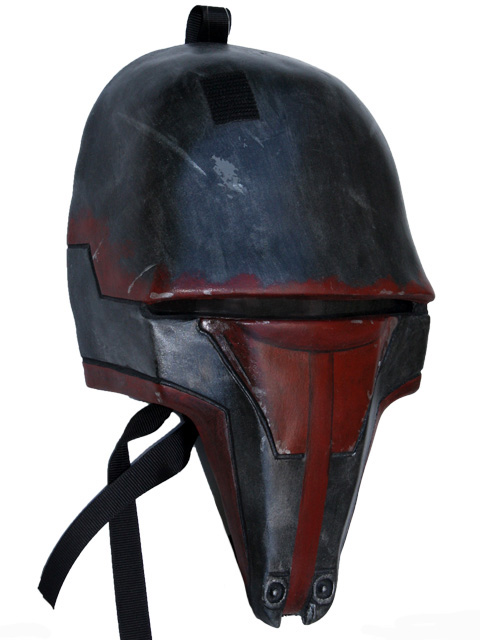
Hey so I was looking for a full head Revan helmet because I'm not a fan of the typical half mask people usually sell and wanted to get y'all's opinion on if you think this helmet would be accepted. I know people tend to say avoid Etsy but I haven't found any full ones from the typical sellers and the mask from Walt's trooper factory isn't even accurate according to here. https://www.etsy.com/listing/875936525/darth-sith-knighs-mask-helmet-complete1 point
-
Helmets are entirely fine for the CRL. When we asked the creator of the character model, they noted that it was a mask and not a helmet at the time, as the helmet reference hadn't been released yet in the comic. Hence why the mask is still listed specifically for the game model version.1 point
-
They messaged me about this external to forum, but it's honestly up to the LMO. We're happy to host if they'd like to submit under us 😁.1 point
-
Work with TFE staff on that part of it. It needs to be submitted to the LMO team for consideration (at least I do not recall seeing that submission). If is is approved for 501st consideration and the content is all edited and ready it will be submitted to the LMO team for review and publishing.1 point
-
I have a question about where I'm supposed to put the images and written CRL for proposals? From my understanding I would post it in the Dark Side Adepts under the CRL and Update Proposals ? I have my photos and written CRL (which I know folks will want to shorten, it's a bit long and it's my first time writing one of these). I just wanted to get this out there so people can star mulling over it.1 point
-
Absolutely phenomenal work!!1 point
-
It definitely looks good! But I would say check the CRL for the costume first before making any purchases: https://databank.501st.com/databank/Costuming:SL_revan Here's the mask you posted .vs the mask in the CRL (I always find it helps to put pictures beside each other for direct comparison). You can probably see as well that there are some major differences between the two. forehead section is too small for Etsy version different curve and shape in the eye slit the red painted embellishments at the front seem smaller for the CRL mask the chin to mask ratio seems to favor the mask in the CRL version (I mean that the mask is wider while the chin is thinner on the CRL version VS the Etsy variant ) red curved line running along the downside of the chin and jawline are different in shape blueish hue for CRL version VS. greenish hue for the Etsy Now I'm not an expert nor am I approved yet so don't take my word for it, but these differences should immediately make you wary of doing such a purchase. Would be sad to pay the money only to find out that it's not accurate enough. And it's a lot so I don't know if you can manage to get this one accepted.
 1 point
 -
Squeee! Thanks Lady! Absolutely honored. 💯1 point
-
Pictures! There are too many to post to this page... here's a link to the Dropbox folder. Enjoy Bad Batch Asajj Ventress with makeup Ventress1 point
-
Oh! Thanks for the heads up. I had no idea. LOL! I'm still going to say I'm fashionably late though. 😉😂1 point
-
I just meant new CRLs in general are not being approved for some time it would seem. I had completed a costume build and a CRL draft for Inquisitor Cal Kestis months ago and no one has really said anything to me about it. From what I’ve seen in other detachments like Ahsoka Thrawn in IOC, they aren't approving new CRLs until the data migration project is complete. But this is only what I have heard.1 point
-
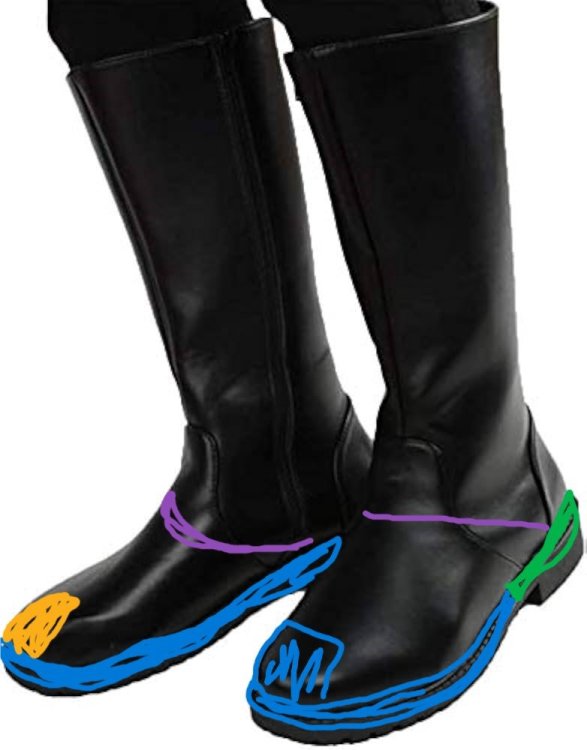
The curse of looking through other detachment forums 😋 Those boots look great though! There's really nothing to indicate on the references that they're anything but normal black boots, so I'd honestly pull the trigger on those You have complete free reign 😁1 point
-
While I'm not a huge AI fan I do have to use it at work. I decided to see if I could get some AI renders of what the 'finished' costume would look like based off of my reference images. I think it did pretty well obvious mistakes aside in giving me a indication of what it COULD look like.

 1 point
 -
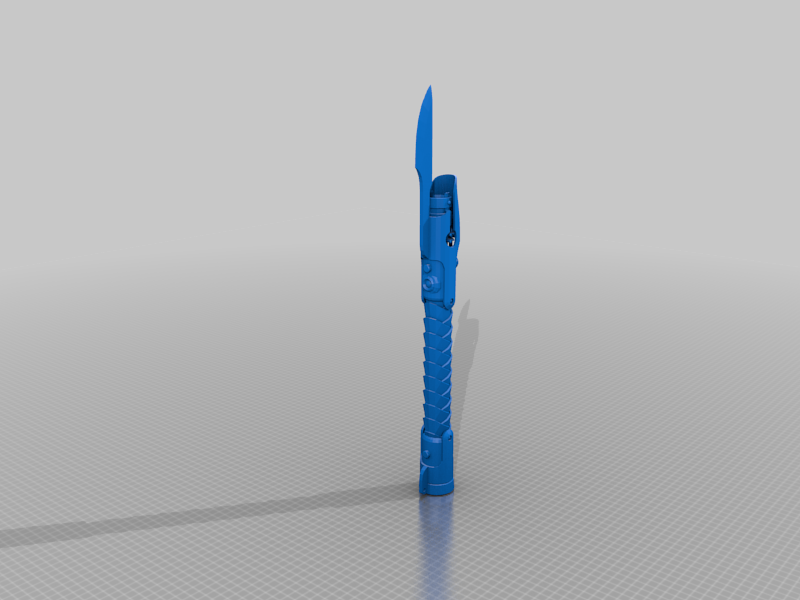
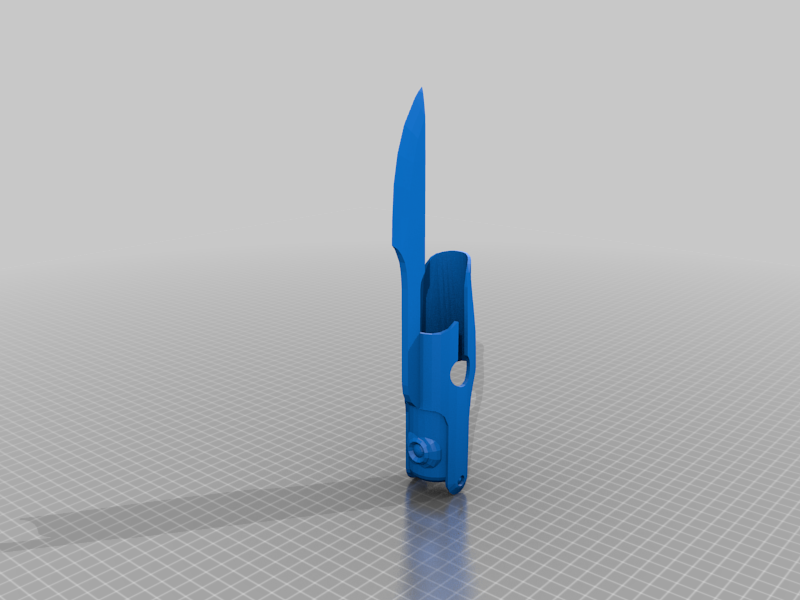
When trying to find some information for writing up the CRL I ran into a few inconsistencies with some of my kit articles. I had to modify the model for my blaster because I realized that lever like thing was more in the center and I'm guessing is more like a sight. And the gauntlets are fully Sintra now. After doing some digging I read about no foam usage with armor parts. I didn't want to run into a roadblock. And I also got new photos from the show and from Star Wars dot com that showed me the gauntlet pattern was different than what I had seen earlier in other screenshots. Both of the items above were redone last week. The knife handle also is updated to the correct pattern at the base of the handle. The knife cannot be removed from the sheath by the way for safety concerns. I glued it in.1 point
-
Thanks! As for the blue fabric it is weathered. I’m posting a picture below for you to see the original fabric against it being weathered. She had a lighter fabric and there were lots of white streaks and such on the blue. Same for the yellow or beige fabric, but that one I darkened and made more blotchy like what she has in the show. I had used a lighter fabric base when printing the pattern because around the edges the fabric was lighter but the main body was darker. I figured it would be easier to blend the darker paint with the pattern than trying to lighten the fabric around the pattern. I’m including some of the pictures I had of Ventress that I was using as reference.1 point
-
Pictures! Some things got a little frumpy and such (the tunic slid up when I was sitting down when checking out some photos we took inside and I didn’t notice till after taking off the kit). Hopefully one of my fellow Garrison members, who has a fantastic eye for details, is coming over on Wednesday to take full kit pictures. I have a background and lights for taking higher quality photos. I will be getting more detailed photos as well. Right now I wanted to get feedback from the heads here as to anything they feel should be changed? Anyways! Here’s my build…1 point
-
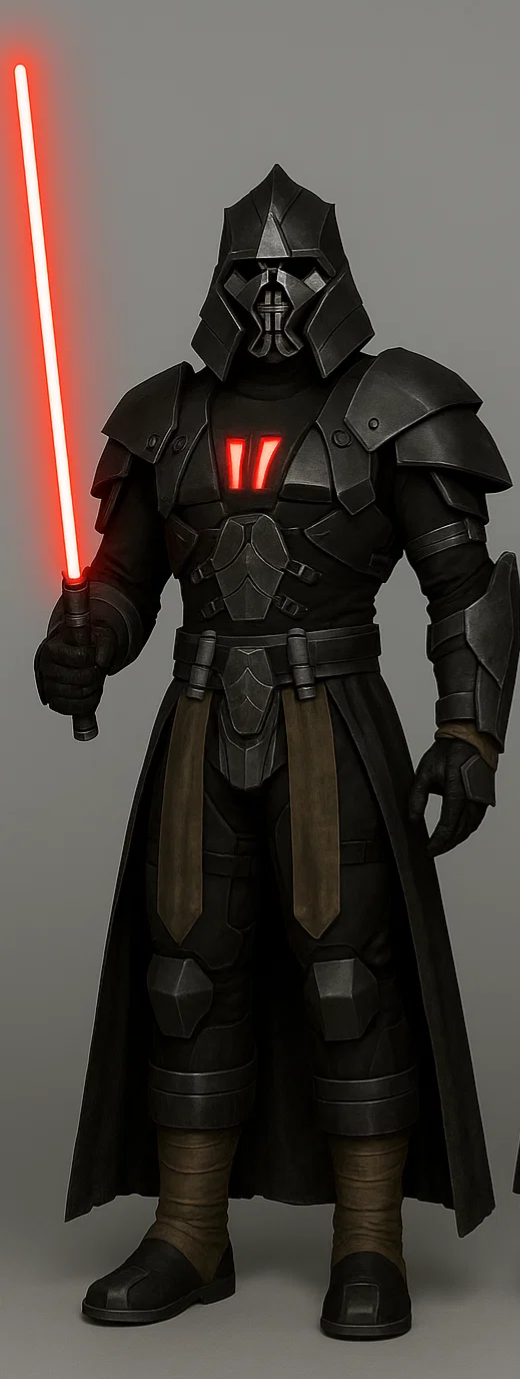
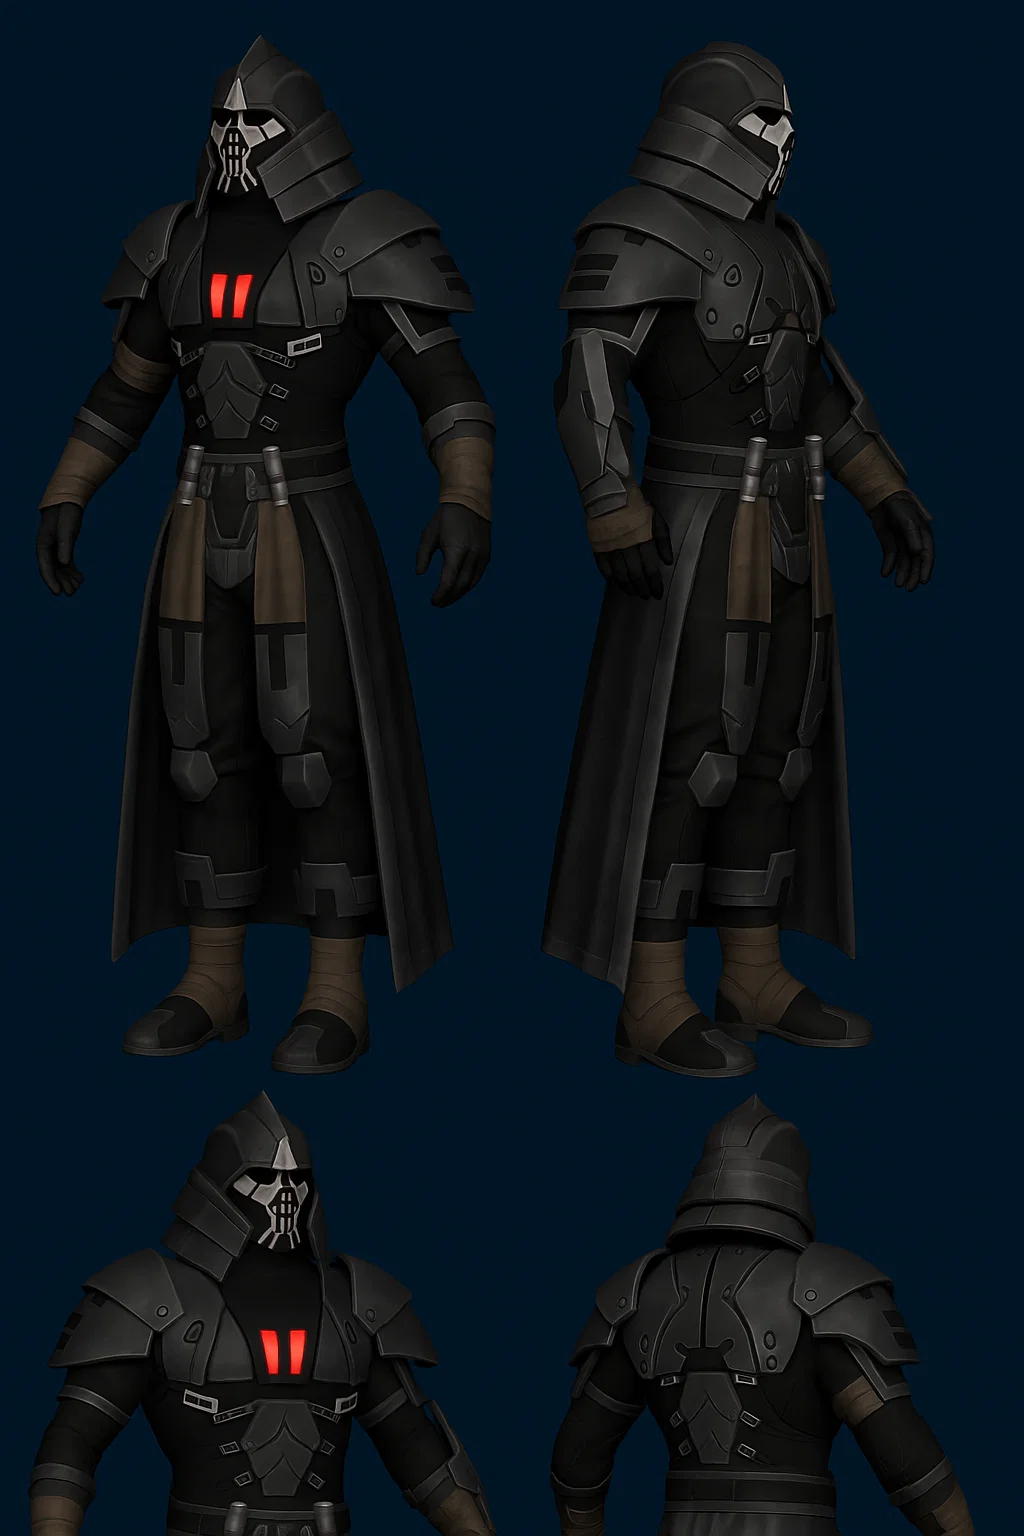
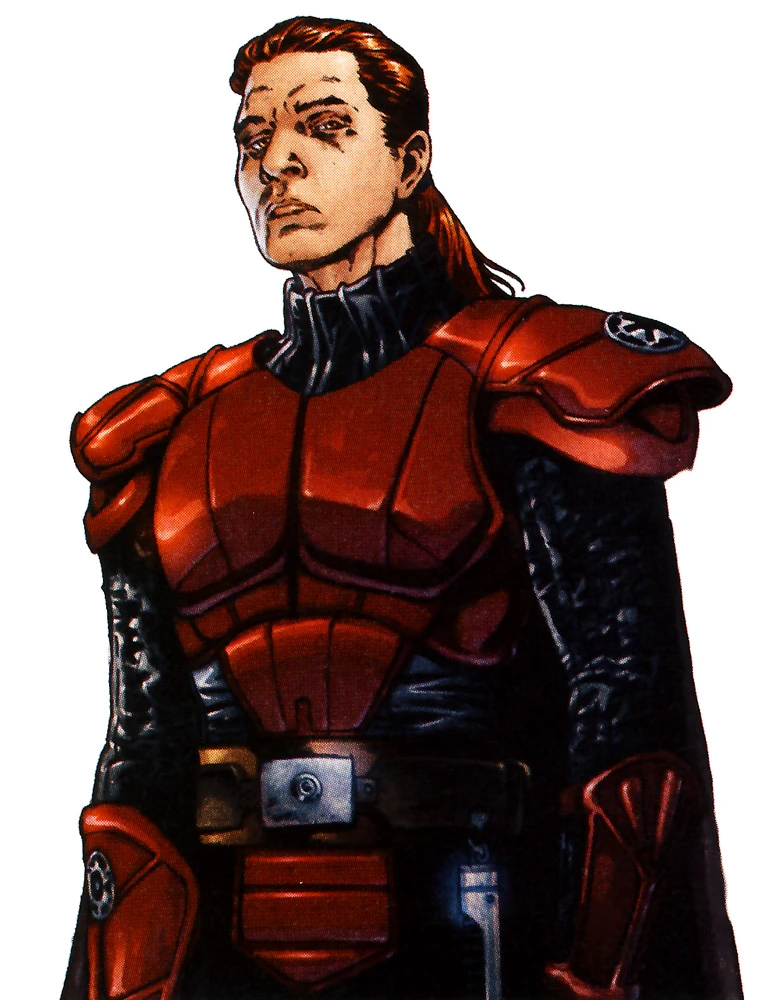
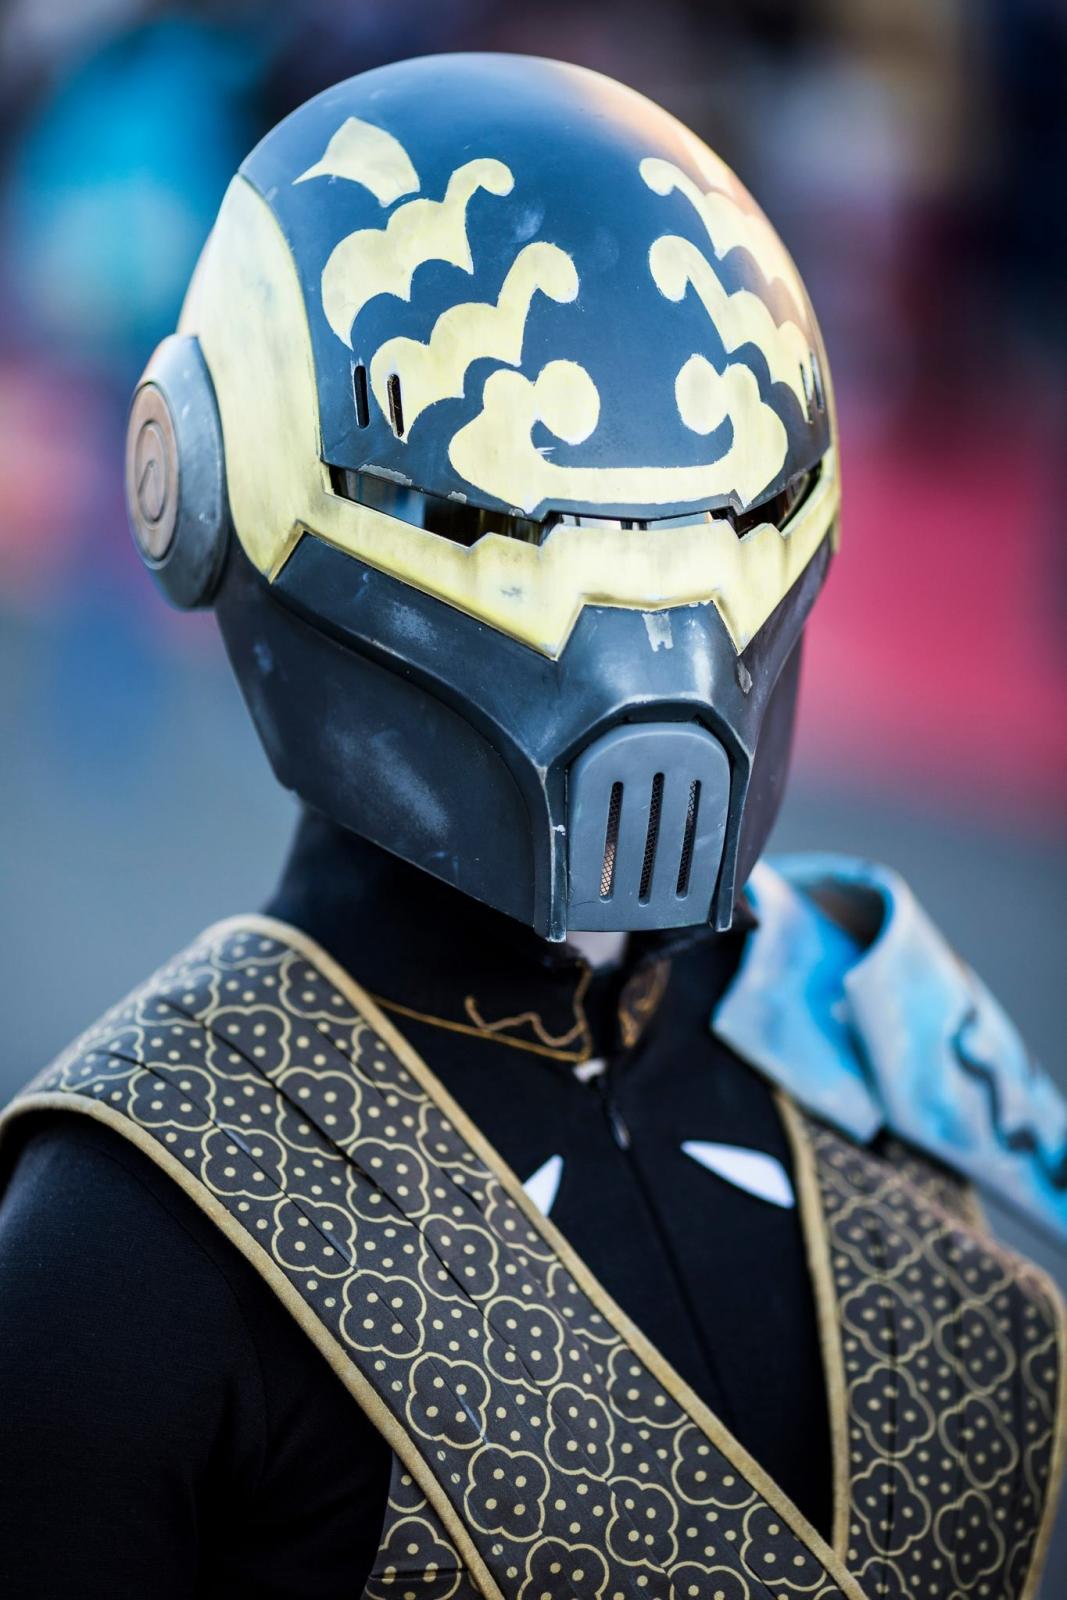
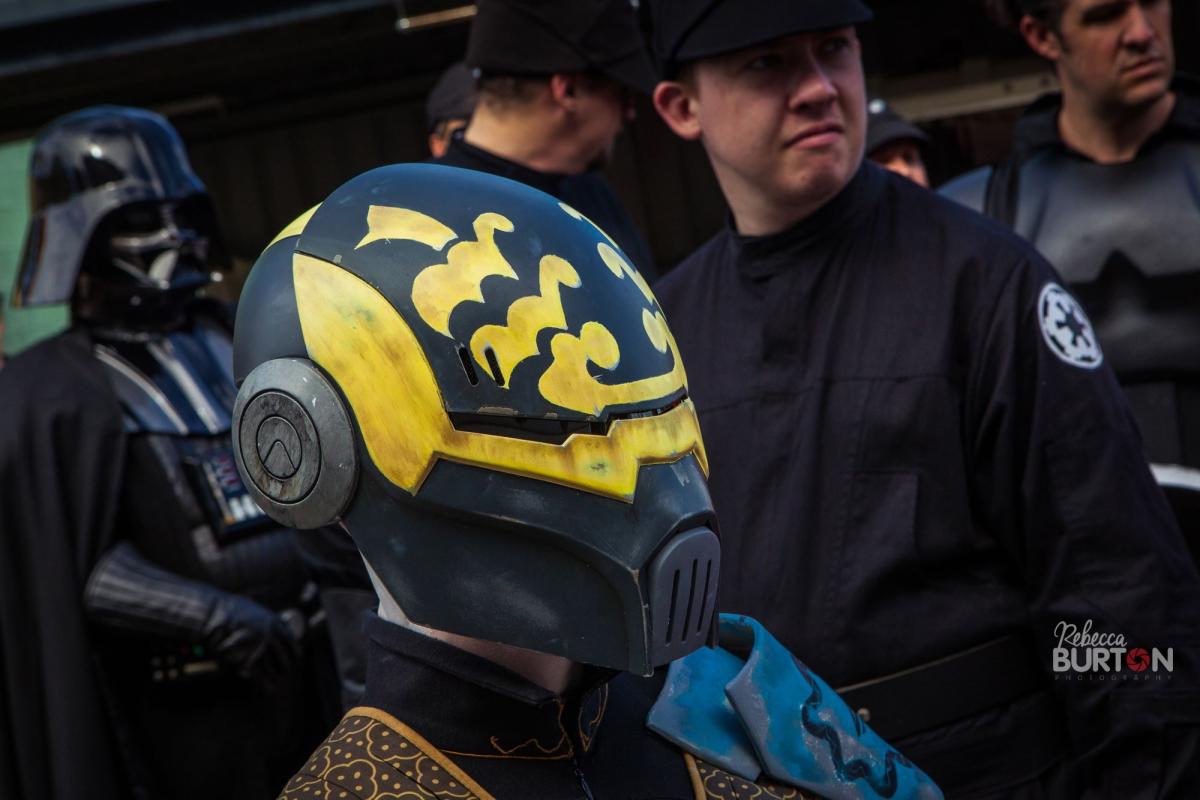
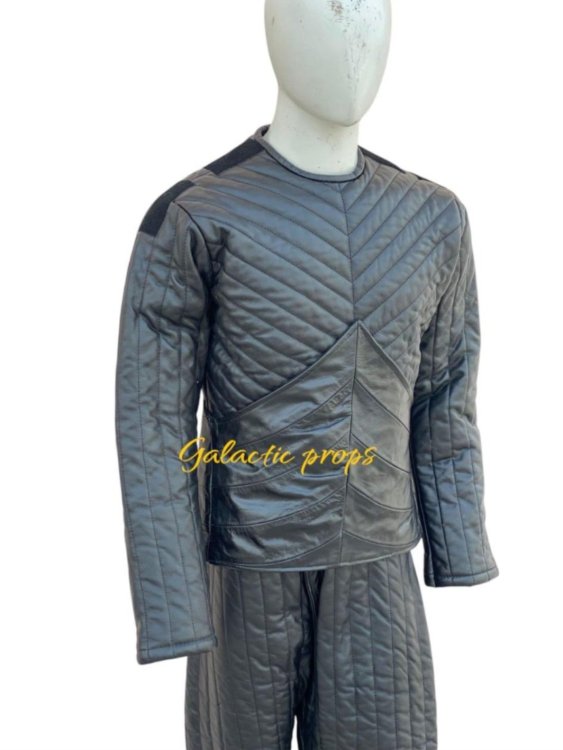
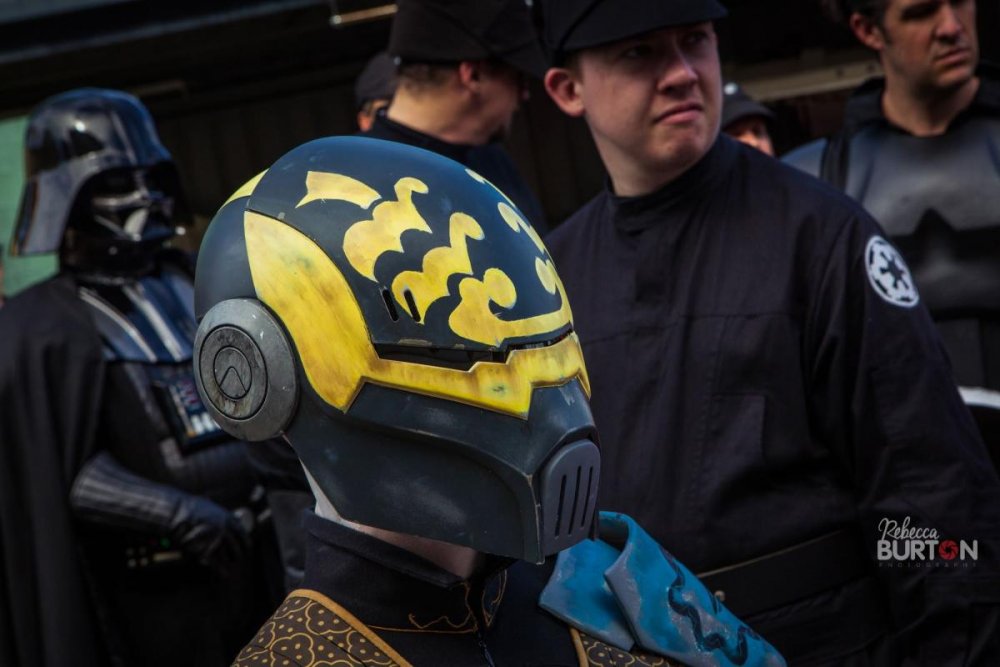
TR Imperial Knight as of 28. June. 2025; Armor The shoulders have dual layer armor; overlaying one another. The outermost portion of the armor has piped line detailing. The costumer's right set of armor has a circle detail inlay into the top shoulder. Bracers The bracers begin at the costumer's wrist and end at the elbow. There is a pointed end at the elbow and two small square hand covers. The hand covers and bracers are etched with simple detailing. The costumer's left arm has a circle with an imperial cog design. Edit; Armor The shoulders have dual layer armor; overlaying one another. The outermost portion of the armor has piped line detailing. The costumer's set of armor has an Imperial Logo detail inlay on the top left shoulder. Bracers The bracers begin at the costumer's wrist and end at the elbow. There is a pointed end at the elbow and two small square hand covers. The hand covers and bracers are etched with simple detailing. The costumer's right arm brace has a circle with an Imperial logo. Reason; To be in agreement with reference and current CRL images
 1 point
 -
I was approved by: RL in March SG in May 501st June1 point
-
Those are some really good ideas, thanks. I will look around for some tall black boots and if I can manage a relatively cheap one I will maybe attach it with glue, else I think I'll go the route you're describing. Indeed if I create the sabatons with a sole I should probably use sintra and not print it for extra durability. Maybe even add a thin rubber sole to the bottom of them. Alternatively I could forego the sole of the sabaton and have it wrap around the boots like you say. Magnets sound good either way though and probably the easiest way to make the boots modular.1 point
-
I honestly think you have pretty free reign on the boots themselves since there's not much detail on them, comfortable black boots are more than enough. Then for the metal parts, I think sintra would honestly would be the go to way for this, that was you can make it a snug fit, besides the design of it is pretty easy. If you don't want to butcher the boots with glue and damage the boots by putting the parts on and off constantly I think there's 2 ways to go about it. 1. (With a seam) once the parts are shaped cut them in 2 parts, front and back and put some magnets in the parts where they meet so they snap onto each other and then put a strap on the back part so it doesn't sag down. 2. Make the part that goes over the front of the boot a separate part, and then allow it to be attached by magnets to the part that goes around the boot, then a strap at the back around the front of the boot so it doesn't sag down as well. Here's a picture that shows both ways, left is 2, right is 1. Hope it makes sense 😆 The wrappings seem to be the same as the hand wraps and the other fabric straps on the costume, your best bet would honestly be to go to a fabric store and just look around for fabric with the same-ish texture that's tan, you can always make it darker.
 1 point
 -
I just read through the whole thread, amazing work man! I love the desert starkiller outfit and you totally nailed it 🙏1 point
-
Yes a helmet or neck fan is something I'd like to add as well! Thanks for all the support man 😁1 point
-
A lot of cooling will be your best friend, I think you'd even be able to fit a neck ventilator in your helmet, which will help a lot already. 😁 Can't wait to see progress on this costume, will be following closely!!1 point
-
I don’t think that’d be an approvable way for the spike vest for Starkiller This Starkiller here has a pretty good way of going about the spike vest, which I think would be the go-to way of doing it too for Tulak Hord- foam and then covering it with pleather or real leather, it’s a fairly cheap way of going about it too. If you want reusability I think going for a Starkiller undersuit would be best since the visible parts are the same, but the spike vest part wouldnt be usuable for both without sacrificing accuracy for one of the costumes.1 point
-
Looking around Etsy I found a couple of Starkiller suits. This one looks like it might do the trick. Only thing is I think the flared ribbing that goes up from the waist doesn't reach as high as for Tulak Hord.
 1 point
 -
Ah I did notice the similarity between the Starkiller hoth vest and the appearance of Hord's suit. Would be a lot easier to buy and use one of those if they are close enough. I definitely like the sound of using a shirt vs the entire vest. Though I might consider reusablity for a potential Starkiller costume in the future if I would be buying his vest, since it's an investment and using it for 2 costumes sounds even better to me. I'm definitely a fan of TFU games as well and I love his Hoth outfit coincidentally. Thanks for the advice! You have definitely given me plenty to think about haha.1 point
-
I made a mistake here, I took a closer and longer look at the references and I think a Vader suit would be perfect actually. I thought the torso's black pieces at the bottom were a part of the undersuit 😆 For that part- since they don't seem to be hard parts either, your best bet would honestly be doing the likes of Hoth Starkiller's vest. There's a lot of documentation around the vest that would give you some idea of how you could do it. One tip though and that'll be at the end and if you're willing to butcher the undersuit top 😄, see how much of the top is visible, and cut off the rest you don't see, then attach what you can see to a t-shirt or something instead. Since you're covered in armor, you'll be thankful you won't have to wear full leather underneath as well. 😆1 point
-
You mean that if I went with the vader or starkiller suits that the torso would be a problem? I think we need to get a consensus on what material and would be accepted for the torso before I go any further with the garments. Was planning on first building the armor anyway and go from there. You've definitely got me thinking about the 3D printing. I was pretty adamant I wanted to go the patterning and sintra route but you're right, it would be alot more work. I was looking online and the Ender 3 is pretty affordable like you said. Would have to create some space in my shed for it but I'm thinking about it now. 🤣 Thanks for the tips about the saber as well! Looks like I have multiple options, I will see in the future what is possible with the print file. Will probably be one of the last things I do for the costume however so it's a way off.1 point
-
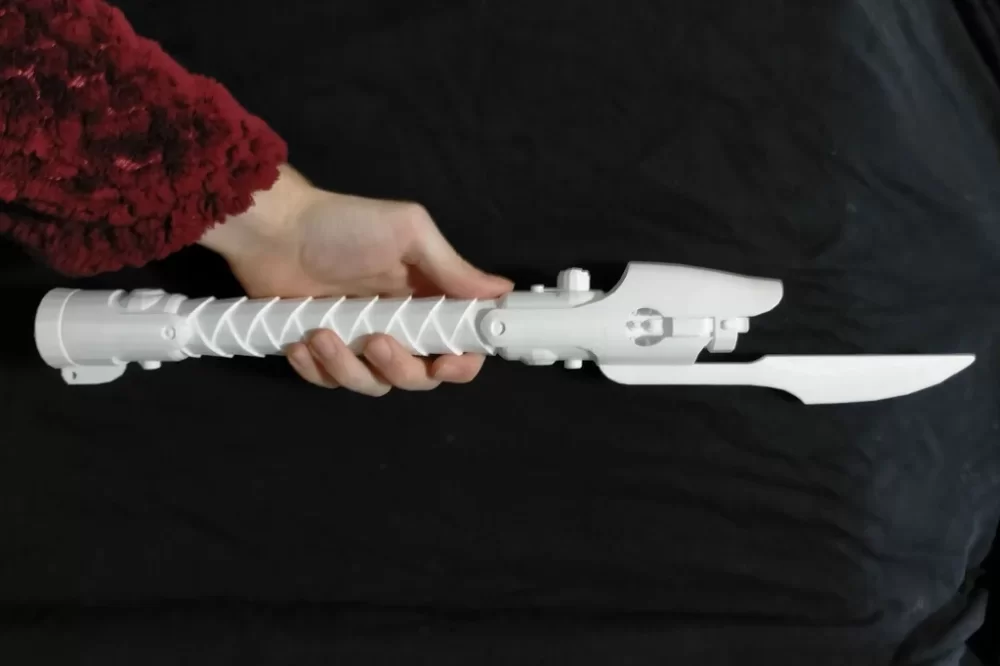
The saber, depends how you wanna do it. If you have enough space in the handle to fit a core, you could probably put a neopixel blade on - if the emitter part is strong enough as well. If it isn't, you could probably just get a coloured base lit blade, and put some magnets- on both the blade and in the emitter so it can click in. Or you can glue it in 😁 The undersuit is definitely a lot like Vader and Starkiller, but the torso will be a problem if you do go with said undersuit. Custom would be the way to go, but that'll certainly be the investment. For the hard parts, I think you'll have better luck with 3d printing, since they all look separated you could honestly cut and fit them all on an Ender 3, you can get these for really cheap on Facebook marketplace or even new. It's an investment but you'll be really happy you got one. Sintra is obviously also really good, but printing will save you A LOT of time. If getting a printer isn't an option, you can reach out to your local garrison, or even myself, they'd I think be happy to help you print some stuff out 😁 Definitely following this thread!!1 point
-
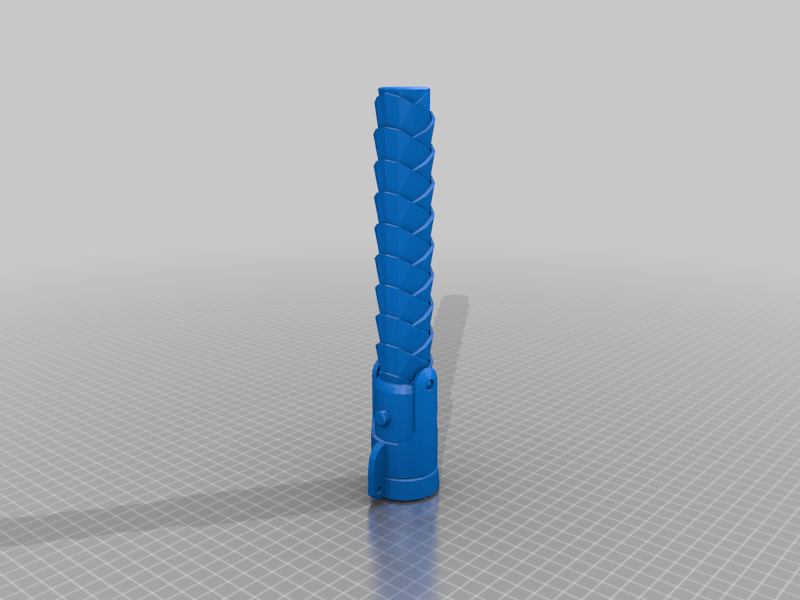
Lightsaber For the saber I have looked all over the internet, unfortunately it is not for sale as-is anywhere. I will have to go the 3D printing route for it since I have no idea on lightsaber construction. Luckily, I have found Hord's lightsaber modeled on Thingiverse. Accuracy looks good to me when comparing to the reference images. Just wondering if I can add a blade into this?
 1 point
 -
I’m very excited to announce… Thats right! The costume is now completely assembled. Now the next steps I’m not entirely sure. I imagine some tweaks may need to be made or what not but I have never made a CRL before so I guess we’ll see. Any advice is appreciated!1 point
-
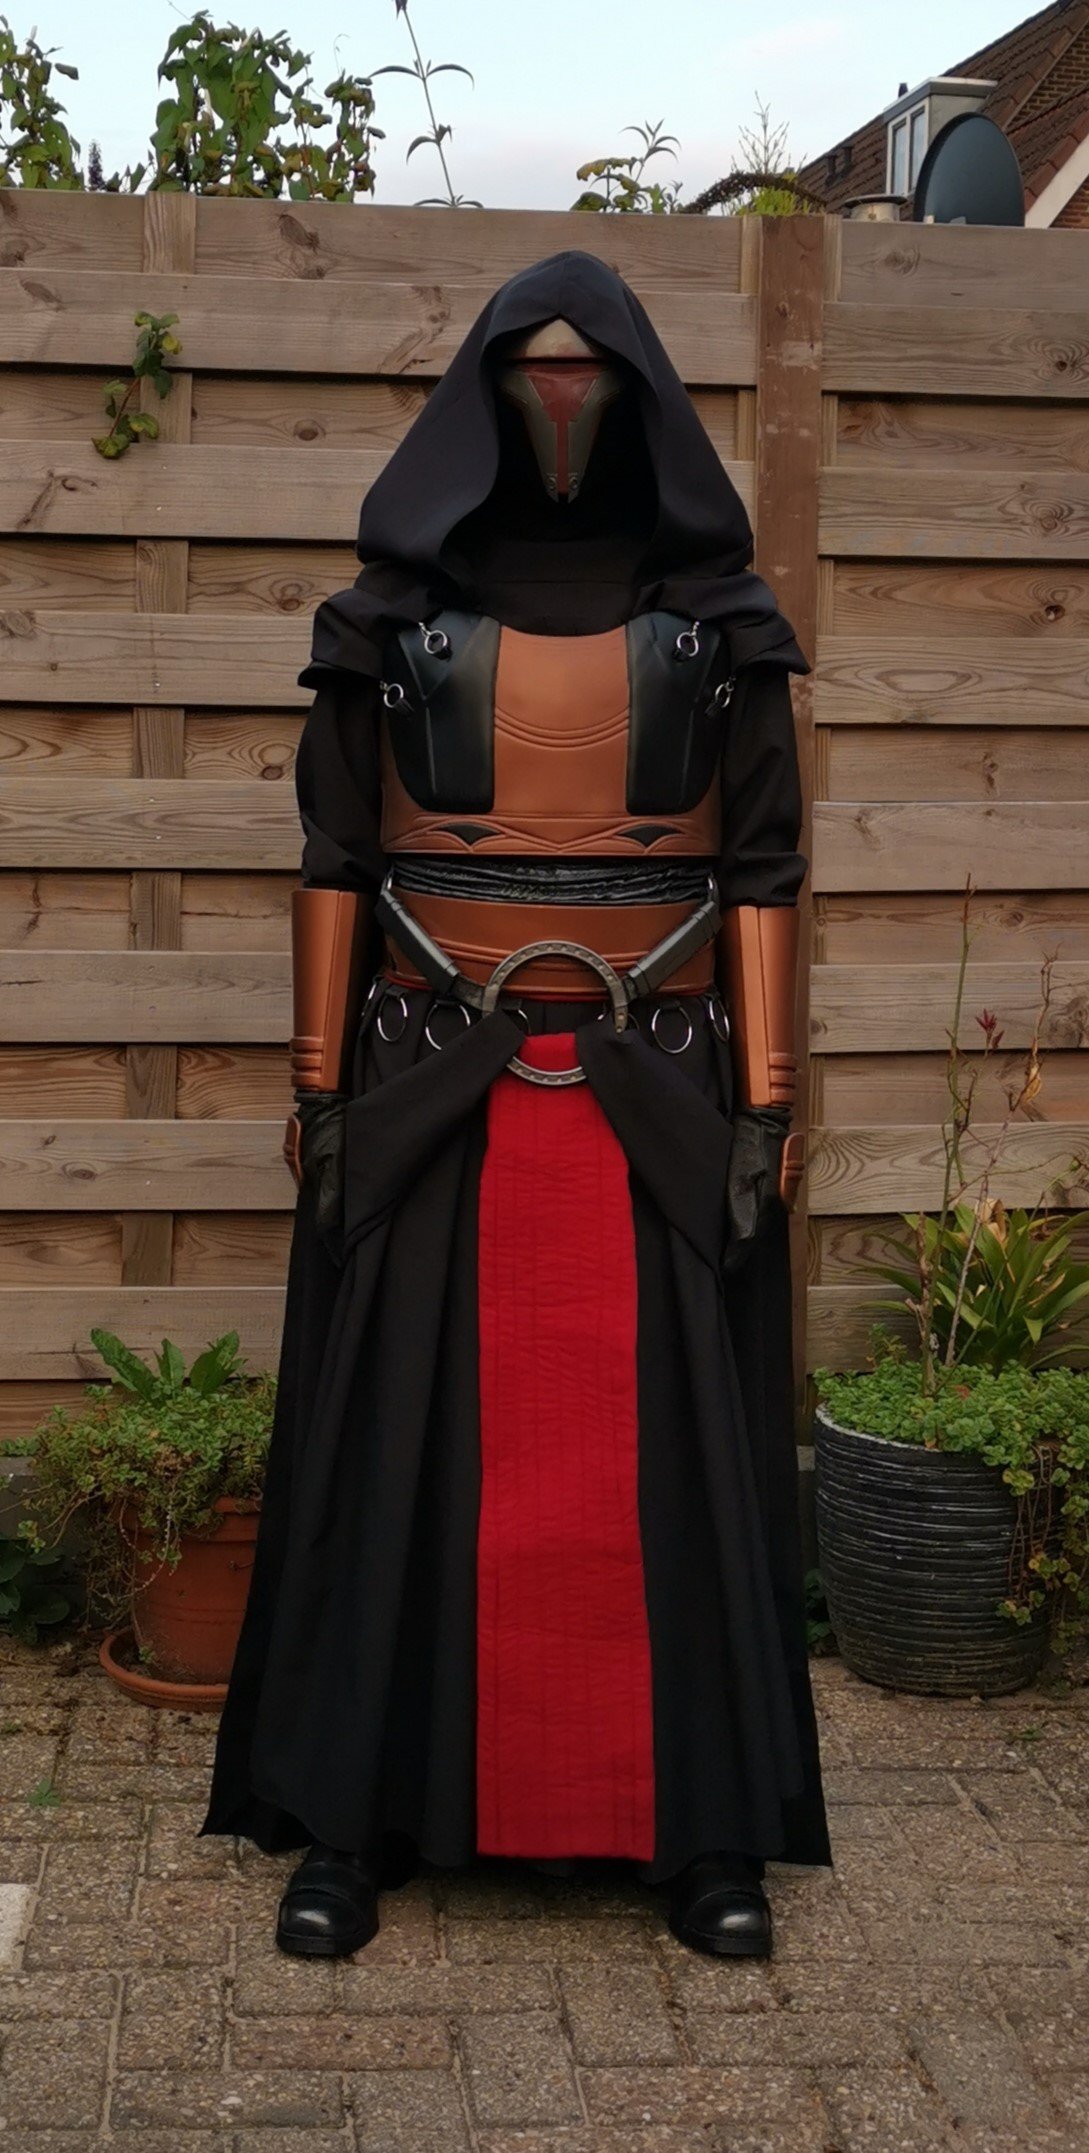
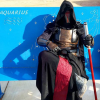
Hello all, I am Kimberley (SL-92021) new to the 501st (Dutch Garrison) and TFE. A Star Wars fan for quite some years and started costuming/ cosplay after Covid lockdown ended. My first projest was a custom character i mostly designed and crafted myself (actually named Darth Eclīpsis, hence the forum name😆). But even before i finished this project i already started looking into costuming as an existing character. Earlier this year i have done a few troops with 501st members of several nearby countries as a member of the Dark Empire and hoped to be able to one day join the 501st aswell. Well, here i am. 😄 I am a big fan of the Old Republic, so i knew if i was going to join it would have to be with an Old Republic character. Darth Revan being one of my favorite characters, the choice was made. As addictive as this hobby is, in the next few years i hope to add another few costumes and join with those aswell. My first troop will soon be fact, with hopefully many more to come.
 1 point
 -
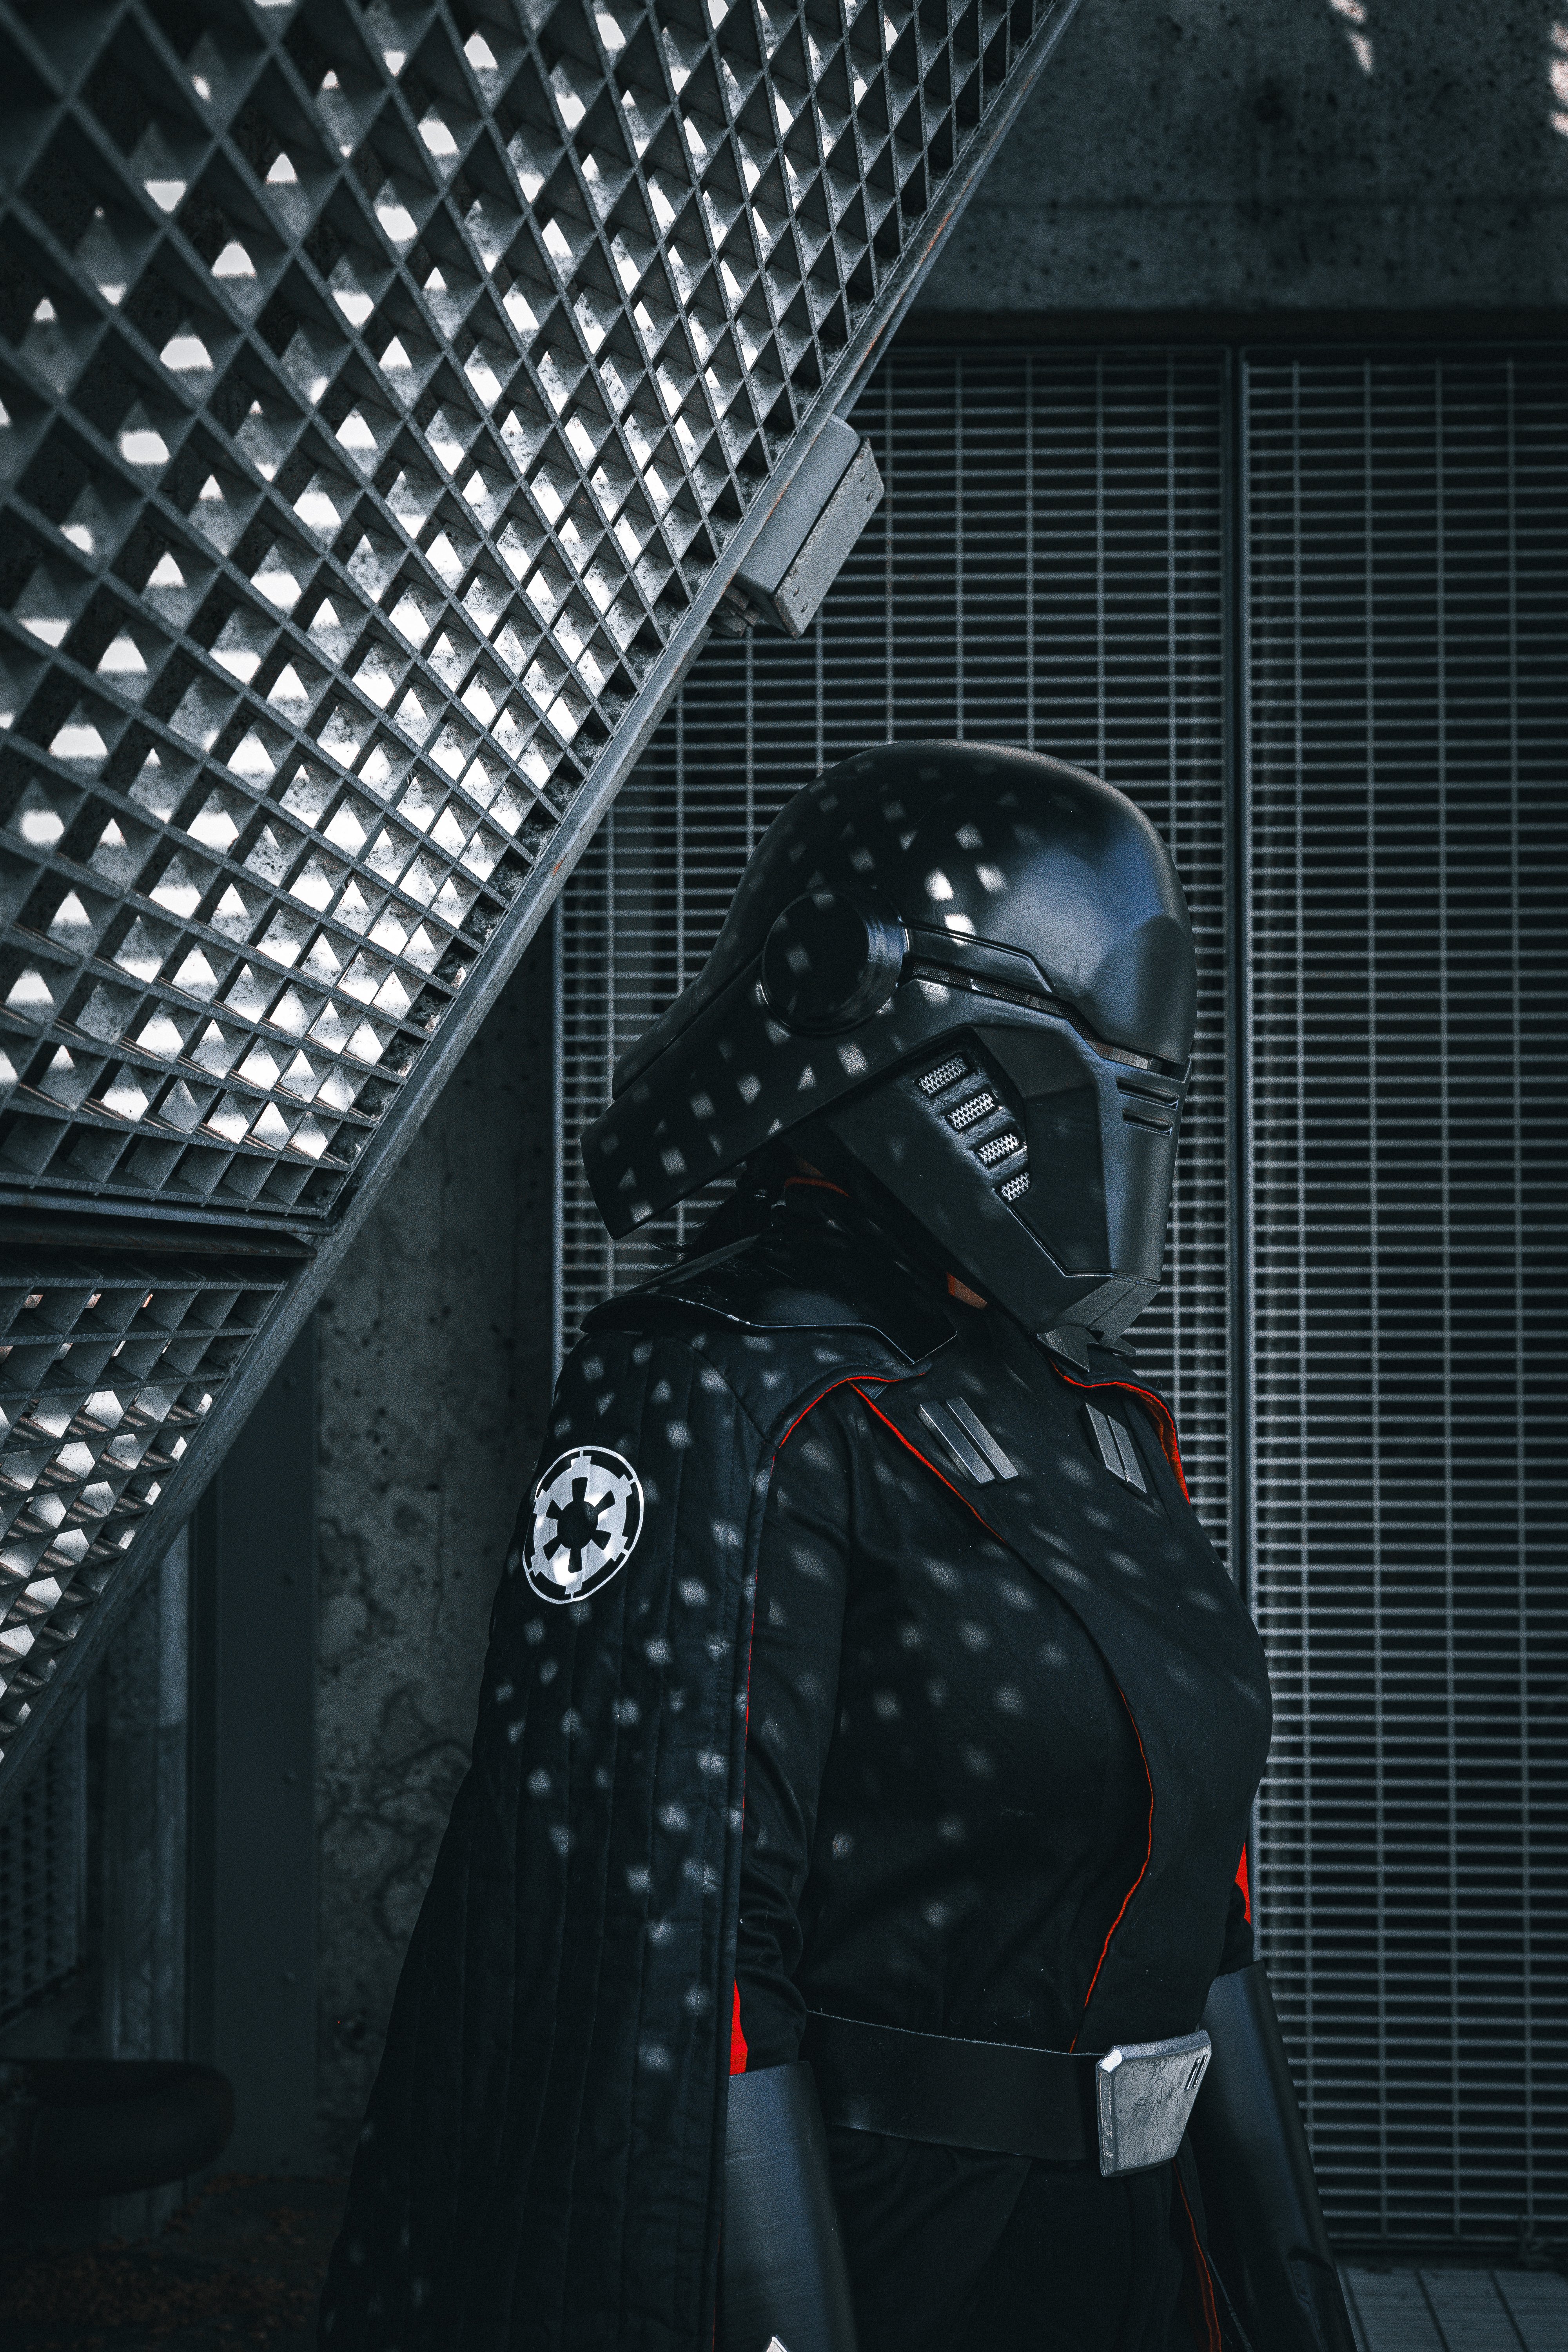
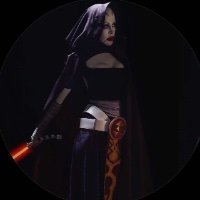
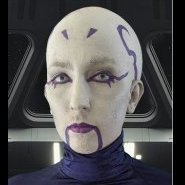
Hi everyone! Finally got my butt in gear and got my clone wars asajj approved and hopefully the first of many asajj approvals for me. I made every single aspect (except my lightsaber) from scratch without much experience before so I’m really proud of this one 😊🥰 I’m a brand new member of the pikes peak squad and the mountain garrison! Excited for all the new experiences to come 💕


 1 point
 -
Looks absolutely gorgeous!1 point
-
That shoulder armor and backbox look amazing!1 point
-
Love these boots!1 point
-
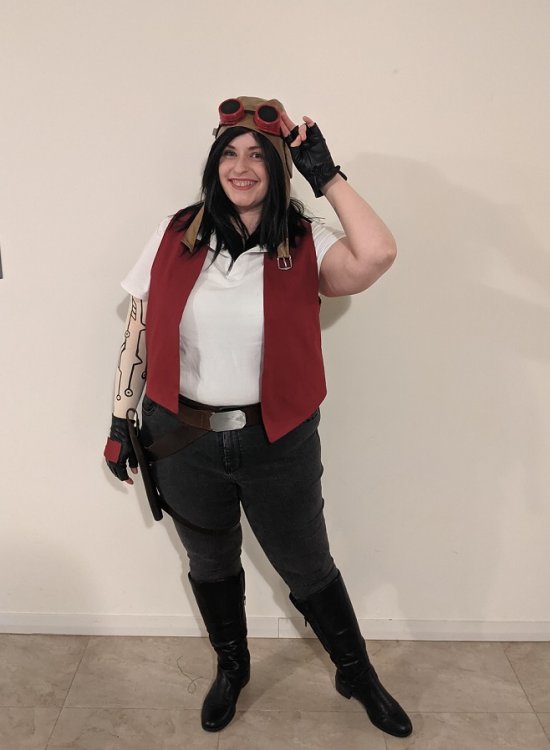
Newly approved DZ-96596 reporting for duty from Desert Scorpion Garrison (Perth, Western Australia) with my Doctor Aphra Red Vest A! https://www.501st.com/members/displaymember.php?userID=33596&costumeID=400
 1 point
 -
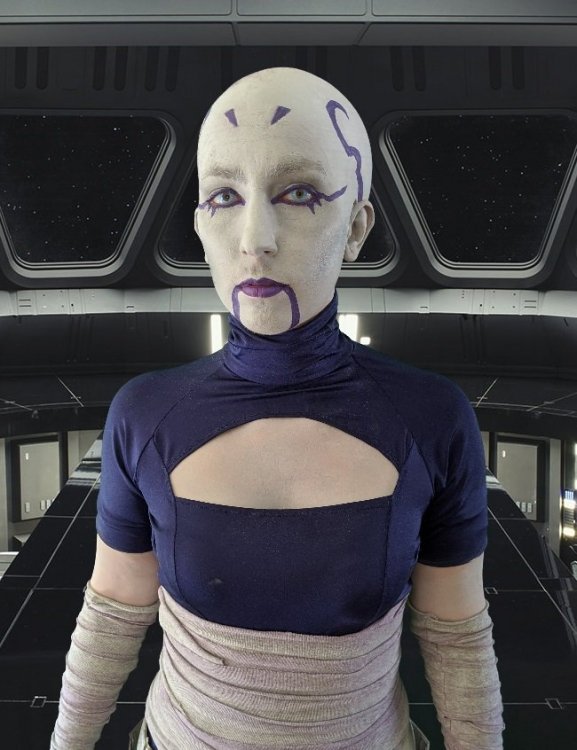
Hi all! New member DS 42659 reporting in! Asajj Ventress: Clone Wars
 1 point
 -
Hi from the Redback garrison Australia! My name is Gabbi and I was approved last month in time to troop the biggest troop in the Southern Hemisphere At Dreamworld

 1 point