-
Announcement
Welcome to the forums!
If you are a newly-approved member, make sure you check out the New Member Checklist!
If you are a Detachment member and can't see the member-only area, post here for access.
-DV
Leaderboard
Popular Content
Showing content with the highest reputation since 04/28/2023 in all areas
-
Just a quick update on what's going on with the detachment stuff since it's been a quiet period (not always a bad thing!). 1. We're actively designing merch for a racing shirt, patch, and coin themed for KOTOR 20th based on votes. These will come in the next few months. It is slow due to lack of artists available and, well, life. 2. We're working on 3 New to the Legion CRLs/costumes currently that we're hoping to be released before the end of the term in Feb after updates to the costumes are finished. 3. We were told by LMOs that we had to wait until the end of the season of Ahsoka before submitting requests for assignment of the costumes. But, after the short, "please don't spoil the episode for us" request time, we're submitting for Shin, Baylan, Morgan, Marrok, and all 3 Great Mothers to be assigned to TFE. 4. We're still looking for artists and a new Programs Officer if you're interested/able to assist the Detachment! If you have any other requests or ideas, please feel free to comment or message me!5 points
-
3 points
-
Korbanth has a Savage hilt for sale: https://korbanth.com/empty-double-sided-staff-the-oppressor3 points
-
3 points
-
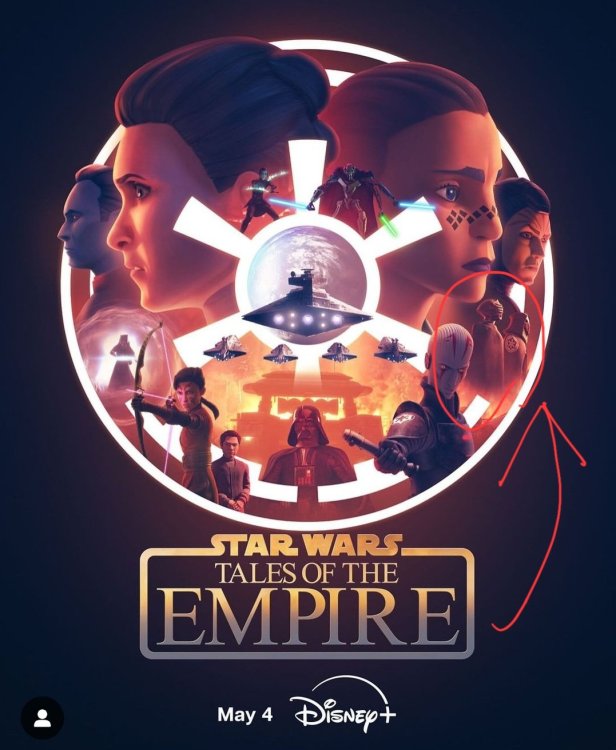
Hi Kyle, When I started doing some research into this costume, I messaged @Cookiedala for some advice, she mentioned this about color: " I would really go for a charcoal grey (almost black!) color and weather slightly on that." I would agree that a dark grey is the way to go with the capes and suit and leave the boots, gloves, and forearm bracers to be black. I know we will be getting some additional looks at this character in Tales of the Empire which releases May 4 and I just learned that there will be a limited series of comic books on the Inquisitors releasing in July! I am hoping we can get some additional images and hopefully a name/number for this Inquisitor in the comics. I am holding off starting my own Research/WIP thread until after those two new resources come out. I am excited to see that you are working on this costume!2 points
-
Hi everyone! Finally got my butt in gear and got my clone wars asajj approved and hopefully the first of many asajj approvals for me. I made every single aspect (except my lightsaber) from scratch without much experience before so I’m really proud of this one 😊🥰 I’m a brand new member of the pikes peak squad and the mountain garrison! Excited for all the new experiences to come 💕2 points
-
2 points
-
We're about 1.5 weeks away from all 501st elections! This means Legion level, Detachments, Garrisons, Squads, and Outposts! Make sure you are prepared for TFE Detachment elections by ensuring you are listed as the correct Detachment Member rank. Also check with each Detachment to ensure that you fulfill their specific requirements if they are different! For TFE directions, please see here: I will be doing the final update to the 501st roster for TFE on Jan 28th, so please make sure you are correctly listed (your name should be in orange if you are not part of command). Cheers and long live democracy!2 points
-
Started fitting this afternoon. Found this image incredibly helpful. Thanks for posting @DarthValkyria2 points
-
2 points
-
There is no embargo on making a costume - if you can provide the reference pictures of the costume from all sides incl. details and such, it should be good to go. You can also message our DL @DarthValkyria and ask on how to2 points
-
@Derek 1) I personally used EVA foam clay and shaped and painted the horns the way I liked. Then I attached the dried foam horns to resin bases using Aves Apoxie Sculpt. 2) The CRL says "made of leather or a material that resembles leather". I'd ask your local GML about this. 3) The silver piping on my vest isn't even piping at all. It's simply leather folded in half and stitched onto the vest. 4) Lightsaber is optional, but so long as the length is believable, I don't think anyone is going to be busting out a measuring tape to call you out. If you have any questions, feel free to DM me or hit me up on Instagram @ozark_maul2 points
-
New forum member here and not yet 501st approved but building the clone wars CRL. I made this on a whim because I was so obsessed with the figure! Figured you might like to see. Would be so cool to have this approved. I even got a shout out from the guys who sculpted it!2 points
-
Thanks LordZedel for clarification - verification. For mine - I use the Etsy neck seal combined with a vest with a v-neck shape to it. Similar look to the bottom pict you reference.2 points
-
If a costume that you want to build is not currently in the Legion roster, you'll be coordinating directly with the Detachment. The order is operations for the process is as such: 1. Contact me with all the references you are able to grab to validate the details of the costume, and an excerpt describing why the character should be included into the Legion. The references will be tossed into a Google drive that we send the link to. 2. I'll take all of that and submit to the assigned TFE LMOs, who will take the info to the main LMO group for a 7 day vote on legitimacy. 3. If the vote passes, you'll want to start a build thread here and keep us in the loop as you build to the references. We do not do pre approval CRLs because we don't want you building to words, but to the actual references. 4. Once built, you will let us know so we can get everything uploaded into the drive folder to go through analysis by TFE DCAs. 5. If it passes DCA approval, it will move to LMO approval. Again, another 7-day vote will occur. 6. If approved, we will begin final work on the CRL, including getting CRL photos from you. If not approved, changes will be relayed and then start again at step 4. 7. Final CRL will go through LMO confirmation and approval, and then once published, we'll work with you to get the information with your GML to assign the costume to your profile. If there are any questions, please ask!2 points
-
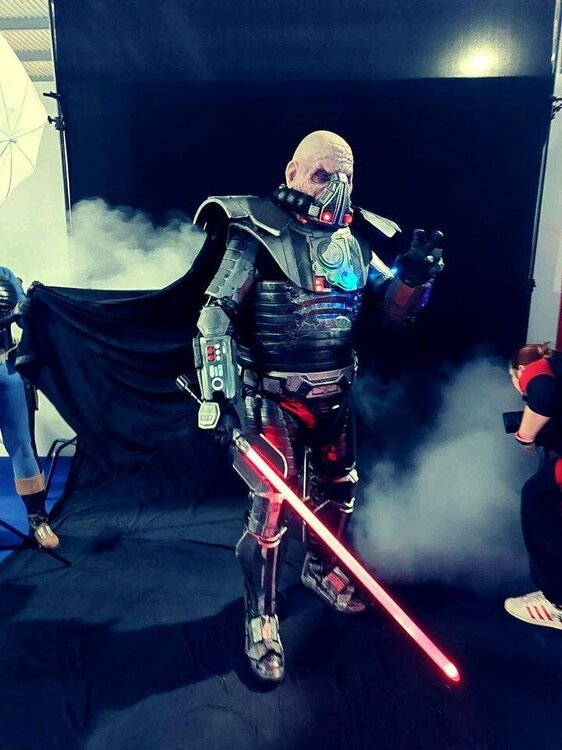
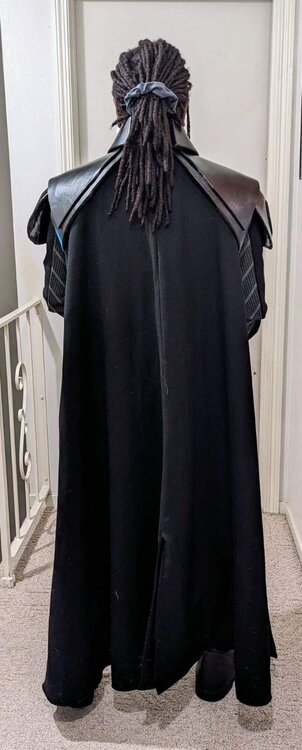
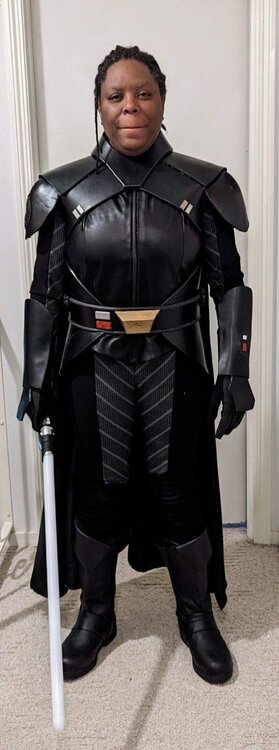
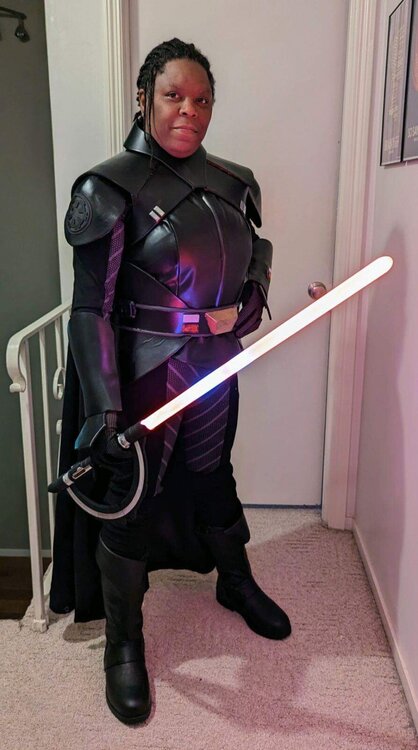
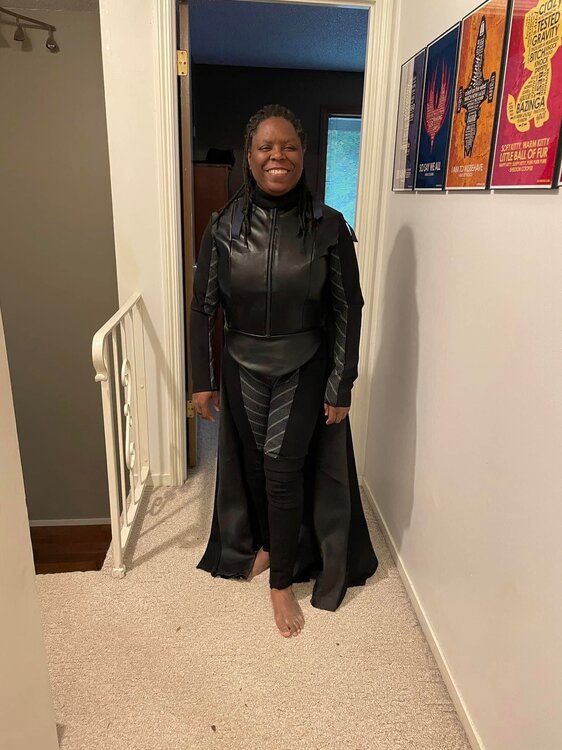
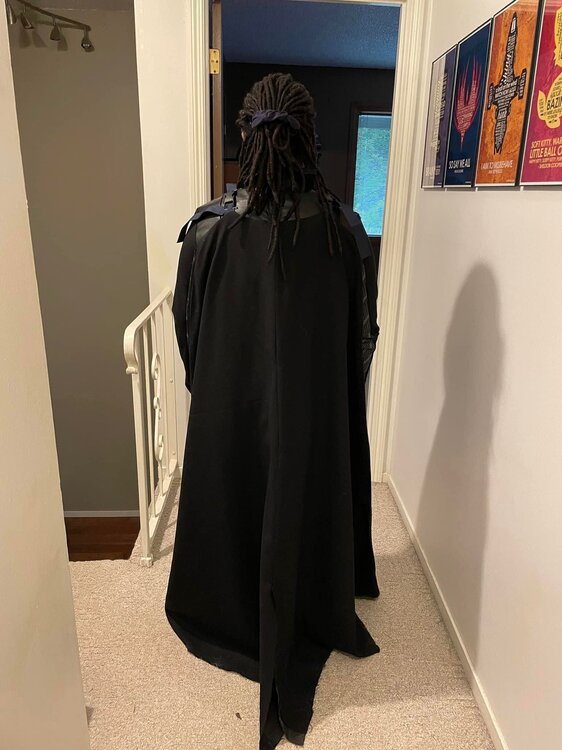
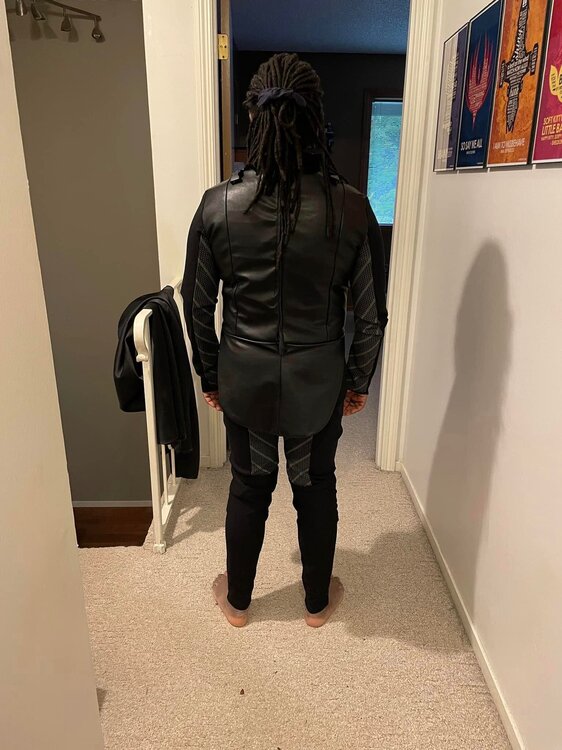
I’m skipping way ahead. I got a little hyper focused and just didn’t follow up with documentation. I have been taking pictures as I go. I have a photoshoot next Sunday and had to step up my game. Finished the bodysuit (sort of) and took some pics. The cape clips on to my shoulders. still to do: Place Velcro to hold armor in key locations Belt - cut to length, finish painting greeblies, wire LED Armor - apply Velcro, repattern collar, model greeblie for guantlets Boots - A friend is working on them for me cape - hem and shorten clip straps saber - all the things2 points
-
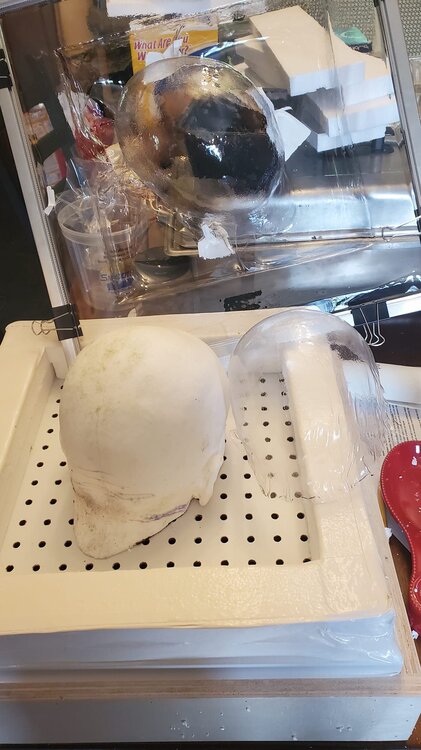
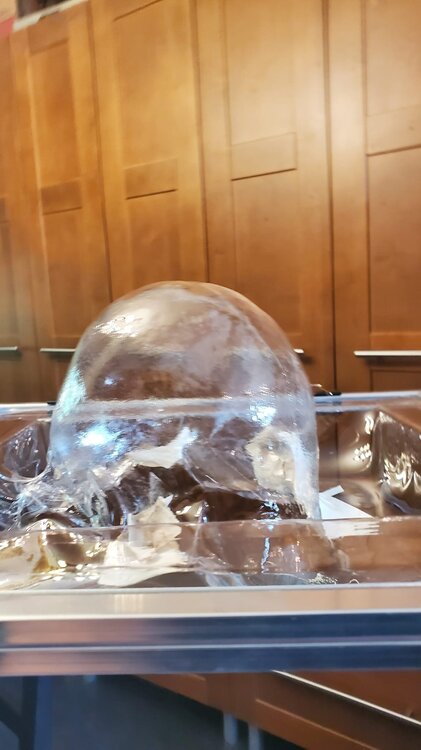
I will do a better write up of this in the next month or so. I will write more about how to make a casting of your head and such, but for now this is how to make the actual hard plastic re-usable stencil. Okay so this is going to be a bit of a long post. For my Ventress I have been planning trying to make a hard plastic stencil to use for airbrushing my Asajj Ventress tattoos on the scalp part of the head. I wanted something that is pretty much a continuous shape that doesn't have to have sections that need to be created every couple of inches. And would fit my head without large gaps. I have been using a Halloween bald cap that I tried to modify to fit my head, but because the material is flimsy the stencil shapes have to be cut into sections and then have to be connected when the bald cap is removed. I had my head cast. Which I did but I had to go to a place to get it done. Mind you I plan on doing other things with my head mold. The process for making this stencil can be done with just casting the scalp and ear area and doesn't have to include the face. I purchased a small (16"x16") Vacuum forming table. Got it on Etsy. Pm me if you want a link. You can also go on Youtube to learn how to make one. I used my house vacuum to create the suction. I also purchased a sheet of PETG from Amazon. .020" thickness. I also had a heat gun for this process. I made a cast from the mold of my head using Smooth-Cast 305 from Reynolds Advanced Materials. I made it a little bigger (deeper) than I had planned on. But I figured out a workaround without having to cut the head shape down. You can learn more about casting at the Smooth-On website. or you can search Youtube. I used the metal frame that came with the vacuform table and secured the plastic sheet I had cut down to the same size as the frame. I then put it in the over, raised a few inches above the metal wire shelf under my broiler (around 3-4") and let it sit for around 30-45 seconds. I pulled it out and pushed it down over the head form. My first try at molding the head stencil failed (mostly). When I first pulled the hot sheet down over the head form, it wouldn't stretch far enough down over the head form to reach the edges of the table to suction down the plastic. I tried using a heat gun while putting pressure on the plastic pulling it down, however this really didn't work very well. So, I tried again. This time I remedied the suction issue by building up walls of the vacuform table with Styrofoam I had in the house and then using duct tape to attach them to the table and seal the edges. This would allow the plastic sheet to come down onto the surface edge of the table to allow the suction of the vacuum to work on pulling down the extra plastic to the table. I repeated the steps like I did the first time with heating the sheet of plastic in the oven. I then pushed the sheet down over the head form onto the wall edges where it then started to suction down the plastic. The plastic cools quickly. When it does it will not stretch anymore. It still needed to form a bit more, so I used a heat gun (550 deg) in spots around the head form while the vacuum was on. Some spots I melted the surface and created holes where I had the heat gun to close to the plastic, so I patched them up with duct tape to create the suction again. I kept going around the head till I was happy with the results. I have cut the head shape out and will be drawing and cutting out the shapes of the tattoos that go on Ventress' head. The only thing I would like to do again differently is using a bit of a thicker sheet of PETG. I feel it would hold up better for future stenciling. For now, I will use this. But I am also currently ordering more PETG in a thicker sheet. I will be posting more pictures of the head stencil being cut tout and being used with the airbrush when I get there later today. If you do not know about Vacuum forming I suggest googling it to learn more. The first image is showing the vacuform table with the failed stencil to the right of the head form and the successful one still clamped to the frame for the vacuform table standing upright (you are looking at the top of the head). The second image shows how deep the forming of the plastic was made. You can also see the pieces of white duct tape I used to seal the holes where needed.2 points
-
2 points
-
Hi everyone, My name is Angélique and I’m located in France. My current 501st approved costumes are Reserv Pilot and Gunner. I loved playing Jedi Fallen Order,and I couldn't miss making the Second Sister costume, even though I know it's a long journey. I've already studied the CRL and the costume from A to Z, and I've spent days browsing the Second Sister Build group on Facebook, which is really helpful. I learned a lot from all Approved Second Sister's experiences. I thank all the ladies who answered my questions (big thank to Jenny, not sure if she is on this forum). I wanted to create this post to show the progress of my project and maybe provide useful information for people who want to embark on this costume. The complete costume will only be available in early 2024, and yes, it seems so far away, but I wanted a custom-made and high-quality costume. Costume details: Helmet / pauldron / bracers: ordered from Cillytek3Dprinting (French propmaker) - delivery: January-March 2024. This propmaker is really nice and very responsive. I could meet them at a convention to discuss my project and I'm very confident about their work. Hard parts will be custom made. I asked to have some room for a fan and the jaw will be removable. For bracers, there will be a fastening system that will allow them to be easily put on. Neckseal: ordered from The Cave: Creature Workshop (in Colombia), RECEIVED The seller was very responsive and shipped the item on the day of the order because they had it in stock. It seems to be one-size-fits-all. Second option is Parallel Life Studios in France, and their neckseal is actually featured in the CRL photo. The price is similar for both neckseals (160€). I preferred The Cave's neckseal based on videos I've seen of both neckseals and feedback from people who say that The Cave's neckseal is more comfortable + Parallel Life is not very responsive (no response to my messenger since end of April so I just gave up). Jacket + pants + cape: ordered from Francesca at PinkingShearsCostume in Italy. Delivery in February 2024. Francesca is really nice, fast response, she makes videos of her work on her Insta page and she posted many videos of her Second Sister work in progress so we can see all details on the fabric. With the armor pieces, I would say this is the part that required the most research. I preferred to order from a seamstress in Europe to avoid duty taxes and because she seemed highly qualified (she has already made 6 Second Sister 501st approved costumes, with great feedback from some validated ladies). The production time is long, but everything is custom-made, and she specializes in Star Wars costumes. Gloves: RECEIVED --> I ordered 2 pairs: 1 pair from Crowprops (South America) (but it's free with the boots+gloves combo). 1 pair from Keeptrooping (formerly Imperial Boots): i ordered by email because the gloves are no longer available in the store. Be careful when ordering, as there were only 4 pairs of size L left. The size should fit because they run small, but they won't be making more! It will be safer to have them in case the ones from Crowprops aren't great (according to 1 or 2 people). For some reasons, communication with Keeptrooping is not very easy (take time to respond and I have to send reminders...). Boots: RECEIVED --> ordered from Crowprops. It only took 10 days between order and shipping, that was super fast ! I hesitated a lot with the Keeptrooping boots, which seem to be of better quality, but the ones from Crowprops are custom-made, and the ones from Keeptrooping seem a bit too wide around the calf compared to my morphology. I have very small calf. Rank bars and buckle: ordered from Cillytek3Dprinting at the same time as the hard parts. Belt: I bought the leather part (I will assemble it myself once the buckle is received). There's also Paul from PHProps in the US who makes the belt with the buckle already assembled. The feedback from validated Second Sisters is very positive for this prop maker, but he told me to wait until I have the jacket to order the belt because the size to provide must be precise with the costume worn (no holes or attachment systems). So I'll try to make it myself to have it perfectly sized but I may also order the fully assembled belt later to PhProps. OPTIONAL: Lightsaber: ordered from Ultimate Works (that will be my birthday present in July from my boyfriend)☺️ If any Second Sisters see this post, I would be interested in having your feedback on your costume, your story about this build. I will update this post as I receive each item. And if you have any questions, please ask1 point
-
Almost 1 year ago I was starting to build my Second Sister Costume. I'm super happy with the costume! Here is the final result, I am really happy with it, it was a real challenge. A lot of stress while making the soft parts, I wanted it to fit me like a glove. The seamstress did an exceptional job and was always available. Hard parts are also custom-made, 3D printed. The seller wanted to provide me with quality work and put a lot of effort and time into it too. They are passionate people. In overall this costume is a real challenge to wear, the helmet offers little space, I bought a 4 cm mini fan but I don't feel much air. I need to see if the Opleprops fans would work. They specialize in fans for helmets. For the moment I'm waiting for my 501 validation but I'm crossing my fingers! In 2 weeks, first convention with my costume1 point
-
1 point
-
1 point
-
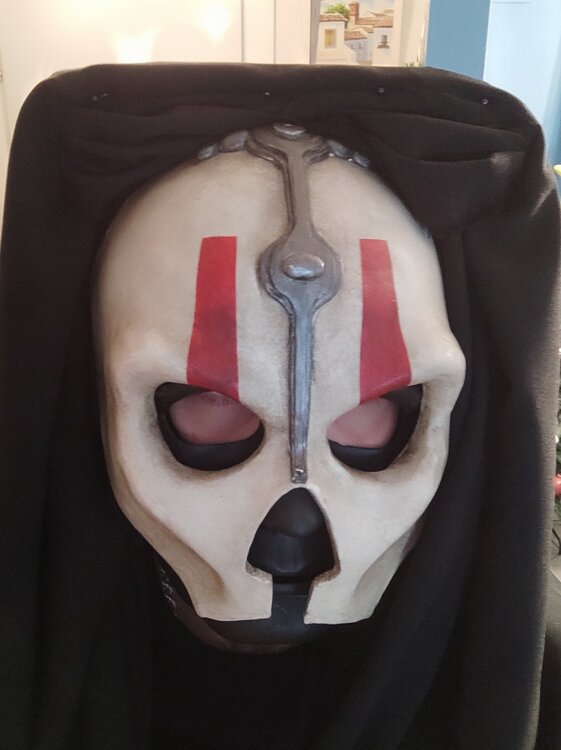
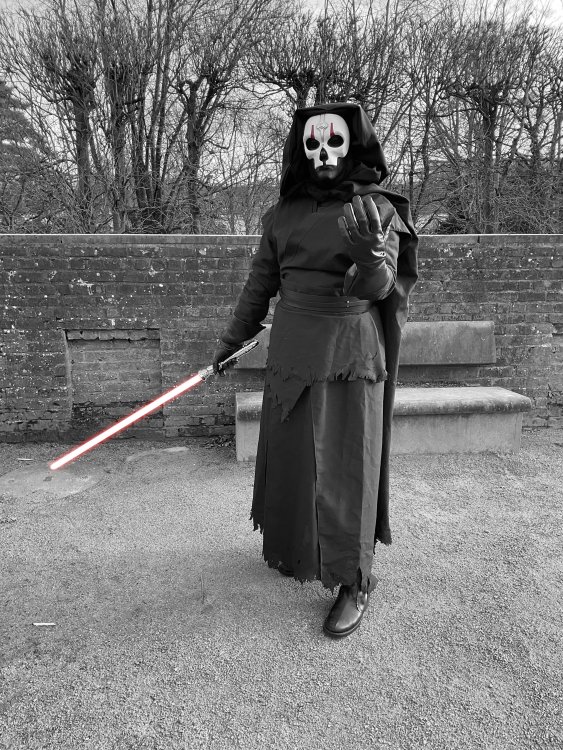
Hi! I'm Miguel from Spain, proud member of the Spanish Garrison and I'm about to finish my second costume which is Darth Nihilus Champions of the Force version. It has been easy to get all the different parts because I was very lucky and I worked with the same tailor of two friends who had two Nihilus COTF approved a few years ago. Here I attach the first photo of the mask and the cape with the hood. Now we are working on the head trying to make it as close as the pictures as possible. Tomorrow I will show you the different parts: boots, skirt, etc. It's a pleasure to share my work with you and I would be glad of receiving feedback from you. Thanks for your kind attention.1 point
-
1 point
-
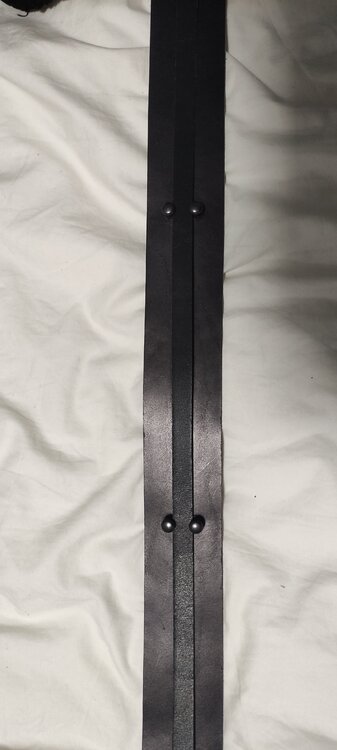
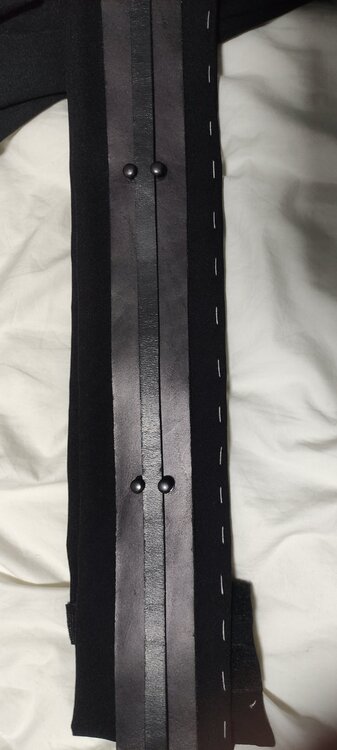
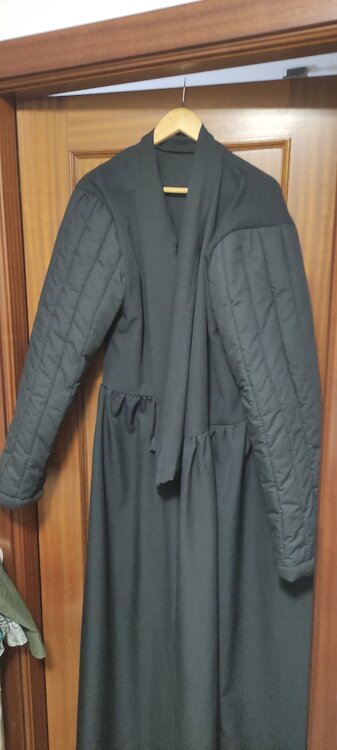
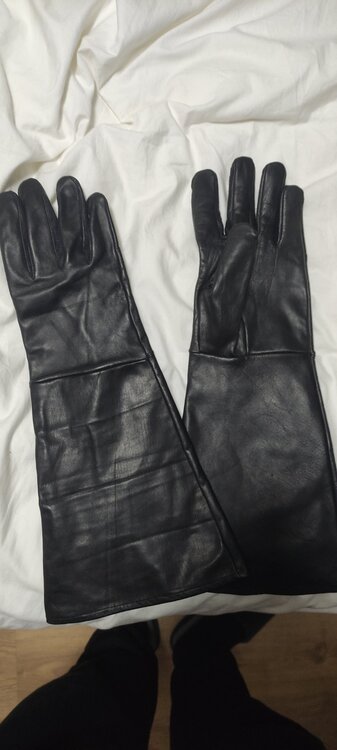
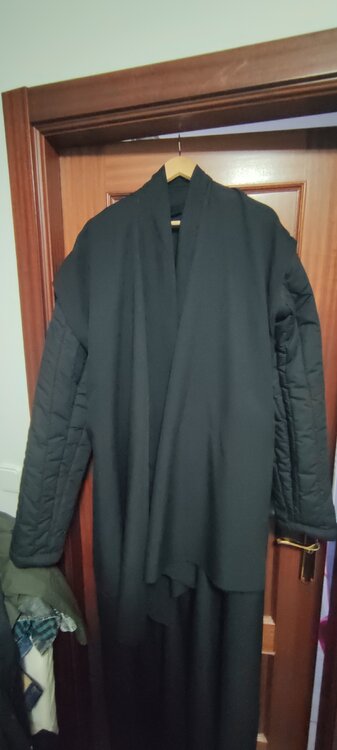
Hi again! As I promised here I show you the different parts of my costume: The leather gloves I bought were recommended by my friend: The leather belt with the right measure and those little black metal pieces: Here you can see the belt on the obi which is almost finished: And the inner robe with the skirt attached and the sleeves finished as the CRL details: Finally the outer shirt on the inner robe: And that's all for now, in a few days I will show you the skirt and the awesome boots, the same for my royal guard costume.1 point
-
Here's a few of mine with the Darman neckseal. Also my cloak was made for me by a friend who could actually sew Was lucky to find one at the time. My kit is a first gen MyNock resin kit with 1st gen and 2nd gen MyNock masks...1 point
-
Sure just make sure to tag me so I see the notification. My phone is very pissy on what it actually notifies me of lol.1 point
-
1 point
-
Hey, I have everything but the gloves, I saw you got yours from Etsy, could you provide me with the link so I can get some too, please?1 point
-
LOVE Dark Disciple...easily one of the best in the "New Canon"1 point
-
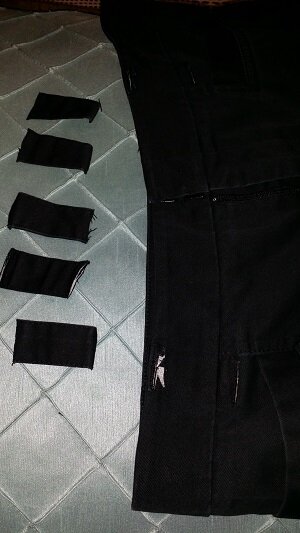
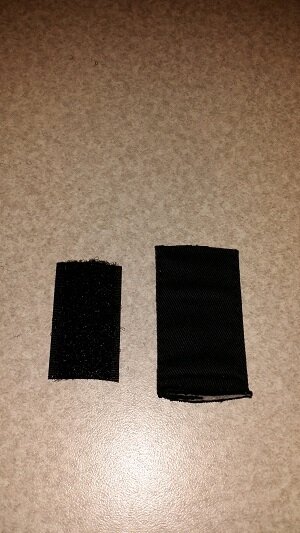
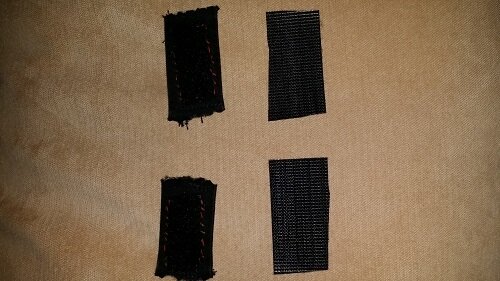
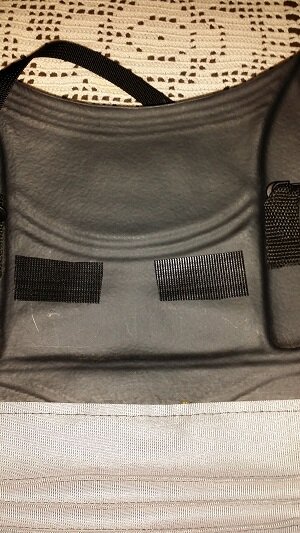
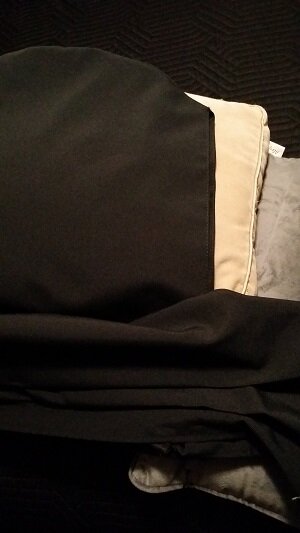
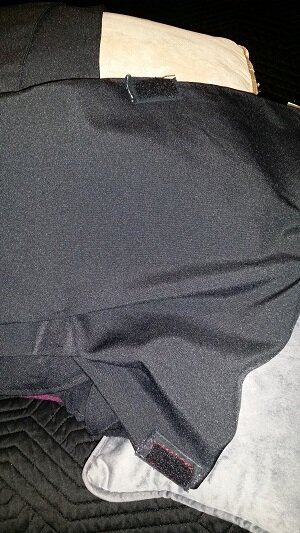
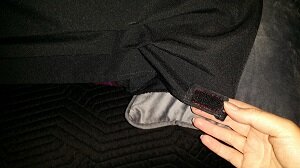
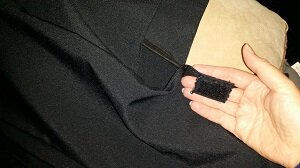
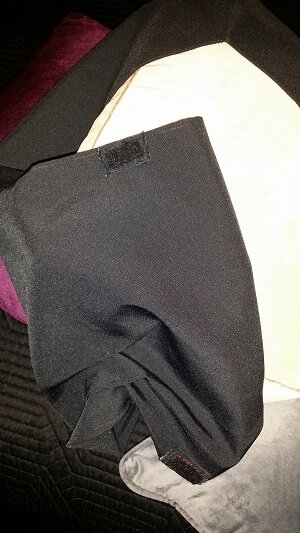
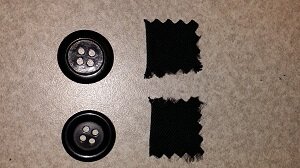
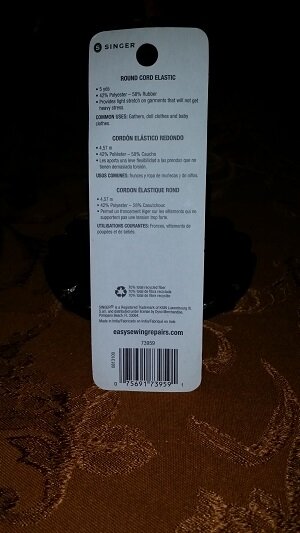
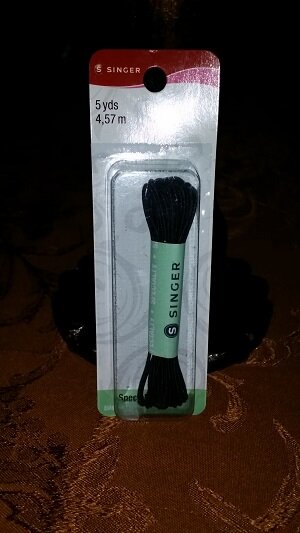
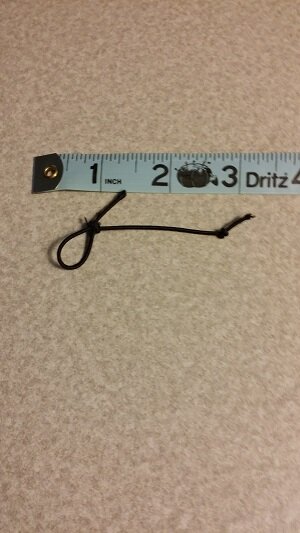
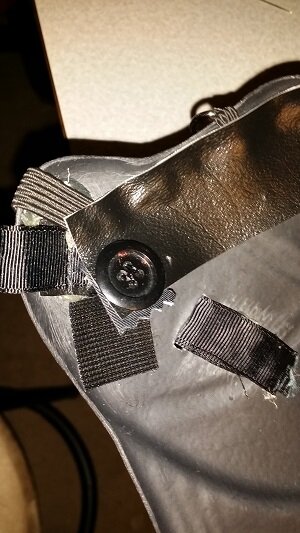
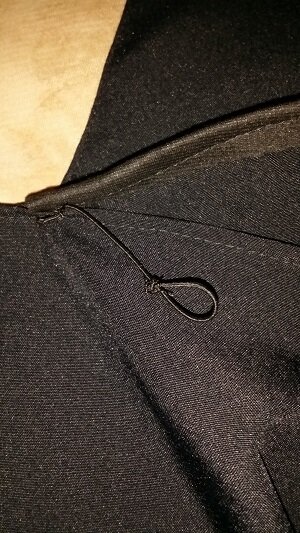
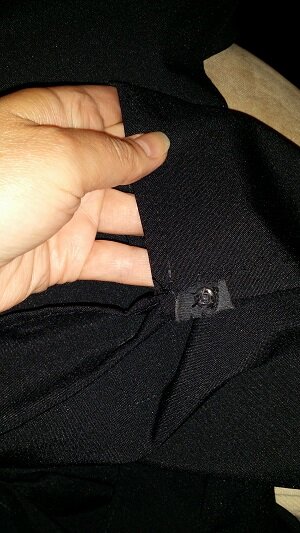
I ordered a Deluxe Darth Revan from My Wicked Armor. I modified my hood and capelet to tuck under the front armor plate and attach with Velcro. This same mod would work for magnets or other attachments. To check my measurement, I put on the chest and back armor and my cape. I put on the hood and capelet piece on and brought the fabric around the front of my front armor piece in place so I could identify where I would need to place the Velcro inside my armor. I have plenty of extra length, so I was able to use fabric clips to clip and hold the ends in place. I moved a bit as I would on a troop so the fabric wouldn't be too tight. I measured and noted where on my chest armor I could place small rectangles of Velcro inside where I would want to tuck and hold the top and bottom edges of the fabric in place. I inserted safety pins in the fabric to measure where I would attach the rectangles of Velcro onto the fabric. I didn't take photos of this, but since I didn't have help, I just stood in front of a mirror. I needed small fabric rectangles to place the Velcro onto the hood and capelet so I could easily remove the fabric to replace the Velcro if it wore out. I removed some wide belt loops from some cotton Dockers I had. These already had a seam in place to avoid fraying so this worked nice. I cut the soft part of the sew-on Velcro to match slightly smaller than the belt loops. I stitched the sew-on Velcro onto the loops. A bit sloppy by hand but they're holding. I made four, two for each side. I cut out the rough side of the Velcro roughly the same size for the upper part of the fabric. For the bottom part of the fabric, I placed slightly wider strips of the rough side of stick-on Velcro so I could have some flexibility if my weight changed, for fit, etc. I placed those inside my armor. To place the top part of the fabric, I placed a stick-on Velcro inside the armor where the top part of the capelet would wrap around in front and reach over the armor buckle, in and down inside to hold. I'll need to add a photo of that area. I didn't completely stitch the rectangles onto the fabric, but rather "tacked" them on into the seams, so I could loop my finger underneath to grab them and to make it easy to replace if I needed without too much puncturing of the fabric. I tacked them onto the fabric facing outward so they could attach inside the armor to the Velcro. The hood and capelet are laying with a side view here and the Velcro areas will follow. The upper and lower Velcro on the fabric: You can see here that I can reach behind the Velcro with my finger: Might be hard to see here, but I put the hood onto a pillow as if facing it being worn and wrapped the edges of the capelet how they go to show more of the Velcro. I added an extra attachment if I'm at an event with a lot of movement, a button and elastic loop to hold the hood in place as I move my head. I used small buttons on each side and cut out some cotton fabric with pinking shears to house them. I used round cord elastic to make the loop. I measured a small length of the loop for each side. I attached a button inside the Velcro, sewing it onto some vinyl reinforced with some cotton fabric and stitching in place into the existing housing. I stitched the loop into the seam of the hood. I tucked some of the extra upper fabric over and tacked it in place. You'll see I added a snap but found it wasn't necessary when using the loop. When putting on my hood and capelet, I wear a ball cap and let my hood drape and hold in place on the cap so I can see. I leave my armor belt unbuckled so I can reach inside the armor to find the other half of the Velcro. After I get the capelet secured, I then secure my armor belt in place. I leave my gloves and mask for last. Wearing the cap, I can simply bend over at the waist, reach in and remove my cap, put on my mask and attach the hood to the mask and then straighten up. Everything stays in place.1 point
-
Per the LMOs, we have to wait until the end of the season at least before the assignments are made.1 point
-
I bought these: https://www.amazon.com/gp/product/B08BYFXMKV/ref=ppx_yo_dt_b_asin_title_o04_s00?ie=UTF8&th=1 If i remember right, I put the two hole one on, but it wasn't holding tight enough so I put a single hole one on after the two hole one.. holds pretty good now1 point
-
I believe that there will be an embargo on any CRL until the series has finished. I am building the costume from my own observations, guidance from lovely people who are also building, so we have time to create a 'living' CRL by building the costune to screen accuracy. I have a build thread on FB which the link is above where I am sharing my ideas.1 point
-
Oh this is absolutely stunning. You just have peak Asajj vibes.1 point
-
1 point
-
Upgrade time...front ring on the Sash (and my sash), fell off during a troop today, and my lightsaber died after 2 hours... Any recommendations for the following Boots - Gloves (not leather) - Lightsabers - Ring is an easy fix just embarrassing1 point
-
Very nice indeed! Might need to add these to my collection! The lucifer sabers one is a nice replica, however they really struggled in sending me the config file for the neopixel1 point
-
I've become approved with some help from my local garrison, but i would love your opinion.1 point
-
Hrm. Apparently I never got this set up properly--the *downside* to being approved in multiple clubs at once! I am (belatedly) requesting detachment access DS-13342 https://www.501st.com/members/displaymember.php?userID=34582&costumeID=5531 point
-
This is not a Detachment system, but a Legion-wide system.1 point
-
1 point
-
1 point
-
WOW! You look fantastic! Your makeup looks great and I love your horns! Wish you lived closer! I'd be all about trooping with you! Great job!1 point
-
1 point
-
Full makeup test. Getting closer to the colors I’m happy with. Thank god Mehron had a pastel yellow that works!1 point
-
1 point
-
I wanted a way to disconnect it if I needed to to fit into the bin I have for it. I just reconnect the buckles and lift it on. In hindsight, connecting two D rings on each strap would have been better and I might change it to them later. Slipping the strap through D rings is really easy to adjust the fit.1 point
-
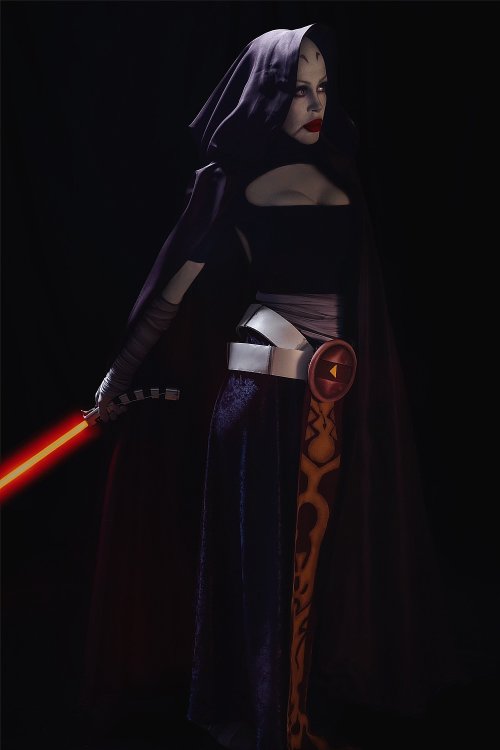
Hi everyone, my wife is looking to make a first in legion costume of Mother Talzin from the Clone Wars, and I need guidance. desperately. We want to incorporate the flowing arched robes that sprout from her back, maybe have them move on their own when she troops.....but I don't know much about fabric work, and this looks like a tough costume to build...HELP! I will post the build from start to finish here but could use as much wisdom as you guys can spare. Thanks, Andy Romero DZ-7244 Garrison Membership Liaison Dune Sea Garrison1 point



.thumb.jpg.6767538d6131650e3b411b09ff9e4989.jpg)






.thumb.jpg.0d1684095db527b839cf5a8a14c59585.jpg)



.thumb.jpg.71ffc70ada245148c97a2dd358072cec.jpg)
.thumb.jpg.090e48bdbb4ab9a03c0d868de1119bd1.jpg)
