-
Announcement
Welcome to the forums!
If you are a newly-approved member, make sure you check out the New Member Checklist!
If you are a Detachment member and can't see the member-only area, post here for access.
-DV

DrakarV
-
Posts
20 -
Joined
-
Last visited
-
Days Won
3
1 Follower

DrakarV's Achievements
7
Reputation
-
I need to get around to posting my progress, as I have definitely made some over the last month. I did get a simple speaker/amp that can be a standalone piece I am going to install on the underside of one of the shoulder plates that will play a breathing loop for effect. I will have to install flat speakers on the underside of the shoulder plates that will route to my voice modulator and amp in order to get the voice modulator to work. I tried to install it all inside the helmet but the speakers were just too close to the mic for it to work properly. I updated the checklist above to reflect progress made.
-
 DrakarV changed their profile photo
 -
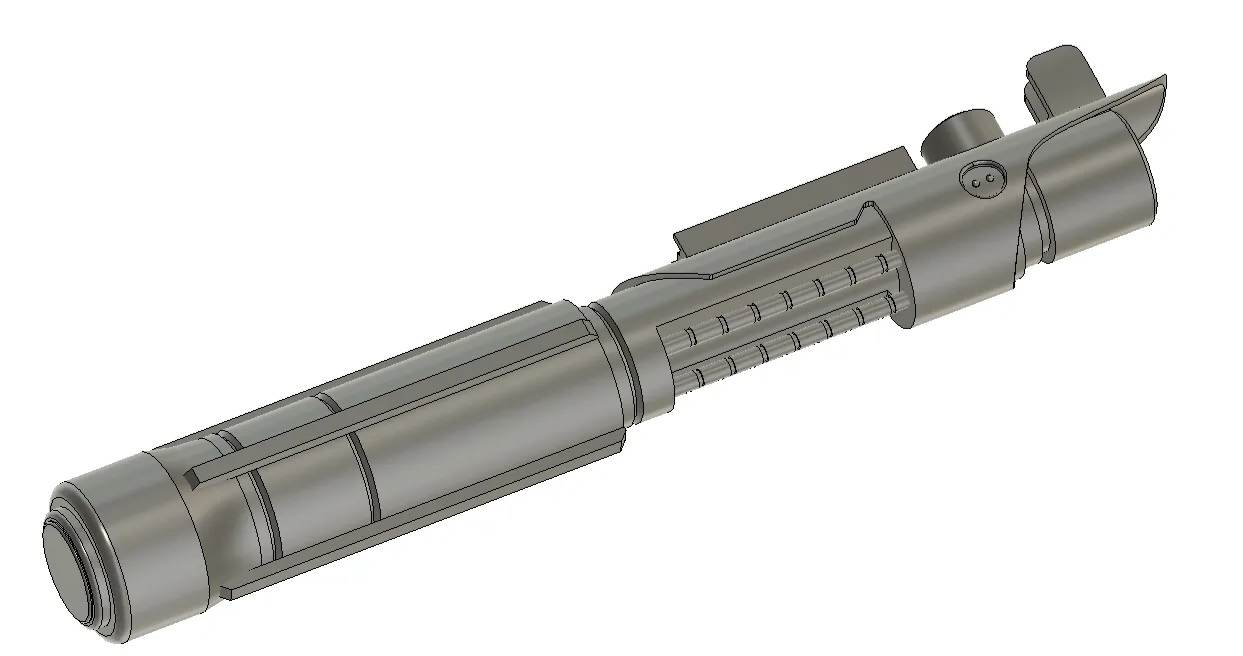
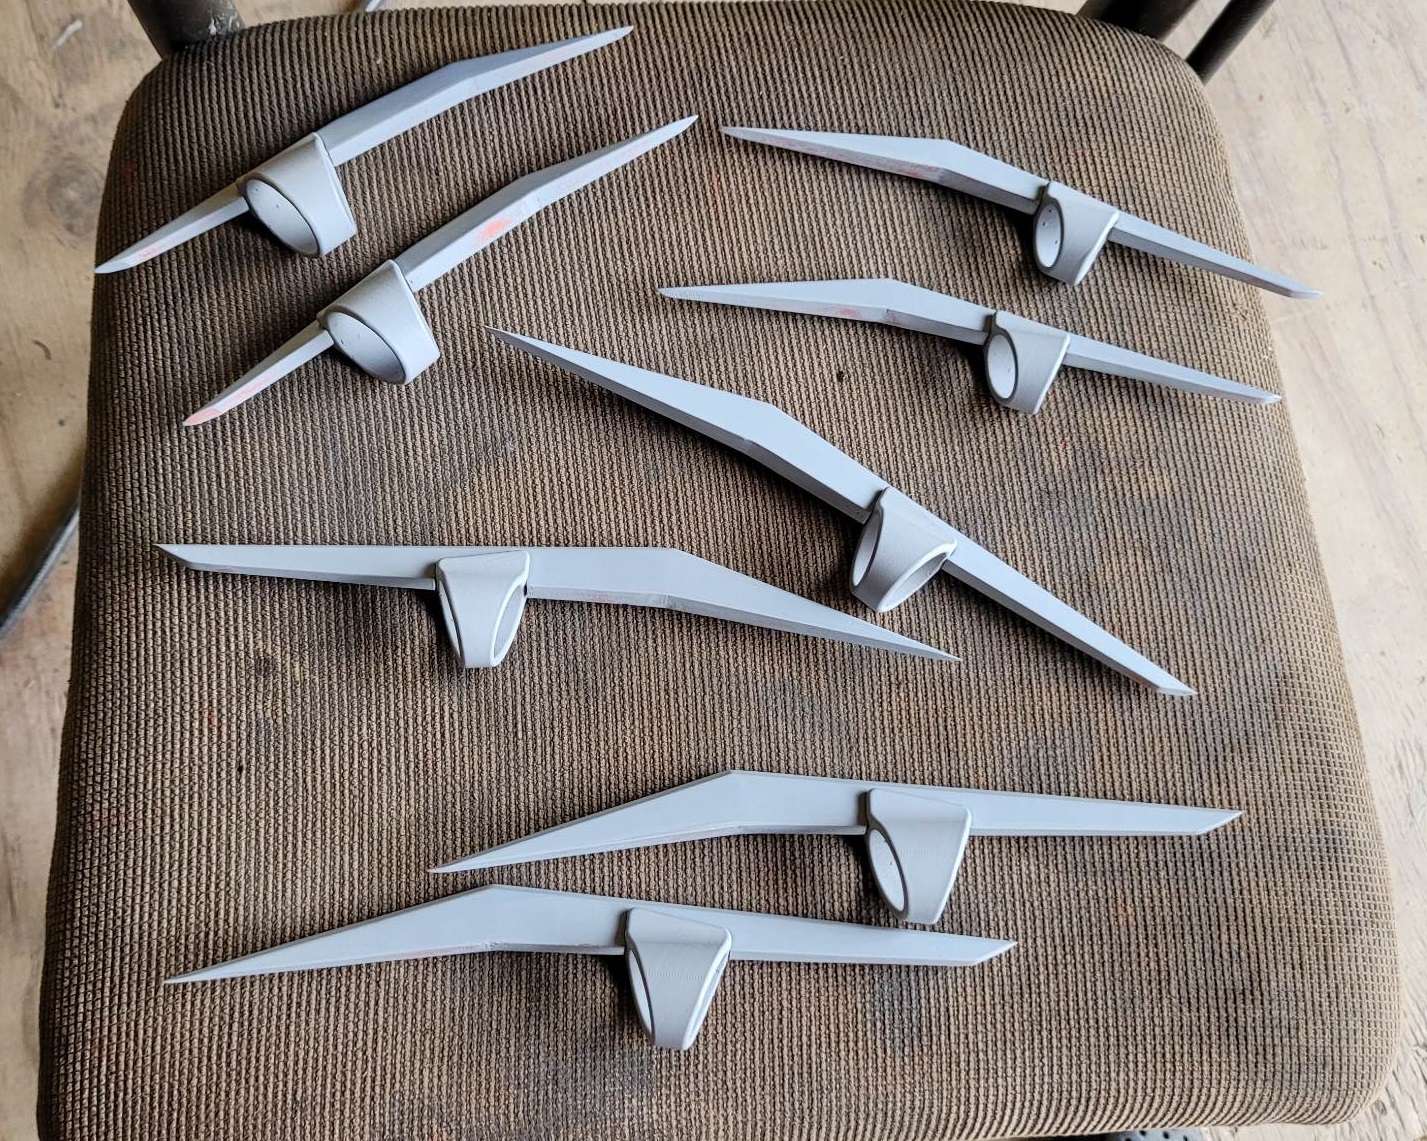
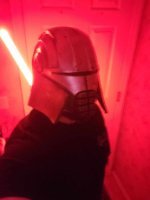
After a long couple of months I finished my 2nd Crusader kit for my LFL recognized club, the Mandalorian Protectors and now I am back full time on finishing this kit for my local 501st garrison. Hoping to get this done by end of the year if not sooner now that I can devote my spare time to focusing on completing. Am about 70% of the way and now have my Wicked Armor helmet in hand. Below is my "finish" timeline that I have to complete before submitting for approval. Before I get to that, I have to give thanks to many of you on here that I have talked to through my Etsy and through Facebook that have lend their generous knowledge on their own Starkillers which has helped me tremendously on developing my path forward. I appreciate your business as a customer and as a fellow cosplayer/friend being so helpful as I hit my own roadblocks. I genuinely love this community at TFE. UPDATED 10/12/23 What I currently have and status on: Hard Parts: Helmet from Wicked Armor - Painted and ready to wear. Voice modulator from HelicalHyperCom - Will be installing small speakers on the underside of the shoulder plates and wearing the modulator/amp on my undershirt. Will use either 1 normal fan or 2 micro fans inside the helmet. Braid has been made and just needs attachment to the helmet. Shoulder Armor - Painted and ready to wear. LED's have been installed. Will be using velcro to attach these to the jumpsuit once the jumpsuit is tailored to fit properly. "Spine" Segments - Painted and ready to wear. Back "Box" - Painted and ready to wear. LED's have been installed. Will be using velcro to attach this to the jumpsuit once the jumpsuit is tailored to fit properly. Finger Blades - Painted and ready to wear. Glove Hoses - All material has been gathered, just waiting on adjusted flightsuit before making final install. Glove Actuated Electronic- This is ready to install on the underside of one of the shoulder plates. Belt Buckle - Painted and ready to wear. Leather needed for belt is secured, and will use snaps on the backside to secure. Lightsaber Trophies - ALL painted and ready to wear. Rahm Kota - Modeled, Printed, Sanded, Primed. Painted and ready to wear. Kazdan Paratus - Modeled, Printed, Sanded, Primed. Painted and ready to wear. Maul - Used old hasbro toy piece, cut in half and filled all seams/screw holes and removed trademark/writing. Primed. Painted and ready to wear. Vader - Used old hasbro toy piece, cut in half and filled all seams/screw holes and removed trademark/writing. Primed. Painted and ready to wear. Starkiller - Modeled, Printed, Sanded, Primed. Painted and ready to wear. Acquired rings needed to hang/suspend these from belt. Boot Heel Plates - Will be using 1/16" metal plate to cut and shape. Waiting to finish boots before starting. Soft Parts: Jumpsuit from CustomProps - Received, needs to get tailored. It came in a bit big and I have lost weight since then, luckily I have a local seamstress that works with our local Mando group that I will bring this to and get tailored this month. Currently in possession of seamstress, should have back before end of October. Rib wrap - Sourcing 3mm-5mm leather to use, will be using groove tool to make the etched lines of the "panels" so that each half can remain a single piece. Will use 5mm-8mm leather for back "wings" and harden via water boiling. Clips and center spine are modeled, printed, primed and ready to paint. Will use these and heavy duty elastic cord as a securement method. Contemplating adding velcro at the bottom edge and on inside of belt so that the two do not fight each other while wearing together. Gloves - Obtained from LeatherGladiators Belt Leather Flap - Will use 1mm leather to sew and make this. Material acquired. Lower Robes - Will use 1mm or lighter leather to make this, plan on cutting out the symbol for the back and sewing on. Material acquired. Boots - After speaking to Bogan, I decided to proceed doing a two-piece design similar to his. The boots I ordered previously have a more pointed toe, so they will not work for this build. I am in the midst of sourcing an ankle-mid height round toe leather boot and will be using a gaiter pattern similar to the book of boba fett style gaiters with 1mm leather, and will modify them to sew thicker leather banding on to better match the in game references and finally add leather strips on the boot tops to get as close to the game reference as possible. One gaitor has been made, need to make second and then the top ribbing parts. Hopefully I can get some solid work in on this over the next few months!
-
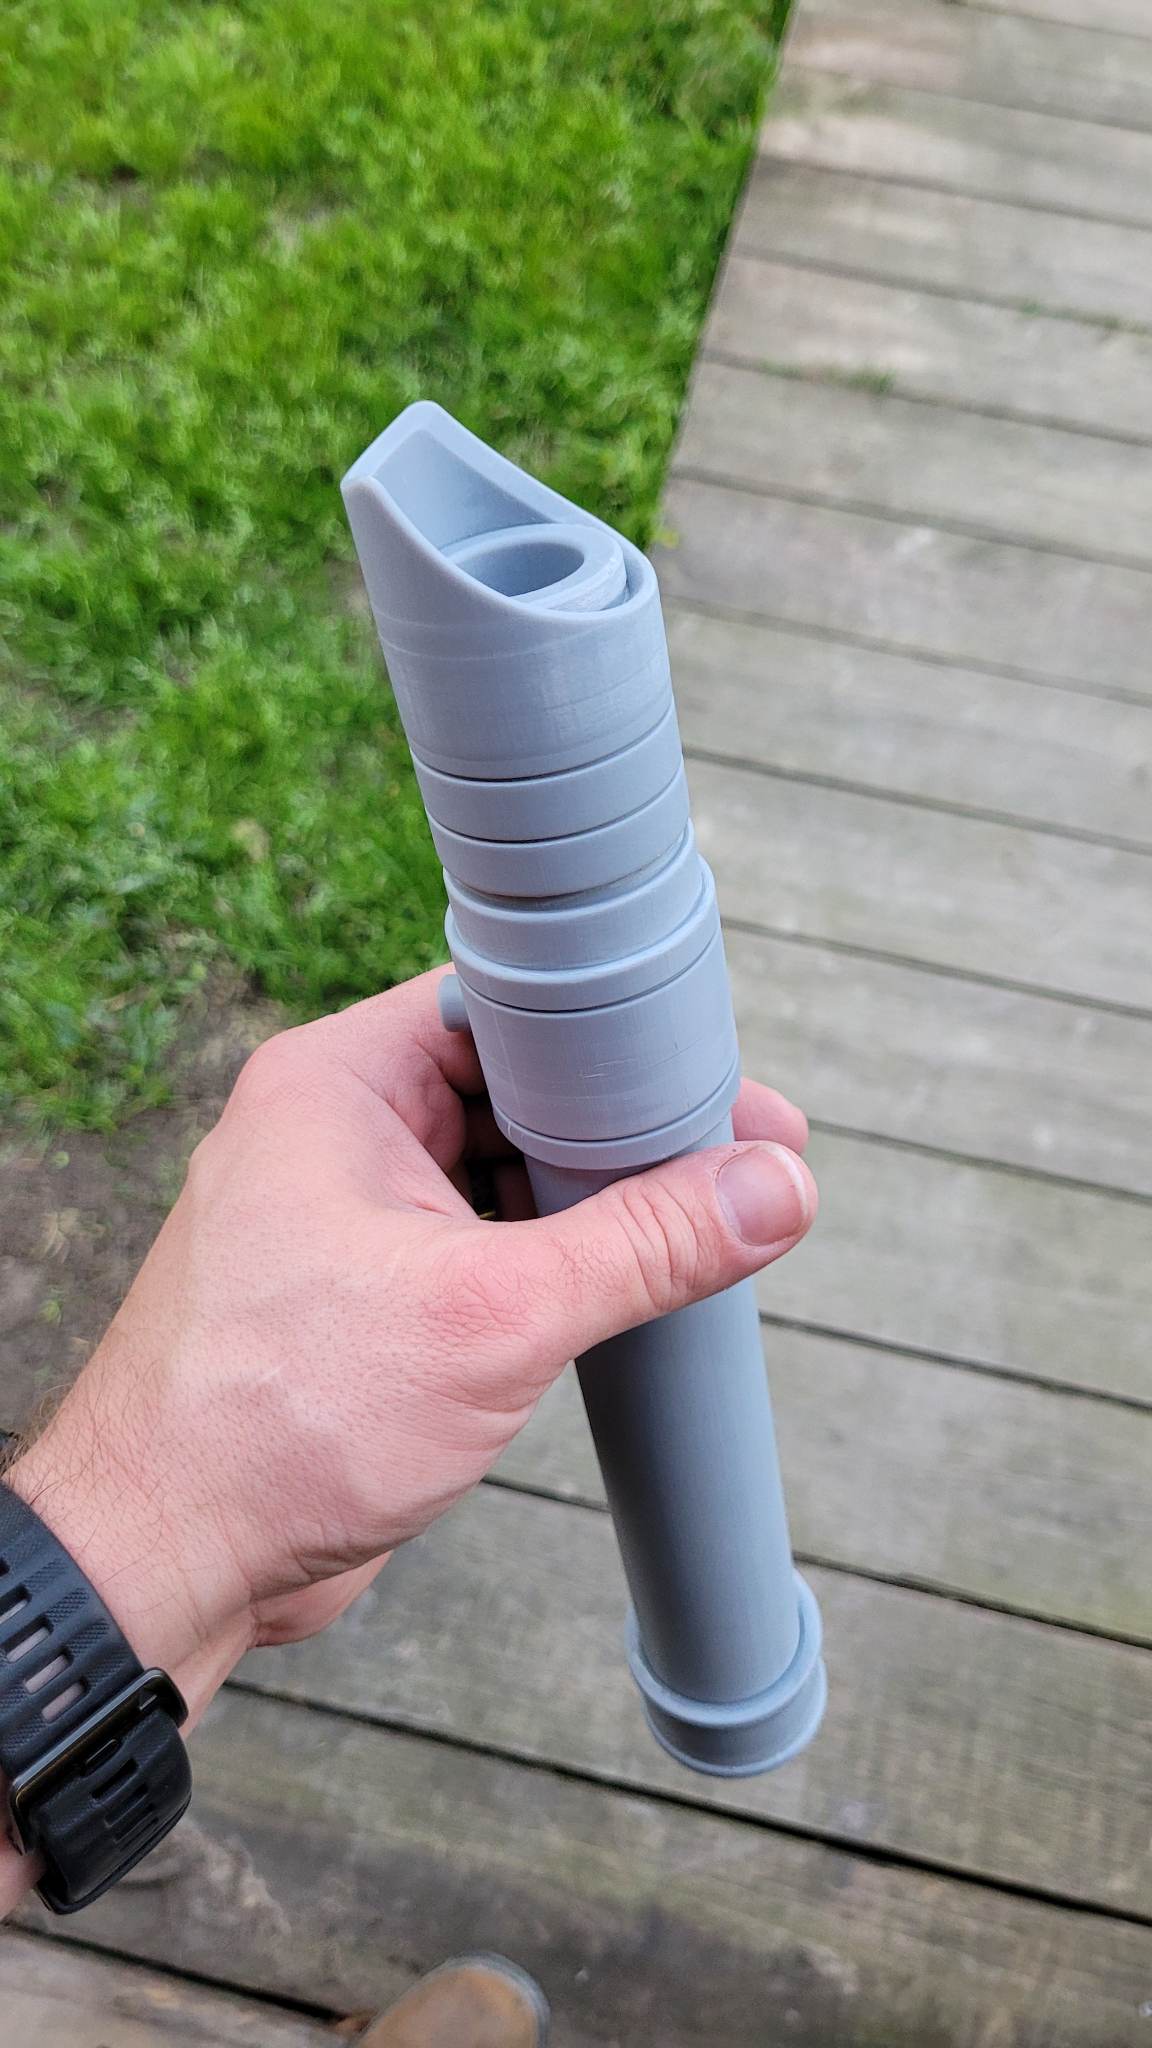
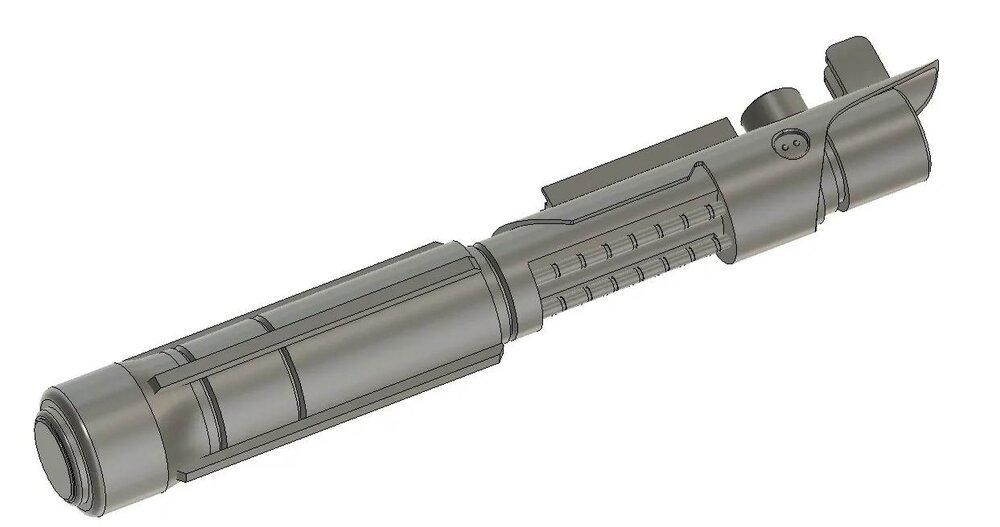
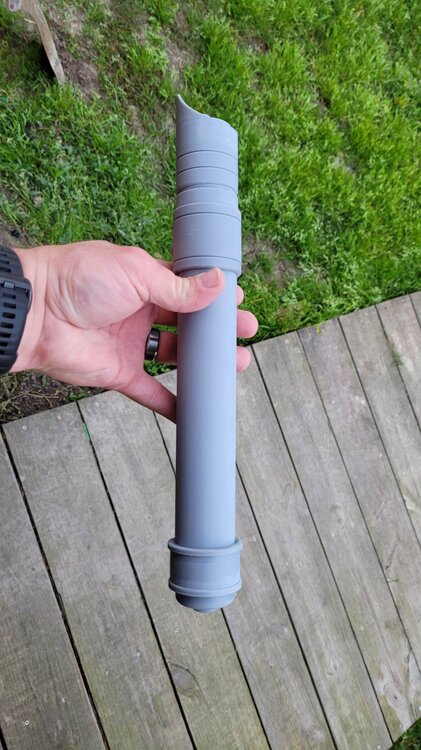
After almost selling this kit, I have changed course and went full in. I have the helmet on order from Wicked Armor and have recently obtained the saber from Ultrasabers. I am currently modeling and printing the remaining lightsaber trophies and have 3 out of 5 for those. Just received boots in that I will be converting much like Bogan's to be more screen accurate. Finger blades are epoxied and ready for painting. Will add some filler around claw and ring joints as needed prior. Waiting on clear red resin to come in so I can resin print the back box LED display piece. Receiving very helpful advice from fellow flagship eclipse Starkillers that are also customers and really starting to wrap my head around the path to finishing!


-
Love these boots!
-
Looking great as always Hervé!
-
You are not wrong! I appreciate the encouraging words from the both of you.
-
I may just sit on it a while and see what happens.
-
Hi, I am currently deciding whether or not to sell my current build. Time and money has been limited lately and motivation lacking.
-
For those that were interested in the 3d files I made for this build, they are now live on my etsy shop - https://www.etsy.com/shop/WarlordArsenal Also, I have recently received both the jumpsuit and the gloves for this build. My buddy is currently printing my helmet, but I will need to get the suit tailored to fit better. It was a bit larger than what the measurements I provided to the Custom Props folks, but luckily I have a friend who can alter it to fit me better. Hoping to continue this build next month.
-
I actually will be releasing them on my etsy shop once I reopen it in a few weeks. I got to fine tune a few models before I do. I don't own the helmet file however.
-
Thank you. I am still working on this, albit a bit slowly as I navigate some RL roadblocks, but my jumpsuit is in production and gloves as well so looking like I will have most of my tailored items by January and helmet as well.
-
Your kit looks great! Thanks for the kind words. Belt has been printed and currently going through some sanding and primer layers until fully smoothed out. Printed in Resin so this should be done and ready for paint by tomorrow night. Used some bondo spot puddy on the shoulder parts to take care of a few divots in the smooth shell and will be addressing the two small touchup areas in the grooves tomorrow night using some plastic metal to help build up the edge to make it more defined. Will post before and after pictures once that is complete. Aiming to begin paint layering Saturday. Once I get one layer of lighter silver down on the shoulder plates, I plan on rigging it up temporarily to check for the spacing needed on the backbox before I set it to print. Want to get an accurate measurement mock up and also use this opportunity to get the proper size needed for the back of the spine part so I can begin printing that also.
-
Thank you for letting me know. I should be fine, as I have quite a bit of experience building and making things work. I appreciate any help I can get. Also, to update the thread, I have now found someone that will be making the gloves and got that process started. I've modeled the belt buckle and ordered the leather strap needed. Buttons/switches for the belt have been printed and will be printing the buckle itself during the week. I have a cut out on the back side of the belt that will allow for the belt ends to meet and connect via snaps and sewed on velcro. At the bottom of the belt I modeled a slot for the leather piece that dangles to be inserted, and have holes meant to secure it via screws. I had some orange peeling going on with the shoulder armor, but have meticulously sanded/re-bondo'd/primer/sanded until these were removed and have been slowly coating with more Krylon primer with some time in between coats to ensure no more peeling happens. I still have a few small spots to fix alongside the grooves but plan on doing that once the overall smoothness is achieved and cured for a few days. Hoping by the weekend to have it ready for paint layering.
-
Lower back "spine corset" is modeled and will be printing once I do another fit test with shoulders and back plate to ensure length is proper on the lower back spine. Will be using 1/8" plexiglass or aluminum for the "wings" and secure the cordage tabs along it with small wooden dowels cut to fit into the holes I will punch through the wings. Epoxy filled and sanded smooth should secure the tabs to the wings, and will be running two 3/16" metal rods into the holes I bored in the middle spine part to give it strength from snapping.
-
First layer of heavy filler primer and followed with thick coating of bondo spot puddy has been applied and sanded off. Coated with 3 more layers of filler primer and will let sit until Saturday then will wet sand and hopefully achieve majority of smoothness before needing to fix problem spots in the groove channel and few small areas on the edges that need some TLC. First set of finger blades have been printed and test fitted with the finger rings. They snap into place as expected and should meet the CRL requirements in length. Have started printing the second set and will begin smoothing out print lines/rough edges next week. I hollowed these out to fit a 1/8" metal rod inside to give them strength from snapping, but also printed at 100% infil at .1 layer height so these should be super strong when its all said and done. Have contacted a third person about the gloves since lack of responses from the first 2, and waiting to see if this new person will be able to start on them.