-
Announcement
Welcome to the forums!
If you are a newly-approved member, make sure you check out the New Member Checklist!
If you are a Detachment member and can't see the member-only area, post here for access.
-DV
Leaderboard
Popular Content
Showing content with the highest reputation since 05/30/2025 in all areas
-
While working on the other gauntlet, I figured I'd work on other stuff as well, including her pauldron. Including pics of it and hers for reference.3 points
-
I ended up modifying the backpack today. After rewatching of the Tales From the Underworld I could see the shape of the backpack better. I tapered it so it came in at the bottom more. I also modified the two boxes to be angular. I also added the toggle buttons (they are functional and hold the lid closed). Yes, I will be supplying the 3d files for them and how i made them. I tend to get hyper focused on stuff and choose to just work and record as i go. I figure i can do a writeup afterwards. I can go more into detail when I'm done for each part if folks are interested. I'm almost done with the build. The biggest hurdle was getting the pack to sit correctly without affecting the shoulder straps. Anyways, I need some sleep... it been a very long week hammering this kit out. Oh and a happy Father's day to all the Dads out there. Cheers Here's picture of the pack as it stands currently modified.2 points
-
Well 3rd time is the charm. I ended up using double knit neoprene on top of the sintra and scuba fabric. I didn't cut into the sintra this time. I just went and added the whole raised shape as one peice, and then gluing the final layer down to cover everything. It took around 8 layers of the purple paint before it was done. I did do two layers of wet sanding to help smooth out the surface. I also did a dry sanding to give it a weathered look along with the silver paint. It now bends when needed and doesnt crease or resist movement. Sort of creating my own custom vinyl. I now have to go back and remake the other gauntlet to match.2 points
-
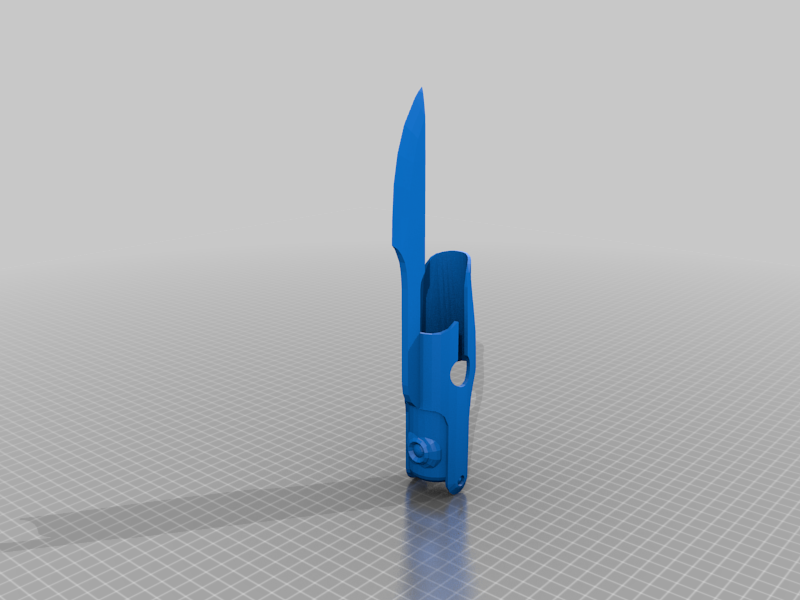
I've been working like a fiend trying to get a few things going. I have been working on the blade, sheath, blaster, holster and now the gauntlets (including sewing the arm part of the gloves to fit a bit better). I will get more photos of the blade with sheath and the blaster with it's holster when they are closer to being finished, possibly with me updating this post with the photos. For now though I wanted to try and hit another hurdle and make sure my idea would work, the gauntlets. I'm showing pictures of what I did for the pattern along with what I did to make it so the part over the hand section will be able to move some. It's not done and will be Velcro'd to the glove for a better effect when it is done. I also will be painting the surface of the gauntlets with paints. This is just what will make up the base part of the shape of the gauntlet. I'm using neoprene fabric and Sintra (the white material for those who are not familiar with it). I will also need to shape the foam around the hand area to continue the inner design shape of the gauntlet.2 points
-
I was approved by: RL in March SG in May 501st June1 point
-
Those are some really good ideas, thanks. I will look around for some tall black boots and if I can manage a relatively cheap one I will maybe attach it with glue, else I think I'll go the route you're describing. Indeed if I create the sabatons with a sole I should probably use sintra and not print it for extra durability. Maybe even add a thin rubber sole to the bottom of them. Alternatively I could forego the sole of the sabaton and have it wrap around the boots like you say. Magnets sound good either way though and probably the easiest way to make the boots modular.1 point
-
I honestly think you have pretty free reign on the boots themselves since there's not much detail on them, comfortable black boots are more than enough. Then for the metal parts, I think sintra would honestly would be the go to way for this, that was you can make it a snug fit, besides the design of it is pretty easy. If you don't want to butcher the boots with glue and damage the boots by putting the parts on and off constantly I think there's 2 ways to go about it. 1. (With a seam) once the parts are shaped cut them in 2 parts, front and back and put some magnets in the parts where they meet so they snap onto each other and then put a strap on the back part so it doesn't sag down. 2. Make the part that goes over the front of the boot a separate part, and then allow it to be attached by magnets to the part that goes around the boot, then a strap at the back around the front of the boot so it doesn't sag down as well. Here's a picture that shows both ways, left is 2, right is 1. Hope it makes sense 😆 The wrappings seem to be the same as the hand wraps and the other fabric straps on the costume, your best bet would honestly be to go to a fabric store and just look around for fabric with the same-ish texture that's tan, you can always make it darker.
 1 point
 -
I just read through the whole thread, amazing work man! I love the desert starkiller outfit and you totally nailed it 🙏1 point
-
Yes a helmet or neck fan is something I'd like to add as well! Thanks for all the support man 😁1 point
-
A lot of cooling will be your best friend, I think you'd even be able to fit a neck ventilator in your helmet, which will help a lot already. 😁 Can't wait to see progress on this costume, will be following closely!!1 point
-
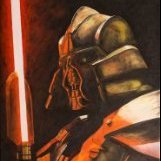
I don’t think that’d be an approvable way for the spike vest for Starkiller This Starkiller here has a pretty good way of going about the spike vest, which I think would be the go-to way of doing it too for Tulak Hord- foam and then covering it with pleather or real leather, it’s a fairly cheap way of going about it too. If you want reusability I think going for a Starkiller undersuit would be best since the visible parts are the same, but the spike vest part wouldnt be usuable for both without sacrificing accuracy for one of the costumes.1 point
-
Looking around Etsy I found a couple of Starkiller suits. This one looks like it might do the trick. Only thing is I think the flared ribbing that goes up from the waist doesn't reach as high as for Tulak Hord.
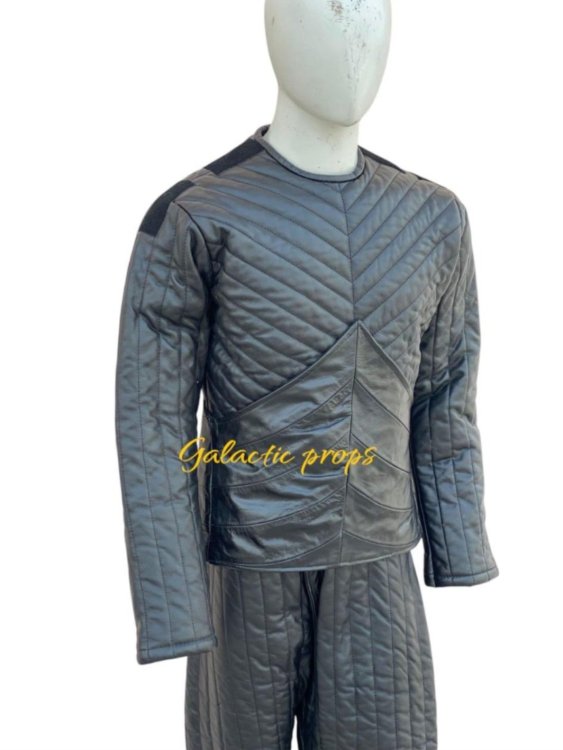 1 point
 -
Ah I did notice the similarity between the Starkiller hoth vest and the appearance of Hord's suit. Would be a lot easier to buy and use one of those if they are close enough. I definitely like the sound of using a shirt vs the entire vest. Though I might consider reusablity for a potential Starkiller costume in the future if I would be buying his vest, since it's an investment and using it for 2 costumes sounds even better to me. I'm definitely a fan of TFU games as well and I love his Hoth outfit coincidentally. Thanks for the advice! You have definitely given me plenty to think about haha.1 point
-
I made a mistake here, I took a closer and longer look at the references and I think a Vader suit would be perfect actually. I thought the torso's black pieces at the bottom were a part of the undersuit 😆 For that part- since they don't seem to be hard parts either, your best bet would honestly be doing the likes of Hoth Starkiller's vest. There's a lot of documentation around the vest that would give you some idea of how you could do it. One tip though and that'll be at the end and if you're willing to butcher the undersuit top 😄, see how much of the top is visible, and cut off the rest you don't see, then attach what you can see to a t-shirt or something instead. Since you're covered in armor, you'll be thankful you won't have to wear full leather underneath as well. 😆1 point
-
You mean that if I went with the vader or starkiller suits that the torso would be a problem? I think we need to get a consensus on what material and would be accepted for the torso before I go any further with the garments. Was planning on first building the armor anyway and go from there. You've definitely got me thinking about the 3D printing. I was pretty adamant I wanted to go the patterning and sintra route but you're right, it would be alot more work. I was looking online and the Ender 3 is pretty affordable like you said. Would have to create some space in my shed for it but I'm thinking about it now. 🤣 Thanks for the tips about the saber as well! Looks like I have multiple options, I will see in the future what is possible with the print file. Will probably be one of the last things I do for the costume however so it's a way off.1 point
-
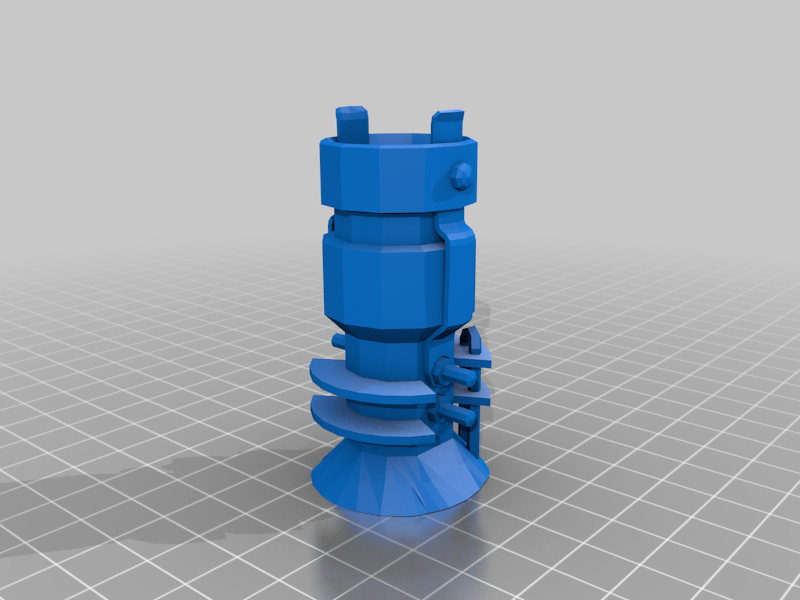
The saber, depends how you wanna do it. If you have enough space in the handle to fit a core, you could probably put a neopixel blade on - if the emitter part is strong enough as well. If it isn't, you could probably just get a coloured base lit blade, and put some magnets- on both the blade and in the emitter so it can click in. Or you can glue it in 😁 The undersuit is definitely a lot like Vader and Starkiller, but the torso will be a problem if you do go with said undersuit. Custom would be the way to go, but that'll certainly be the investment. For the hard parts, I think you'll have better luck with 3d printing, since they all look separated you could honestly cut and fit them all on an Ender 3, you can get these for really cheap on Facebook marketplace or even new. It's an investment but you'll be really happy you got one. Sintra is obviously also really good, but printing will save you A LOT of time. If getting a printer isn't an option, you can reach out to your local garrison, or even myself, they'd I think be happy to help you print some stuff out 😁 Definitely following this thread!!1 point
-
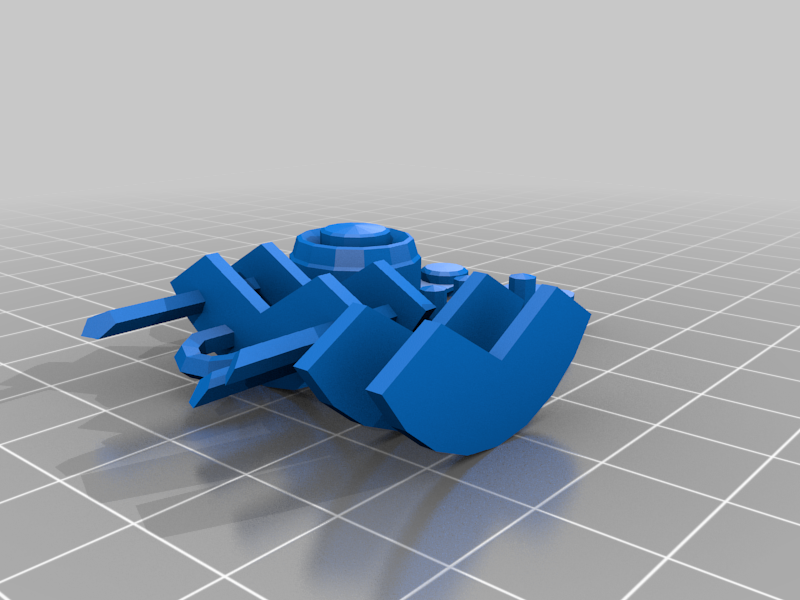
Lightsaber For the saber I have looked all over the internet, unfortunately it is not for sale as-is anywhere. I will have to go the 3D printing route for it since I have no idea on lightsaber construction. Luckily, I have found Hord's lightsaber modeled on Thingiverse. Accuracy looks good to me when comparing to the reference images. Just wondering if I can add a blade into this?
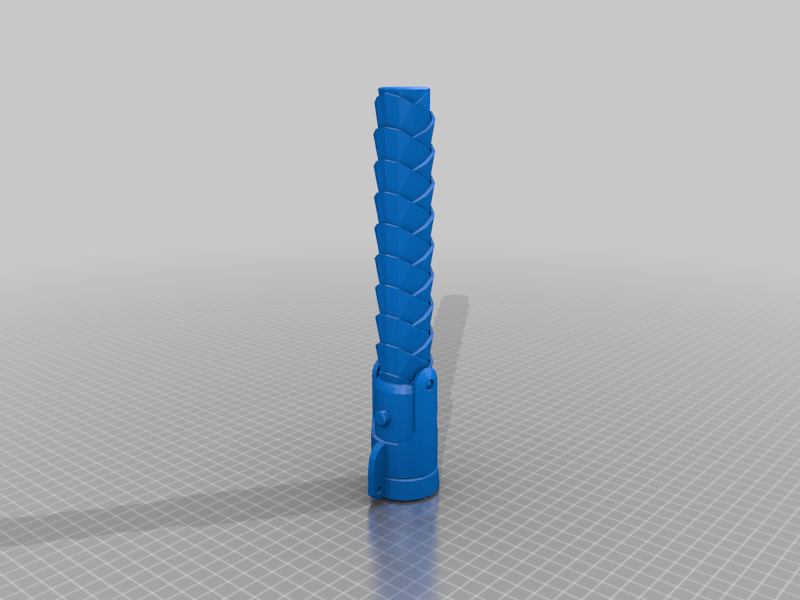
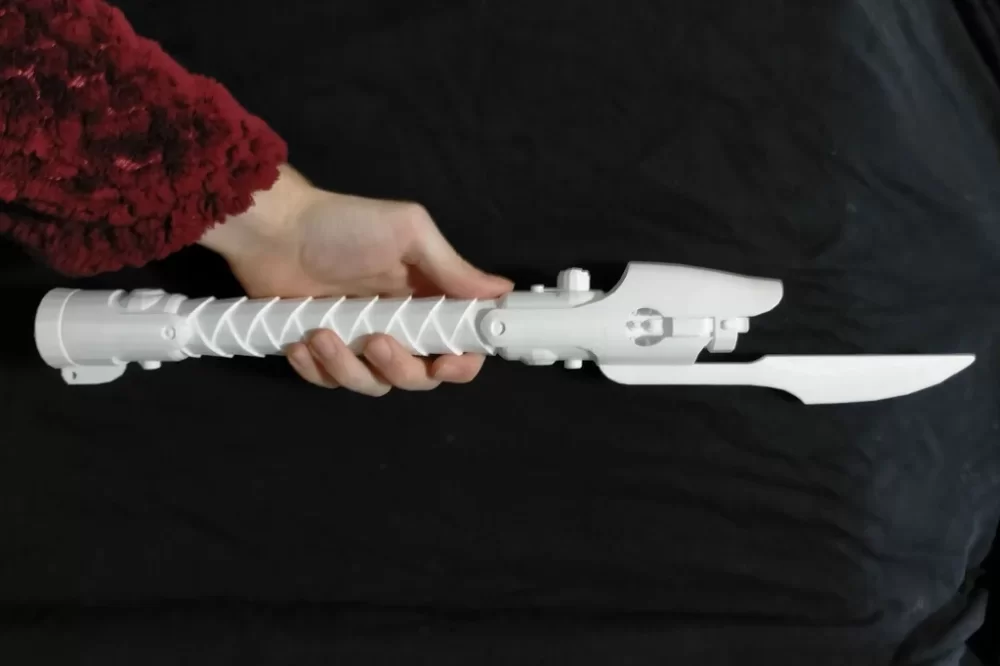
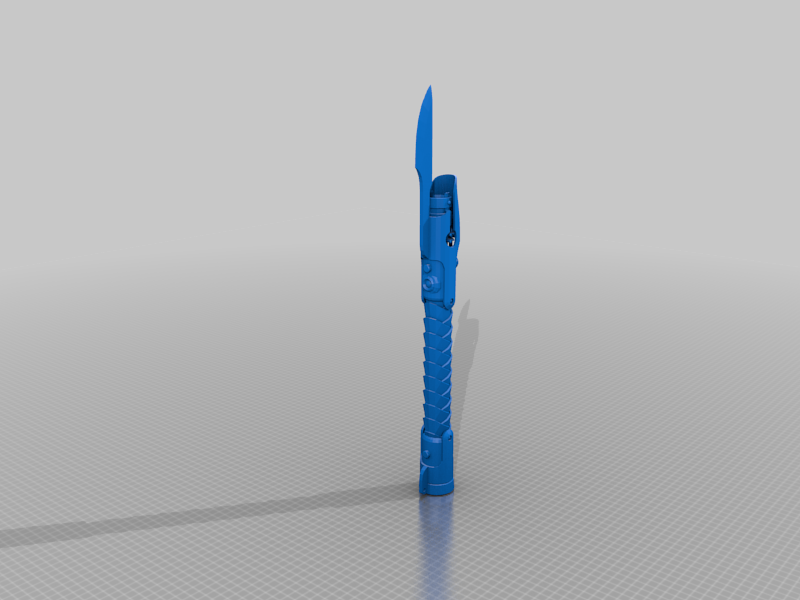
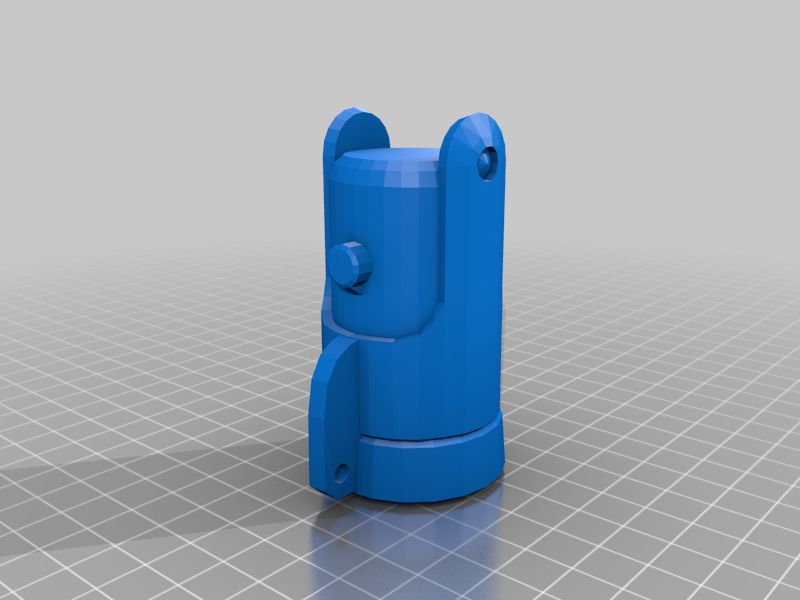
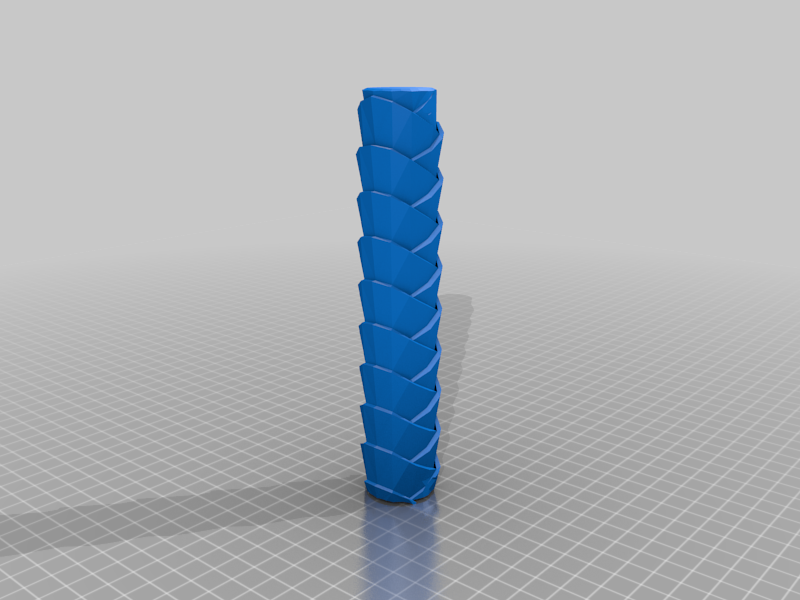
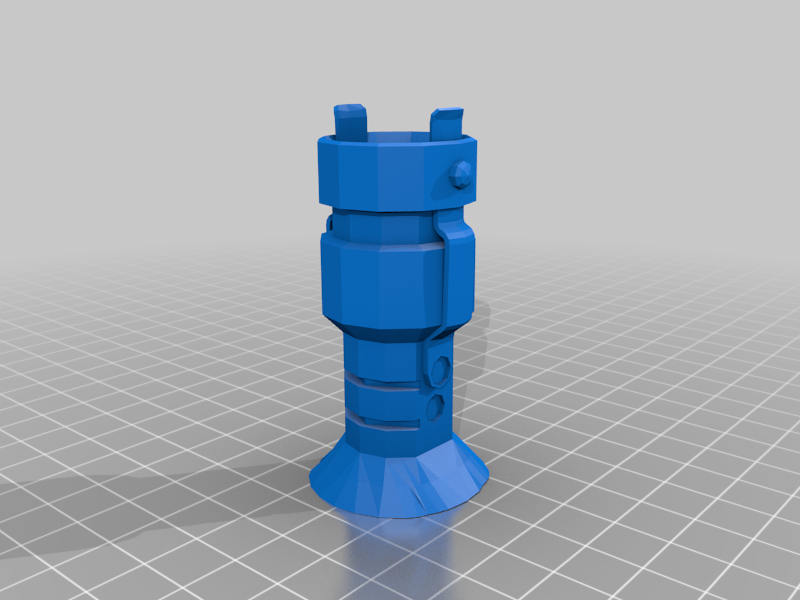
 1 point
 -
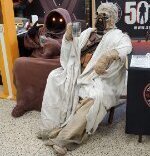
Soooooo, figured I'd give it a go with trying to make the outfit for Ventress from the Bad Batch episode. I wanted to do some research first and try out a few things before moving forward with this on here (FE forum) as a thread. I'm going to post things that I have already played around with, along with moving forward for stuff I will be doing in future. A thank you to folks who have posted pictures on the Facebook group. It has helped immensely and I will be including some of them in this build. Please keep in mind I am having a hard time with getting my phone to take pictures of the colors so I did invest in two Pantone booklets Pantone GP1601B 2022 Edition Coated and Uncoated Guide. I have been making notes of the colors of the fabric to compare to what I have seen on the different screen from the show. I will be pointing them out in the photos so people can check the colors and whatnot. I'm currently working on the prints for the tunic and the two outer collars and short sleeves. I worked on the patterns in a program called Creative Space that is used with the xTool Laser machines. They have a silk screen printing machine which "sort of" works with what I am trying to accomplish. The fabric for the tunic and the outer collars I am choosing to use Scuba knit fabric. Partly due to it laying down smoothly on a human body, two it has stretch, which shows up on the upper sleeves of the lighter fabric (see following image of upper arm) and it's in tribute to the fact that this episode deals with water and an island (this particular part will continue with some other parts of my build that I will share when I get to them). So, I guess I'll start with the pattern for the collars and short sleeves. I looked online and in some of my books to see if I could find a woven pattern that could be bought or even hand woven on a loom (I have a loom). But there is no actual weave for this pattern. There is something close, but it was definitely different. And physically it wouldn't present itself well for a fabric as it would be too loose of a weave and not look like what is in the cartoon. But this is just my personal judgement call. I have decided to go ahead and make a print of the pattern and silk screen it onto the fabric. My first attempt I felt was too uniform and didn't have the same feel as the cartoon. So I went back and reworked the edges of the lines and reshaped as well as resized the pattern. I worked on the counting of the height of the repeat of the print to the collars and to the cartoons neck and my real neck. I sized the print accordingly to "hopefully" work for myself. I'm still working on alignment for repeating the pattern on fabric, but I have pictures to show what I have so far. When I am done with printing it, I will be going back over the fabric with another layer of transparent paint with more of a light coffee stain color to match the color in the show. There are areas around the seams and edges of the collar where the material is lighter, closer to ivory. I am working with the ivory colored fabric to see if I can keep some of that coloring in and around the collars edges. For now I am just working on the printed part. I have been hand mixing my colors. I am using a mixture of Speedball water based inks. After making the changes to make the pattern feel more organic The following section deals with the blue printed fabric on her tunic. Boy this is an oddball fabric but I think I have it pretty much figured out. Though I do have questions about pattern repeats, but I will continue with that at the end of this post. The main part of the issue is finding a way to have the pattern show up in light but not as much in darker shadowy areas. After studying different images of her outfit in the light and dark (and even when it is wet and in the light) I came to the conclusion that the print itself is a semi gloss coating on the surface of the fabric. BUT, when you put a coating of say acrylic clear coat it turns darker when printed on. I also noted that even with the "clear" print on top some areas of the fabric had a "painterly" feel to it. I ended up getting a teal colored scuba fabric and then painted it in long strokes with a sponge and a translucent paint mixture (of transparent, white, blue and a dash of yellow) that soaked up mostly into the fabric, giving it a ghostly painterly look as the base and making the color a bit lighter than the original fabric which I found to be too intense for the base color. I also decided to try out a oil based paint for the clear coat on top of the fabric. This seems to do the trick on a synthetic material (natural cotton did seem to absorb some of the ink and make it darker). As with the collar and sleeve pattern I had made an initial pattern but felt it to be too angular and modified it to look more organic with slight curves and I also resized the pattern to match the size of myself. Being a bit larger than Ventress I opted to go with a few rows more in the sizing to keep in ratio with what is in the cartoon. So far I have some of the fabric painted with the translucent white mixture along with trying to print a repeat pattern on the fabric with the oil based transparent paint. I'm having a bit of an issue with getting the pattern exactly aligned up. Which is where I am at the moment. My question so far is how close does the pattern have to match? I have pictures included for folks to look at. I might be able to stabilize some of the printed pattern and wash out part of the other sections and try again when the fabric is dry. But if I don't have to do it, I'd rather not as it is already a massive undertaking. showing the best copy of the neoprene fabric that I have (on the right). The fabric on the left is a stretch cotton wool blend that didn't work out in my testing. But I have found that between the paint and the clear coat it lightens up and has an overall feel/look of the fabric on the left. You can see the brush strokes of lighter colored paint on the fabric. printed clear coat on top of fabric so far. How it interacts with light and shadow. Highlights on left are from inside light and outside light on the right. in slight motion (blurred like in many screen shots from her movement) same angle but not in motion and shows how it blends into the fabric when in neutral lighting. Couple of reference shots I'll leave it here for now and hope to get feed back sooner than later.1 point
-
Amazing work and I admire the attention to detail. Definitely will look for more details once you are done. Much appreciated!1 point
-
I just removed the information from this post. I had used leather as an alternative because the fabric in the last post wasnt holding up to the wrar and tear of sanding. Don't use leather if you want the wrist to move. It just lost all elasticity when finished. My next post will discuss another way of doing the above, but slightly different and with a more rugged material, but has stayed flexible.1 point
-
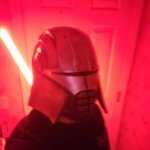
Hey so I was looking for a full head Revan helmet because I'm not a fan of the typical half mask people usually sell and wanted to get y'all's opinion on if you think this helmet would be accepted. I know people tend to say avoid Etsy but I haven't found any full ones from the typical sellers and the mask from Walt's trooper factory isn't even accurate according to here. https://www.etsy.com/listing/875936525/darth-sith-knighs-mask-helmet-complete1 point
-
So I've gotten some stuff done. I decided to try on what I have so far. I'm working on finishing the boots. Just got the backpack pinned to the shoulder straps and x straps along the back. I'm going to be adding some Sintra or thin metal to help the shoulder straps keep their shape and prevent the sagging in the back. Pouches are almost completely done. I had to blue tape the small additional pouches on the backpack, but they kept falling off. I'm happy with how they look so I plan on gluing them down. I also started on the belt. I have to make the second layer and fix up the side where her light saber hangs. and I also have to make a mount for the lightsaber. I also started working on the bracers. Played around with a concept which seems to have worked so I am moving forward with it. When I'm further along with them I'll post pictures. Once I have the boots finished, the backpack and straps finished, and the belt finished, I'll start modeling the blaster and the knife. Then make the holster and sheath. Either way, please excuse the untidiness of everything and that my husband took a few weird photos. Oh and pinning through multiple layers of leather and neoprene sucks. And pliers are important!!1 point
-
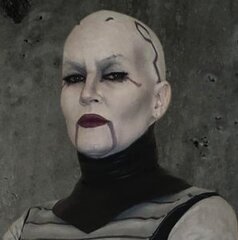
Posting a few pictures of how it's going. I'm almost done with the main tunic. I'm working on finalizing the shape for the black vest. Also, I tossed in a beginning of a boot to show the direction I'm going with it. I'll be using a zipper and hook and eye closure for the back of the collar. I'm also planning on raising the inner black collar about 1/4". Leggings are pretty much done. I have to hem the bottoms, but I won't do that part until I have the boots on the go. I'm very happy with it so far. I have black gloves. I'm still thinking which is the best way to make the gauntlets (I have a few ideas in mind and have a couple of different kinds of materials to play with). I'm pretty excited about how this is turning out.1 point
-
Looks absolutely gorgeous!1 point
-
That shoulder armor and backbox look amazing!1 point
-
Love these boots!1 point