-
Announcement
Welcome to the forums!
If you are a newly-approved member, make sure you check out the New Member Checklist!
If you are a Detachment member and can't see the member-only area, post here for access.
-DV


DomCDA
-
Posts
9 -
Joined
-
Last visited
DomCDA's Achievements
1
Reputation
-
Thanks for explaining this in detail. Yes I was referring to the VK3 design as that's the only set of files I've found that had all the 3d files in one package.
- 8 replies
-
- 1
-

-
- question
- leatherworking
- (and 2 more)
-
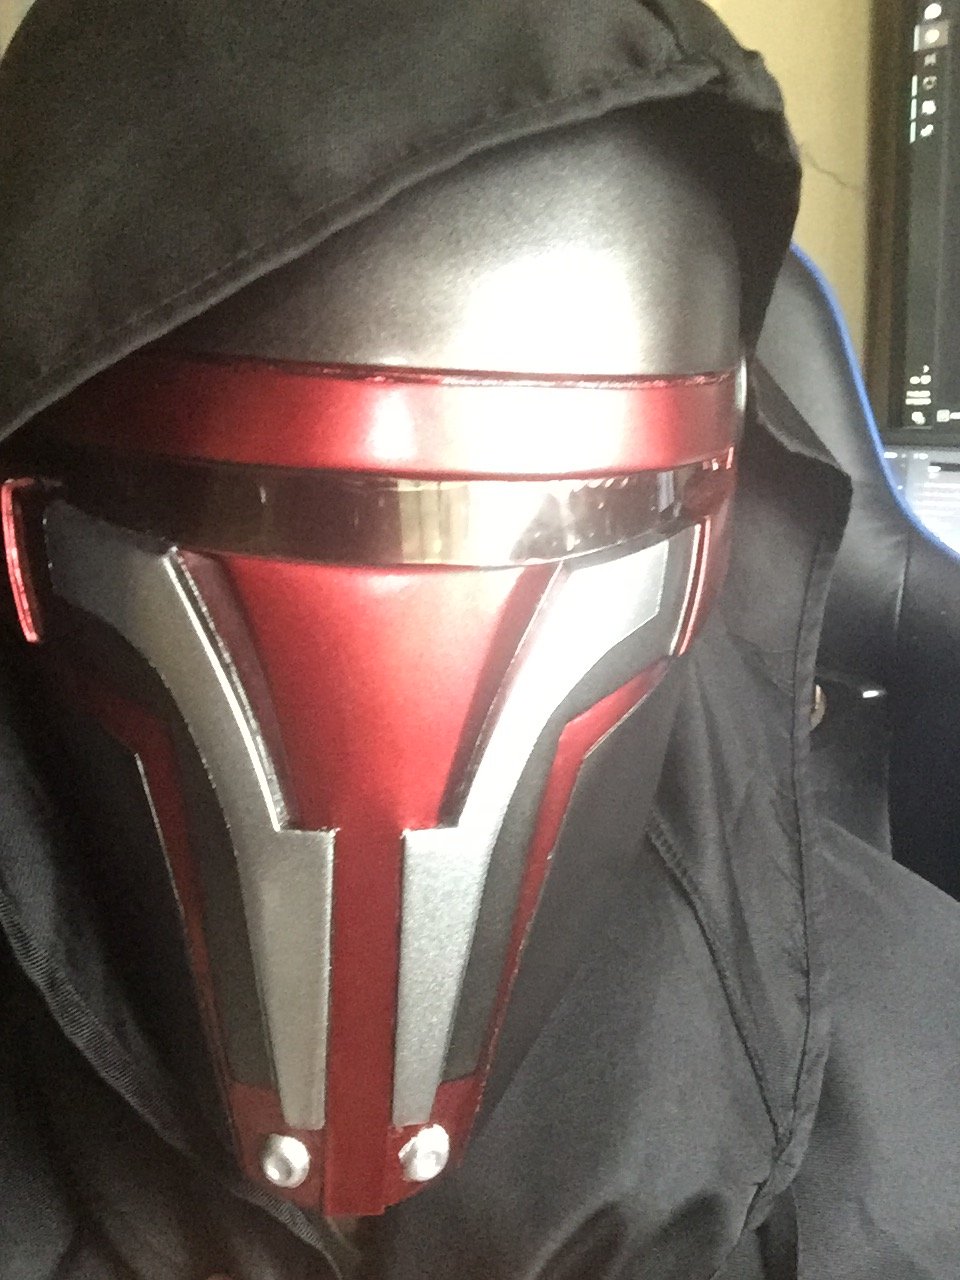
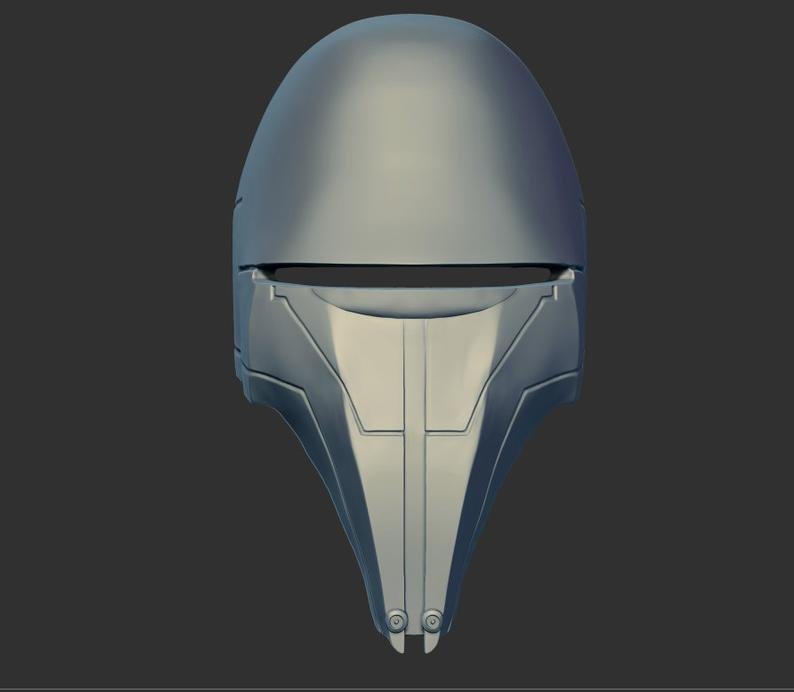
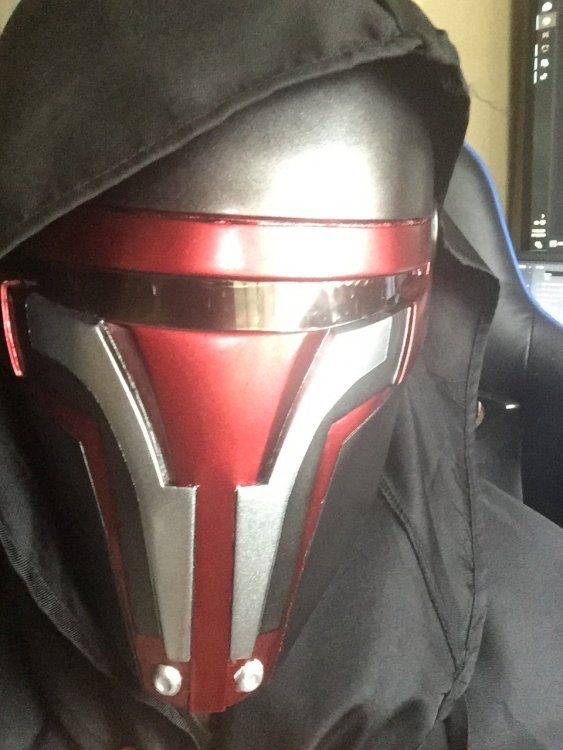
Besides the "silver"(I hate paint colors, this is supposed to be a dark grey apparently.) and the vagueness of a "rust red color" in the costume specs what about the color scheme is incorrect? I could not find any specifics as to the proper colors and had to eyeball it via home depot. Is it that I used metallic instead of a flat color? I know the red isn't exact as I went with a prettier red than a rust red. Honestly though its looking like I'll have an easier time just 3d printing an already approved version. I'll likely just wear this one for non 501st events. As for the center strip its very faint on the model before painting but its there. The distinction disappeared on mine after lots of bondo and paint. Probably could edit the 3d file and make it more pronounced. Heres a link to the original file: https://www.thingiverse.com/thing:3202178 Also, this is the mask version that came with the 3d files I purchased from the VK3Design on Etsy. I assume this ones good out of the gate? Minus paint of course...
-
Just wanted to chime in here and mention that the option always exists to have a local 3d print shop 3d print the plastic parts for you if your so inclined to finish them yourself afterwards ( Since you mentioned lack of space). You'd just need the .stl 3d files first. A 501st approved set exists on etsy for $70. You'd also have to make sure the post-processing is done well so the print lines don't show through the paint.
-
Well they're still kinda there just not protruding out the bottom. They're moved up instead. I didn't see any information as to whether or not this mask/helmet variant would pass the certification but I like the design far too much to care really. I have the 3d file for an approved mask version so I could default to that worst case. Definitely worth passing the info along to the original artist. I might be inclined to change it myself soon after I learn 3d modelling a little better. Anything else come to mind that could possibly disqualify it?
-
Im actually really glad OP had this issue with the capelet. You helped me figure out how to make it inadvertently! Yaay! Beautiful costume Btw. Looks great!
-
Its definitely a closed helmet. I found this .stl version on thingiverse. Its a full helmeted version of a fan-made Hasbro action figure. Model was combined by jace1969. Both parts were made by others. Here is the link: https://www.thingiverse.com/thing:3202178
-
So far only the helmet is complete.
-
Hello!! I am currently in the process of completing my first costume as Darth Revan. I've got the solid parts handled as I have a 3d printer, and the proper materials to ensure a quality post-process. What I'm terrible at is the fabric! Ive got all the necessary tools and materials, but am having extreme difficulty with what is apparently normally a simple ordeal. Creating Revans single-piece hood. I have tried modifying the closest template I could find from joannes, but its all wrong. Would anyone here have a simple picture of the sewing pattern they would be so kind as to share? That alone would save me dozens of hours of trial and error. Reference photos are nice, but don't really help all that much when cutting a fabric pattern for the first time.
-
Looks fantastic! I hope mine turns out as good as yours did! Thanks for posting your build.