
-
Announcement
Welcome to the forums!
If you are a newly-approved member, make sure you check out the New Member Checklist!
If you are a Detachment member and can't see the member-only area, post here for access.
-DV

aricajade
-
Posts
13 -
Joined
-
Last visited
-
Days Won
1
aricajade's Achievements
1
Reputation
-
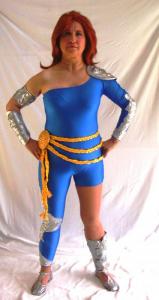
Wow. skilled work here.
-
501st/SLD and/or TFE Detachment Access Requests
aricajade replied to DarthBrute's topic in Welcome Area and Forum Help
Black Nebula costume link is. https://www.501st.com/members/displaymember.php?userID=6196&costumeID=233 Arica body suit link is.. https://www.501st.com/members/displaymember.php?userID=6196&costumeID=67 I hope this is the correct information needed to continue being a proud member of the detachment. If not, please offer help .. thanks, Terry XO Edit: You already have Detachment Members Status, That is the highest it goes, unless you are part of the Detachment Staff. -
501st/SLD and/or TFE Detachment Access Requests
aricajade replied to DarthBrute's topic in Welcome Area and Forum Help
I believe I did thisbefore but am confused asto specifically what to put here. I have Arica blue suit, Mara Jade Black Nebula I will see If I can find where those are on the legion board. https://www.501st.com/forum/memberlist.php?mode=viewprofile&u=1912 -
There were two different boleros shown in the graphic novel as well as two different versions of the hats. Perhaps this is due to the artist lack of consistency but the differences exist in two different missions she was on so perhaps it was intended. I used velcro to hold the front of the vest together since there does not appear to be a zipper. I permanemty attached the bolero to the leather to prevent it from slipping around on troops.
-
501st/SLD and/or TFE Detachment Access Requests
aricajade replied to DarthBrute's topic in Welcome Area and Forum Help
I would like to become a member of this detachment. Here is the link to my 501st costumes http://www.501st.com/members/displaymemberdetails.php?userID=6196 . Thanks for the work on this .. -
your wip is amazing and thanks so much. A friend is going to make one of these and this helps so much. Congrats on your work here.
-
I have been asked to offer some tips on constructing the Admiral Daala Flight suit .If you are interested in doing this I hope these are of help. If I failed to answer any questions feel free to pm me or e-mail me. Terry Fabric: an olive green stretch gabbardine, 3.5 yards for a size ten, 6 yards of olive green seem binding or ribbon, .125 yds of blue, yellow, white and red duck fabric or other stiff fabric to make the insignias, .25 yd of very stiff facing for epaulets and collar, two olive green dog collars, one piece of .5 inch wooden dowel, brass brads and strips, brass paint. The suit: I used a very old Simplicity pattern for a one piece jumpsuit. That gave me the basics. I modified the top sections in the front to give the overlap effect in her flight suit. Th suit does not have separate top and bottom. So there is no attachment at the waist as it is all one piece. I narrowed the legs because they were originally bell bottoms so that tells you how old the pattern was The top right extends up to the left shoulder underneath and is held with velcro strip. Double stitching along the facing gives the finishing to the edge of the left front as it is on the outside and down the front. the neckline is high so that the collar can overlap it. A zipper at an angle recessed about one inch holds the front as well as hidden snaps. ( 1/2inch). The zipper extends to just below hip line. You would have to determine how long your zipper is depending on your torso length. Sew the ribbon in all the areas as seen in the original. Here is the basic suit:; Picture is blurry but the only one I have. the epaulets: ~ six inches long and two inches wide depending on your shoulders. Sew the side and one end then turn right side out. cut a piece of the stiff facing and stuff it into the epaulet and stitch closed the end with a sealed seam. Collar: Use any 'stand up collar' pattern. Use the stiff facing to hold it upright. Finish edges with the ribbon. Use snaps to hold it to the neck in front and one in middle back if needed. I did not sew it to the neckline top because of the opening size needed to step into the jumpsuit so make sure you finish what would the open edge to give it neatness. Belt. I bought two unfinished belts that were about 38 inches. Size is variable for individual. I cut one to just about and inch bigger than waist and the other so it fell down to the hip bone. Brass brads and strips are placed to match the original belt. Brass snaps hold the two belts together and where they join. If you need further description or image just let me know and I will take a picture and post it. Side pockets: buckles and trim. The pocket was made as seen in the original and the dog collars and the wooden dowel are used for the trim of the pocket. The insignias: use the heavy duck fabric to form the needed shapes. Sew tight zigzag stitching to give it that look of a patch. I will add some close up pictures to this. I see as I read through it that some other images might help. Terry