-
Announcement
Welcome to the forums!
If you are a newly-approved member, make sure you check out the New Member Checklist!
If you are a Detachment member and can't see the member-only area, post here for access.
-DV


Mike M.
-
Posts
50 -
Joined
-
Last visited
Content Type
Profiles
Forums
Gallery
Events
Everything posted by Mike M.
-
I'll bump this as well, to help it gain some traction. the changes in requirements to the mask are keeping one of my friends from reactivating with his nihilus costume. also, a sculpted mask covering the lower half of the face looks really out of character.
-
i used hot glue to "press" the seams. the first seam was a mess, but it looked fine on the outside, the subsequent seams got much nicer.
-
final update: yesterday, 12/14/15 Alex was approved as Visas Marr and got her numbers! SL-75241
-
update 11/16/15 this costume is finished! after about three years it's finally done. Alex is very excited about it, and will be trooping her first event tonight for the Battlefront release party at GameStop. but enough with the jibber-jabber, here's some pictures. i'll post a few more from the troop of her in make-up later tonight or tomorrow.
-
it's been two months since my last update, i moved to a new house so that delayed getting this costume done, but i've got a new shop set up so here goes. I've got a hat! i remember the muslin version of this going together much easier than the final version. the color looks a little off because of the lighting in the sewing room, and it'll look better on a full size persons head, these styrofoam dummy heads are really weird undersized.. i wish i had taken wip photos as i assembled this, but i'm terrible at that once i get in the zone. there are pennies sewn in around the edge to hold it down rather than using curtain weights, because 60 cents and a little time to take a strip of muslin and turn it into a bunch of little pockets, i'm pretty sure i came out ahead. other updates: i've painted the stripes on the gloves, and dyed the sash a bit. all that's left is to paint the gold, and i think that will be happening tomorrow.
-
i took these photos a few days ago, i just hadn't updated the thread yet. first up, we have a hem! i realized that i hadn't posted a photo of the back of the dress yet, so here's the zipper closure. i added a hook and eye at the top of the zip just to give it a bit more support. yesterday i managed to meet with the girl to do a test fit of everything we have so far. i was very happy with how well the outer dress fit. show me your war face!!! things left to do: 1 - paint silver stripes on the gloves 2 - dye the sash with some blue to tone down the red 3 - figure out the veil (i have a mock up done, but i'm not entirely pleased with it yet will post pics of that soon) 4 - paint the gold parts
-
since the panel pieces were the right size i went ahead with cutting them out of the vinyl, and got the pinwheels painted on. fortunately for me, i didn't have to cut out the stencil for the pinwheels, i handed that off to alex and she got it all taken care of in an afternoon of pain meds after she got her wisdom teeth pulled. if you notice in the upper right corner there are the gloves we'll be using. they're the ebay patent leather kind, i'll need to spray them with the black i used to tone down the pinwheels, before i add the silver stripes. before sewing the outer dress together i decided that i'd like something to reinforce the seams a bit so the thread wasn't pulling on just the vinyl. i happened to have a yard of 60" black canvas, so i cut 1" strips from the width of the canvas and pinned that to the 'wrong' side before sewing the panels together. unfortunately i didn't take any photos of the construction of the belt, but it is an engineering marvel. there's an adjustable 1.5" webbing strap hidden inside with side release buckles that slides into the sash and a snap to hold the draping bit in place. i'm pretty happy with it. the seams are all hotglued down, if you turned the dress inside out it's real easy to tell the first seam i did because it's a hotglue-y mess. they got much nicer as i progressed. i still need to hem the outer dress though, i'm wondering if it's ok to stitch the hem or if i should hotglue it. any advice on that would be very appreciated. with flash no flash i didn't feel like setting up the photography lights, so the colors look a little wonky, especially in the no flash photo. the only thing left i have to do is make the veil, pam's tutorial has been a big help for this build so far, but i really could use more of a step-by-step instruction with that. my plan is to make a skull cap and attach the veil and drape onto it, it's been a lot of trial and error so far, mostly errors. if anyone could lend some advice (with pictures) that would help so much. as with any of my other projects, any feedback is welcome. thanks!
-
and there the costume languished for a long time. katie gave me some suggestions though, and i picked up the mccalls 3129 pattern and eventually got to work on creating a new outer dress. there was a bit of modifying the pattern needed, i reworked the neckline probably three times, and i had to draft the collar myself. the first neckline was already modified from the pattern as i cut it out. and i just kept adding to it until i was happy. oops, the sleeves are on the wrong way! through trial and error i discovered how to assemble the sleeves, then which direction they should go on, and that there was a definite right and left. there collar is still too tall, but that was on the list of things to adjust as well. i got that figured out and we had a test fitting. it was a little tight, but nothing that couldn't be fixed by adjusting the seam allowances.
-
about two years ago i began working on a Visas Marr costume for a friend of mine, it really shouldn't have taken this long to make but there were... complications, along the way. she moved from bozeman to denver and back, i moved as well, and will be moving again soon. since i don't really want to have to haul this project with me again in another move, and episode 7 just around the corner, it's time to get this thing done! now come with me on a journey through the history of this build. i started off with the inner robe, it seemed like the logical starting point for the entire costume. i drafted the pattern for this dress myself based on a t-shirt that alex gave me. here it is in the muslin, i typically only attach one sleeve when working with muslin, because i don't need two patterns for the same piece. next i took a trip to joann's to find fabric for the inner dress, and found these. here we go now with some progress, inner dress done. i designed it with ties up the back for closure since this part of the dress won't even be seen. my first attempt at the outer dress. i drafted my own patterns for this based on pictures of the panels that pam cut out and sized them to the inner dress. i used a satin flat sheet that was never going to find its way onto a bed because i was out of muslin at the time.
-
that's one of scott's masks, right?
-
i picked them up on ebay from seller: glovecityleather518 i had to search through the feedback i left for others to find the name, i couldn't remember it. they've got some black gauntlet gloves up for sale right now that look pretty good.
-
i make them with no face seams!
-
If I have enough black stretch material I can make one up for you. I would need you to measure around your head at the eyebrows, if you could get someone to help it'll make getting a height measurement easier from the shoulder to the top of your head.
-
I used between 17-18 yards of raw silk when I made my friends nihilus costume, but he's 6'5". Even though you're not that tall it still takes a lot of fabric to make this costume, so I suggest you buy an extra yard or two more than you think you'll need. If you need the mask and crown you should pm woodman.
-
you do have the cobra hood affect going on. what i figured out was when putting the cape/hood on you should wrap it around you then adjust the cape coming off the hood over your shoulder first, then adjust the other cape. it'll frame your face much better.
-
a friend of mine has asked me to sew palpatine robes for him, i was thinking if there was any waffle weave left over after making that i'd use that and the left over raw silk to make her a little mini-sith costume.
-
in case anyone was wondering, my friend was approved with very little issue. here's the picture we took for his legion profile: and here's another shot with my step-daughter. she saw trevor getting into his costume so she decided she wanted to play too. so she got dressed up and came out to the garage while we were taking pictures of nihilus. she thought since trevors face was completely covered she had to do the same too with the hood of her little bath robe, then she followed him around for about an hour making the cutest evil laugh.
-
what fabric are you using? it looks very heavy and stiff.
-
i don't have the bib attached to the mask, it's on a collar that the mask goes over. this is a shot of me wearing my friends hood to demonstrate that it was just a matter of putting it on the right way. what i did to take care of the "cobra effect" was to basically wrap both layers of the cape around me, then adjust the outer cape on my shoulders first, then adjust the inner cape. it give the straight drop and flow over the shoulder look that all the lmo's are looking for.
-
Something you might want to consider is making sure your neck stays completely covered. For my friends nihilus I made him a collar with a bib attached. The collar is hidden under the blackout mask and the bib covers up any area if the tunics shift. I made it out of leftover fabric from the robes and it blends together quite well. Just measure your neck, add four inches to that measurement, then cut a rectangle that length by six inches wide, fold it over, sew the ends together, cut another rectangle flap that's about a foot long and about eight inches wide for the bib. Sew the bib into the open side of the collar then finish sewing that seam all the way. Then sew about two inches of Velcro onto the ends of the collar for the closure. Just remember to put the collar/bib on second when getting into costume, right after putting on the inner skirt and before the inner tunic. The other thing I would suggest is the one thing my friends nihilus got held up for, and that is the hood. Make sure the fabric stays close to your head and that it doesn't flare out to your shoulders. That's as simple as adjusting the capes while you're getting into costume.
-
well then, since katie, pam, and scott are all in agreement i will go about commencing with their suggestions. i've already painted the belt studs black (though i did really like them in the antique brass), i'll find a big ol' sharpie to take to the edges of the belt, and i know i've got a small wire brush somewhere, i'll attack the hems and tears with that a bit to shred the fabric a bit more.
-
i can take the studs off and put them on a thin piece of wood or cardboard and spraypaint them. though for the edges, they're more gray than black, would it be ok if i just took a super sharpie to the edge to make it a matte black that would hide in with the fabric a bit better?
-
so close to the finish line now, here's the costume all put together just about ready to submit but i'd like to get some more eyes on this before i do. i spoke with katie about it earlier and she mentioned i still need to do something with the edges of the belt. i'd like pam and scotts opinion on this because i did follow his tutorial very closely when working on it, also it's scott's mask and crown. but i would like to get other opinions as well. and a couple for funsies
-
like i said, i was just modeling the costume. the guy that it's for is about 5-6" taller than me.
-
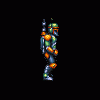
i'm almost finished with this costume as far as i can tell. here's the breakdown so far: all the robes are made from raw silk as suggested on scotts website. the sleeves are made from polyester gabardine i had left over from an officer uniform, i used blanket batting in the sleeves to create the quilting effect. the quilting only comes down to the just below the elbow so it doesn't bunch up as much under the glove. the tunics were based on the same pattern i've used to make officer uniforms with a lot of modification. the gloves are leather, i picked them up on the 'bay. finally, i made the "black-out" mask myself from bathing suit lining. please remember even though i'm wearing the costume in the pics this costume is for a guy a lot bigger than me. things i know i have left to do: - mask, crown, and cape. the mask is painted but needs to be attached to the crown, and the cape needs to be attached as well. - weathering out the yin yang. - belt and obi. the belt i'm wearing in the pics is from my officer uniform. i'm not going to assemble the final belt until the guy gets back down here so i can fit it to him. same goes with the obi, it's really long right now; so i'll cut it down to size and attach the closure then. - add a dickie to the "black-out" mask so cover up any possible exposed skin around the neck. is there anything else that i've missed? should i add a cap shoulder to the outer tunic? should i make "black-out" masks for other people, i know that it's a difficult part to find.