
-
Announcement
Welcome to the forums!
If you are a newly-approved member, make sure you check out the New Member Checklist!
If you are a Detachment member and can't see the member-only area, post here for access.
-DV

DarthValkyria
-
Posts
2,557 -
Joined
-
Last visited
-
Days Won
342
Content Type
Profiles
Forums
Gallery
Events
Posts posted by DarthValkyria
-
-
A little late on the response, but congrats! It looks fantastic.
-
Ha ha ha ha, this is awesome.
-
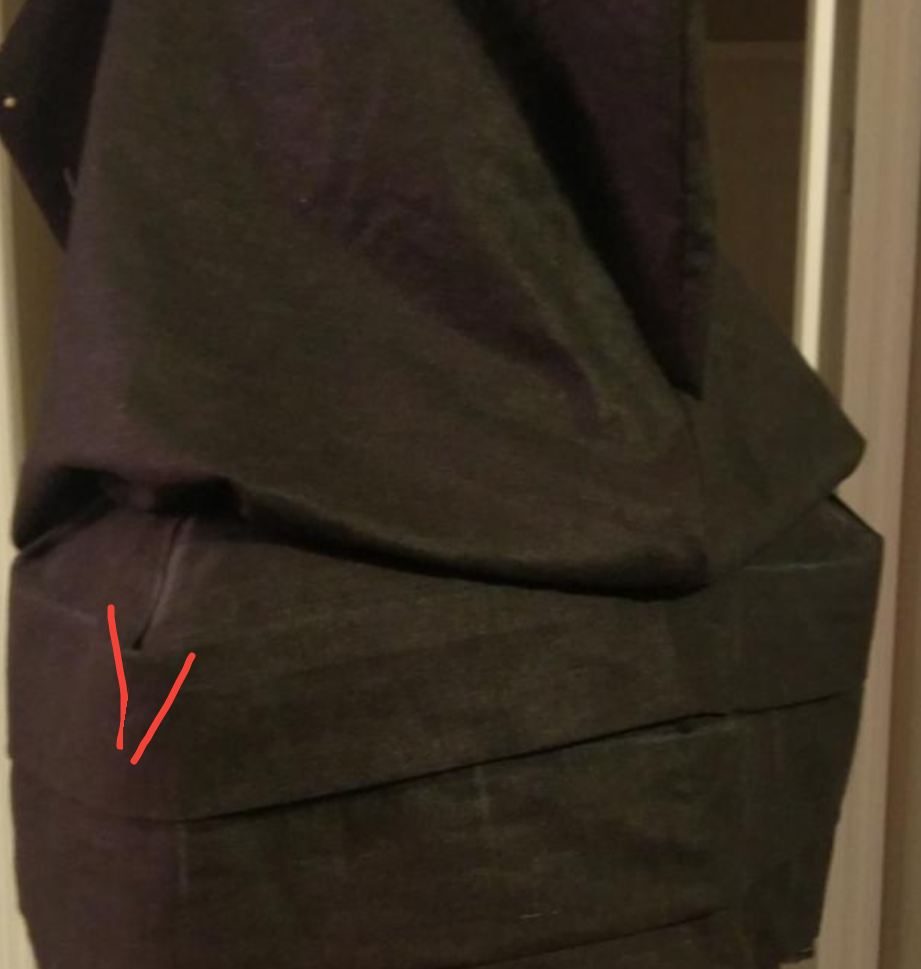
The pleats are a very MyWickedArmor trait and are not necessary to the hood, just for clarification. You can see more references I posted here: http://www.theflagshipeclipse.com/forums/index.php?/topic/2105-additional-darth-revan-reference-photos/
-
I loves me some Lethan Twi'leks! On the topic of the original post, if you can find a 360 degree OFFICIAL set of references (sketches or designs from the creators of the character, concept designs, figures, busts, statues, comics, etc) then there shouldn't be much issue with approval so long as the character falls under the concept of what TFE fits for dark side users, Legend denizens of the antagonistic influence, etc.
-
 1
1
-
-
I'm planning on getting a sub thread made for this after the 1st to keep everything organized, but nothing yet as of now. I was even looking into the possibility of getting a patch makde to be distributed at Celebration and such, but that will depend on time frame for the patch company and designing. Maybe at least a decal.
-
That's been my issue is that stupid ribbed fabric. It's the only part I am missing to finish my soft parts and I'm trying to avoid making it from scratch >.<
-
This is looking great!
-
1
-
-
It looks like it forms a lot better now!
-
1
-
-
Excite! I really want to do a total KOTOR shoot one of these years with all the characters we can get in one place.
-
1
-
-
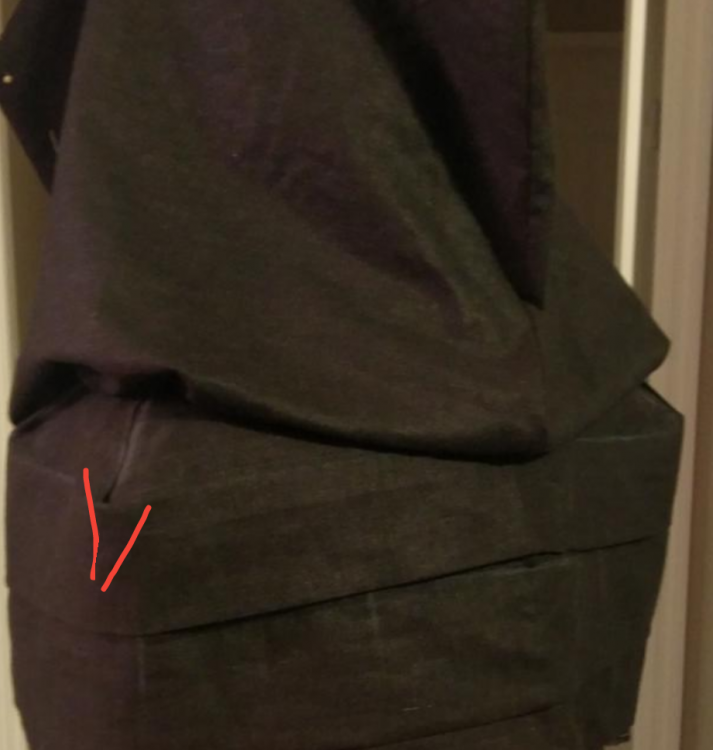
Possibly taking out a triangular section on the upper pleat could reduce the squareness.
-
Also, triangles on her knees.
-
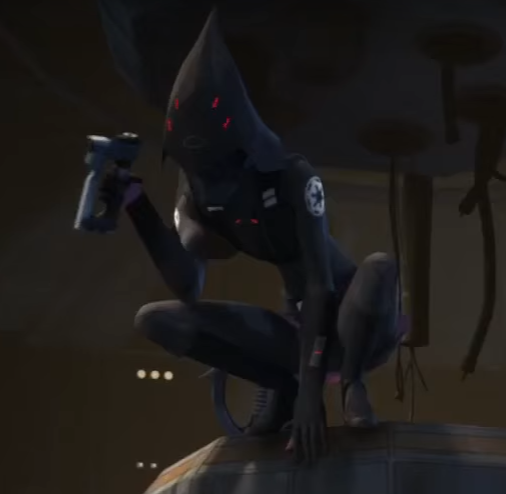
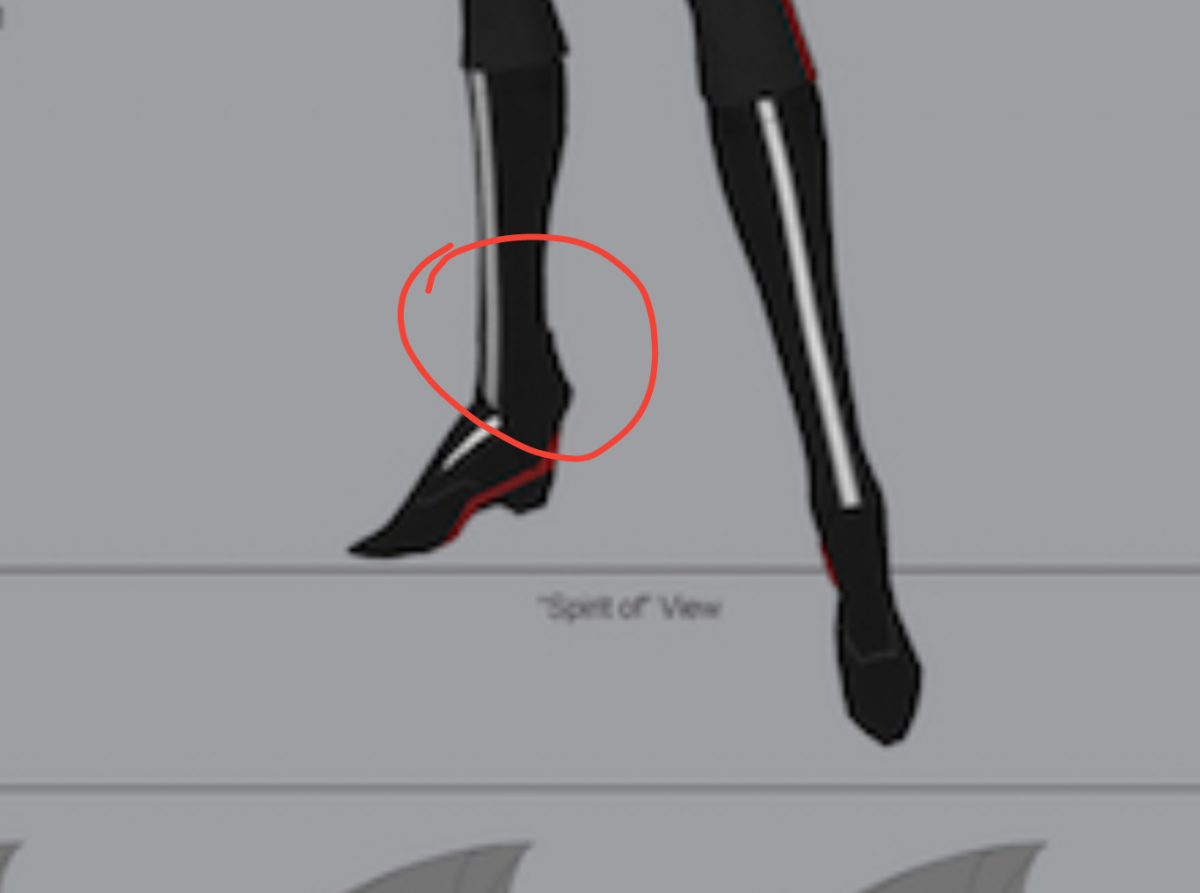
Proof of soft spat vs armor:
#1.
0:00- 0:03
I can't find the 4K quality version of this, but watch the video at .25 speed in 1080p. The leg piece extends all the way down the back of the boot, yet look at how she is sitting and how she jumps down to Ezra. Basic physiology and anatomy study would dictate that her ankle pivots and causes her heel to an angle that extends past the ankle in order to complete the basic action of jumping down from that surface. Now try to do that with a solid piece of armor that reaches from your knee to the bottom of your heel and see how much motion or mobility you have.


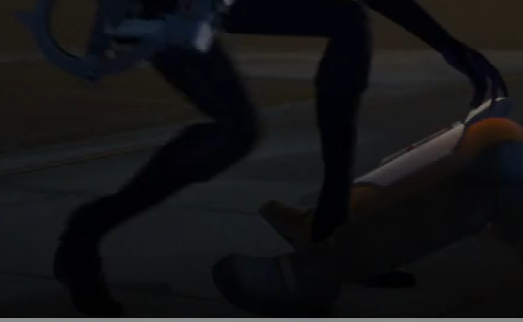
0:13-0:18
You can actually see the piece bend and bow with her natural leg motions while she walks around, same basic anatomy concept as above.

Yes, it is a cartoon, but being that they are Humanoid and follow basic movements and motions of humans, we can use our own knowledge of our anatomy to understand that the way the leg piece fits over the leg and the boot, she would not be able to do ANY of what she did in the video with a hard armor leg piece vs. a fabric spat.
-
1
-
-
There are multiple official references showing the triangles on the knees, which would carry it from "optional" to "required". If we are going to say we make accurate costumes, we can't pick and choose that accuracy. The Legion understands physical body points as something that doesn't match accuracy, but that doesn't include costume parts. Regardless of the physical stuff, the details are still present.
-
I absolutely agree, Crus. Detail is what made us the preferred costuming club (along with RL) for LFL and now Disney, and our charter states it with, "a costume that meets with the standards of ACCURACY, completeness, and quality of construction."
On the references, I'll post the YouTube link as soon as I can get to WiFi, but the concept art also shows it on the first pose with the right leg. Unlike the static poses next to it, the first pose shows movement from standing straight, and there is a protrusion in the back of the ankle to match the fold of the material that would happen when you spread your weight in the pose. Hard armor would not have the protrusion that is lacking in the other static poses.
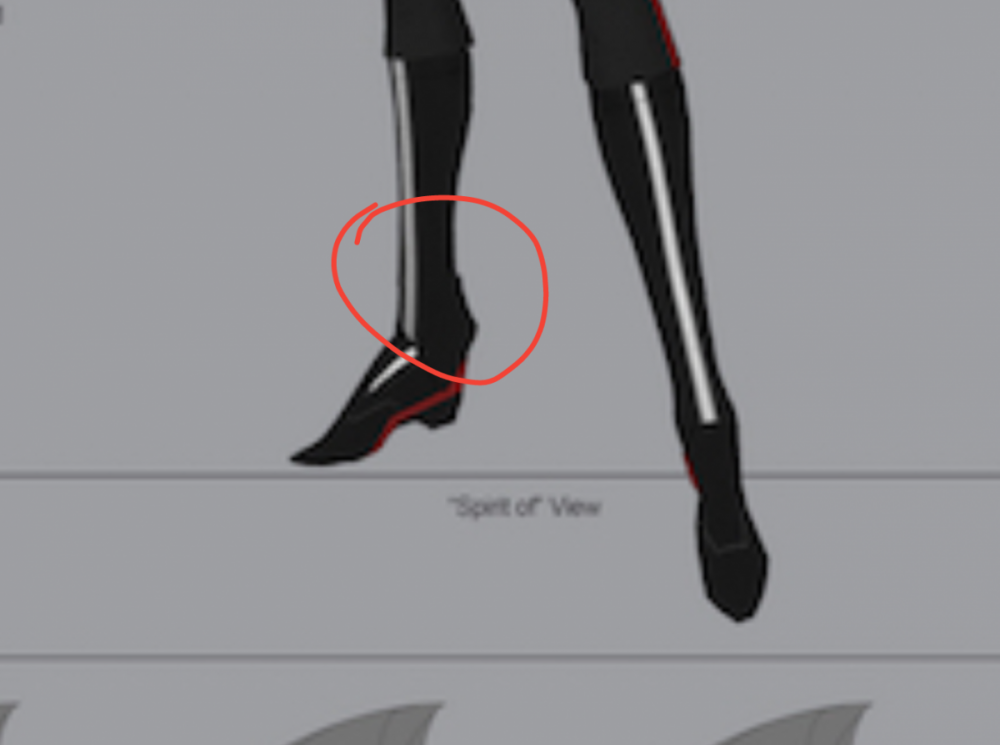
-
But the triangles ARE on the concept art.
-
My point is show me a reference where it shows armor. The show and the Disney costumes both use soft parts, and since the CRL was created from the show character, it should reflect it. If not, then that means the CRL is wrong on that part as the reference trumps the CRL.
-
If you want to go off the real costumes, both Disney locations also use soft material spats.
-
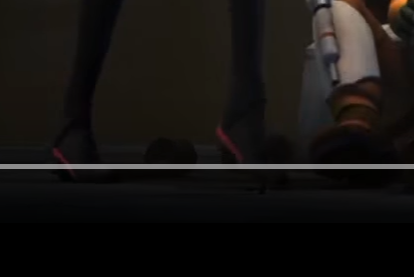
The shin should be a spat, not hard armor. When you watch the show, it creases like fabric around the ankle when she moves.
-
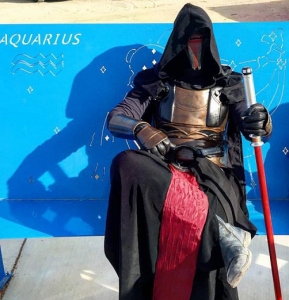
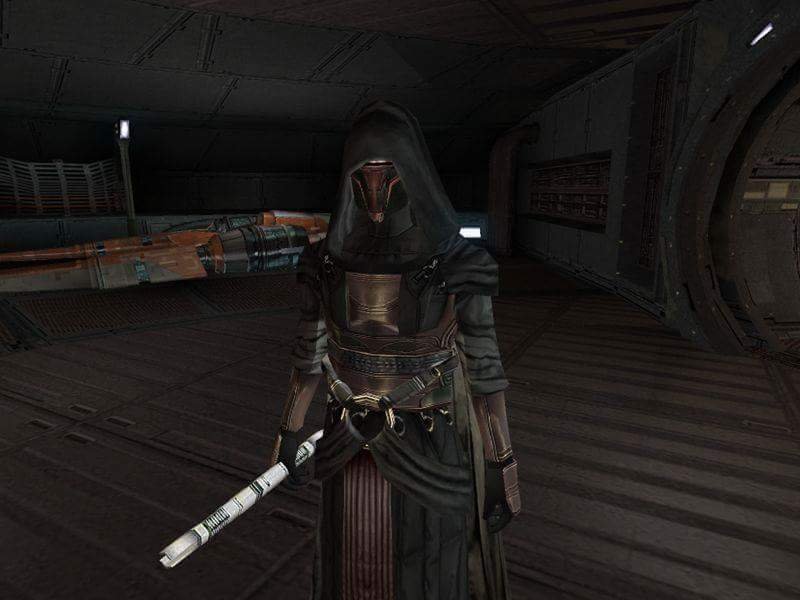
The only thing I see is that the armor looks a little too red for the KOTOR style that the armor is, the rings at the bottom of the armor should be held on by straps vs the single string, maybe centering the main sash ring a bit more, and the sash itself shouldn't flare at the bottom, but be a uniform with from top to bottom.
-
Sith have too many varying personalities and styles to be able to tie down a single, approvable CRL for it. The Jedi have it easy since they technically work well together and are unified under specific teachings and whatnot (at least majority since there are always exceptions) while the Sith all sort of did their own thing and didn't really have much of a "school" aspect to theirs (academies aside since aside from the acolytes, there are no solid references to having some sort of "dress code"). It's similar to Jedi going to a university to follow one of a handful of degrees that have all been planned out by a board of education and whatnot, vs the Sith pretty much all being trained by tradesmen with every master teaching their apprentice their own special flavor and ways of doing things, and spanning a much larger spectrum of possibilities.
-
I went with a nice, high quality men's long sleeve in a few sizes larger than I am so that I could get the proper "scrunchiness" of the sleeves that is shown in the file references. Nothing fancy, but I did rip the tag out of it since I hate tags. Sewed in the piping across the chest and added a high enough collar and bam.
-
The only detail I can make out is your hood is way too high. Take some sticky Velcro and add some to the inside of the hood and into the mark sheet it keeps the hood just barely over the eye slit.
-
The sole those is a little too accentuated and stylized for Revan. It should be a simple, fairly flat sole.
-
Hello
I'd like to become a member of the detachment Please.
http://www.501st.com/members/displaymemberdetails.php?userID=21039
Hi there.
Detachment access is only for those 501st members with a costume that falls under the detachment. Your profile only lists a TK, so 501st access is the highest access you'll have until you are approved with a Flagship-approved costume.


Darth Atroxa - sith twi'lek from Star Wars - Old Republic
in Darth Atroxa
Posted
Good luck! That would be amazing if they can supply them.