
-
Announcement
Welcome to the forums!
If you are a newly-approved member, make sure you check out the New Member Checklist!
If you are a Detachment member and can't see the member-only area, post here for access.
-DV


NVSE
-
Posts
31 -
Joined
-
Last visited
-
Days Won
6
Content Type
Profiles
Forums
Gallery
Events
Posts posted by NVSE
-
-
45 minutes ago, Darth Vanghelon said:
Thanks for the link! That's definitely a good solution and I will have plenty of eva foam left from my previous costume. Always fun to try and learn something new as well imo and that way I can customize the vest. Getting even more excited about this build now! Thanks again man.
Gotta say though I hope the weather will be cooler than it has been in the Netherlands these past few months when I finally get to wear this costume.
It's 33°C today over here. 🥵🤣
A lot of cooling will be your best friend, I think you'd even be able to fit a neck ventilator in your helmet, which will help a lot already. 😁
Can't wait to see progress on this costume, will be following closely!!
-
 1
1
-
-
I don’t think that’d be an approvable way for the spike vest for Starkiller
This Starkiller here has a pretty good way of going about the spike vest, which I think would be the go-to way of doing it too for Tulak Hord- foam and then covering it with pleather or real leather, it’s a fairly cheap way of going about it too.
If you want reusability I think going for a Starkiller undersuit would be best since the visible parts are the same, but the spike vest part wouldnt be usuable for both without sacrificing accuracy for one of the costumes.
-
 1
1
-
-
34 minutes ago, Darth Vanghelon said:
You mean that if I went with the vader or starkiller suits that the torso would be a problem? I think we need to get a consensus on what material and would be accepted for the torso before I go any further with the garments.
I made a mistake here, I took a closer and longer look at the references and I think a Vader suit would be perfect actually. I thought the torso's black pieces at the bottom were a part of the undersuit 😆
For that part- since they don't seem to be hard parts either, your best bet would honestly be doing the likes of Hoth Starkiller's vest. There's a lot of documentation around the vest that would give you some idea of how you could do it.
One tip though and that'll be at the end and if you're willing to butcher the undersuit top 😄, see how much of the top is visible, and cut off the rest you don't see, then attach what you can see to a t-shirt or something instead. Since you're covered in armor, you'll be thankful you won't have to wear full leather underneath as well. 😆
-
1
-
-
The saber, depends how you wanna do it. If you have enough space in the handle to fit a core, you could probably put a neopixel blade on - if the emitter part is strong enough as well. If it isn't, you could probably just get a coloured base lit blade, and put some magnets- on both the blade and in the emitter so it can click in. Or you can glue it in 😁
The undersuit is definitely a lot like Vader and Starkiller, but the torso will be a problem if you do go with said undersuit. Custom would be the way to go, but that'll certainly be the investment.
For the hard parts, I think you'll have better luck with 3d printing, since they all look separated you could honestly cut and fit them all on an Ender 3, you can get these for really cheap on Facebook marketplace or even new.
It's an investment but you'll be really happy you got one.
Sintra is obviously also really good, but printing will save you A LOT of time.
If getting a printer isn't an option, you can reach out to your local garrison, or even myself, they'd I think be happy to help you print some stuff out 😁
Definitely following this thread!!
-
1
-
-
Hi,
Requesting Detachment Access:
SL-19444
https://www.501st.com/members/displaymember.php?userID=48284&costumeID=307
-
Approved!!

Suggested changes are to add some more weathering to the bandages on my arms and the bandolier, which are on my to-do list this week!!
Also adding weathering to the lightsaber trophies, they're a little too shiny for being in the desert.
-
Hi everyone, heard back from my GML yesterday!
The only changes that I need to make are:
- Gloves need to be darker or weathered.
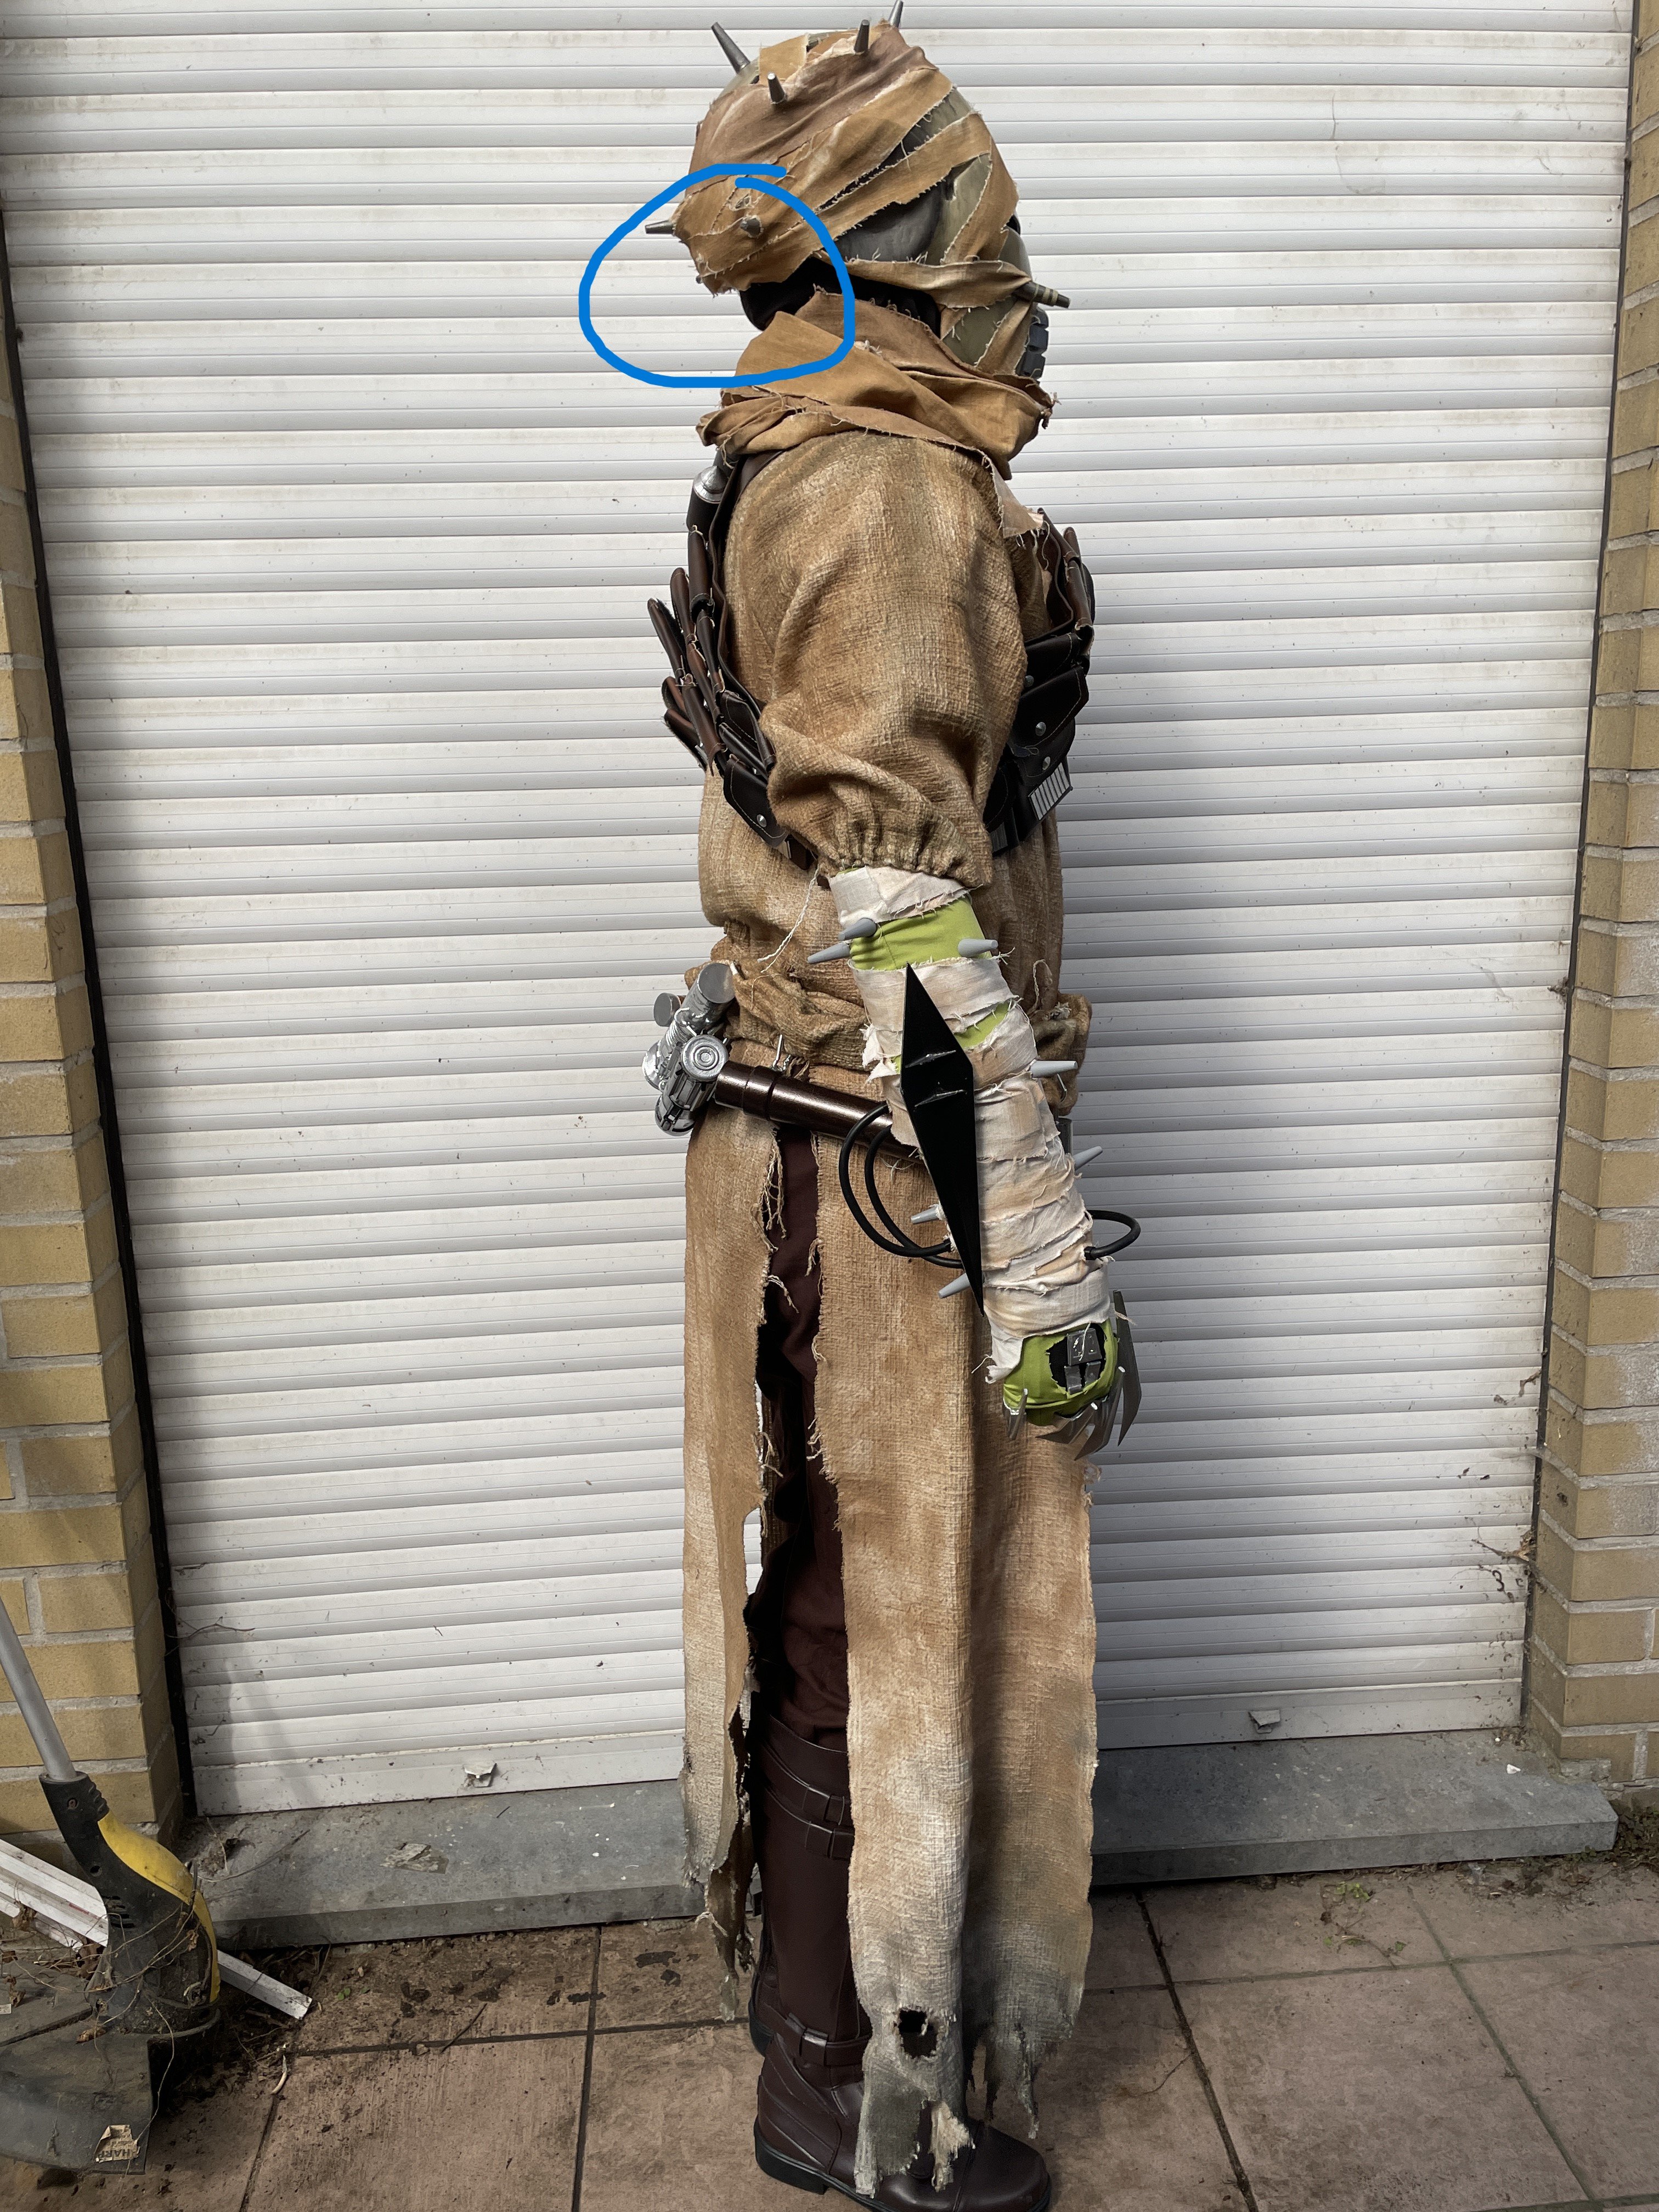
- The arm spike needs to extend over the elbow.
Decided to just make a new spike instead, so the sizing is a bit more accurate to the game with the requested change.
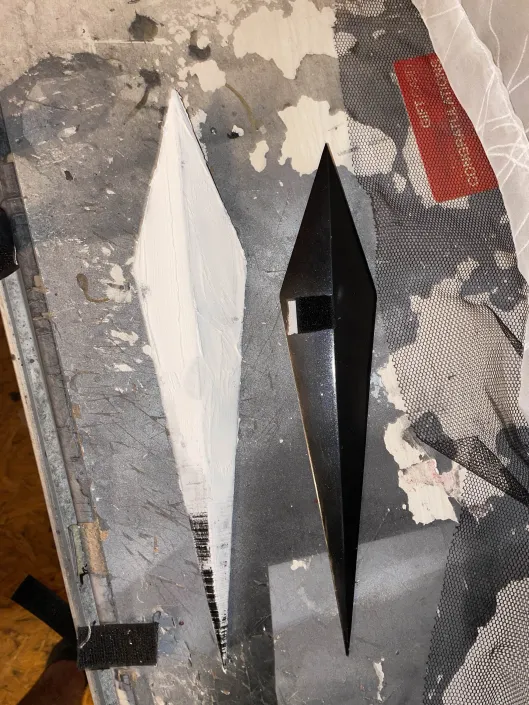
New vs old
While looking at the in-game model I discovered that the spike is attached via solid ( shaped piece at the bottom of the spike, exactly like the Sith Stalker arm spike, so that's what I'll be doing as well.
This makes it so much easier, I can just attach this to the arm shells I use, so I don't have to mess with velcro anymore and get the perfect placement every time 🥳
New colored gloves compared to the game
The end is in sight after nearly 2 years!

-
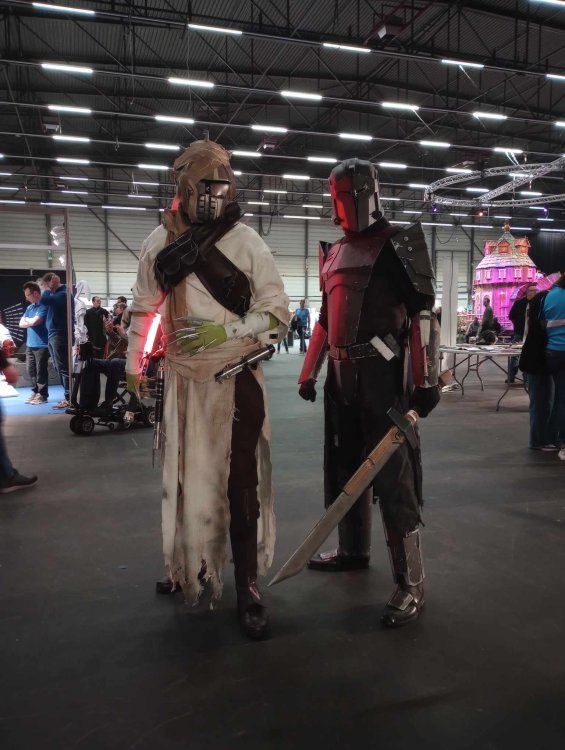
On 4/8/2025 at 5:58 PM, Starkiller said:
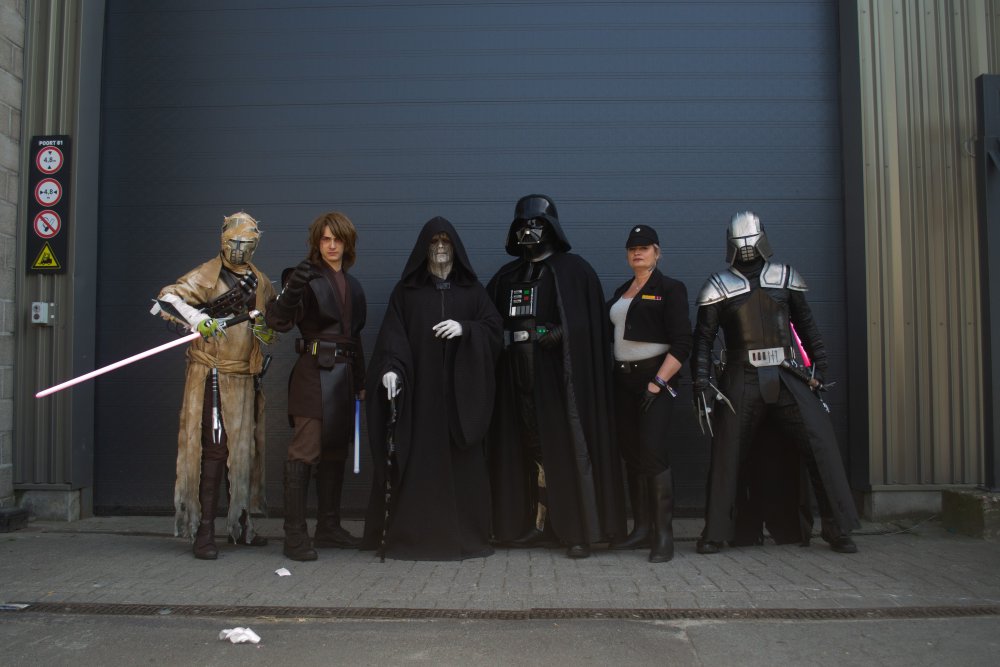
(Palpatine here) Love this pic of you kneeling before me! Was cool seeing a Desert Starkiller IRL

A bit late but thank you!! One of my favourite pictures! I can't imagine how hot it must've been in the costume 😆
-
1
-
-
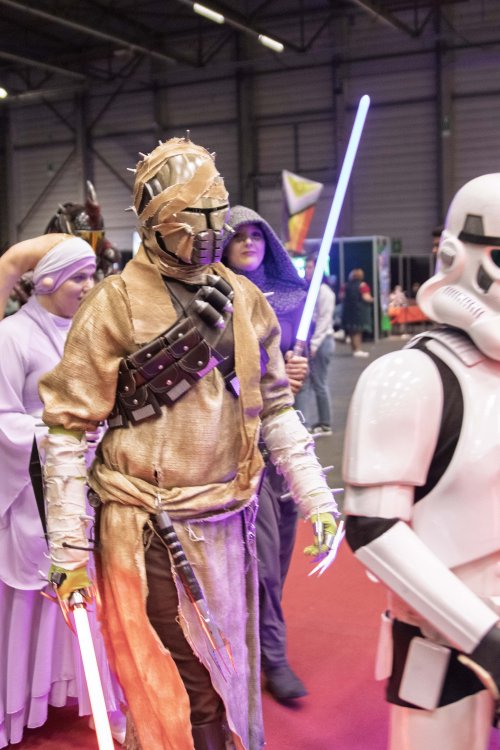
Hi everyone!
Con has passed, GML looked at the costume from close up and pointed out some changes I need to make! Which I did as soon as I came home 😁
The only changes were: A more intense blood drip under the eye and the sections on the braid.
Pictures from the changes:

Submitted these today, with some CRL inconsistencies that were also pointed out!
And now some con pics:
.thumb.jpeg.7429fda79ead8c04ae7f04e0e5b69b5b.jpeg)

-
1
-
-
Oh man that looks amazing! Really did a great job!
-
1
-
-
Hi everyone, I submitted my costume! I'm really proud of how it turned out. Now we wait for a fix list or potential approval! 😅
I did notice that putting on the helmet was a pain in the ass in full costume, I'm looking into attaching the piece of cloth mentioned in my previous post onto my balaclava, I'm unsure of how the neck spacing would look though, so might just give that a try so putting the helmet on is easier!


The next time I post will probably be after I hear back from the GML! Wishing myself good luck 😆
-
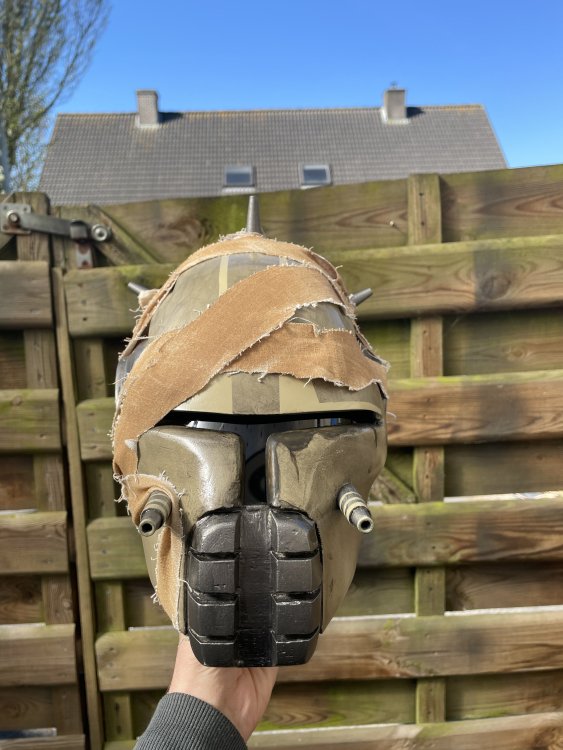
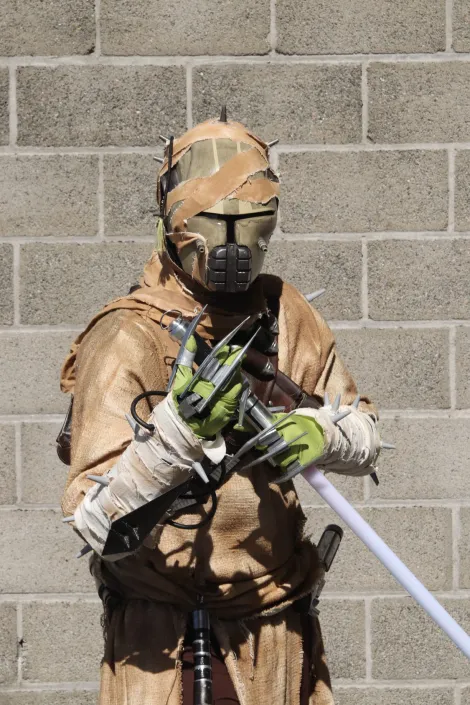
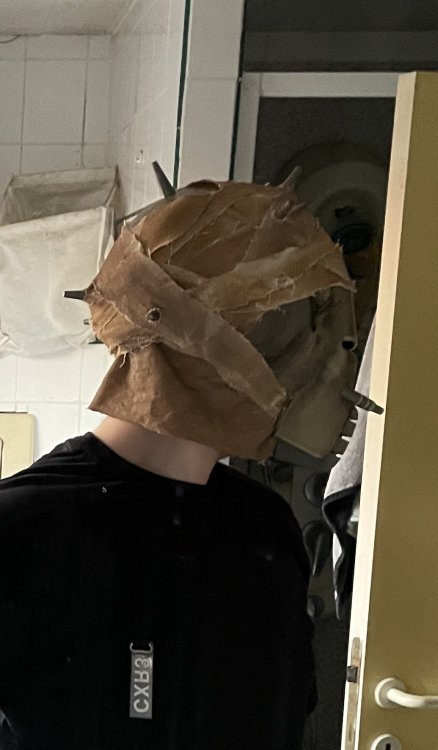
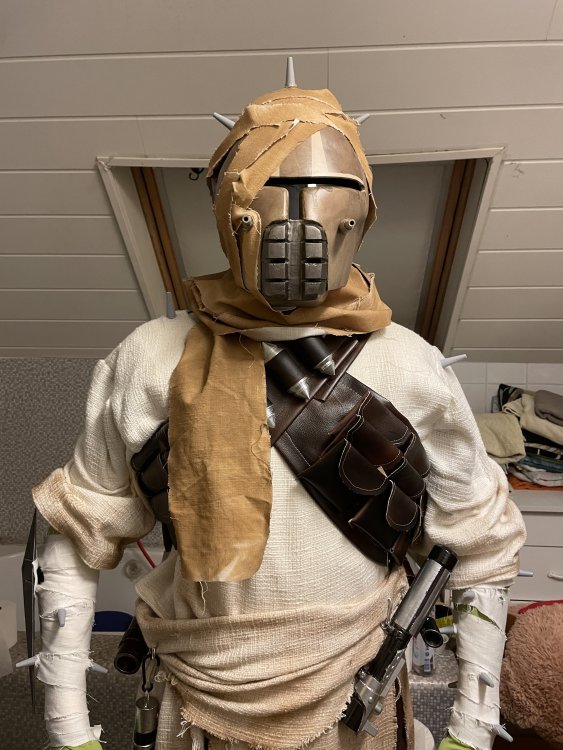
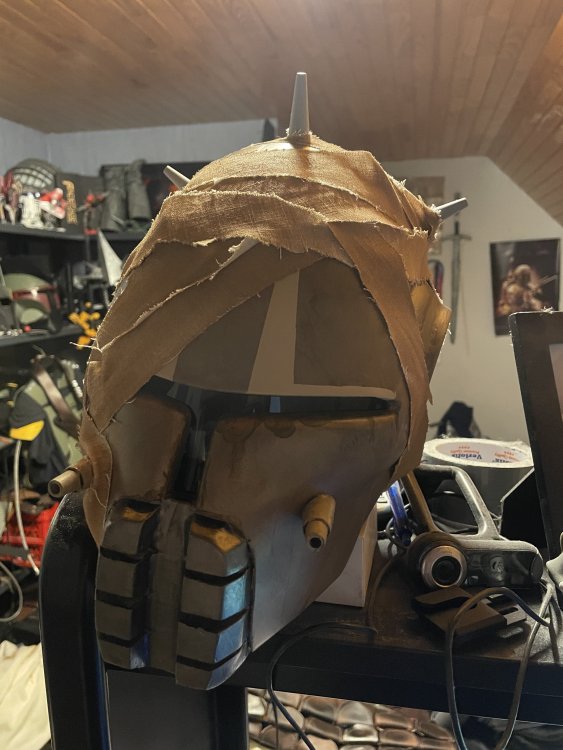
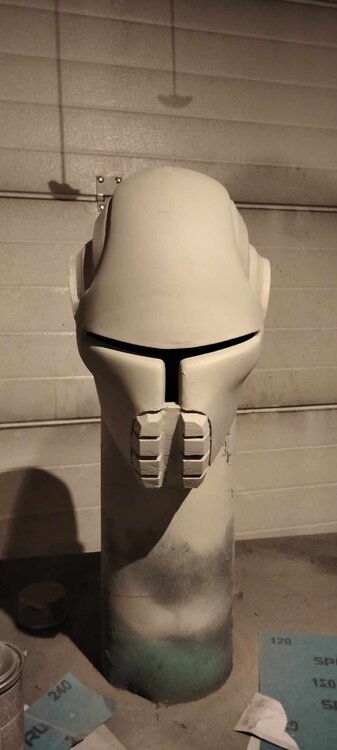
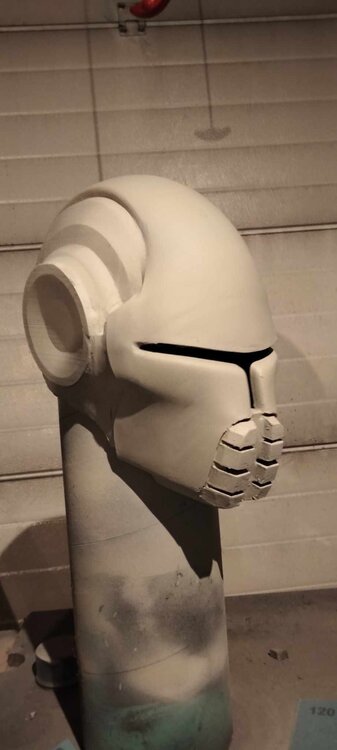
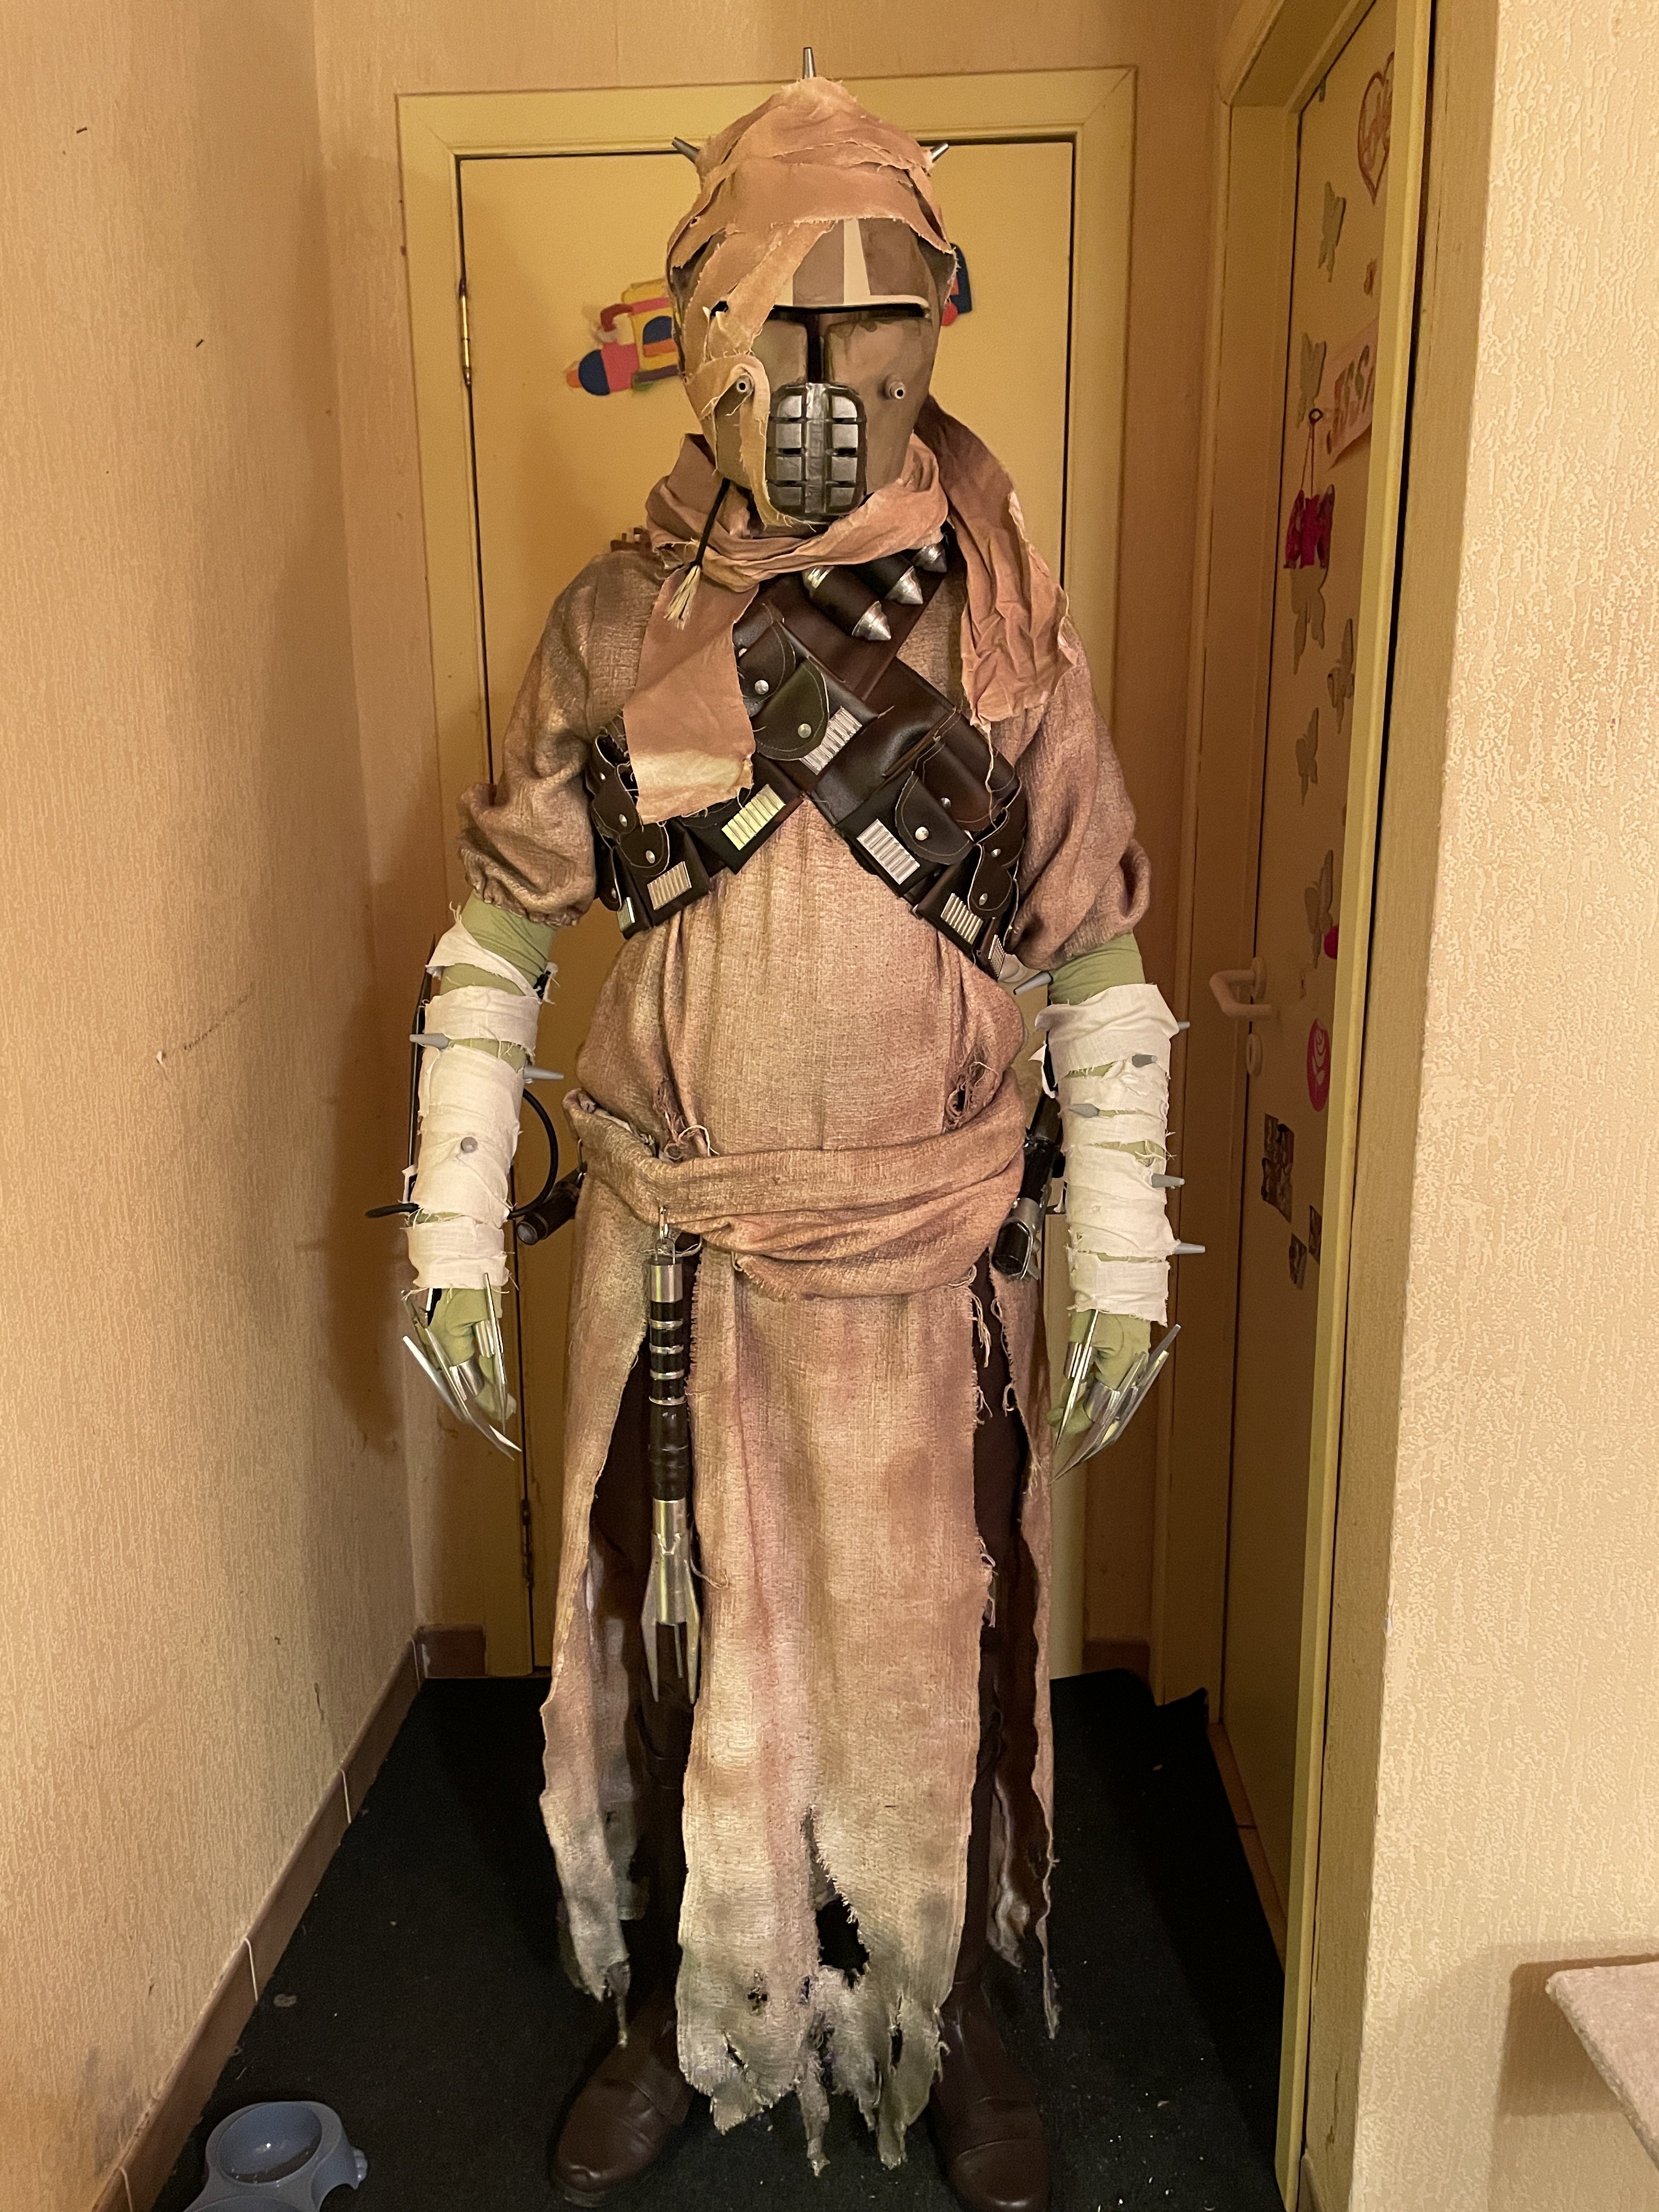
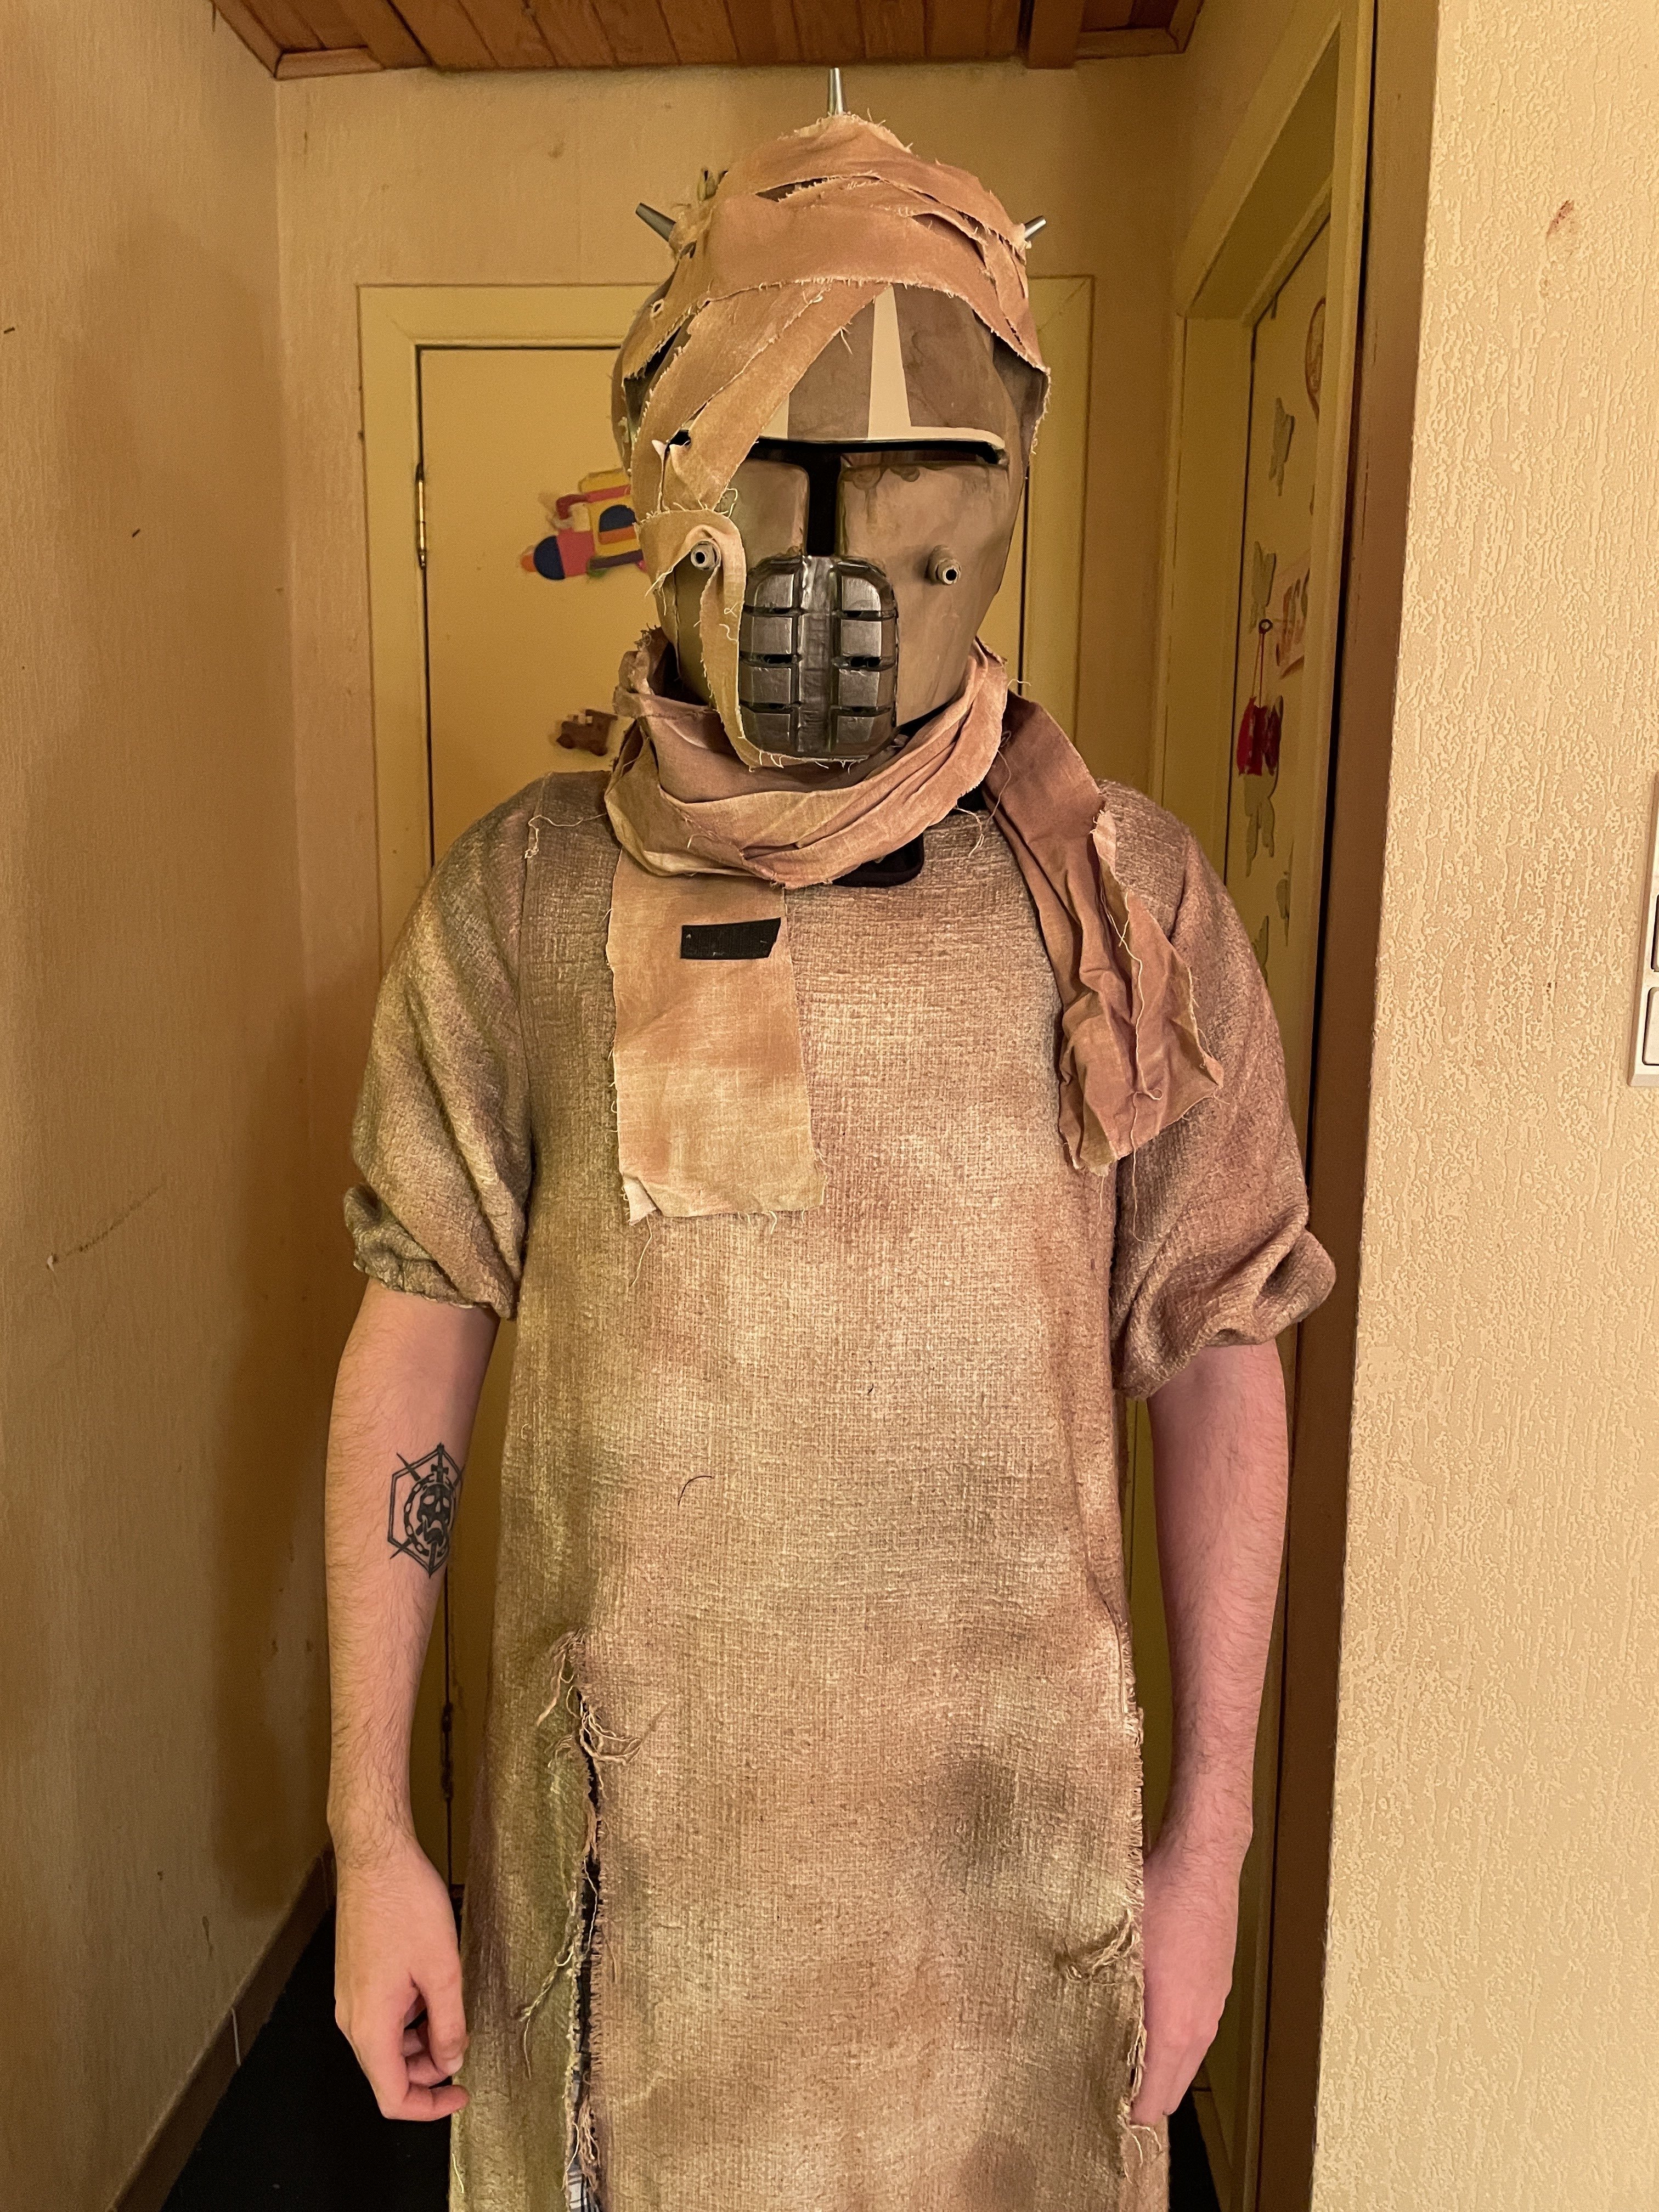
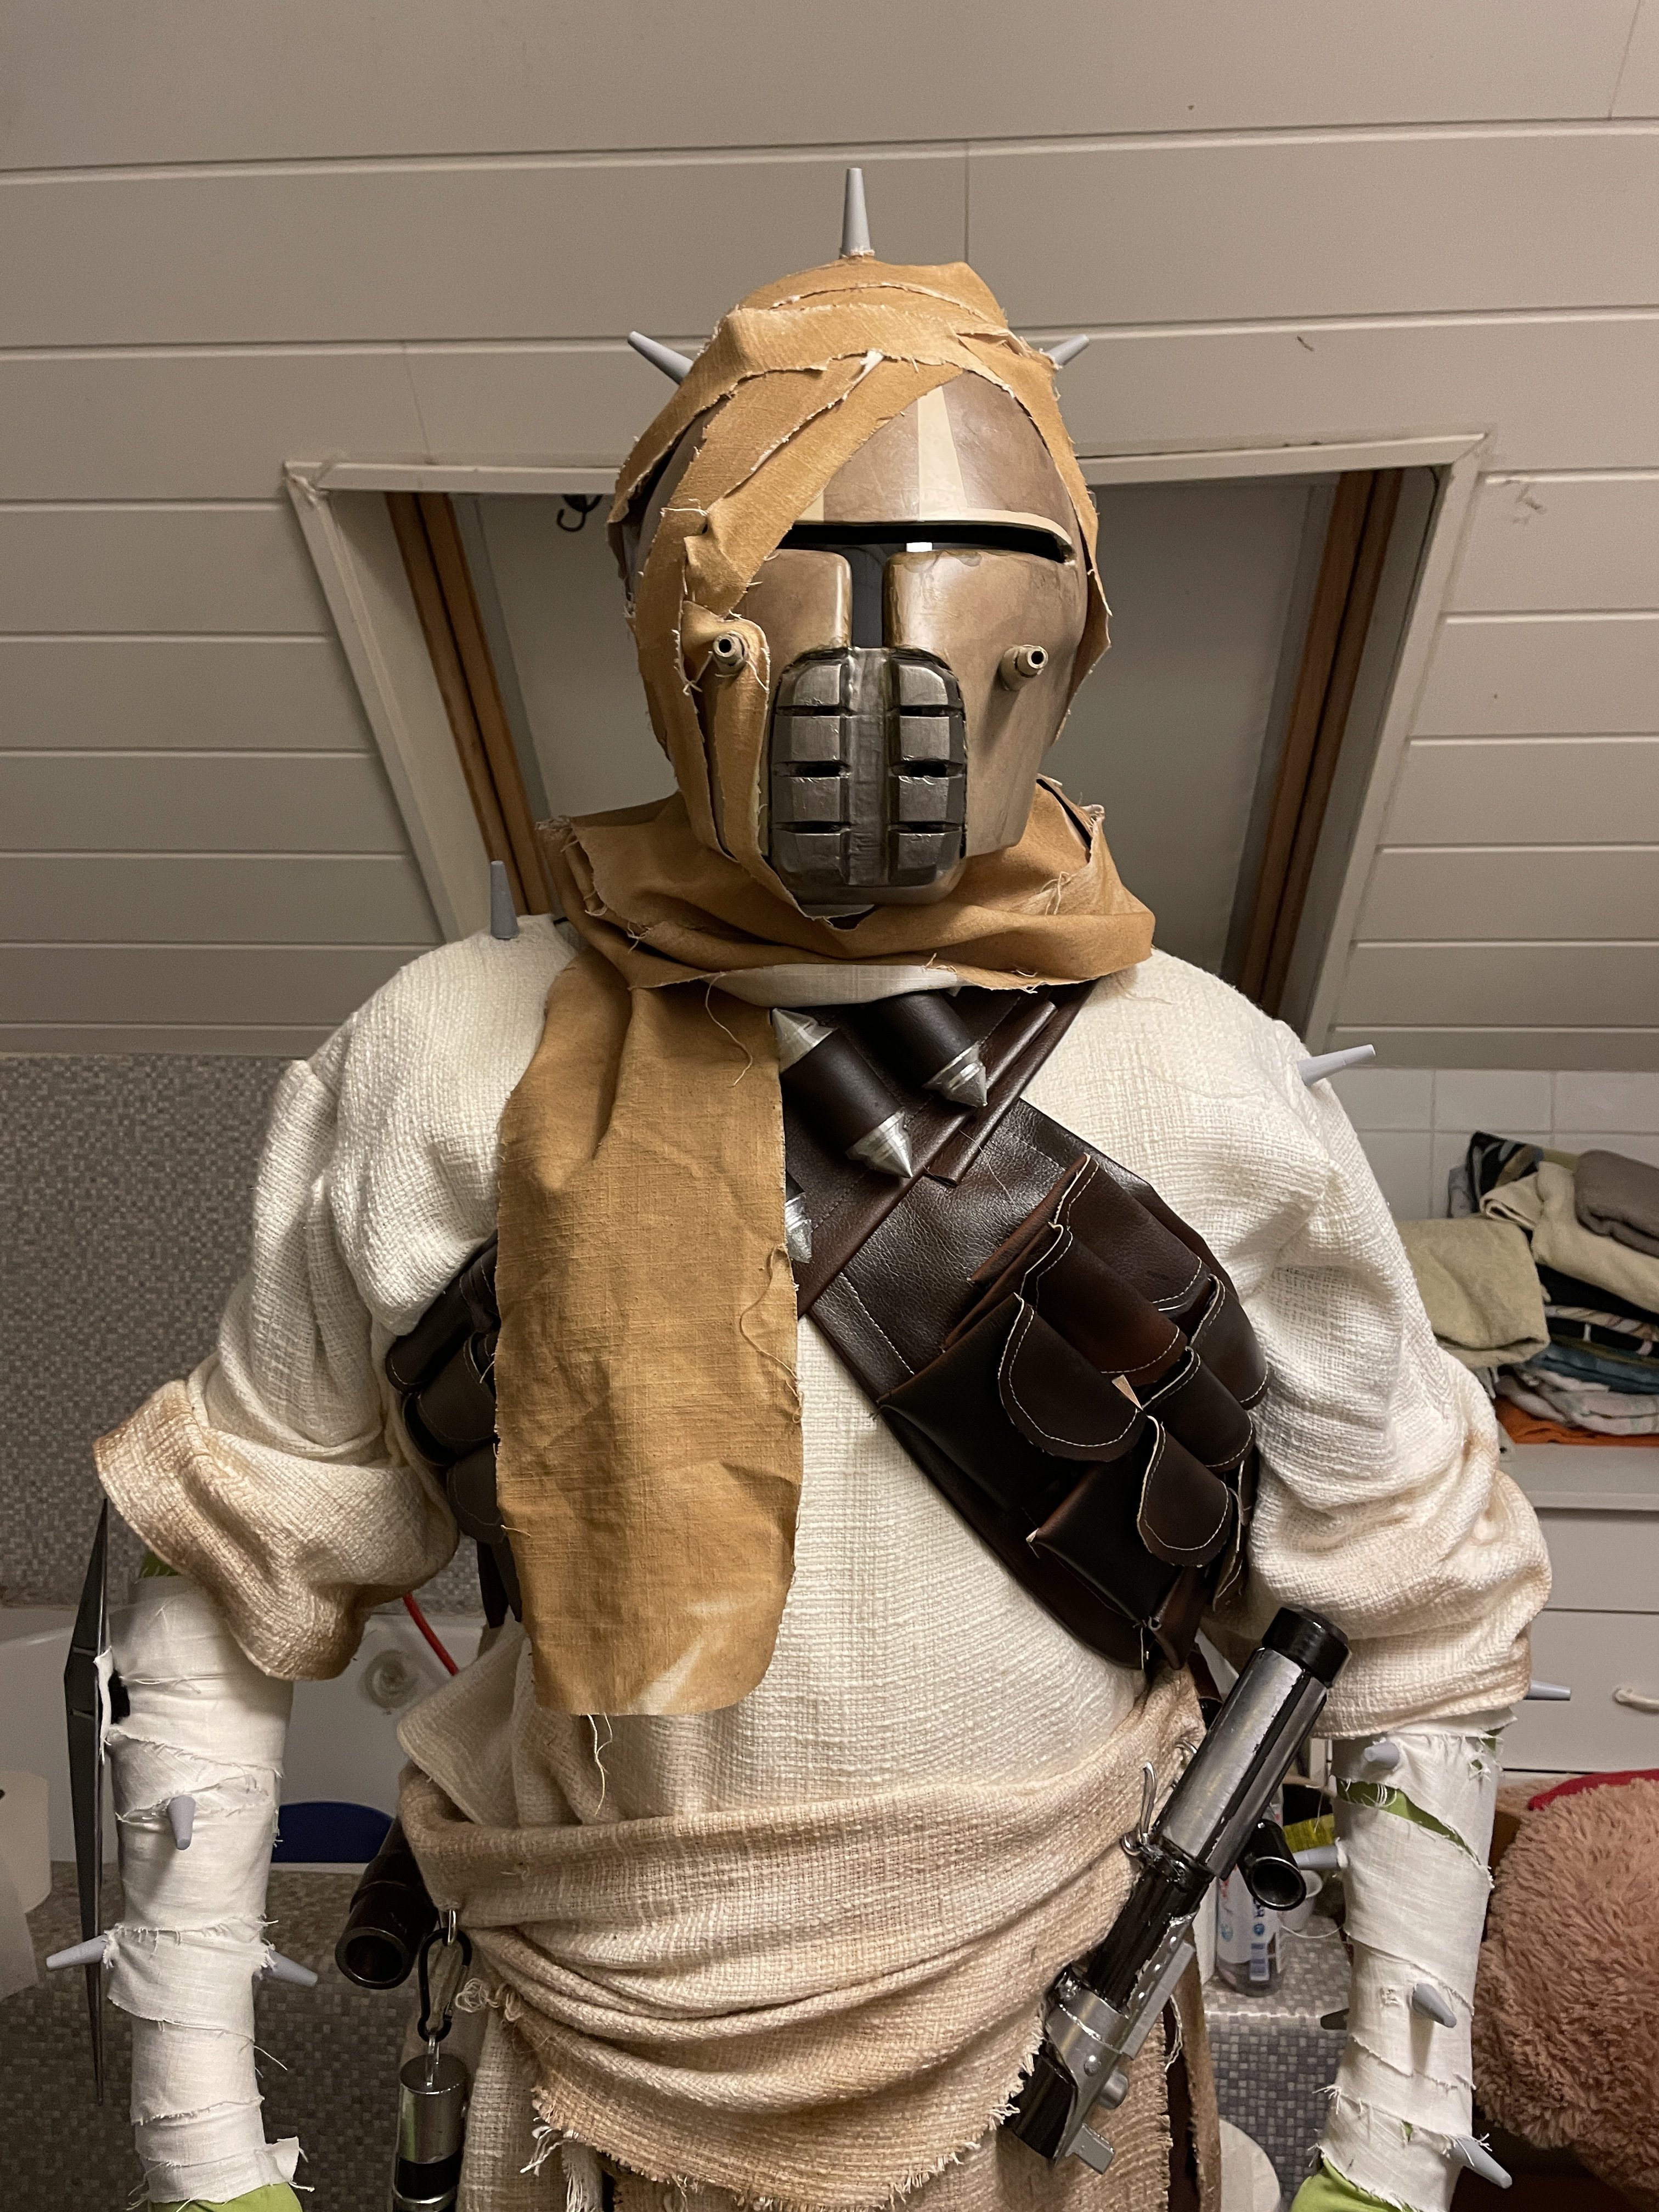
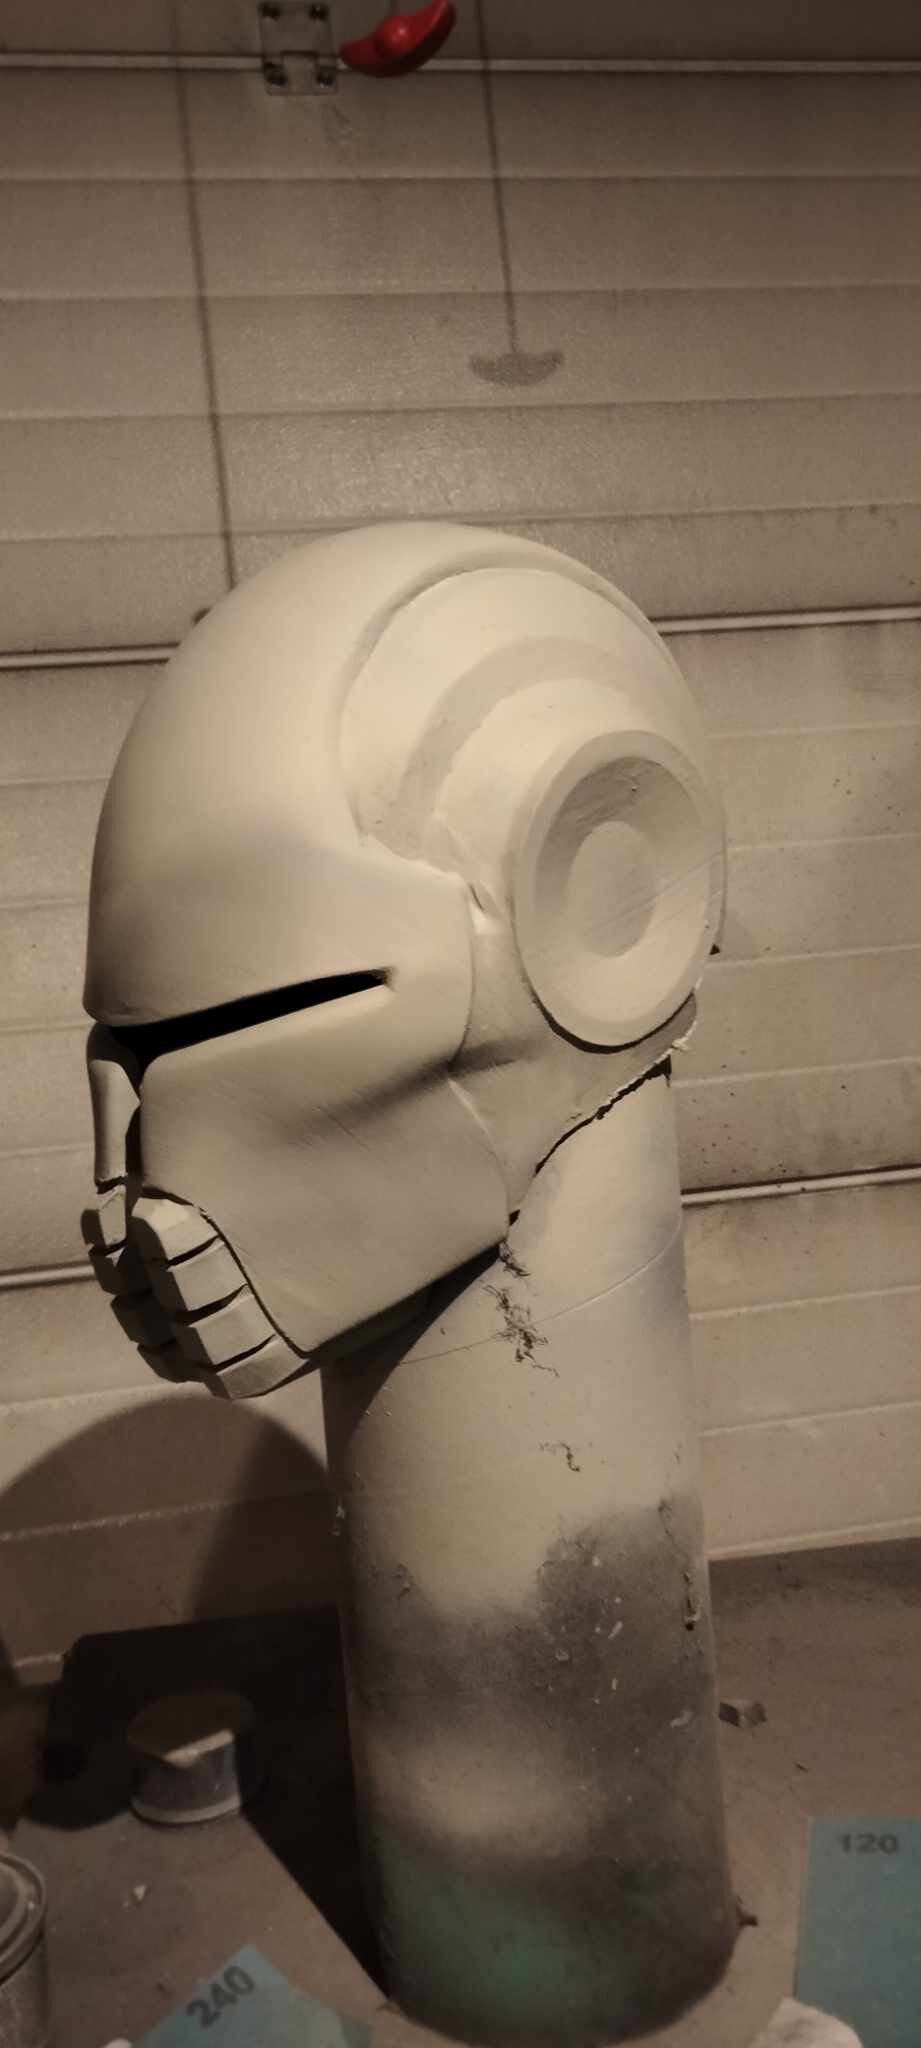
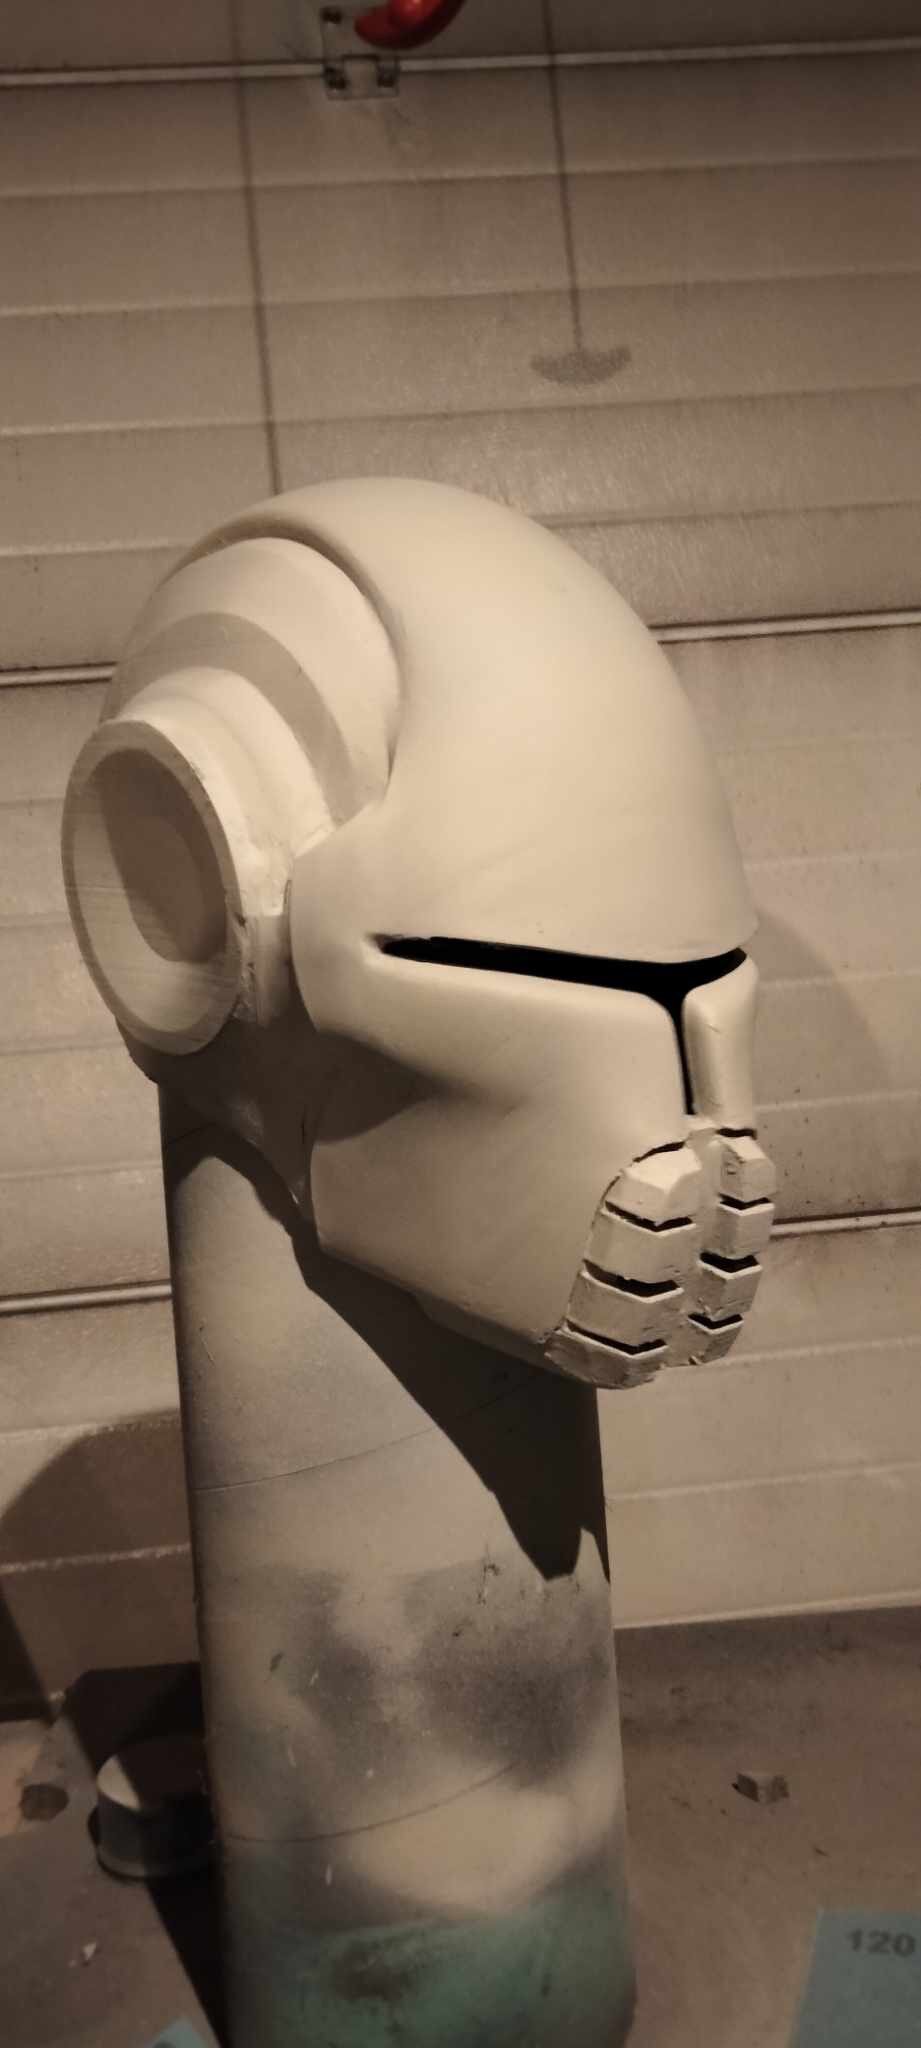
Hi everyone, helmet is done! The color I like much more, the front cheek tusks are spot on as well now! I also took some full costume pictures and noticed some changed I need to make
One of the changes was the gap between the helmet and the scarf, and the white spot on the scarf.
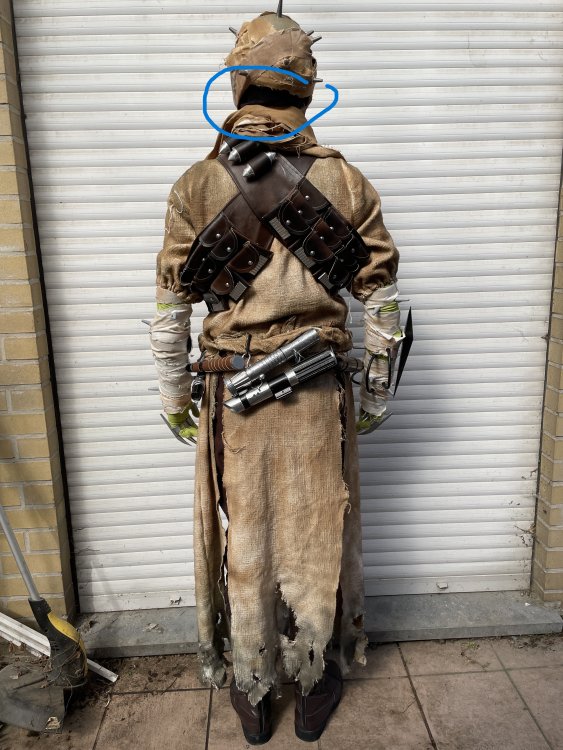

.jpeg.d66df5f1fa2c0a9210c0e020638ef0b9.jpeg)
I'm happy to say that both were an extremely easy fix. For the gap I attached a piece of cloth around the inside of the helmet, perfectly connects the helmet to the scarf now! And the white spot on the scarf I just went over it with the dye.
.thumb.jpeg.30bbc56a096f637974ecaf6c6ecb5f6a.jpeg)
I'm really proud of how the new helmet turned out, it really can't get smaller in size now, my ears thank me everytime I get out of the helmet😆
Thanks for reading!


-
1
-
-
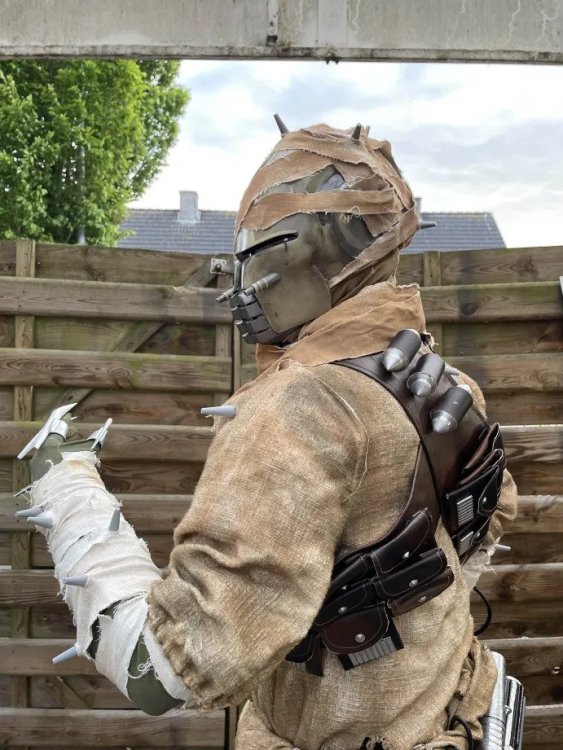
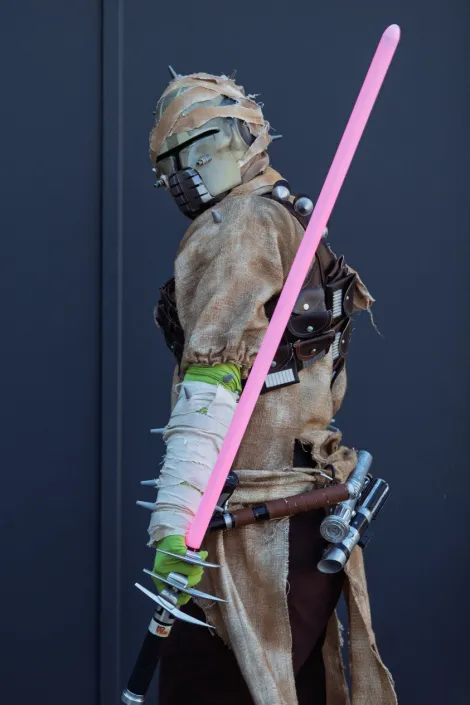
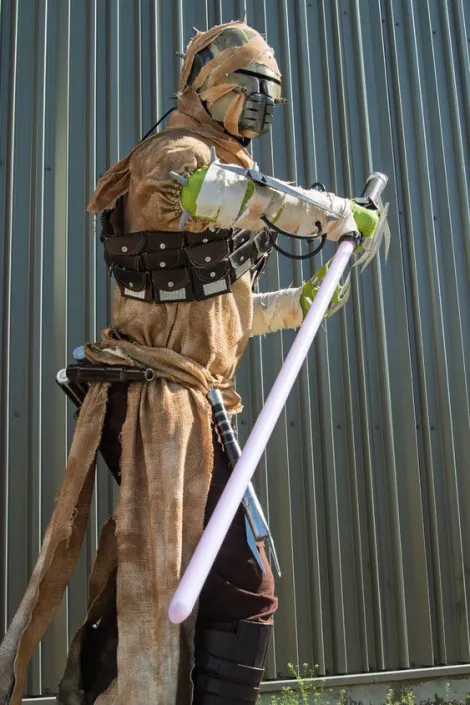
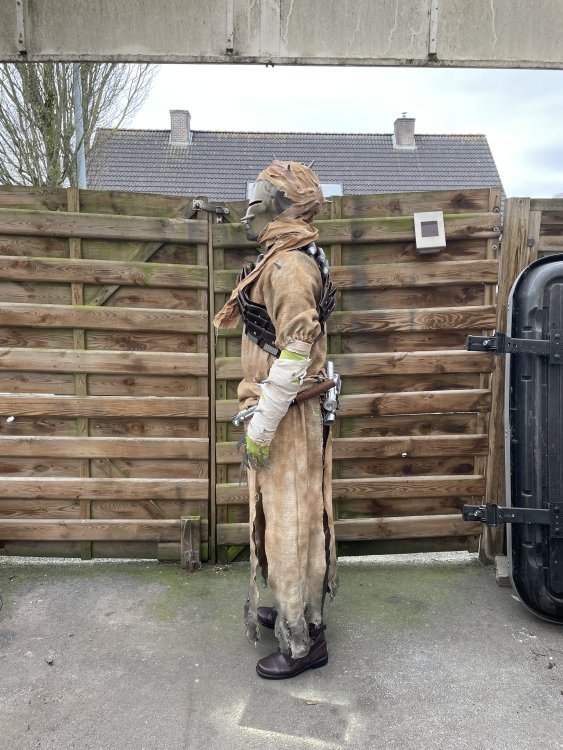
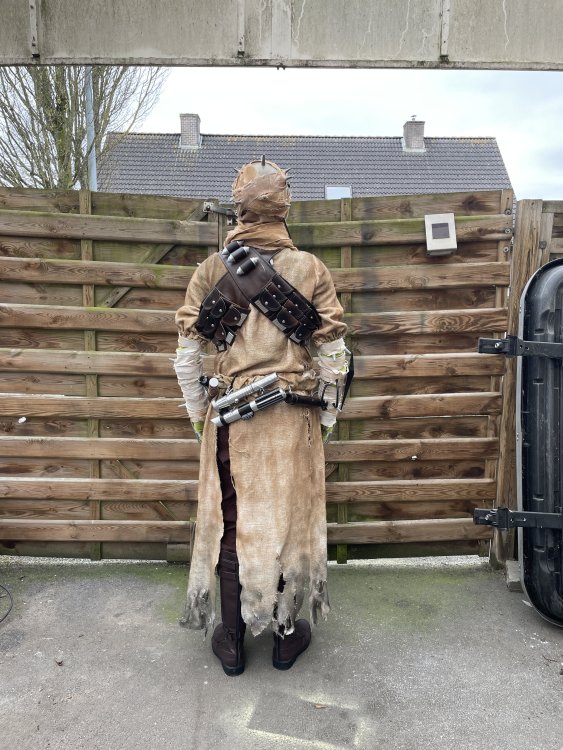
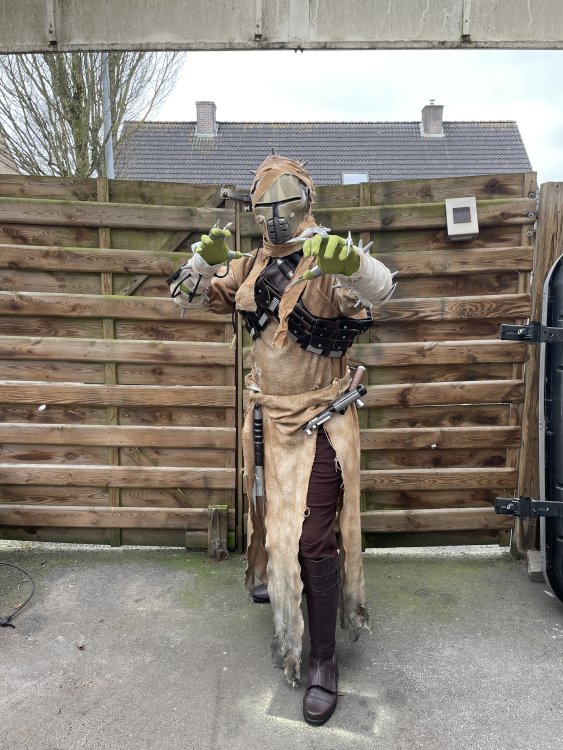
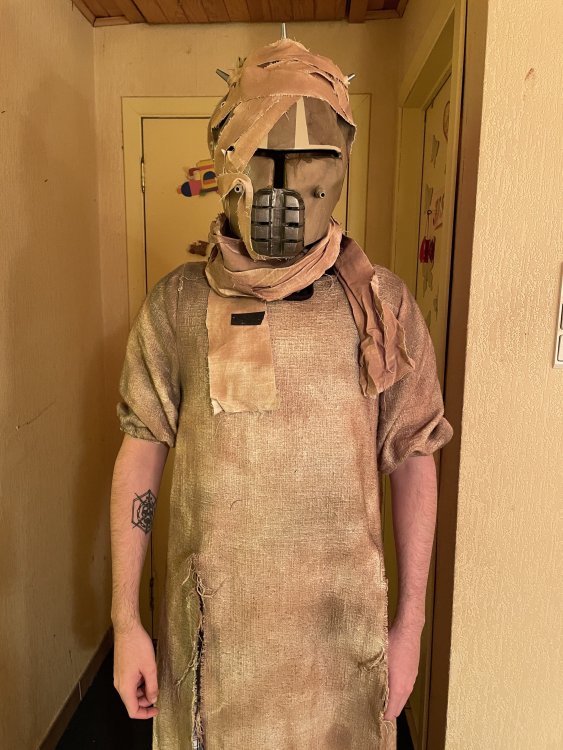
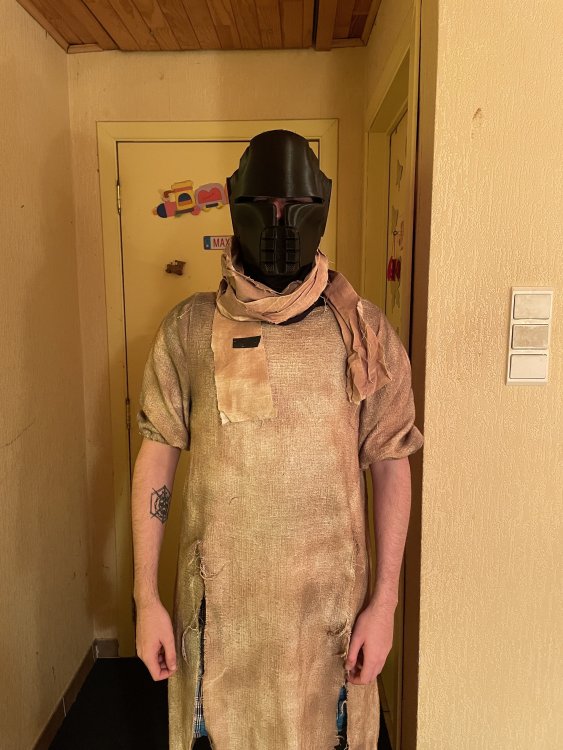
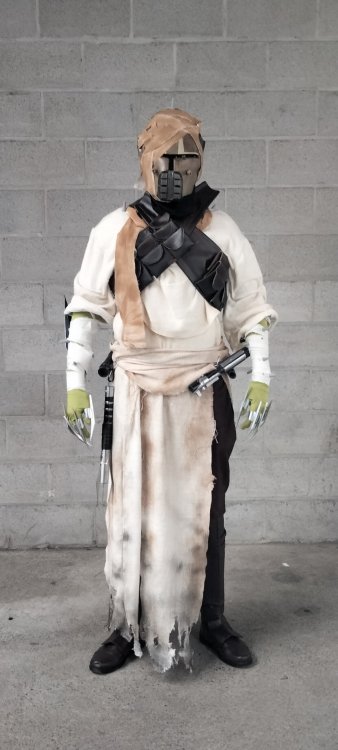
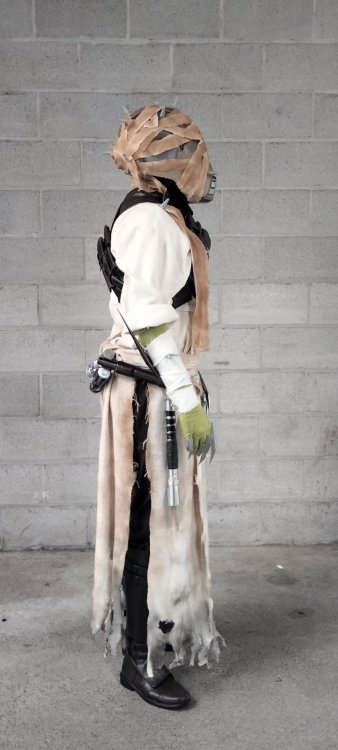
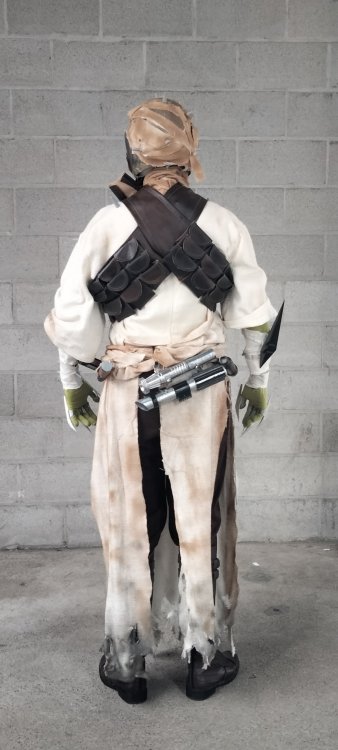
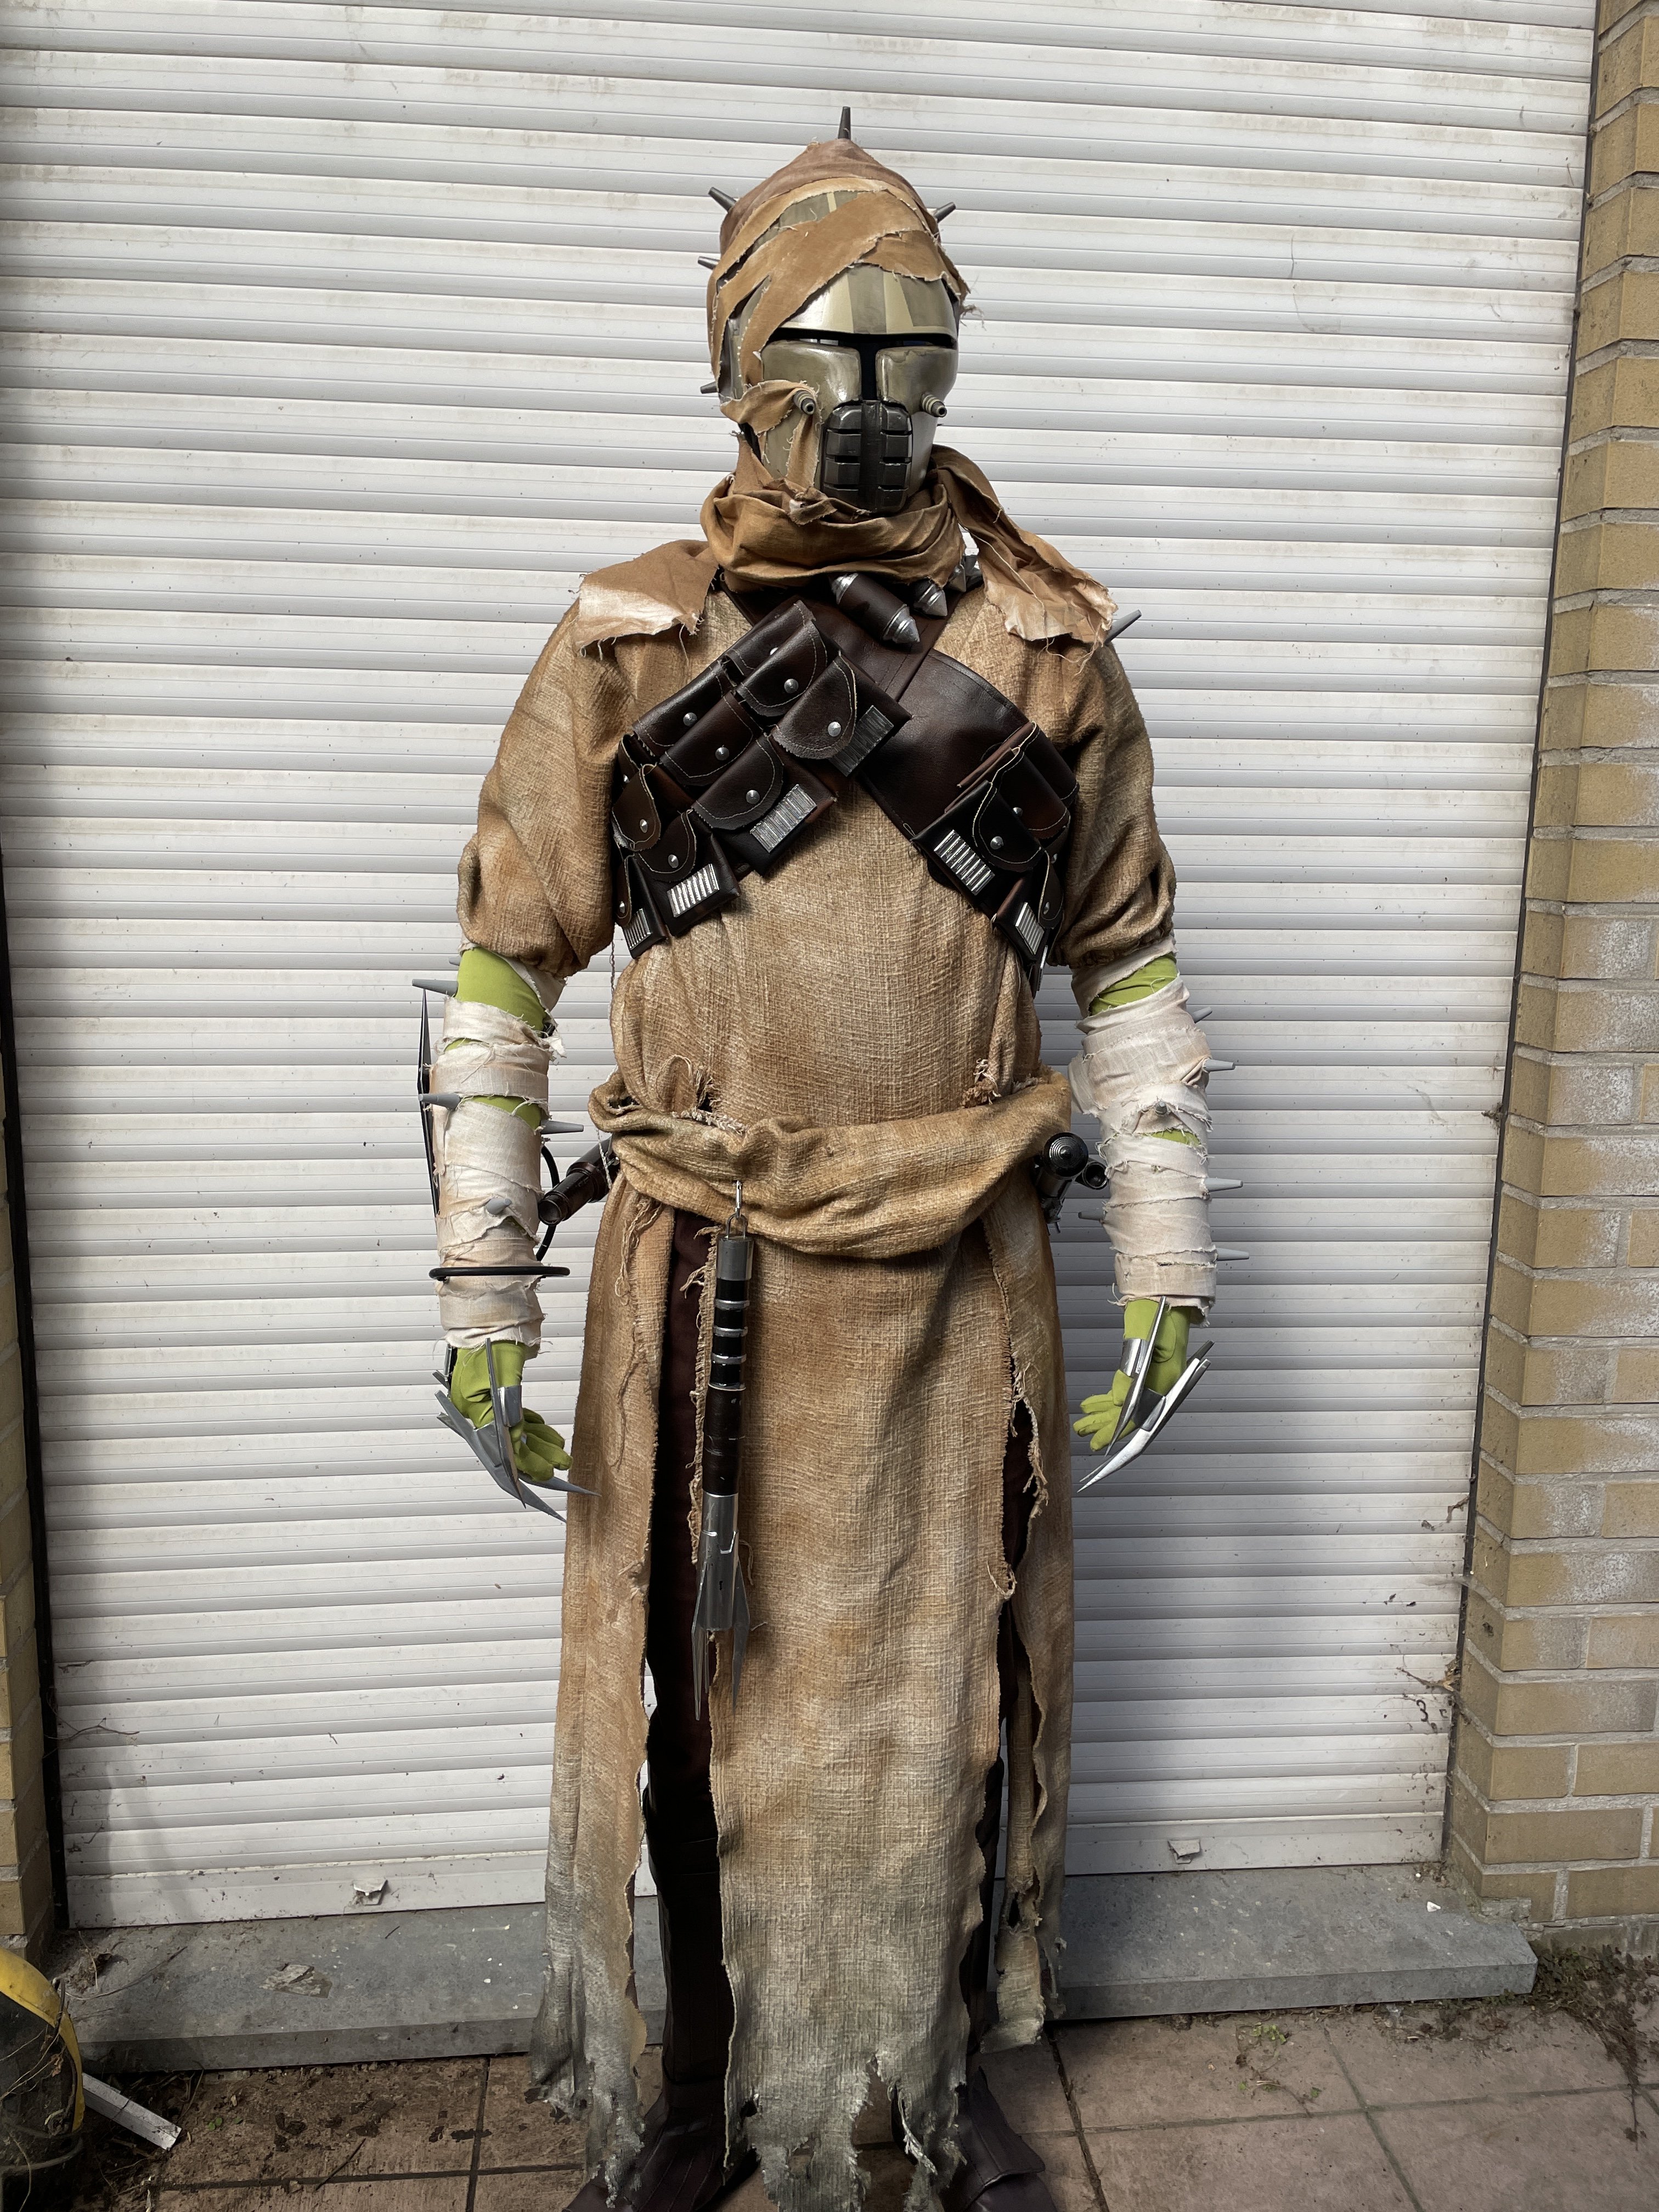
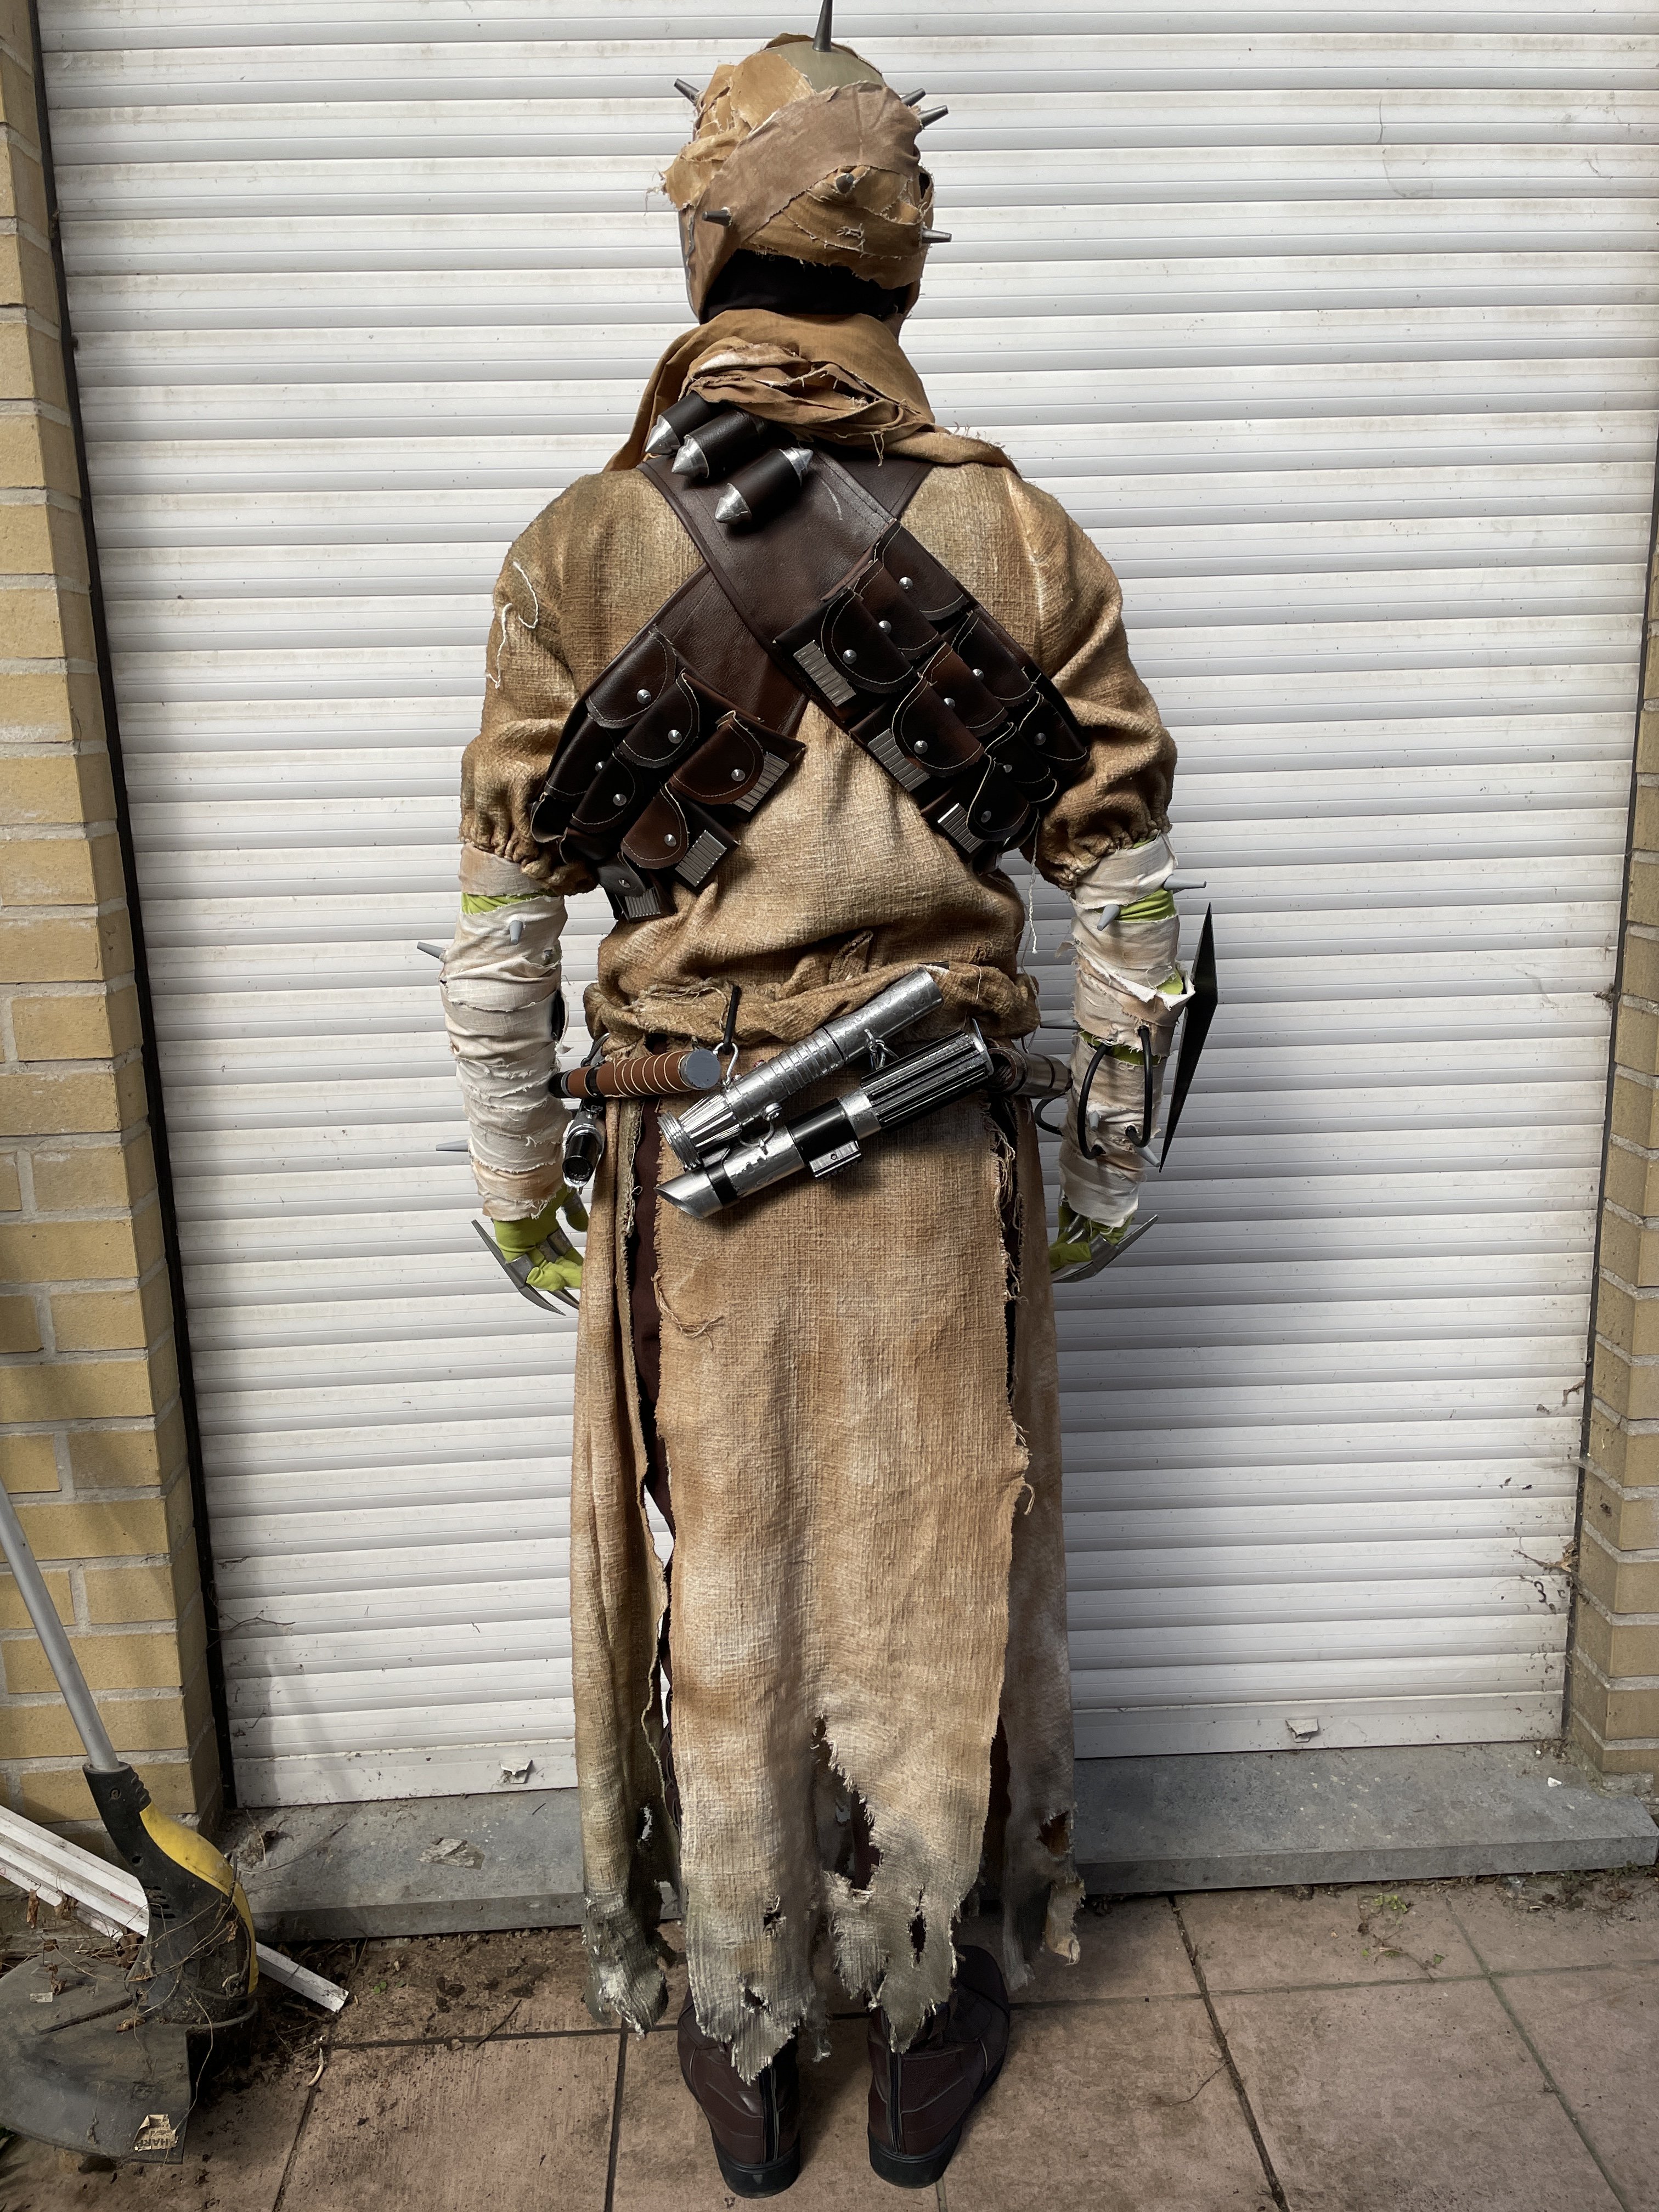
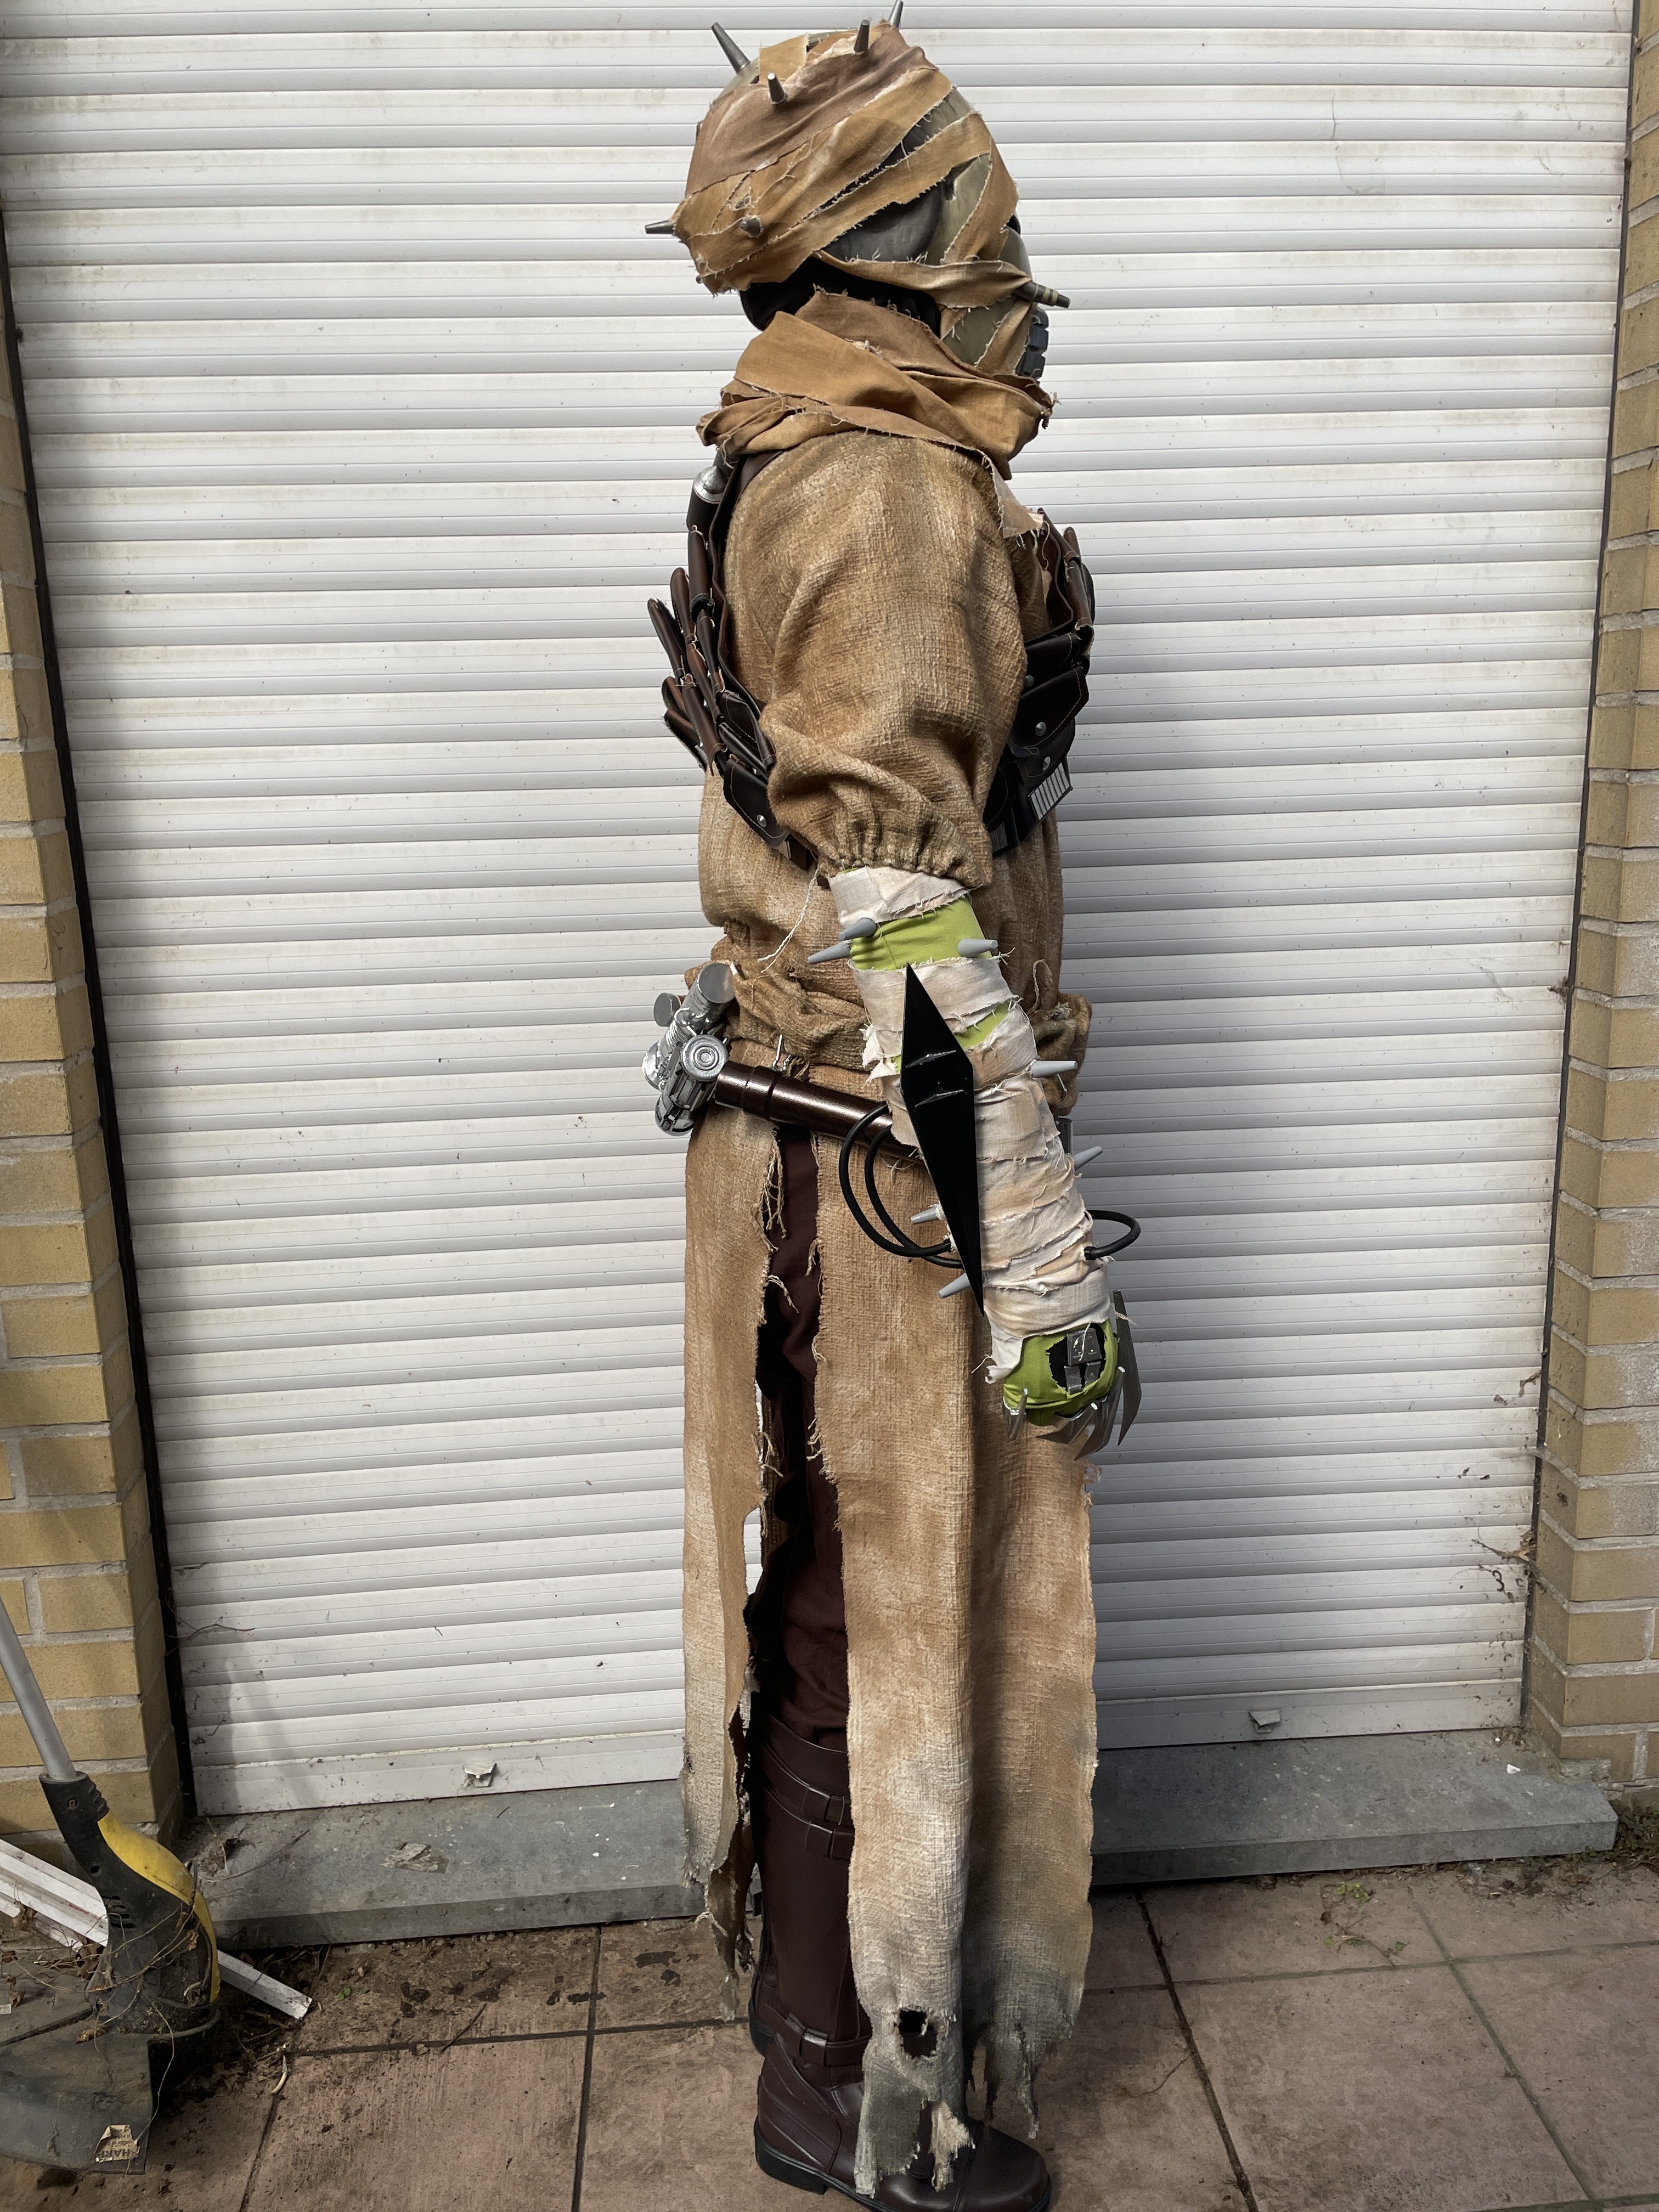
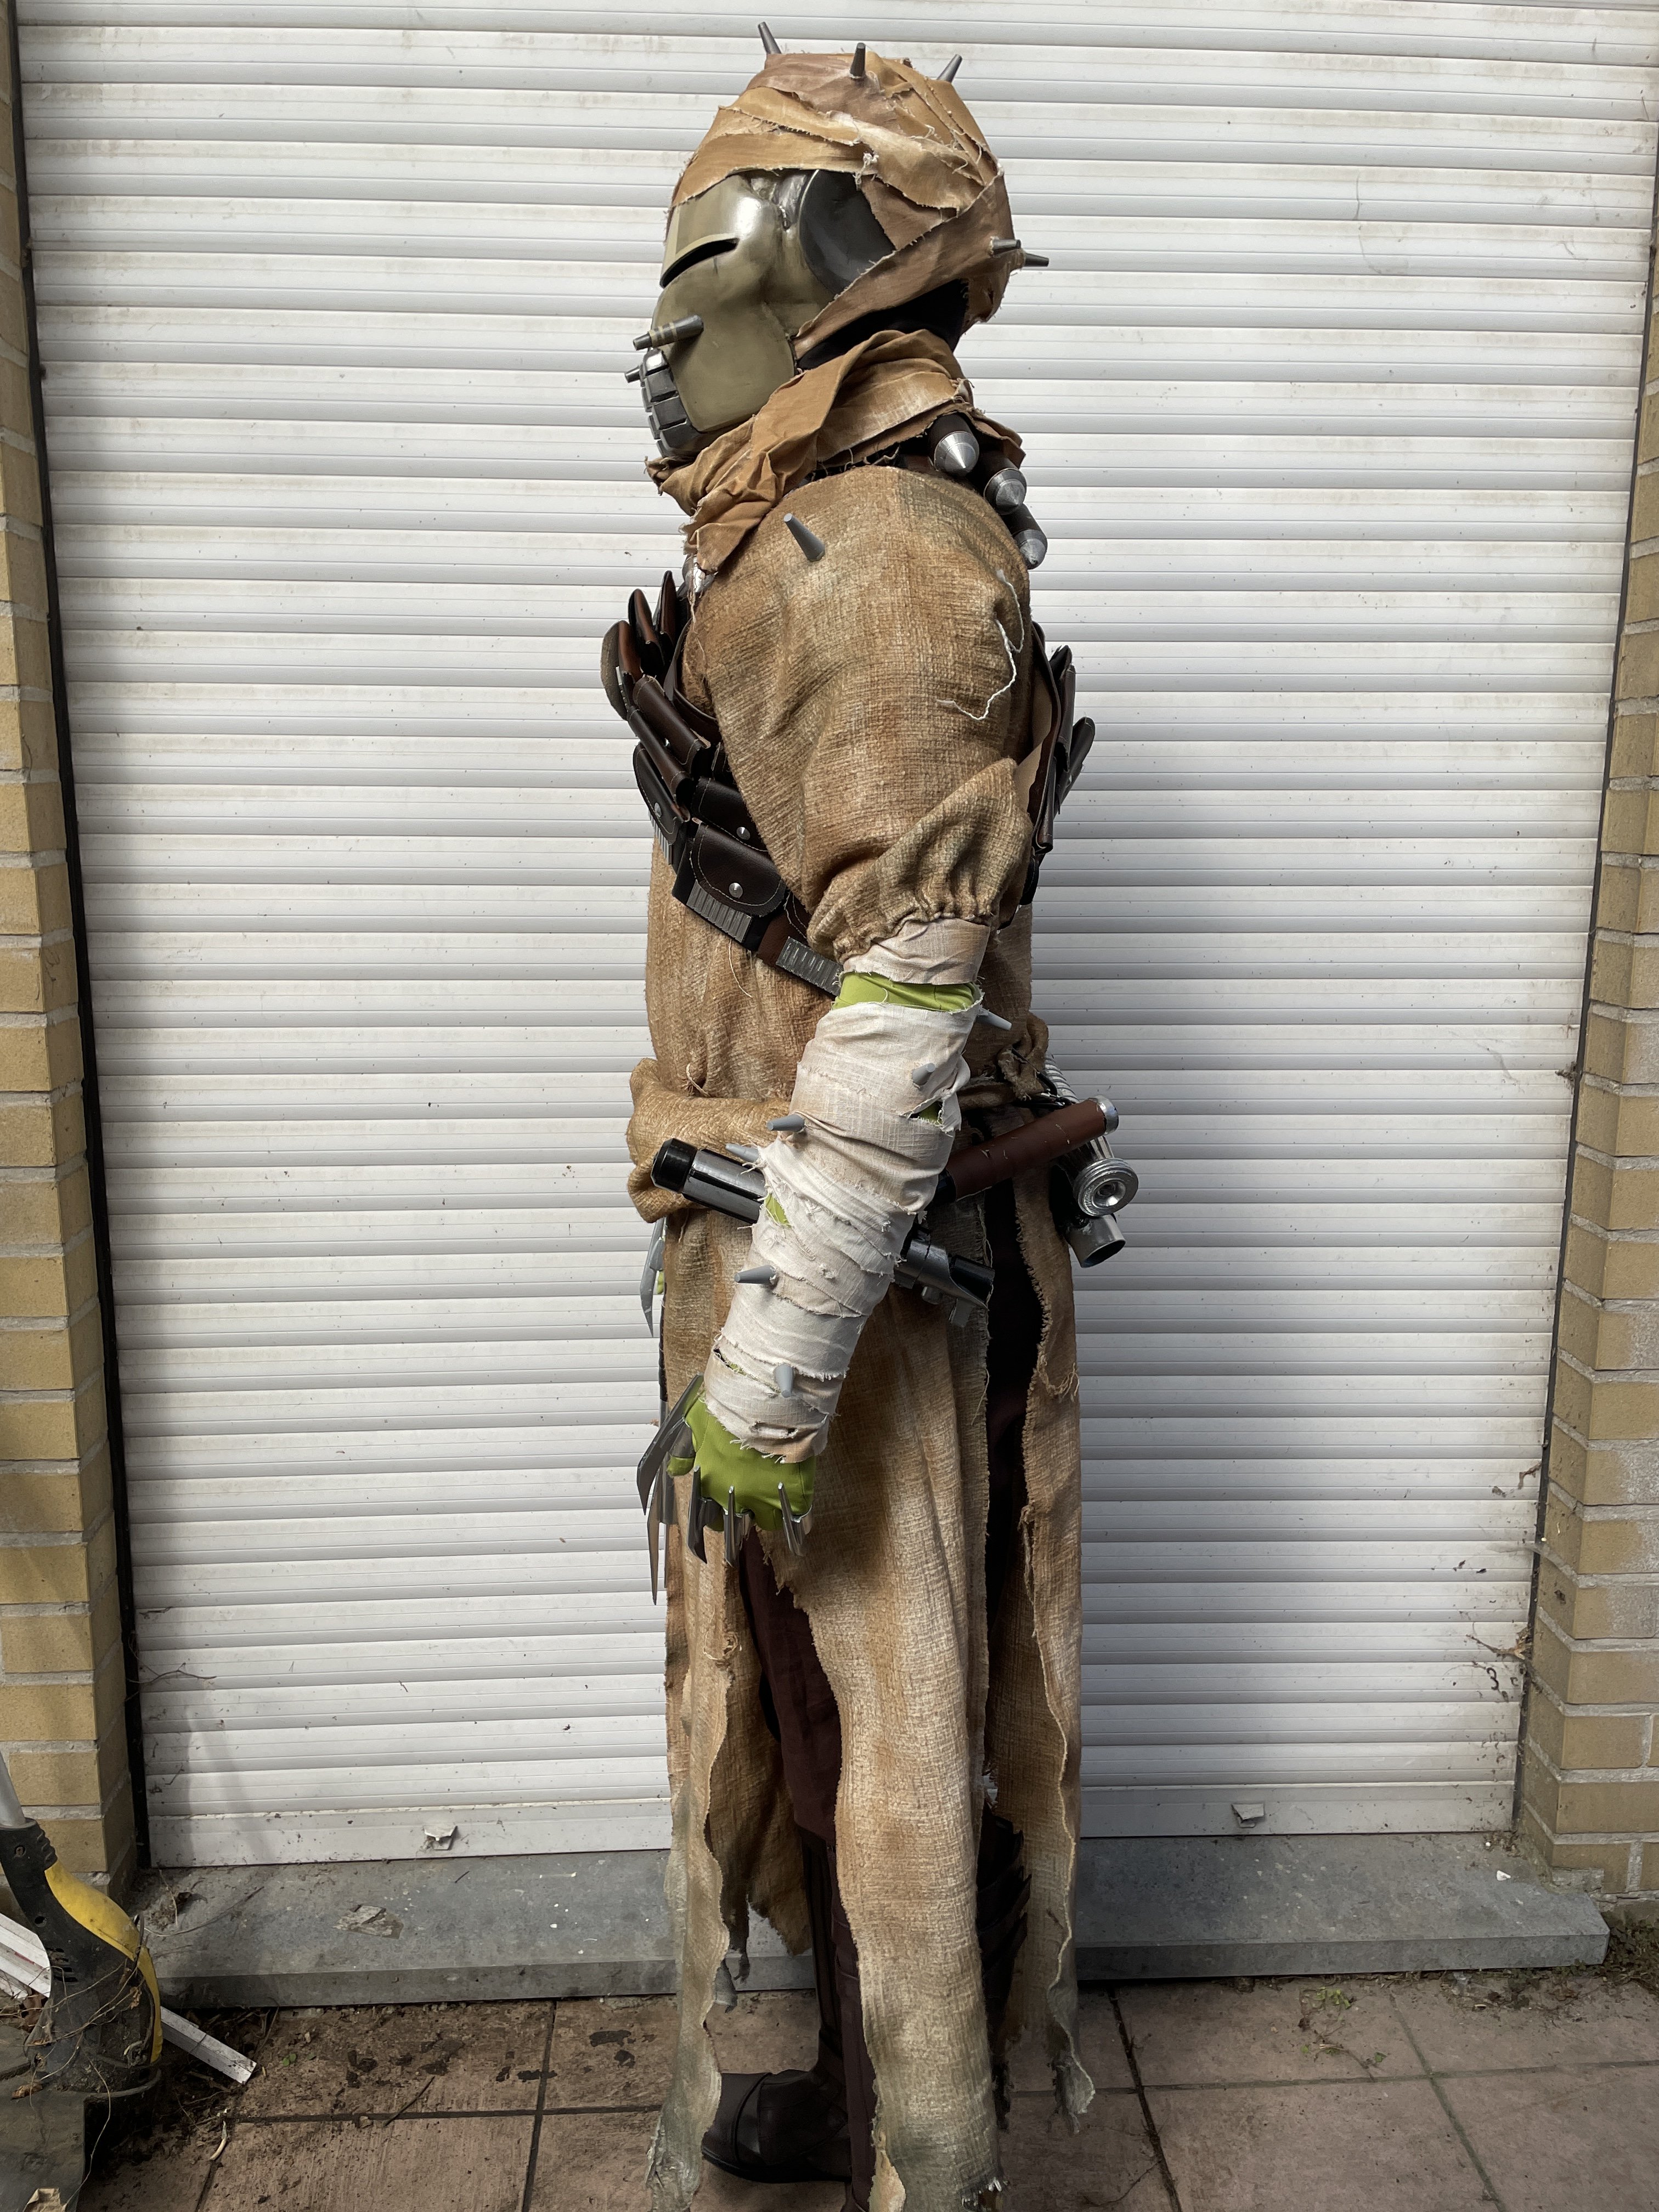
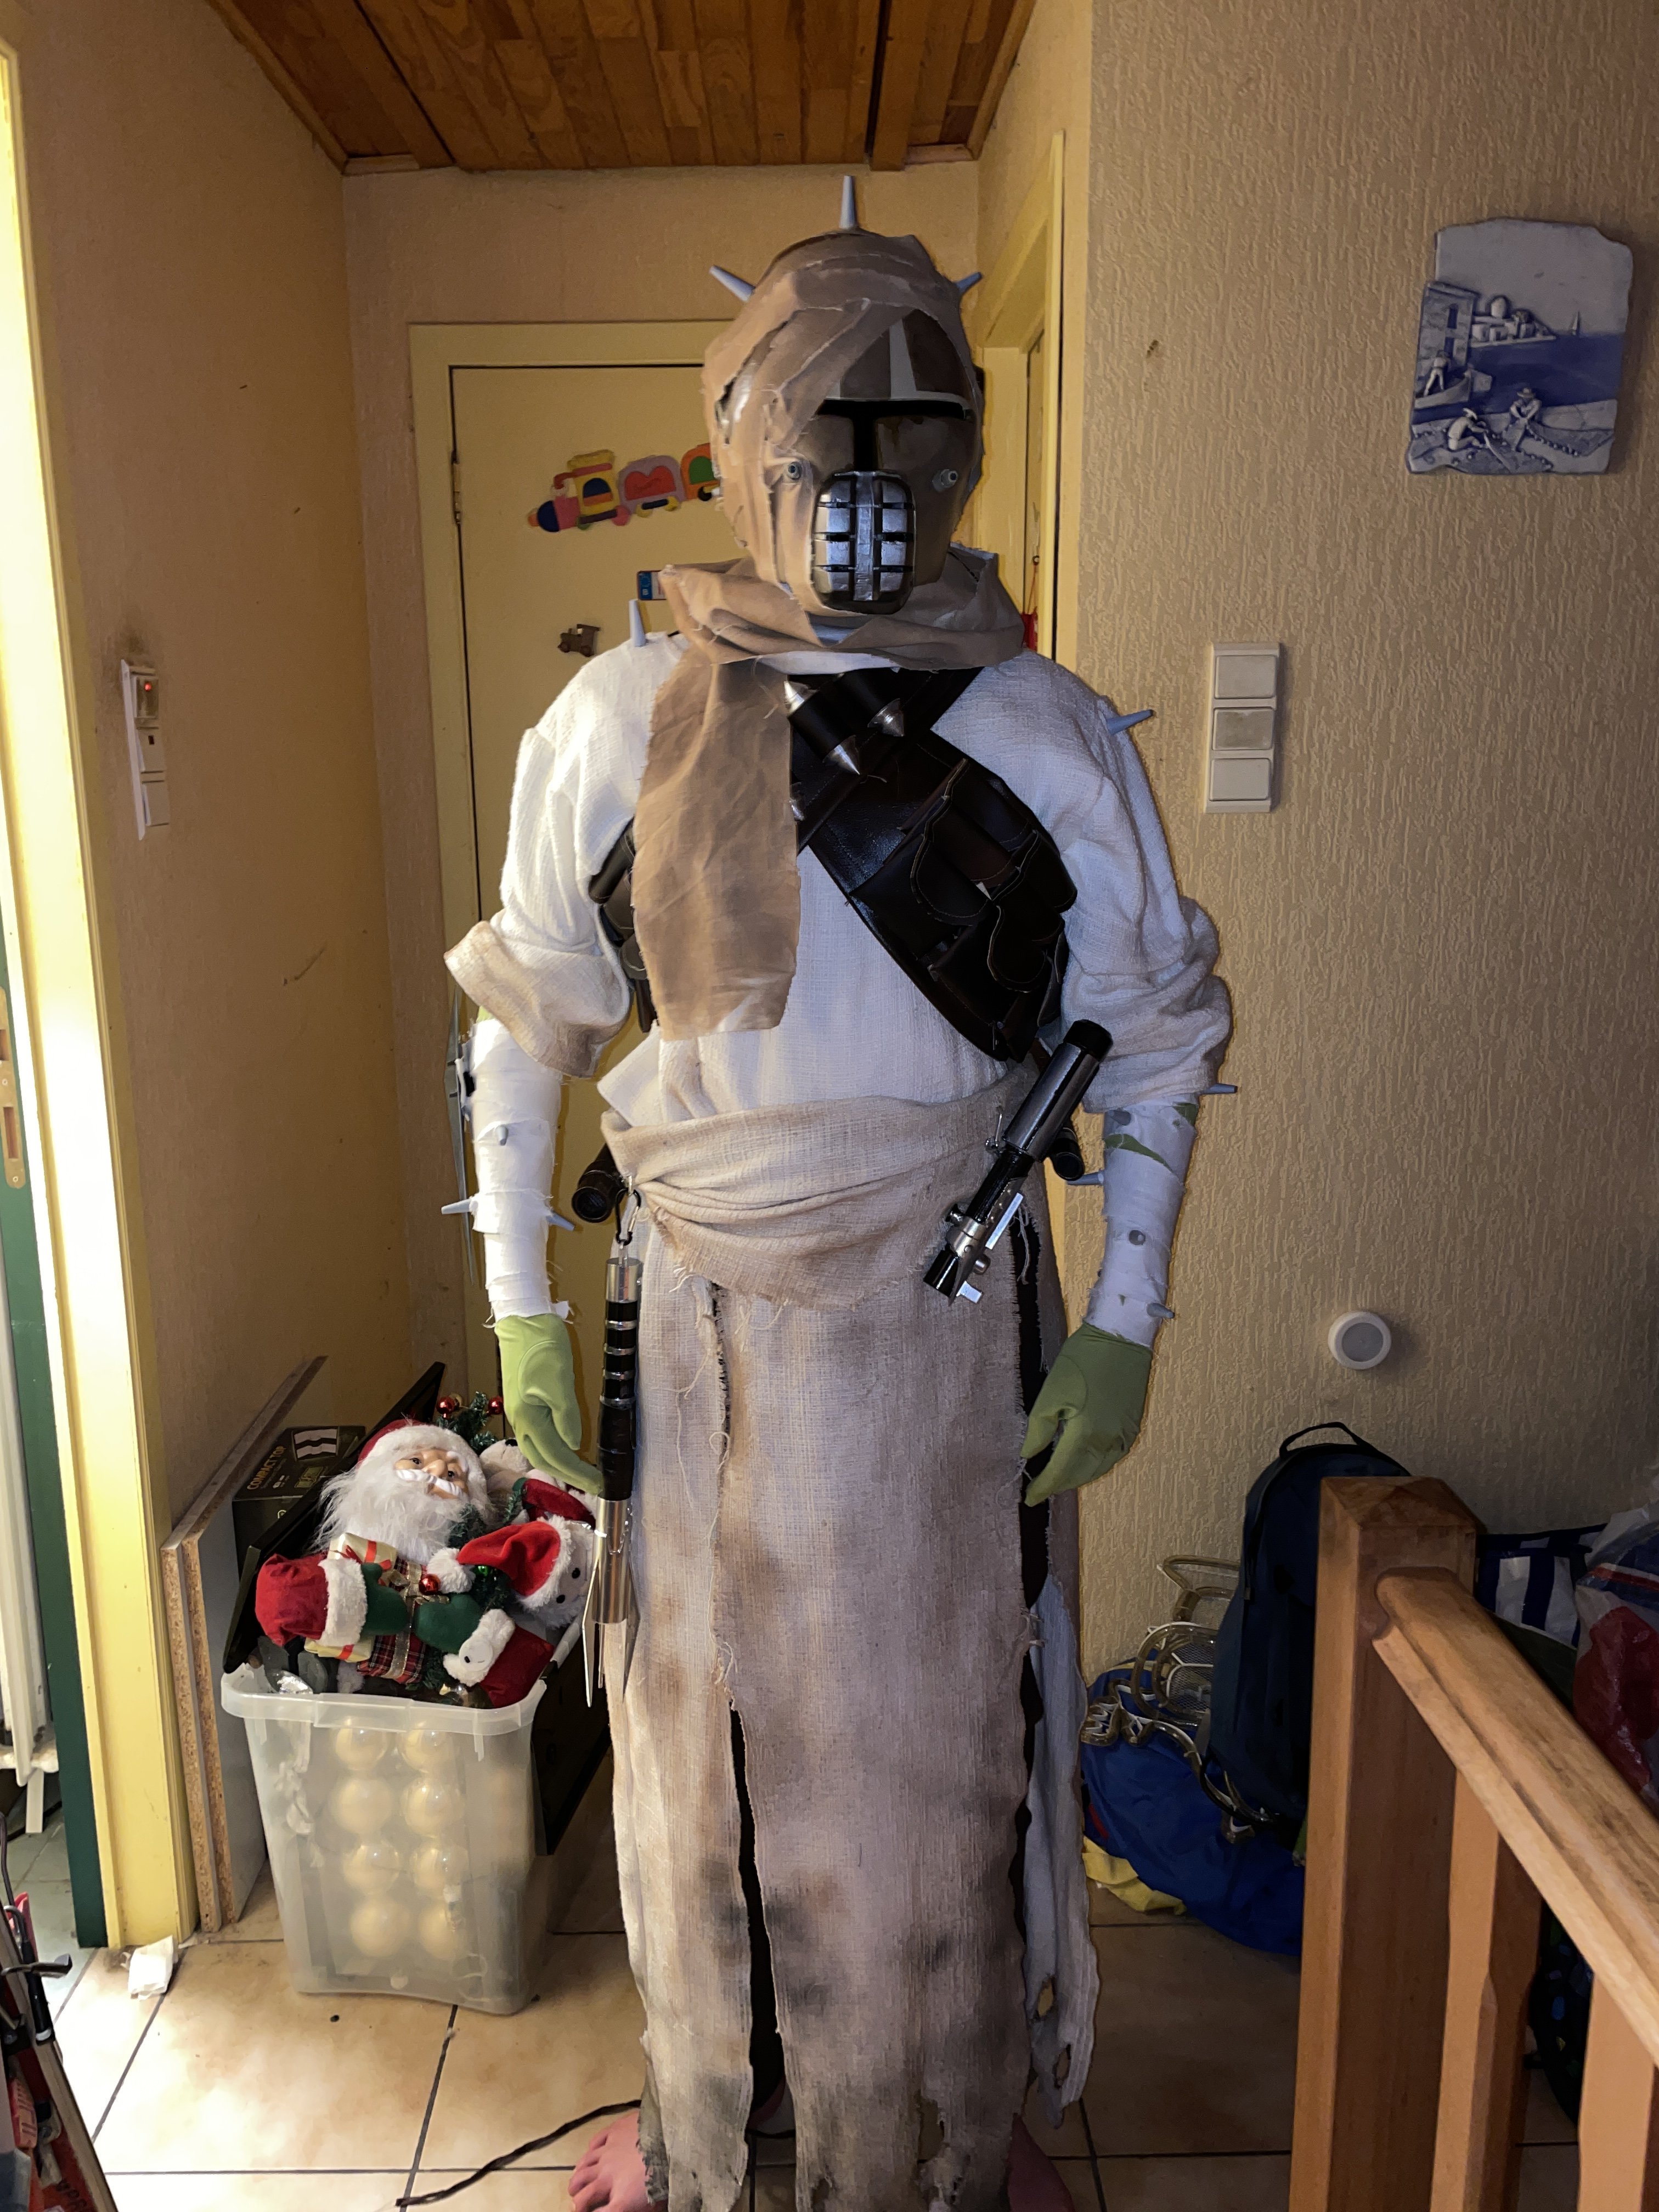
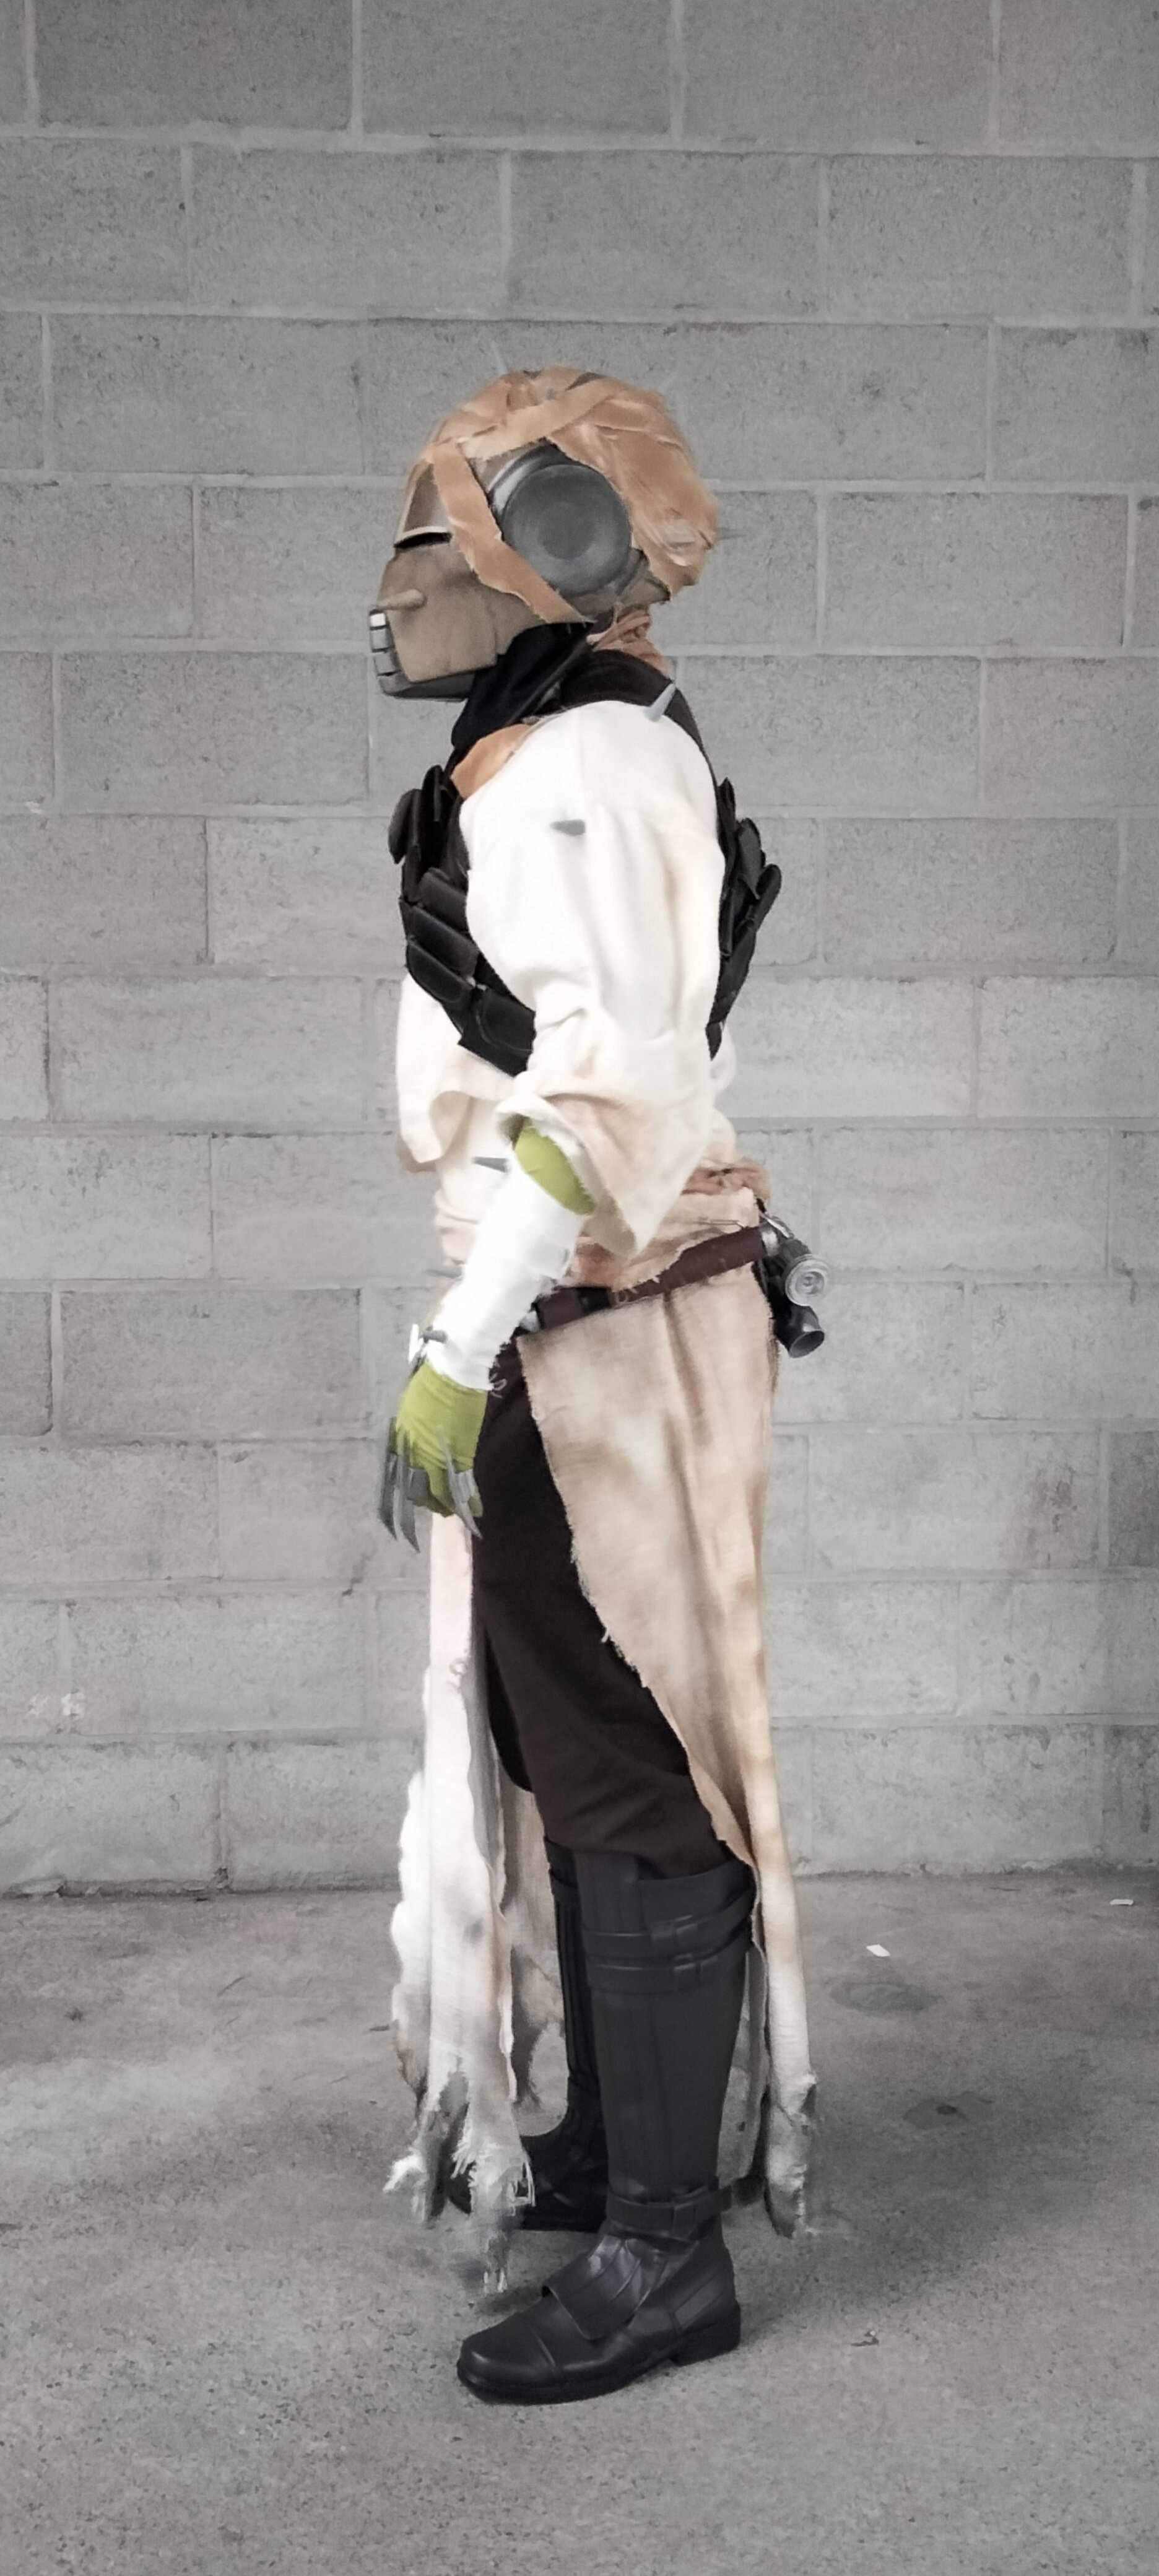
Hi everyone, the pictures are here!

.thumb.jpeg.8fb835c03ced6fcf063ebed22b0f438e.jpeg)
.thumb.jpeg.2ac135fd51a502617dc30d5a4413524b.jpeg)
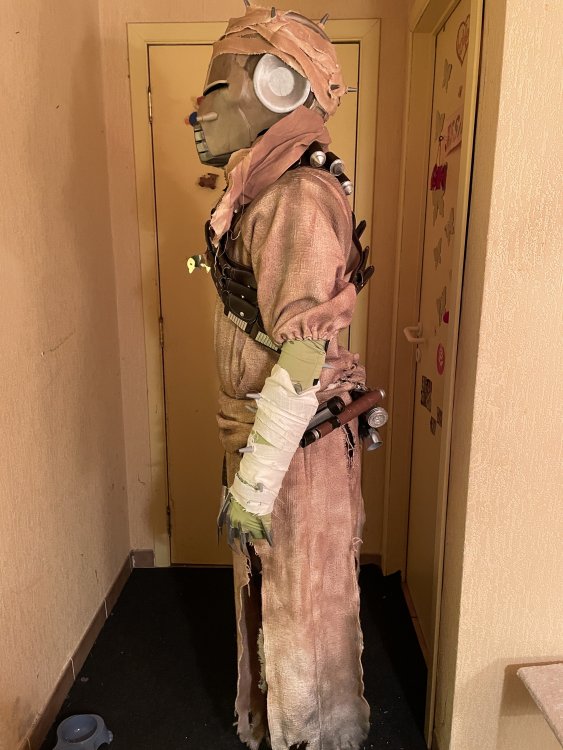
As you can see the helmet is a bit too big, I hoped that getting a padded shirt would help relieve the effect but sadly not (The pictures above are still without padded shirt). So I started printing a couple of days ago and today a smaller one finally finished! This time it really hugs my head, there's absolutely no space left for fans or my ears really 😆, I'm VERY happy how it looks now, measurement wise. This is personally a very big improvement for me as I wasn't too sure about the helmet in the first place. Here is a V1 and V2 comparison! (With padded shirt)
I've also weathered the bandages a bit, and added bandages at the top of the arm, but that was after I took the pictures at the top, I haven't had time to take new ones with the small changes 😅
In the meantime any feedback on the rest of the outfit, except the helmet and the changes mentioned above?
-
Hi everyone, happy new year!
I updated my progression to reflect what I've done so far. I'll be posting pictures as soon as I receive my changed bandolier!
What I've done so far:
- Bandolier is getting changed up as we speak to reflect the thinner bandolier in the game.
- Made 'shells' for my arms so I can put on the arms a lot quicker, and that way it stays like it's supposed to.
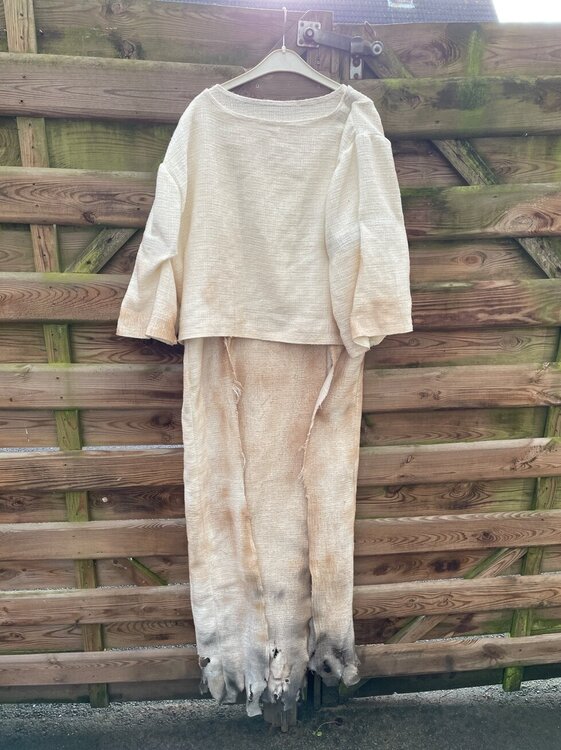
- Combined the tunic and shirt and weathered it
- Added tubes and hand electronics to right arm
- Remade the belt to reflect the game more, and replaced the belt underneath to an elastic one so it adheres to my body and is a lot easier to put on.
What I'm planning to do in the coming days/weeks:
- Better scarf, looking to maybe combine it with the helmet or balaclava directly?
- Rivetting and putting the little metallic rectangles on the pouches
- Weathering the lightsaber trophies, only Starkiller's original lightsaber got the desert weathering in the game, but I think of giving the desert weathering to all the lightsaber trophies.
Hoping the bandolier gets finished this week so I can take some proper pictures with it soon!
If I do end up forgetting: there's a con in the beginning of April where'll definitely get some good pictures, talk with my local 501st Garrison and maybe even take my application pictures 😁
-
This is genuinely very impressive, it looks amazing! I'm definitely using some of these methods.
-
1
-
-
A bit late but congratulations! Looks amazing! 😁
-
Hey everyone, I'm back from a little break. I did work on my helmet a tiny bit, the tusken spikes on top of the helmet I painted metal, I also added the hair braid.
Also about time I posted about paints:
Helmet:
-Tan: The Army Painter: Colour Primer Skeleton bone.
-Metal parts: The Army Painter: Warpaints: Gun Metal
-Dried blood: Just a random /brown/ I had laying around.
After everything was painted I went over it with a heavy black wash.
Finger blades, Arm Spike:
Both were done with Spectrum Silver, with the arm spike I applied a heavy black wash over it.
As for my future plans:
1. Hand robotics, and tube.
2. Combine the tunic and shirt, I really don't see any signs on the actual in-game model that they're separate. The color is just a little different.
3. I'm also still planning on getting a proper bandolier sometime in the future, or making a new more accurate one myself, the last one was rather rushed since I wanted one for the con.
4. I'm also planning on seeing if I can add a tiny bit of a greenish tint to the metal parts on the helmet as seen in-game.
I'm hoping I can complete all of the above by the next con in April! We'll see how it goes!
On 8/5/2024 at 6:45 PM, Naasad Tal said:Sorry for the delayed response...looks like you had a perfect first outing and sorted out some issues. One thing I would suggest would be a coffee/tea soak to darken your lighter fabrics, right now they look a little too on the "white" side of tan. You want everything to look more like the wraps on your helmet. Great start though and glad it survived your first con!
Thank you! You're definitely right, It's way too white right now. I'll try the bath and see how it comes out.
-
Hey all. went to my local con on Saturday. The kit held fairly well together. Couple of headspikes snapped off, thermal detonators fell off and bandolier velcro came loose. The rest held up great. Spoke with the 501st leather worker and discussed getting a proper bandolier. Other than that got some good pictures of it.
The scarf on the pictures are underneath it, its supposed to be on top so the bandolier attachment methods are hidden; definitely going to use some velcro or something to keep it in place in the future.
Tunic sleeves will definitely have to be more up, arm spike will need a better attachment method to keep it in place. Might also just attach the waist sash to the tunic. I'll also definitely look into adding some sintra or something to my shoulders to get them wider. Tunic definitely also needs some weathering. Will also redo the dried up blood on the helmet with a darker paint.
Missing the arm tubes and hand robotics still, will be one of the first things I'll add.


Any other changes that you guys see that'll need to happen that I haven't summed up?
Still a lot of work ahead!
Will also try posting more info on helmet paints and such this week or next week for anyone trying to get the same finish as myself.
Thanks for reading and thanks in advance!
-
Updated my progression list, going to my local comic con tomorrow with this costume and hoping to get some proper pictures there, will also meet up with the local 501st garrison for feedback.
I'll post all of the progress what and hows tomorrow after the con or the day after if I'm exhausted tomorrow!
A little sneakpeak:
-
Looks amazing!
-
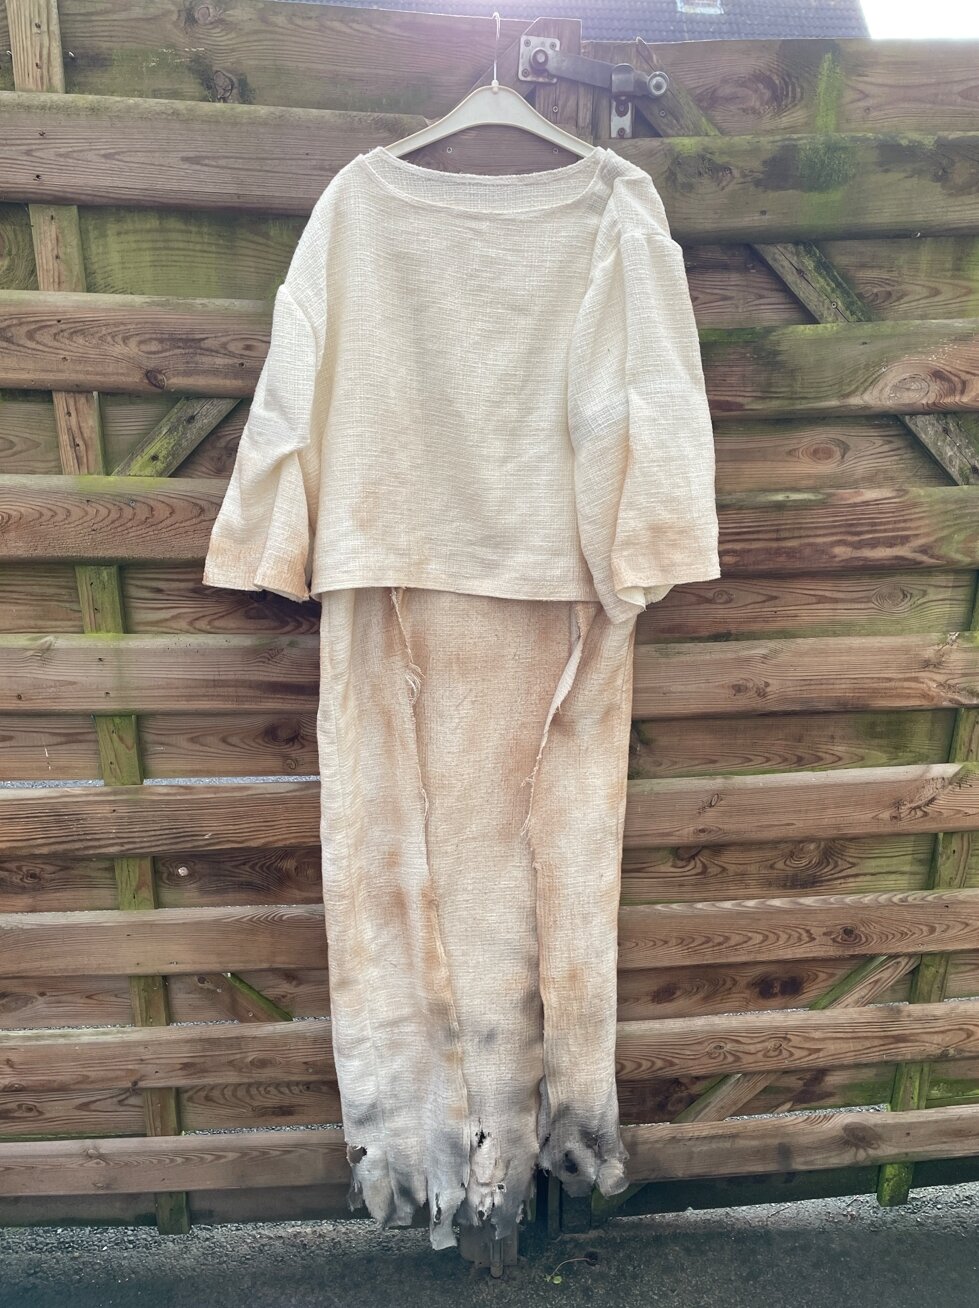
Tunic & skirt weathered, just needs the tusken spikes on it. Will most likely make it darker at the part where the tunic and skirt meet, will see how dark the sash gets. Might also add a bit more weathering on the tunic.
-
Lightsaber printed and ready to be sanded and filled. Depending on what will look best, will most likely change the position of the piece it'll hang from from the waist sash. In the CRL it states that it needs to be attached via a covertec wheel, but the way my sash is built it wont be possible to. I'll most likely have to attach it via a tiny hook or a small carabiner.
.thumb.jpg.25c3c47d3ff684f86420b8d2a74f1af4.jpg)
.thumb.jpg.33b3be2c8797bd45c7692597fe1f9473.jpg)
-
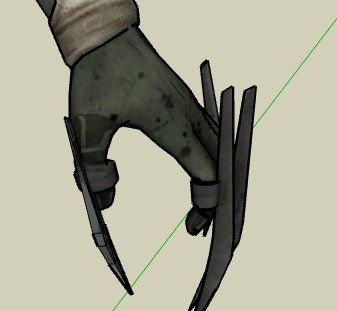
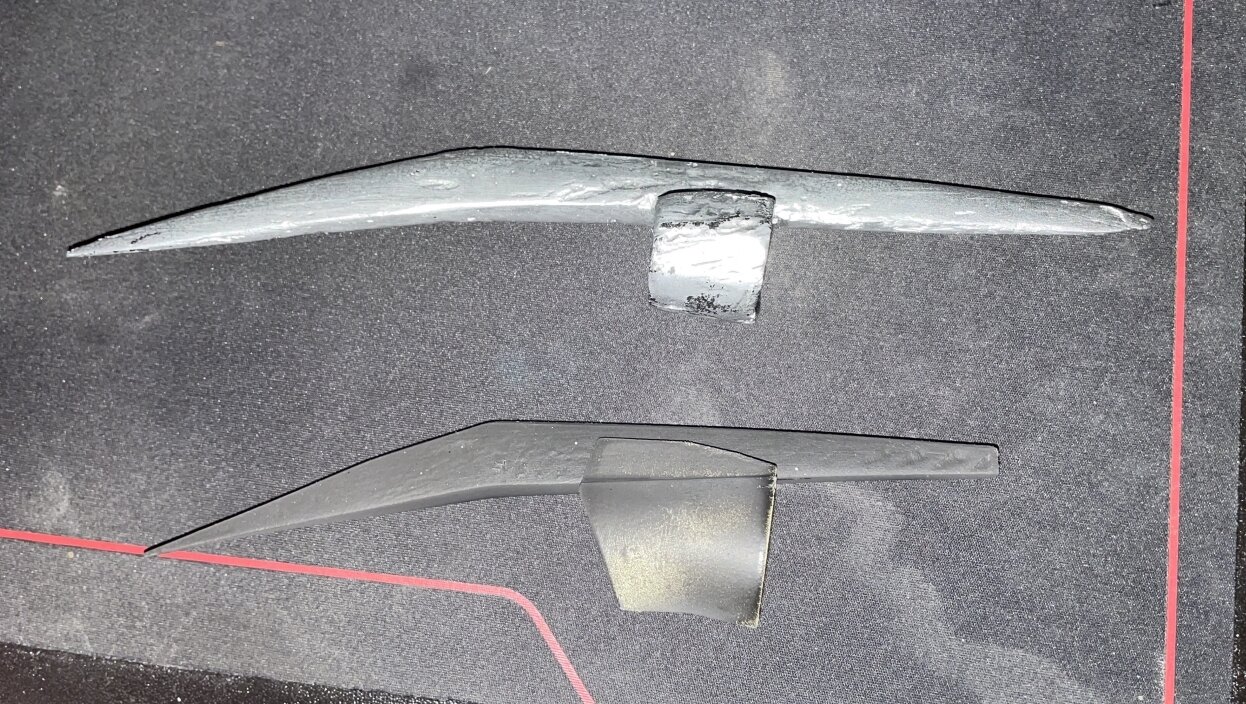
Hey all, I've got a little bit of progress to share.
Back in December I've gotten new finger blade files from MysteryMaker, it's a pretty big difference quality wise compared to my old ones, so I've printed them and am in the progress of sanding and filling. (Top old, bottom new.)

There has also been helmet progress. Still a lot of sanding and filling ahead, but it's getting there!

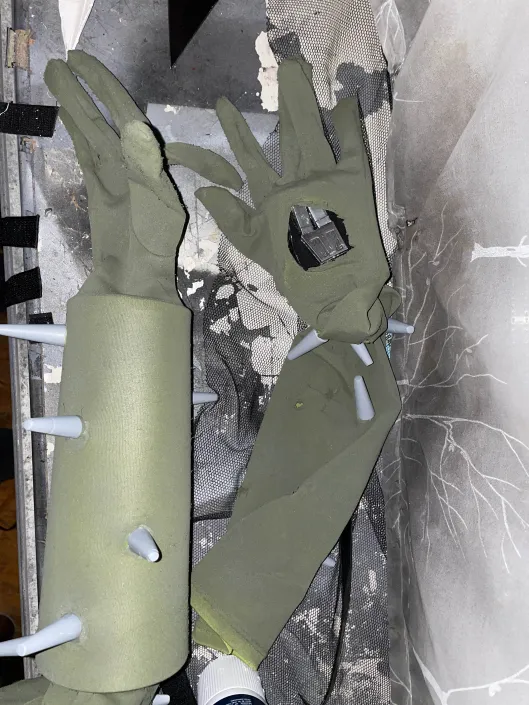
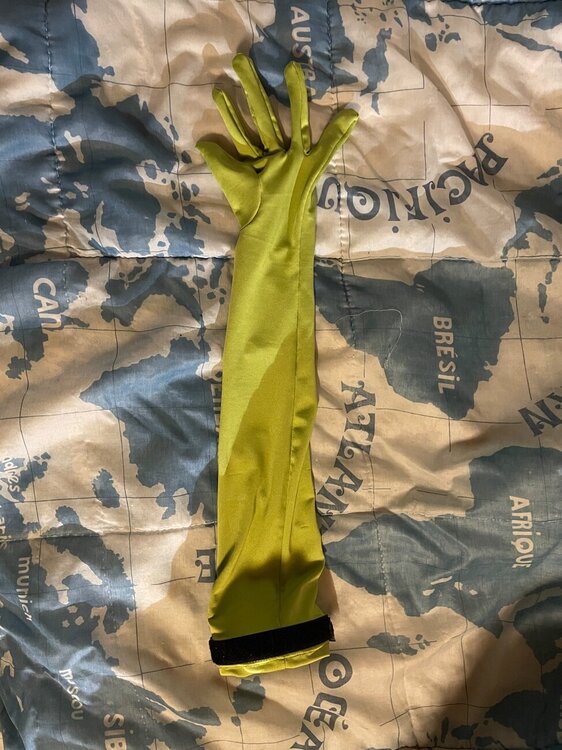
For the gloves I've decided to go with thin long elastic satin ones, my hands are on the smaller side so rubber gloves would just look too big. They came in a lighter color than I wished for but I can make it darker. I wrapped around a piece of velcro at the top and sewed a couple pieces on on the inside of my tunic to keep them up.
I also picked up black fabric that I'll sew on in certain spots so I can cut out parts of the green glove to reveal the robotic hand with.
As for the tunic, I've lost some weight in the time that I've made it and now: so I'll have to make some adjustments to make it fit better.
I've also been making minor adjustments to the sash so it looks like the positioning in-game, and I've been working on the saber trophies. Managed to snap my Kato saber in half while I was going over it with a handpalm sander, so I've decided to model another one without the flaws of other one & printed it with a lot higher infill percentage.

Going to be working on all of it a lot more since there's a local comic con coming up next month that I want to wear this to.
-
Hey all, I've been looking around for glove alternatives but am unable to find ones that look remotely like the ones on the CRL. I originally went for olive satin gloves but they dont really look like the ones on there. Does anyone know which ones are used, or something that can point me in the right direction?
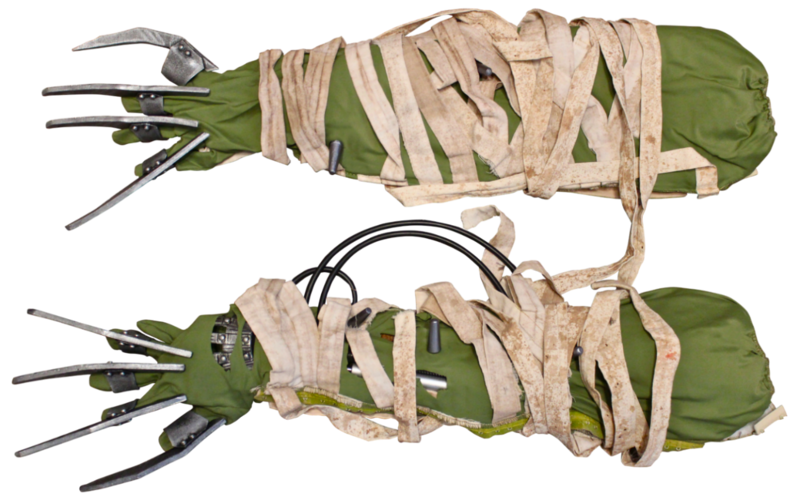
On a more positive note, I've recently gotten game accurate finger blades files that'll replace my current ones.


.jpeg.7a0c68760e975fd8aa4ac84995e5db3b.jpeg)


.jpeg.0666095e97dc6e47d1e6f65b1f88952b.jpeg)
.jpeg.efe39f1b0eabfee4a29d3a9958aaca99.jpeg)
.jpeg.a5c90836d6b7f45e5f4c04de97606830.jpeg)


.jpg.c4b1e1f272d313c1262a7940c985e950.jpg)
.jpg.2f56db2e400ab8ed32b2a2a17838ef21.jpg)


Tulak Hord
in SWTOR Characters
Posted
I honestly think you have pretty free reign on the boots themselves since there's not much detail on them, comfortable black boots are more than enough.
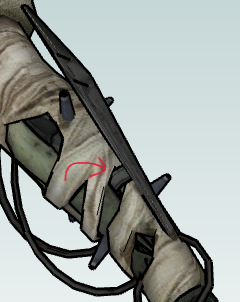
Then for the metal parts, I think sintra would honestly would be the go to way for this, that was you can make it a snug fit, besides the design of it is pretty easy. If you don't want to butcher the boots with glue and damage the boots by putting the parts on and off constantly I think there's 2 ways to go about it.
1. (With a seam) once the parts are shaped cut them in 2 parts, front and back and put some magnets in the parts where they meet so they snap onto each other and then put a strap on the back part so it doesn't sag down.
2. Make the part that goes over the front of the boot a separate part, and then allow it to be attached by magnets to the part that goes around the boot, then a strap at the back around the front of the boot so it doesn't sag down as well.
Here's a picture that shows both ways, left is 2, right is 1. Hope it makes sense 😆
The wrappings seem to be the same as the hand wraps and the other fabric straps on the costume, your best bet would honestly be to go to a fabric store and just look around for fabric with the same-ish texture that's tan, you can always make it darker.