-
Announcement
Welcome to the forums!
If you are a newly-approved member, make sure you check out the New Member Checklist!
If you are a Detachment member and can't see the member-only area, post here for access.
-DV


kwinchell
-
Posts
20 -
Joined
-
Last visited
kwinchell's Achievements
0
Reputation
-
That's a great idea, thank you! That should make a much neater circle.
-
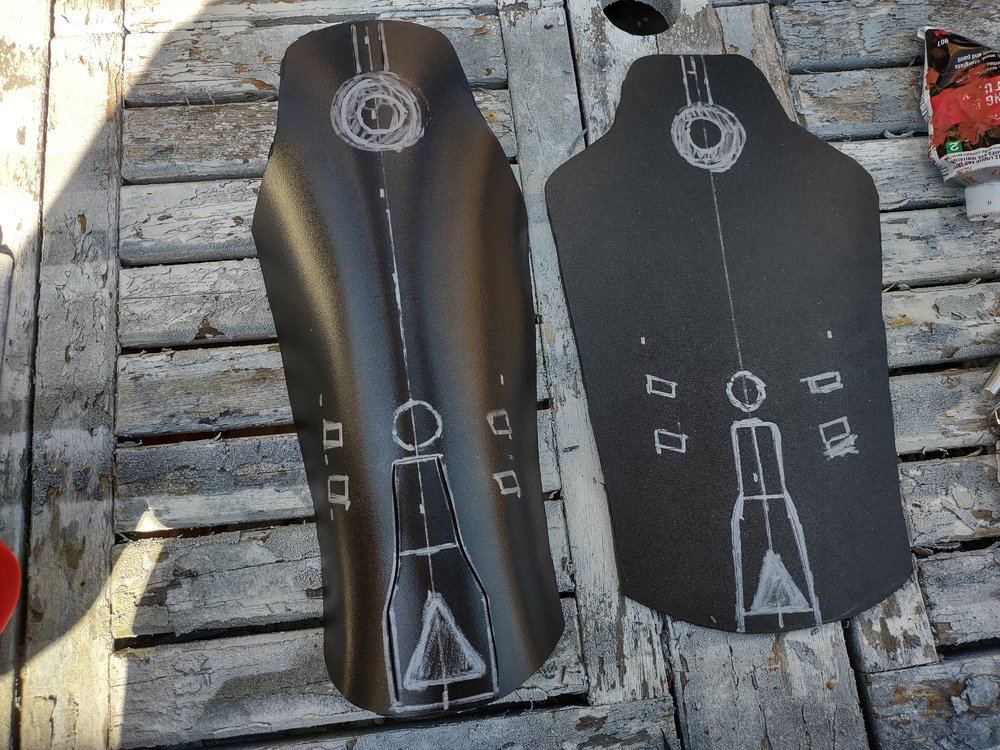
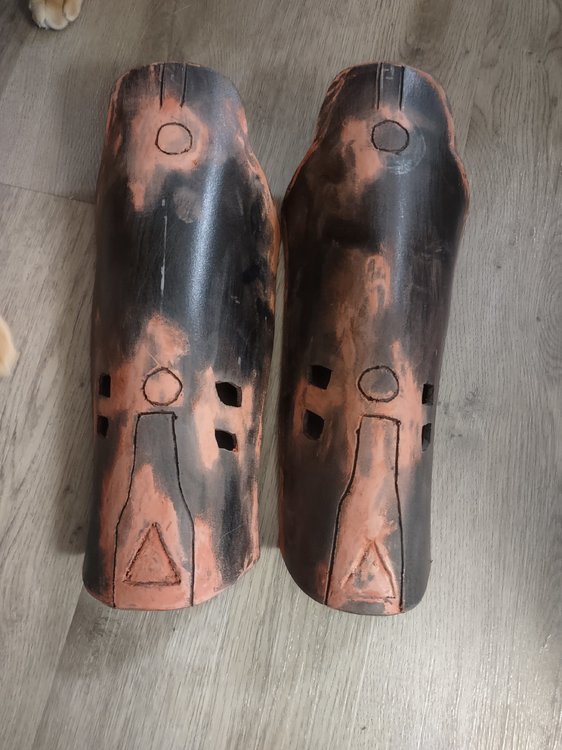
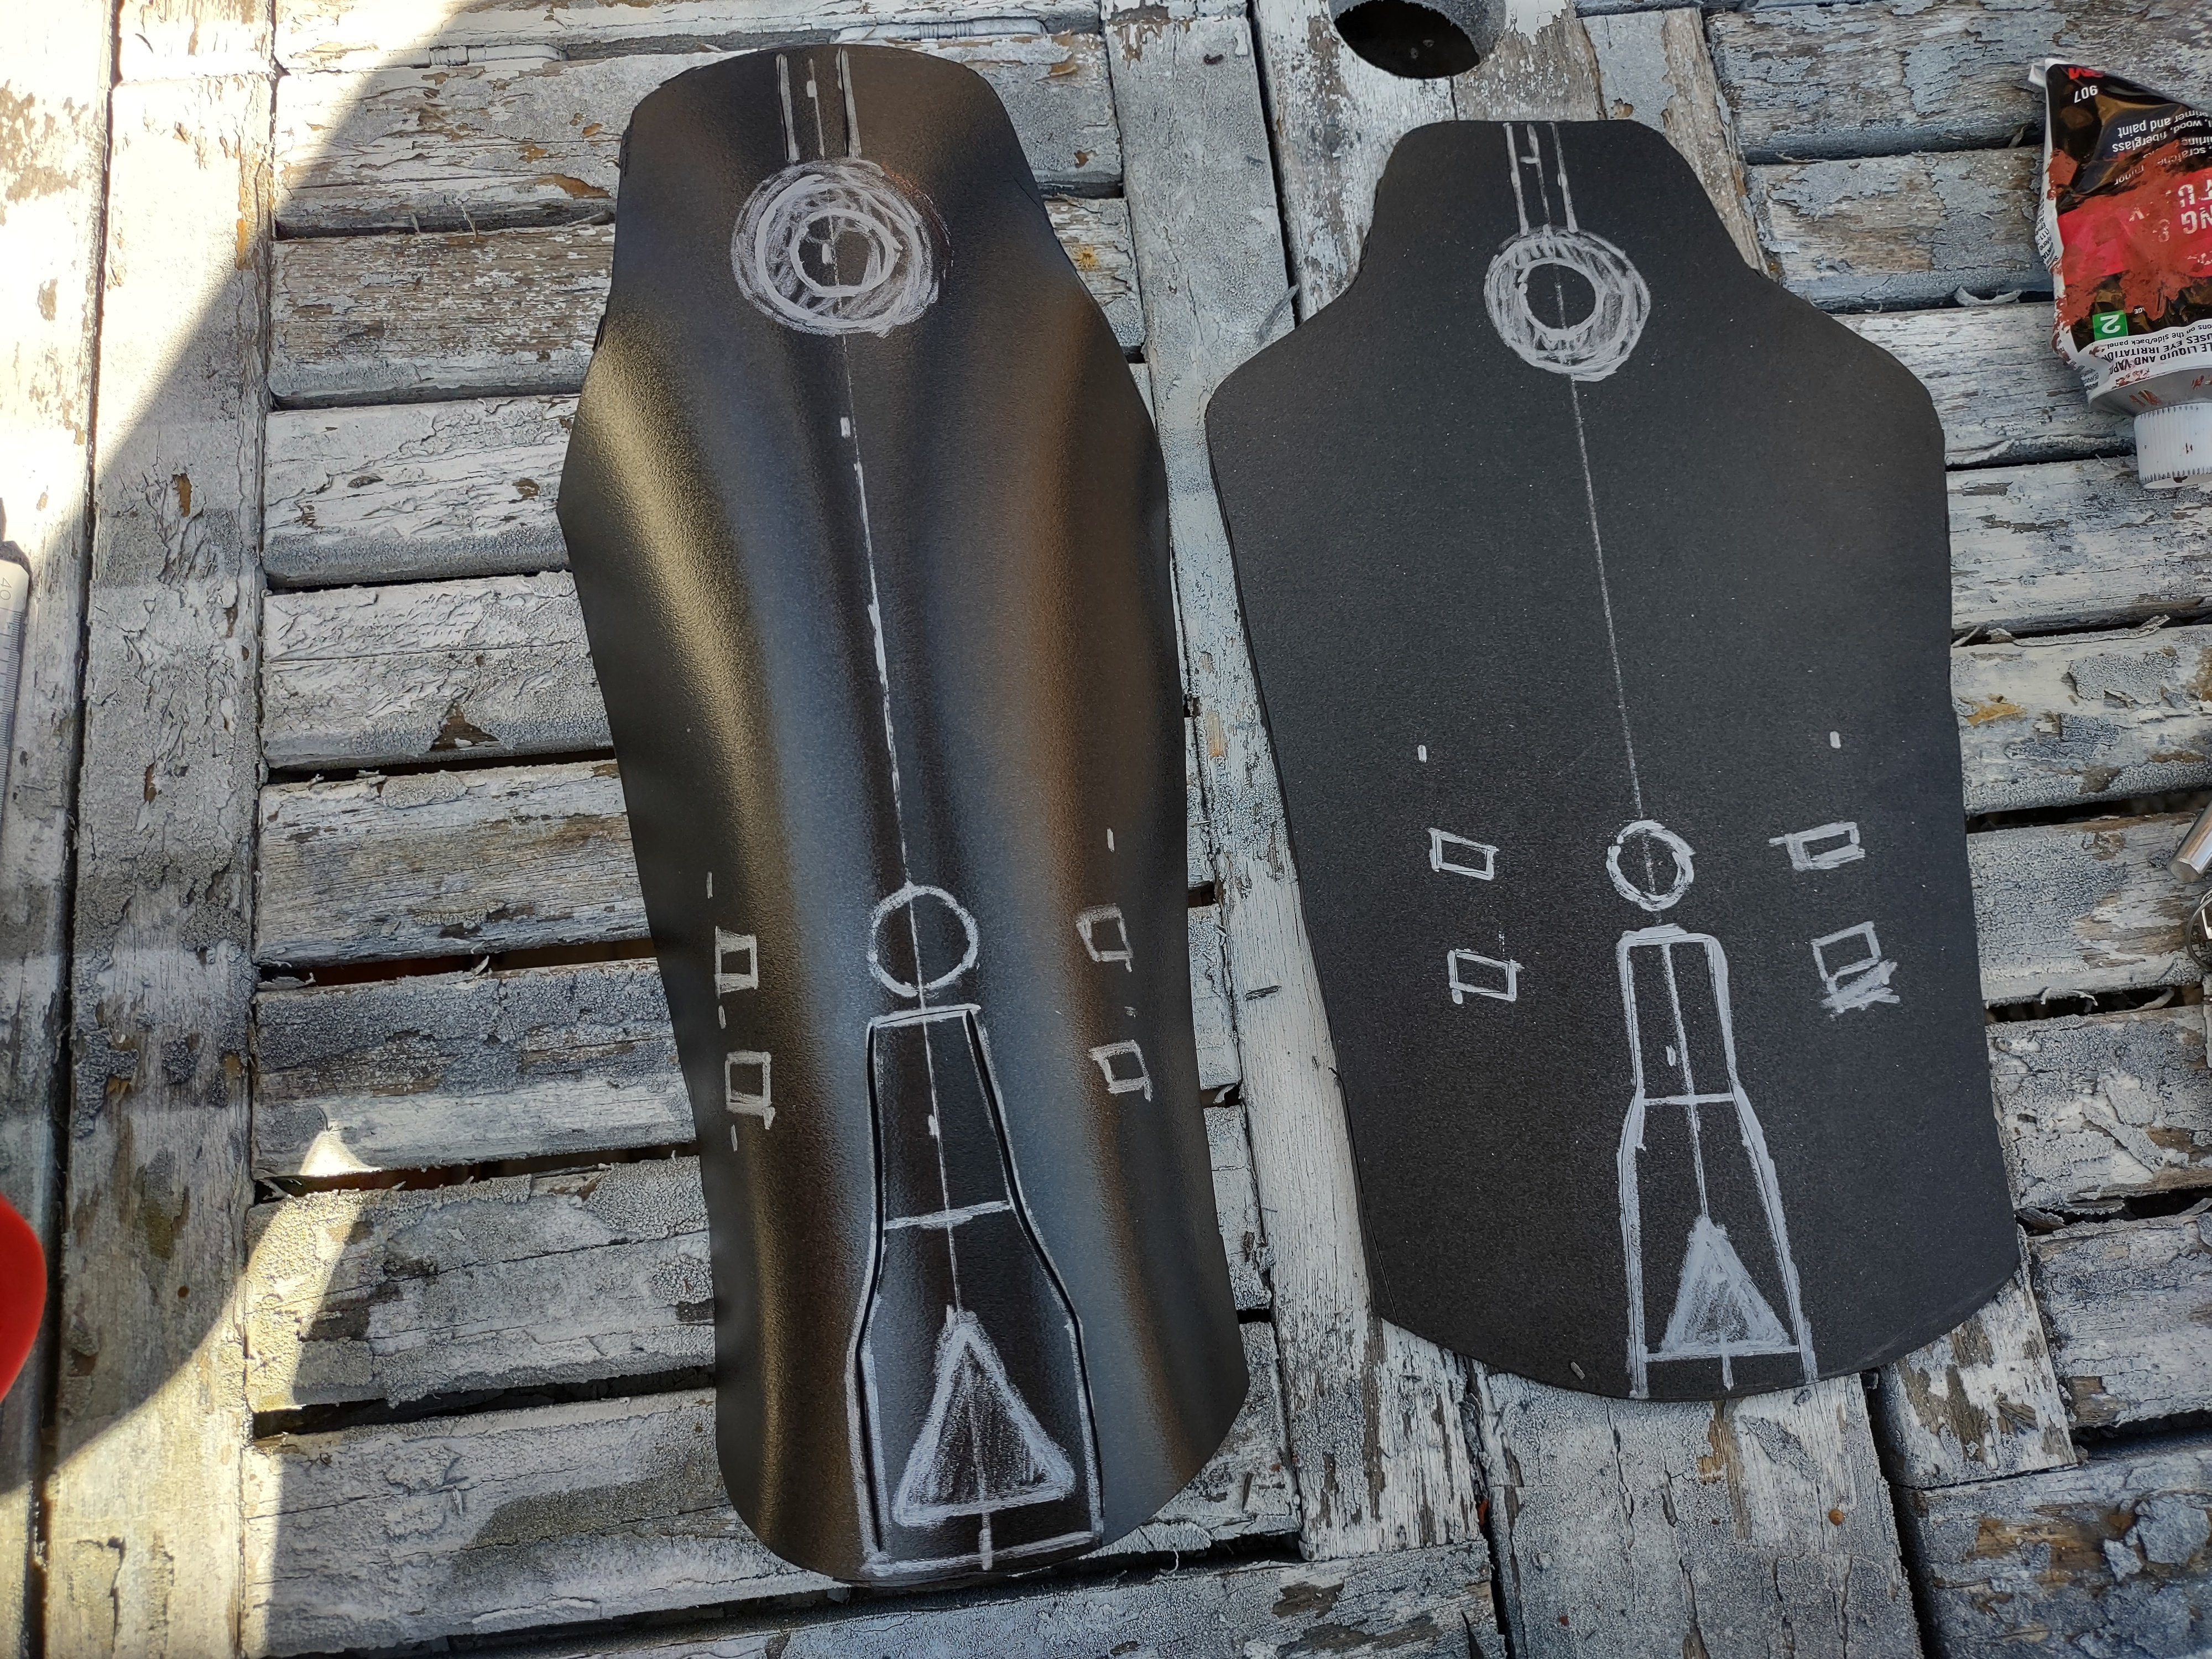
Some armor updates! I ended up removing all the putty and replacing it with thin strips of sintra Which then needed to be filled and sanded over and over. I'm happy with the shape of them now, I just need to paint them. I drew on the shin guards and started to shape them This was my first time using a dremel, and while they turned out okay I'm not entirely happy with them. Some of the circles ended up off center, but I'm not really sure how to fix that
-
That's it for now! I'd love to hear feedback!
-
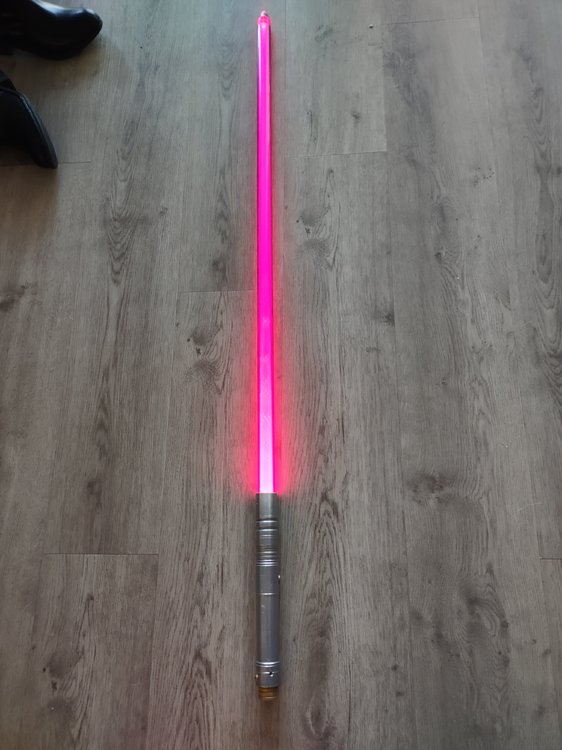
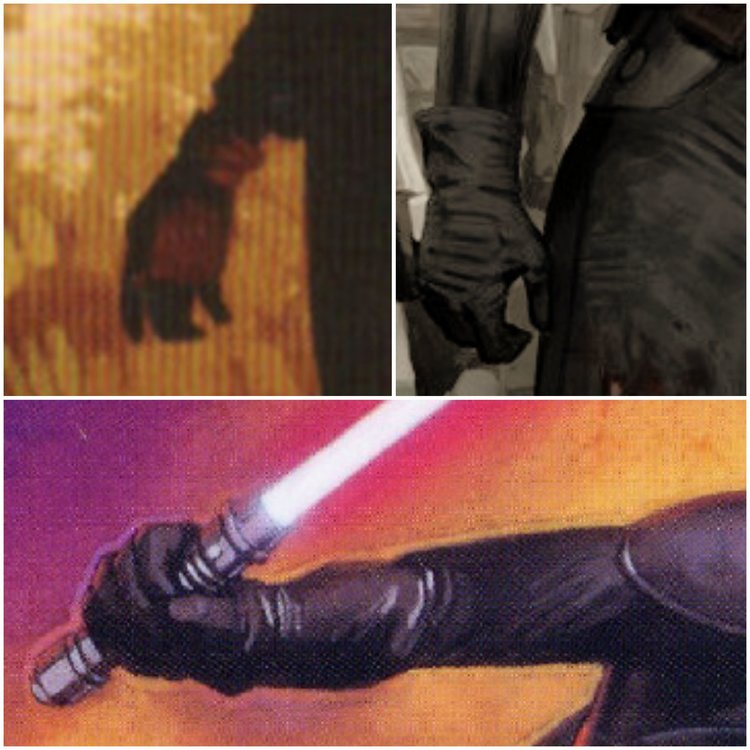
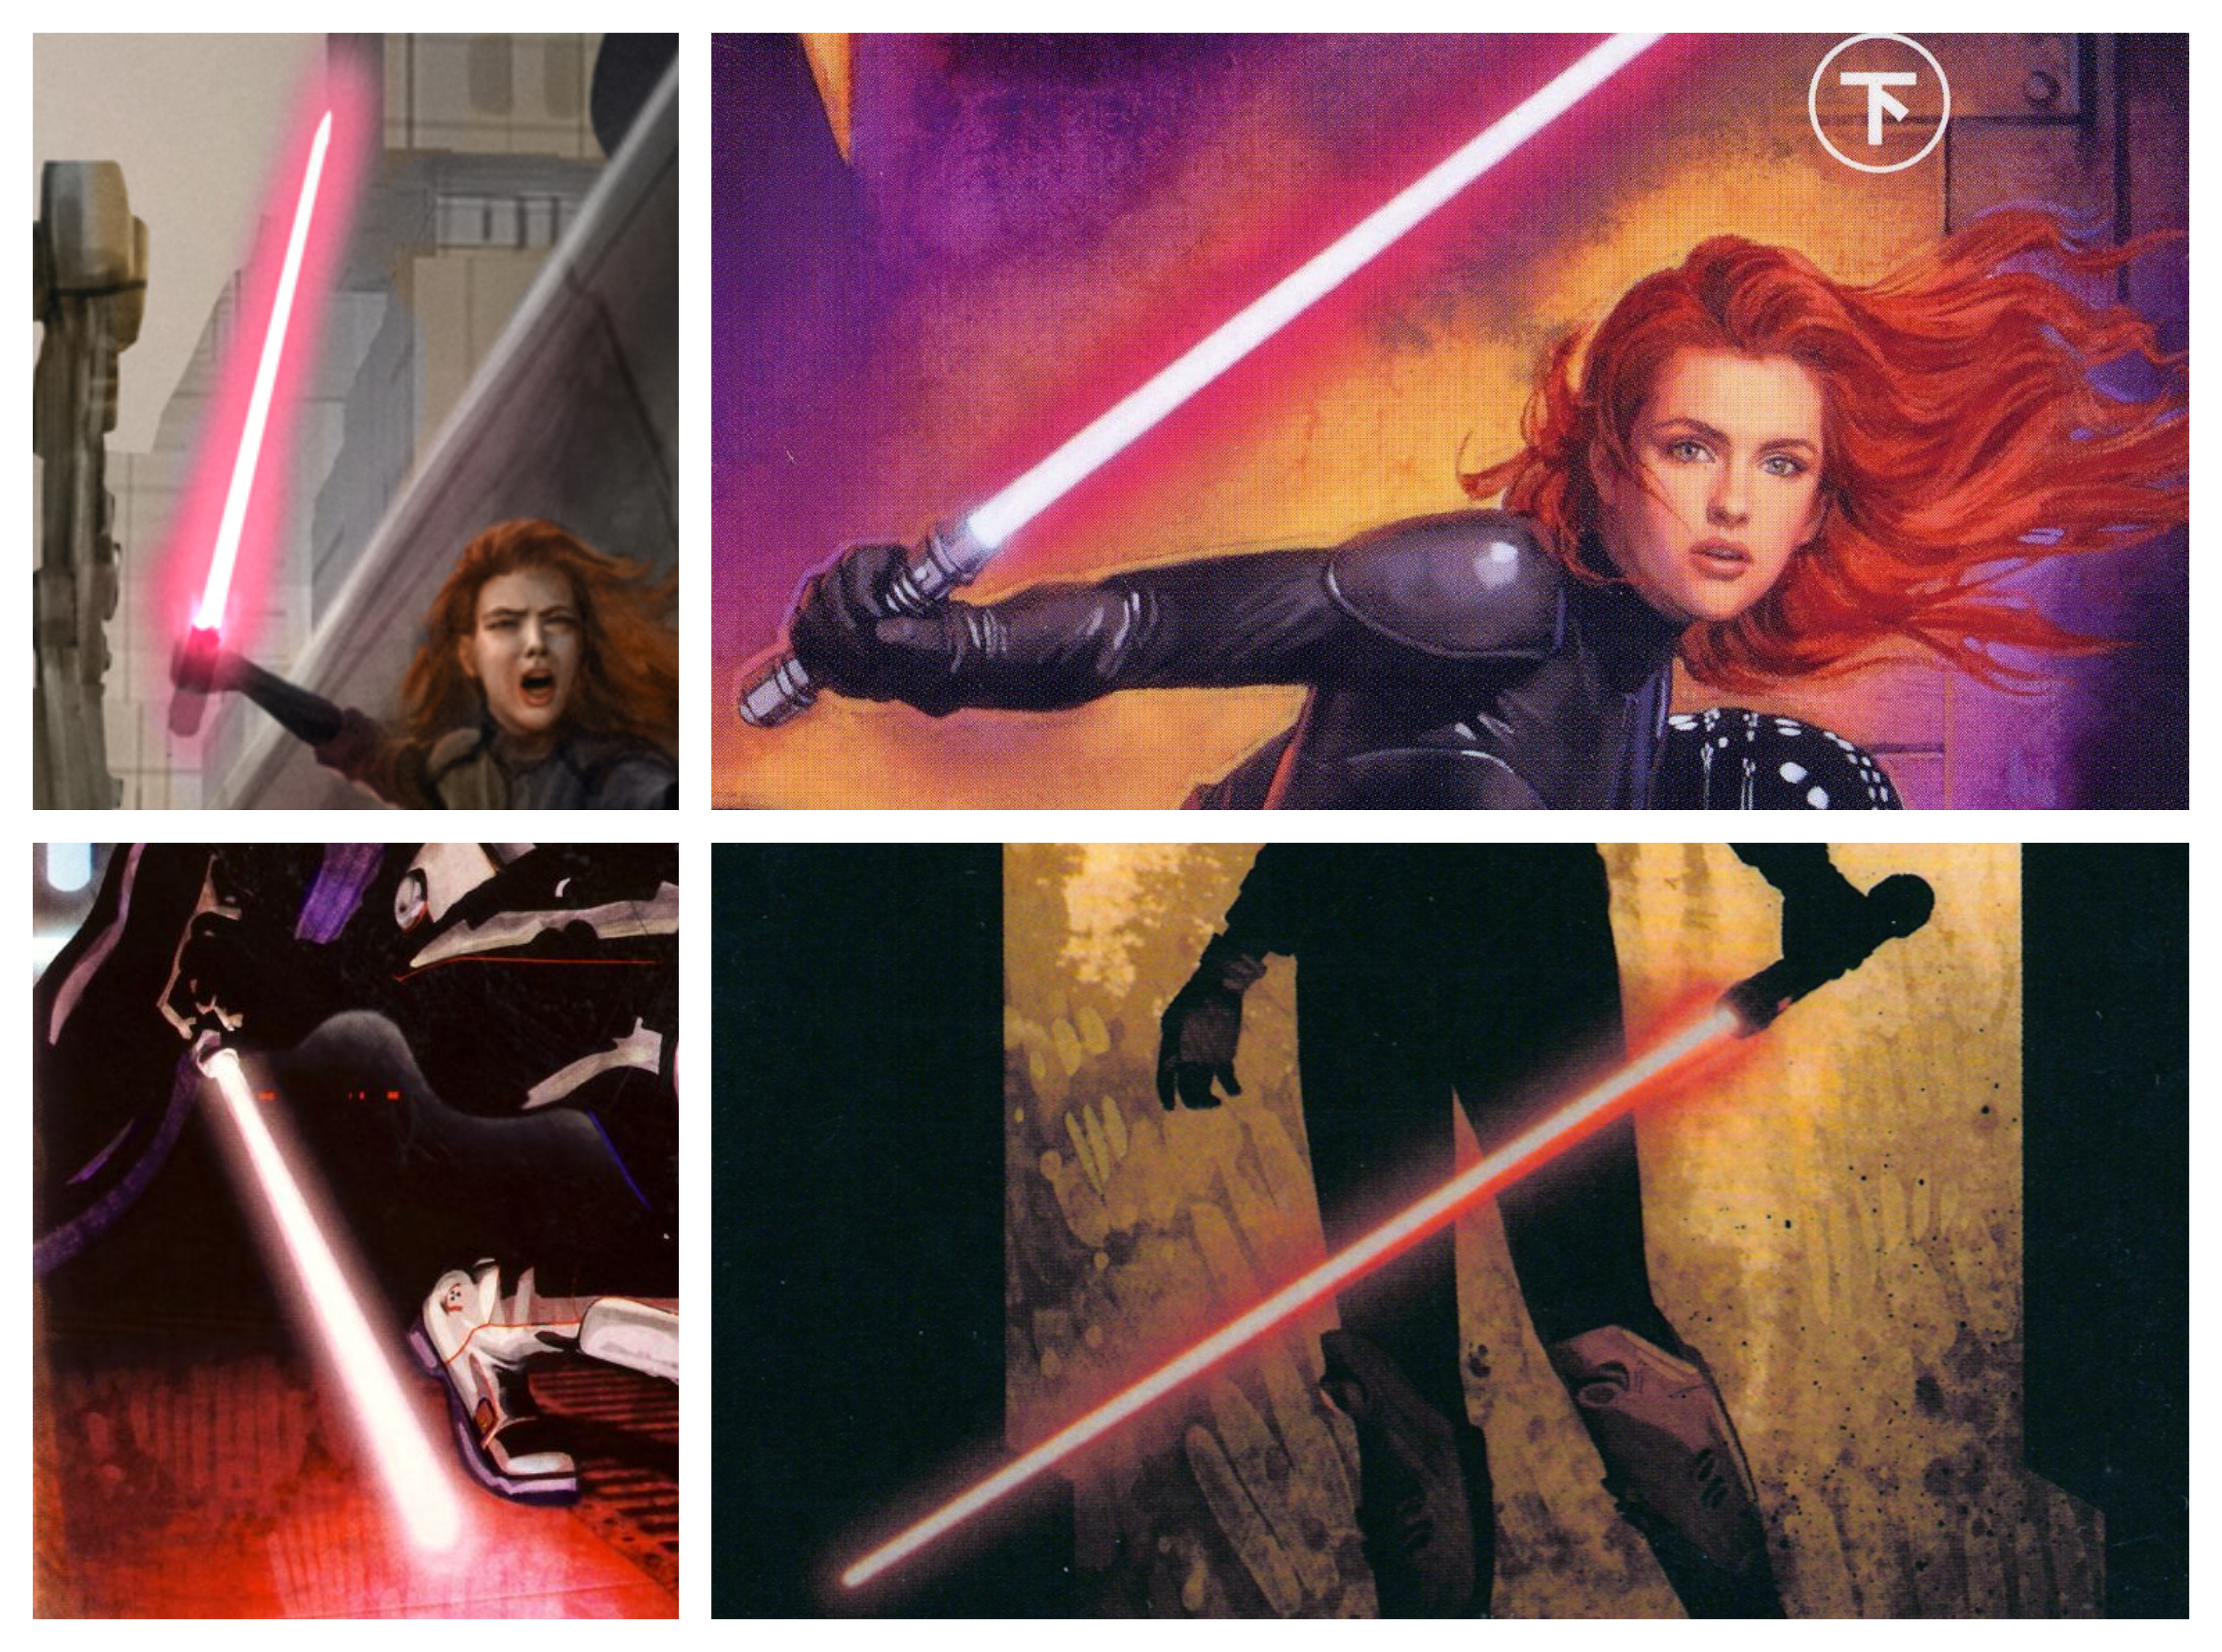
6. Top Belt: I have the leather, but I'm waiting to finish the chest piece first to cut it so that it is correctly proportional. My dad has the equipment to cut metal and I don't, so I sent him a Tandy belt blank and he's going to cut the edges into it. 7. Lower Belt: I'm currently searching for that funky little buckle, I believe it might be entirely fictional and need to be 3D printed, so I've asked a friend to help me with it. 8. Lightsaber: the wonderful Shayé Whitmer built me a beater saber for Saber Guild that has Tri-CREE LEDs in it, and makes a lovely pinkish red when I put the red LED through my purple day blade.
-
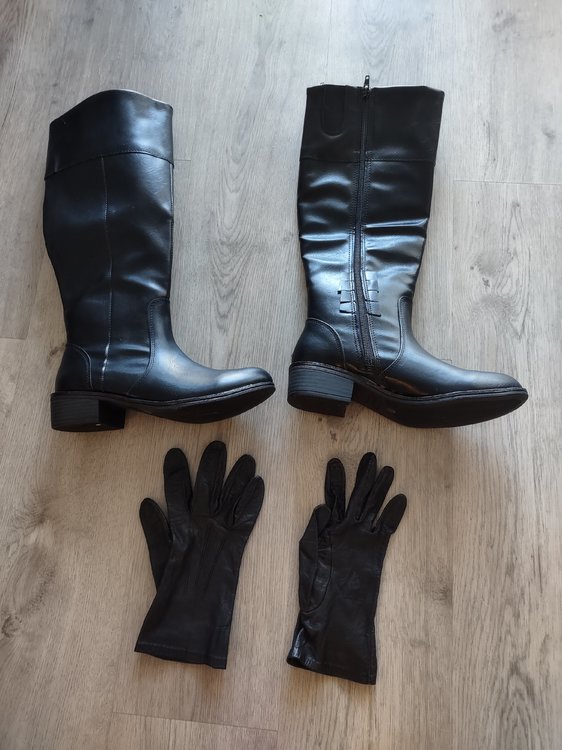
4. Gloves: found these at my parent's house, my mom hadn't used them in years so I was able to take them. (Thank goodness, sewing gloves is the WORST) 10. Boots: I got these on clearance since I'm going to sacrifice them to this costume since the shins will be glued on. I'll be cutting off the strap.
-
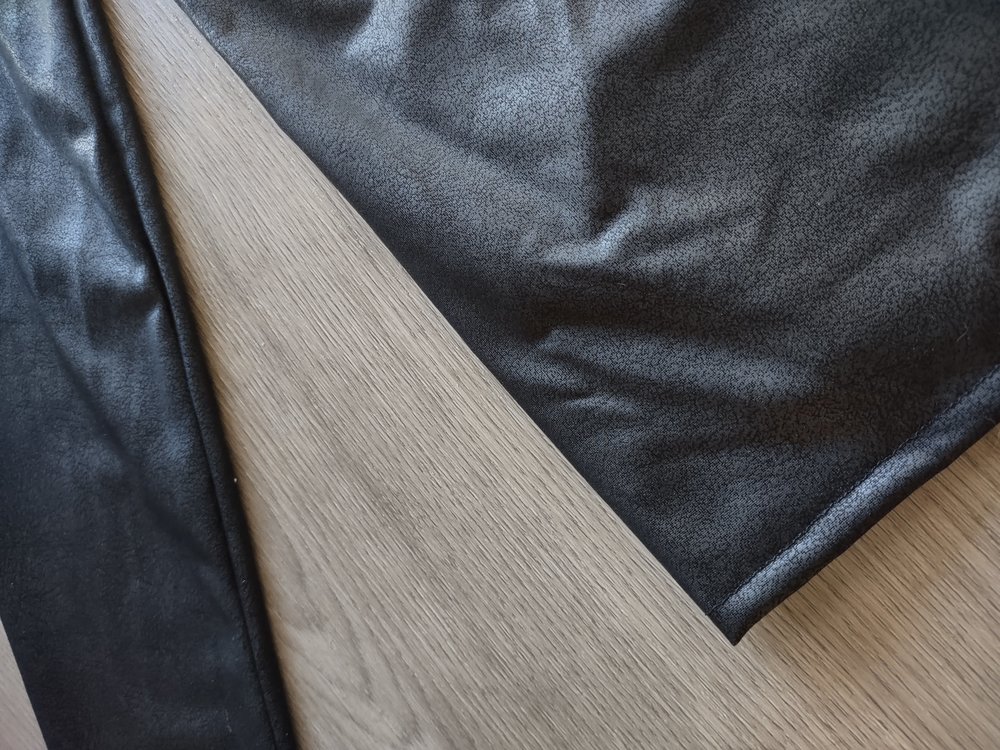
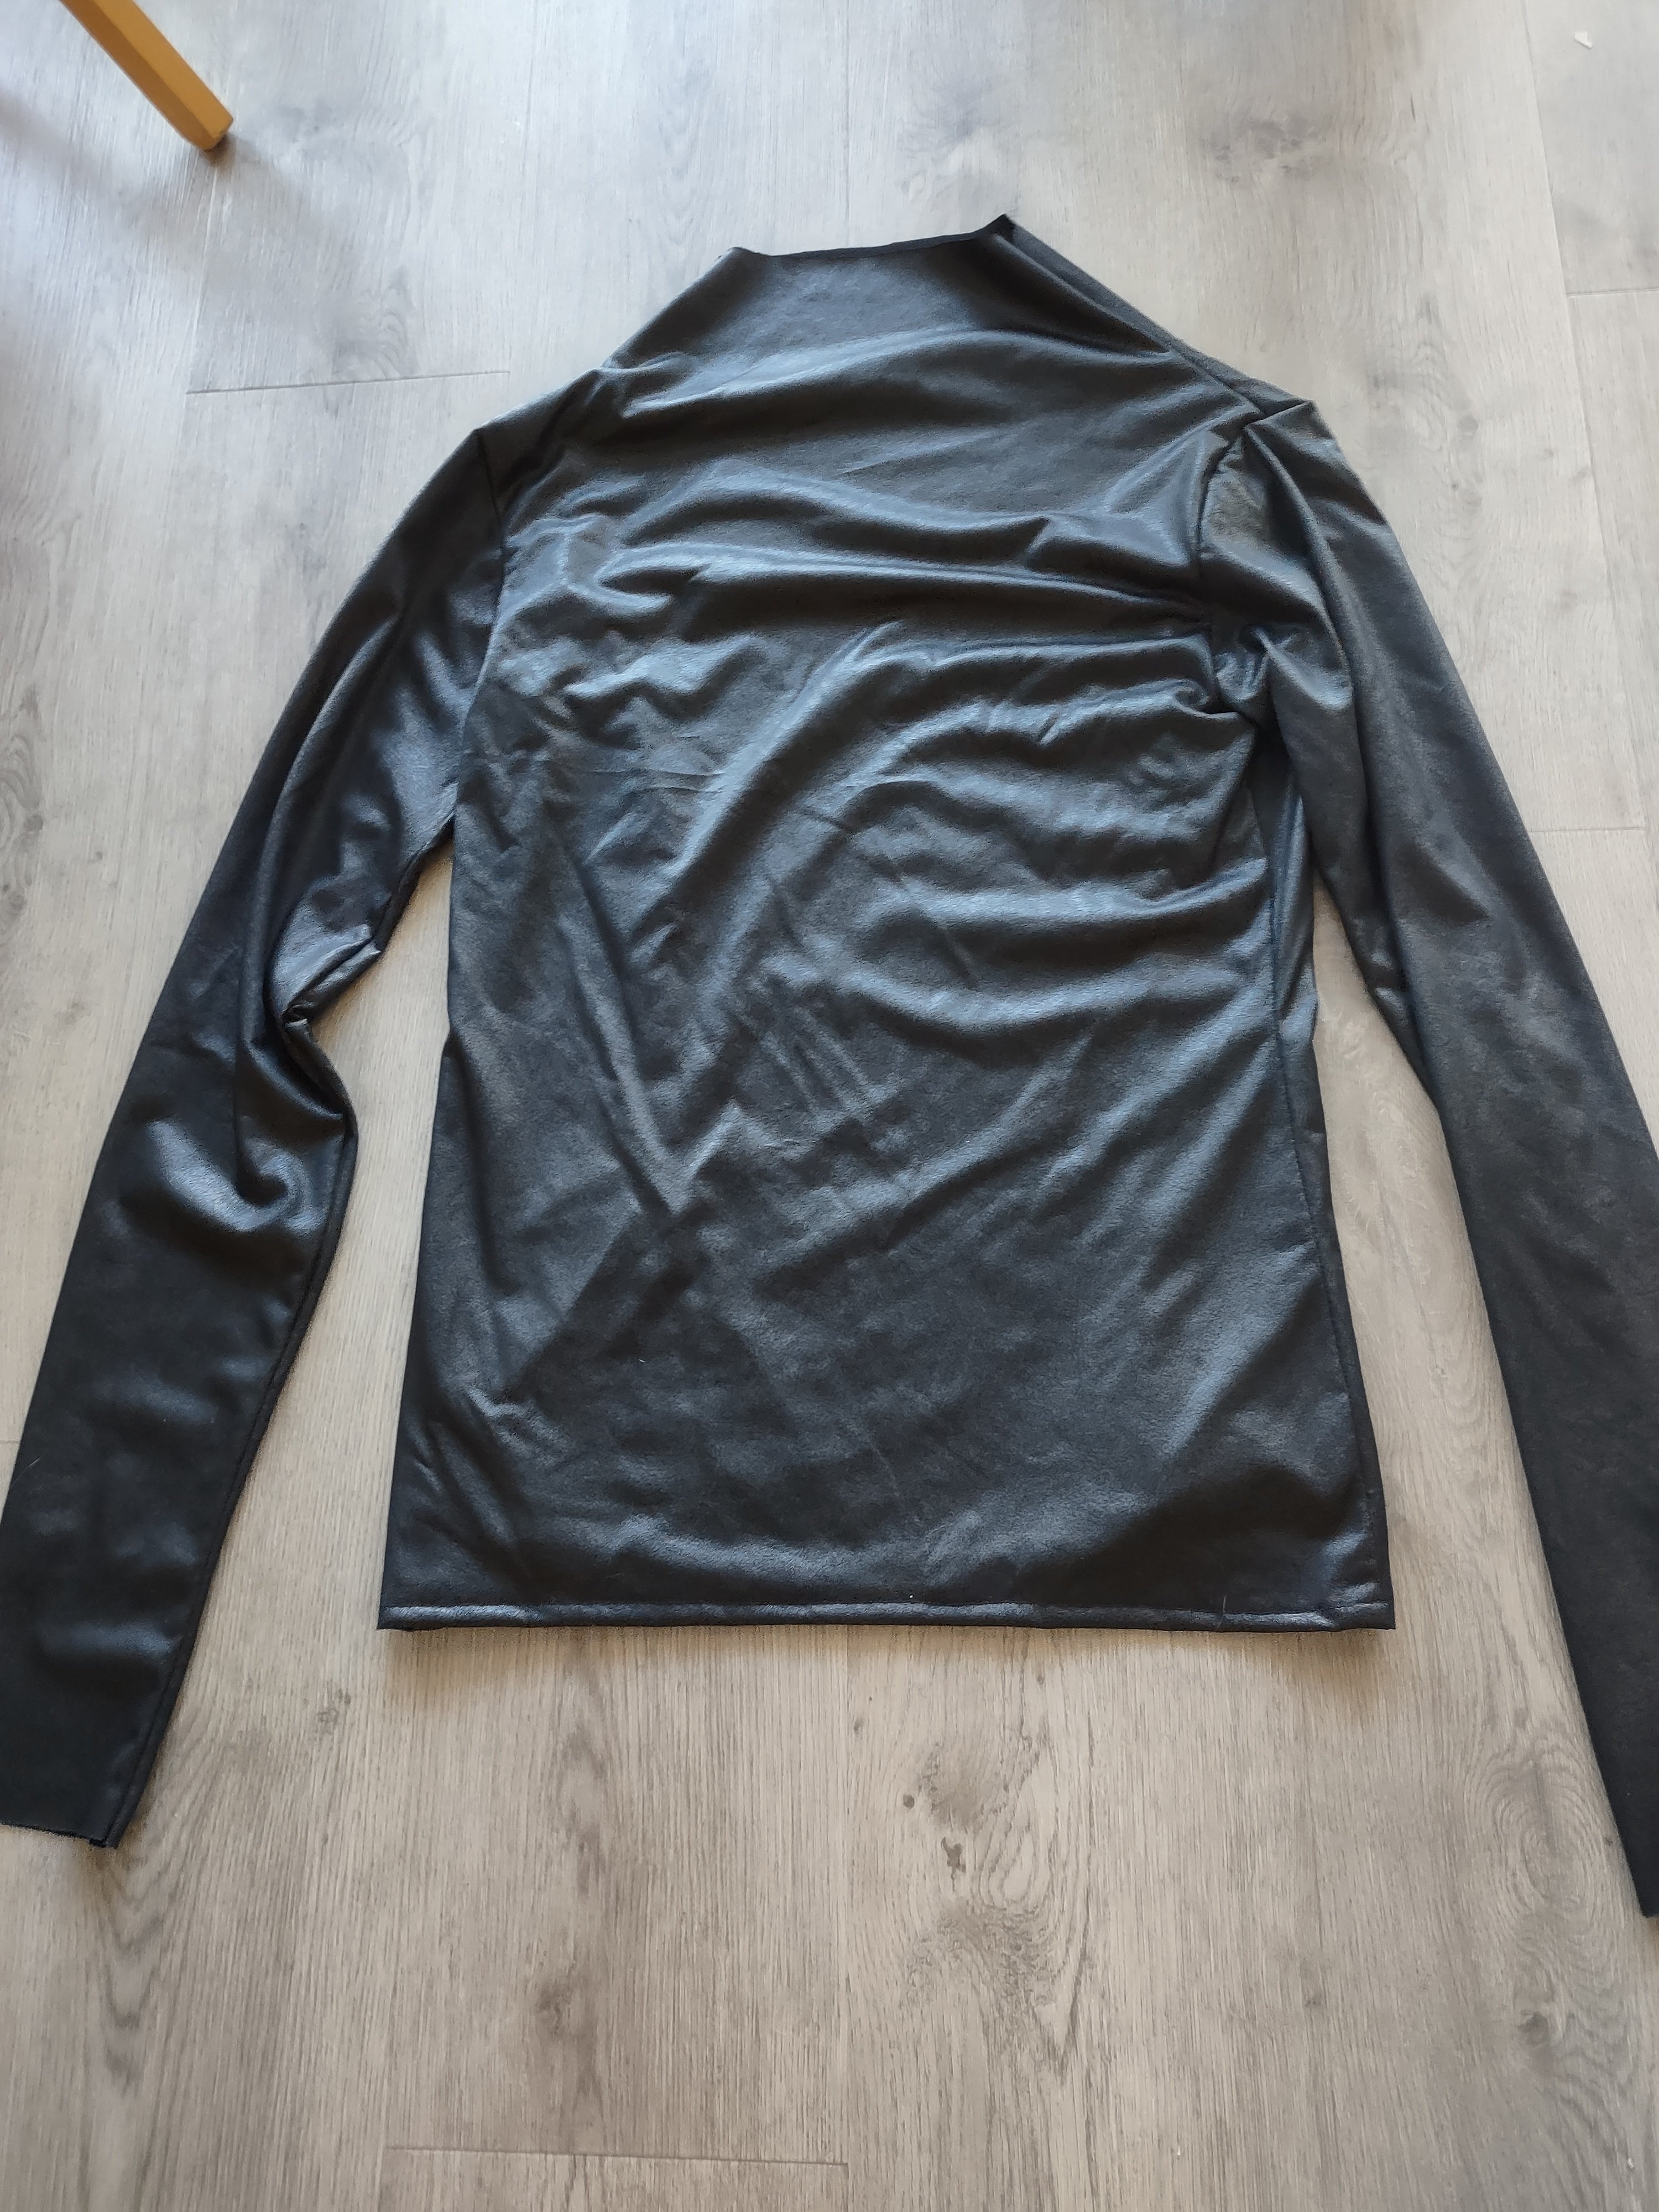
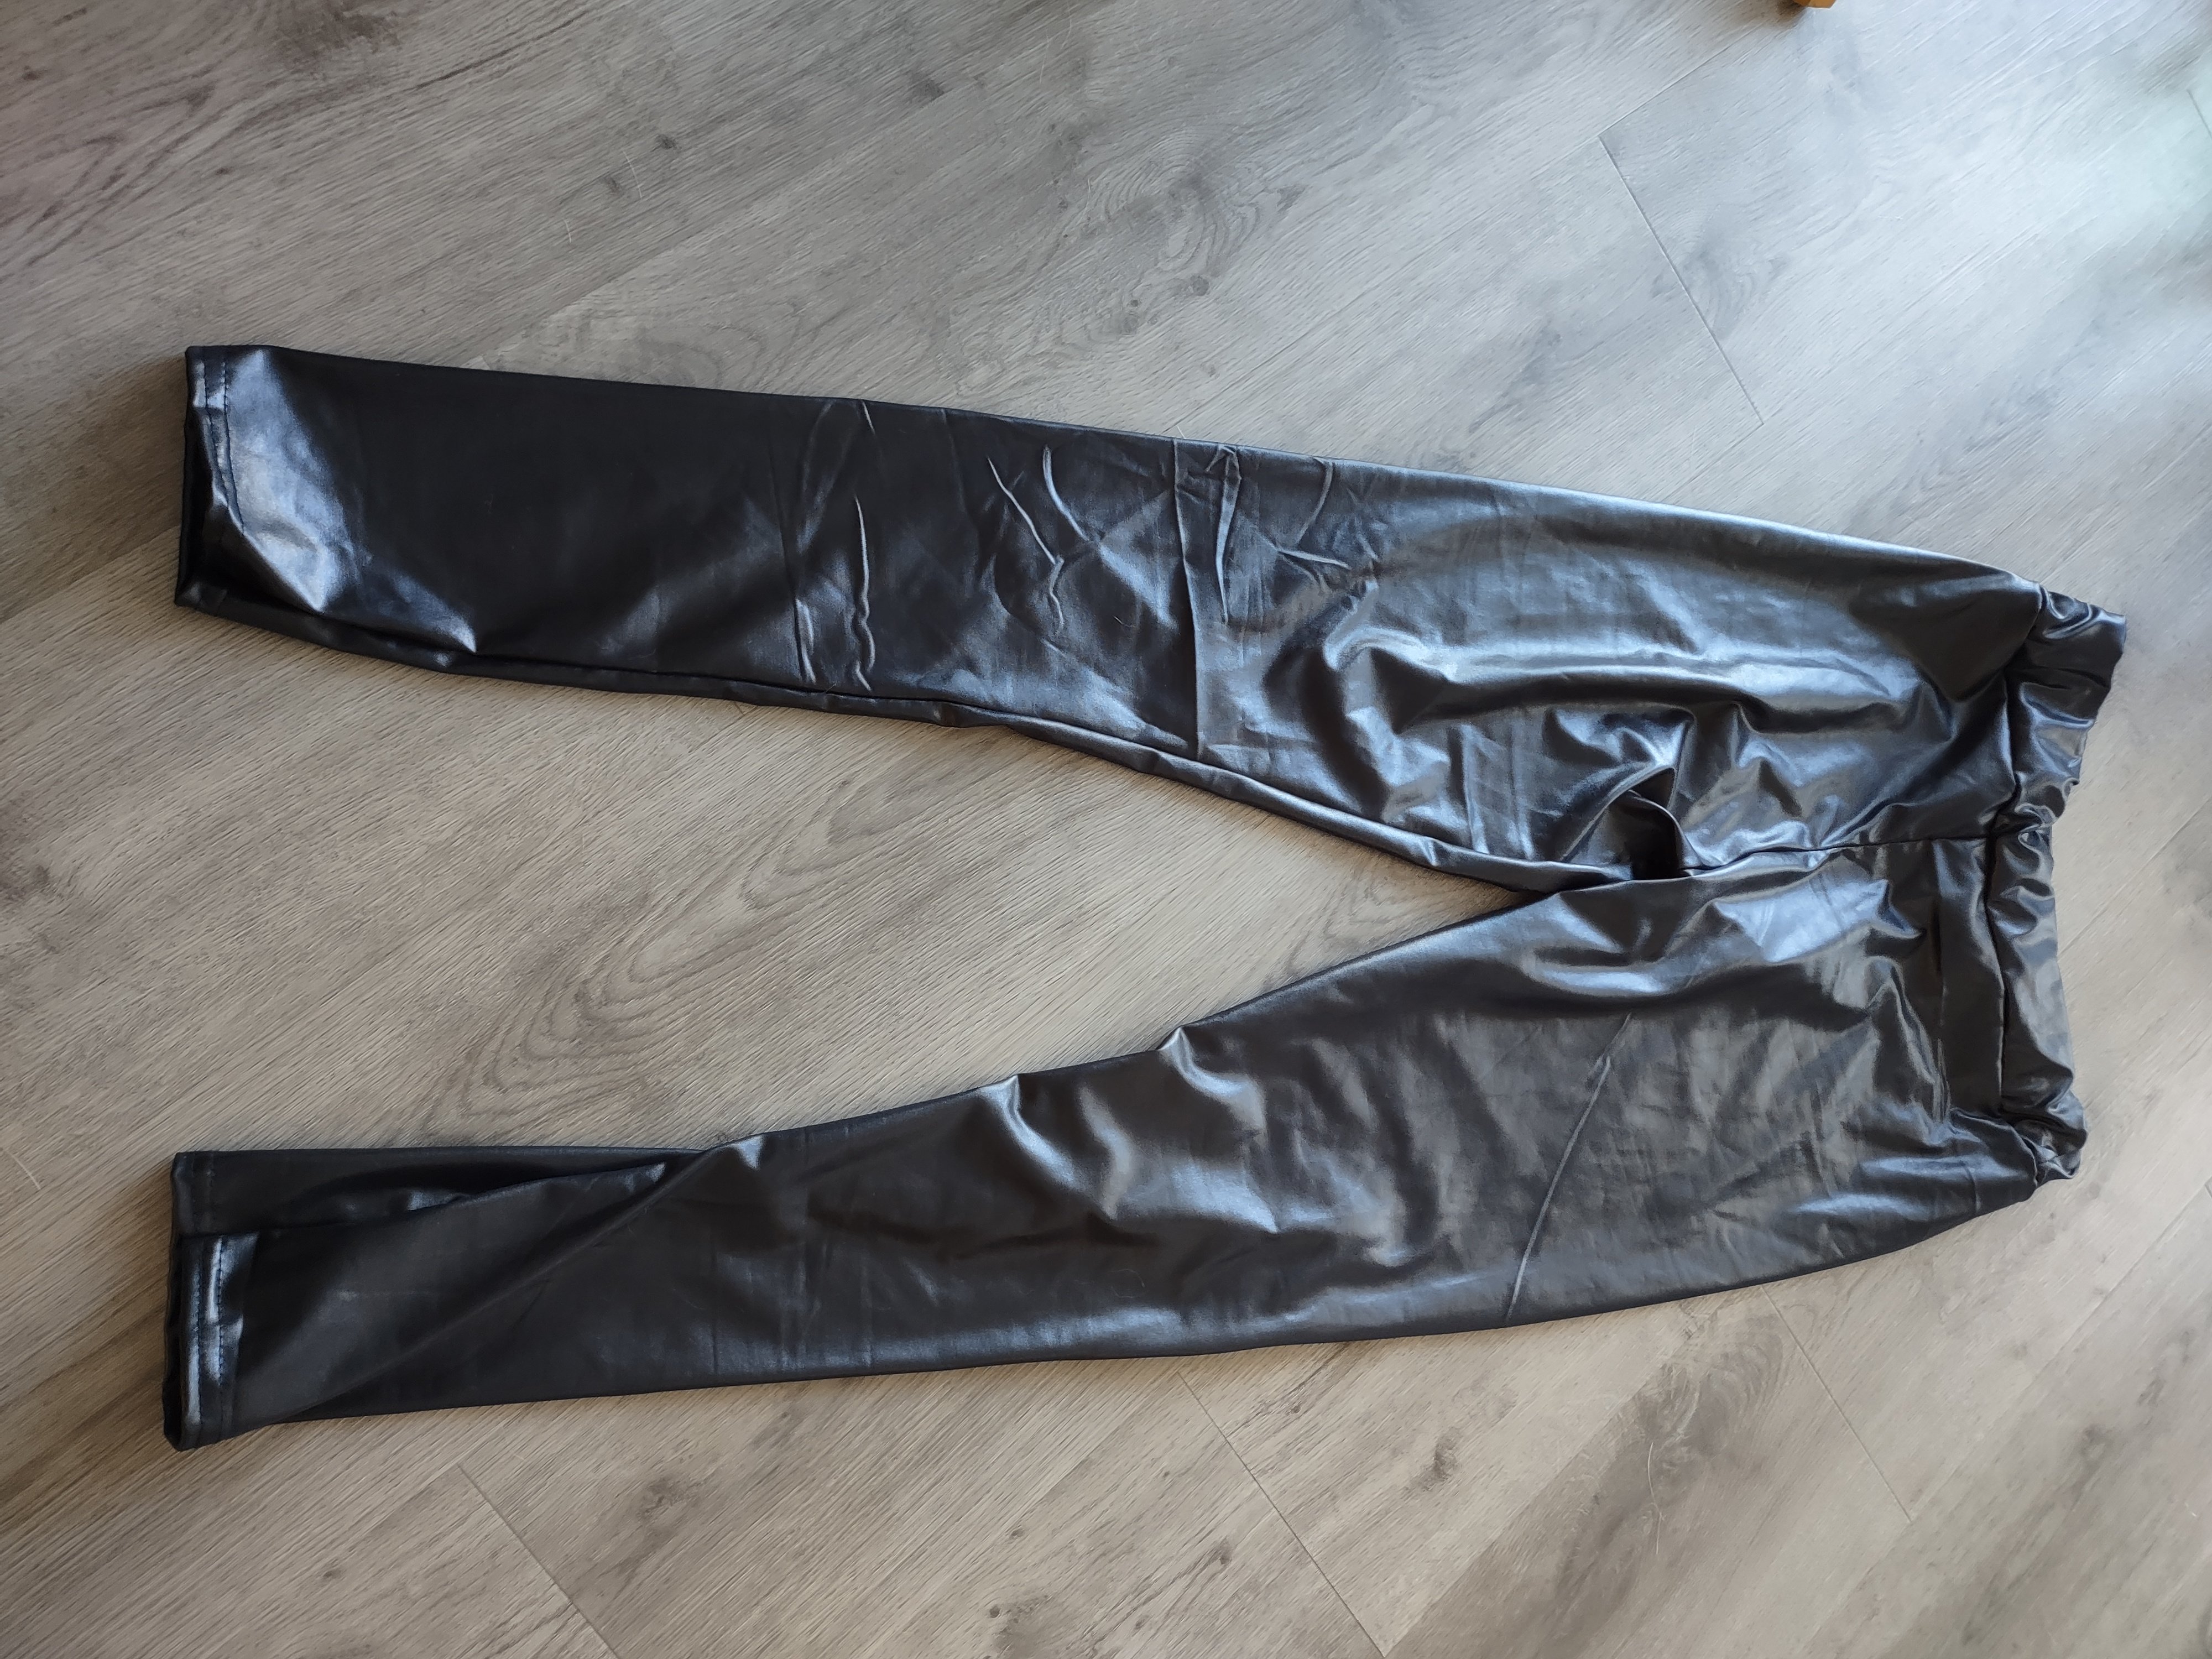
1. Shirt: This is still a WIP, I haven't fixed the collar yet, but I needed it to exist in some form to be able to work on the chest piece. It is a very light pleather. It looks less wrinkly when it is on me. This is the texture of it: 2. Pants: I actually got these off of Shannon McRandle's Poshmark when she posted in a Mara FB group that she was putting some things up for sale to help her cover medical bills. These also look less like a wrinkly trash bag when on me.


-
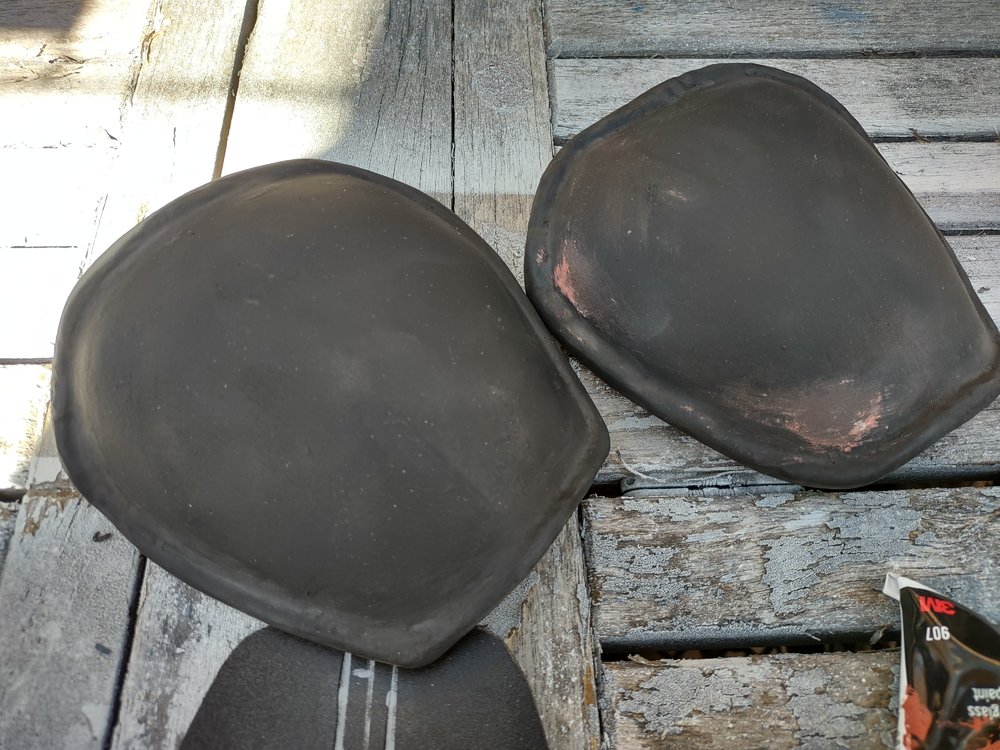
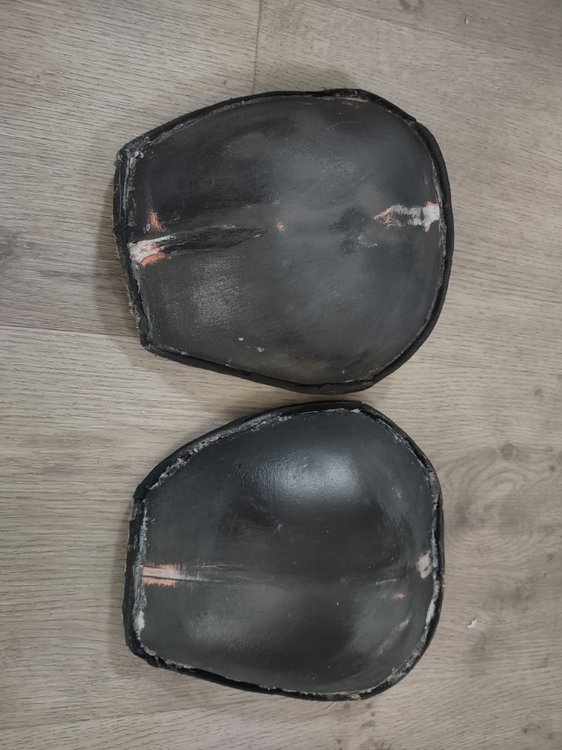
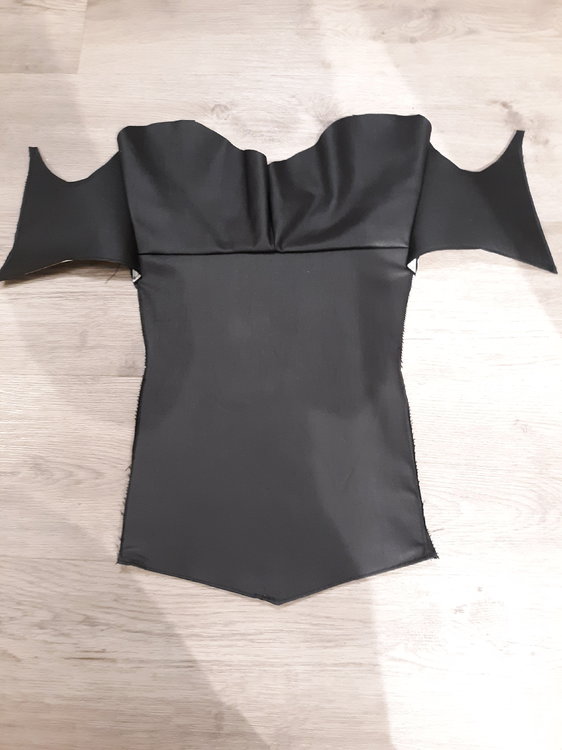
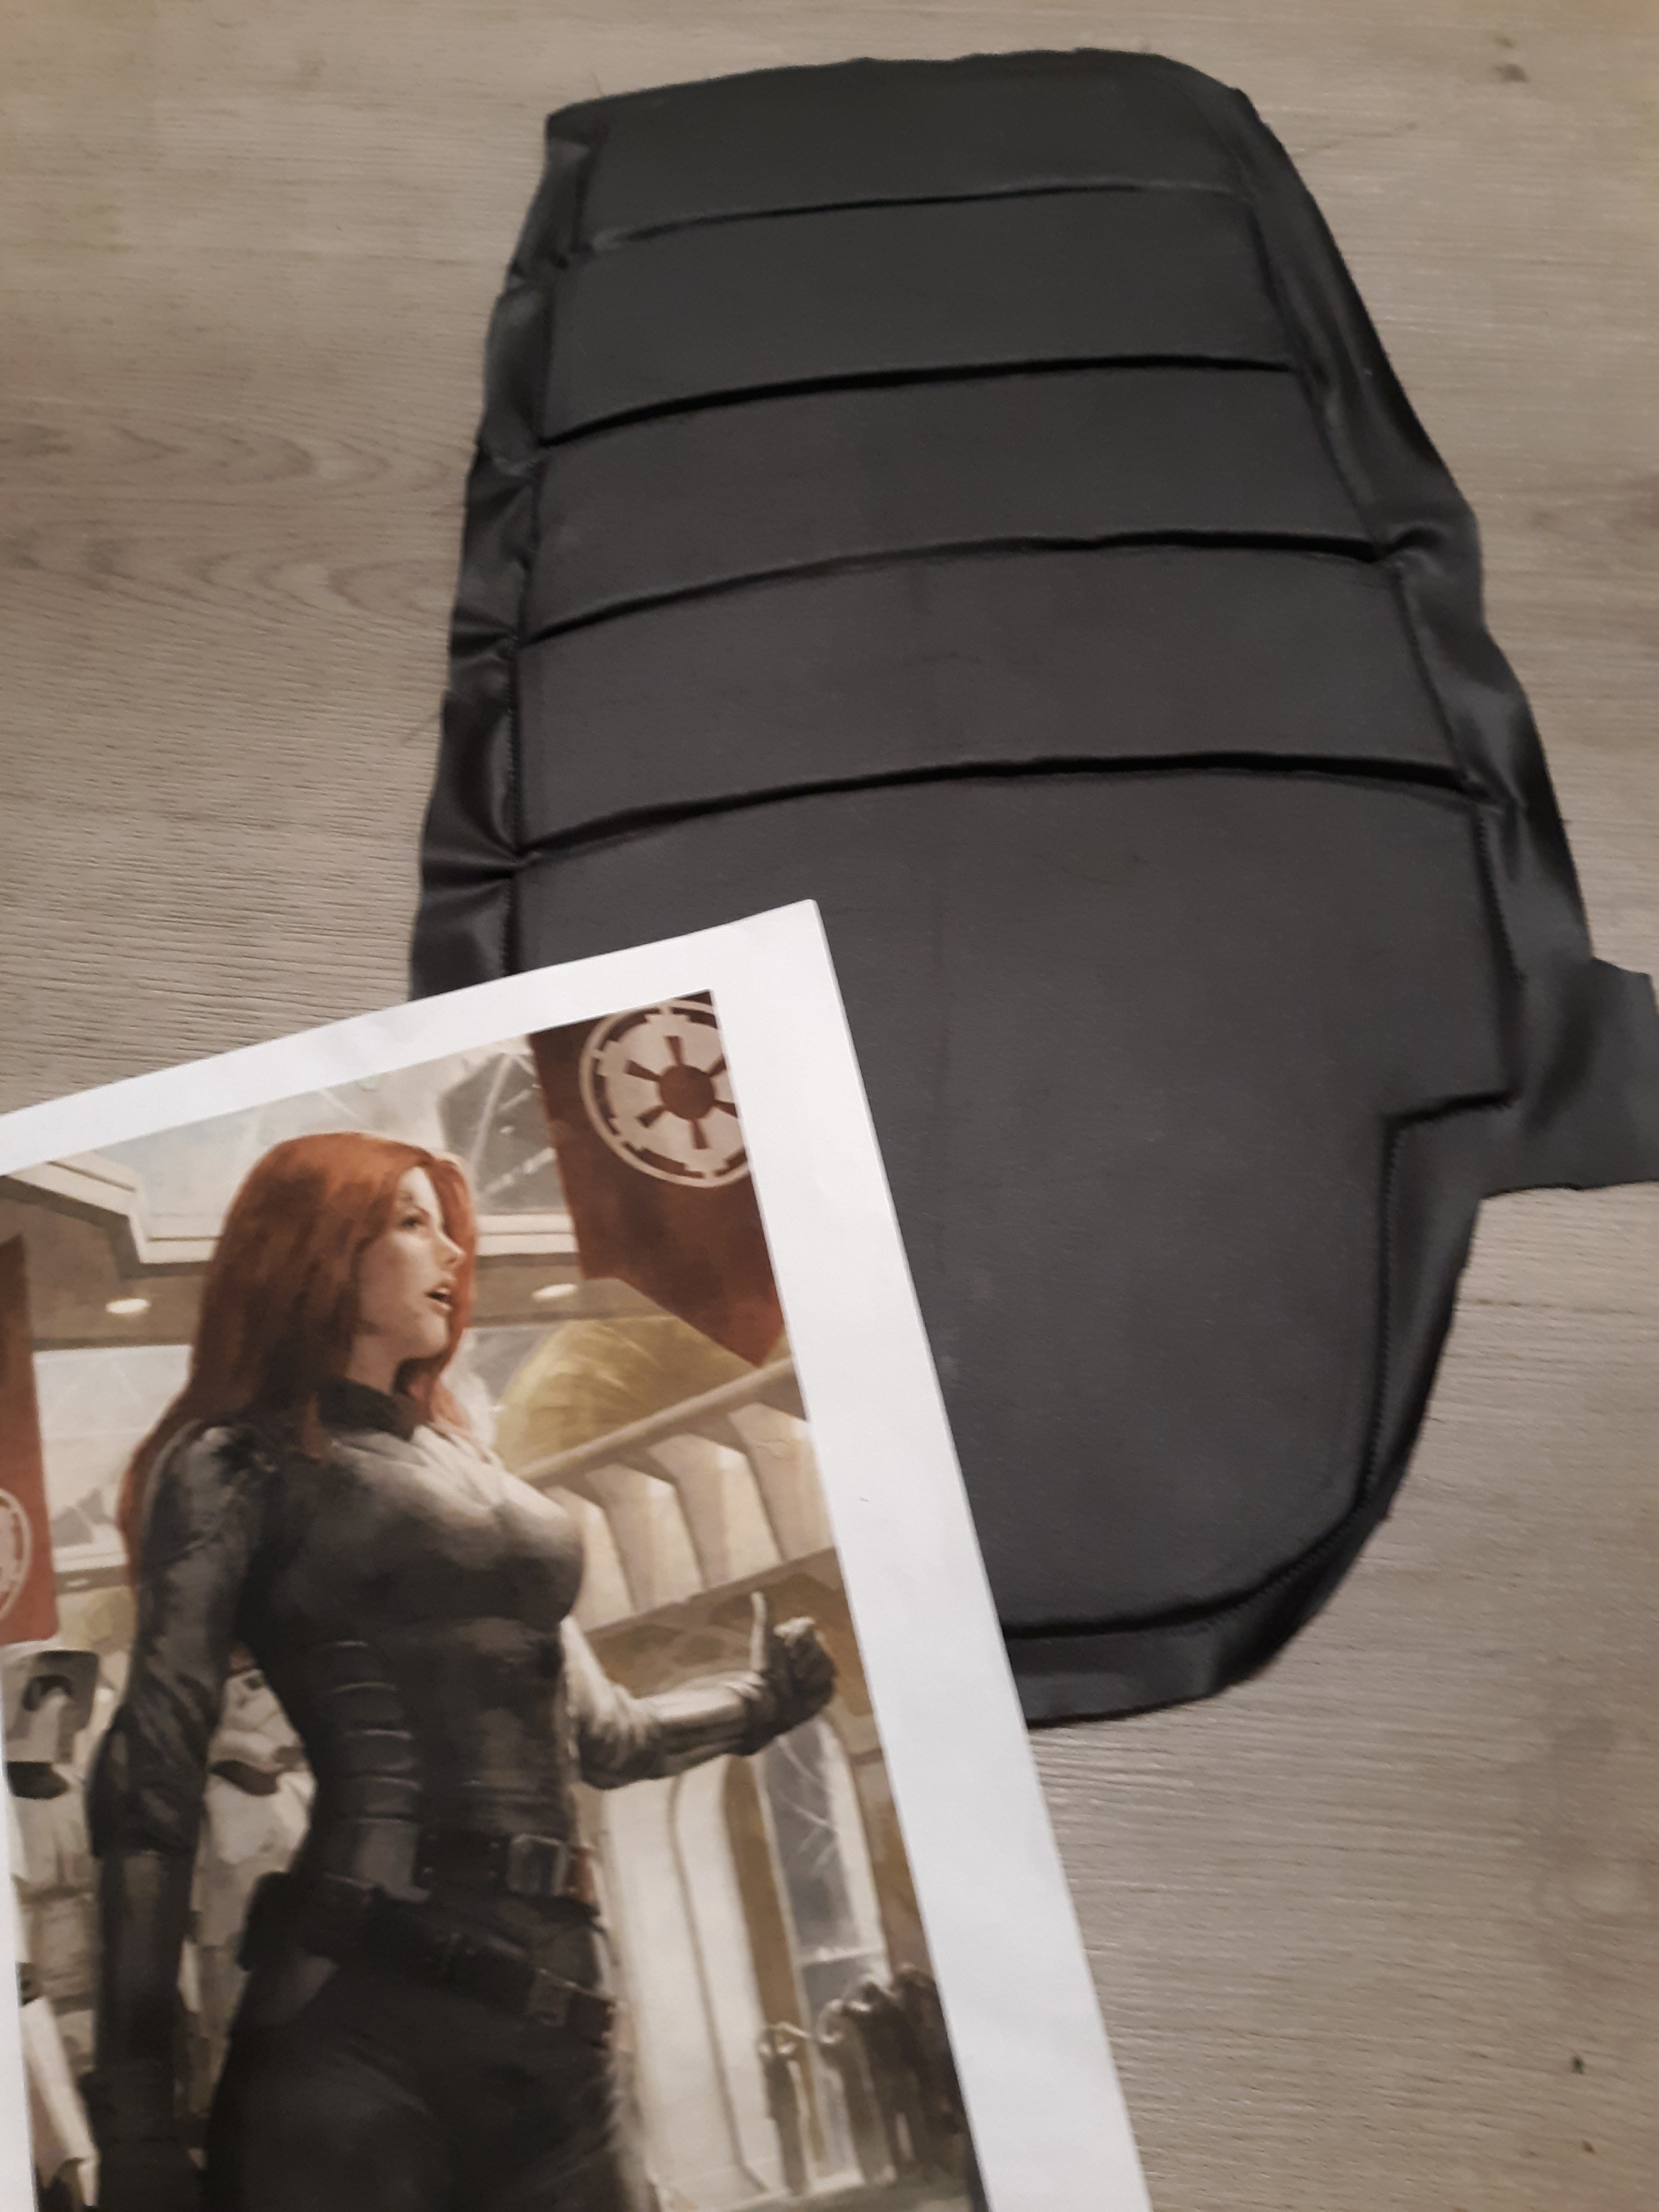
Early WIP on #3, the chest piece And it's current state, which is messy: This has been giving me the most trouble, particularly the little wedge details on the sides. I've been experimenting with different materials as an insert and all have been a bust so far. It's hard to get something that adds sturdiness but it still form fitting. Up next to try is neoprene. We'll see. It zips in the side of the back so the zipper is as invisible as possible.


-
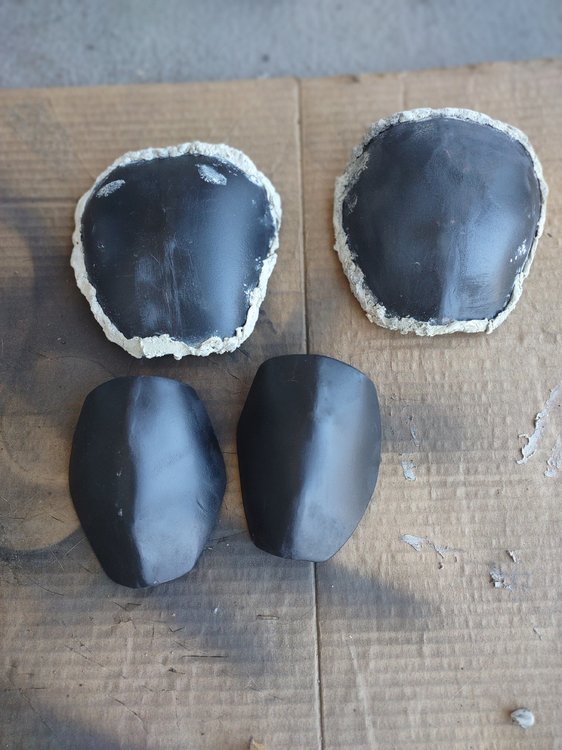
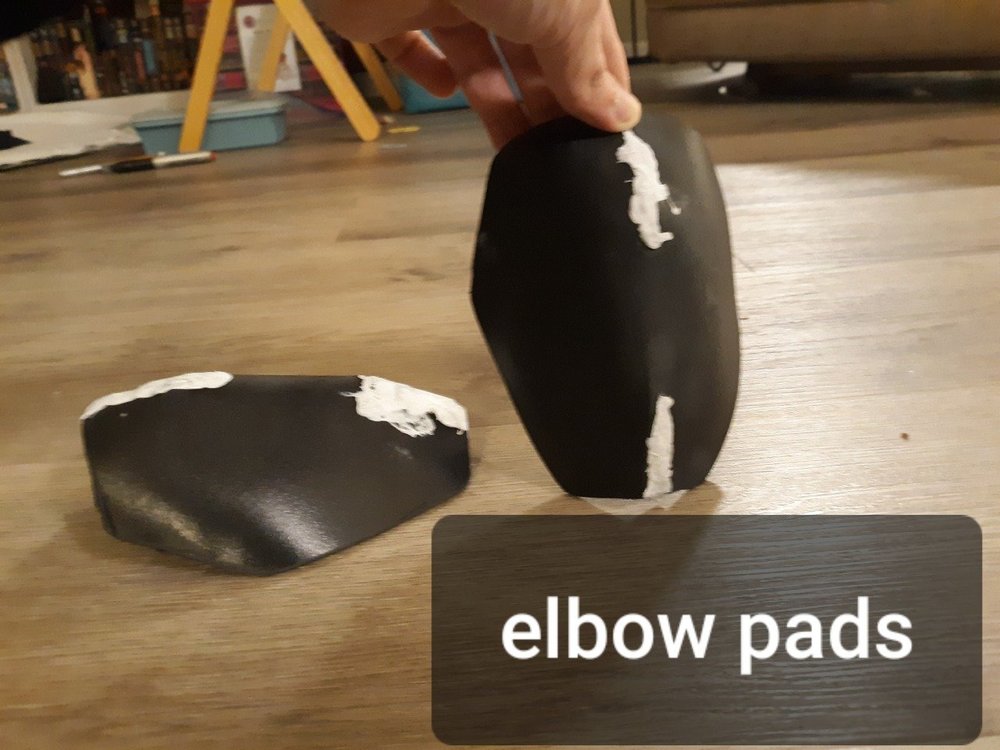
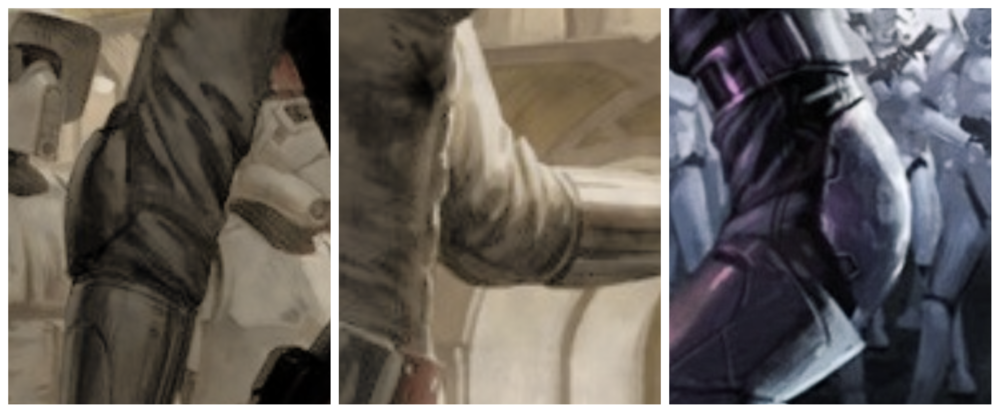
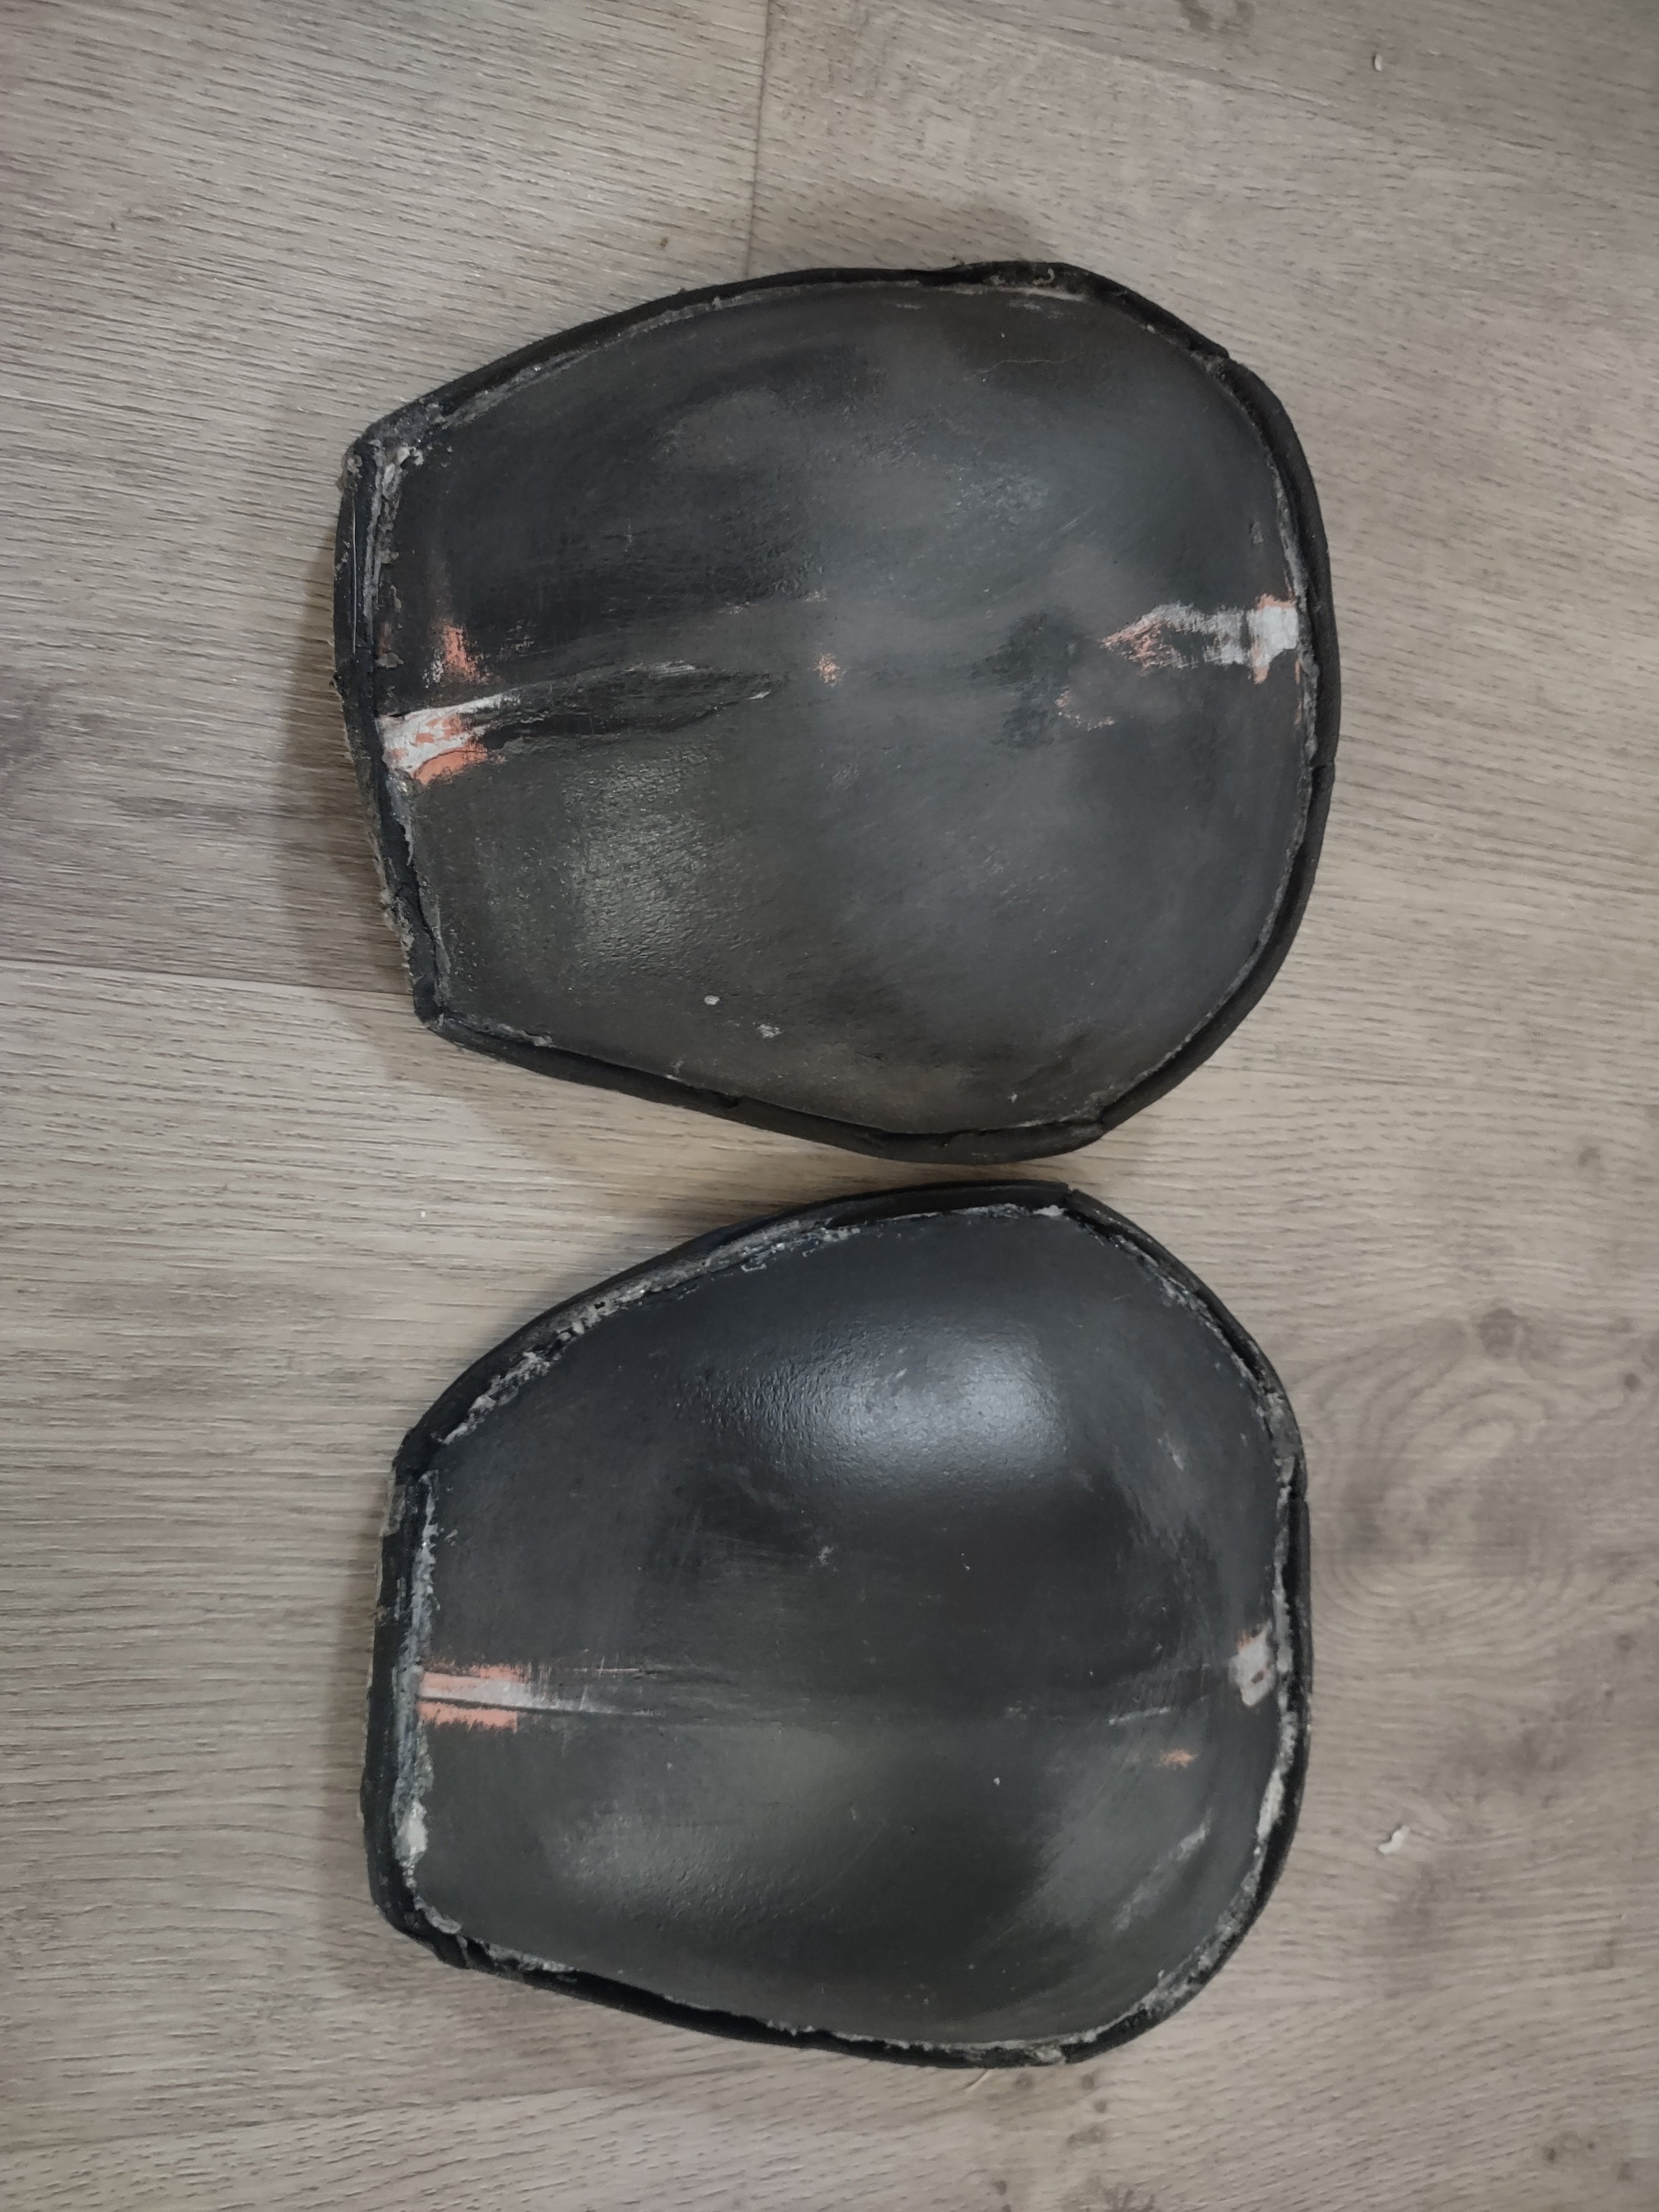
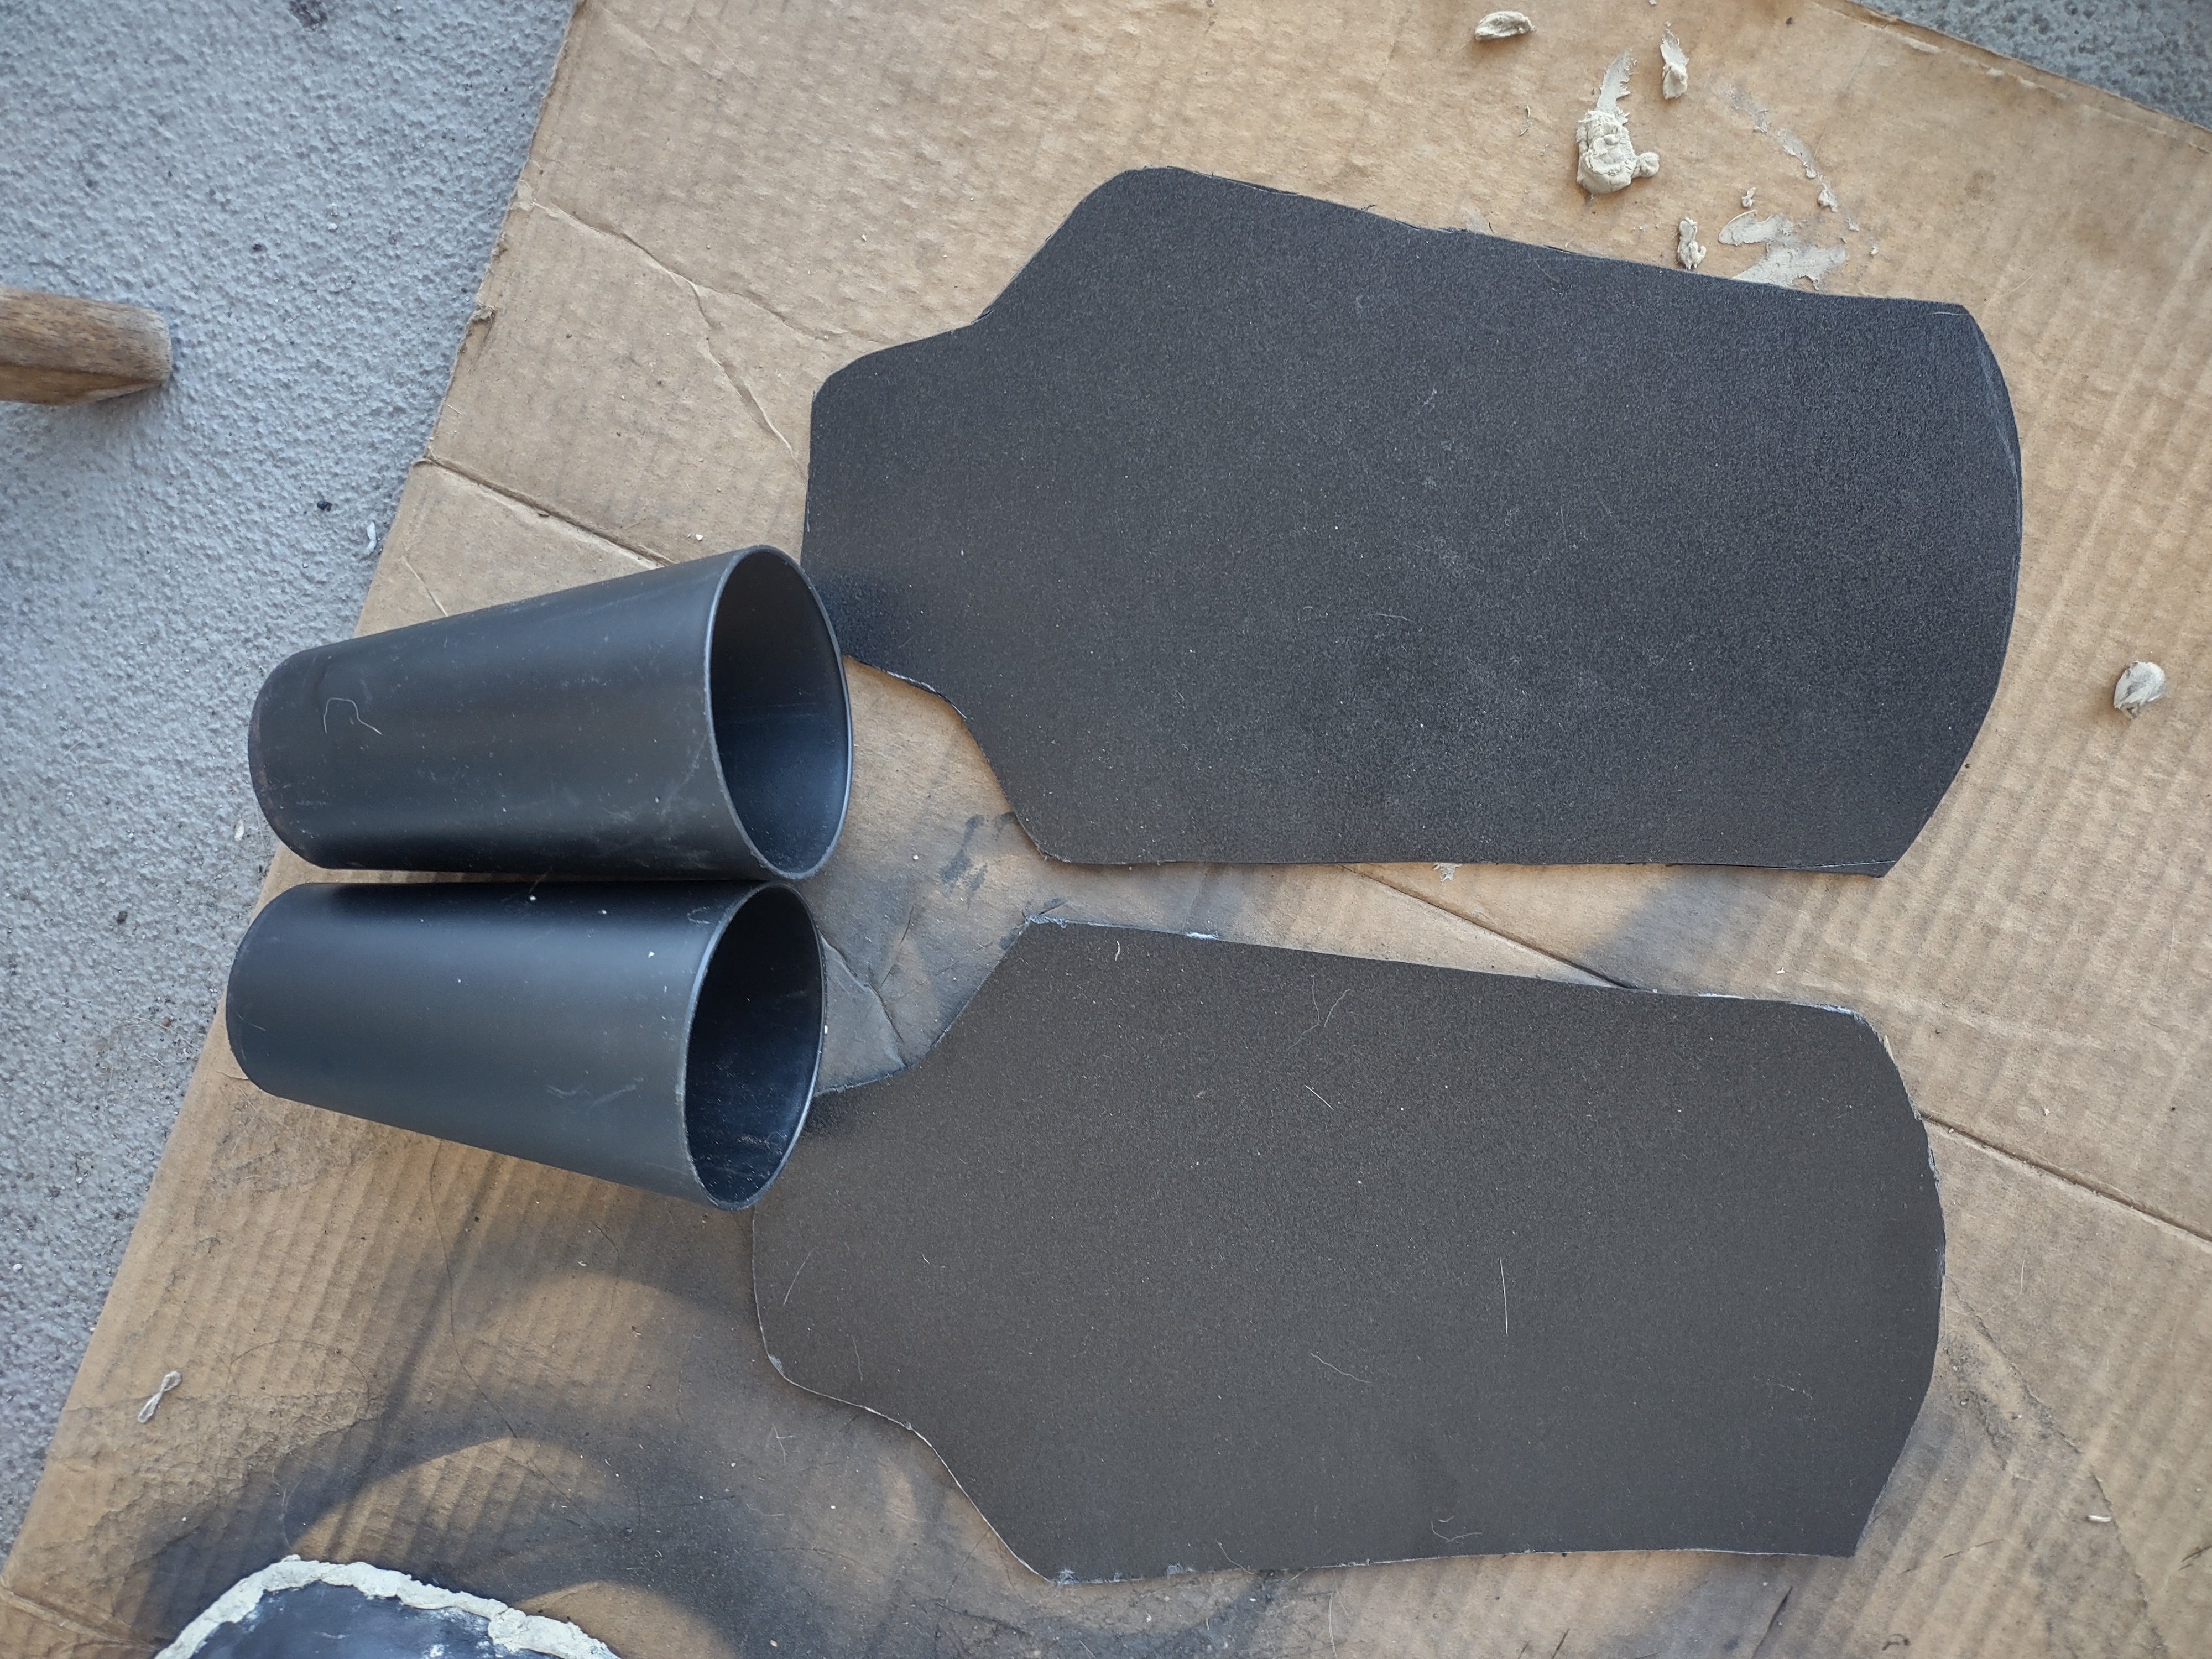
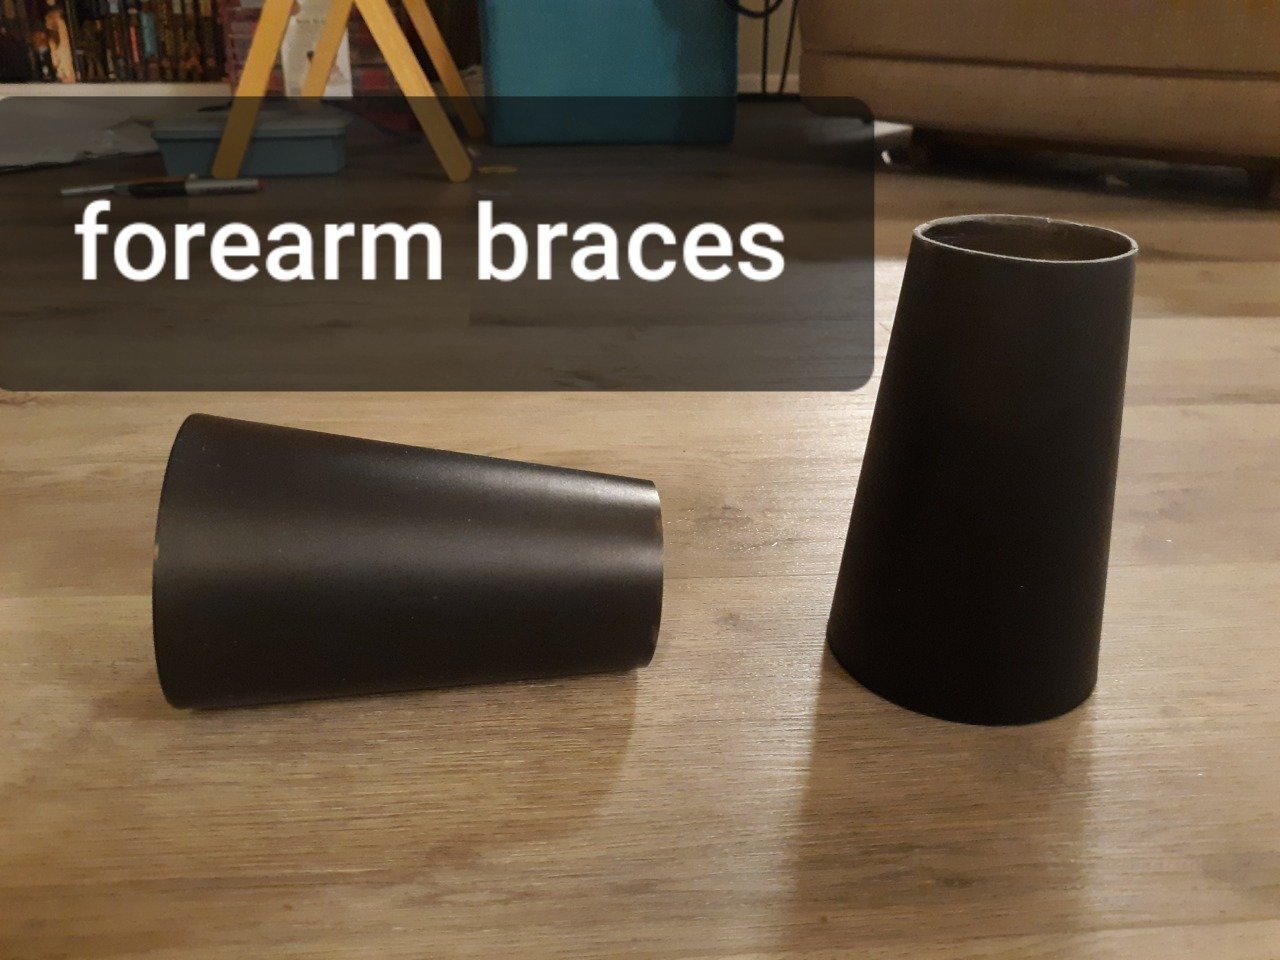
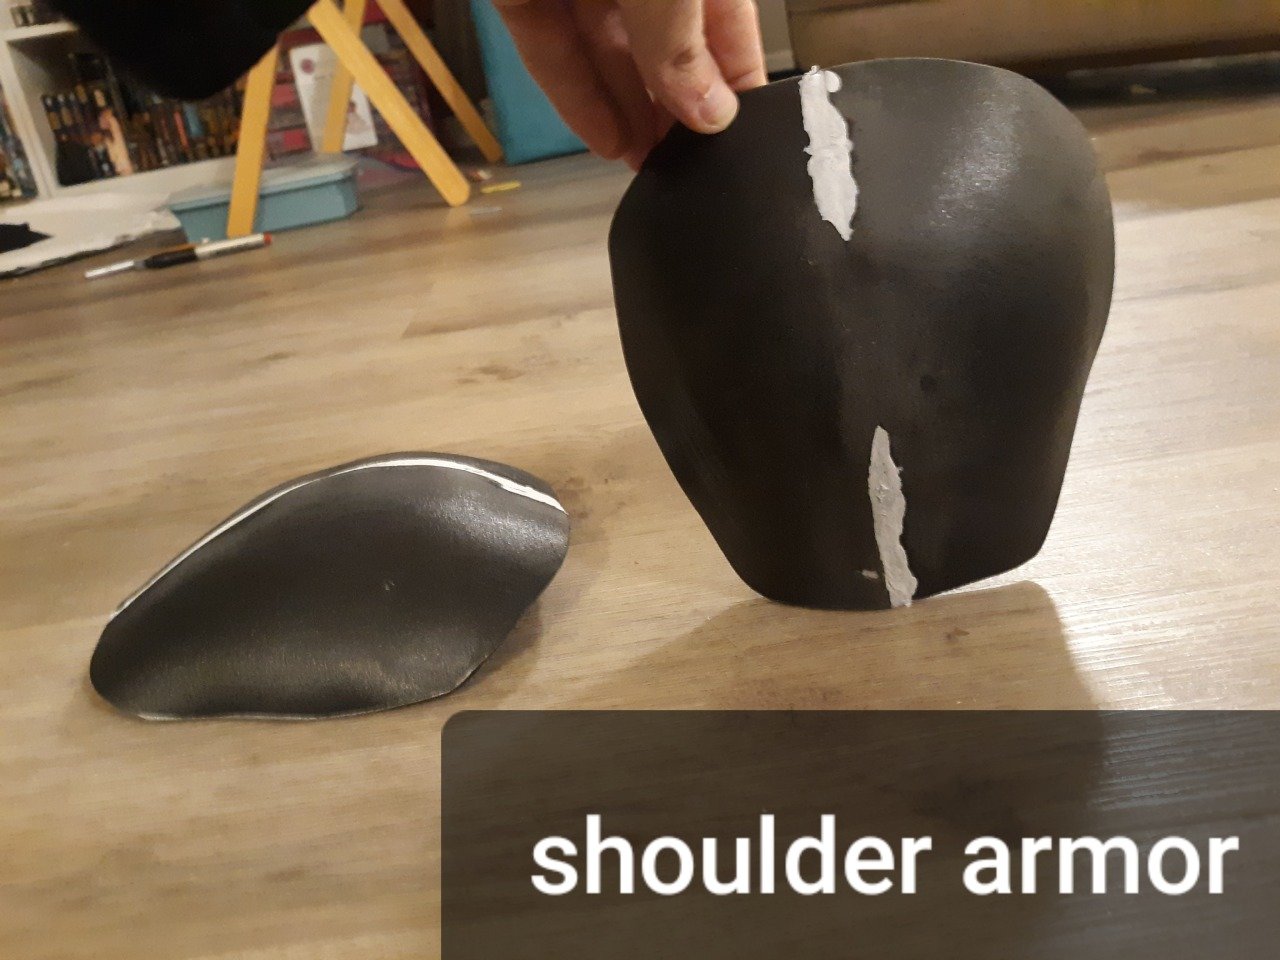
Current state of the armor: 5. Shoulder bells: A Mando friend helped me shape these. I'm currently at the stage of putting the lip on the edge, so I globbed a bunch of putty on. I need to borrow an electric hand sander from a friend to smooth it out. I'm open to suggestions if there's a better way to put the lip on. 11. Elbow pads: These are almost done. Currently there's a primer coat on them that I need to sand a bit before painting for realsies. 9. Shin guards: I cut them. Need to shape them with a head gun next. I think I'm going to bend it before putting the embellishments on so that I get them centered correctly. Is that a mistake? I'm still an armor noob. 12. Forearm guards: I have the bone structure of a bird, so I was able to just chop the bottom off a cup and use that as a base. I need to dremel in the embellishments and then sand and paint.

-
Early WIP on the armor


-
That's all for my reference images. I'll post my WIP pictures next.
-
Optional Items Since these are only in one of the four primary/secondary references, I would say they could be optional. I plan to make them though. 11. Elbow pads: Five or six sided shape, taller than it is wide. Same material as other armor pieces. No lip. 12. Forearm Gauntlets: Oval shape on outer side, parallel lines on inner side Shown best in reference V. Not shown in references J, NEC, and HC. Possibly shown in reference RH. Appears in different design in supplemental reference PB
.thumb.png.4e0ce2da468eff23e5d5b83447feaad5.png)
-
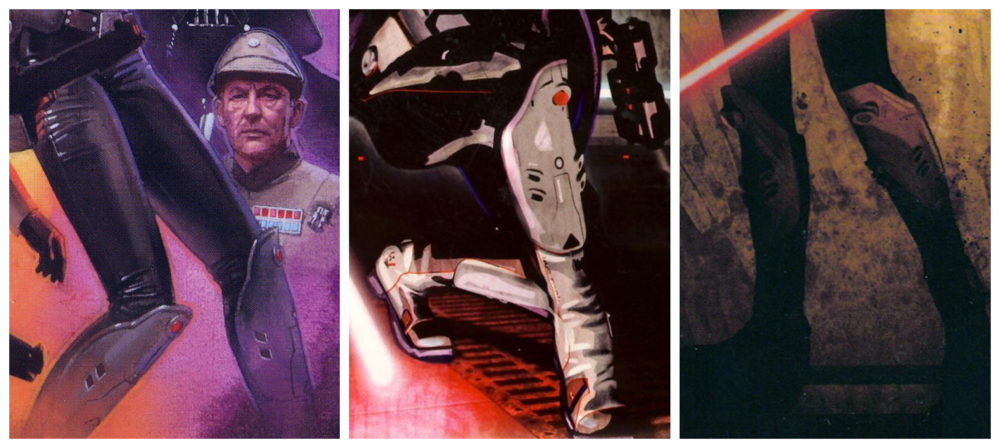
8. Lightsaber: Pinkish red. Silver/Gunmetal hilt. I would say anything that looks vaguely like these references that isn't distinctly another character's saber is acceptable. 9. Shin guards: Wrap a little more than three quarters of the way around the shins. Sit just on the knee, and above the ankle. Appears to be attached directly to the boot with no visible straps. Same type of material and color as the other armor pieces. Has a lip like the shoulder pieces. Red circle at top. Black triangle at the bottom. Diagonal embellishments on the side. Long thin design with a circle at the top goes up the center about to about midway. 10. Boots: plain black boots with a low heel made of leather or leather like material.

-
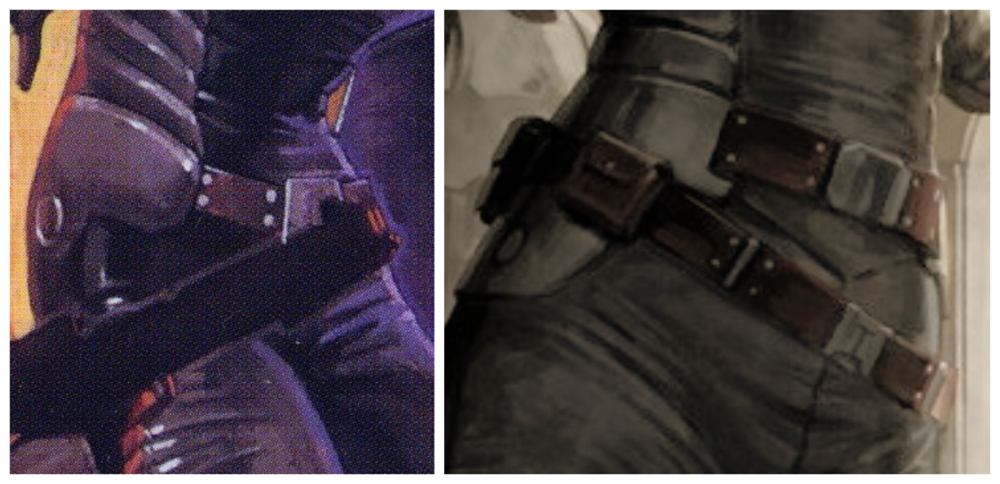
6. Top Belt: Connects to the chest piece at the edge of the gray material. Having it snap on is likely the most practical option. Sits around the vicinity of the belly button Looking closely at ref V (right), you can see that it connects the same way on her left as her right. Proportions The attached leather or leather-like material is not much longer than the buckle on each side. Assuming the belt buckle has the standard type of fastener, the length of one piece of leather should be roughly: ((width of front panel of chest piece/2)-buckle length) = X And the length of the other piece will roughly be: (X+buckle length) Hardware Belt buckle is the same height or slightly taller than the belt. Chicago screws or similar are stacked vertically in pairs on each edge of the belt. Eight total. 7. Lower belt Optional? Does not appear in reference J, and *probably* not in NEC and HC, it is hard to tell if it is there due to lighting and positioning. Slightly thinner than the top belt. Sits low on the hips and wraps fully around. I plan to put snaps under the pouch furthest to the front to keep it positioned on my hip. Pouches Two on her right hip, the one further back is a rectangle and the one closer to the front is a square. Do we want to include the two pouches on her left (ref PB, below) as optional? Hardware Rectangular interlocking buckle at center. Posts and two sets of vertical Chicago screws connect segments of belt together.

-
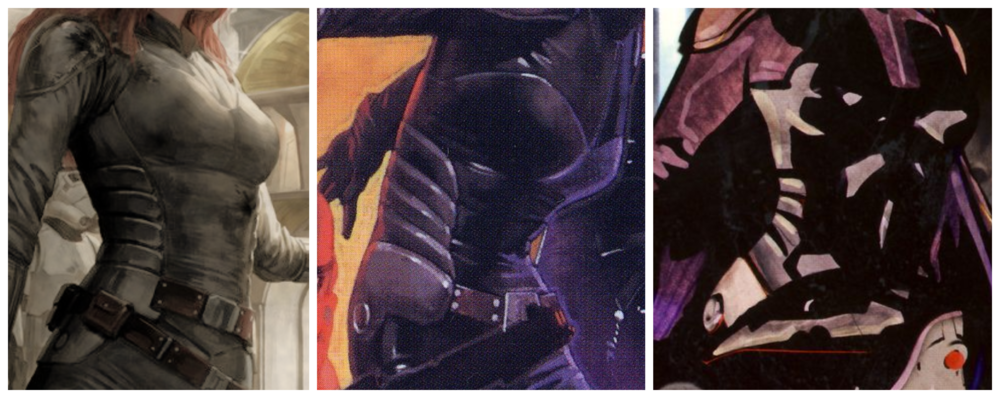
4. Gloves: Black leather or leather-like material. Shown coming to the wrist in references V, HC, and NEC. They appear somewhat longer in reference J, but perspective is weird on that arm in general. 5. Shoulder bells: Overall unadorned, with a raised lip around the edge. Reference NEC is high contrast so the lip is much more visible there. Edges are rounded. The piece is thickest at the top of the shoulder where it is roughly rectangular and tapers downwards to curve. We only see the shoulder bell on her right side well, but our tertiary references confirm symmetry on the left.
.thumb.png.29785eaff10122c31c8e514e4cd26a3c.png)
-
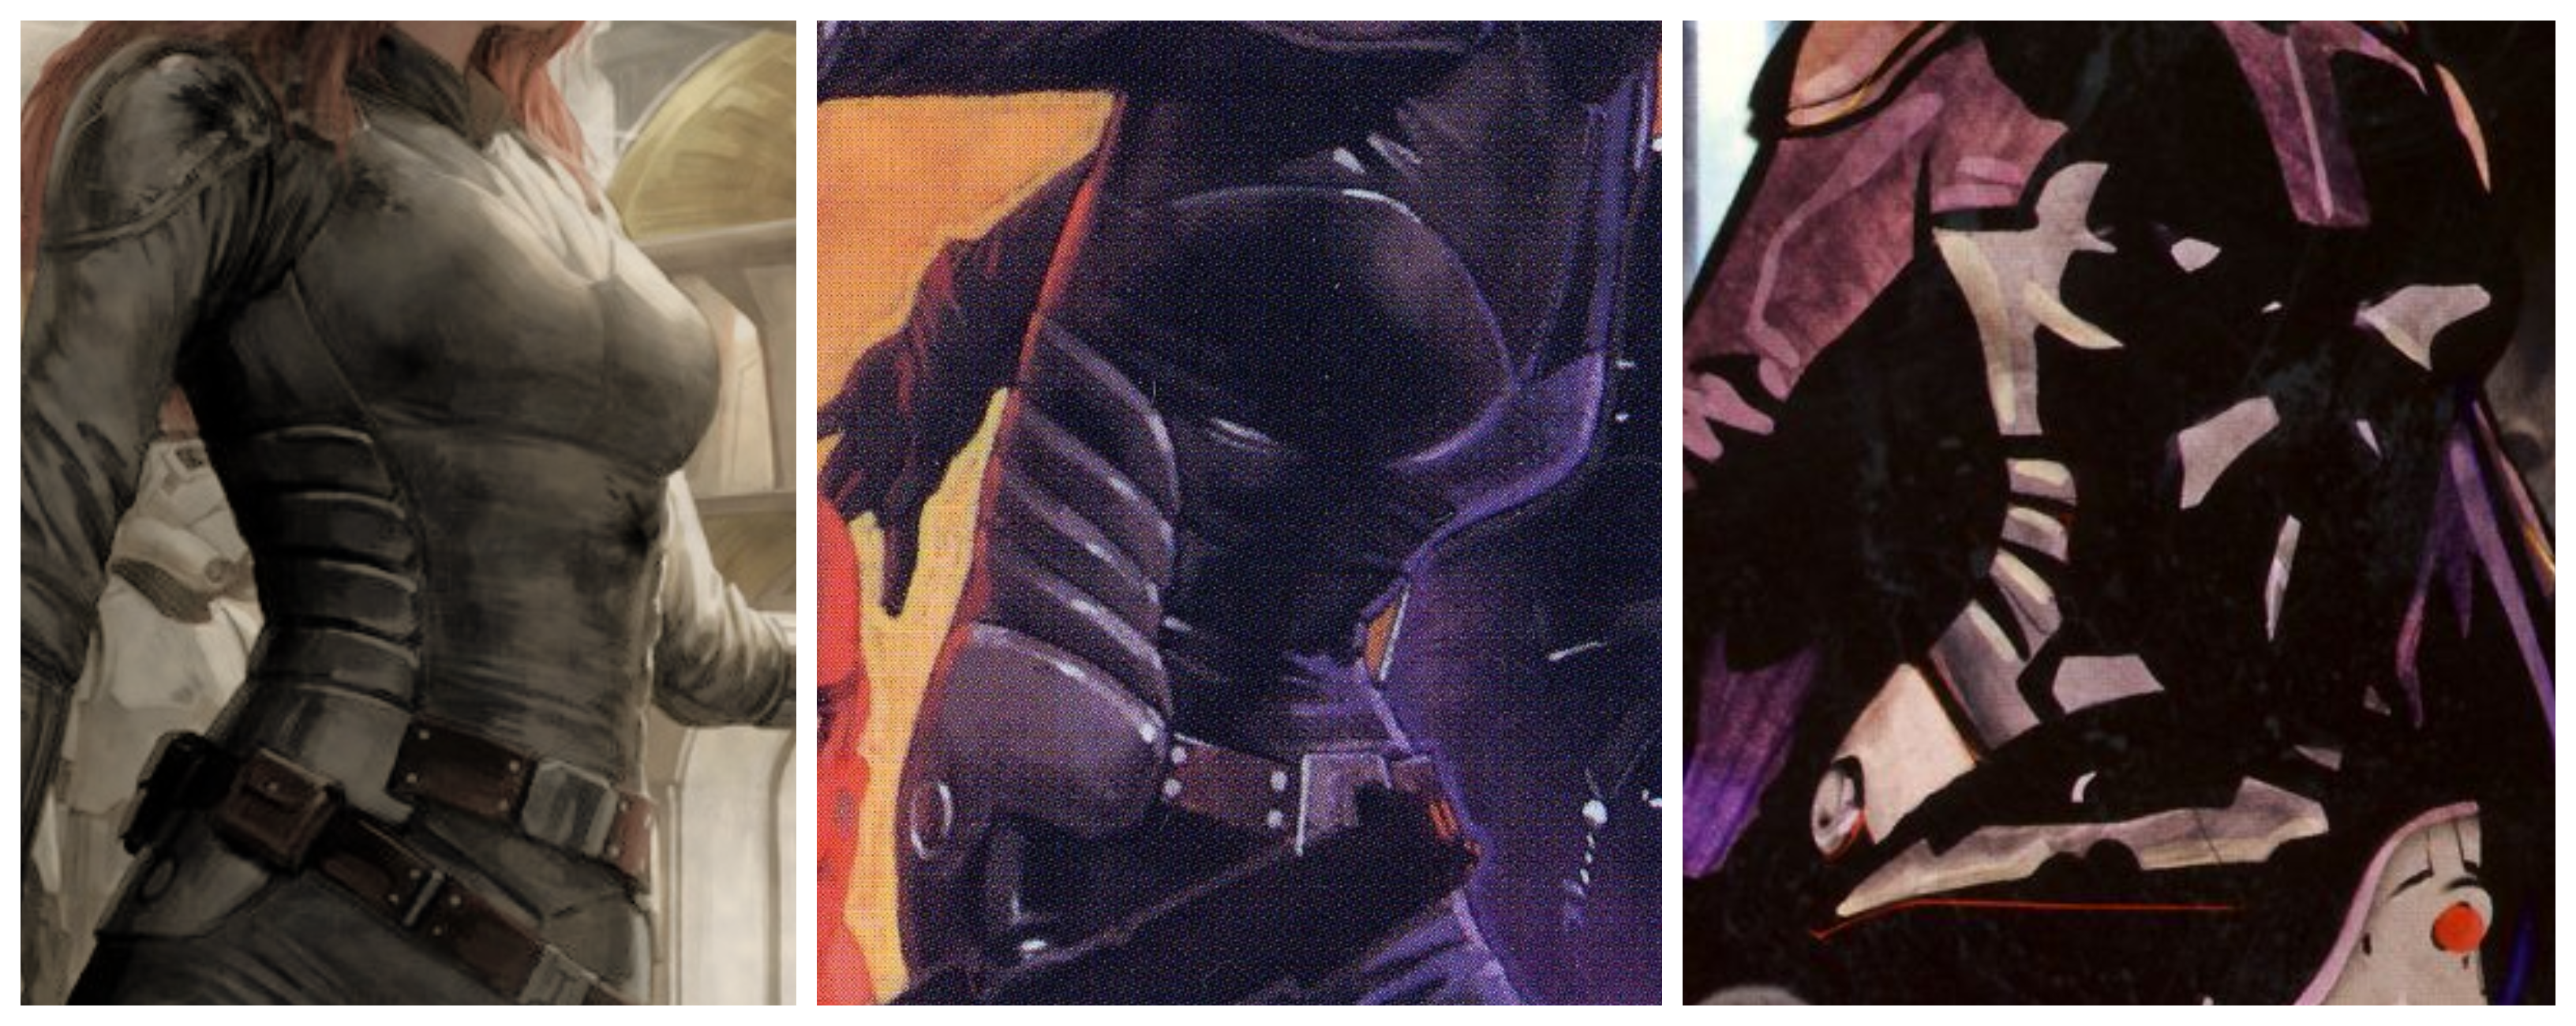
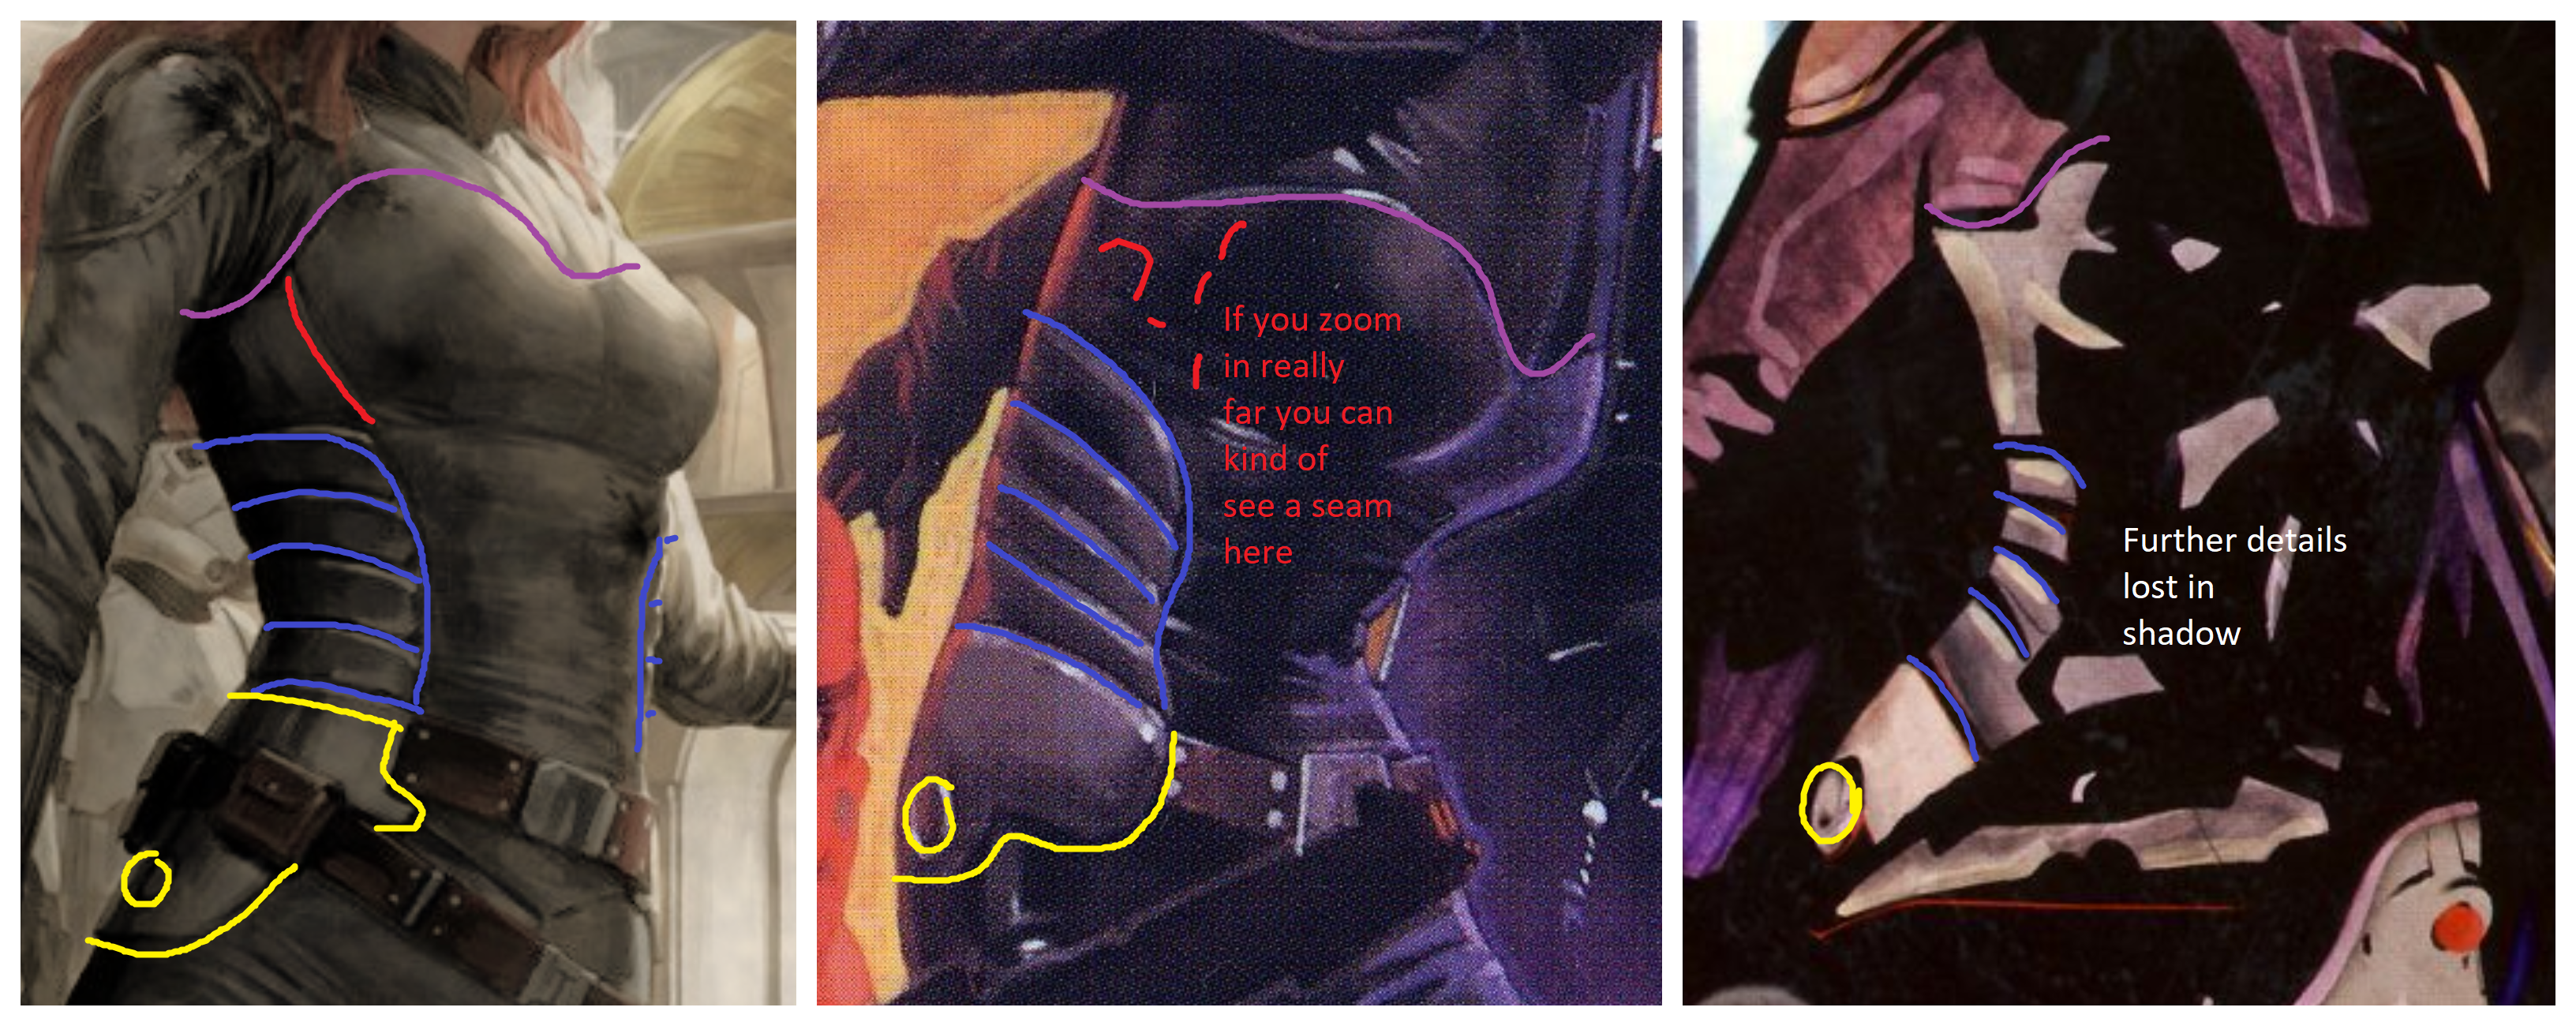
3. Flexible armor: leather or leather-like and sturdy. More fitted than the top. Wraps around to the back. Center piece is black, probably the same material as the pants. It has a bit of a sweetheart neckline in the center. Additional seams may have to be added for real person boobs. Dark gray in color on sides, four panels of roughly the same height and width, but curve upward and decrease slightly at the top. There is a fifth segment that comes down the hips about halfway to the buttocks. There is a circle near the very bottom. Top belt attaches near the gray part of this piece. Snaps rather than Chicago screws on that side may be a practical option so that the belt can be removed if/when the chest piece needs cleaning. Overall seam placement is supported by references V, J, and NEC* *Note that NEC has especially high contrast, and details are lost in shadows. It can be assumed that the gray panels extend further.


.png.4123fc1e34c26b4279b65a31c01e08bf.png)


.png.90768e45bc495e702bf0b3400837b348.png)