
-
Announcement
Welcome to the forums!
If you are a newly-approved member, make sure you check out the New Member Checklist!
If you are a Detachment member and can't see the member-only area, post here for access.
-DV


Glory530
-
Posts
176 -
Joined
-
Last visited
-
Days Won
8
Content Type
Profiles
Forums
Gallery
Events
Posts posted by Glory530
-
-
OK, thanks for the photos. I still think this is a little too shiny and has a bit too much of a rubbery look. I edited my previous post to include some additional fabric options.
-
There is not a specific list of approvable materials. The important thing is that whatever you use closely matches the reference images. To me, latex sounds too shiny, but if you have some photos of the material in various lighting conditions, go ahead and post them here so I can have a look.
Some possible options would be a stretchy cire fabric or 4 way stretch faux leather (the Yaya Han version of this was great but was only sold at Joann, so until she finds a new distributor for her cosplay fabric line, it may not be an option).
-
Hi there. Unfortunately the Etsy shop that I got my suit from that I usually recommend is down. I understand that you said sewing is not your thing, but I would recommend asking around to see if somebody would be willing make it for you on comission. Perhaps start with your garrison and see if anyone there can help or knows somebody local who can? Eliste's tutorial is very good and could be used as a guide for anyone willing to take the project on.
-
Hi there. You are absolutely in the right place!
I'm the Mara you met at Motor City Comic Con and also the Detachment Costume Advisor for Mara Jade costumes, so I'm happy to assist. I'll also likely be working with the GLG GMLs on your submission, so thank you for creating a build thread - this will make our lives much easier down the road.
Here are a few comments based on your questions and photos:
- If you're going to do the arm wraps, they need to be a sleeve, not the boxing tape, and finished on the edges per the CRL.
- Regarding the cape, it needs to be hemmed. No raw edges. Another option is to go with two layers, sewn together on the inside. Dye-wise, coffee is not going to get you the right color, as you have found. As much as I despise dyeing fabric, that's really the route to go here. RIT tan is your friend if you are going the tan cape route.
- Your cape clasp looks a little bit too big. I always recommend pulling up the reference image of Shannon McRandle and scaling the clasp to the body/clasp proportions in the photo. Make some samples in various size on paper and cut them out to dial in the right size.
- On the belt, the hip strap absolutely needs to go all the way around to the back. Depending on how it is attached to the belt, it may be possible to rework the belt with a new hip strap. Otherwise, yes, you will need a new belt.
- I'm also noticing on the holdout blaster that your blaster is upside down. The grip should be coming out of the holster on the bottom side. Also, Mara is canonicaly right-handed, so I like to see the holster open and the grip coming out on the right side. However, if you are left-handed and absolutely need it to be that way, the opening can be on the left.
- I'm not sure what you're talking about with the "weird circle things" on the bottom of the shin guards. I have the same ones, and the came with foot guards that were attached with Velcro and easily removable.
Please feel free to ask more questions if you have them, and keep updating this thread as you progress with your build!
-
 1
1
-
I was so excited to see this in person this weekend! I'm not sure how Revan masks attach, but this seems like it could probably attach in a similar manner.
-
Hey Todd, I see what you mean about the eye shape and nose vents. Just a suggestion from Ryan, since I was asking him about the feasibility of modifying .stl files, if you bring up the discrepancies to GA, they may be willing to modify their file, especially if you tell them that you want to use it for the CRL. Ryan brought up something in a Bad Batch build group about an inaccuracy in their Wrecker armor, and the GA guy saw it and fixed the file a couple days later.
-
1
-
 1
1
-
-
Looking at the photo in your forum post, the back piece on the harness definitely looks too big. It should be a similar proportion to the costumers body as it is to Mara's body in the reference pictures. That's something you'll want to keep in mind for scaling a 3D print or ordering a comission.
The Etsy one looks decent on the model in the photo. Just keep in mind that the part needs to be silver (not the gold shown) and also free of layer lines (since it's a 3D print).
-
Congratulations once again! Velcro dots are totally the way to go for keeping the poncho in place on the suit. That's the only modification I've made since developing the CRL, and it helps a ton!
-
1
-
-
My suit is the same type of fabric, and I had this start to happen below the zipper. I had some extra fabric (since I purchased some of the same fabric to make my gloves), so I cut a small rectangle patch to reinforce the area and used E6000 to glue it to the inside. It helps take some of the load off the stitch holes, which are weak points.
-
1
-
-
If you can share a pucture, that might help. Is the stitch itself pulling apart, or is the fabric tearing away from the stitch?
-
The shin guards/knee pads do not need to exactly match the CRL image, as we are given another option:
"The shin and knee guards may be custom sculpted to match the designs used in the comics, or they may be based on the police style shin and knee pads used in the Decipher image of Mara."
Here is the Decipher image:
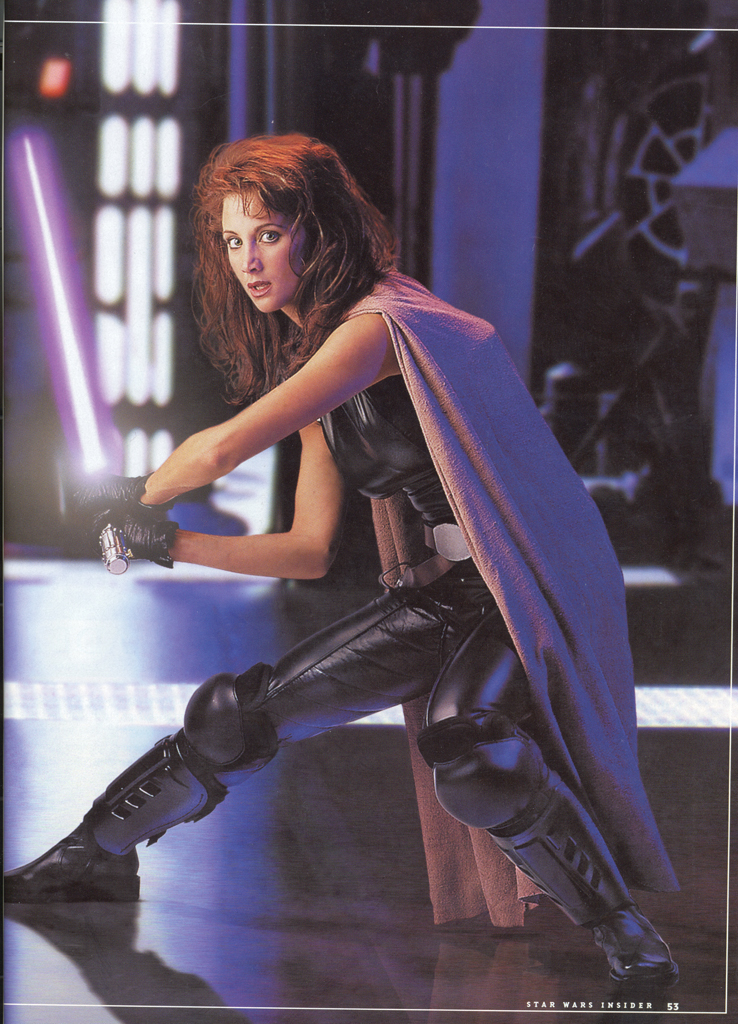
It's not possible to find this exact pair anymore (believe me, I tried), so something pretty close in a similar style will typically be approvable. Shannon McRandle said the guards in the Decipher image were hockey ones, but many of us use the police/SWAT style shown in the post above.
-
1
-
-
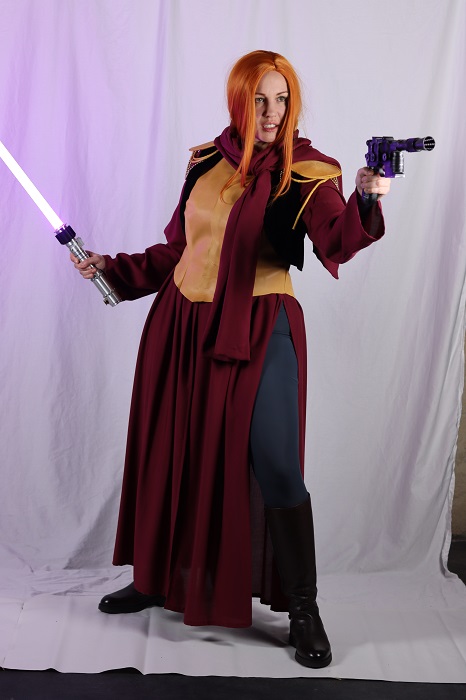
My costume was approved today! Yay! DS Mara Jade set complete!
-
2
-
-
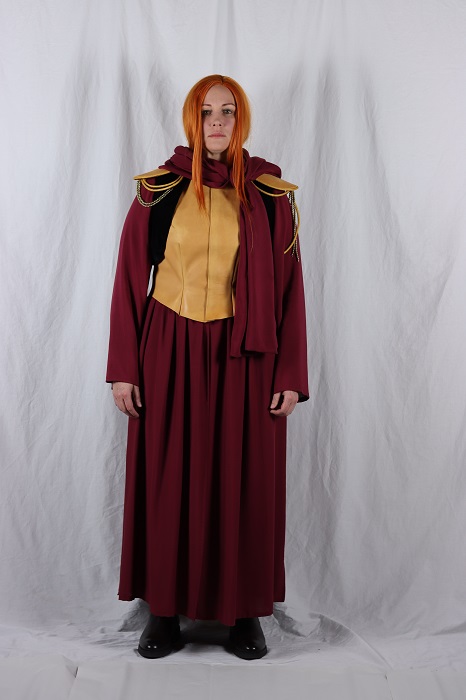
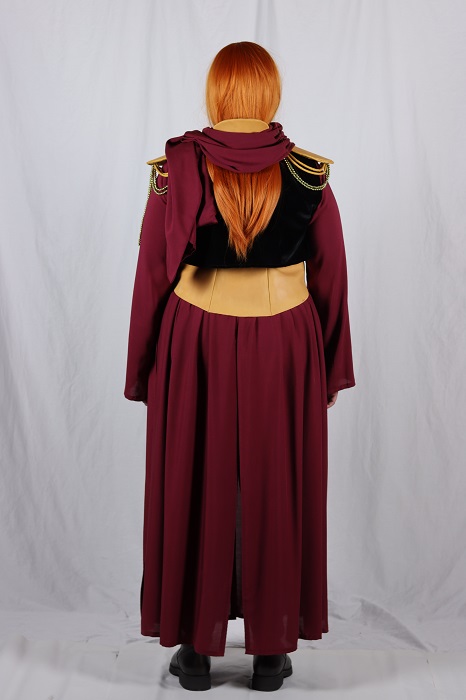
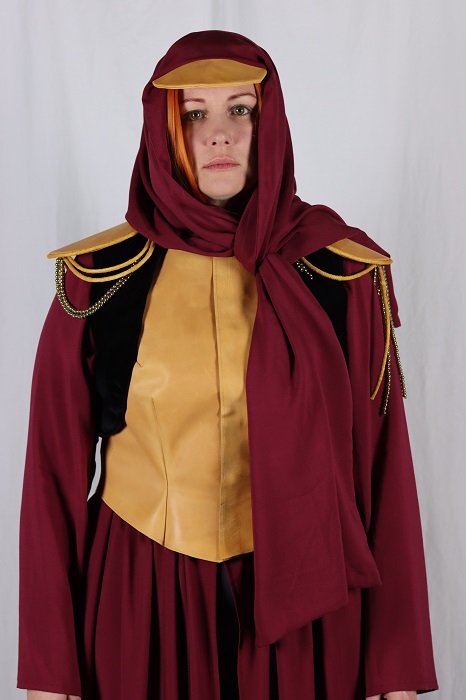
And last but not least... the approval photos! I just submitted this tonight, and this was my first time putting on the whole costume together. I love this so much! Note: even when we adjusted the color temperature on the camera to the exact specification of my studio lights, the maroon fabric still looks a little on the bright red side. Ah well, at least all the other colors look right. Fingers crossed the approval goes swiftly with no issues!
-
1
-
-
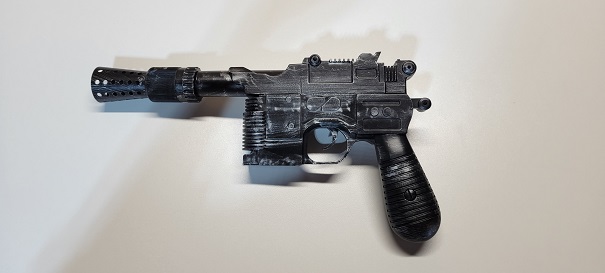
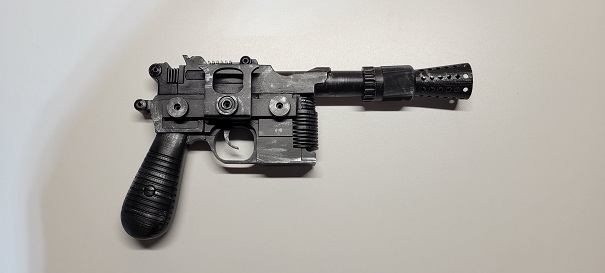
Ah, I forgot to mention the blaster that my husband was working on while I was sewing! This was resin printed, primed, painted all black (like the comic), clear coated, and weathered via silver dry brushing.
The model included a scope and the mounting hardware, but I chose to omit these since the blaster in the comic does not appear to include the scope. So basically I went with the Doctor Aphra configuration with the base blaster and bracket.
-
Here are some photos of my completed scarf. I made this in two layers so that both sides look clean and free of visible seams and hems. I also added a keyhole slot on my left side to pull the other side of the scarf through. This makes it look more like the comic and also prevents me from having to throw one side of the scarf back over my shoulder when it slides off pretty muck every time I breathe.
For the visor part, I added a piece of stiffener between the two leather layers (the same kind I used for my Imperial Officer hat) to keep it from folding in half.
-
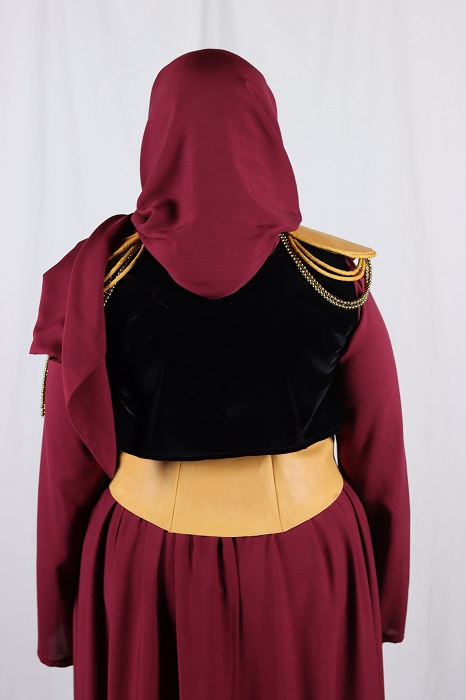
My epaulettes are now completed!
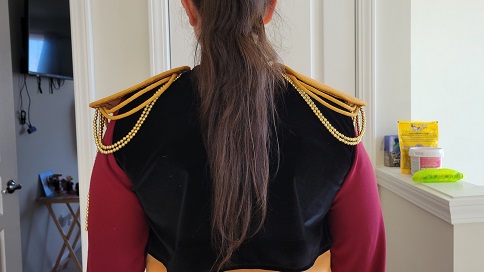
I used 3 mm Sintra for the base and curved both pieces just slightly lengthwise. I then wrapped the bases in the same leather I used to construct the vest and weathered them (again with the Scotch pad). The hanging cords and the trim around the leather-wrapped pieces is 3/8 in cotton piping, airbrushed with gold fabric paint. The hanging bead strands are 5.5 mm plastic round gold beads that I strung on jewelry wire (thank you, Internet, for the crash course in beaded jewelry-making!). Then I used adhesive Velcro to attach the epaulettes to the black vest. I noticed after I took the photos and changed out of costume that the epaulettes are tilted a little forward. Moving forward, I will be sure to stick these on so that they tilt just a little but further back and sit evenly on top on my shoulders!
One more piece to go (the scarf), so this should be ready for submission very soon!
-
1
-
-
Thank you so much for your kind words! It's getting there - my goal is submission and approval before Motor City Comic Con in May.
-
Yay! I'm glad they worked out for you.
-
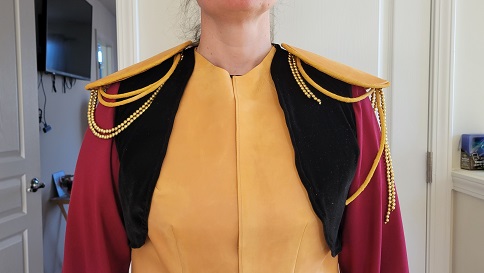
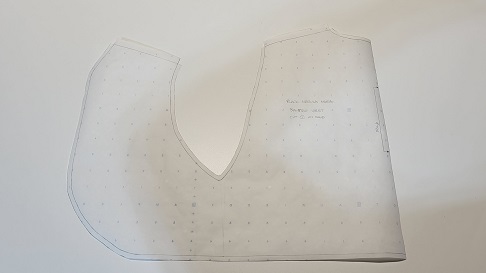
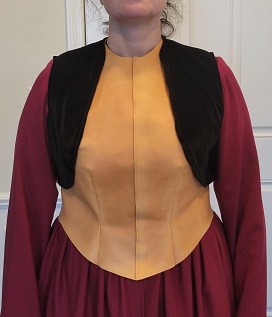
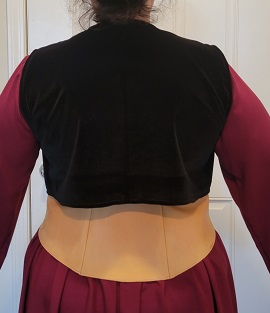
Black vest completed!
For the pattern on this one, I went back to my bodice sloper and closed out the upper darts, shaped the front sides, and shortened it. Getting the right length and looseness took a little bit of trial and error, but was not too troublesome. Here's my pattern - I opted to not include side seams to keep it a little cleaner.
I used black velvet (and that little boy's smiiiile) for my fabric. I finished the edges and armholes with black bias tape since it would be difficult and messy to roll under and hem all those curves. The finished product is shown below. I'm getting so close to the end - just two more pieces and one 3D print to go! 😄
-
1
-
-
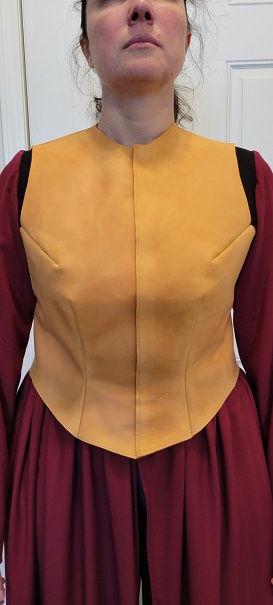
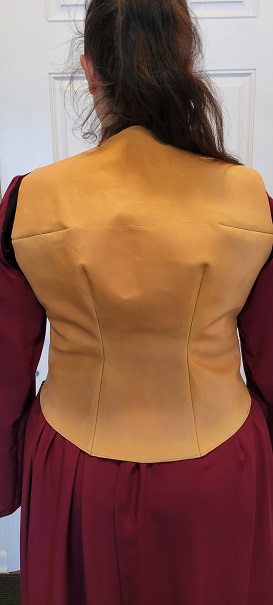
I finished the leather vest today! The pattern was pretty simple - basically the same as the dress bodice, but with larger armholes and added length to the bottom with double-ended darts to make the vest form-fitting over my hips, belly, butt, and lower back, as shown in the comic.
For the material, I used 2/3 oz veg tan leather in beige color (but it actually looks more like a tan color) from Tandy. The color is fairly close to the comic (which bugs me a little since I tend to obsess over matching colors exactly, but I'm not about to start messing with mixing leather dyes to get it closer). Plus it's pretty much an exact color match to the CRL.

I used 3/4 in wide adhesive Velcro in a beige-ish color for the closure. Velcro makes the most sense to me since there are a couple panels in the comic (one example above) where the vest is open only in the middle section of the front opening (where Mara tucks in her blaster) and appears to stay closed at the top and the bottom.
I also added a topstitch around the bottom edge and up the center front to match the topstitch or groove in the leather shown in the comic.
Finally, the weathering. I was lucky that the leather I purchased had some scrapes and imperfections in it already (yay natural weathering!) I added some additional wear to the edges, side seams, and darts using a Scotch pad - a tip I picked up from one of Adam Savage's videos when I was looking into how to weather leather.
Finished product:
-
1
-
-
Hi there! I spent a while searching today, and I found some boots that appear that would be approvable and are available in your size (as long as they are the faux leather version - I didn't see anywhere to select a material option). They are over $100, and sorry I neglected to ask what your budget was, but in my experience it's worth it to spend extra on a good pair of boots - your feet and back will thank you!
Edit: they are also available on the Aerosoles website for a lower price, and you can select the material. https://www.aerosoles.com/products/berri?variant=32891485487188
-
1
-
-
I would be concerened about holes being left behind after removing all the straps and buckles, depending on how they are attached. Just cutting away a strap or two that is sewn into a seam would probably be ok, but these seam like they might need some pretty heavy modifications. Also the cutout in the back looks too large. The vertical expanding elastic slits that are in a lot of boots are ok, but I think I would say no to this one.
I see you listed your size a few posts up, so I'll try to help out with some searching as well. Fortunately we'll see the best boot options and availability this time of year. Hang in there!
-
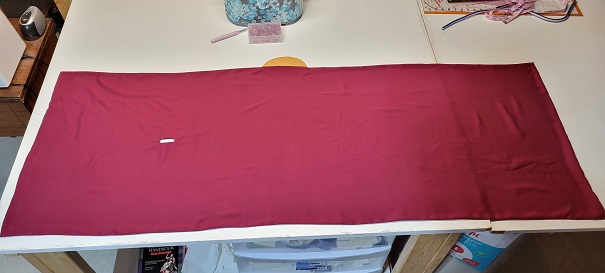
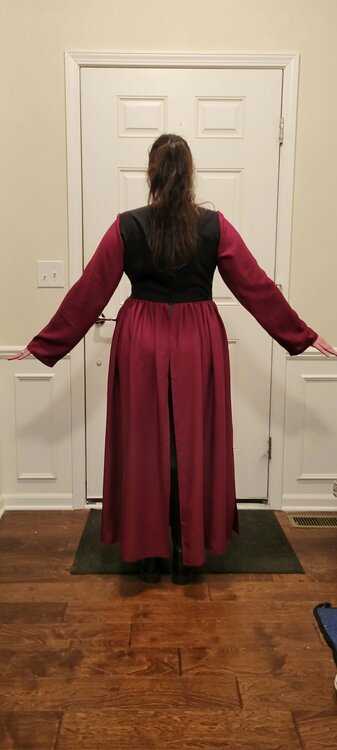
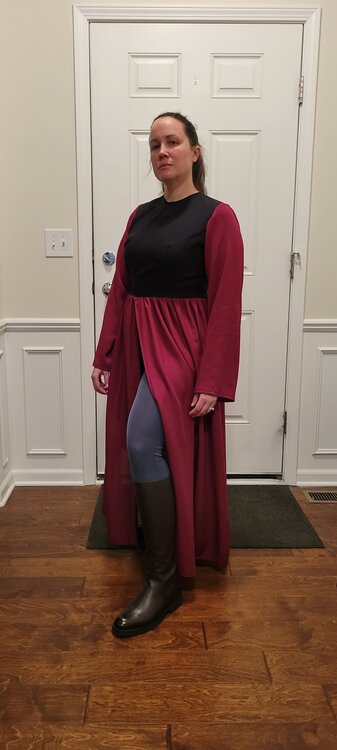
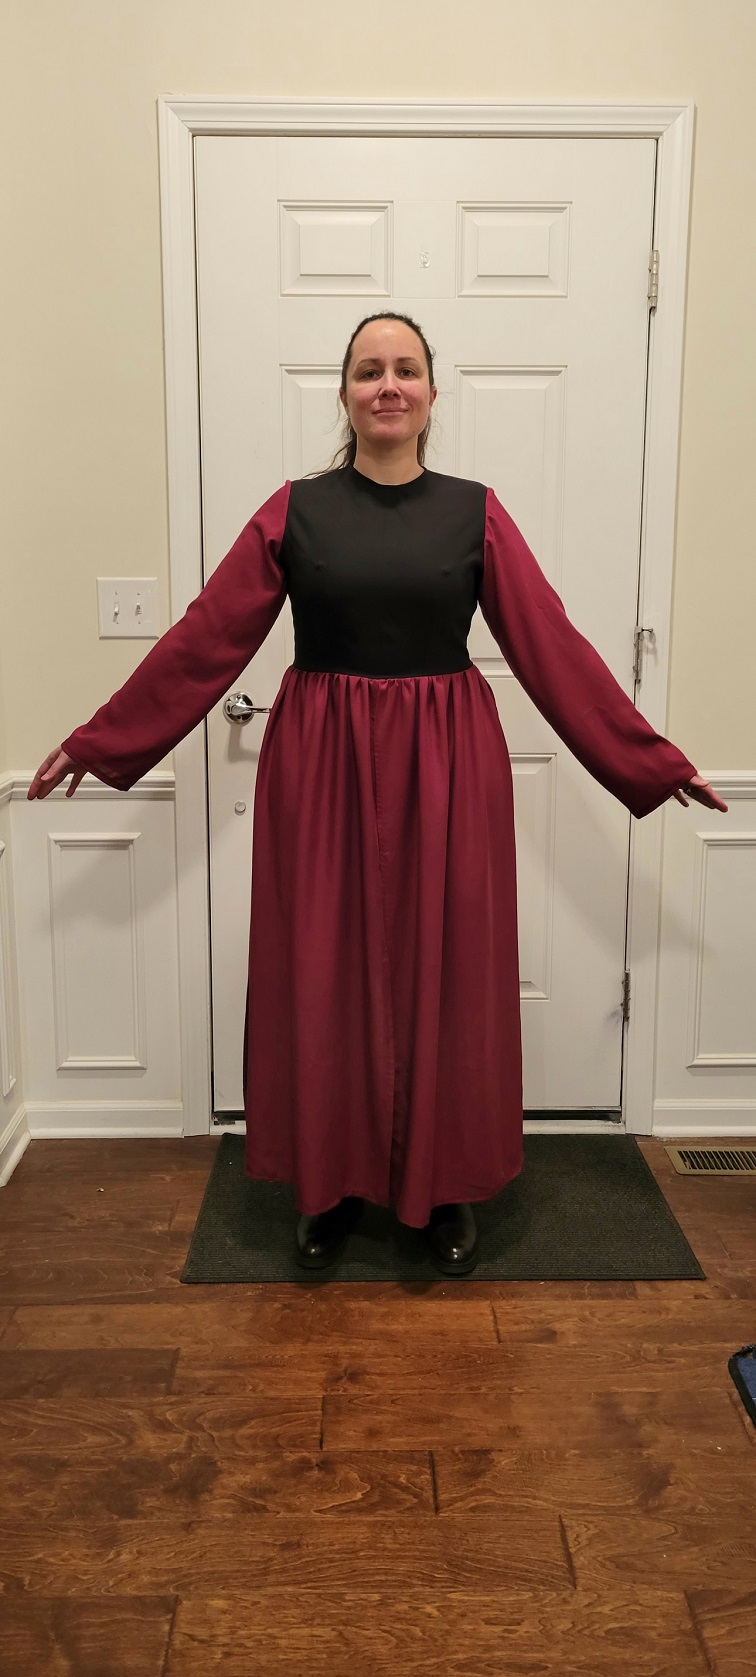
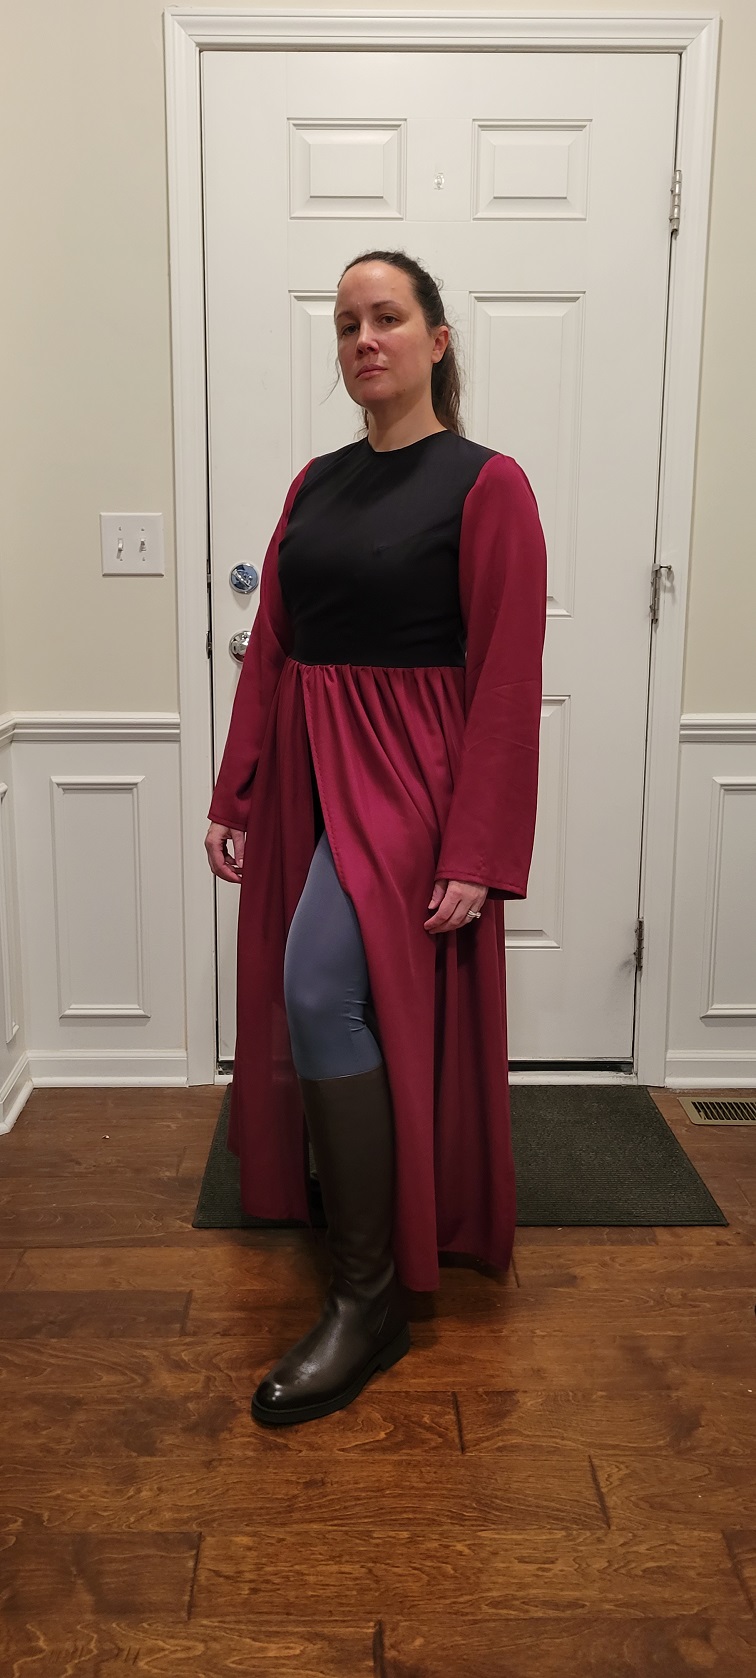
Very slow progress (I've been dealing with extremely painful tennis elbow in my dominant arm since early September), but I've finished the dress!
Here's the materials I used:
Black fabric: Rayon challis (black) from Fabric Wholesale Direct
Maroon fabric: Rayon challis (burgundy) from Vogue Fabrics
Zipper: Invisible separating zipper from Amazon
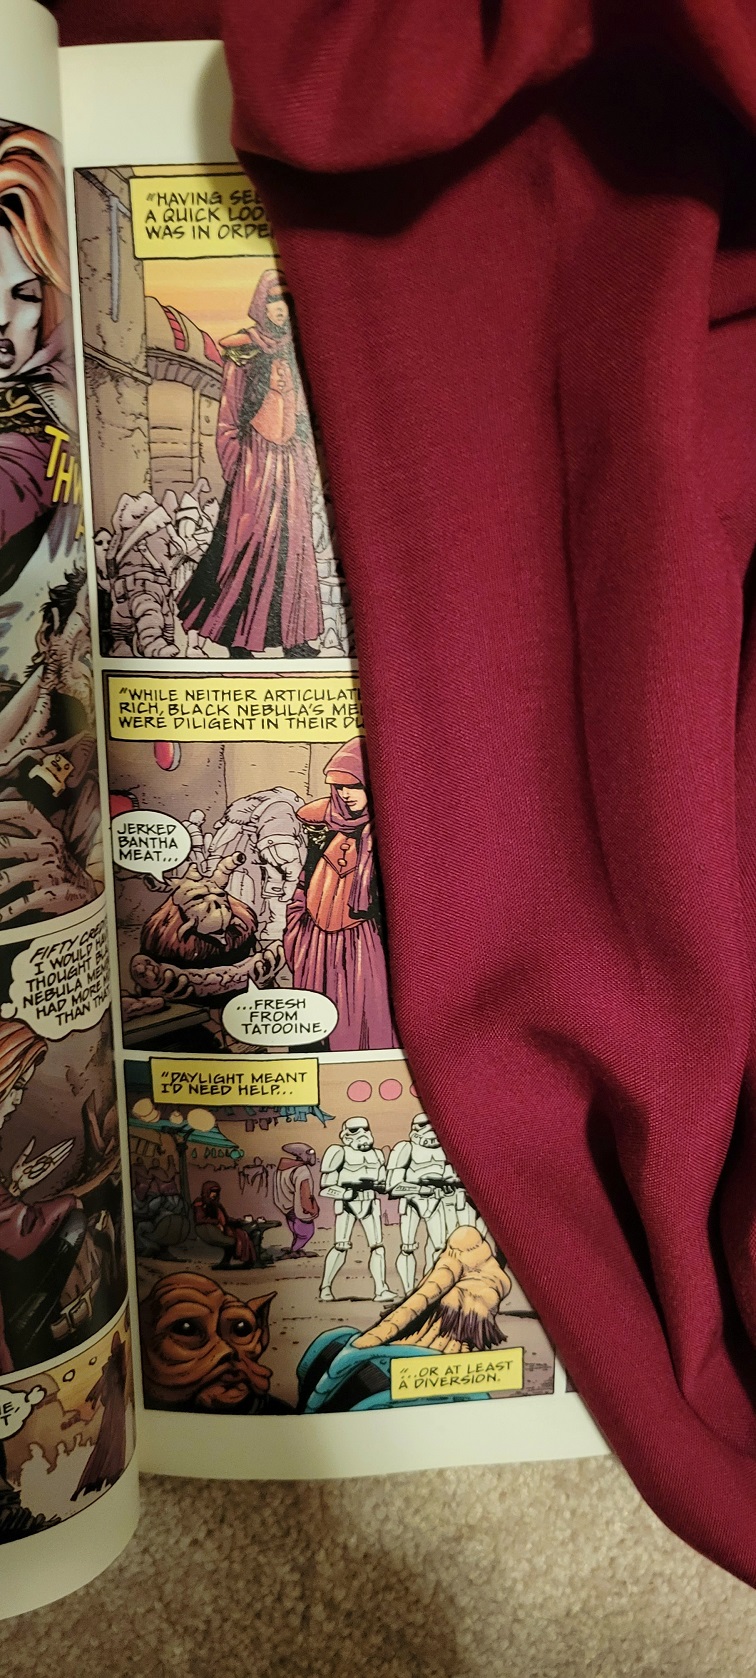
A couple notes on the fabric: rayon challis frays SUPER easily, so French seams are KEY. But it's very comfortable and drapes and flows just like the dress in the comic, so I think it's a really good match for fabric type. Also, the burgundy fabric is not a perfectly exact match to the comic (it's just a tad darker), but it's probably closer that I could get trying to dye match exact and saves me a ton of stress. I say it's close enough!

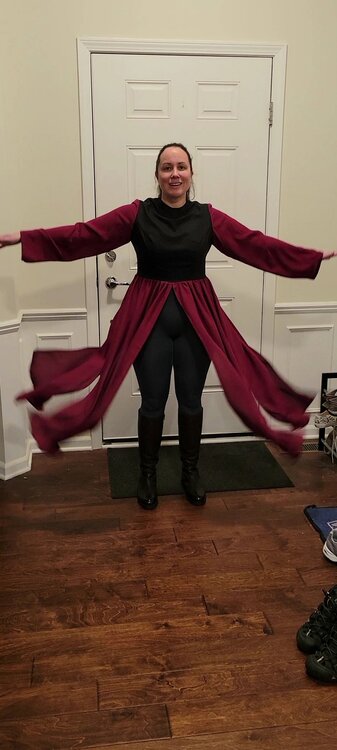
Here are the photos of the completed dress. Note: the cell phone camera doesn't capture colors exactly as they appear to my eyes, and the shot with the skirt panels in the air is a still from a video, so it's way off (but it was fun to take and looks cool). I'm going to be shooting submission pictures with the DLSR and studio lights, so those will be much better! There is a little gap between the two back skirt panels at the zipper, which was pretty unavoidable, but this will be hidden by the leather vest since the bottom goes below the waistline in the back.

-
1
-
-
Thank you! Hopefully they may be helpful for whoever stumbles upon them or at lest help me remember what I did should I need to reference back.


Mara Jade Black Bodysuit WIP
in Mara Jade
Posted · Edited by Glory530
The arm wraps (and honestly, "wraps" is a kind of misnomer in this case) should be like a slide-on sleeve with finished edges as opposed to what we see Rey wear, for example. If you look at the comic book images, they appear sleeve-like. The photo in the CRL is like as sleeve as well, it is just a tad bit bunched up (as mine like to do as well when the top slowly creeps down and needs to be pulled back up). Here are mine, as an additional reference:
This tan color looks good to me!
The warmer brown and the darker brown are both acceptable, as there are references for both. Always, for any costume, if there is something in the official references that appears different from what is pictured in the CRL, it's acceptable, provided you can supply the references to back it up. The black bodysuit Mara reference gallery can be found here, but there are a ton more official images out there, especially in the Heir to the Empire, Dark Force Rising, and The Last Command comics: https://www.theflagshipeclipse.com/forums/index.php?/gallery/category/50-mara-jade-black-bodysuit/
Let me know if you have any other questions, or feel free to stop by the GLG table and ask next weekend, if you're coming to MCCC.