
-
Announcement
Welcome to the forums!
If you are a newly-approved member, make sure you check out the New Member Checklist!
If you are a Detachment member and can't see the member-only area, post here for access.
-DV


AlphaZulu
-
Posts
38 -
Joined
-
Last visited
-
Days Won
2
Content Type
Profiles
Forums
Gallery
Events
Posts posted by AlphaZulu
-
-

I really didn’t want to leave for work today. I made some great progress. -
Don’t know how it shows up in pics but the Gum Tragacanth and some burnishing works wonders and really makes it look professional. Foreground belt has been burnished, background has not. I used Fiebing’s brand from Walmart.com for only $6

-
Belts and pouches are looking great!
The pouch fits trading cards. I’ll be a prepared mascot for the Garrison. -
3 coats of dye, might not have needed that much but it wasn’t looking uniform until the 3rd coat. I am very much a beginner at this. I have been flexing the leather as well and it’s giving it a very nice texture. I have been applying extra virgin olive oil in thin coats to keep the leather moisturized.
I ordered Gum Tragacanth to burnish the edges. After that I’ll apply some oil and then beeswax to seal it all up. It’s a good black but I would like it a bit deeper with a slight sheen. -
I started the dying

Fieblings black dye
Wool daubers
Nitrile gloves -
Just a simple pattern I made of the pouch. The holes marked are estimates

-
-
This was a lot of fun. Sorry no accurate measurements accompany this but I can put up my rough pattern soon.


-
12 hours ago, Naasad Tal said:
Great progress so far!
One of my favorite things about this hobby is learning new things, over the years I have learned, fiberglass work, painting/weathering techniques, electronics, leatherwork & most recently sewing, I also love seeing folks learning new thigns as well.
Keep up the good work & good luck on the rest of your build!
Thank you, and I agree with you while heartedly. Learning new crafts is intimidating but this hobby gives you obtainable goals to work towards such as the following...
-
I’m familiar with this pattern because I do have the Wizard as a costume
I’m pretty awesome like that -
Found some patterns that I’m going to build off of. The sleeves of the (what I now know is called) doublet will have to be elongated and cut off at waist high. I’ll also have to avoid the seam in the cloak.
Oh I’ll also have to learn how to sew. My lessons are scheduled


-

Black dye and loops will be next on the shopping list -
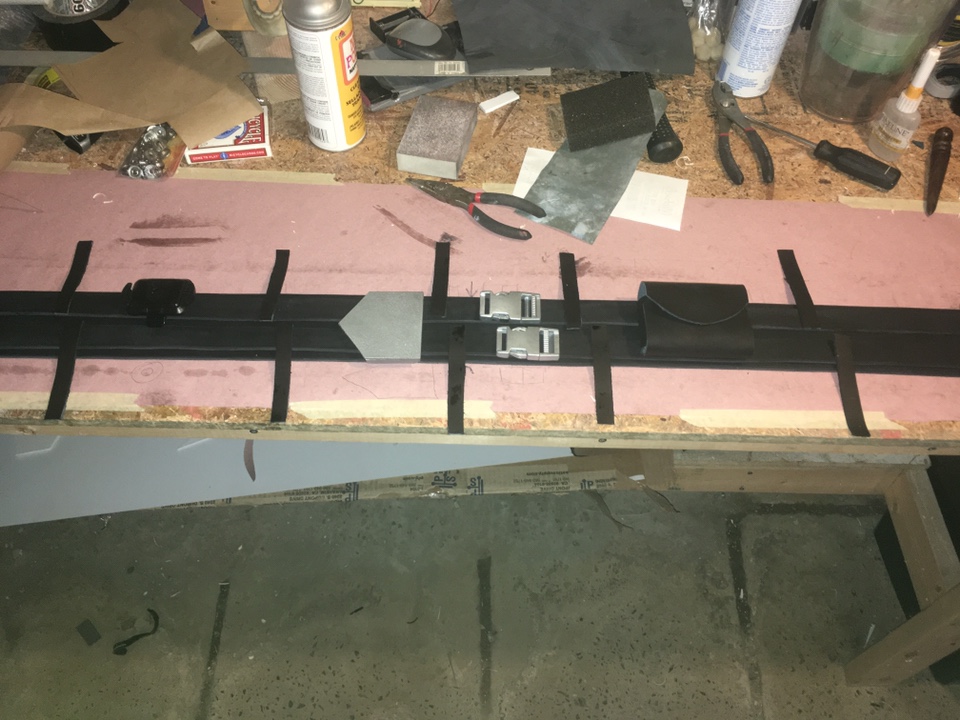
Here are my two approximately 2.5 cm leather straps ($5 a piece). I’ll be gettting the approximately 8 cm strap and black dye next week.

-
Probably won’t be much movement on this for a bit as I gather pieces. I ordered 2 thin leather straps for the belt this week. Next pay I’ll order the large strap and dye. I have a few theories on how to design the belt for ease of use and making sure it stays in place with the slight angle to the right. As always I will keep this log updated.
-

With proper spacing and securing with more than some blue tape I think this has potential. -
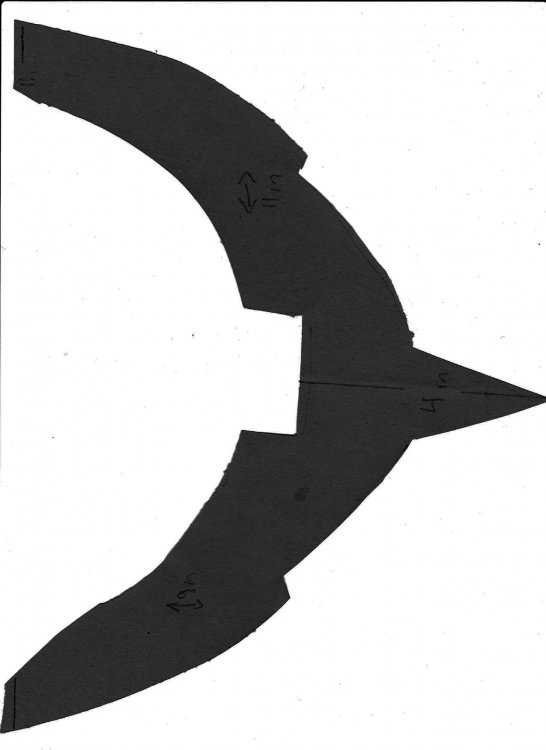
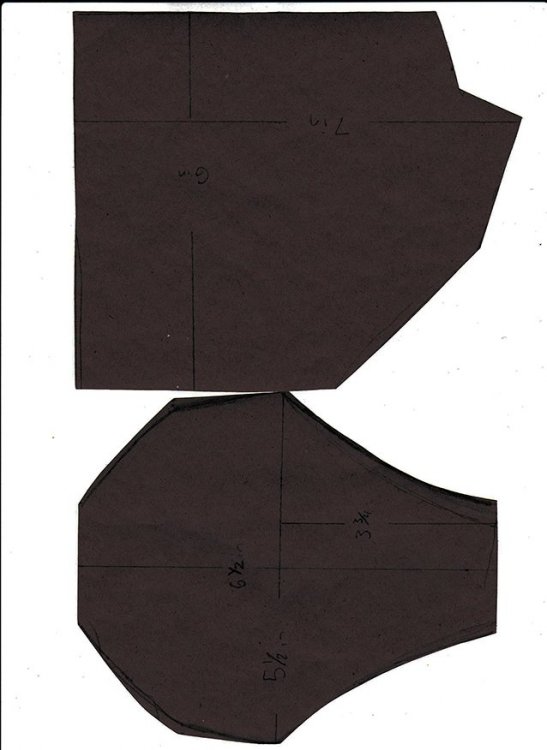
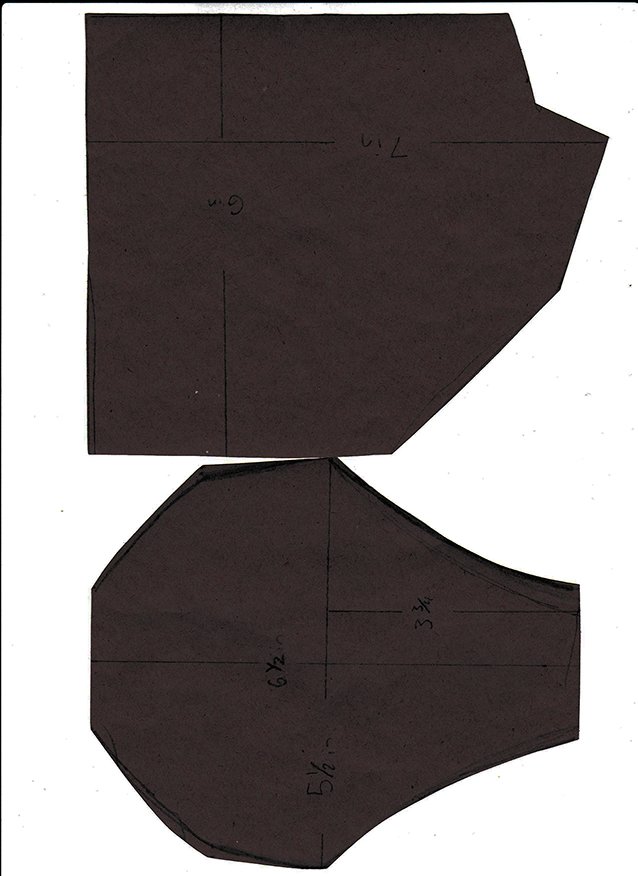
I will edit this out if/when this changes
I HAVE NOT BEEN APPROVED WITH THIS ARMOR!
But I would like to share my templates. Due to the variations i am not 100% confident the throat armor will pass, i based it off of the concept art as much as I could but added some more girth to cover the cloak clasp.
Print these out to fit page and they should be accurate enough to Spray adhere to plastic and cut with a razor knife.
-


Still going to add more coats -
2nd coat of primer. In between every coat I sand with 1000 grit sandpaper. It gives it such a smooth solid feel and look.

-
I decided to try the chest armor just to see how it would lay. I think this design will sit well on the padding. If changes will be made in the future I’ll adapt them to fit.


-
Neck Armor
Some more neck armor evolution shots

Then I decided to go with the point
No regrets -
I got my shoulder bend on, I attached the .40 HIPS on it and will chamfer it when it’s cured.

Also, the throat armor has a good bend on it now as well. I’m growing more pleased now that it is sitting flat

I’m going to let it cool and try to bend it to enclose my neck more tonight
-

The very reason why I never threw away my expired hard hat. I just didn’t realize it until today.
The concept here is to get a preliminary bend. In my head I’m envisioning this being attached with hook and loop straight to the flak vest neck. I’ll be able to conceal the robe enclosure behind it.
Again this is the Beta version. I’m not sold on the shape yet and I think I prefer the arrow style with the crease down the middle. -

It feels like I’m torturing them -
Shoulder Bells (prototype)
Drew and traced like I did with the neck armor. This is 3/16 in HIPS.

I also did a smaller section of .40 hips, same chamfering concept as above
Now they are getting a preliminary bend before being Ziptied to my basement joists for a few days.

These are NOT adhered together yet. I do not think it’ll make much of a difference due to their different sizes but bending 2 pieces then gluing them together often helps maintain the bend.


AlphaZulu Starkiller Concept Build
in Starkiller
Posted