
-
Announcement
Welcome to the forums!
If you are a newly-approved member, make sure you check out the New Member Checklist!
If you are a Detachment member and can't see the member-only area, post here for access.
-DV


Heavy1973
-
Posts
629 -
Joined
-
Last visited
-
Days Won
58
Content Type
Profiles
Forums
Gallery
Events
Posts posted by Heavy1973
-
-
Sad to see you two go - wish you all the best

-
This is a beautiful costume, very well done

-
 1
1
-
-
So sorry to hear that, do you have any pictures of your costume ? and what did your GML point out was the reason as to why it was denied ? that way it is easier for us to help you.
-
 1
1
-
-
Congrats
")
-
Very nice work
") when you get the the skirts and cape adjusted in lenght the fabric looks like it will flow very well.
when you get the the skirts and cape adjusted in lenght the fabric looks like it will flow very well.
You will need to hide the ends of the knot, I did it by sewing them behind the knot on the inside. And yes the tunics needs to cross left over right.
Personally I would shorten the tunics bottom edge as it would be more as to the CRL ref. : https://databank.501st.com/databank/Costuming:SL_darth_nihilus , so it sit a bit higher, and make sure the sleeves are straight, when you put them on, they are a bit twisted-
1
-
-
10 hours ago, Gomcse said:
Submitted for approval today! I noticed the CRL has been updated again, and blackout (cloth masks) are no longer allowed. Good thing I got the plastic one! I had Wicked Armor make some changes so that the mask only had 2 ovals instead of the 3 he normally makes. Also had them separate the inner tunic from the skirt, though that isn't an issue anymore thanks to DarthValdyria. The costume is comfortable and looks really good on me (if I do say so myself...) Keep your fingers crossed for me!


Looks nice, though you need to pull the cape over your shoulders and down behind your back, it is not correct like this. Good luck on the approval.
-
1
-
-
Congrats

-
I would say no, not without reshaping - I haven´t been able to find a 3d file that can be used without making mods on it, but WA do sell the correct mask here : https://wickedarmor.com/collections/darth-nihilus/products/darth-nihilus-mask-inspired-by-star-wars-knights-of-the-old-republic-ii-custom-prop-replica if you´re not up to reshaping your 3d print.
-
Yes it is the same, that I used and it is not approvable as it is... you will need to sand down the raised areas above the eyes and sculp the mask to look more skull like with raised areas around chins/eyes. You can take a look at my wip and see, how I did
-
What 3d file are you using ?
It looks like the one, that I used, and that can´t be approved unless you makes some heavy mods to it. -
A natural weave fabric that drapes well - most uses silk, I used a silkblend that I found, that gave me the look for the draping and a different fabric for the sleeves to give it the right look.
-
I used a silk blend I found, that gave the right drape for the whole thing and a natural weave fabric for the sleeves
-
When I started out with costumes back in 2012, I hadn´t done much sewing myself - and see me now
For my Nihilus COFT I used a basic shirt pattern and made mods for the cross over for the tunics - you can also use one of your shirts to lay on the fabric and cut after that.
The skirts are easy, the innerskirt is done with an elastic at the waist, just pull the fabric around you and take more fabric to get the voluminous appearance, remember the split.
Same with the outer skirt
The cape - I measured myself from top to floor, added about 30 cm more and drapped it for the right fit, before I made the knot, I sewed in snaps at the shoulders to hold the cape behind the shoulders.
The obi - not hard either, take your meassurements at the waist and remember to add on for the closure, I use velcro for that. Same with the belt, I bought two leather pieces and 8 chicago screws + added velcro for the closure.
WA makes some really nice costumes, but I prefer to save money and do as much as I can myself. I think my costume was made for about $200 in total with all the materials. I was so lucky to get the fabric with 40% of at my local supplier
You can see my WIP here :-
1
-
-
You can do it - Rome wasn´t build in a day
-
1 hour ago, Compa said:
Hi, did you use a pattern for this build and if so can you share it please and thank you?
Hi
I used a normal shirt pattern for the tunics and moded it so it fit - the same with the skirts, and just winged it, so sadly I don´t have an exact pattern for them.-
1
-
1
-
-
6 hours ago, Rico said:
Love it
Thanks
-
Dan can perhaps help you regarding the soft parts and paint - you could try and write him a pm : https://www.theflagshipeclipse.com/forums/index.php?/profile/1834-danrodjr/&wr=eyJhcHAiOiJmb3J1bXMiLCJtb2R1bGUiOiJmb3J1bXMtY29tbWVudCIsImlkXzEiOjY0LCJpZF8yIjoyMzg3Nn0=
-
10 hours ago, Twi'lek Pam said:
I still haven't had time to work on making a new tutorial website... but I did discover that you can still find the old one on the wayback machine archives! (Yay!)
https://web.archive.org/web/20181119005223/http://chucrew.com/Nihilus/Nihilus.html
Pam
")
Thank you so much - this is a really nice WIP, that I have used for my build also - and I love the formed hoodpiece, that I got from your store
-
It has been a month without a reaction to my proposal - anyone ?
-
Nice to see, that you are still working on this
-
Bumping this one...
-
Hi
Many uses the formed hood from Twi´lek Pam - I´ve just been approved with my COFT version and it can be used for both versions to get the support you need.
It looks like this :
+ there is a very nice WIP with pictures of the back, that you can take a look at here :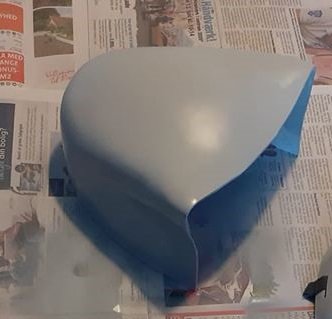
-
14 minutes ago, Gomcse said:
Super helpful, thank you. The belt construction you described is exactly what I did. Total cost was very low even with the purchase of Chicago screws. Leather was from Amazon and saves $100+ from buying off etsy, where most belts are incorrect to the CRL anyway.
Congrats again.I think I paid around 160 DKK for all the materials for the belt, and it is totally worth it to make it yourselves
, you can save money and get the correct looking belt.
Thank you so much - looking forward to seeing, how you put yours together.-
1
-
-
You´re welcome
My heart goes out to your country in this hard periode - it is horrible news we are getting - here in Denmark, we got closed down pretty fast, only food and medicin stores are allowed to be open. I am 3 weeks in a quarantine with my 2 sons - but also standing by for deployment if the Military needs me. Hopefully it will be better soon...
You can use one of your own t-shirts as a pattern on the black fabric to cut after
Retiring from the flagshipeclipse
in Off Topic
Posted
That is awesome, glad to see, that the costume stays in the Legion - looking forward to have you here")
Good luck on your approval