
-
Announcement
Welcome to the forums!
If you are a newly-approved member, make sure you check out the New Member Checklist!
If you are a Detachment member and can't see the member-only area, post here for access.
-DV

Thalizar
-
Posts
50 -
Joined
-
Last visited
Content Type
Profiles
Forums
Gallery
Events
Everything posted by Thalizar
-
Got quite a bit more done. So I made the thighs the same way I did the gauntlets. Used a thicker No Parking sign and again used craft foam to form the armor plates. I did a rough outline to show where the plates should go. I made her abdominal plate out of some faux leather, I cut it into the shape I needed and I attached it to the chest plate and cod piece using industrial strength Velcro. I also added ab armor plates using craft foam. Some close to finish shots. I cut the cloak sleeves down so they fall just below the elbow and hemmed them. They are not painted yet in the pictures. I did pick up some Tulip brand fabric paint from Michaels and painted the sleeves, they are drying on the table. Looks like the paint worked very well. I'll post some pics of the finished painted cloak when it has dried. Now just for her mask from Wolfgang and it will be finished. Now on to her next costume.
-
Worked on her gloves and got them done, next project will be to get her thigh armor built. Made the hard armor out of ABS and then the claws out of craft foam. Been busy as of late, have not had much time to get much done, plus it's warming up so I had to get the cycle out.
-
Also looking at the pics of several Acolytes the stripe size does not seem very consistent. On some of the pics they seem thick and on others the stripes seem a bit thinner. Is it possible to have the CRL read that the stripes need fall into a certain size, such as the stripe needs to be 2" but no bigger then 3" as an example?
-
The way I have my sleeves painted, the dimensions are the first red stripe is 2" wide then a 2" wide space then a 1" wide red stripe. Looking at the pics, I believe that a 3" stripe would be a bit thick. Looking at the top pic of Lord Ardass, the stripe does not seem to be that thick.
-
I like how it's reading so far.
-
Still plugging away at the build. Did a small version of the side canister. I will sink the nut flush after I finish sanding the canister so it will match the larger version. I made her shoulder bells out of an empty Mt. Dew 2 liter bottle. I used the natural curve of the spout area to make the bells. I then reinforced the bells by using plastic strips on the inside and then to finish it of I cut strips of foam to place around the outer edge of the bells to give it that molded look. Some more test fits.
-
Some more work done on her build. Balaclava. Gloves. I will make the coffin armor and back plate out of ABS and the claws out of foam. I decided to use soccer shin armor for the shin armor. I figured instead of doing a clamshell on her I would just do the front for better mobility. For the shoes I wanted slip on shoes with no laces or Velcro to deal with. Also this would allow her to put on and take of the shoes much easier. The shoes look much more silver in person. I did get more signs so I will start to get her thighs figured out and completed.
-
Finished her gauntlets. Gauntlets ready for paint. Gauntlets done and ready to wear.
-
That's awesome! You need to make a Big Daddy costume for yourself!
-
Thank you, now if I can just get her to be as excited to do her homework I would have it made...
-
Alittle more work done, I think I'll finish her build before mine. Finished the cod piece, attached the belt which is a silver strapping material, I then used a backpack clasp to fasten the belt in the back. I used an extra pouch I had for her build, the cannister is mine, I still need to make her a scaled down version. This is her first test fit, she was pretty excited. Started on the gauntlets. Again I used a No Parking sign since it was made of a thicker plastic. I formed it to her forarms then used a heatgun to shape it. I'm using industrial strength velcro to close the clamshell. I used a thicker craft foam to simulate some heavy armor running down the forarms, I will cut out small plates out of thinner foam to make the gauntlets have an armored look.
-
Hello everyone, Since I started my build my 9 year old daughter wanted to be one as well. She is currently a Jawa in the Galactic Academy. So I picked some supplies and started to do some work. I started by using some thicker For Sale signs and different thickness crafting foam. I cut the signs to my daughther's body size and then used a heatgun to form the plastic around her to give it shape. I did the same process to make the cod piece. After I got the desired shape I cut the foam and used adhesive spray to attach them to the breastplate. I then gave it a plastic black prime coat then a coat of gunmetal. Which I will highlight. The cloak is in the works and I will paint the sleeves. What I plan on doing for the shoes is to get some slip on shoes and again using thin craft foam cut out patterns to simulate armor and then paint the shoe in the same shade of gunmetal.I made the buckle out of foam and plan on using silver strapping that I have to make the belt, I will carve a cannister for her and she can use one of my extra pouches. Hoping to acquire one of Wolfgangs small Acolyte masks to finish of the build.
-
Just want to add something that I've noticed. Looking at trailers with the Acolytes and also from the picture posted above, the Sith's armor seem to be much darker then that of the shiny silver Jedi. Almost a black/silver like a gunmetal color. I think that should be stated in the CRL that the armor should be dark silver not a shiny silver. Just a thought.
-
Worked on my belt cannister that I don't think anyone knows what it really is. Instead of cutting out the belt loop area as suggested, I did not feel that the resin would be to solid with such a small amout of resin that would be left after I opened the gap to fit a belt through and I did not want to glue the cannister to my armor. So I decided to go a different route. I used a dremel and a sanding wheel and ground out the back of the belt clip area to make a groove that my belt clip would fit into. I then test fitted my belt clip that I picked up from Tandy Leather, the clip fit into the groove nicely. I taped of the groove, then gave the cannister a black primer coat then a coat of automotive paint. I chose automotive paint because it is a strong coat and also had a wide variety of silver shades. I chose a dark gunmetal silver, which I will then use my airbrush to highlight the armor. After the paint was dry I used a combination of CA glue and E6000 to secure the clip.
-
I ran into the pouches purely out of luck. it was a sleepless night thinking of my build and I decided to see how hard it would be to find small black leather pouches. Harder then I thought, after about two hours of looking all over the web I tried Ebay and happen to see these listed. They are old Voight shotgun shell holders for you belt, they were made to hold five shells each. After a bidding war with another bidder I managed to get them. The only thing I found even close to useable pouches were double handcuff holders from tactical gear shops.
-
The logos will be covered.
-
PM sent Nipshank.
-
Even with the halt on the Sith Acolyte I'm still plugging away at my Lord Ardass. Some progress photos. Getting some things done while I'm waiting for my armor to arrive. Neckseal and mask with balaclava. Got my cloak, test fit, may need to bring it up a bit. Waiting to see how far it drapes when I get my boots. The sleeve stripes are painted. The gloves I'm going to be using, light weight material, nice fit wit lycra material and padded palm. Finger armor with the side cannister, still need to get some pouches for the belt. Worked on the gloves a bit. They are black the flash make them look blue. Managed to find these great pouches, these should work nicely.
-
I would have to disagree with only having mesh behind the eyes instead of a lense. I've seen so many pics of Vader and you don't always see a saber glare. Keep in mind this is a CG image, do you spend the time putting in a saber glare in all the eyes? Perhaps no glare for effect keeping the eyes dark keeps them sinister. Also they are wearing helmets not just a mask, would you put mesh in a helm or lenses? Can't think of a helm in Star Wars that does not use lenses, Tusken Raider perhaps, but I'm thinking the Sith are a bit more advanced. Mesh should be an option. My 2 cents, Dan
-
You've got a great start going. Love to see more pics as you get more done. You'll be trooping in no time.
-
I painted the mask myself. I have not had time to work on the back of the helmet yet. There was a crack in the back piece that I have to repair first. The test fit was a bit tight for my head. I may have to do some modification to have a better fit. For the moment I made a three point strap system like a hocky style mask. What I will do is to attach the front and back pieces together with elastic straps and be able to pull them apart to fit my head in and then the straps will pull the two parts together for a snug fit. Dan
-
yes it is, awesome mask!
-
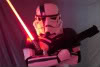
Hello all, Been working a bit on my Acolyte in between my Galactic Marine build. Received the fantastic helmet from Slave1 and neckseal from Wolfgang. The cloak is just a Holloween prop I had just to use for the pic. I do have a great cloak currently being made. So any pointers from the other Acolyte builders would be greatly appreciated. Thank you, Dan Thalizar TK3967
-
Thank you, I can repair motorcycles, put armor together like a mad man, but put a needle in my hands..... I was hoping to perhaps find a crafter that could help me in that department.
-
Hello, New here to the Flagship forums, I'm a member of the FISD and currently have a TKC build that I have finished. Now I'm looking at starting a Nihilus build and would love any advice where to start. i've looked into My Wicked Armor but have heard he is slow to respond to e-mails and I was wondering if there are other options out there? Any advice would be welcome. Thank you, Dan