-
Announcement
Welcome to the forums!
If you are a newly-approved member, make sure you check out the New Member Checklist!
If you are a Detachment member and can't see the member-only area, post here for access.
-DV
Search the Community
Showing results for tags 'wicked armor revan'.
Found 2 results
-
Working on a Level 1 Darth Revan (KOTOR I & II) Looking forward to your feedback! Component source is Wicked Armor unless otherwise specified. Ordered 5/23/23 - Received 8/31/23 ✅ Hood and Capelet Images - https://imgur.com/a/J3l3XN1 ✅ Cape Images - https://imgur.com/a/8JLI6ua ✅ Mask Images - https://imgur.com/a/wAydI5q ✅ Shirt Images - https://imgur.com/a/wP8NyAY ✅ Vambraces Images - https://imgur.com/a/fwuqXp2 ✅ Hand Plates Images - https://imgur.com/a/LesZZ8x ✅ Gloves Images - https://imgur.com/a/boWlP0r ✅ Cuirass | Chest Armor Bridge | Abdomen Armor | Belt with O-Ring Images - https://imgur.com/a/LrirOwk ✅ Fabric Drapes Images - https://imgur.com/a/5QgPOpo ✅ Back Armor | Back Armor Bridge | Kidney Armor Images - https://imgur.com/a/xI3RQwE ✅ Split Skirt Single Hole Cord Lock Ordered 11/15/23 - Received 11/17/23 Images - https://imgur.com/a/33R2vP5 ✅ Pants Amazon Ordered 5/11/23 - Received 5/13/23 Images - https://imgur.com/a/CO9UxZh ✅ Boots CrowProps Ordered 5/16/23- Received 6/9/23 Images - https://imgur.com/a/lBESk6N ✅ Lightsabers Vader's Vault REV-N Elite Ordered 07/21/23 - Received 08/22/23 Images - https://imgur.com/a/CJHBouu Vader's Vault Revanchist RTS Ordered 07/21/23 - Received 08/22/23 Images - https://imgur.com/a/CJHBouu ✅ Undergarments Balaclava Compression Short-Sleeve T-Shirt Compression Socks 12-inch Tummy Trimming Belt ============= Purchased but will not submit Korbanth RevanV2 "Dark" Ordered 08/01/22 - Received 08/03/22 Korbanth / Vader's Vault comparison images - https://imgur.com/a/jmD2Guk Korbanth RevanV2 "Light" Ordered 08/01/22 - Received 08/03/22 Korbanth / Vader's Vault comparison images - https://imgur.com/a/JiAaSzT Wicked Armor Resin Saber Hilt Ordered 5/23/23 - Received 8/31/23 Images - https://imgur.com/a/e8dgYge
-
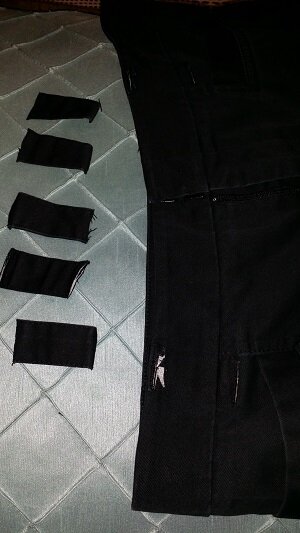
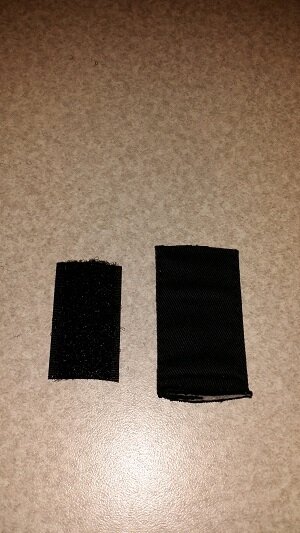
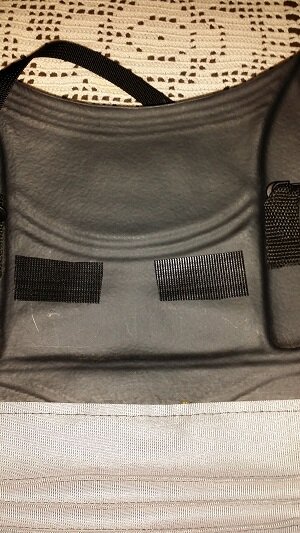
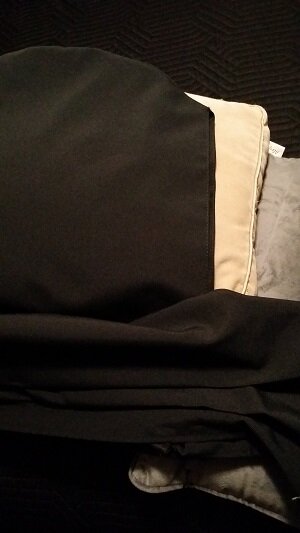
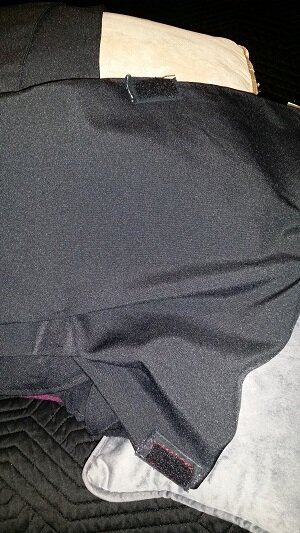
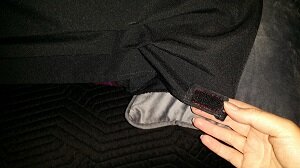
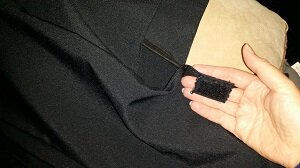
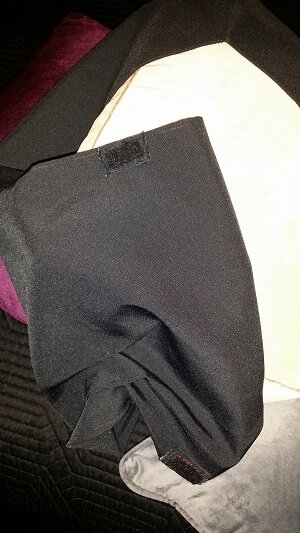
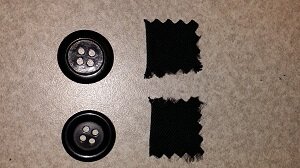
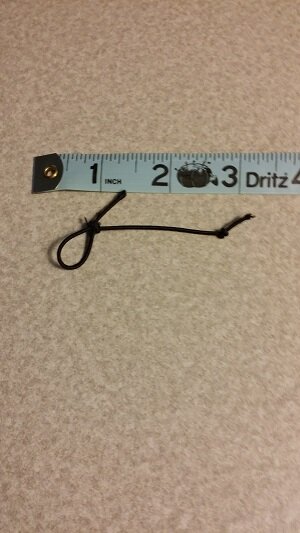
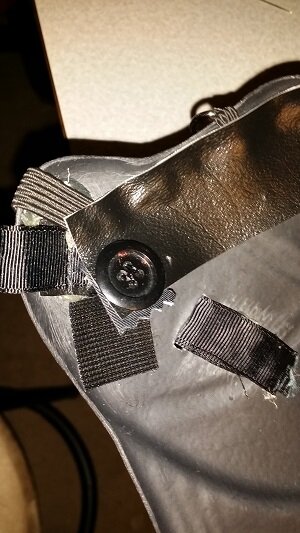
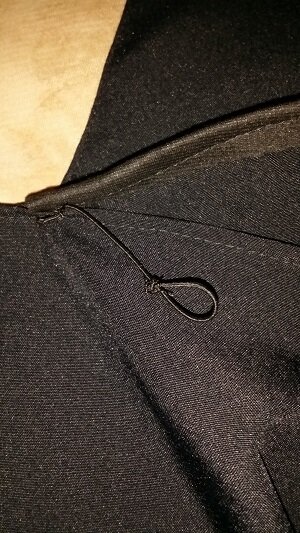
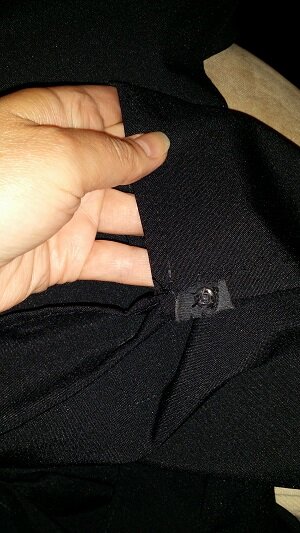
I ordered a Deluxe Darth Revan from My Wicked Armor. I modified my hood and capelet to tuck under the front armor plate and attach with Velcro. This same mod would work for magnets or other attachments. To check my measurement, I put on the chest and back armor and my cape. I put on the hood and capelet piece on and brought the fabric around the front of my front armor piece in place so I could identify where I would need to place the Velcro inside my armor. I have plenty of extra length, so I was able to use fabric clips to clip and hold the ends in place. I moved a bit as I would on a troop so the fabric wouldn't be too tight. I measured and noted where on my chest armor I could place small rectangles of Velcro inside where I would want to tuck and hold the top and bottom edges of the fabric in place. I inserted safety pins in the fabric to measure where I would attach the rectangles of Velcro onto the fabric. I didn't take photos of this, but since I didn't have help, I just stood in front of a mirror. I needed small fabric rectangles to place the Velcro onto the hood and capelet so I could easily remove the fabric to replace the Velcro if it wore out. I removed some wide belt loops from some cotton Dockers I had. These already had a seam in place to avoid fraying so this worked nice. I cut the soft part of the sew-on Velcro to match slightly smaller than the belt loops. I stitched the sew-on Velcro onto the loops. A bit sloppy by hand but they're holding. I made four, two for each side. I cut out the rough side of the Velcro roughly the same size for the upper part of the fabric. For the bottom part of the fabric, I placed slightly wider strips of the rough side of stick-on Velcro so I could have some flexibility if my weight changed, for fit, etc. I placed those inside my armor. To place the top part of the fabric, I placed a stick-on Velcro inside the armor where the top part of the capelet would wrap around in front and reach over the armor buckle, in and down inside to hold. I'll need to add a photo of that area. I didn't completely stitch the rectangles onto the fabric, but rather "tacked" them on into the seams, so I could loop my finger underneath to grab them and to make it easy to replace if I needed without too much puncturing of the fabric. I tacked them onto the fabric facing outward so they could attach inside the armor to the Velcro. The hood and capelet are laying with a side view here and the Velcro areas will follow. The upper and lower Velcro on the fabric: You can see here that I can reach behind the Velcro with my finger: Might be hard to see here, but I put the hood onto a pillow as if facing it being worn and wrapped the edges of the capelet how they go to show more of the Velcro. I added an extra attachment if I'm at an event with a lot of movement, a button and elastic loop to hold the hood in place as I move my head. I used small buttons on each side and cut out some cotton fabric with pinking shears to house them. I used round cord elastic to make the loop. I measured a small length of the loop for each side. I attached a button inside the Velcro, sewing it onto some vinyl reinforced with some cotton fabric and stitching in place into the existing housing. I stitched the loop into the seam of the hood. I tucked some of the extra upper fabric over and tacked it in place. You'll see I added a snap but found it wasn't necessary when using the loop. When putting on my hood and capelet, I wear a ball cap and let my hood drape and hold in place on the cap so I can see. I leave my armor belt unbuckled so I can reach inside the armor to find the other half of the Velcro. After I get the capelet secured, I then secure my armor belt in place. I leave my gloves and mask for last. Wearing the cap, I can simply bend over at the waist, reach in and remove my cap, put on my mask and attach the hood to the mask and then straighten up. Everything stays in place.


- 2 replies
-
- 1
-

-
- wicked armor revan
- darth revan
- (and 2 more)