
-
Announcement
Welcome to the forums!
If you are a newly-approved member, make sure you check out the New Member Checklist!
If you are a Detachment member and can't see the member-only area, post here for access.
-DV


Takamatsu
-
Posts
61 -
Joined
-
Last visited
Content Type
Profiles
Forums
Gallery
Events
Posts posted by Takamatsu
-
-
Looking great Mynock!
-
And it looks like the mask is due in game tomorrow:
-
I know the in game shots of SW:TOR will never look as good as the cinematic trailers but someone pointed out to me that the Sith Acolyte armor style is now in the game.
The in game graphics I think is just a recoloured version of the Jedi armour which, as we know, is very similar in style.


-
Yeah, thanks for the files.
I cut my foam armor using some cardboard templates I eye-balled a couple of years ago but since then there has been much more interest and reference for this character so I might take another look at remaking the armor and these files will be a great start.
My armour kind of worked but wasn't that accurate:
-
Congrats Darren
 , happy to see this character has been approved.
 -
I know we've discussed this previously, but there is definately something between the ab and chest plates.
So I did a little experimenting. I've added a detail line and shaded part to the top of the ab. This then matches up with a piece of matte vinyl that I've cut the match the 'shape' in the refs. This piece also extends under the chest plate which will effectively hide the zipper ( bonus ).

What do you guys think?
Darren
Well, slave1pilot has a nice high res image on his website which might help you out with that upper ab section, there is clearly some armour that links the chest to the lower ab section.
(sorry I'm pinching your image here slave1pilot)

-
_Jaster":129bbfgl]And Jaster, I'm loving your new avatar. Have you got a link to a bigger version?

The guy that did it has done a couple from SWTOR and will be putting them on his deviantart site soon.
When he does I'll post a link here, you can also see some on his Facebook page just look for Matt Difa.
Thanks for that. I found him and his work

-
I caught this over on therpf, and it looks great. I like how you created the two main layers and I feel like I could do with a vacuum table now.
How much does it weigh?I guess it must feel pretty lightweight compared to my own version.
-
That looks great Darren!
And Jaster, I'm loving your new avatar. Have you got a link to a bigger version?
-
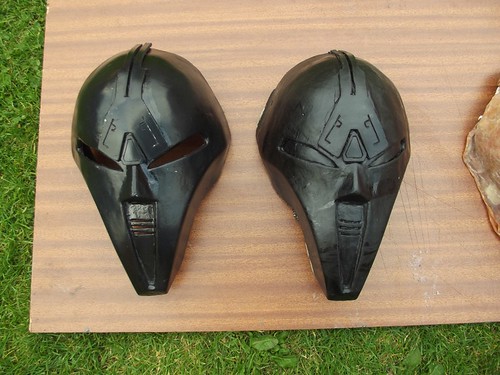
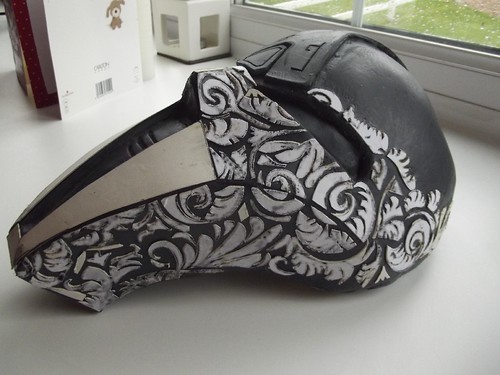
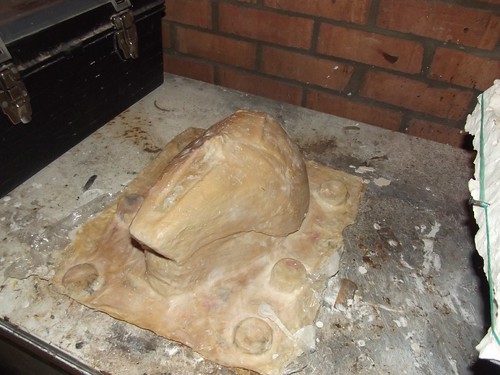
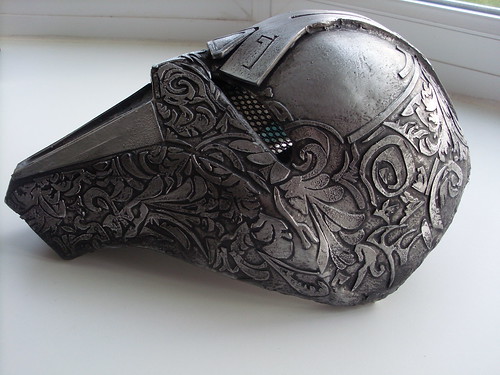
Well, I saw over on therpf a few people making this mask using the same method I used before and it inspired me to try this again.
First mould built. Smooth versions can now be cast:
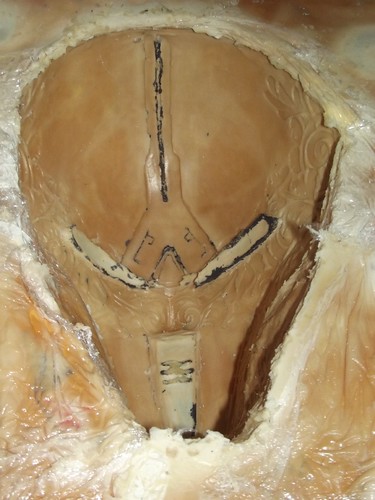
Filagree detailing on top of the first smooth pull .. time consuming
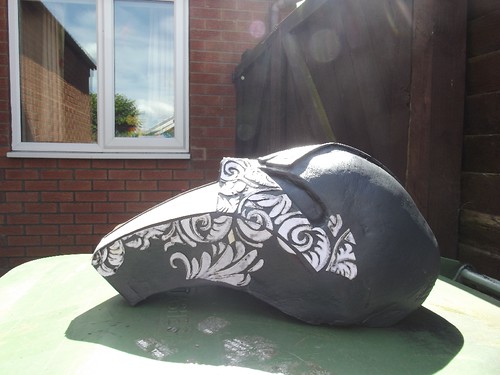
A few more hours in. Fingers numb from scalpel use...
Another coat of resin. Perhaps I used a slightly thicker layer of resin than I'd of liked, some of the edges are not as sharp as before but I'm hoping it looks okay once finished and painted. Prepared for mould.
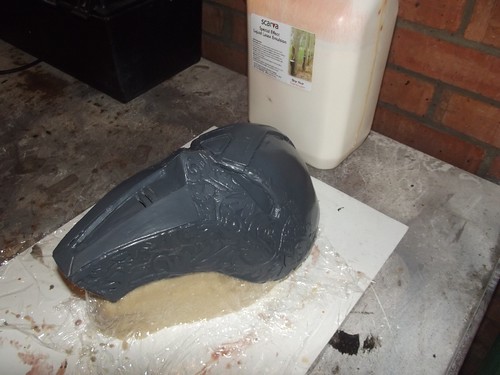
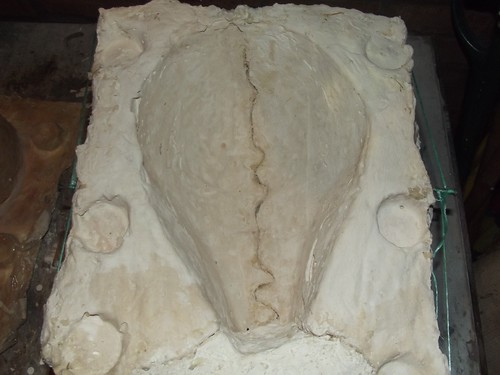
Latex mould completed, first half of Plaster mothermould completed:
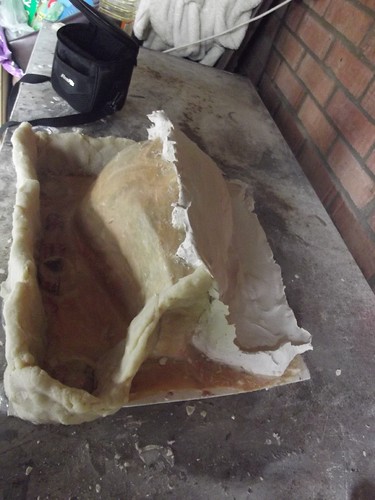
I had a bit of a panic when I couldn't get the plaster mother mould apart and feared I'd have to break it, but after working at the edges of the plaster I was able to separate the pieces and retrieve the original mask with minimal damage:
The latex "detail" mould:
It needs some cleaning up on the inside but it should work out fine, the details are easily visible:
The Plaster mother mould, viewed from inside:
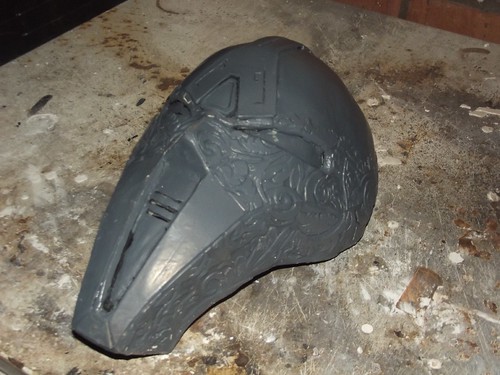
Okay, so I got the first cast done today. The mouth vent area needs a little work but otherwise it's not too bad.
Cast in black resin and painted with Rub n buff (no blackwash here).
It needs some eye mesh and a strap at the moment.
It was kinda horrible to think that after a week of making the mould that the whole time could've been wasted, so I'm pleased that this came out okay!
-
Was it this one?

Image taken from the official star wars flickr http://www.flickr.com/photos/starwarsbl ... hotostream
-
Quick question guys.
I reckon the mask looks far to big on a person of my frame. I'm thinking of buying one of Wolfgangs smaller versions.
What do you think?
Sorry to say it - but I would agree, it's not quite "bobble head" size but it does look a bit too big in that photo.
-
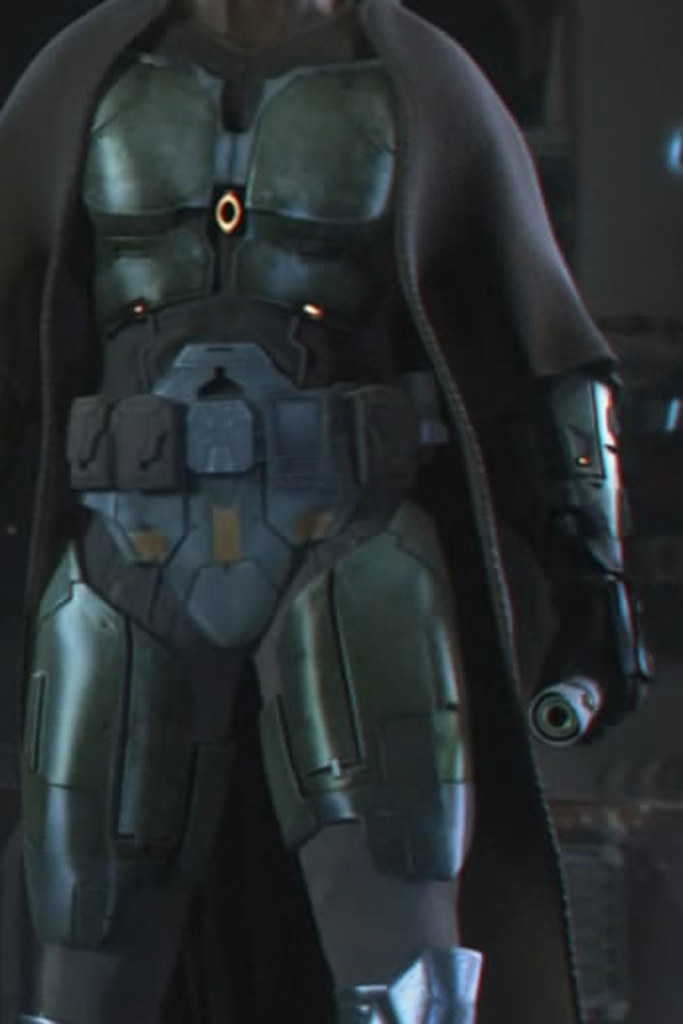
I'd imagine the best (possibly only?) images would be from the cinematic trailer for SW:TOR (The return) and I guess you've already watched that a number of times.
Just had a quick google and found that Shaun Absher did some work on this character (he also worked on the Sith Acolytes) and there are some images of his here if they help: http://cghub.com/images/view/140778/
They're images taken from the trailer but this one is a pretty clear almost full length shot: http://cghub.com/files/Image/140001-141 ... 18_max.jpg
-
_Jaster":2en9r2x2]
I'm going to use some black mesh material used to line track pants and shirts, I'll try and post a pic of it soon.
That's pretty much what I used on the mask that I made, you can see it on this picture:
It allows good visibility and ventilation and most of the time hides the eyes (although sometimes your eyes can be visible in flash photography).
-
No problem, glad to see all the great progress you're making on this costume. As you know I love the character and it's great to see your hard work bringing it to life.
-
A friend of mine linked this auction to me today, so you can see someone has started crafting some sabers with a pretty close resemblance.
-
Well, I almost ruined the mask completely
 . I attempted to make a mold from the mask only I didn't use enough release agent or something and I ended up with the mask covered in silicone, it took quite a bit of time picking bits off and needed loads of repairs on the paint and details. I ended up with more battle damage to the mask in the forms of pits and scratches.
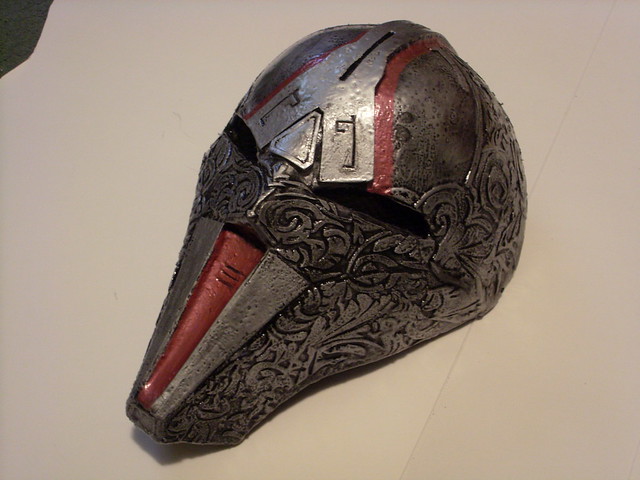
Since Christmas I seem to have lost a lot of motivation for this costume, I think I need to give it a break and come back to it at a later date.
-
This is looking great so far. Makes me realise how poor my attempt was (I'm still glad you said I inspired you to start this project though
 )
) -
Looking good, I've kinda given up on my costume since the game has come out.
From watching your progress I'm sure I'll get inspired again at some point.
-
I noticed on facebook this morning that more people now have this costume built
and there is also a decent looking Malgus!! -
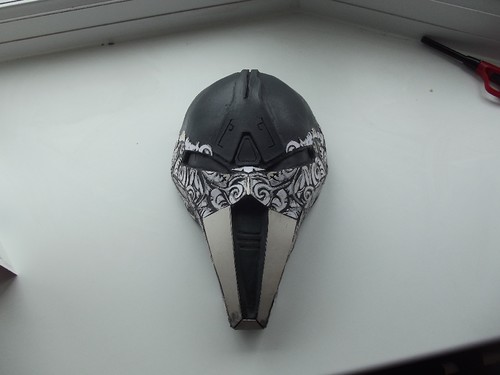
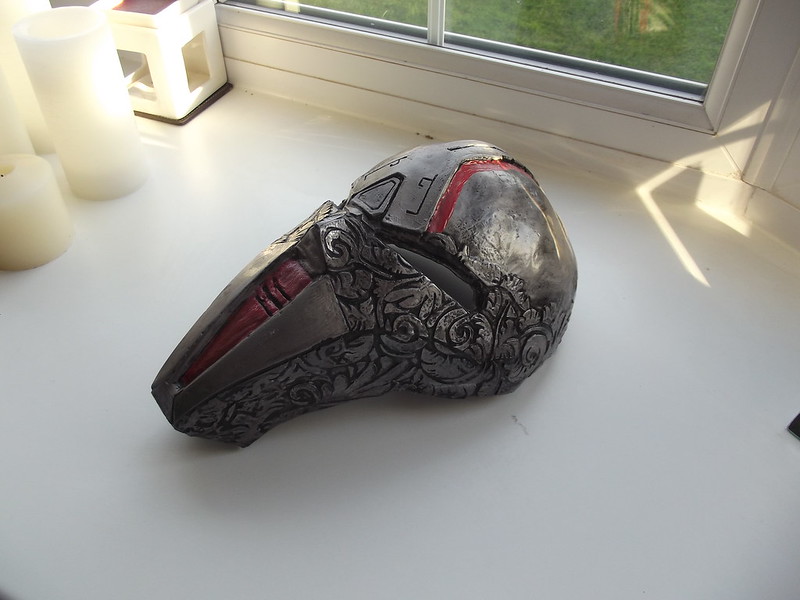
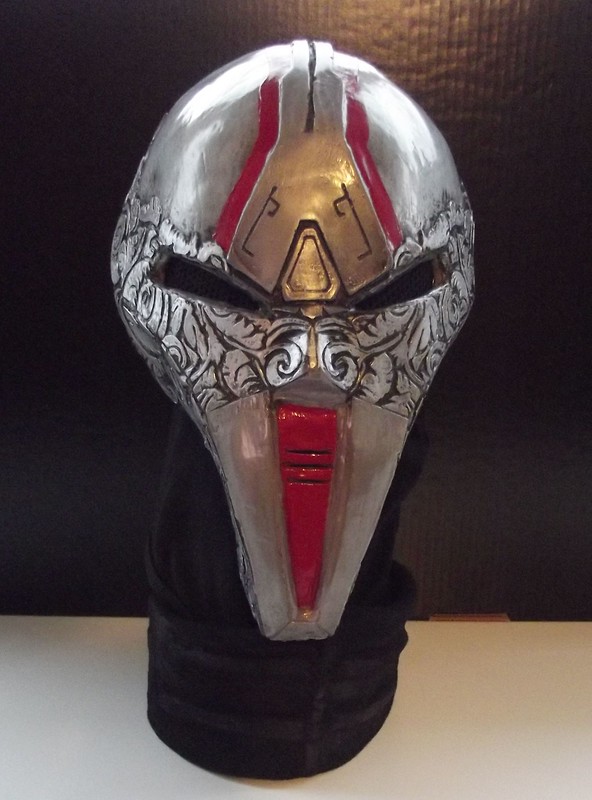
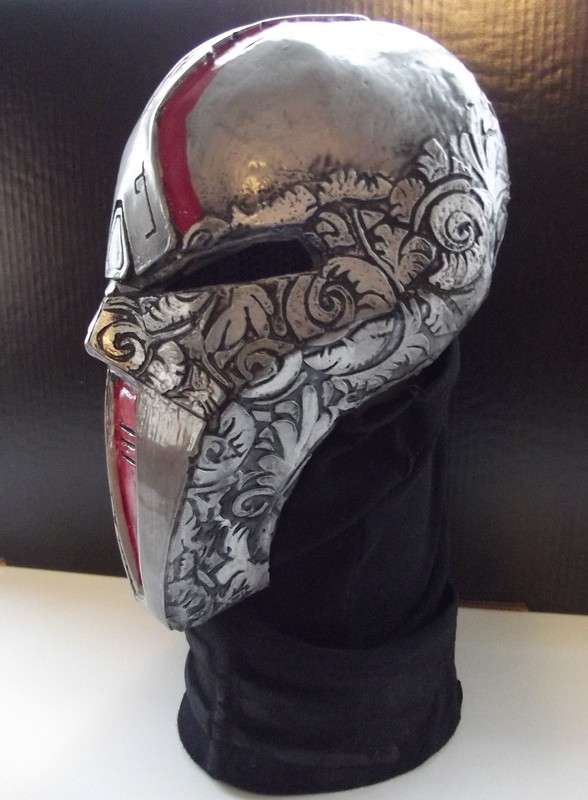
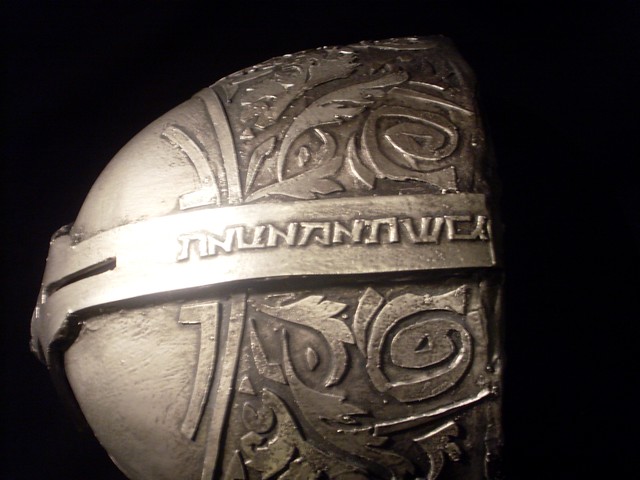
Well, I've remade the helmet from scratch again. This time I feel it has the detail that it deserves and I ended up with this:
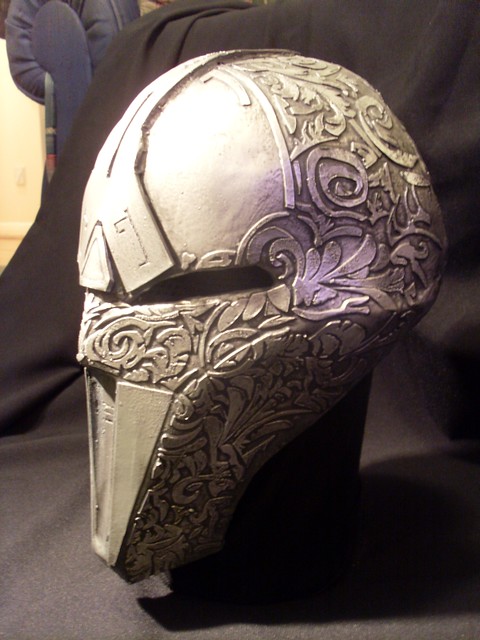
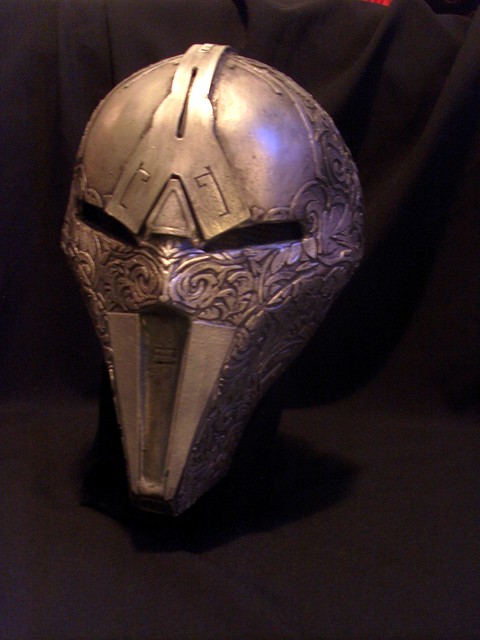
It even has my forum name on it (Sith prophecy font - thanks to http://www.erikstormtrooper.com/sithprophecy.htm)
I'm still waiting for some red paint that I've ordered to be delivered so that I can paint the mouth area and the forehead areas. I'm pleased I've done this, I certainly consider this an improvement for my costume and I've learnt a bit along the way.
I hope you agree this is an improvement on the previous helmet/mask.
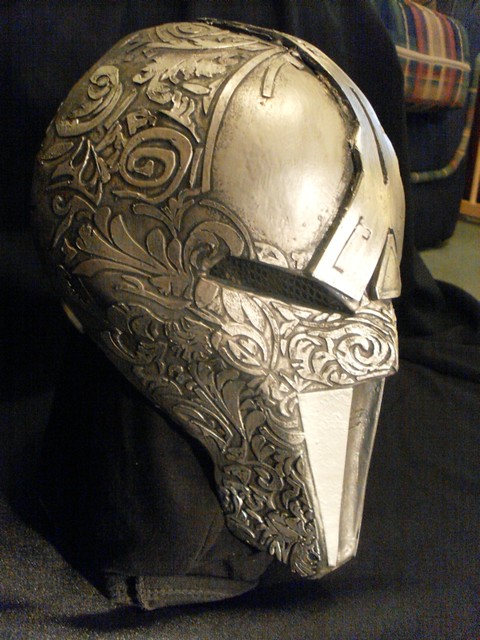
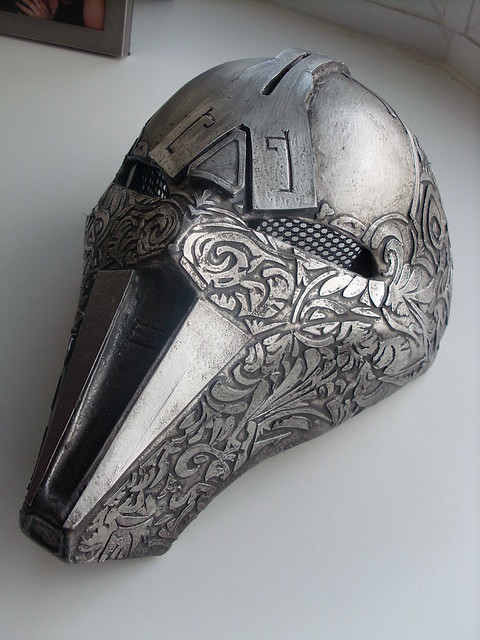
edit**
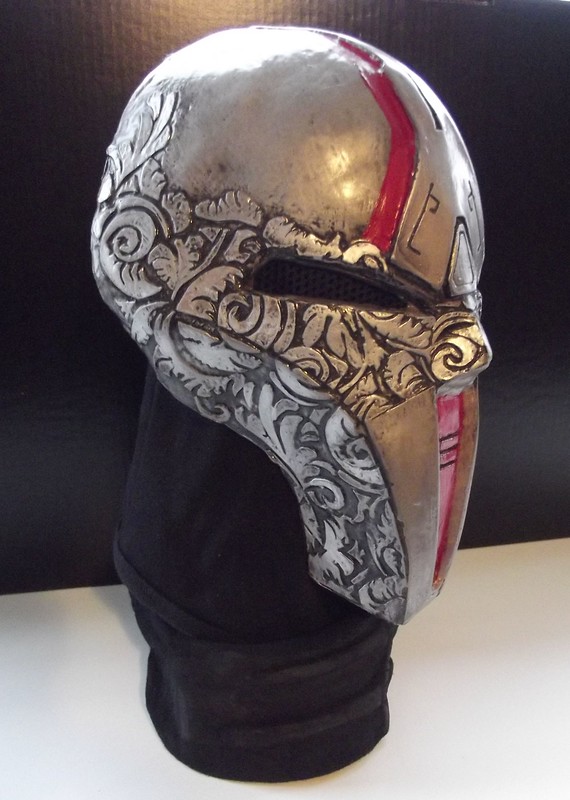
Extra image taken in natural light:
-
Welcome to theflagship.
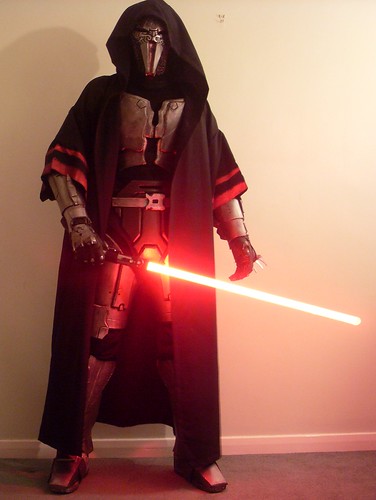
Thanks for the shout out, I take it as a huge compliment that you say that I've inspired you. I'm a complete novice when it comes to building costumes and this is the first costume that I've ever had a real proper go at (I've made halloween costumes etc in the past though). I originally made this costume for Halloween 2009 but keep coming back to try and improve it when I get the time (I really do wish I had more time to devote to this but real life often gets in the way).
As you've probably seen I have a wearable version of this costume already but I still have many things that I'd like to improve on. And like you say it would be great if it becomes a 501st troopable character as the small level of customisation on the mask details would add individuality without straying from the character's canon (canonicity?). I'll be updating my thread on this character whenever I've made any real progress.
-
Welcome! I think most of us start with a "quick" costume, and then realize that we want to try something better. It's a process that we go through step by step as we learn more, set our goals higher, and find out what fantastic things we can make!
Pam

So so true!
Welcome to the forum Lycanthropica.
-
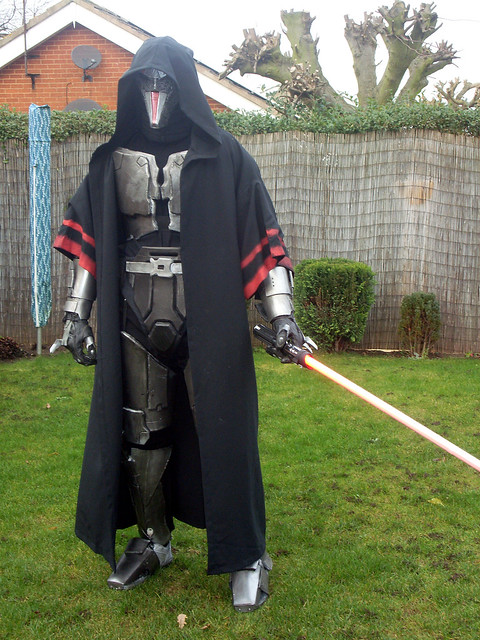
it looks like your getting there
 there are still some points that it can use some improvement. the neck/cowl part looks like it should be a lighter grey rather than the black you've got going on. The chest piece flows down to the belt/cod area and you've got a brake between your chest and belt/cod area. Love your mask, just remember to tip your chin down when you take the picture, it looks like your thrusting your chin out and I really want to see pics after you've got your weathering done
All the pictures above apart from the bottom comparison were taken after the blackwash, perhaps it needs even more darkening?
The area between the chest and abdomen armour is one of those areas of ambiguity I was talking about before and took most reference from the Jedi in the Return trailer as it provided a clearer view of this particular area. Although the armour is slightly different, especially the belt, you can see a clear break in the armour between chest and abdomen.
I agree on the neck/cowl part, and the whole undersuit might actually appear more of a dark grey rather than black, although the areas of undersuit that are visible on the legs the colour appears very close to that of the cloak suggesting black. On other screengrabs the armour pieces look black and makes the undersuit look grey in comparison.
You are also correct on my need to tilt my head down for photos' I think that perhaps I forget about the "pose" so much as trying to view the photographer which sometimes requires me to lift my head slightly so I get a lot of the "sticking my chin out" kind of looks.
Sith Acolyte Armor - Mynock's build - Completed and 501st Approved!
in Sith Acolyte
Posted
This is all looking extremely impressive Mynock, loving watching the "Ultimate Sith Acolyte" coming together.