
-
Announcement
Welcome to the forums!
If you are a newly-approved member, make sure you check out the New Member Checklist!
If you are a Detachment member and can't see the member-only area, post here for access.
-DV

Koda Vonnor
-
Posts
334 -
Joined
-
Last visited
-
Days Won
1
Content Type
Profiles
Forums
Gallery
Events
Posts posted by Koda Vonnor
-
-
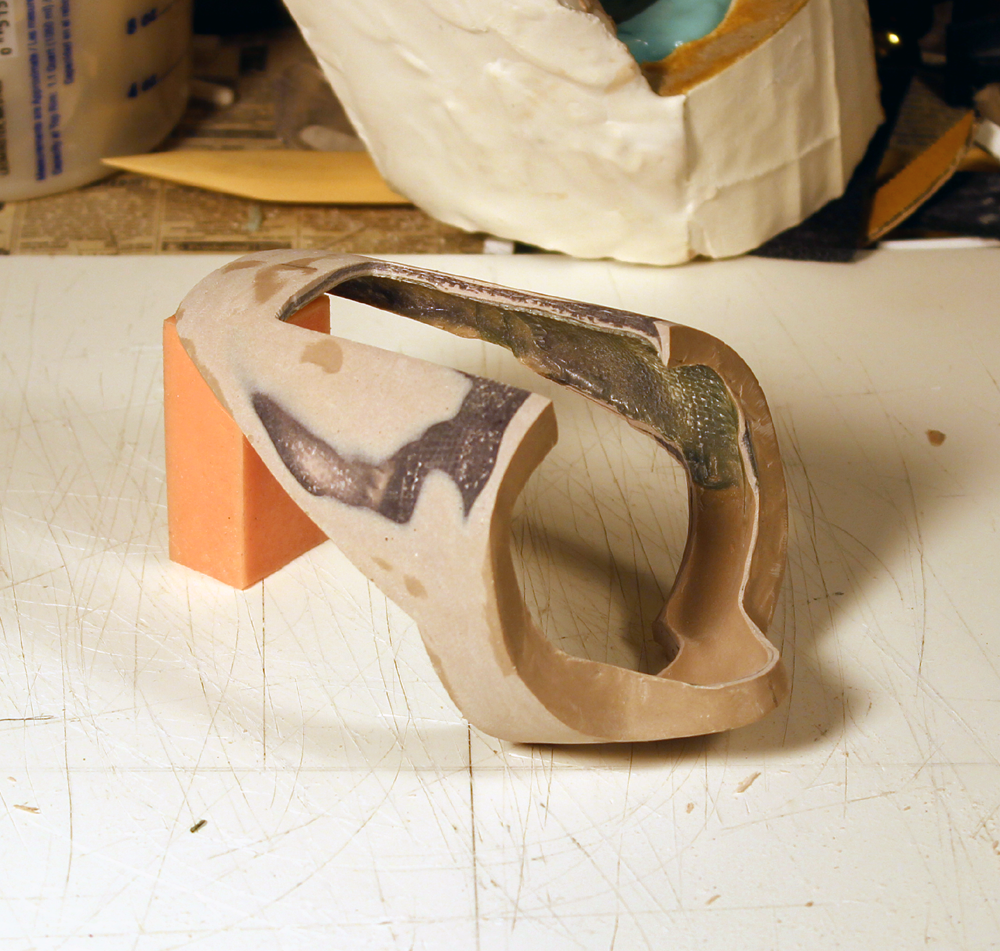
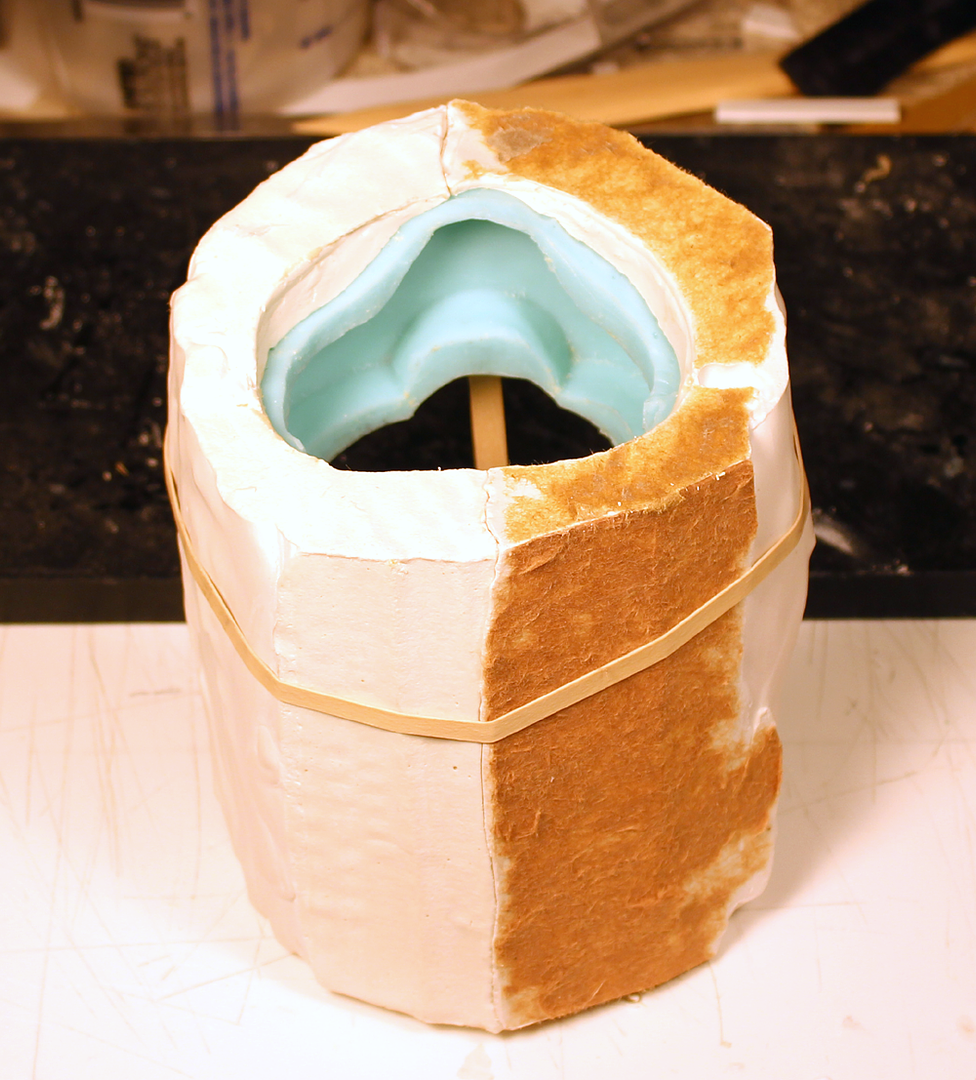
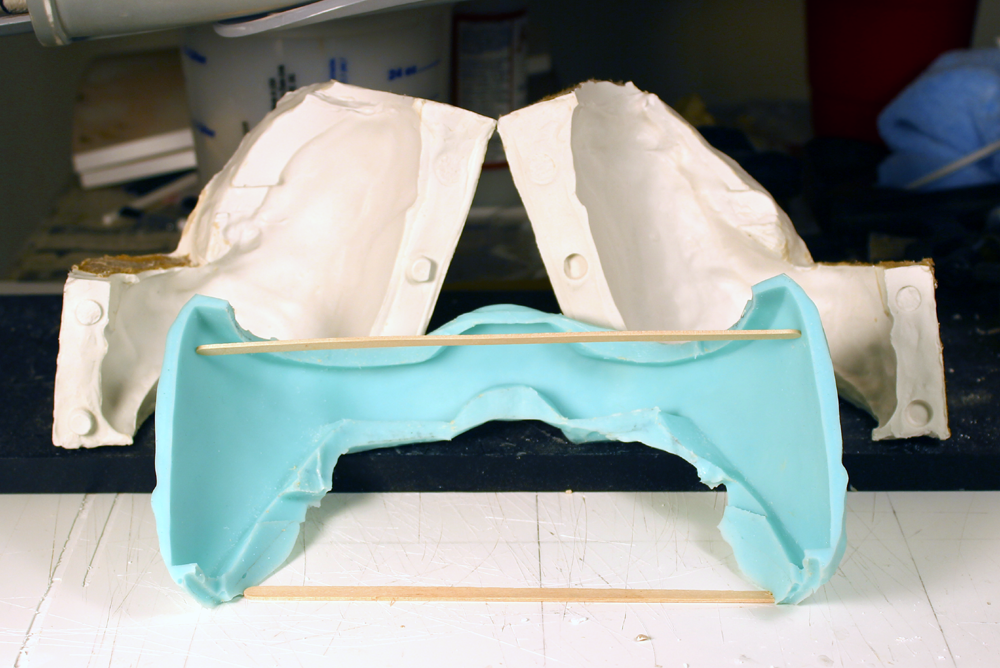
Walling off the rubber mold so a plaster shell can be poured over it. It doesn't have to be pretty, just mostly waterproof. I use corrugated cardboard sprayed lightly with clear coat. I brushed the armature with Vaseline where it was plaster on plaster before the pour. The other half of the mold shell will be completed tomorrow, then just have to wait for nice weather to lay up the fiberglass rigid model.
~ Vonnor -
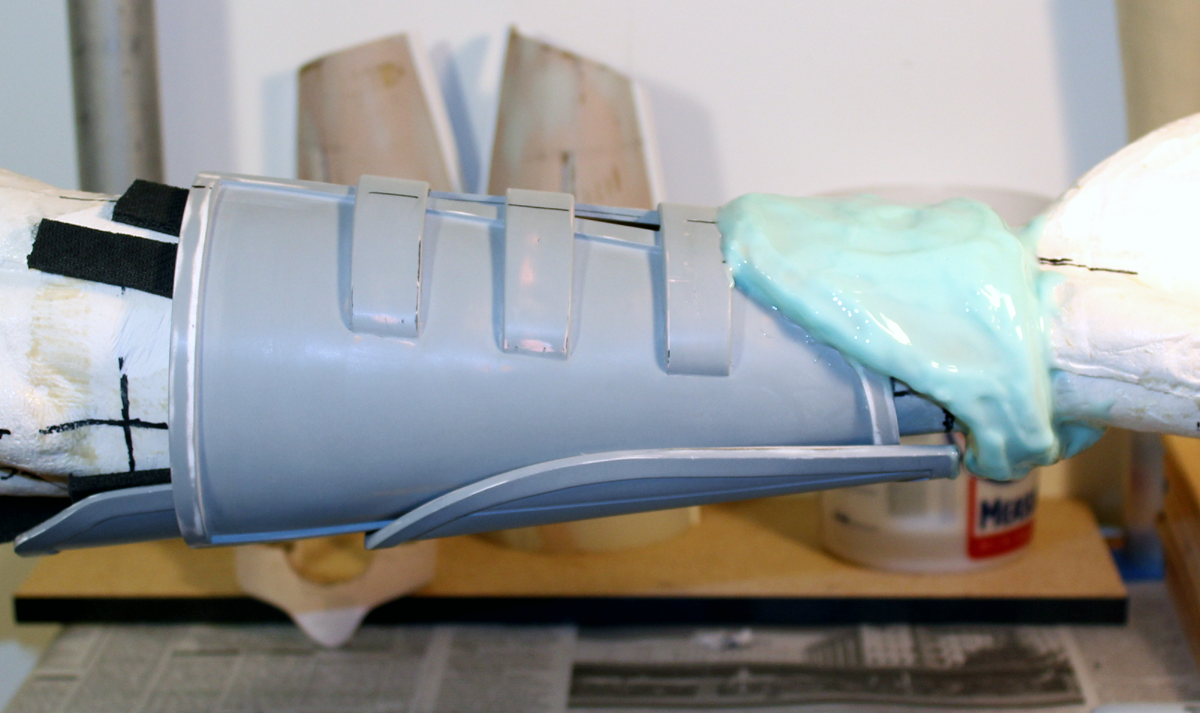
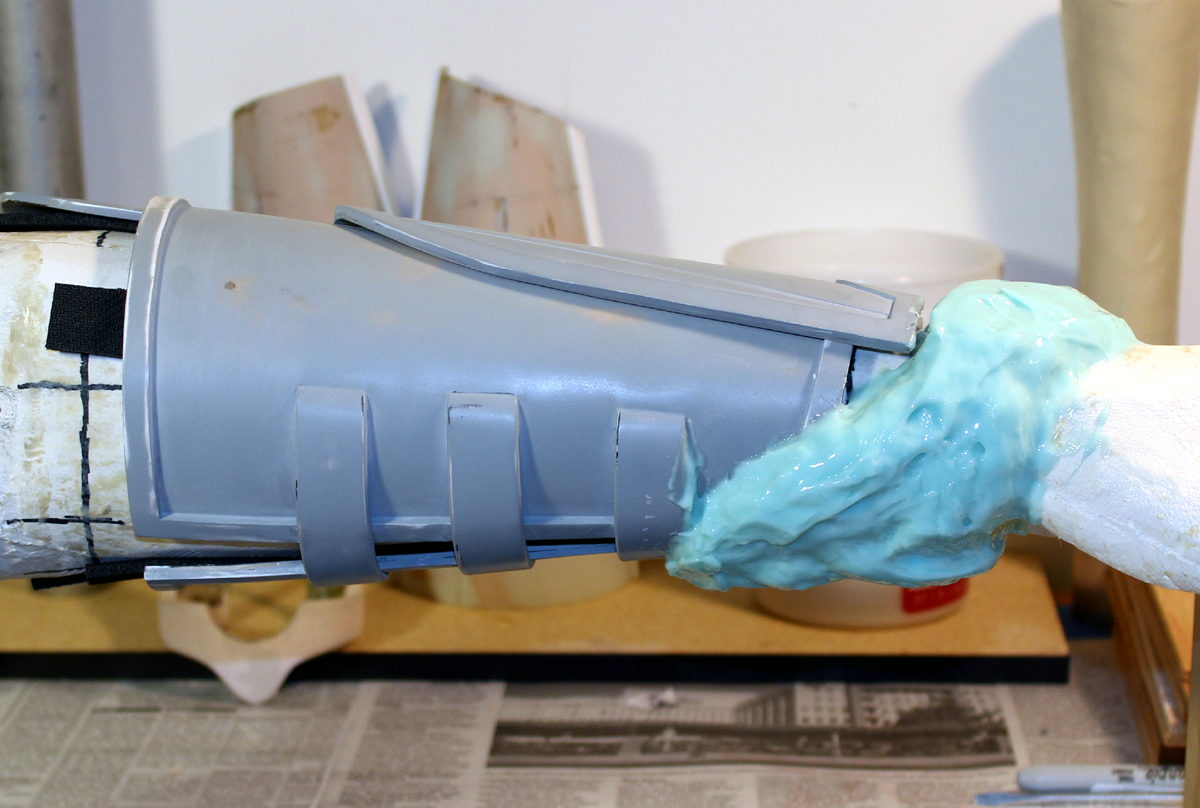
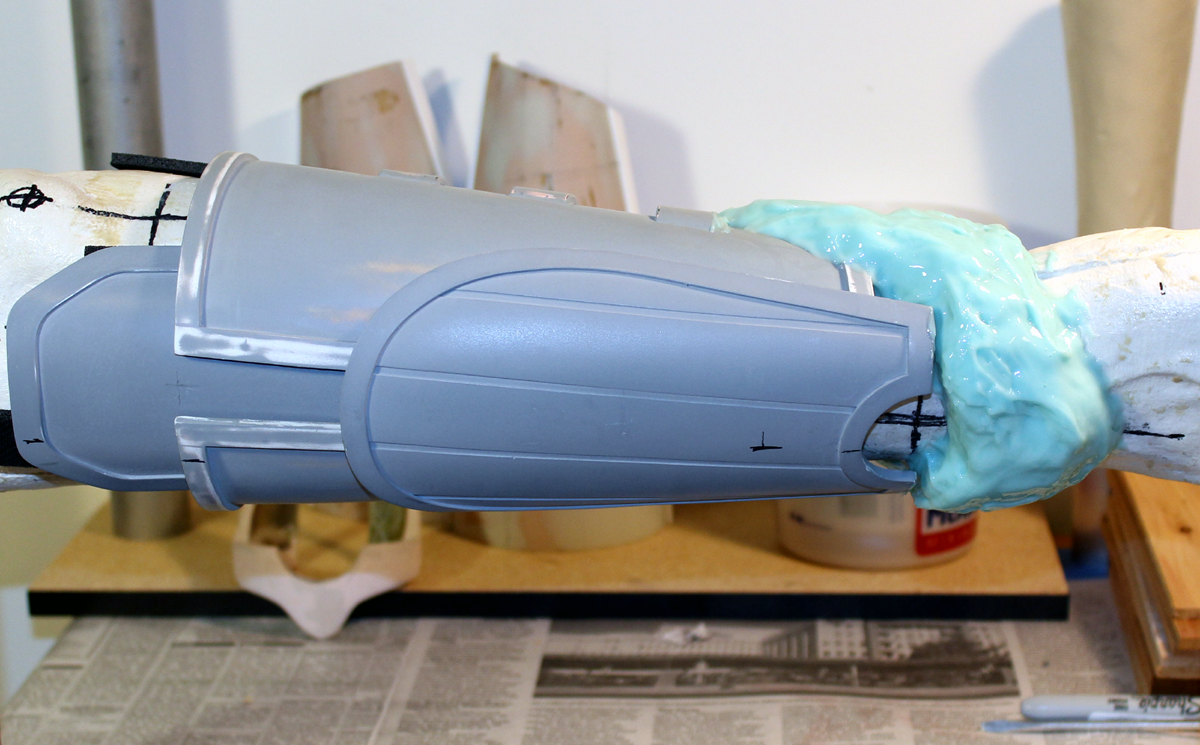
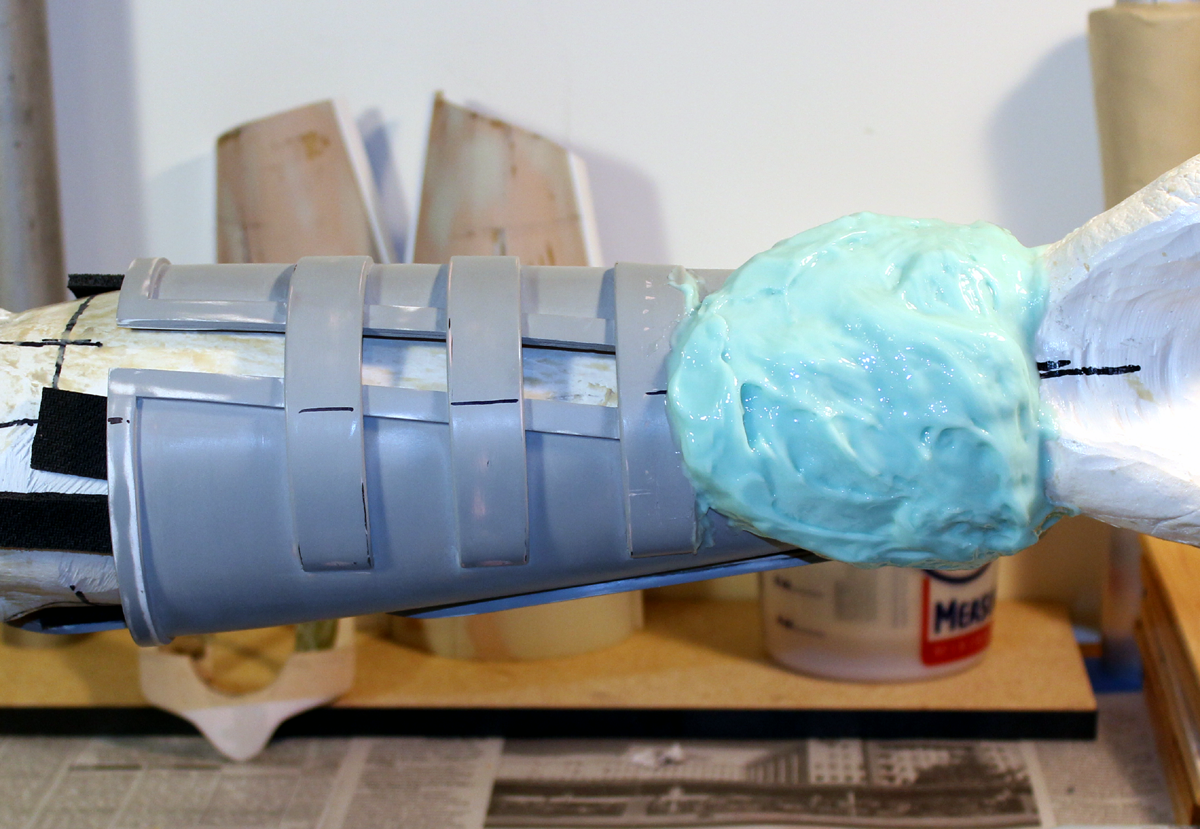
Started with one ounce (half oz each parts A and
 of Rebound-40 from Smooth-On and painted a thin coat over the clay sculpt. After about 45min this was followed by a 2nd layer of Rebound-40 (2oz total) with 2 drops of Thi-Vex silicone rubber thickener. Then a final coat of thickened rubber after about 30min.
Later today I will under-cut the edges as best I can and wall it off for a Hydro-Cal plaster mold shell. I'll have to do that in two pieces or it won't come off the "ARM"ature.
~ Vonnor -
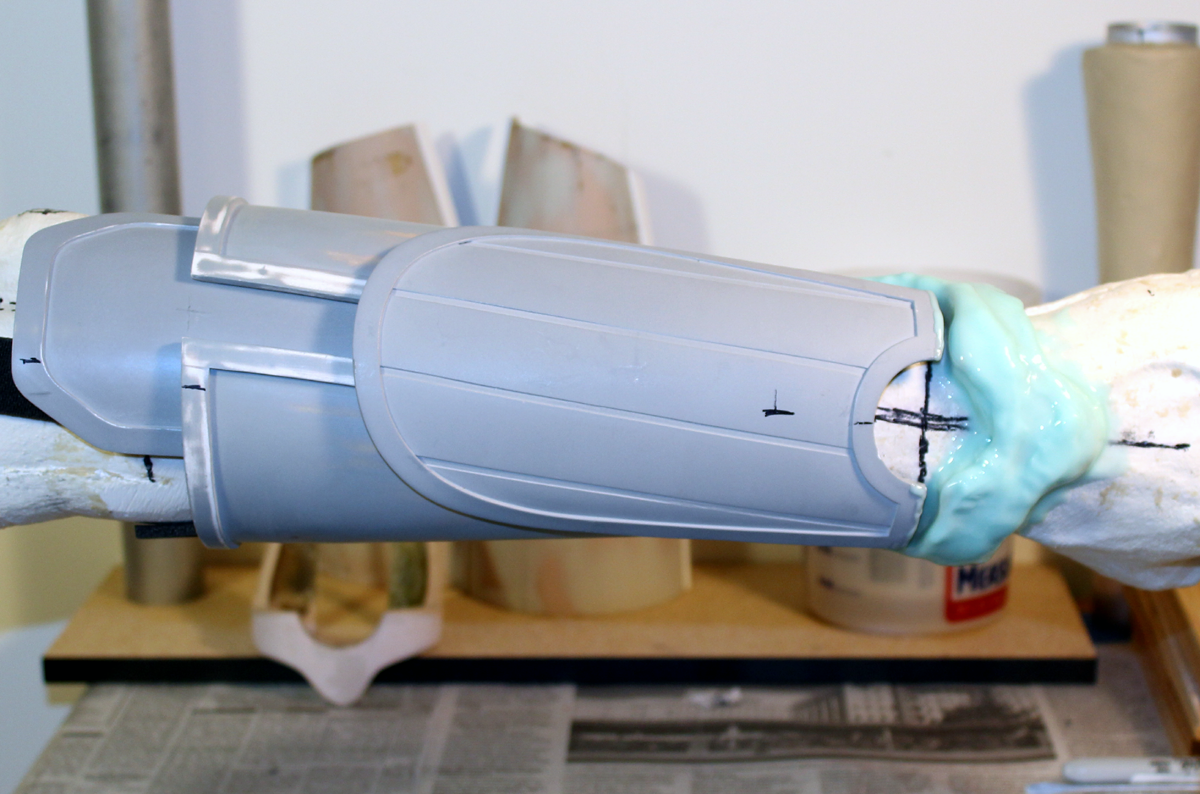
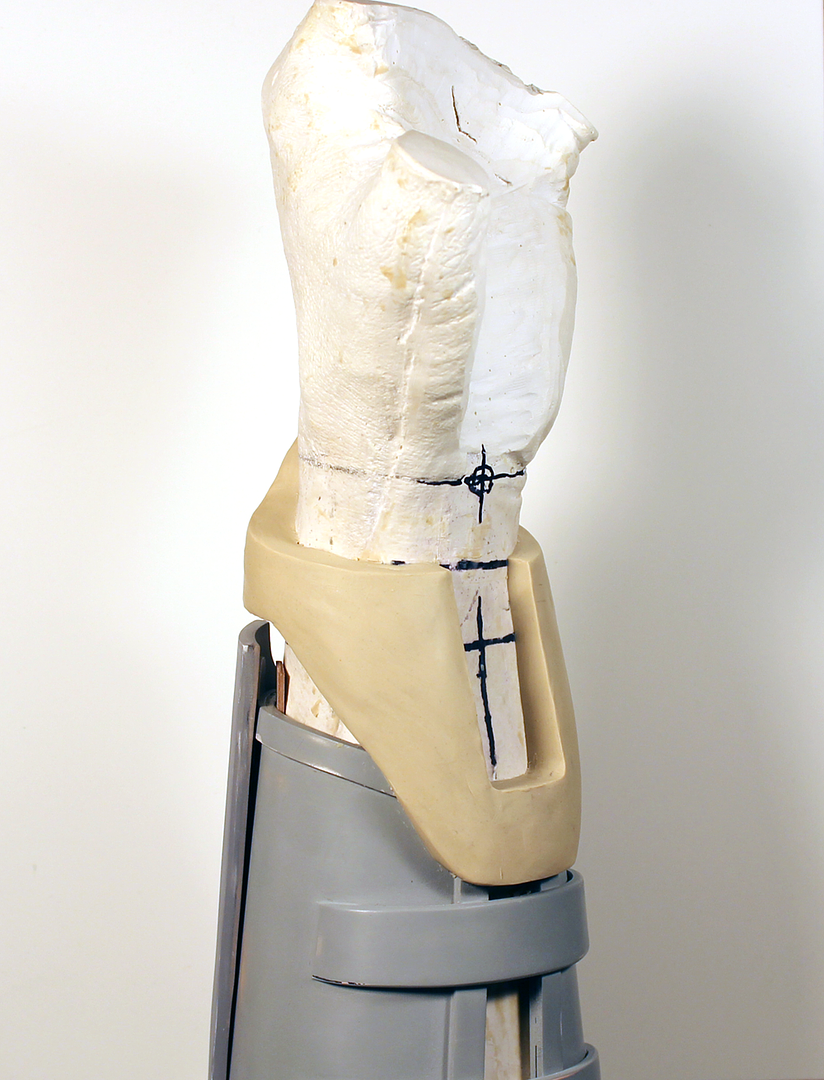
I trimmed a lot of bulk off the sculpt, and did some surface smoothing. It's not perfect but will be easy to fix on the rigid model. I am much happier with the alignment, spacing, symmetry and contours compared to the last attempt. I coated it with clear spray acrylic to help keep the mold clean. If the unopened Rebound-40 on my closet shelf is still viable after 10 months I will paint the rubber mold liner on there tomorrow.


~ Vonnor -
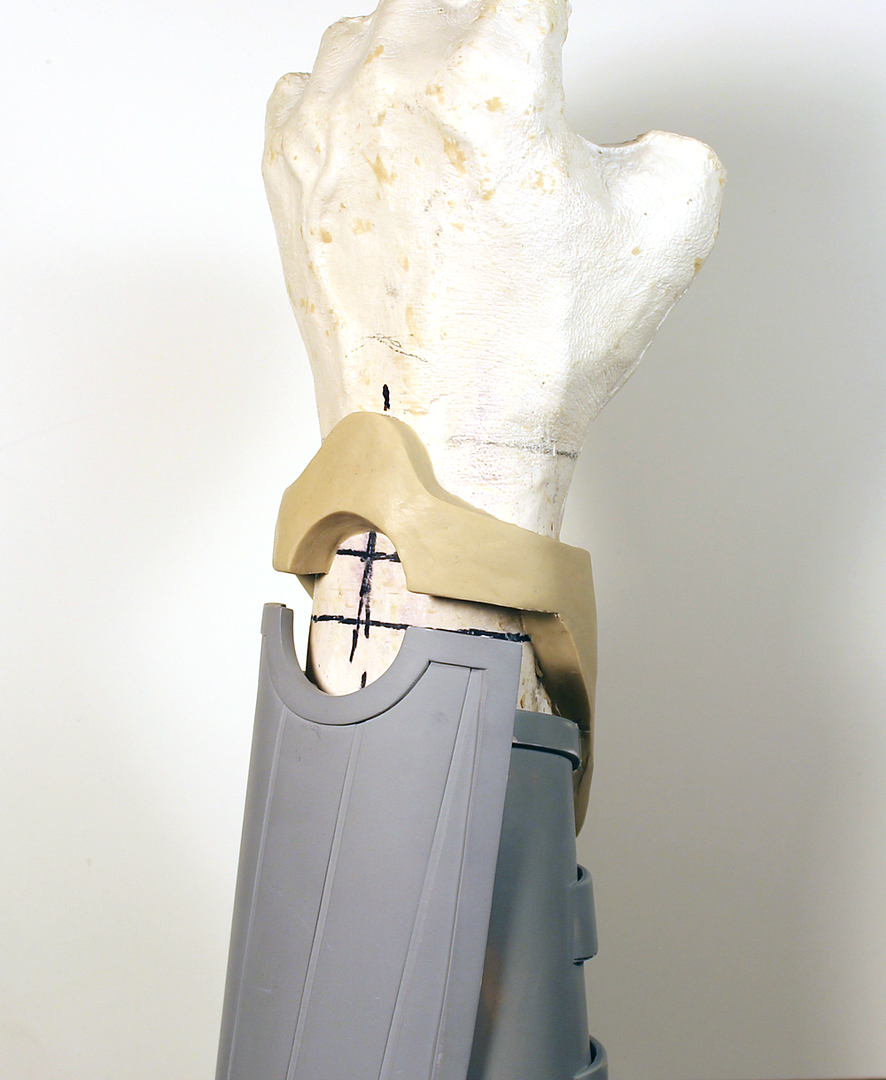
I wedged the left vambrace back on to the armature and cut a rough clay sculpt for the wrist-clip redeaux. I took more time to form the clip in alignment with the main assembly as opposed to the armature. The spacing came out much better both from the forearm plate and from the hand guard. This will still need to be shaved down some before taking a mold, but all in all it is much better than the first attempt.
More coming soon.
~ Vonnor -
NOTE: As it appears now that larger size images are allowed in this forum, I would like to catch up my project documentation from where I left off. Most of these posts were copied verbatim from the Rebel Legion forums.
Thanks very much, Maestro! I am honored.
----------------------------------------
1st: Learn how to make the part.
2nd: Make the part.
Yesterday I smoothed the surface and shaped the contours on the left wrist clip. After cutting the join-notches and clamping it to the main assembly, several issues were noticeable.
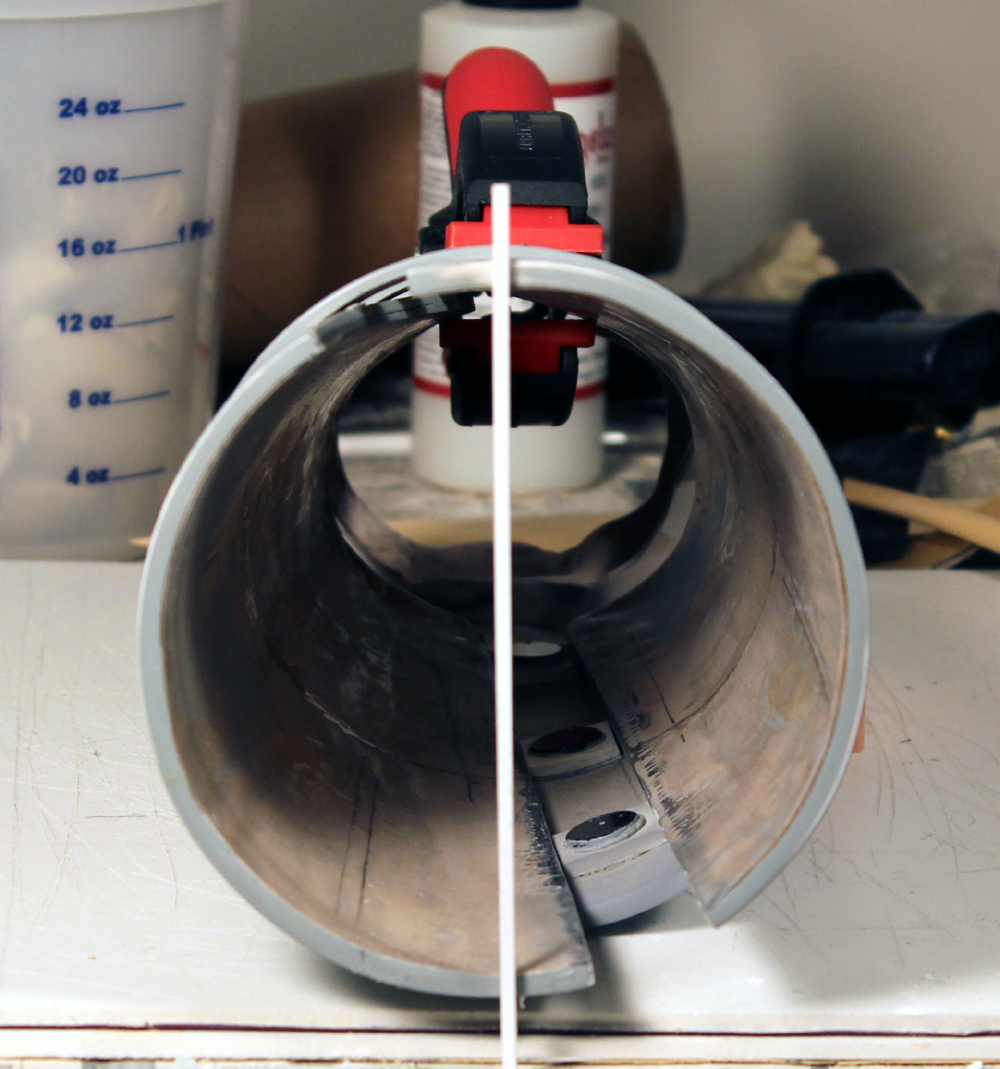
On the sculpt, I left the semi-circle cutout a bit small, so that the alignment might be adjusted left or right if necessary. I mistakenly ground out it's alignment based an attempted self-symmetry for the part, rather than waiting until I had it clamped in place, so you can see it does not line up with the semi-circle cutout on the forearm plate. Also as you can see in the last photo, the palm-side rectangle cutout is not aligned with the center line of the main assembly, as it should be. The skew of the whole thing rather threw me off during the sculpt. Look closely at the handle of the clamp, and the jaws. The centers of those should both be lining up with each other and with the reference vertical.
Lastly, notice the gap between the forearm plate and the wrist clip. It is very inconsistent, as are the surface flush lines between the two parts.
This is just another lesson. I will re-do this sculpt, but this time I will take care to pre-mark center lines and guide-points, and measure the alignment off the entire assembly rather than just the one piece.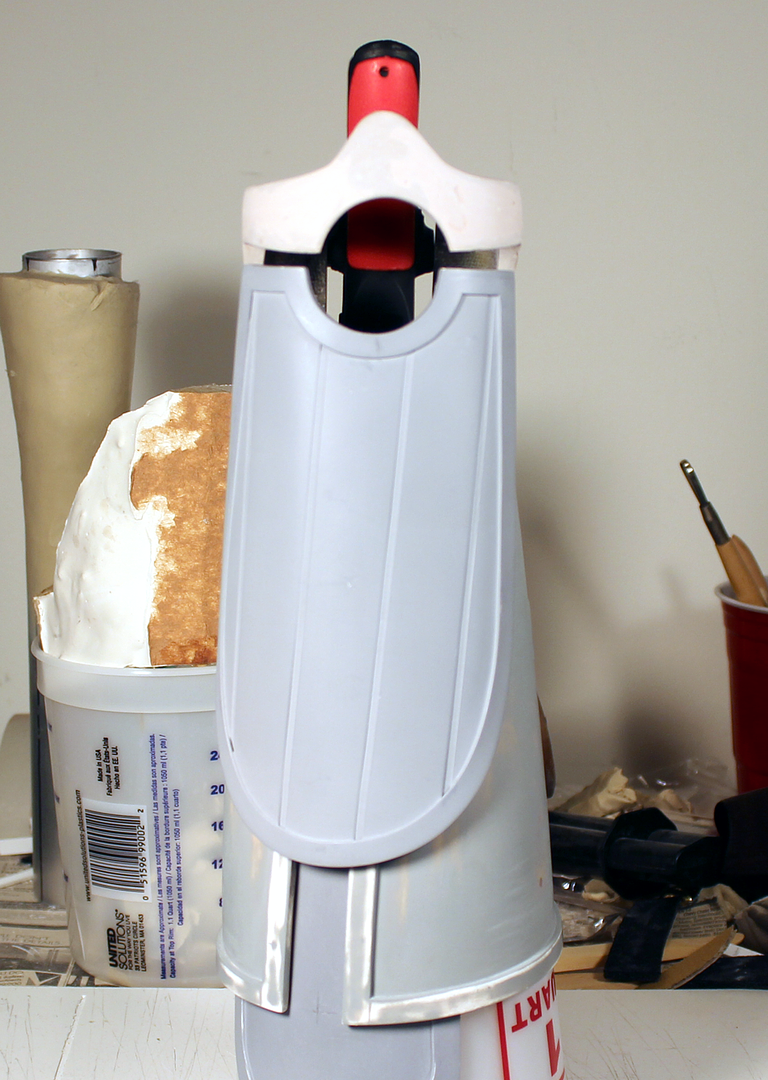
~ Vonnor -
Alright guys be honest, sorry this took so long.
Been super busy.
Hope everyone is doing well!

http://img.photobucket.com/albums/v421/Neolilangel/6_zps5d015051.jpg~original
http://img.photobucket.com/albums/v421/Neolilangel/1_zps03cc50f5.jpg~original
http://img.photobucket.com/albums/v421/Neolilangel/5_zps26543baf.jpg~original
http://img.photobucket.com/albums/v421/Neolilangel/4_zpse0b5b915.jpg~original
http://img.photobucket.com/albums/v421/Neolilangel/7_zpsb0cbe95e.jpg~original
http://img.photobucket.com/albums/v421/Neolilangel/3_zps0ff645b4.jpg~original
http://img.photobucket.com/albums/v421/Neolilangel/2_zpsf4ad218c.jpg~original
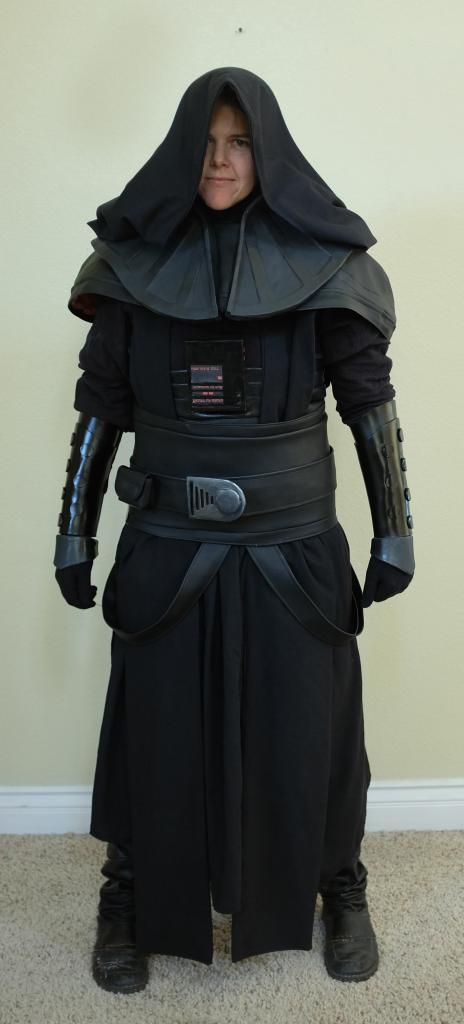
It is a small point, but as you asked...
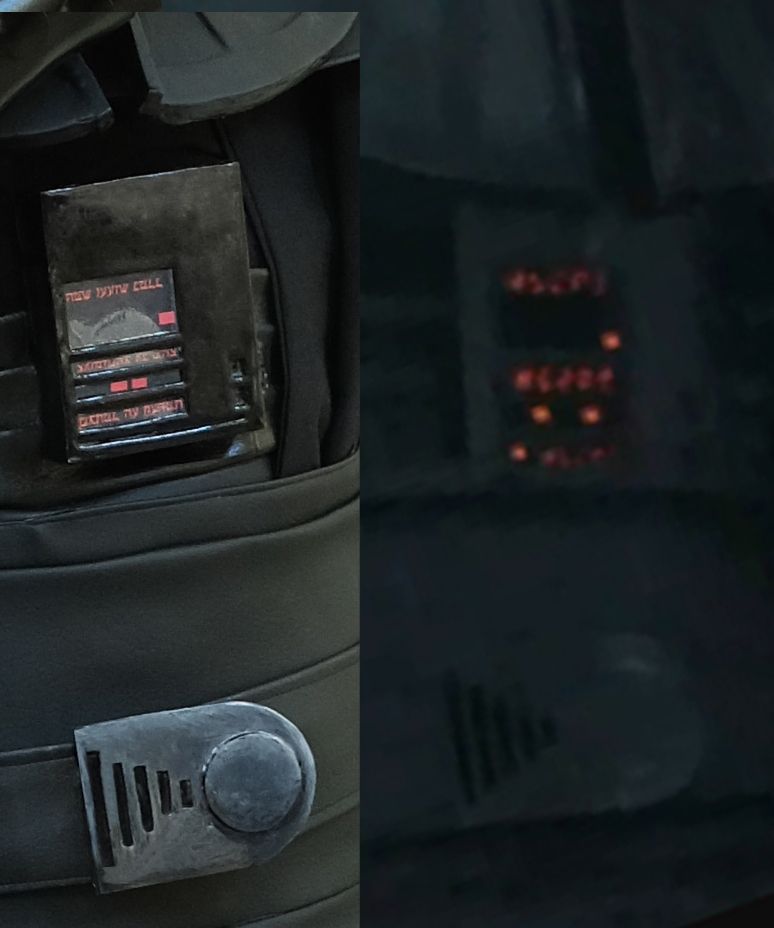
The studs on the reference bracers appear to be about 1/4" taller than on the recreation.
I count 4 ribs on the hard collar, all before it reaches Starkiller's neck. The recreation I count 2.
(You had to expect it from me, sorry
 )
)Your recreations are ridiculously perfect, Dawn. Fantastic job!
~ vonnor
-
Excellent work... 'boy.'
-
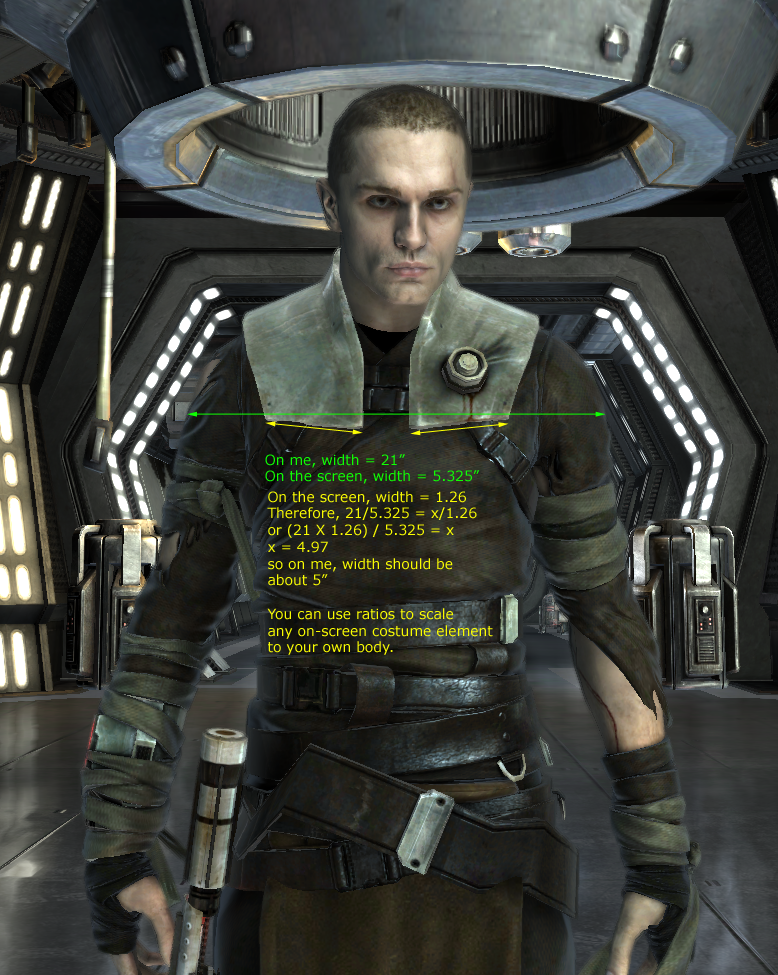
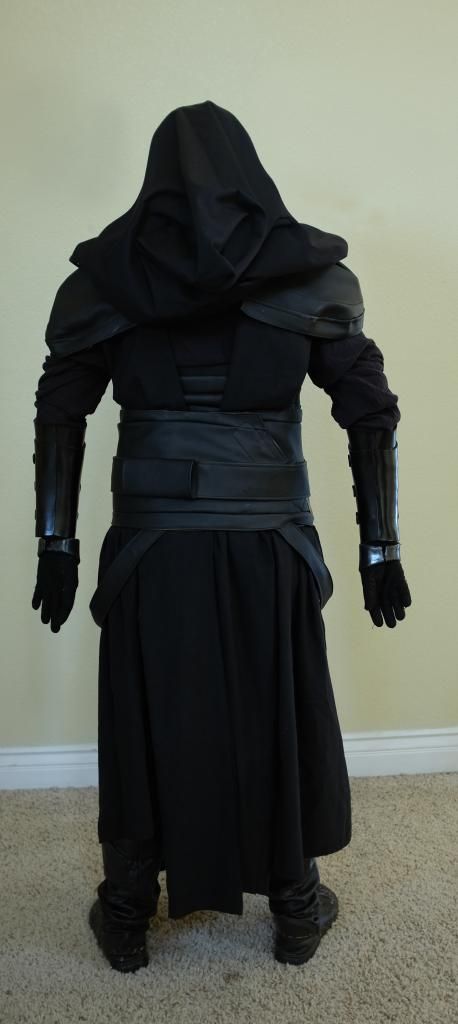
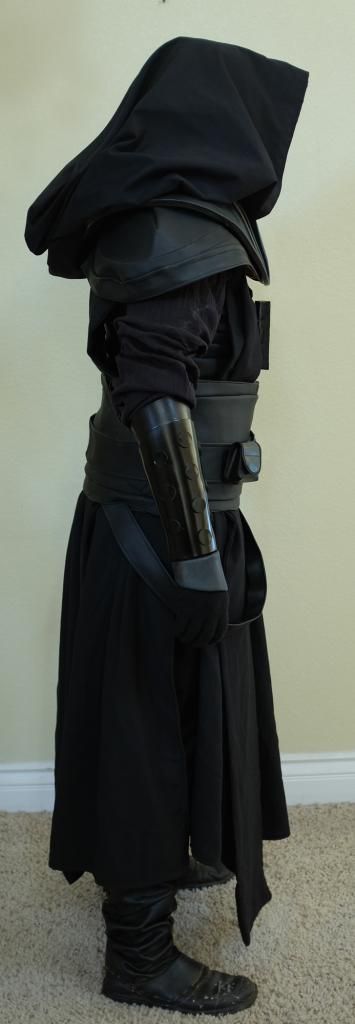
The back of the shoulder armor looks perfect, but if I were building this I might taper in the sides of the armor in the front. Note the references show the sides angle a bit inward in front, whereas yours is almost straight down on the sides.
To see your character model from a hundred different angles, http://s107.photobucket.com/user/Koda_Vonnor/library/TFU_USE_PC
~ vonnor
-
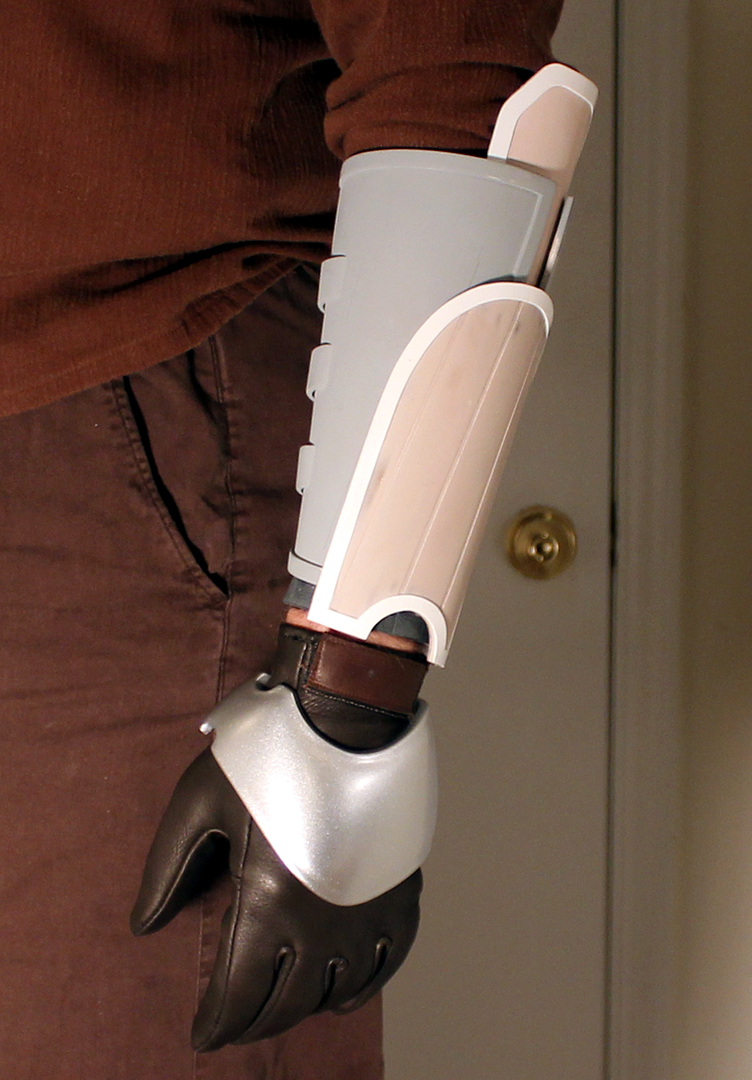
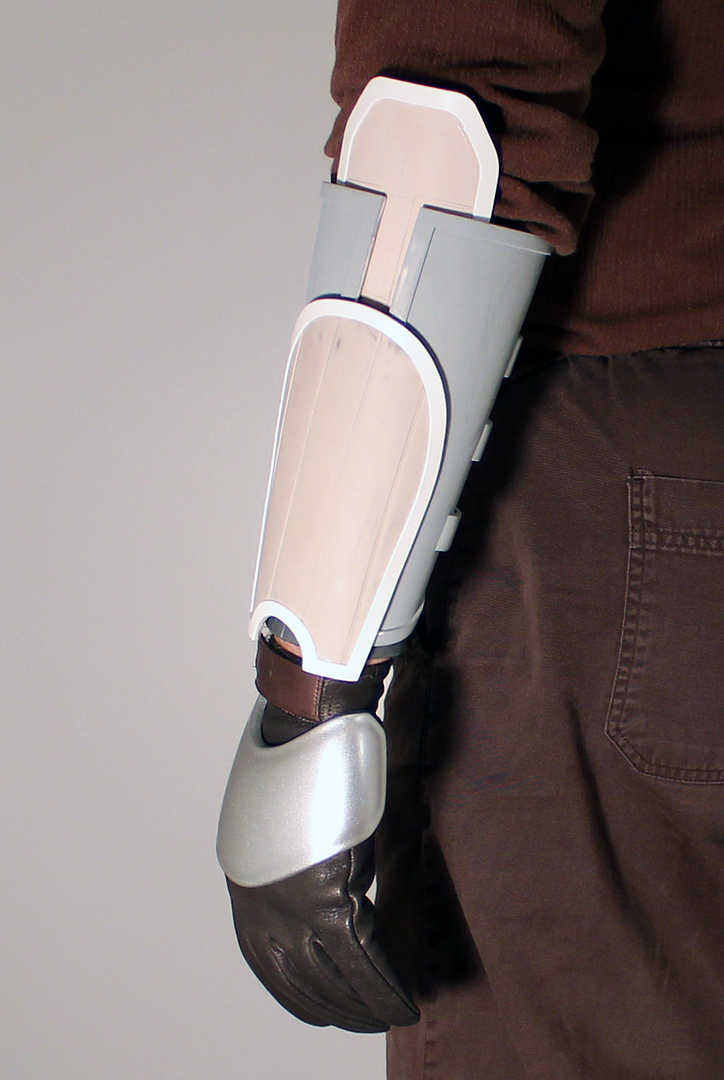
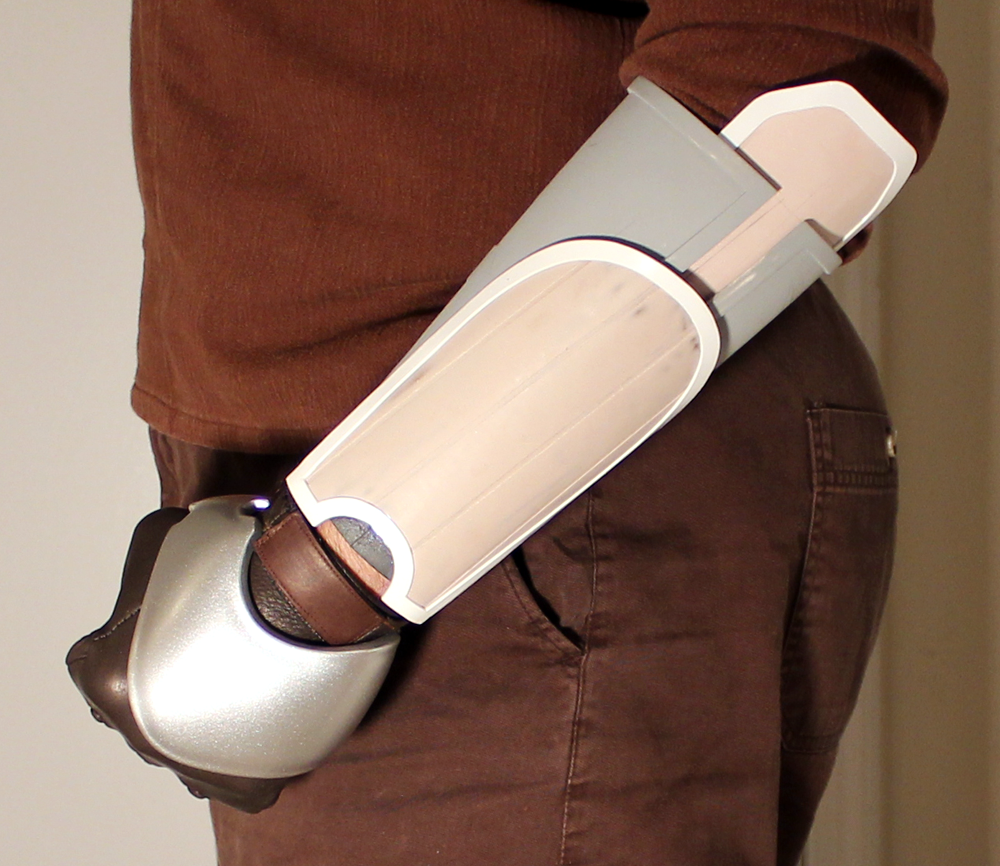
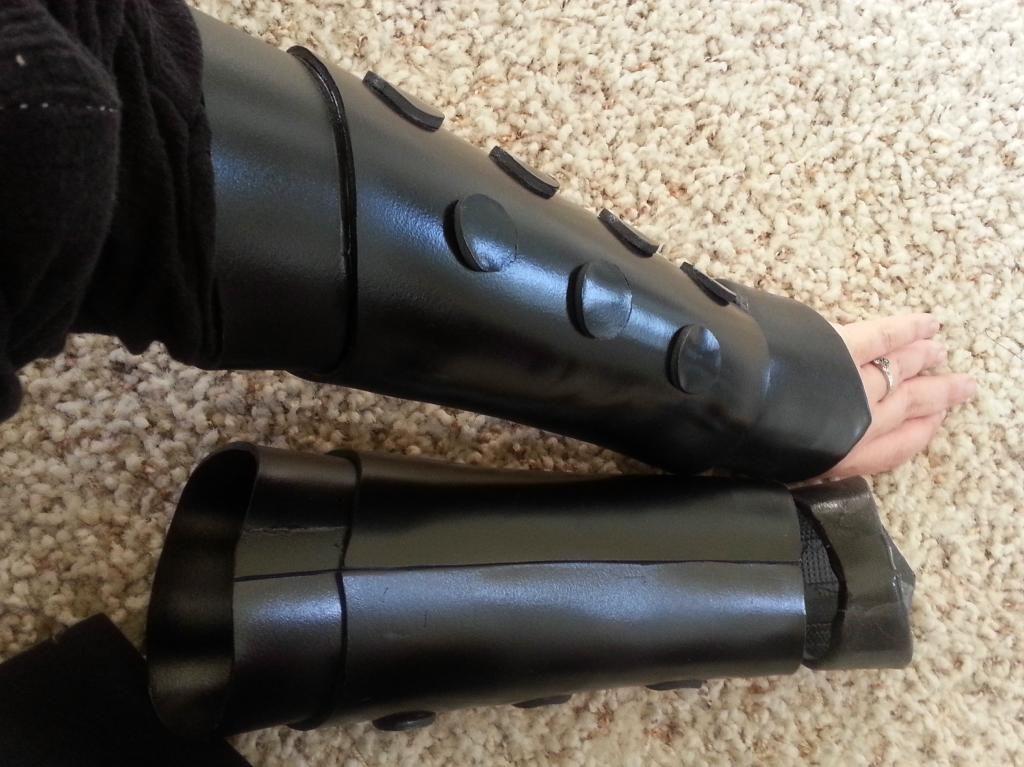
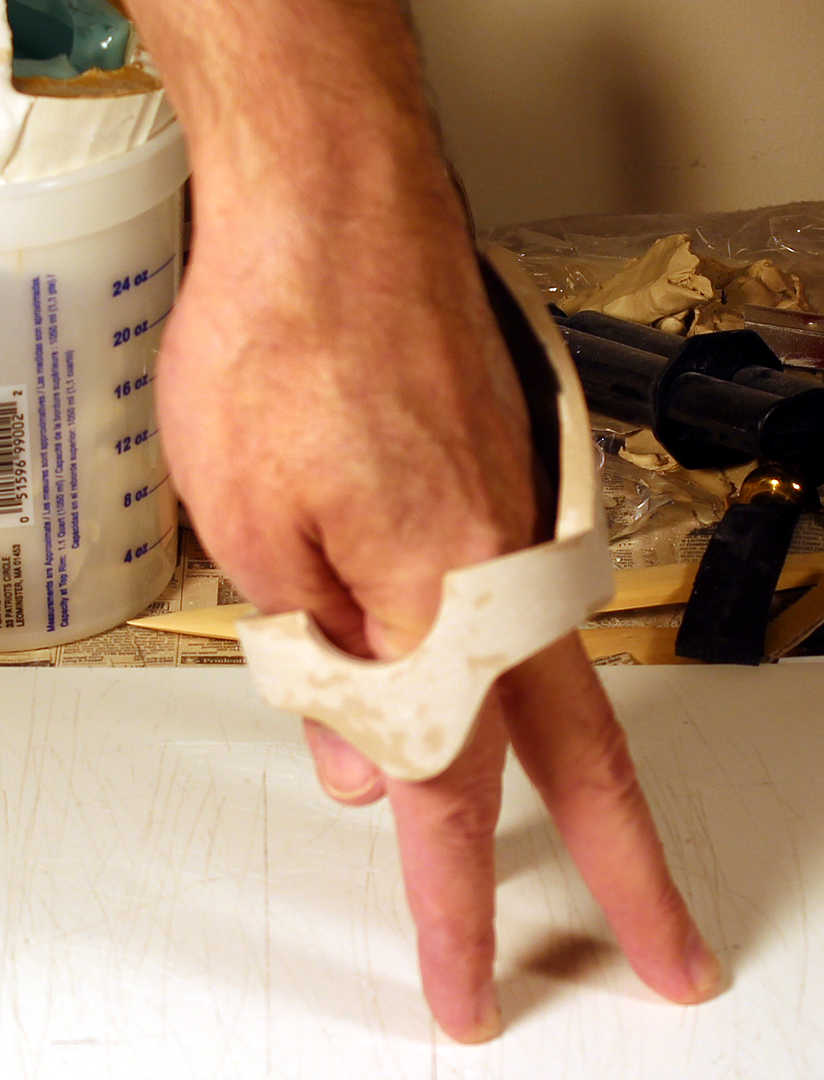
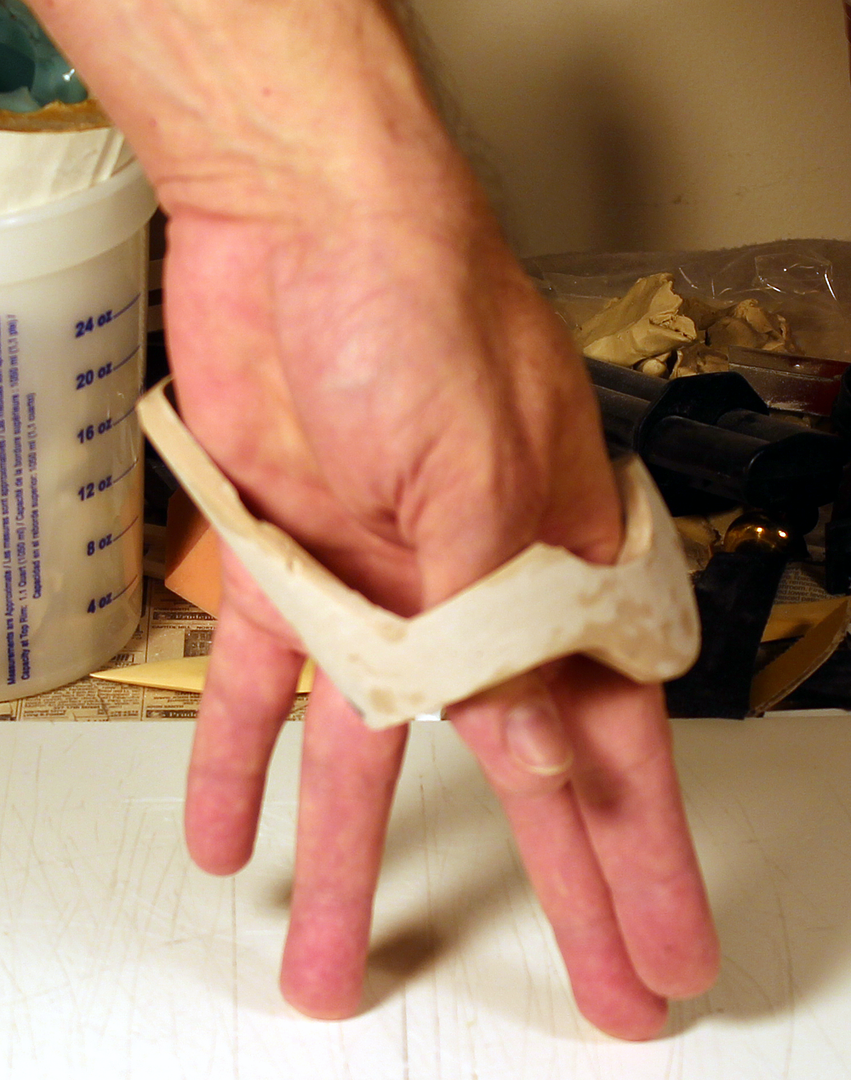
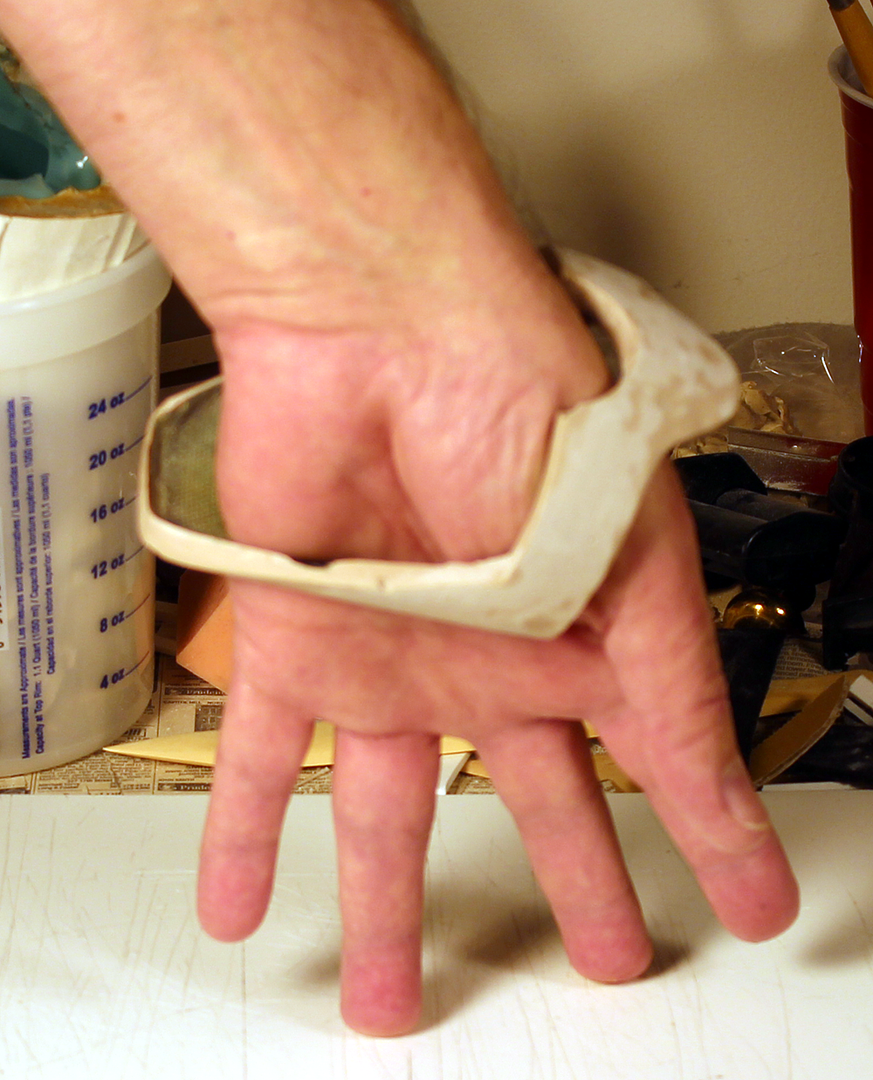
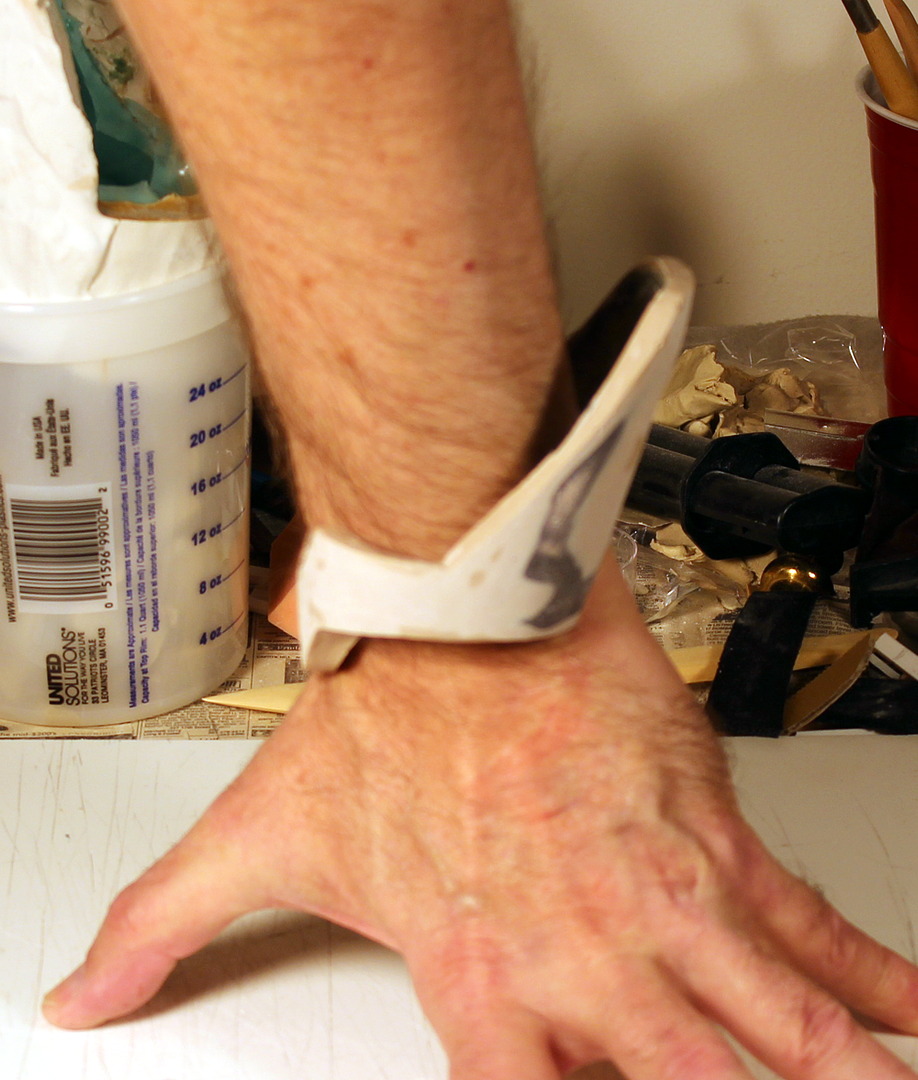
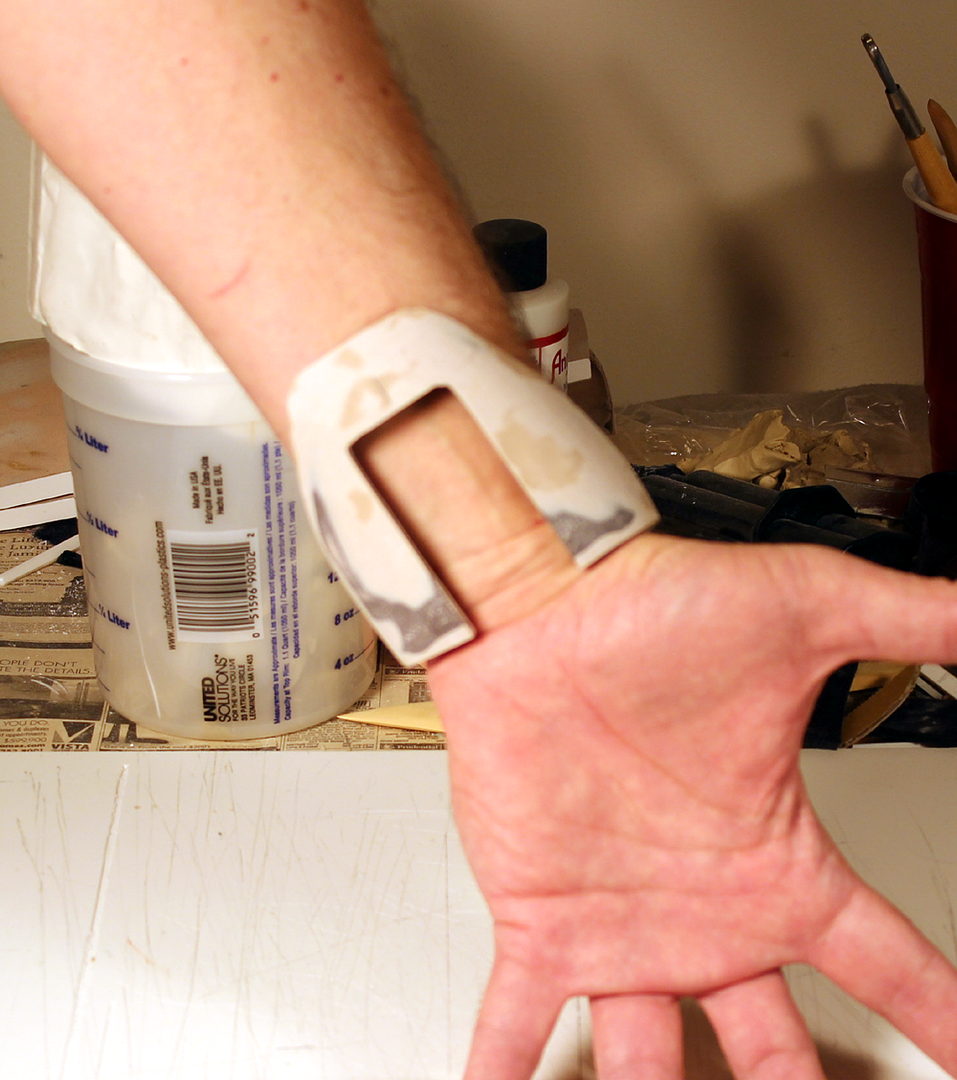
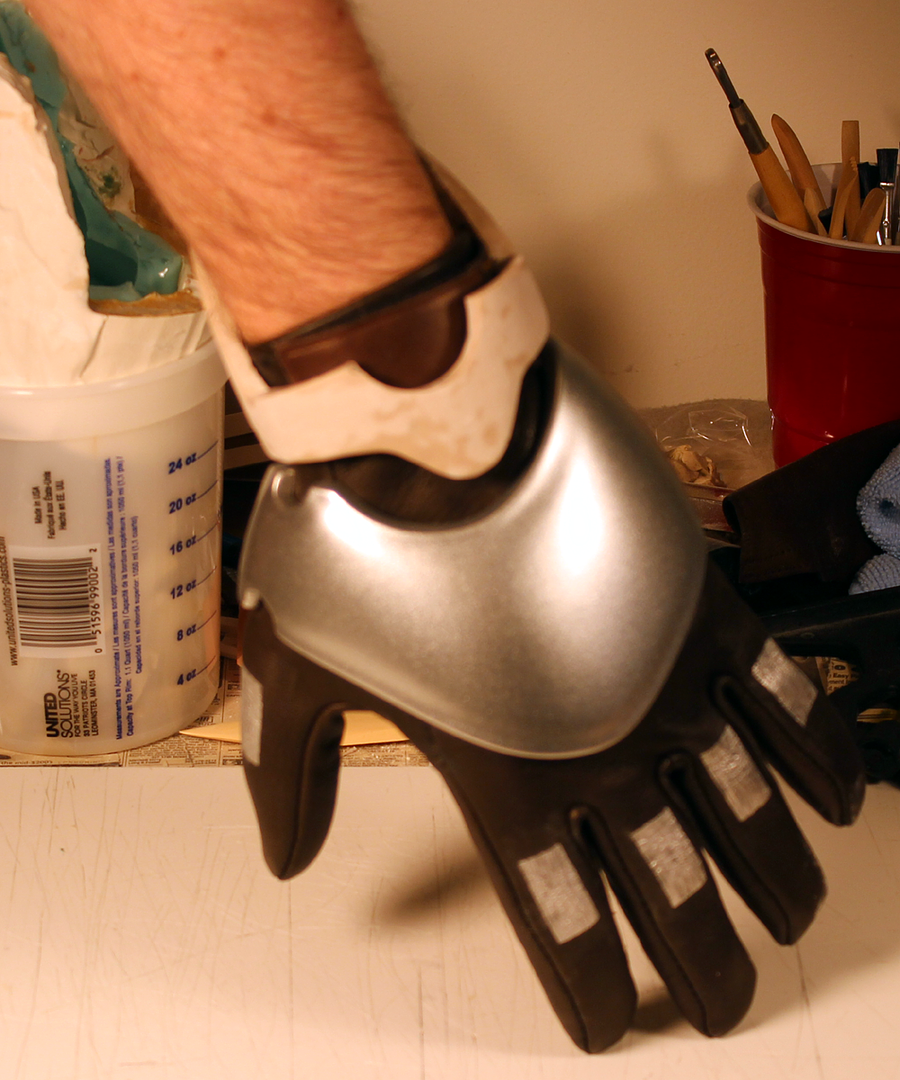
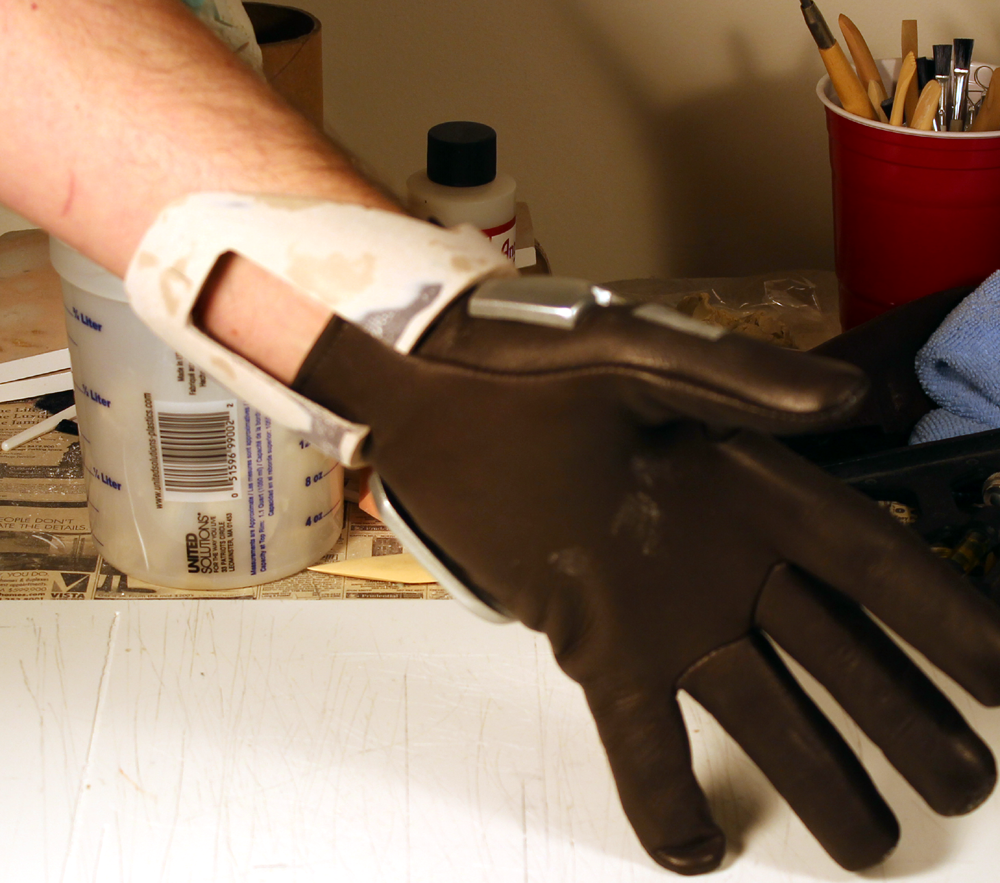
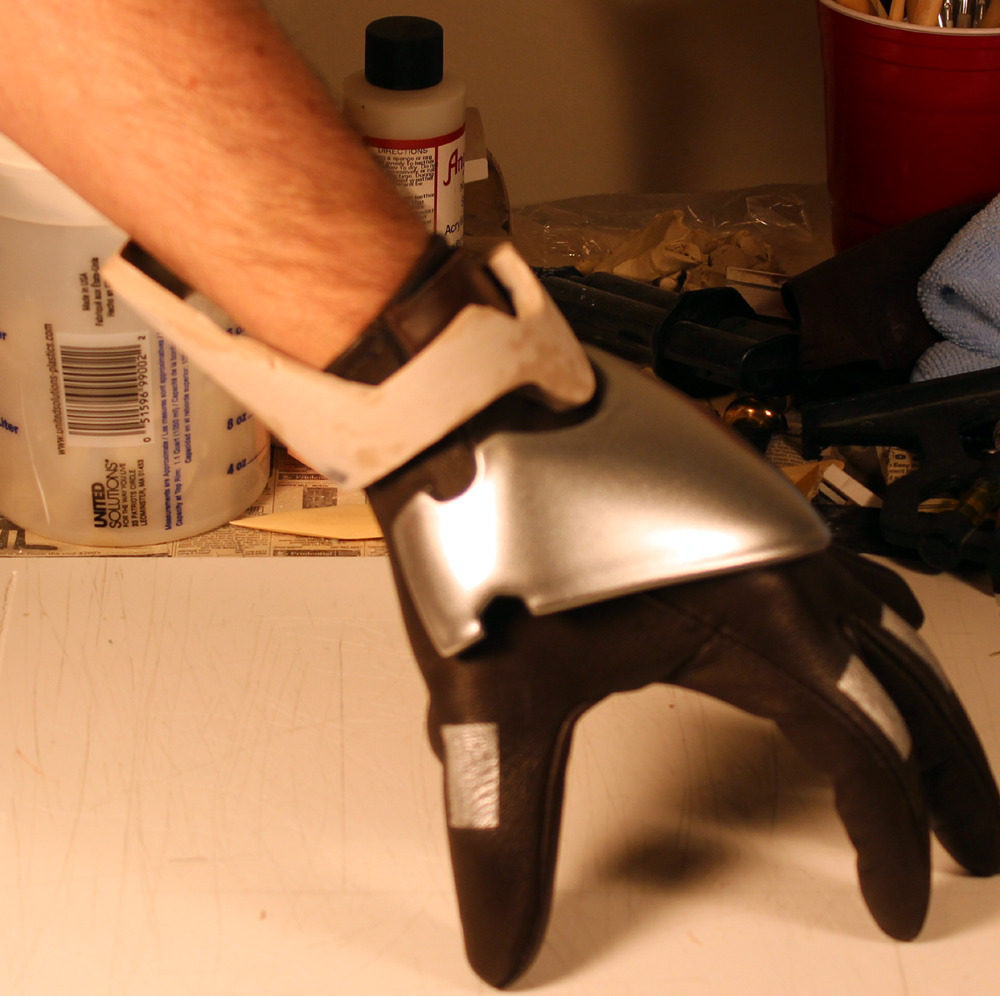
First, I had to be able to put the one-piece wrist clip on and take it off. It is a VERY tight fit and will be a bit tighter before the production piece is cast. As you can see I will have to squeeze it on before the glove, then pull the glove cuff up under the clip. With just the padding afforded by the glove, it is moderately comfortable. It may take a prolonged period of elevation to get it off after a long troop, but I will pay that price for accuracy. The clip will also support the main assembly and keep it from encroaching on the hand guard.
Still just a first round of smoothing and shaping. It will have more Bondo filler and surface spread before it's ready for molding/casting, but so far I'm very happy with the results.
Apologies for the unfocused shots. I was using a remote shutter with my right hand, and neither hand is as steady as a few years ago.
More as it comes along.
http://i107.photobucket.com/albums/m305 ... ces230.png
http://i107.photobucket.com/albums/m305 ... ces232.png
http://i107.photobucket.com/albums/m305 ... ces233.png
http://i107.photobucket.com/albums/m305 ... ces234.png
http://i107.photobucket.com/albums/m305 ... ces236.png
http://i107.photobucket.com/albums/m305 ... ces237.png
http://i107.photobucket.com/albums/m305 ... ces238.png
http://i107.photobucket.com/albums/m305 ... ces239.png
http://i107.photobucket.com/albums/m305 ... ces240.png
http://i107.photobucket.com/albums/m305 ... ces241.png
~ Vonnor
-
I laid in some fiberglass yesterday. Thick Rondo coat then 7-8 layers of cloth glass strips then another thick Rondo. I added 2-3 more layers on the wrist side for reinforcement since I will be doing the rectangle cutout. It's fugly for sure, but very solid. Symmetry isn't perfect but I can shape it a lot on the next phase. It won't be worn anyway, just a hard model for taking a shell mold. I have some super strong urethane resin I will use to pour the production piece.
Oh and now that I can examine it closely, I realize I'm going to have to sculpt a second one of these for the right gauntlet. I was hoping to use only one and just pour two from the same mold, but to lay flat against the end of the main assembly the sculpt picked up a very small amount of skew twist. This one will not lay flat on the right assembly. Oh well, practice practice practice.
http://i107.photobucket.com/albums/m305 ... ces227.png
http://i107.photobucket.com/albums/m305 ... ces229.png
http://i107.photobucket.com/albums/m305 ... ces226.png
~ Vonnor
-
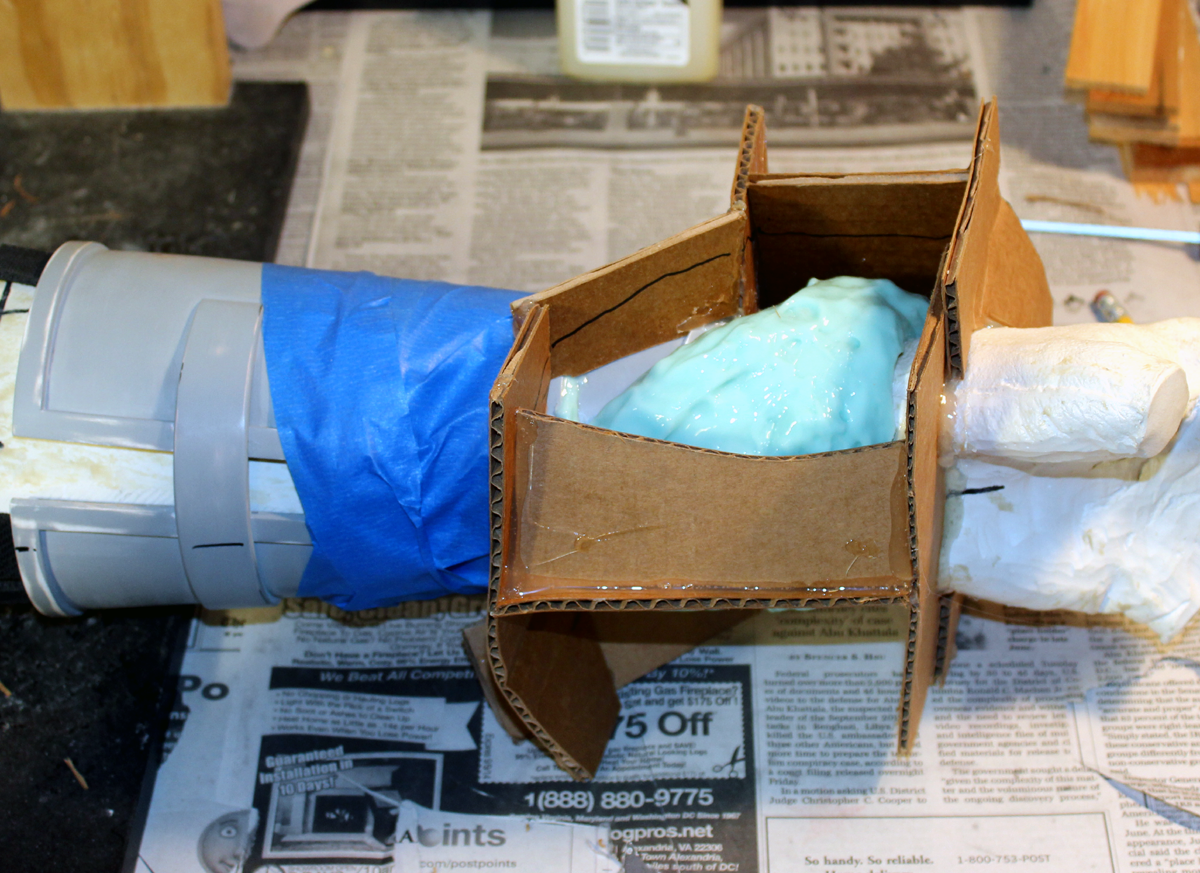
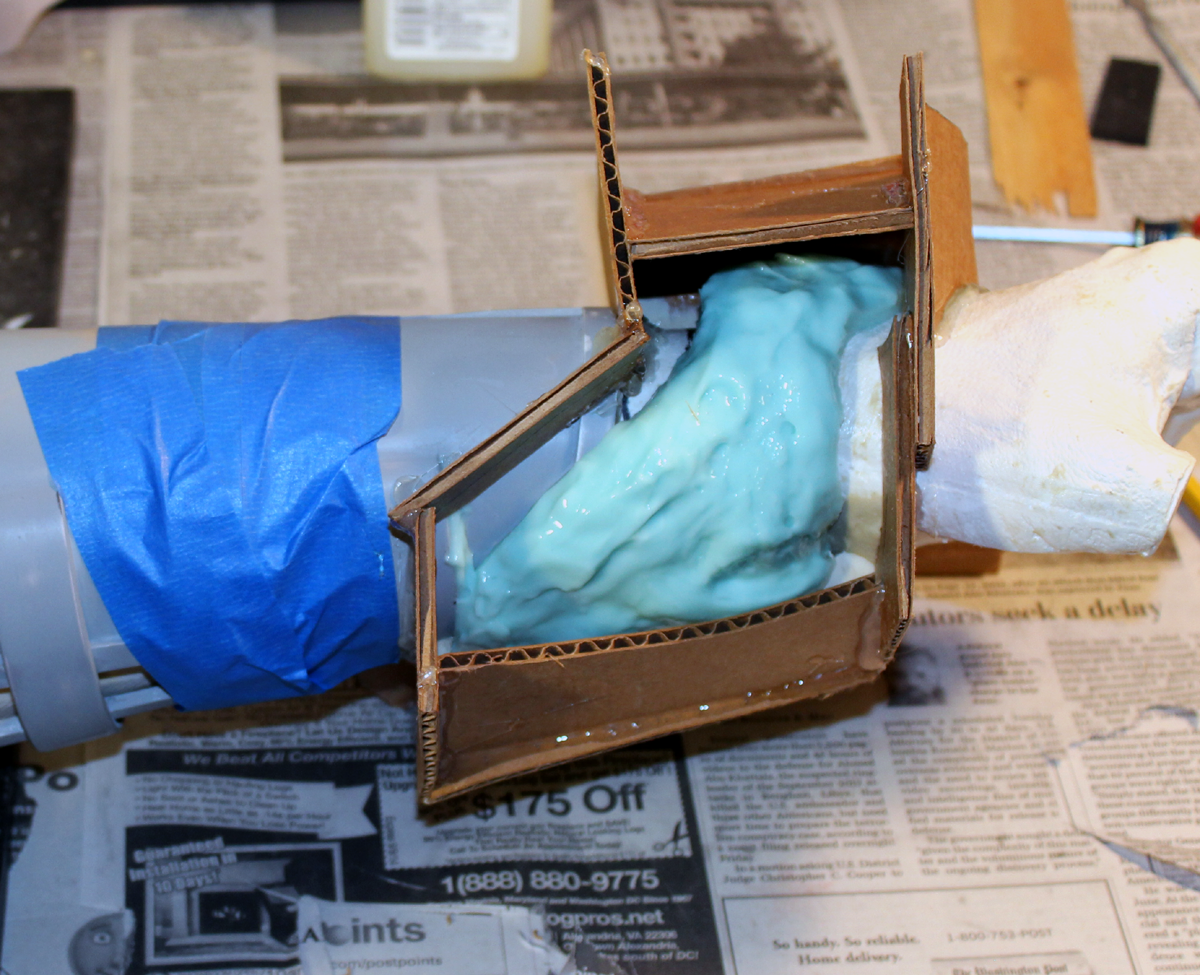
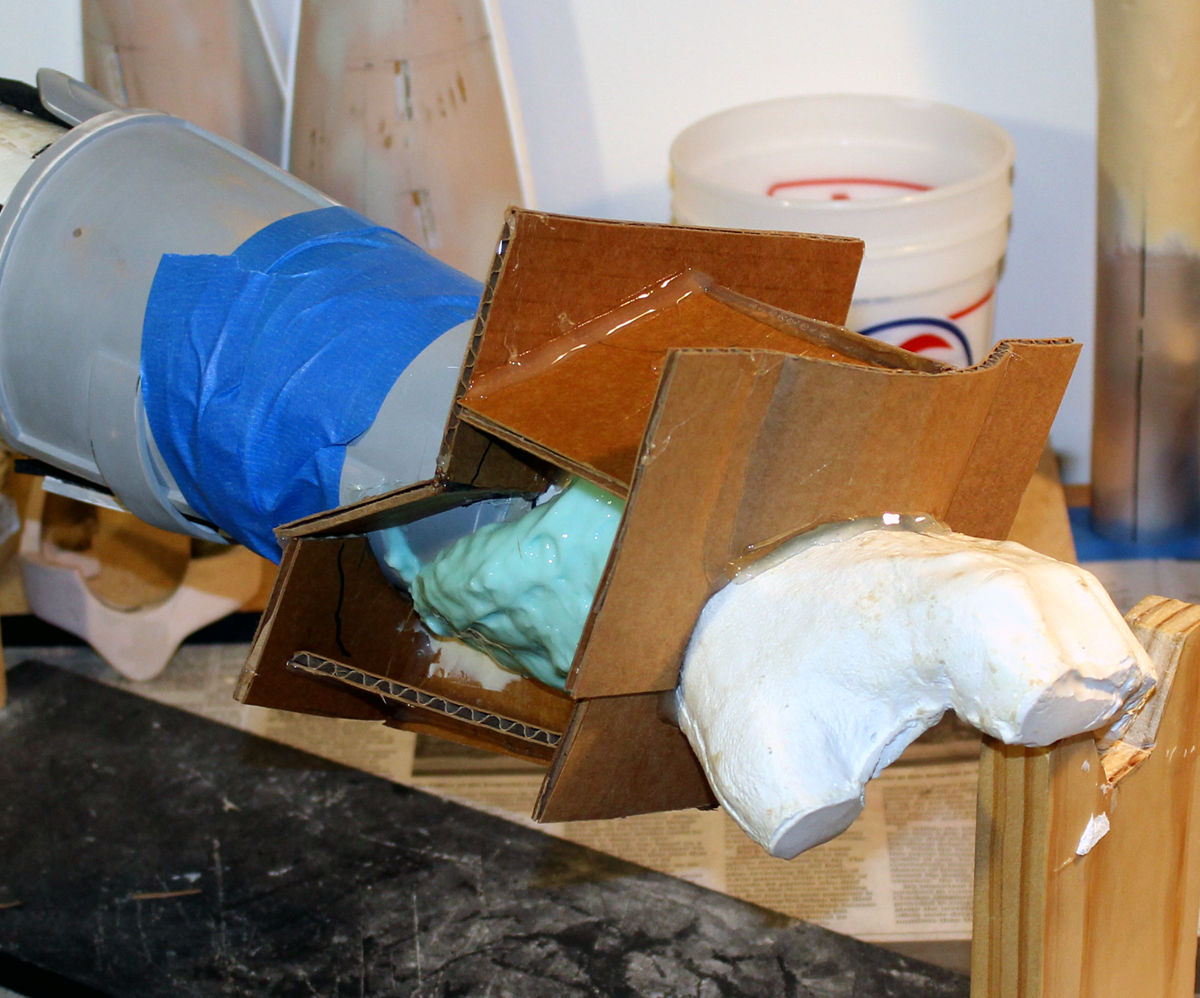
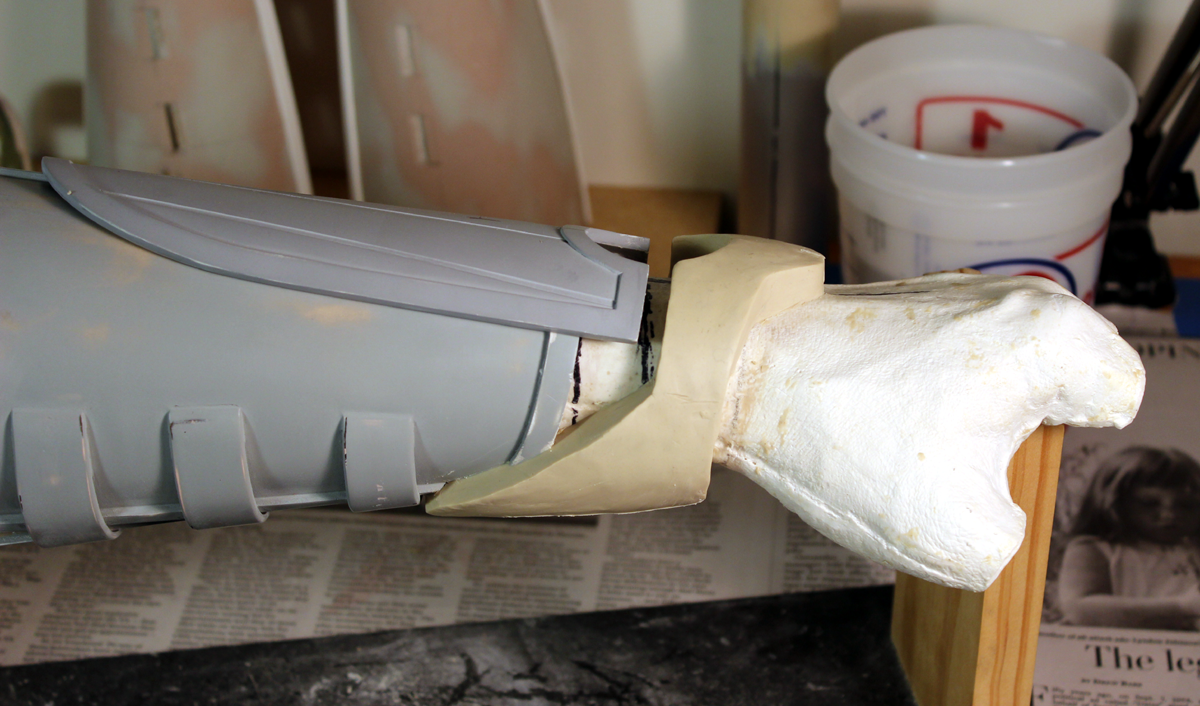
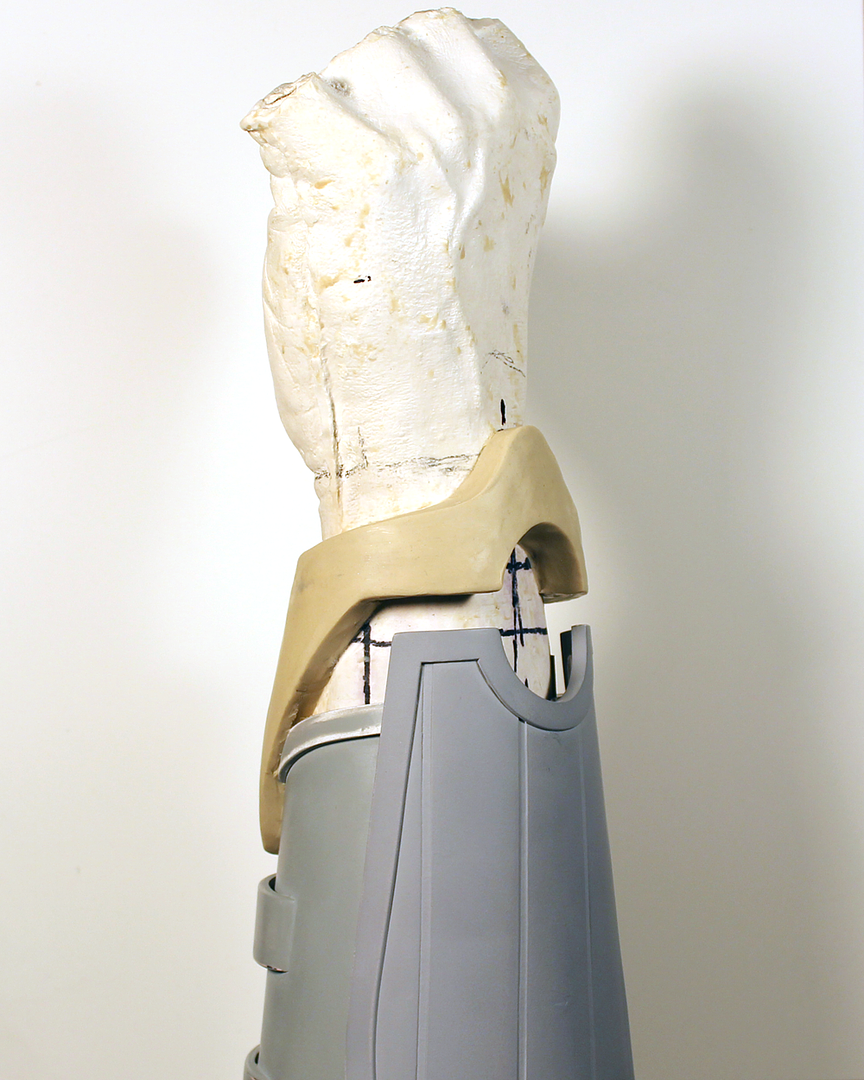
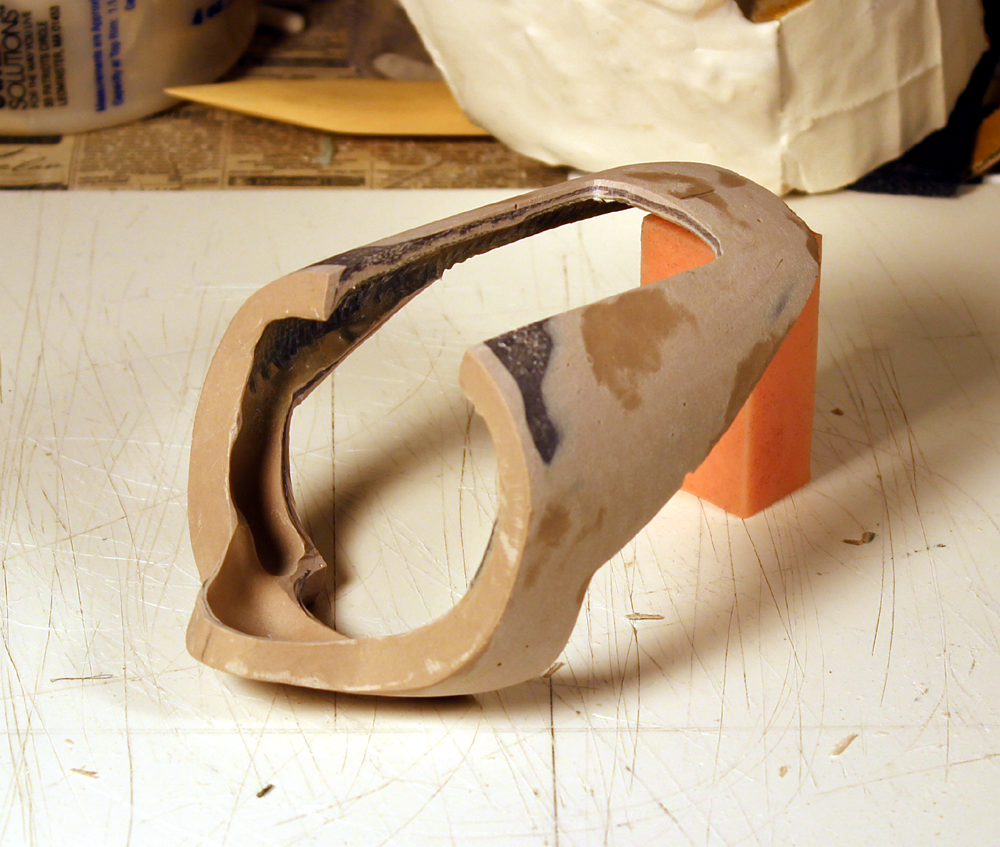
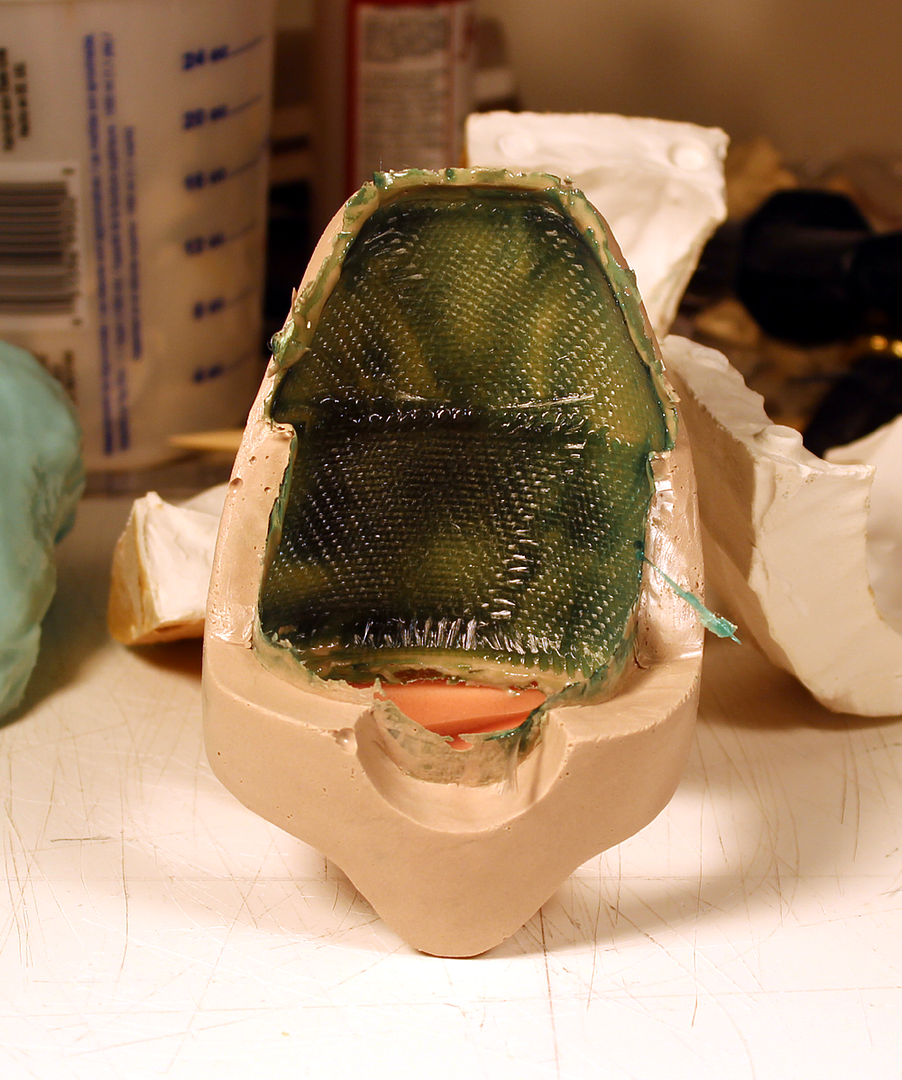
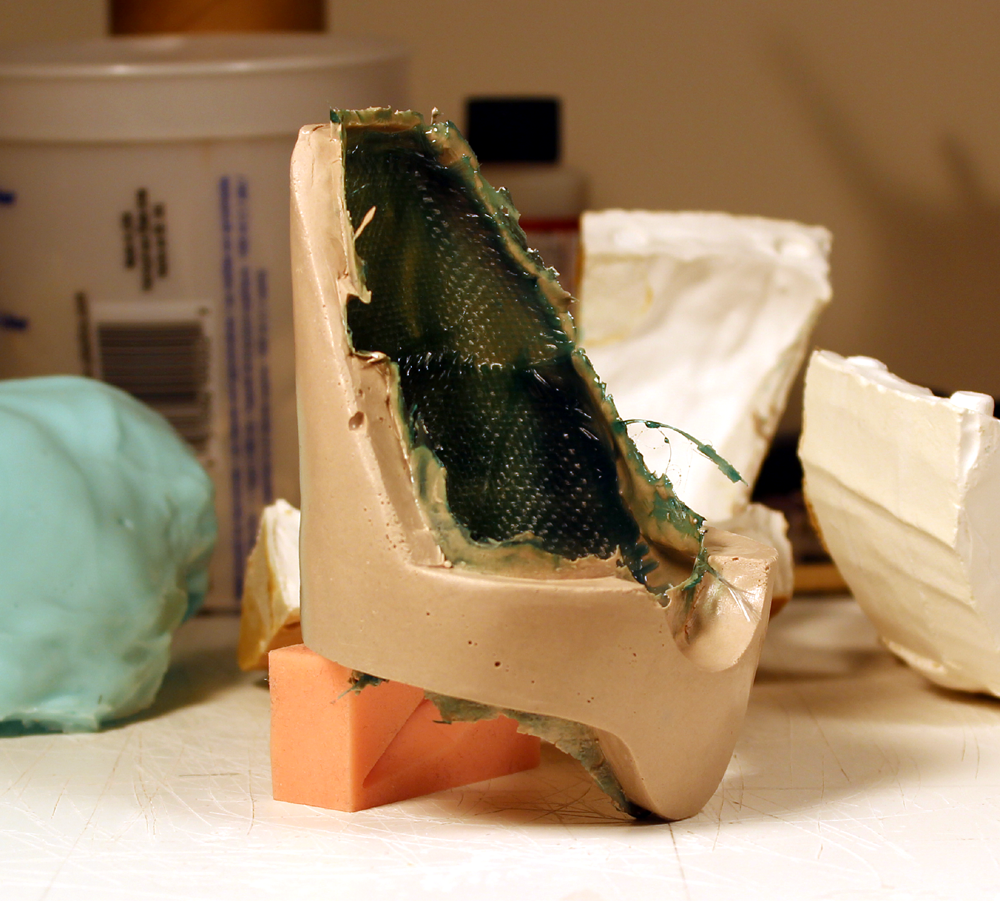
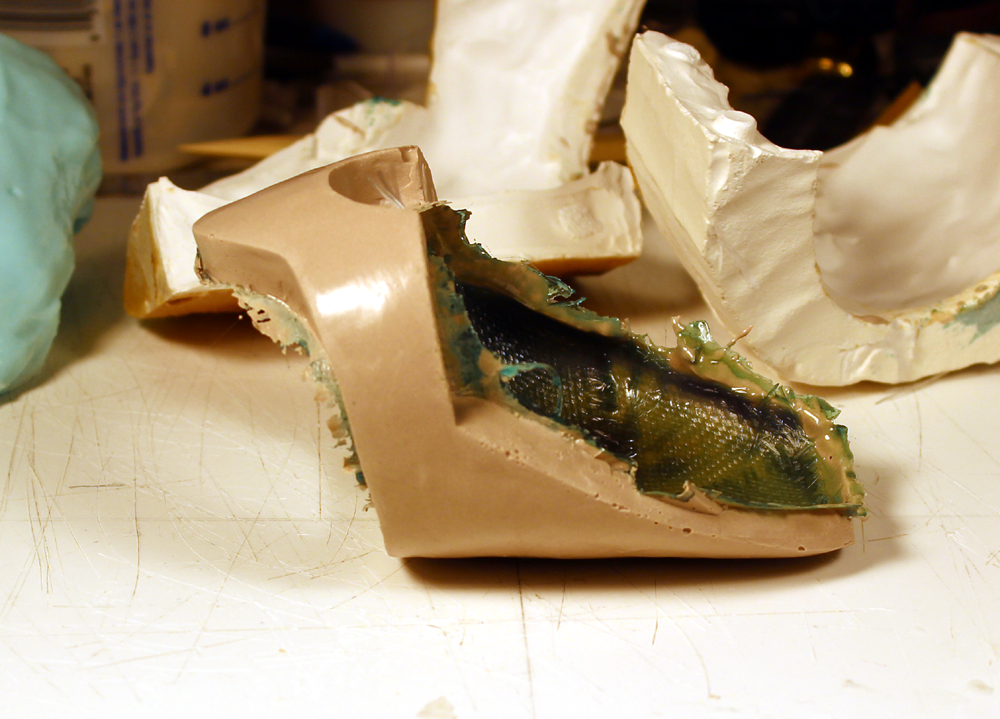
Back from NYCC and back on the project.
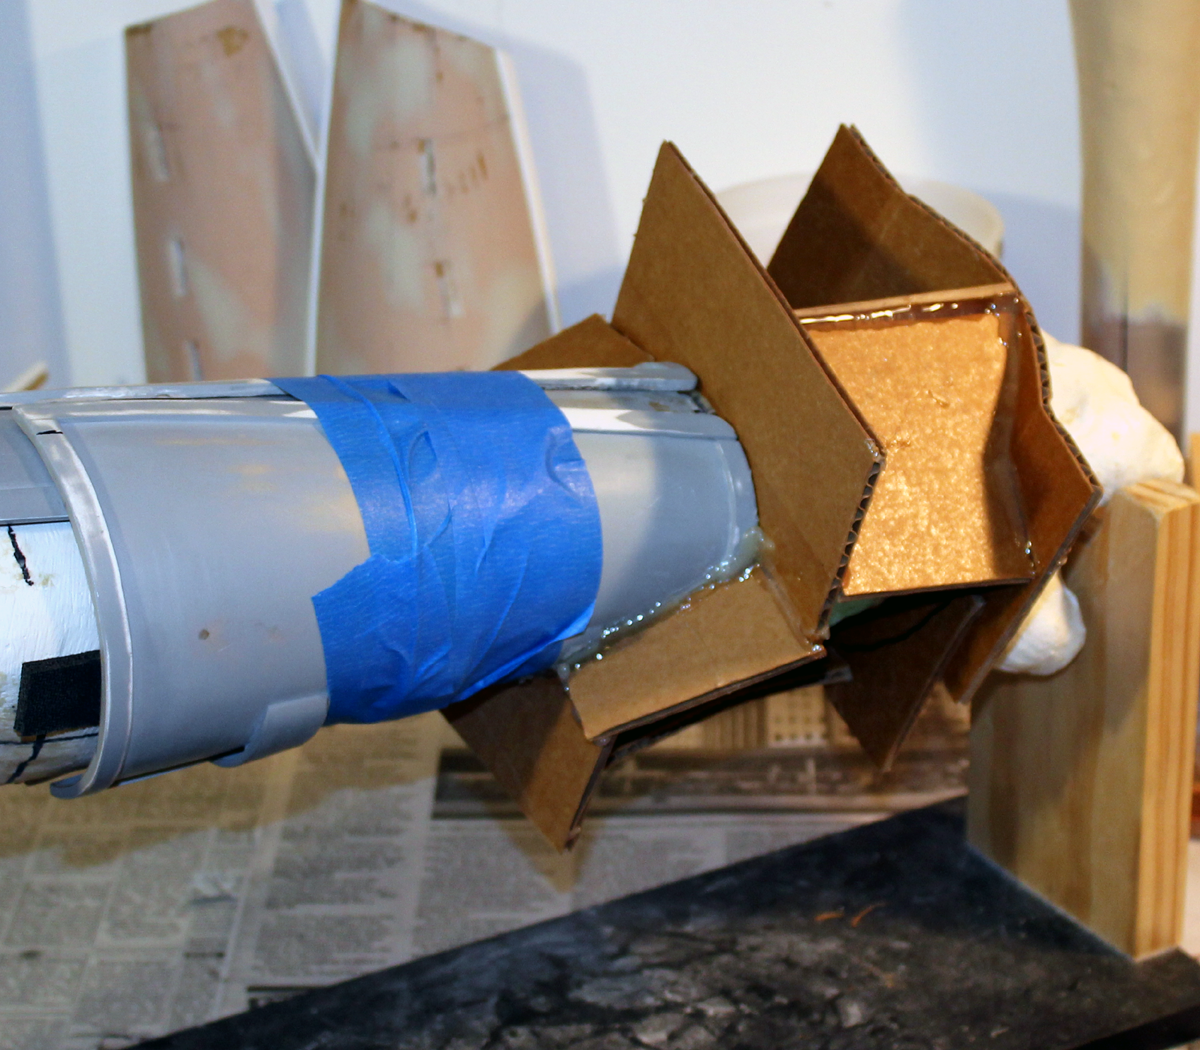
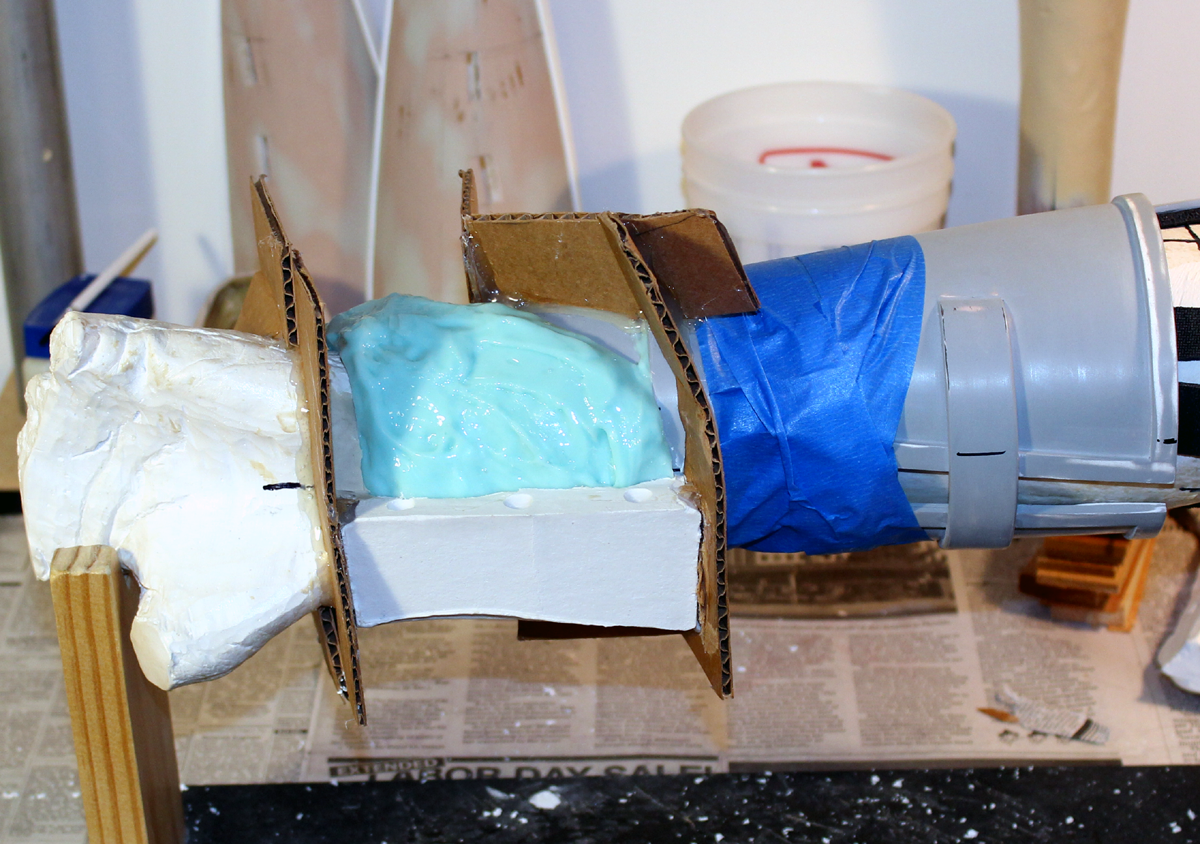
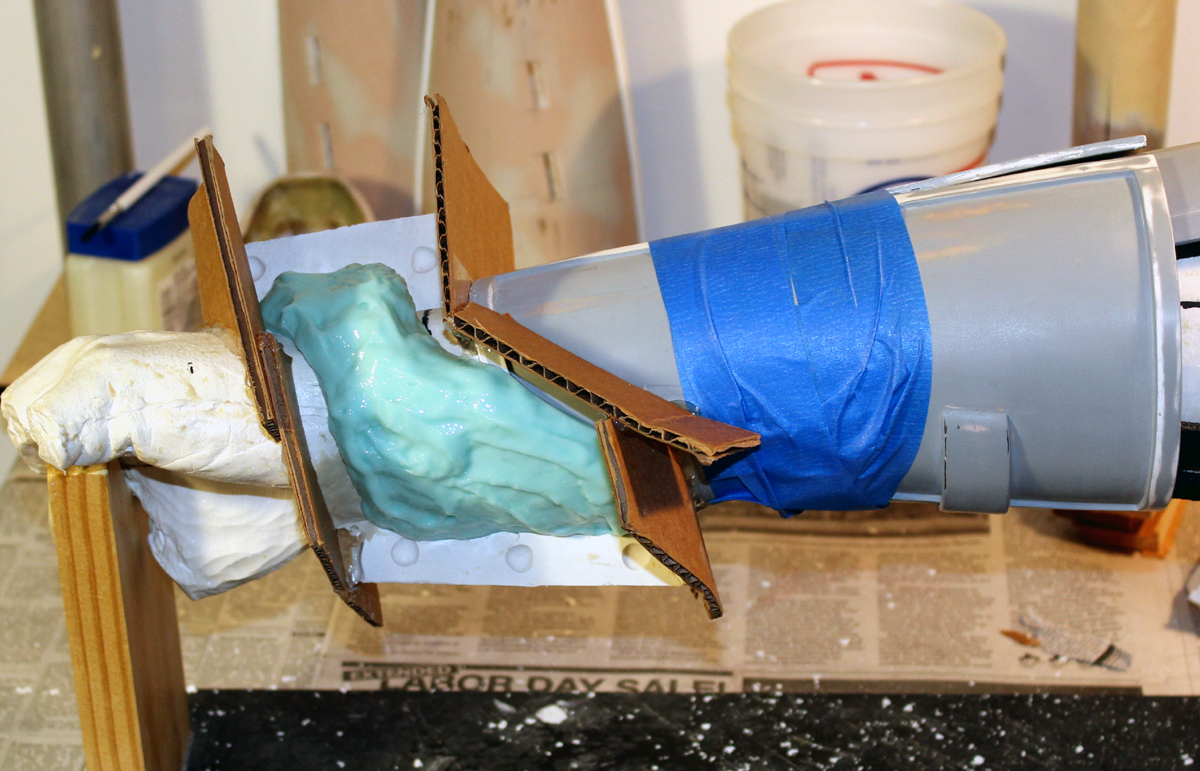
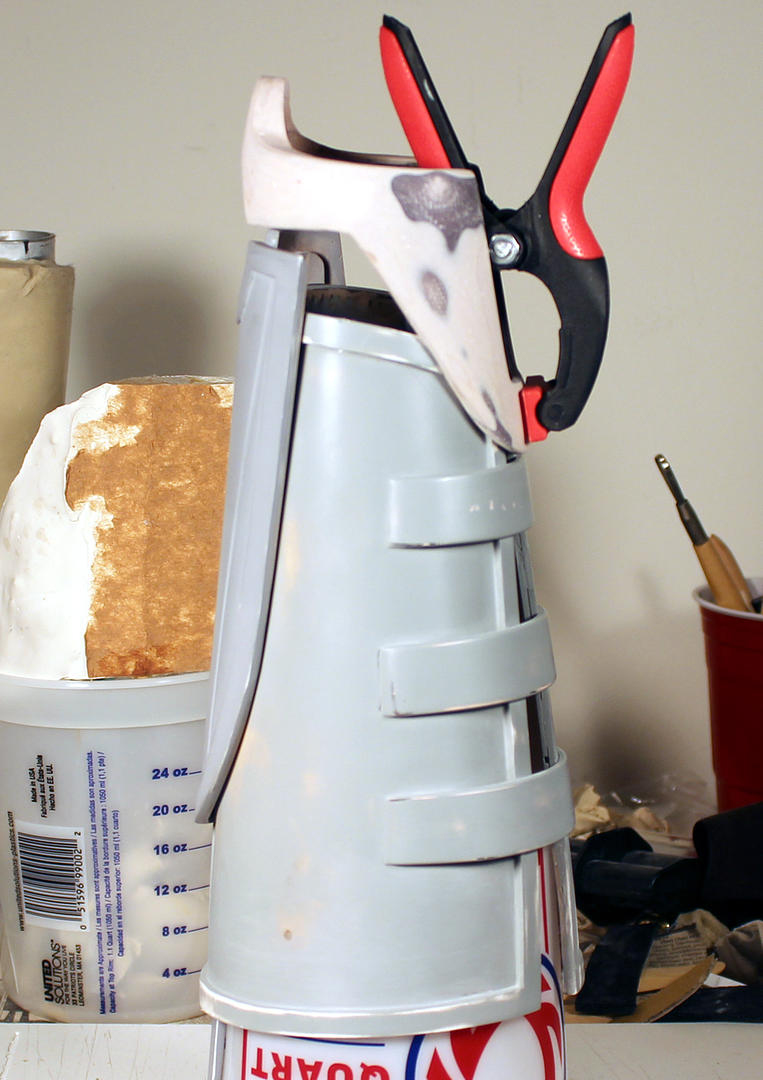
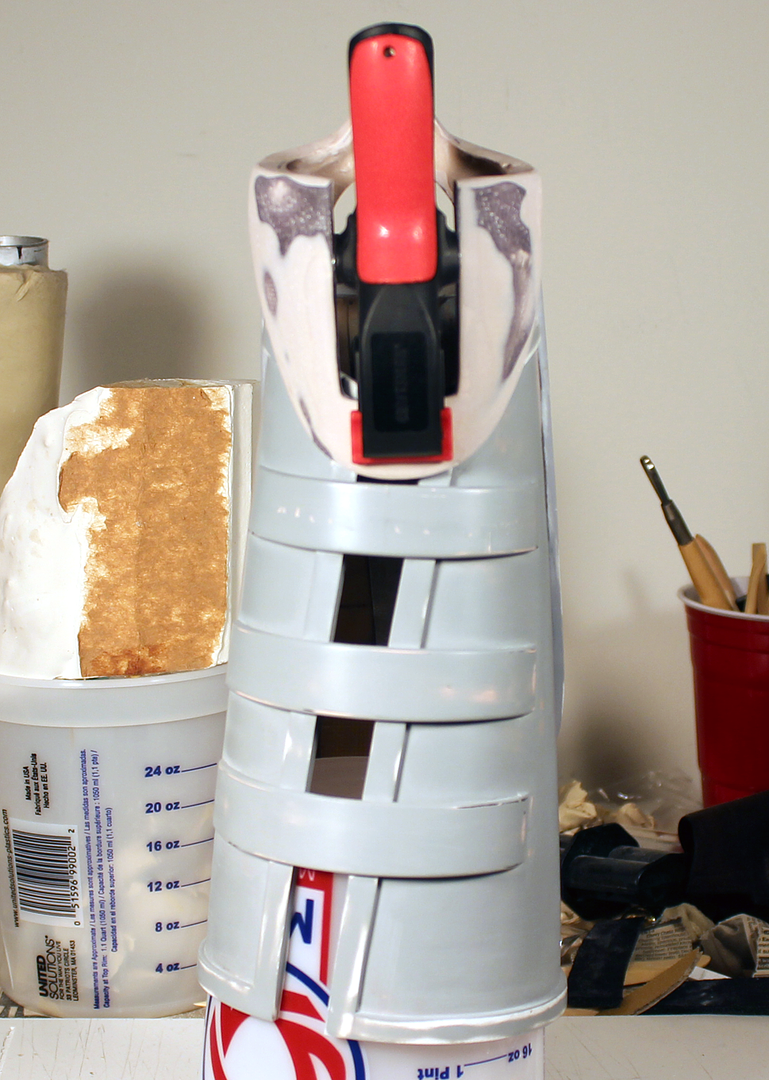
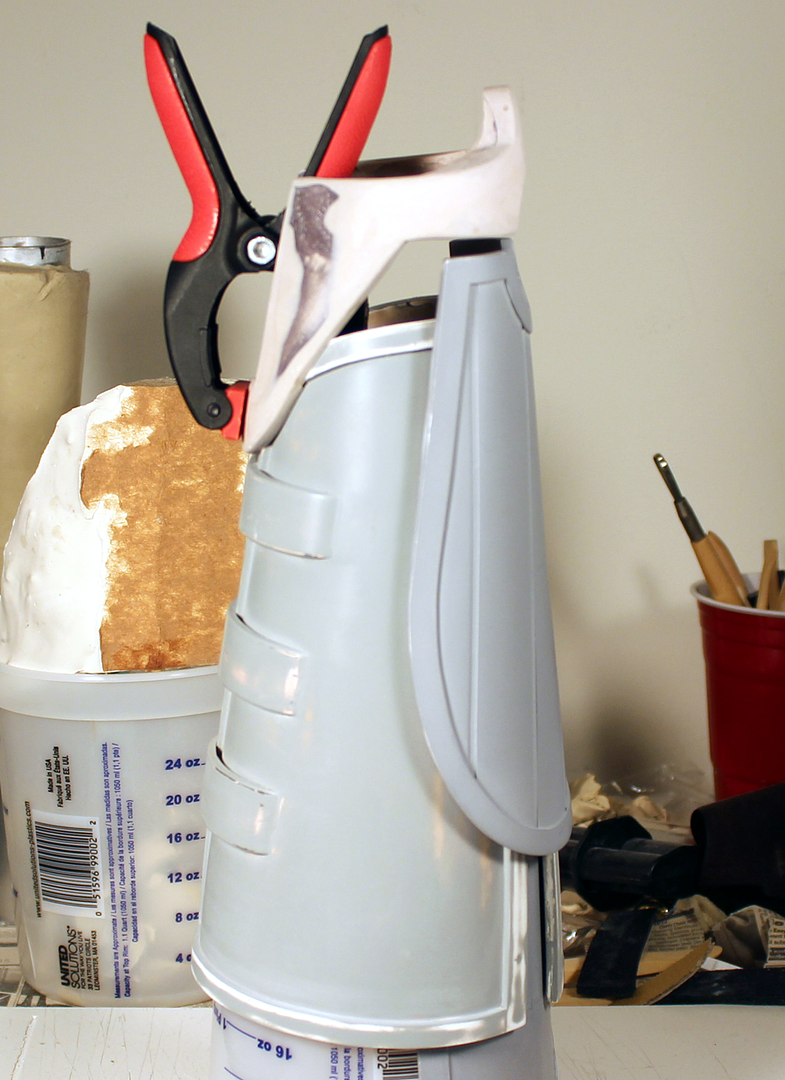
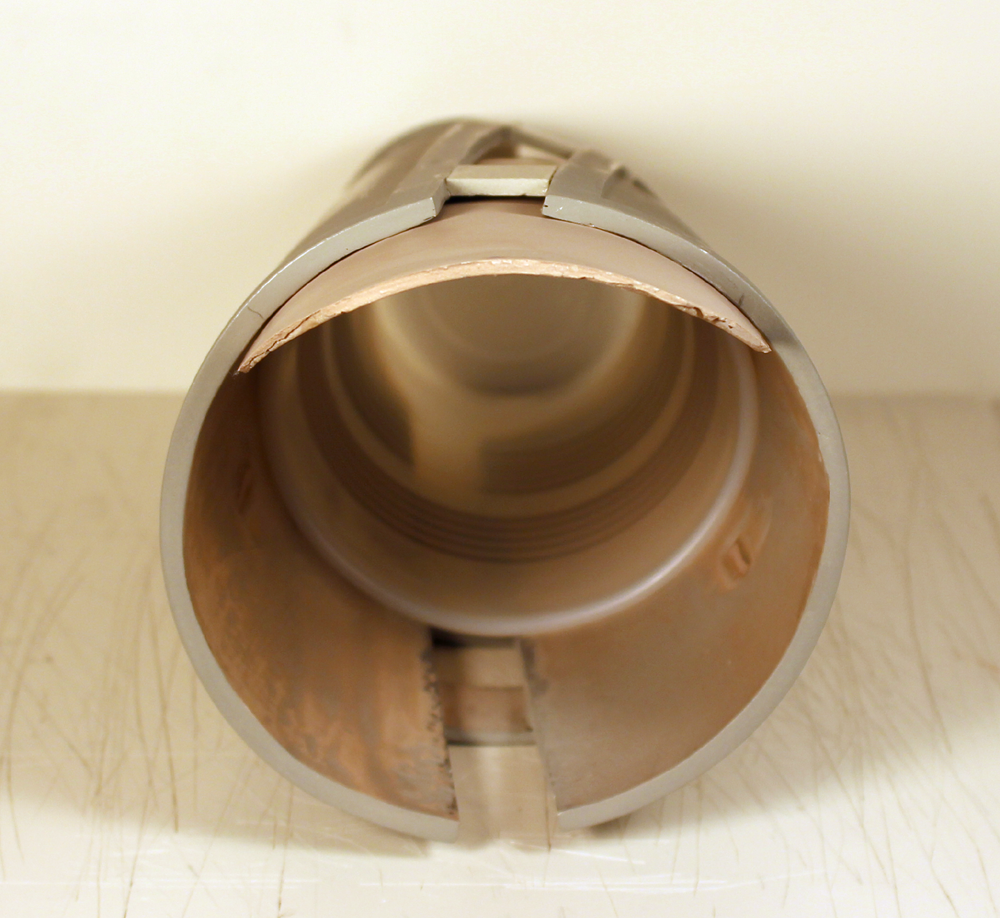
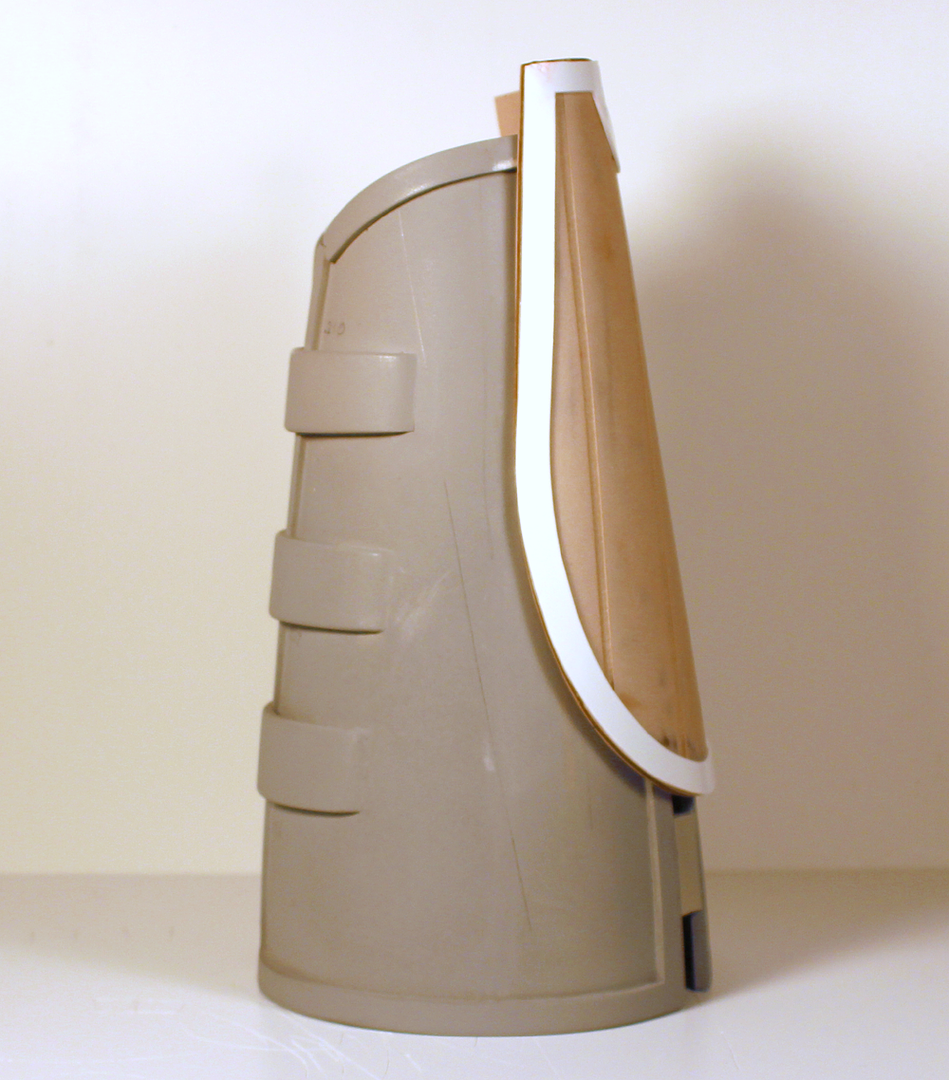
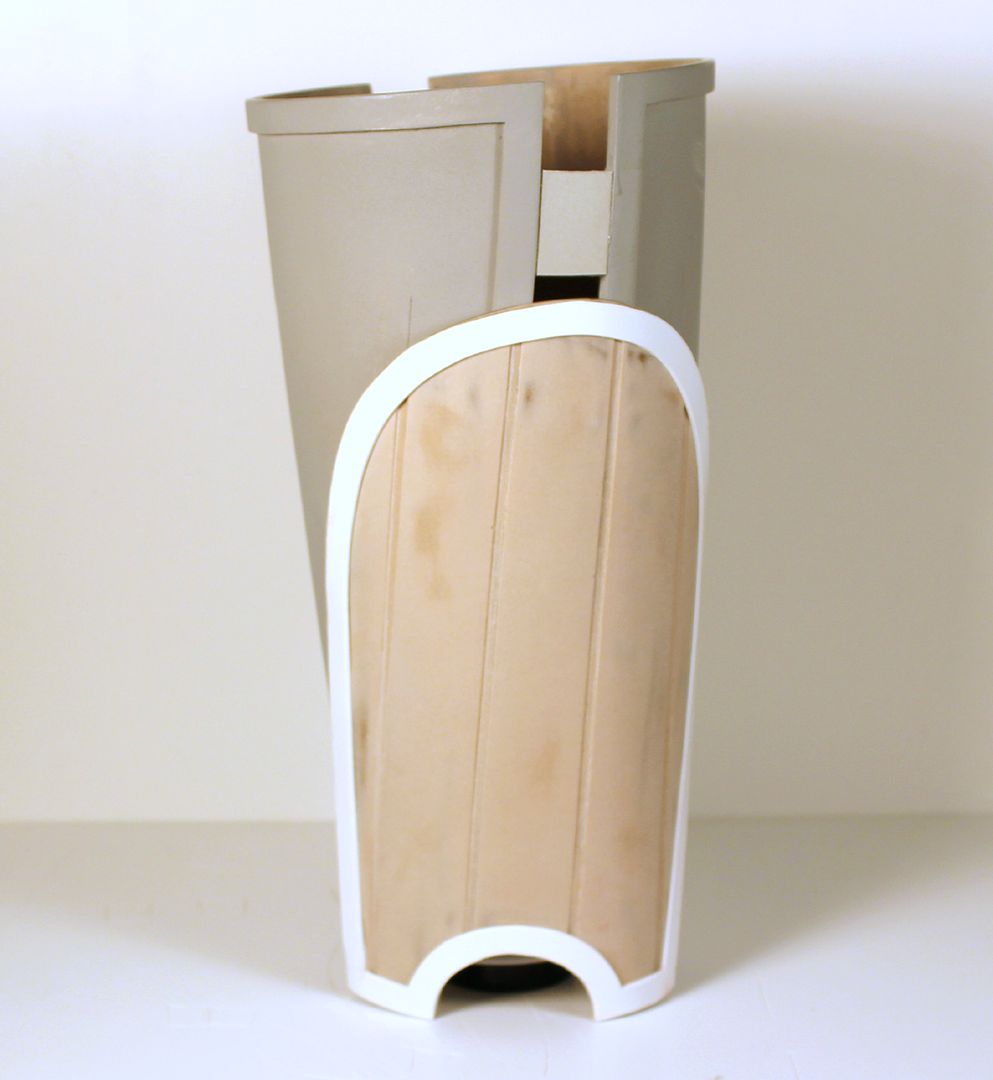
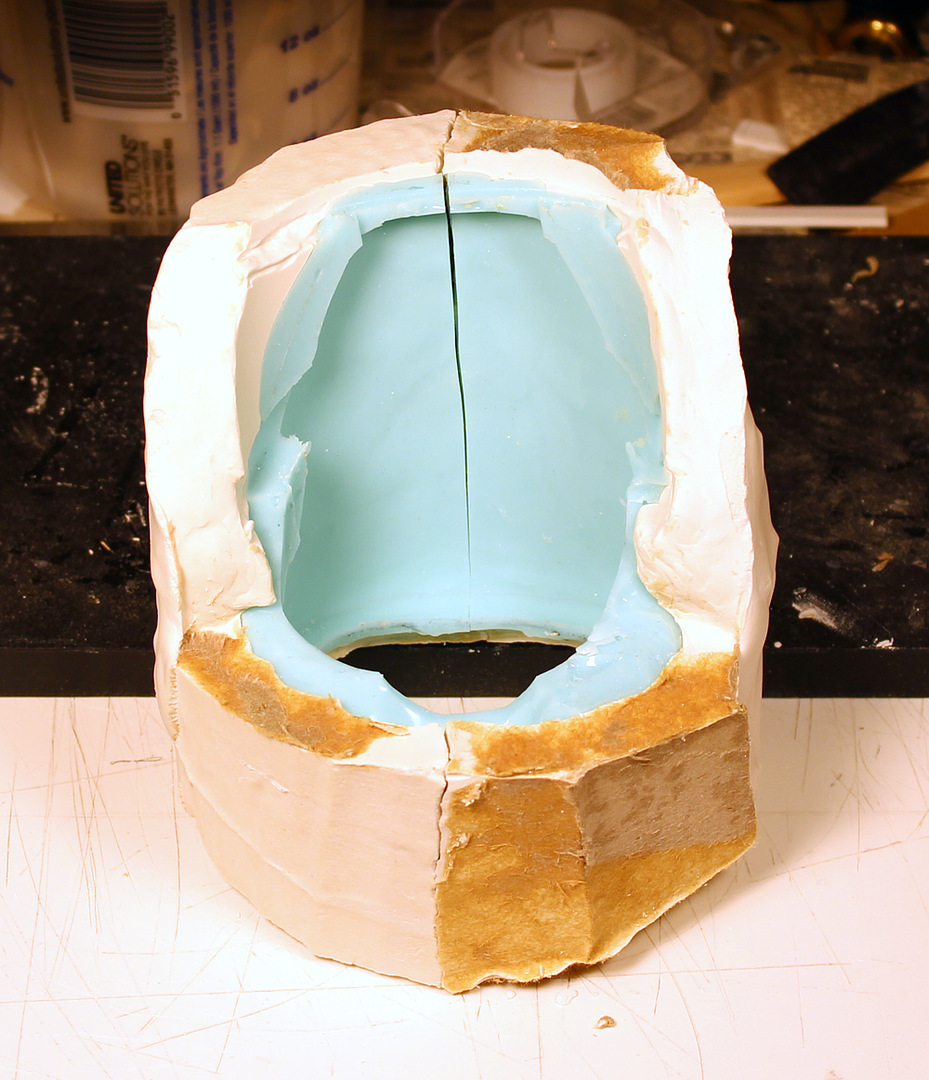
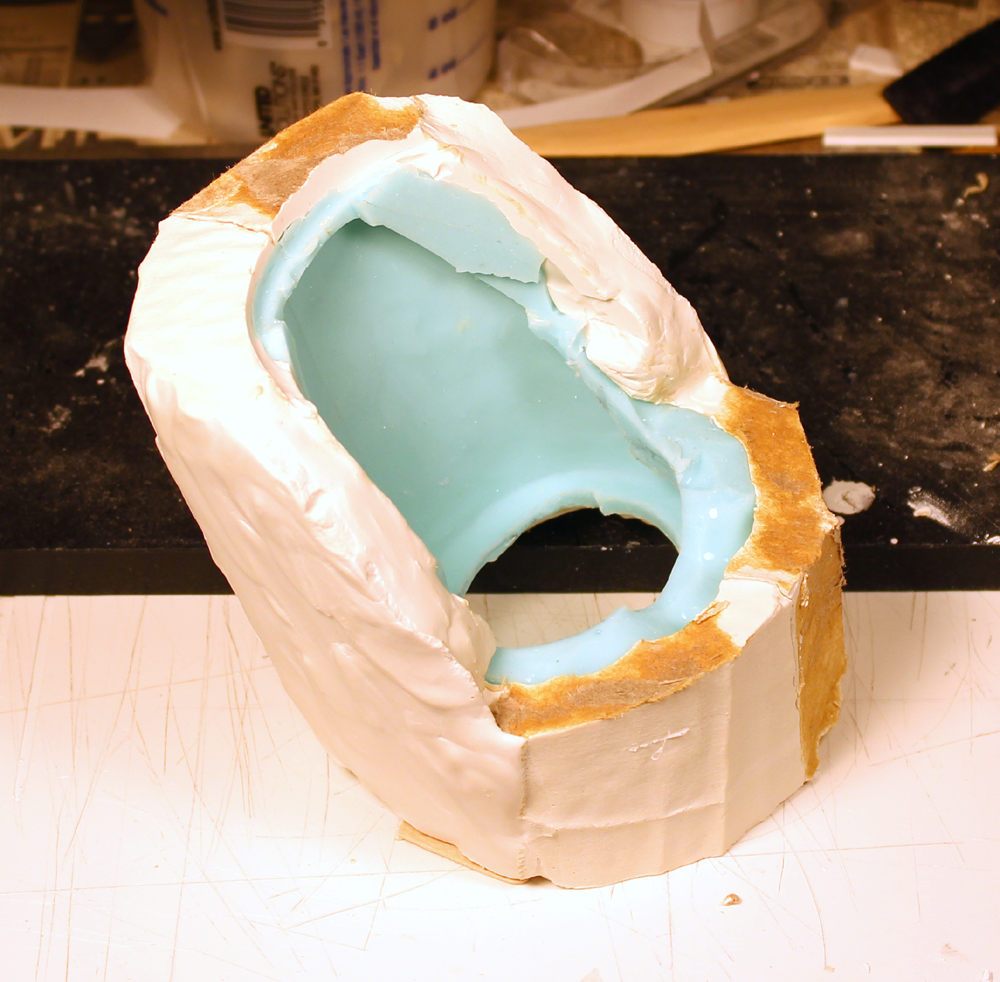
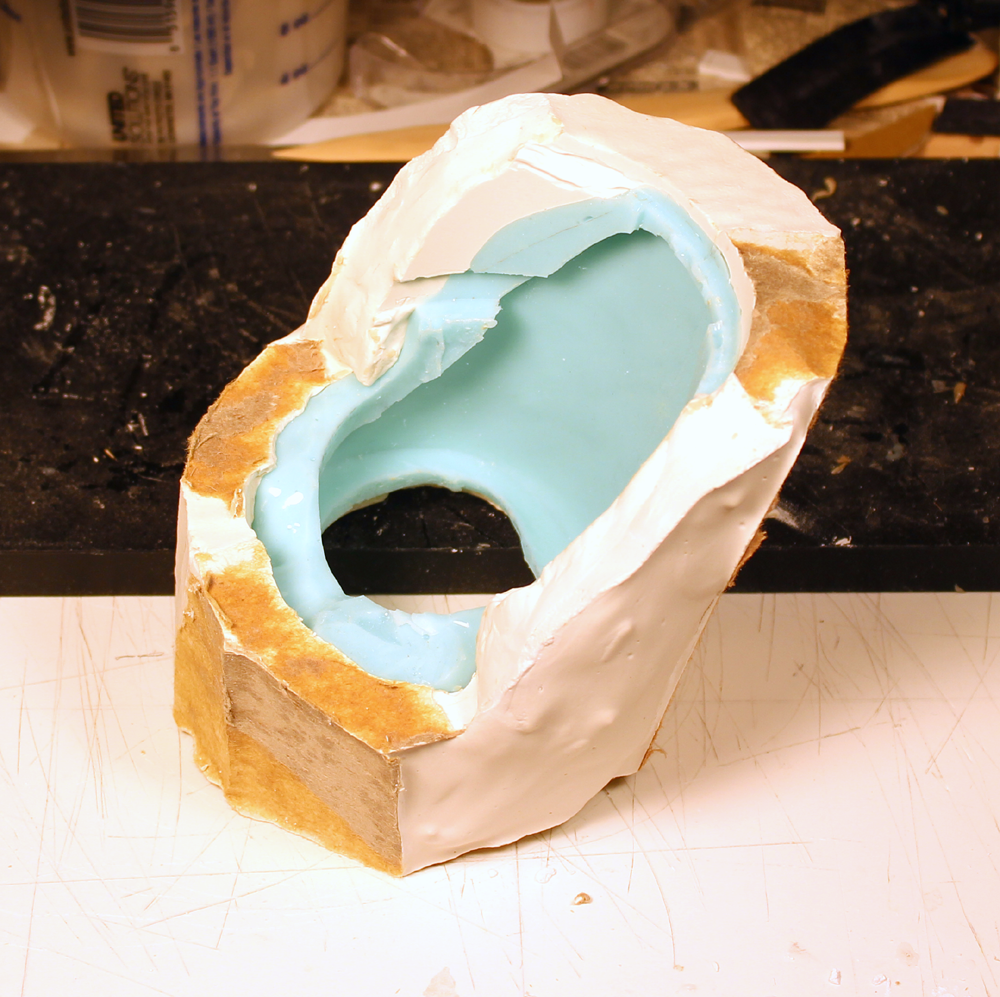
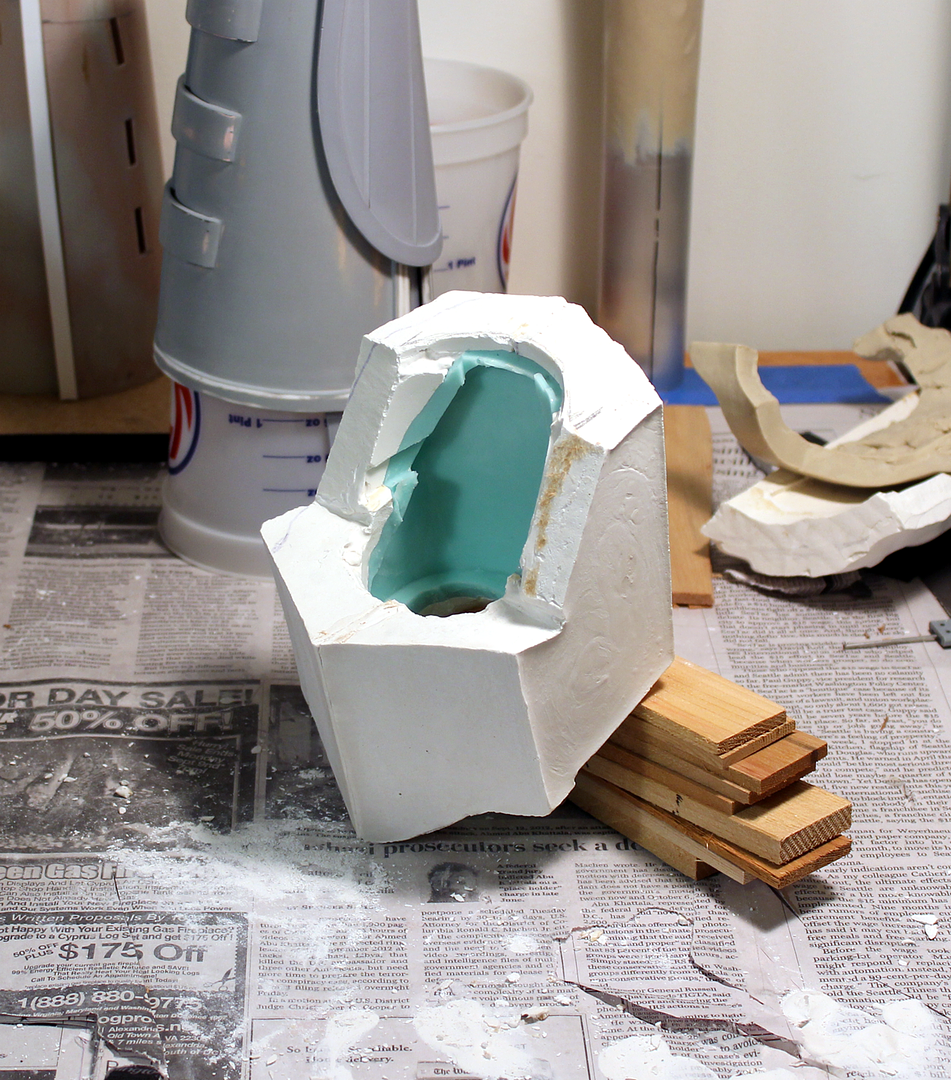
Since I had to do the clay sculpt directly on the production gauntlet parts, this was by far the most difficult to wall-off and mold. I painted a few layers of Smooth-on Rebound 40, trimmed the edges a bit then used a contour guide to cut out cardboard for walling off the perimeter. Carefully added Hydrocal White plaster in half sections, with vasoline applied to the seams in between halves.
I will stuff some Bondo and glass inside to get a rigid model to work with. I can finally visualize how the piece will be worn and removed. The design is quite remarkable for a CG model. I'll show more detail on what I'm talking about after I take the casting. Also, the palm-side cutout will be done on the rigid model.
More to come.
http://i107.photobucket.com/albums/m305 ... ces221.png
http://i107.photobucket.com/albums/m305 ... ces223.png
http://i107.photobucket.com/albums/m305 ... ces224.png
http://i107.photobucket.com/albums/m305 ... ces222.png
http://i107.photobucket.com/albums/m305 ... ces220.png
(Links only - the new board does not allow 1K wide pix.
 )
)~ Vonnor
-
I sent a PM Jeff.
I'll be there all 4 days helping out TJA, but only costuming on the weekend.
~ Bill
-
If any starkillers plan on attending New York Comic Con in a couple weeks, I will be wearing Rahm Kota from TFU on Sunday (sans topknot). If you'd like to go in search of camera lenses for a bit let me know. I'd be happy to join you.
~ BC
-
Today I did a rough sculpt of the wrist clip. The photos show I need to adjust the alignment a bit, as well as smooth out the edges and contours. I ended up being off a little on scaling and relative positioning of the forearm plate. It should have been about 0.25" longer and extend by the same amount more toward the hand. It's funny there was just no way to get it perfect without the wrist clip, but the entire assembly had to be completed before the clip could be sculpted. Catch-22.

The end result is the wrist clip is a bit shorter end-to-end than it should be, but I'll live with it rather than redo a whole new forearm plate and mounting.
Most of the finish shaping and fitting will be done on the hard model. Will also be able to measure the symmetry and can always re-do the sculpt if corrections are needed.
It slowly rolls forward.

~ Vonnor
-
...Will Kyle Katarn be at Celebration?...
Likely not, Sempai.
If luck is with me I will be presenting Rahm Kota from TFU2, with foot-long hair.
We'll work out something for a future event.
~ BC
-
From now on if I ever call you "boy," you'll know why.

Well done!
~ The "Old man"
-
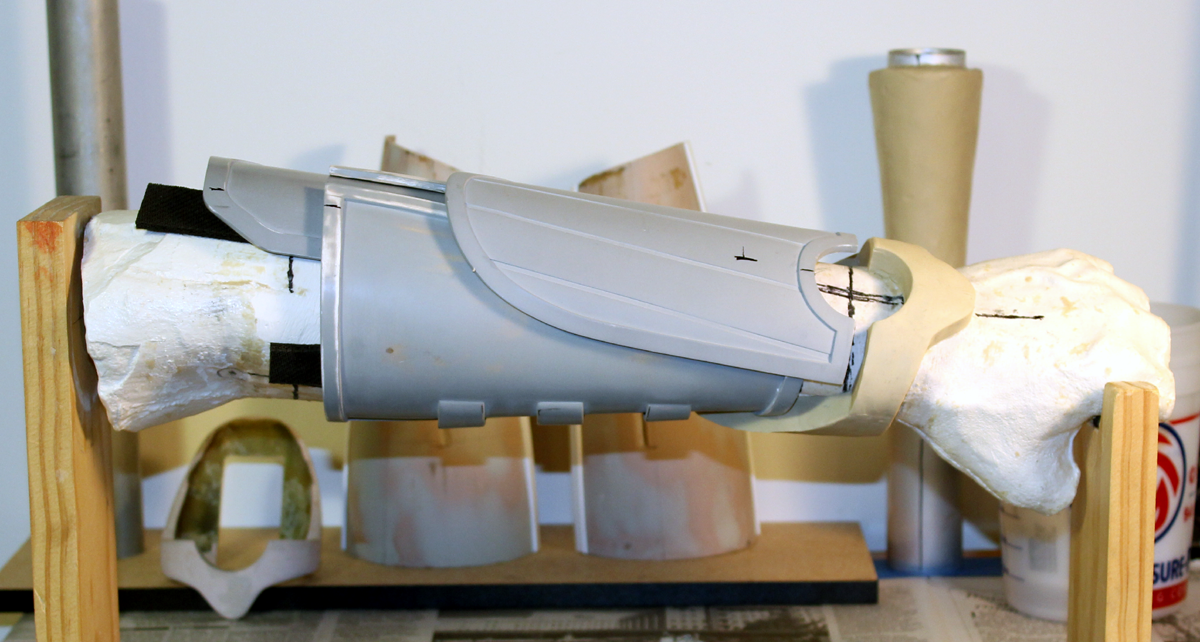
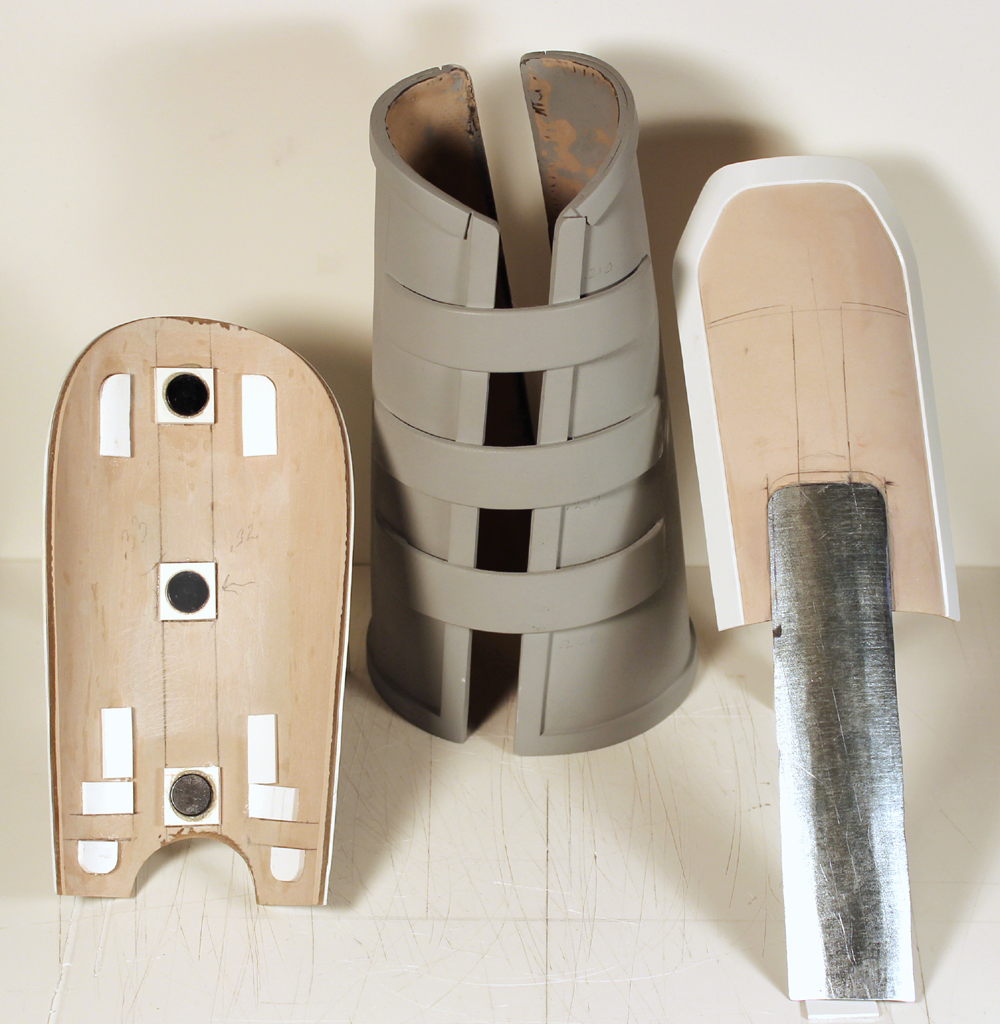
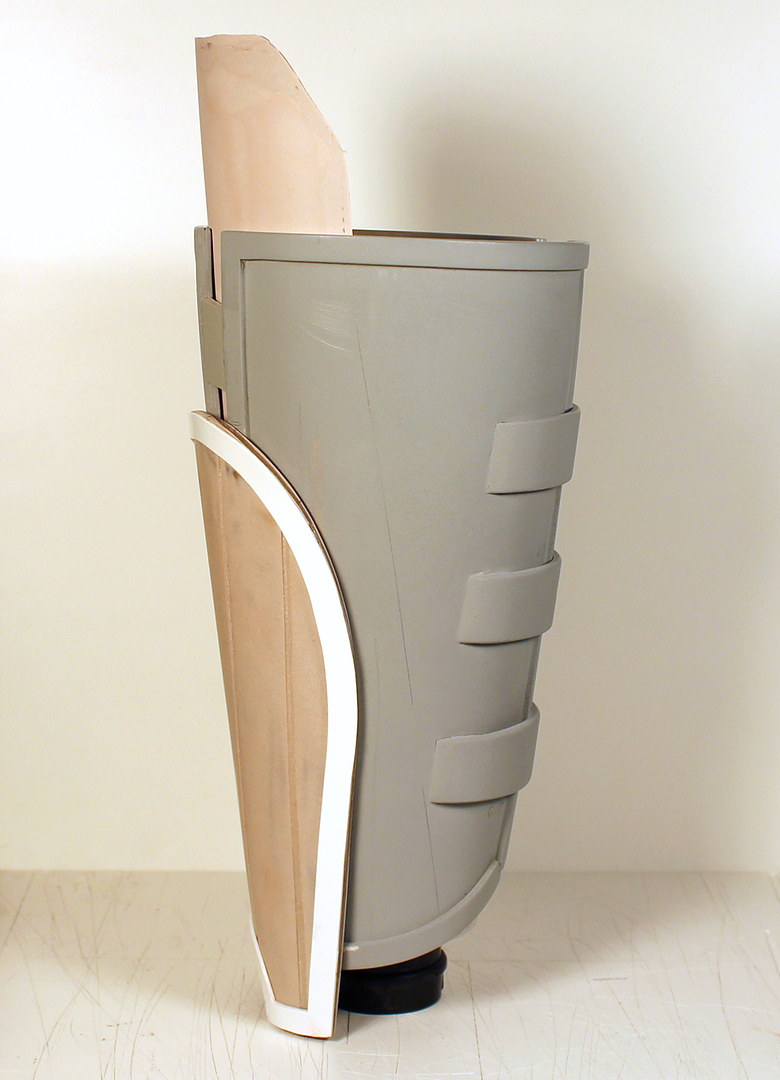
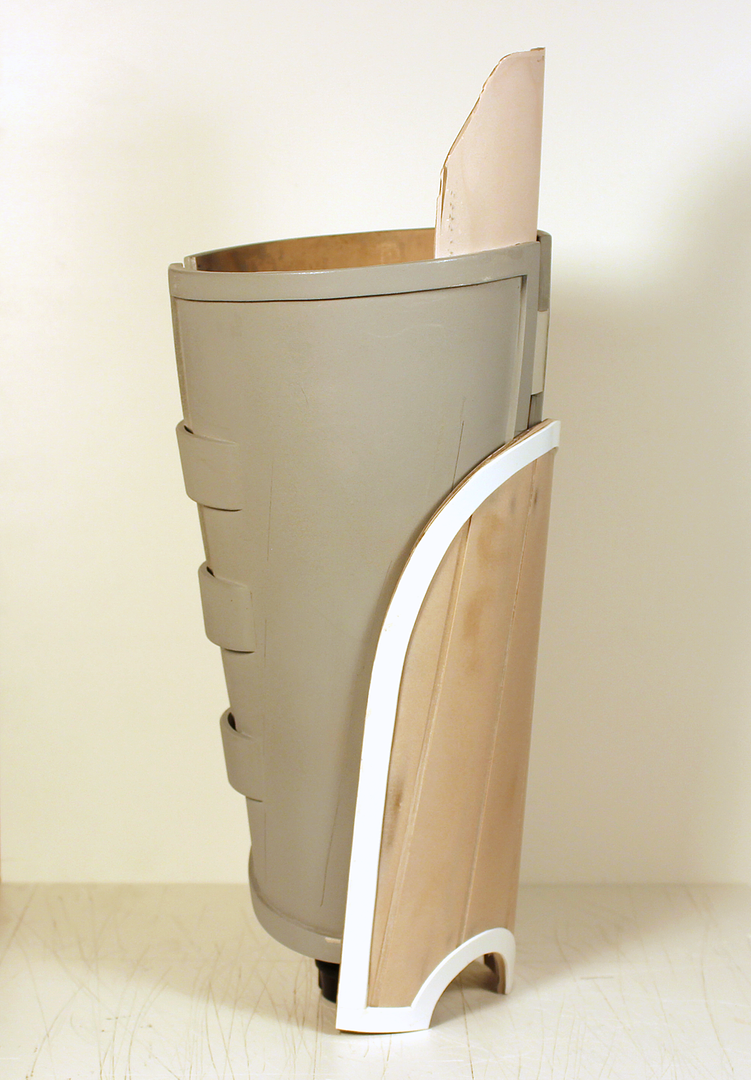
I added the edge trim to the elbow guard, and took a first cut at the gauntlet closure. I added alignment blocks to the rear of the forearm plate and a strip of galvanized steel to the elbow guard. The square spacers were milled out to hold the magnets. Unfortunately, I accidentally drilled through the center spacer and out the other side. The pix have a nice Photoshop patch over the hole, but I'll have to fill the real one with a fiberglass/bondo plug or else re-do the part. I'm kinda leaning toward the latter as it is rather thick and heavy with its 6-layers of glass. Four or five layers would have been good, and left a bit more flex in the part
The magnets are N52 pull-weight, which is on the better side of the more common N42s, but with just the two (the center one in the pix is fake) it didn't pull against the backing plate as well as I'd hoped. I may end up using 0.75" Dia. instead of 0.5" shown, and just ream out the slot a bit more. The forearm guard will cover the ream-age anyway. Also, the 0.25 thickness is a bit too much as well. I can get 0.20 without epoxy coating and try those.
The glue I used for the metal to plastic bond is LocTite Pro-Line Fast-Grab Premium 8X construction adhesive. Absolutely wicked bond. Gotta clamp it for a few hours though.
After the glue dried I just had to try the thing on. With the neoprene wrist seal under it, the assembly holds pretty tight, maybe too tight. Also it will have to hold 1cm higher on the forearm, and with the TFU1 Kota shirt on it resists any rotation. I'll have to keep the fabric light and the sleeves tight under the gauntlets.
Stay tuned.
~ Vonnor
-
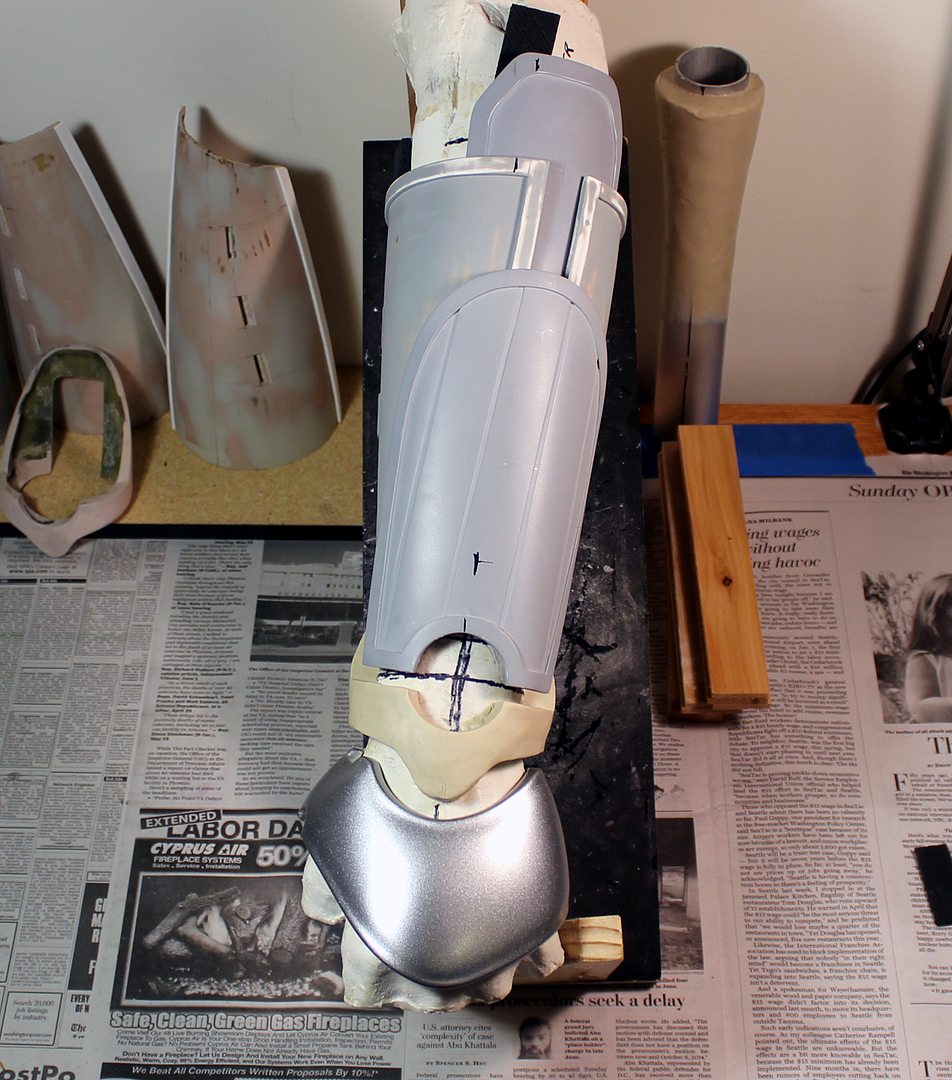
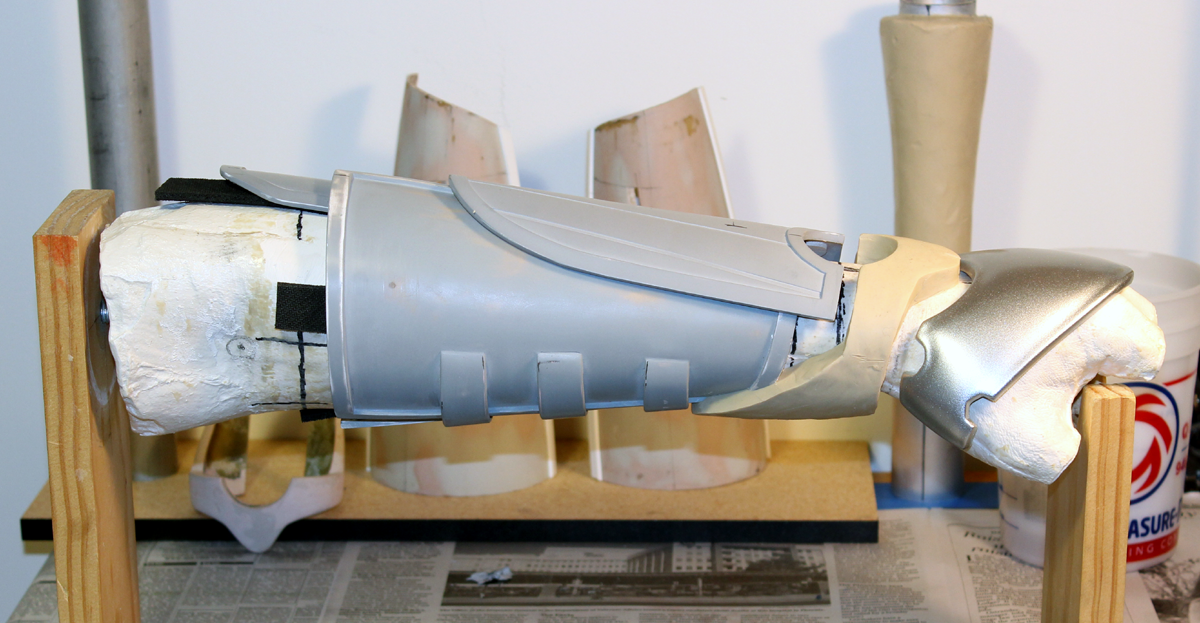
After much trial and error, with no trial and success, attempting to heat-form a Sintra elbow guard, I decided to go with what I know. Taking advantage of the dry mid-70s temps with no sun or wind, I built a 4-layer fiberglass elbow guard.
In the process I discovered an interesting thing. Before I laid in the cloth I was worried about releasing the production cast from the mold, so I sealed the hell out of the plaster, then used some auto paste wax on the mold and polished it up a bit. Not only did the casting release easily, the no-gelcoat back surface was dry as a bone with no tackiness. The wax in the mold reacted just like wax in the resin allowing it to fully cure. I added a couple layers of Bondo icing and sanded it down while in the mold to be sure of the surface curvature.
The contour came out perfect with very little gap . Still missing the edge trim at this point but wanted to test fit the assembly for scaling. The fiberglass material is going to work better for riveting to the galvanized steel plate in the magnetic closure system.
It's starting to look like something.
Come back soon.
~ Vonnor
-
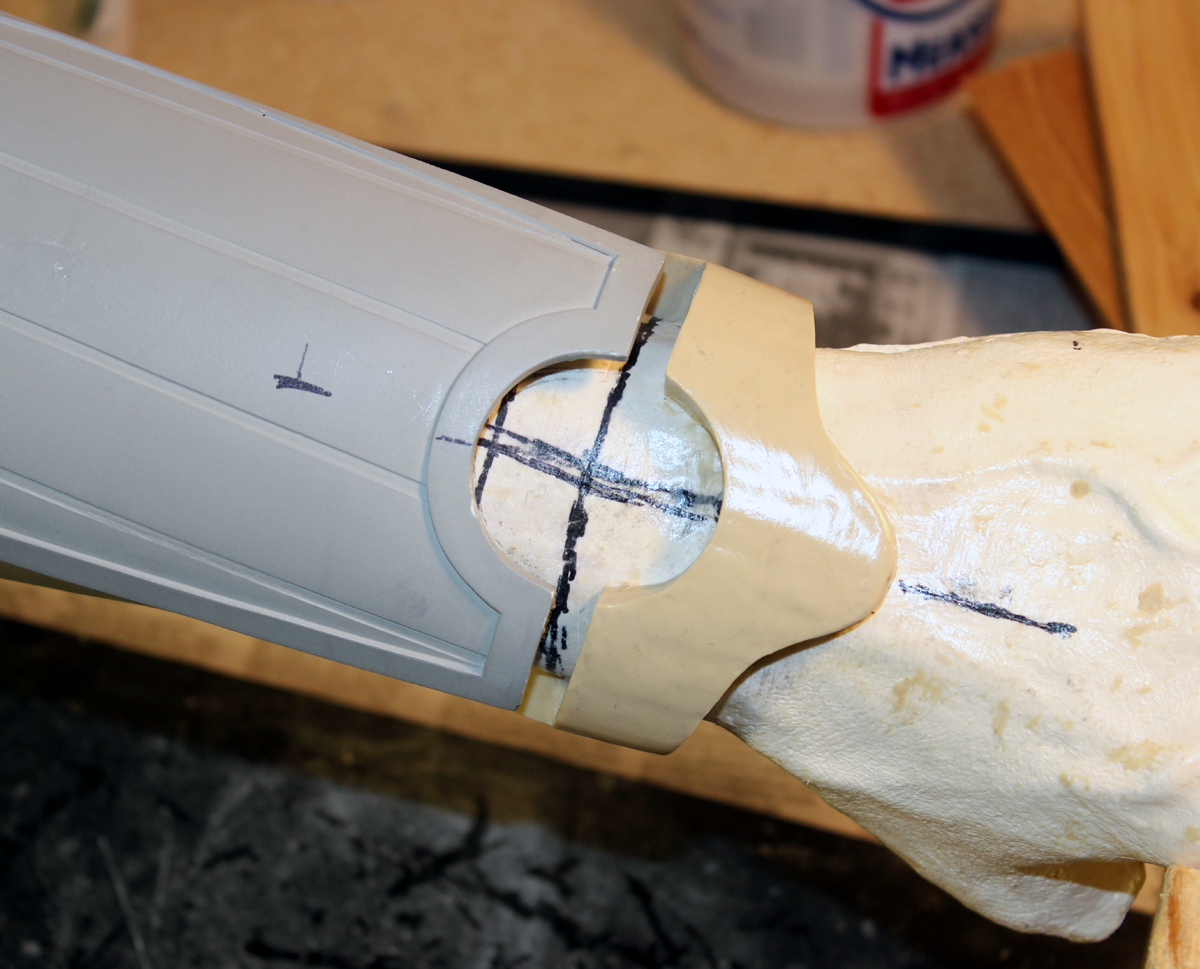
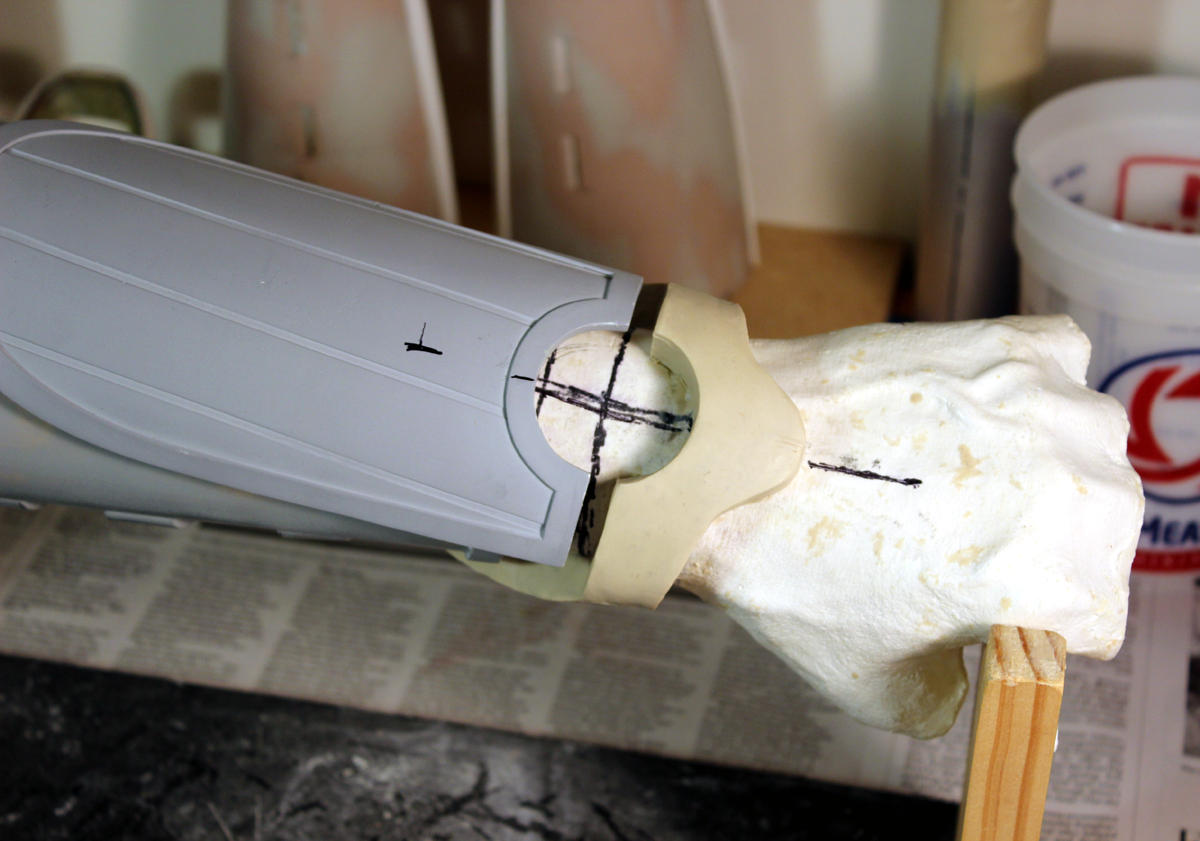
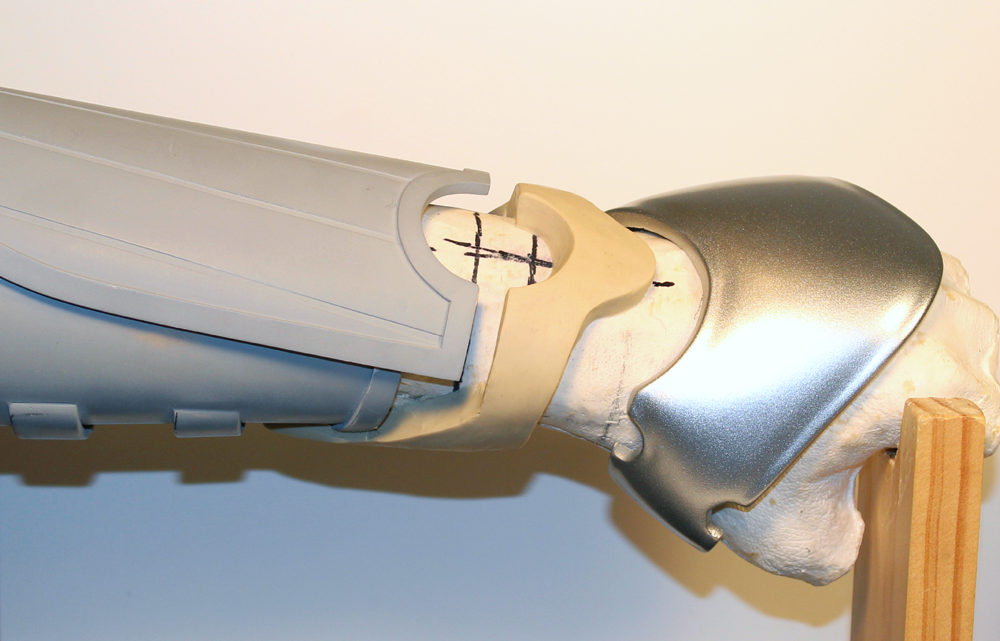
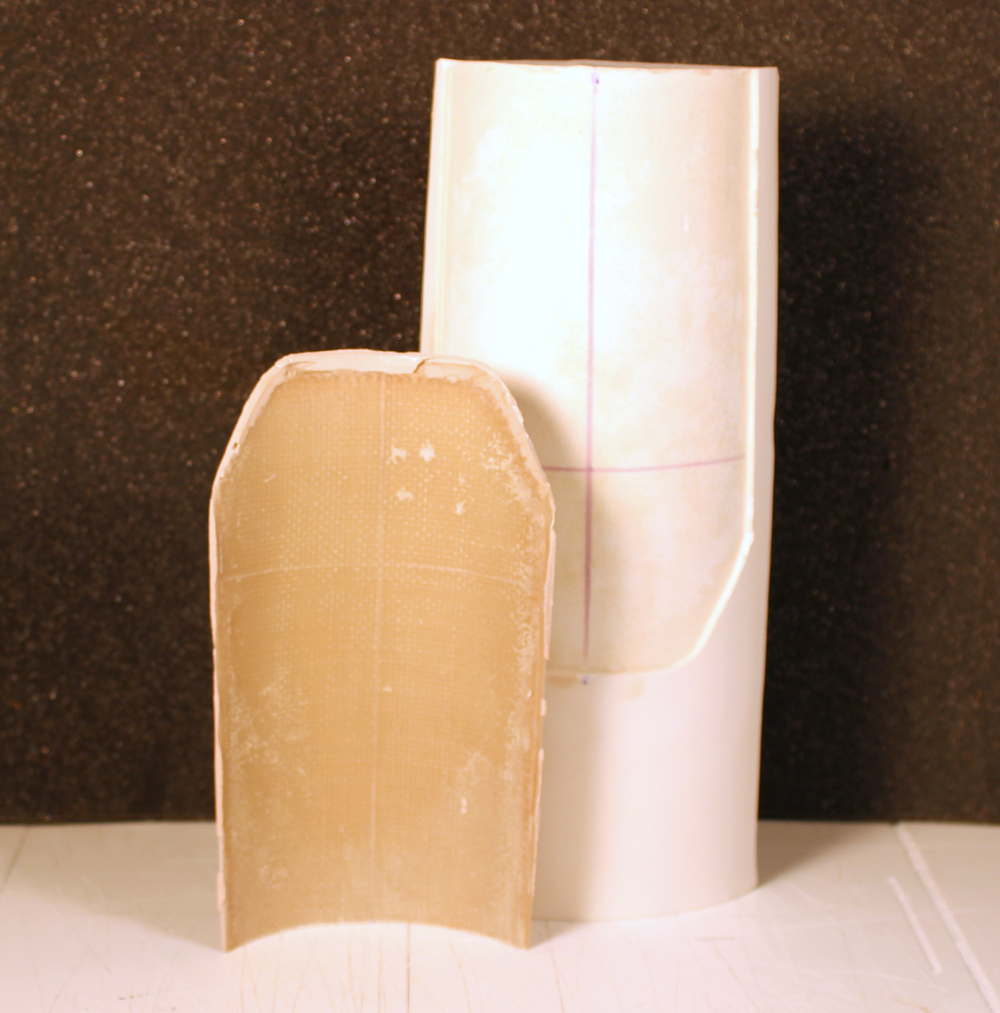
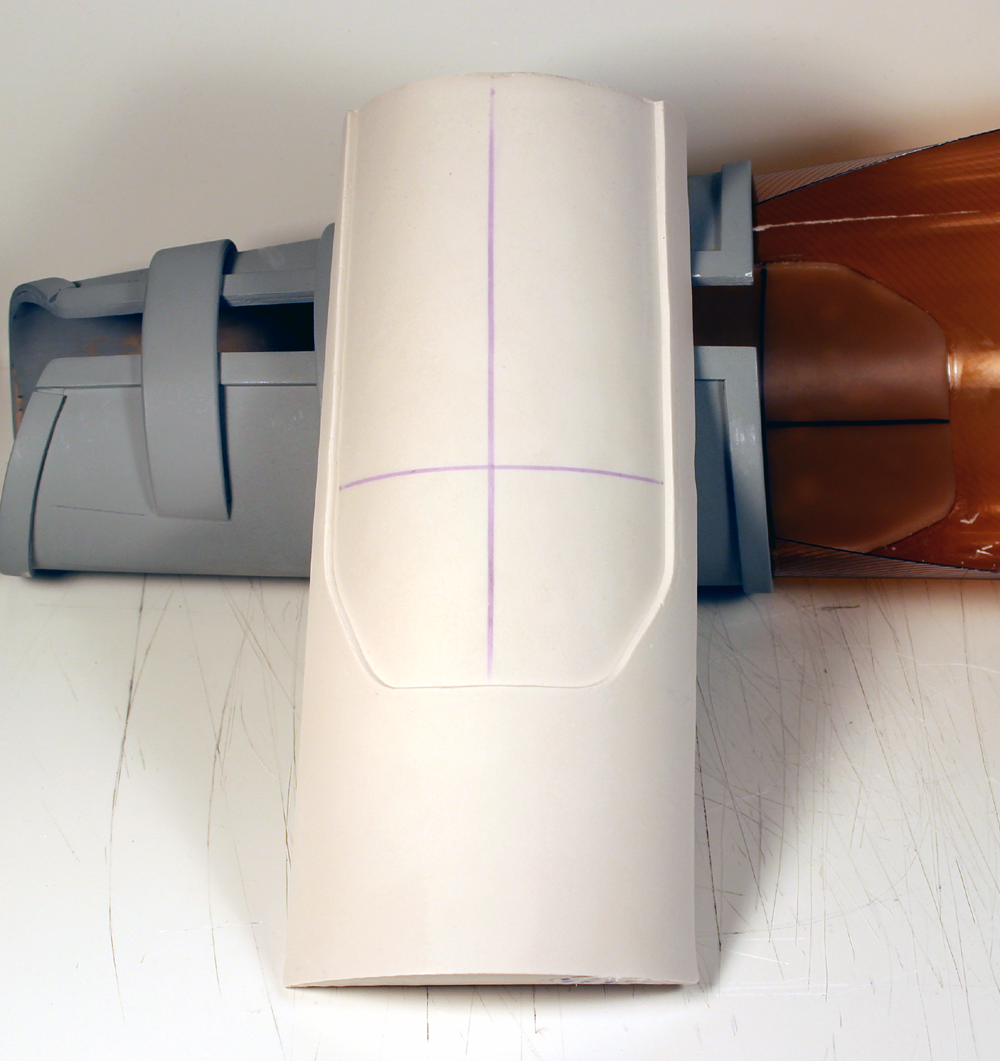
Masked it off at both ends.
Poured in Hydrocal.
Pulled out a mandrel.
The Sintra production elbow guard will be heat-formed to shape in that little depression. The cross-hairs transferred from the soft model are a free bonus.
~ Vonnor
-
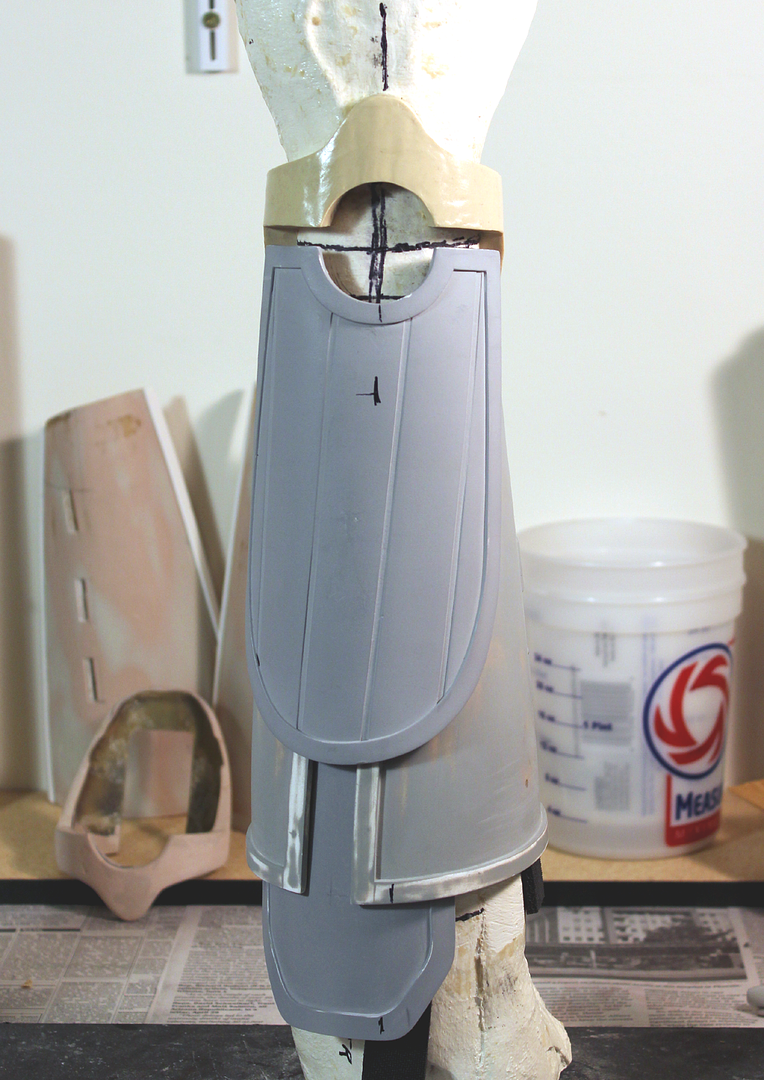
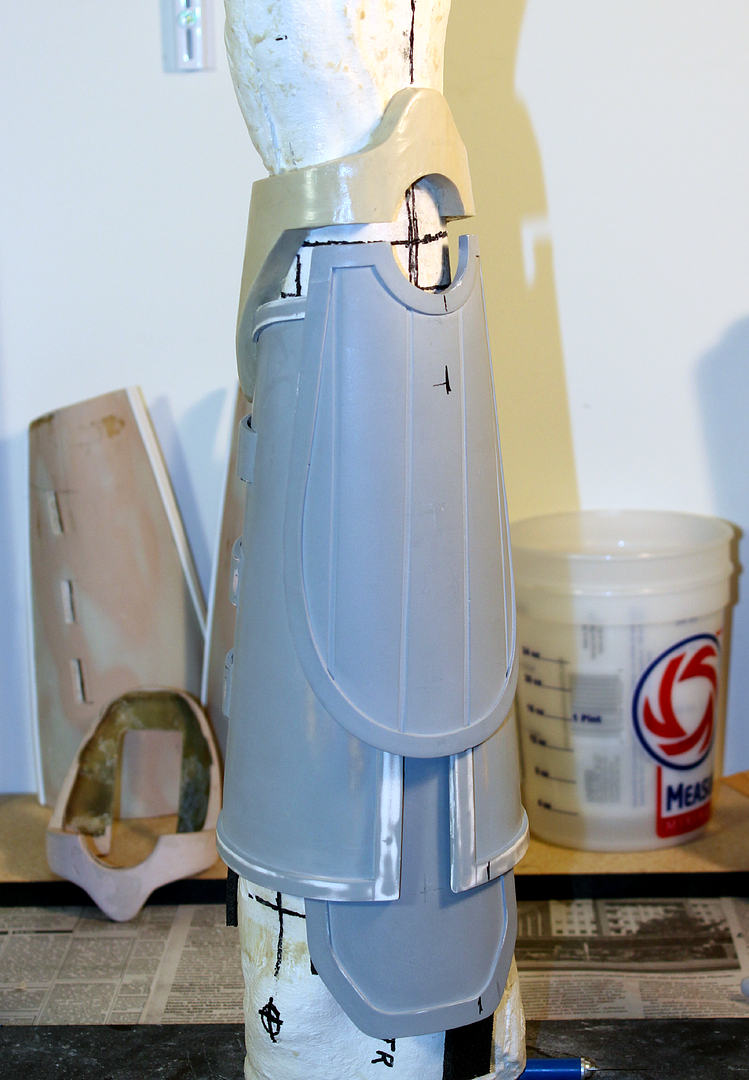
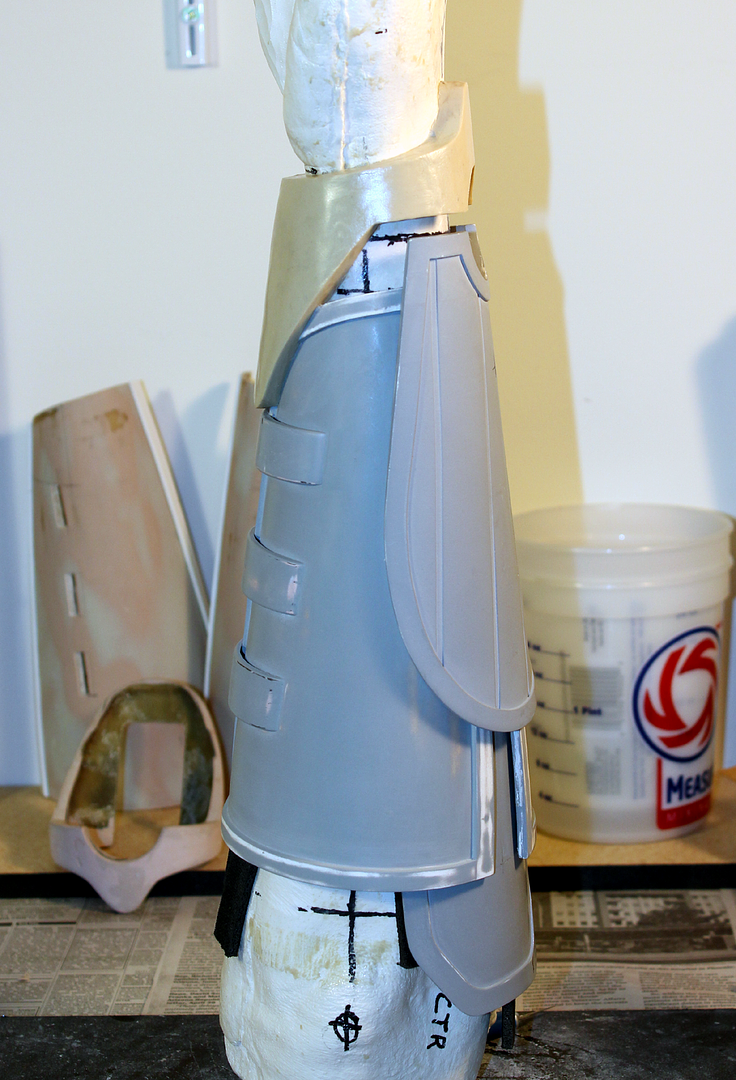
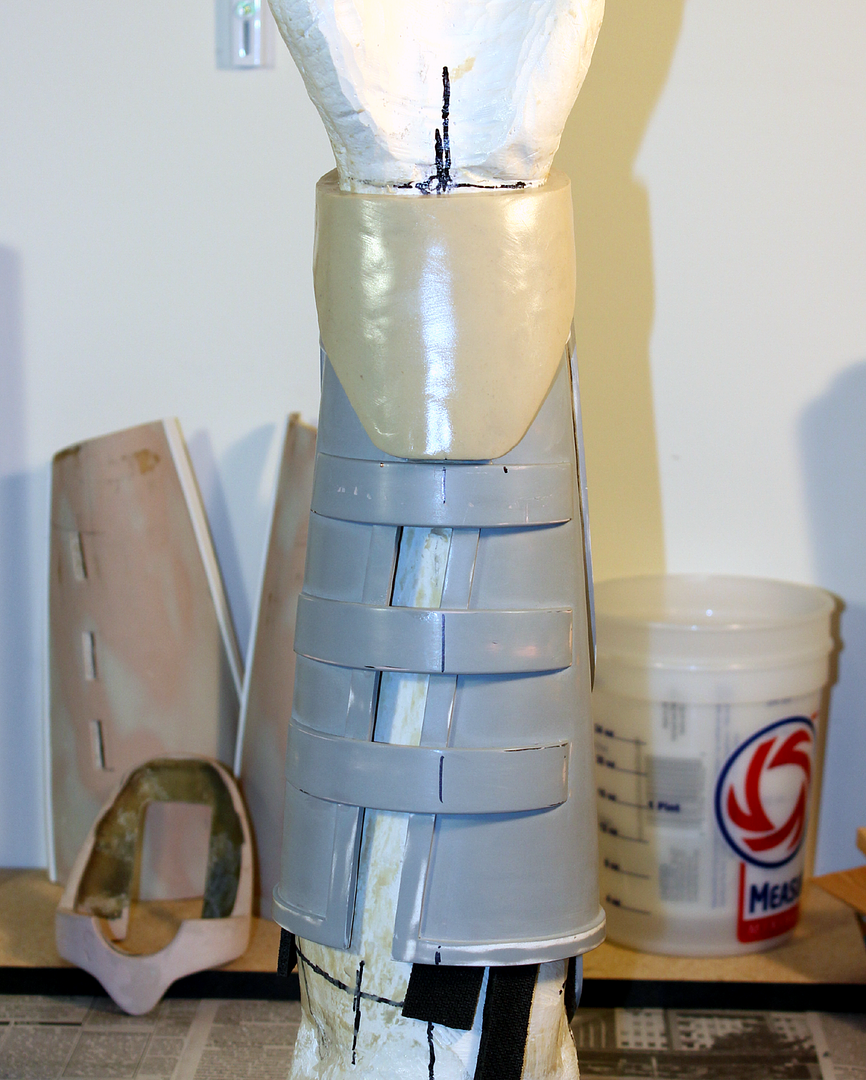
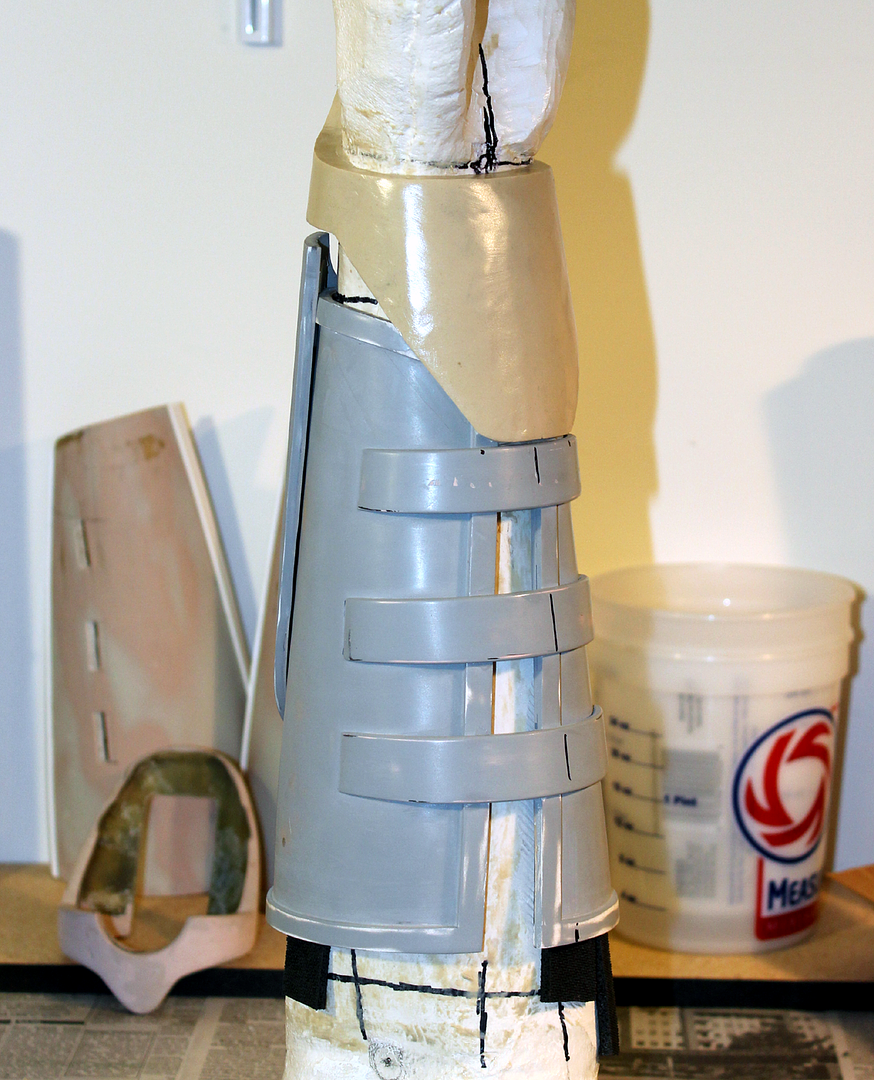
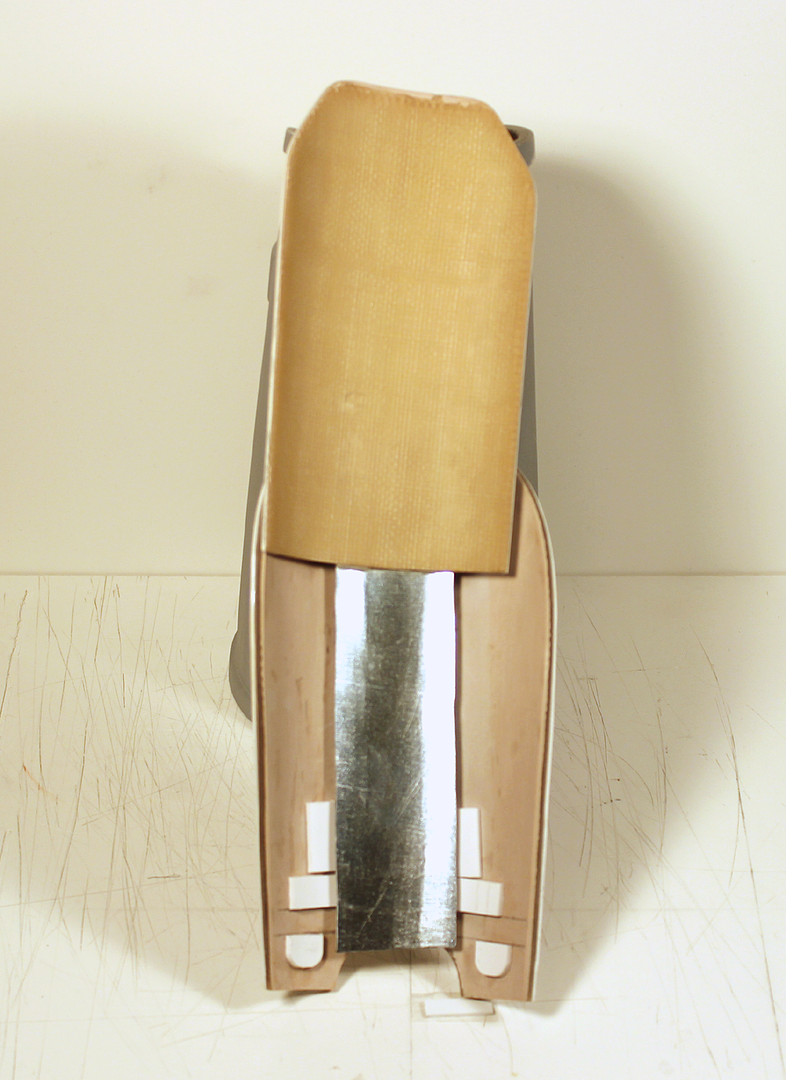
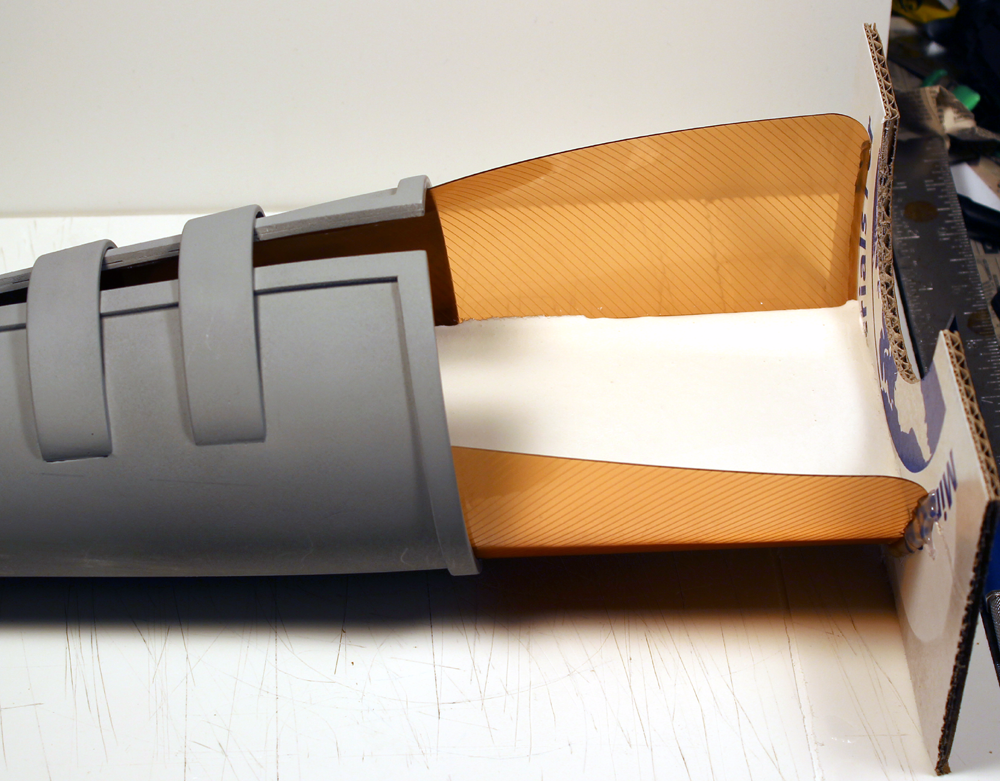
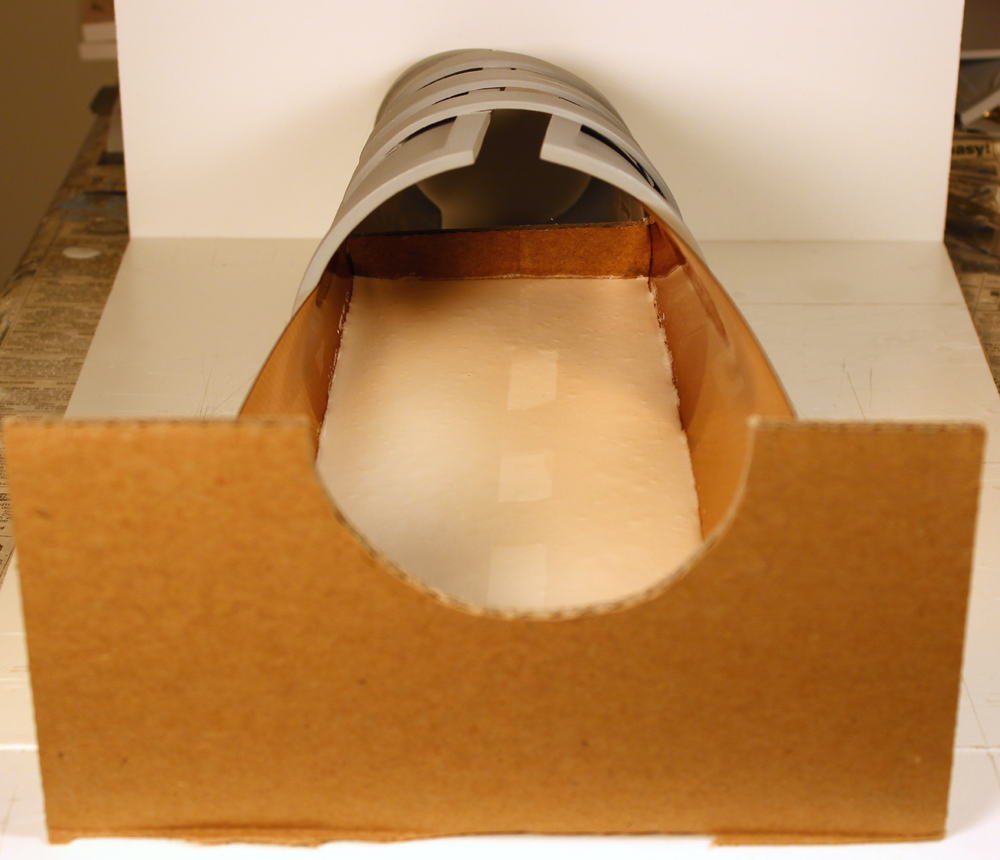
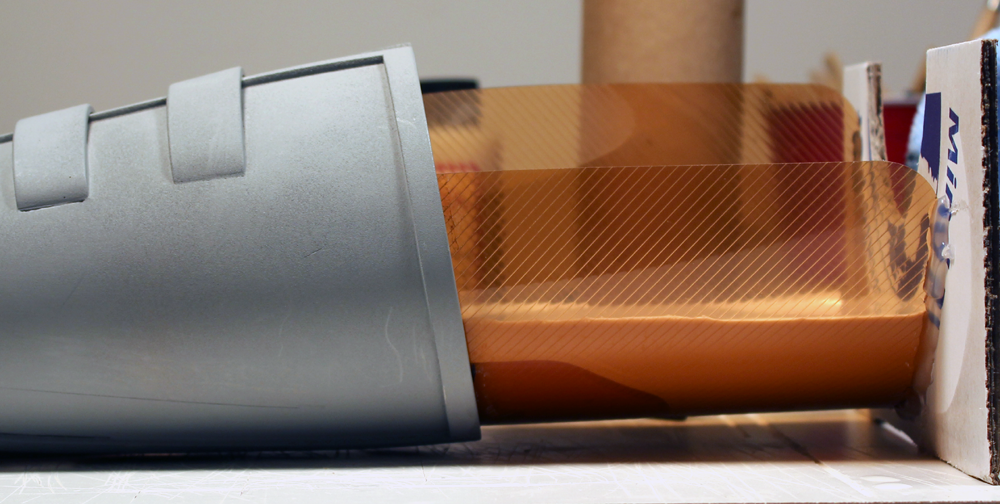
I cut a slightly oversize elbow guard from 2mm Sintra, then took a silicone rubber mold of it on the flat, then poured a urethane rubber model using ReoFlex-40 from Smooth-On. I used an old plastic sheet that I think was for covering a bowl in the microwave and tack-glued it inside the gauntlet assembly with a bit sticking out the elbow end. I wanted a semi-rigid form that would extend the conical curvature beyond the end. I lined up the rubber model and glued it to the plastic sheet, sealing the edges with superglue.
The plan is to mask off the elbow end inside the cone and pour a Hydrocal mold over the rubber elbow guard model. That will give me a smooth mandrel to use for heat-forming the Sintra elbow guard. This will ensure that the curvature exactly matches the inside of the gauntlet at the elbow end.
The top and side edges of the guard will have 1mm raised edging. The bottom (wrist end) edge will be riveted to a curved strip of galvanized steel, cut from a piece of duct-work. The steel strip will have two squares of Sintra spaced out and rivited. The forearm plate will have mating sintra squares spaced to the gaps in the steel strip assembly, each with a super magnet embedded in it, as well as raised keys that mate with the edging on the main assembly. The whole thing should snap into place like a row of teeth.
Stay tuned.
I told you the gauntlets were the hardest element of this costume.

~ Vonnor
-
oooo nice work
 as of these pieces how much closer are you to completing this?
TODO: (from memory)
Cast left elbow guard mandrel
Cut-form L elbow guard
Build left gauntlet closure
Sculpt symmetrical wrist clip
Mold wrist clip
Cast wrist-clip hard model
Back-fill / contour wrist-clip
Mold/cast production wrist-clips
Final interior shaping / fitting for left wrist-clip
Build right gauntlet (about 20 steps)
Lose 30lbs
Build ab plate mandrel
Cut / shape ab plate
Build ab plate closure
Build torso cast
Sculpt back plate
Mold / cast back plate hard model (production piece?)
Sculpt chect plate / scapula plate (2-pc? 1-pc?)
Build / mount back box
Build torso armor closure
Build shirt
Rebuild pants
Determine belt-straps mounting / placement
Build strap / loinpad / hippad mounting
Build shoulder bell mounting
Build kama
Paint armor
Weather
Grow hair
Of these, only the last one is a certainty.
Never build to a deadline, but always keep the end in sight.
~ Vonnor
EDIT: Forgot all the bandolier stuff, but you get the idea.
-
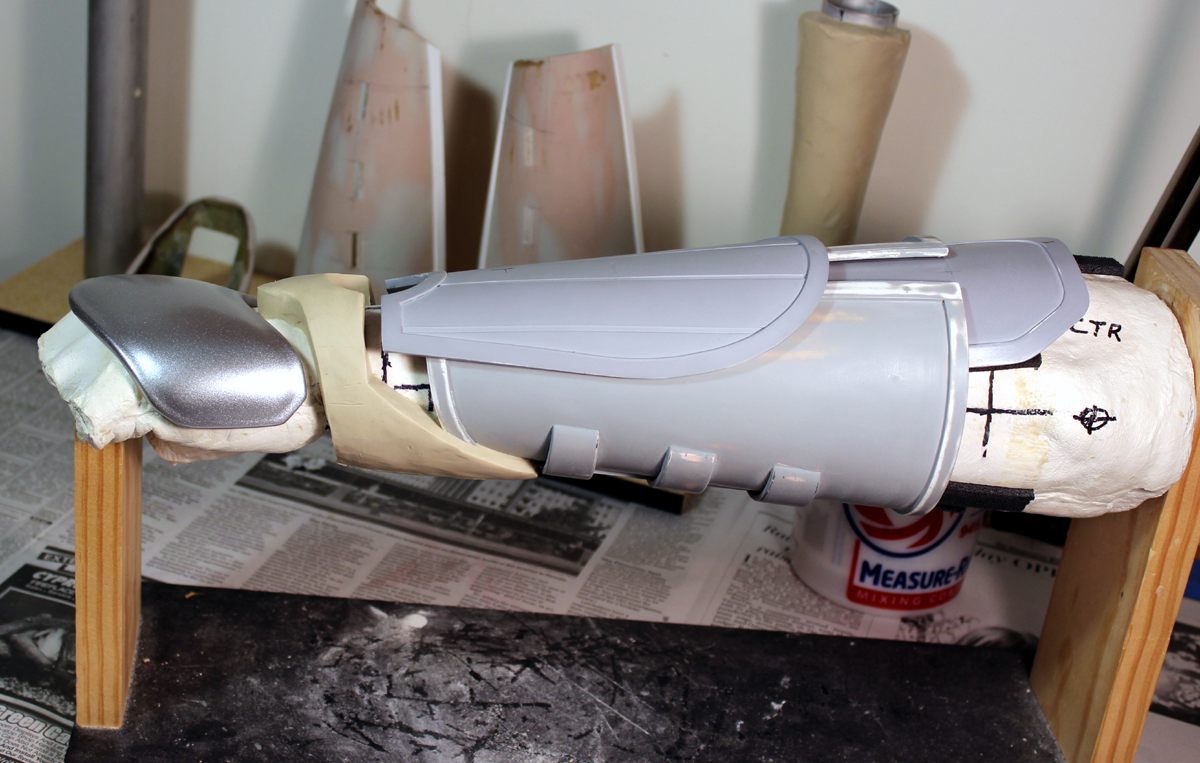
I shaved the edges of the forearm plate down to a decent representation of the CG model's contours and added the raised edging. Had some slightly worse than moderate errors in the edge trim (as in broke it clean through) but will fix it a bit with filler and disguise it with the paint and weathering. The last pic shows the angle cut at the elbow to allow nose scratching and sandwich eating.
I found a reasonable solution to the metallic silver rectangles on the glove fingers. After much trial and error I tried inking them with a silver autograph marker and sealing them with Angelus matte finish acrylic sealer. Without the sealer the ink smudges very easily, but sealed it holds to the deerskin a lot better.
I also got some little neo-D magnets in the mail today that will power the gauntlet closure system.
More to come.

~ Vonnor
-
Thank you, Maestro.
-
I'm counting the handguards as complete.
Just gotta add dirt.
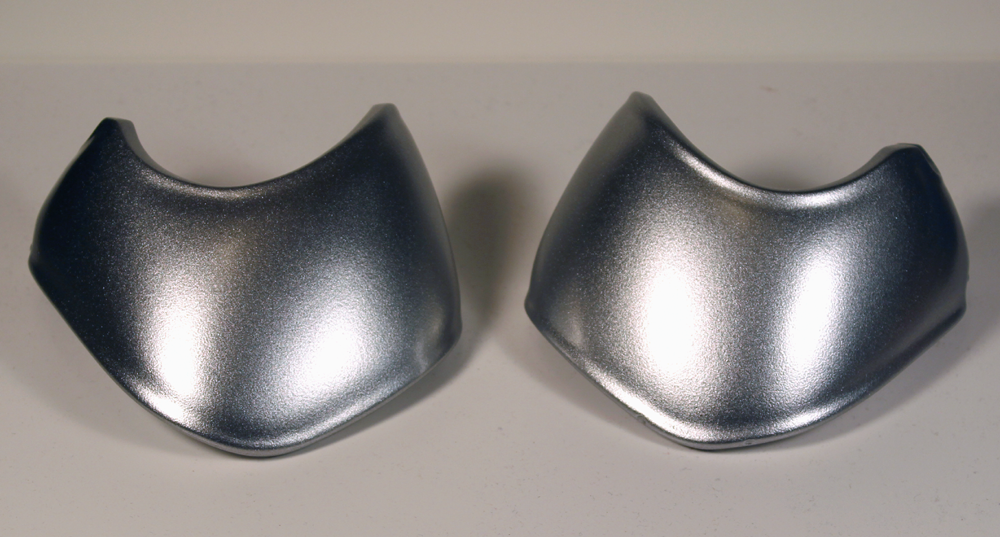
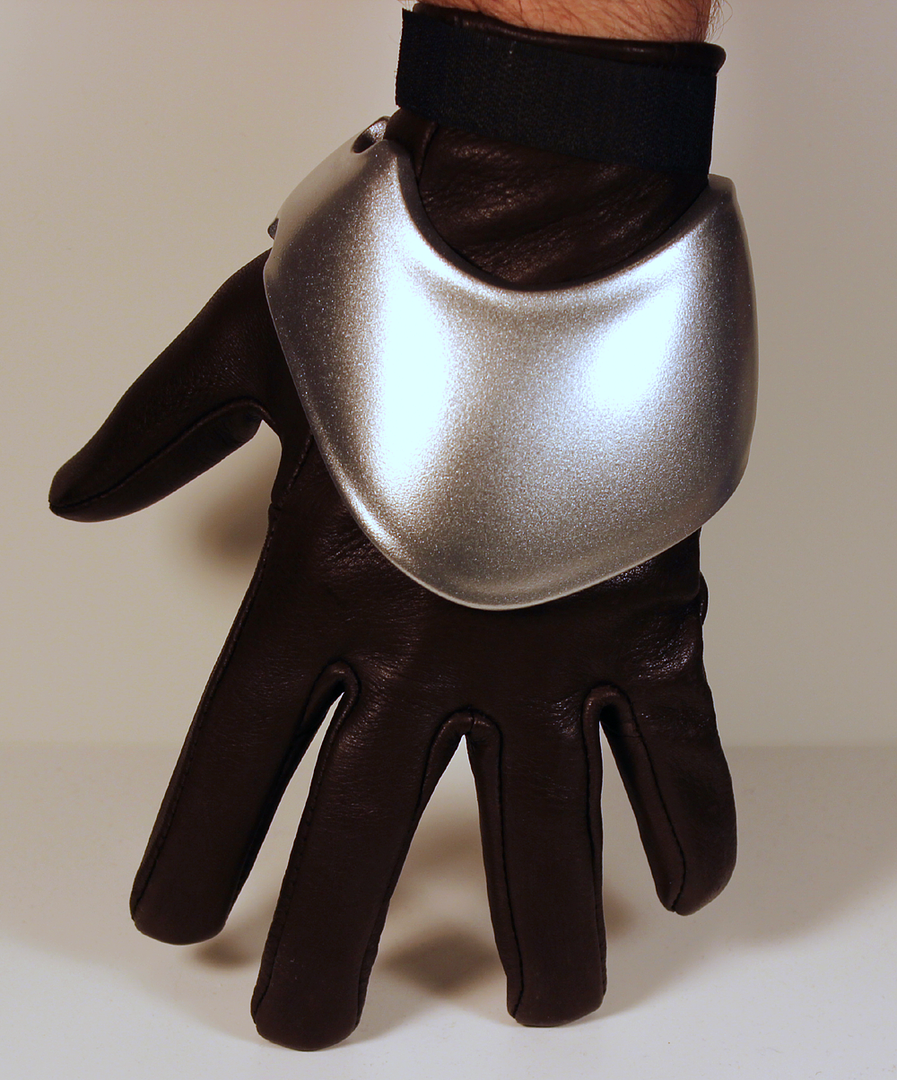
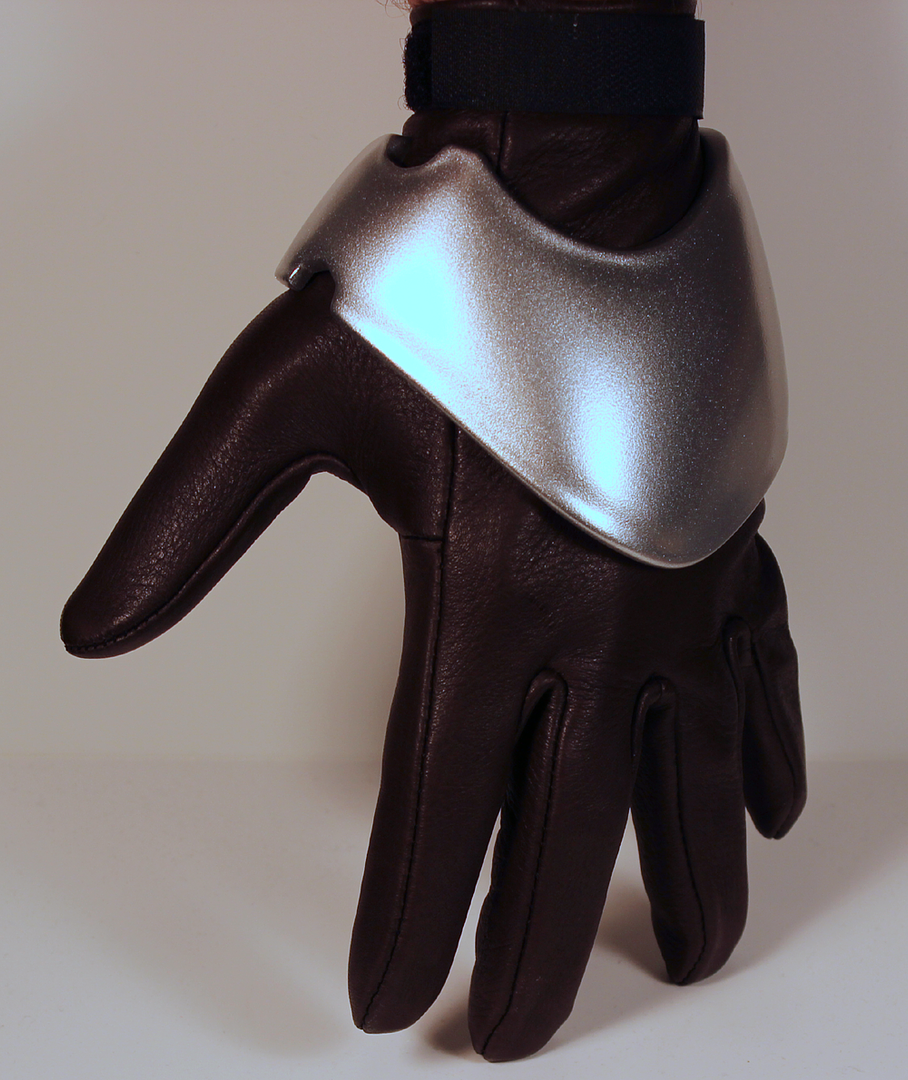
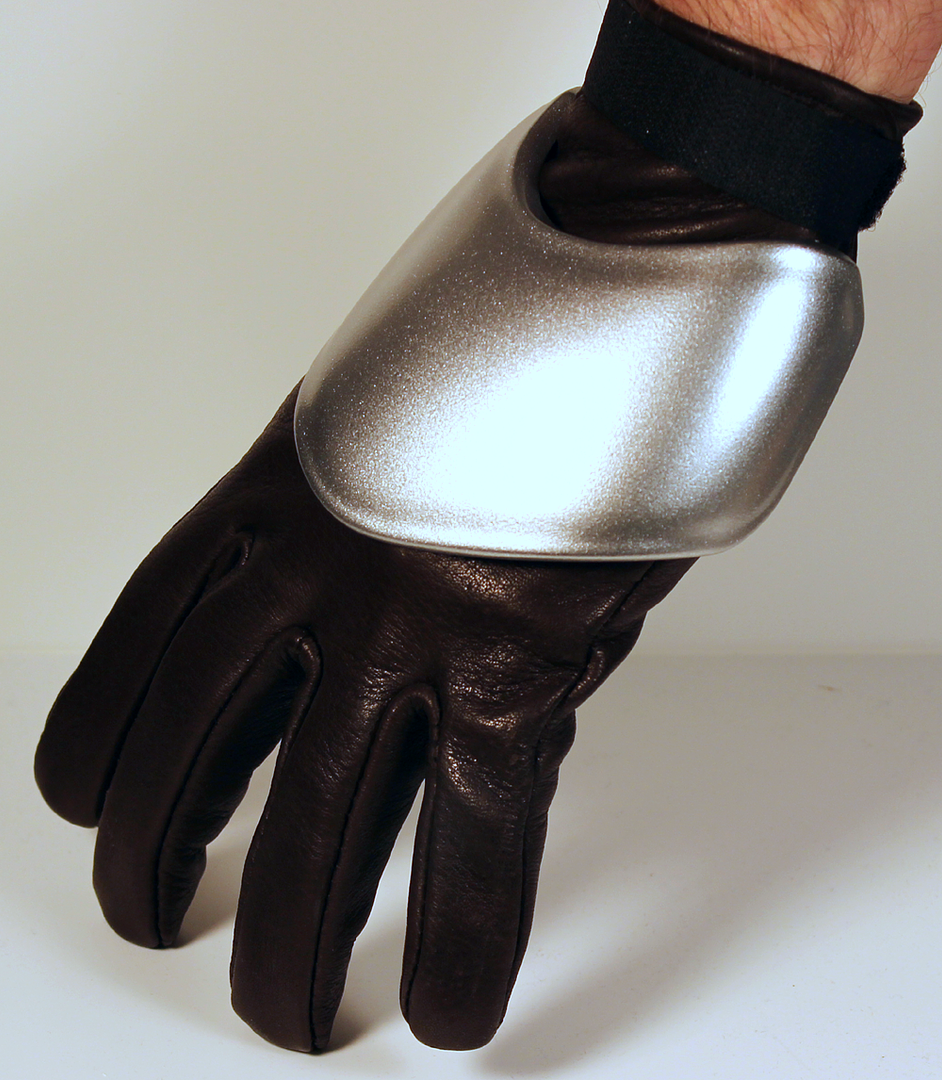
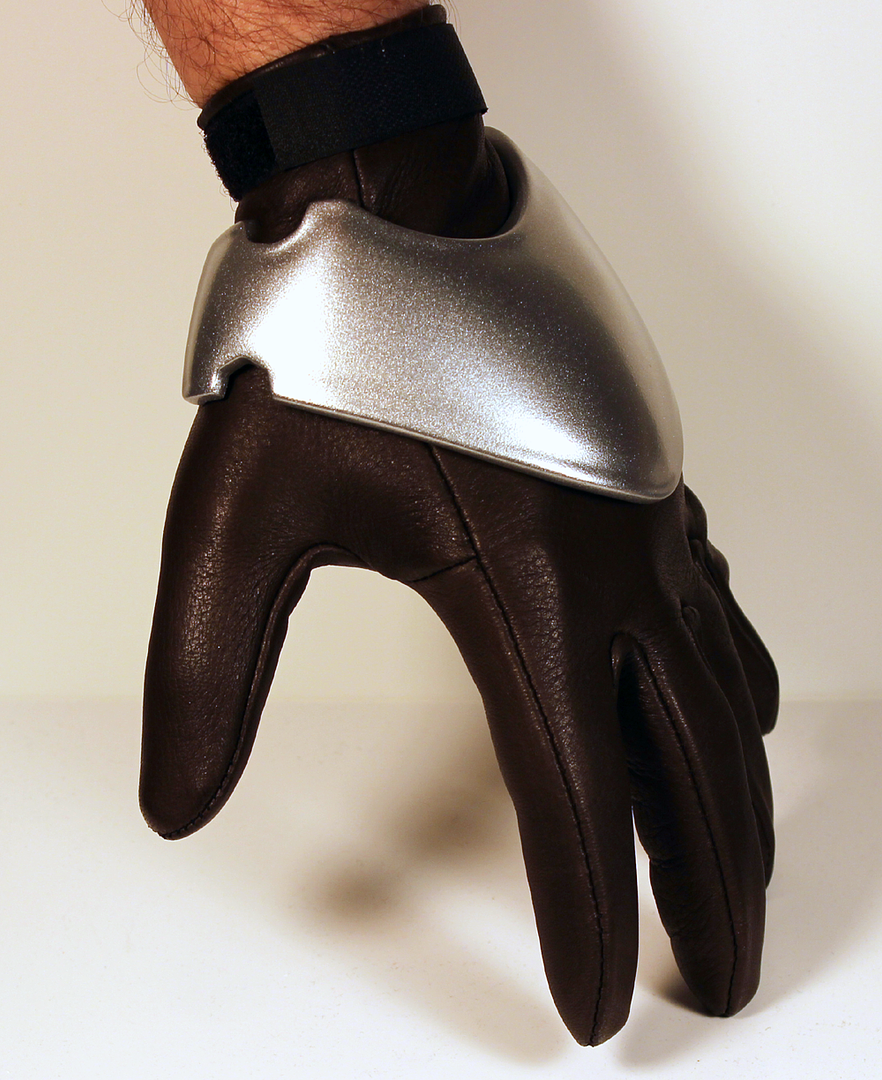
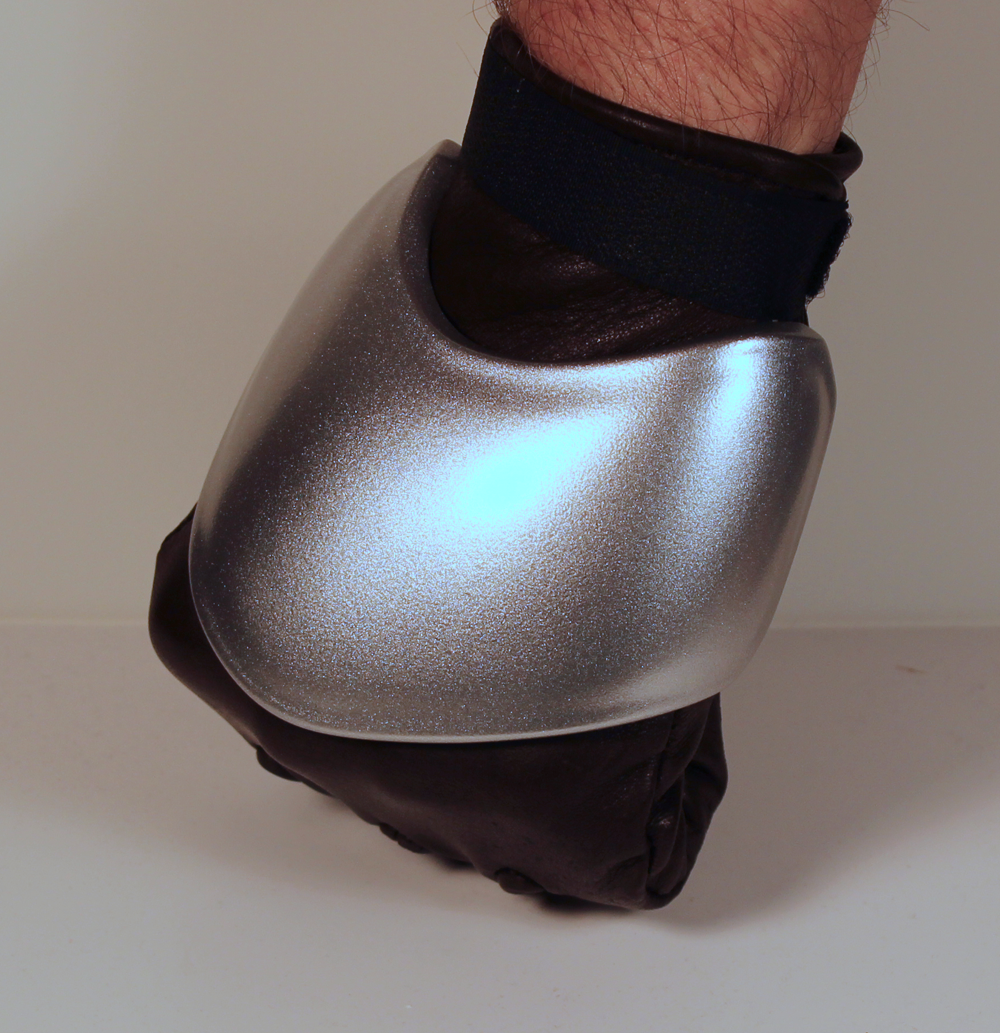
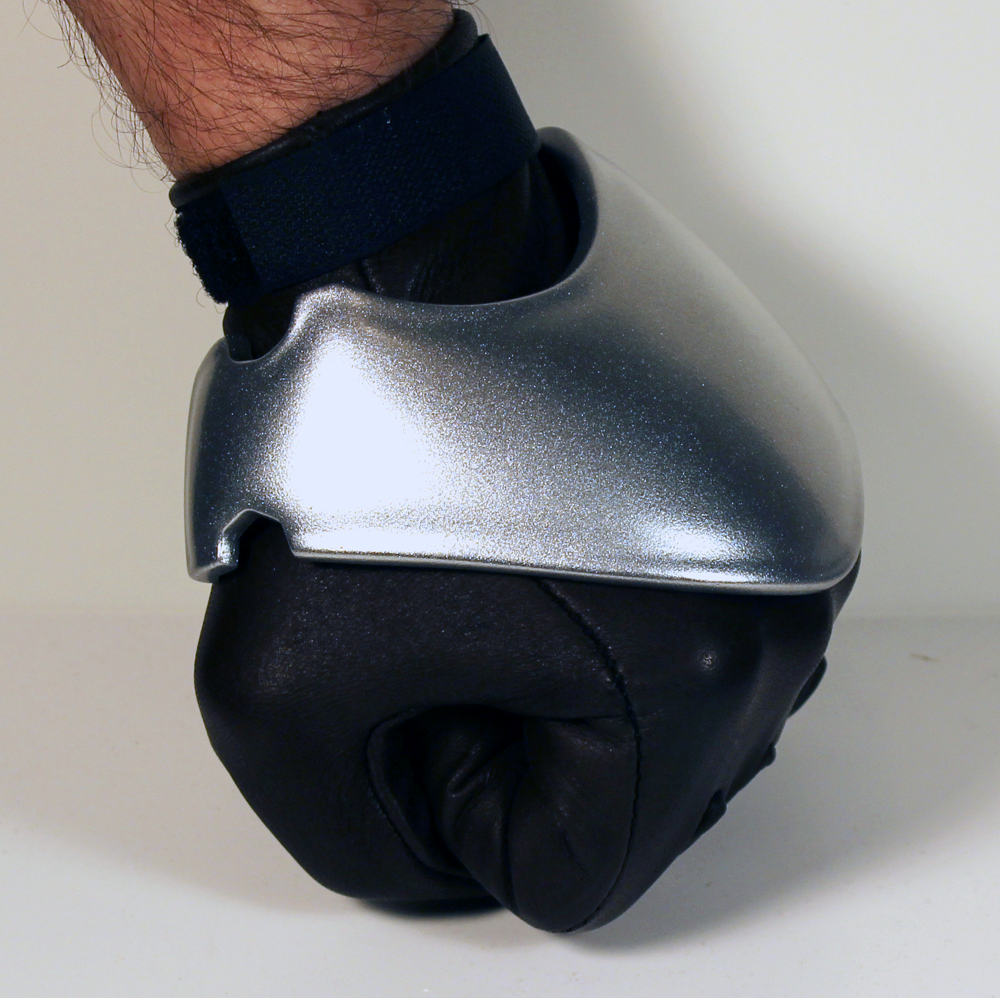
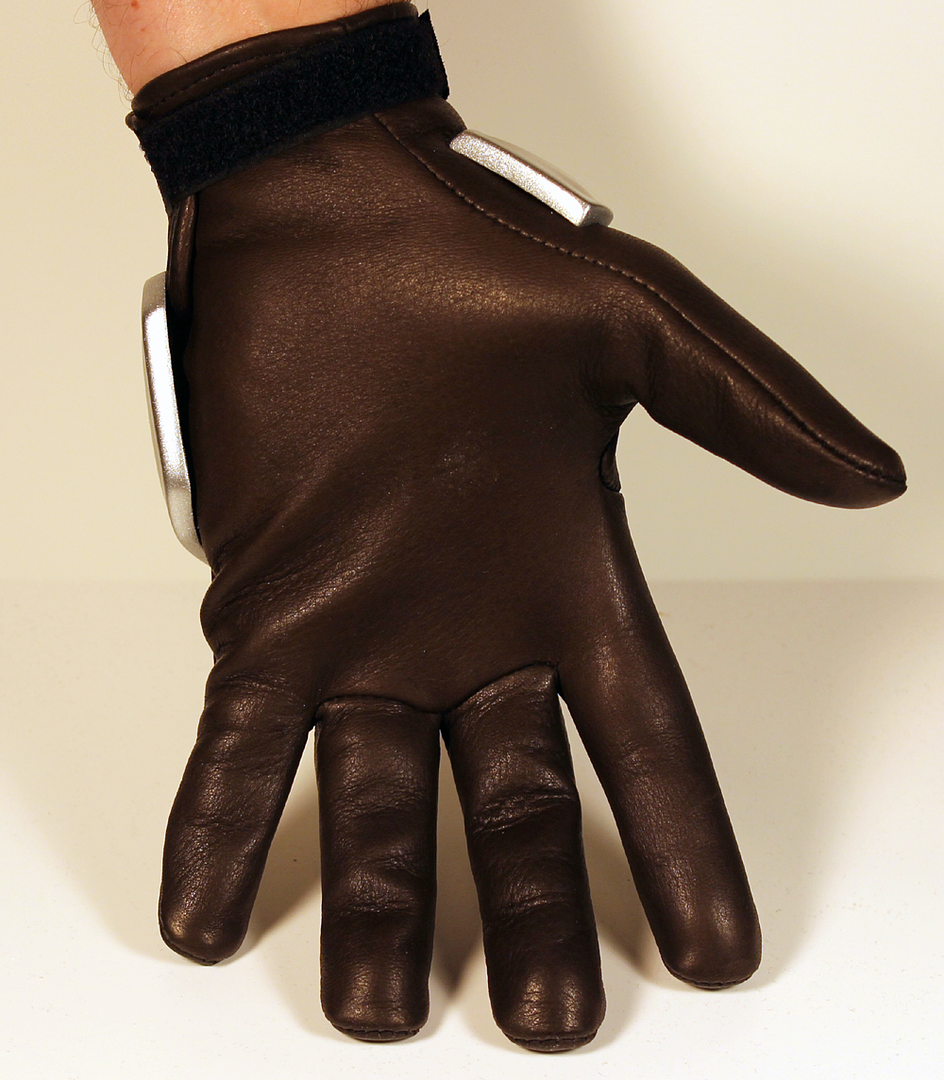
Really love the shinies.
~ Vonnor
Sculpting more Rahm Kota armor
in Sculpting
Posted
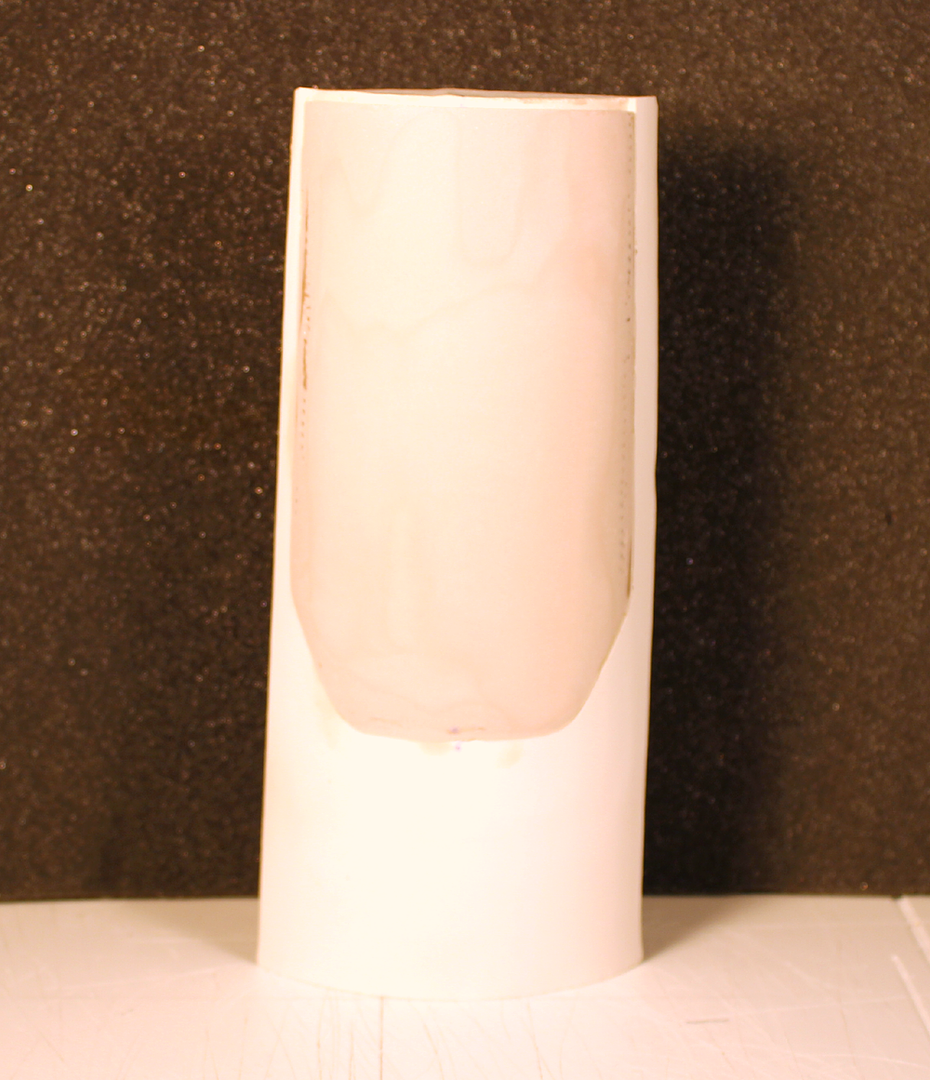
The mold came out very clean. Next will be layering in bondo gel-coat and fiberglass cloth strips to build the rigid model shell.


~ Vonnor