-
Announcement
Welcome to the forums!
If you are a newly-approved member, make sure you check out the New Member Checklist!
If you are a Detachment member and can't see the member-only area, post here for access.
-DV
-
Posts
43 -
Joined
-
Last visited
-
Days Won
1
Content Type
Profiles
Forums
Gallery
Events
Posts posted by Malt
-
-
Thanks a lot for the precision, I kind of bought this one in a rush to have the full set ready for the release

I'll make sure to modify or buy a proper one before applying for validation ^^
You may notice that I changed my hood, your "improvement" thread helped me a lot on this case, it was a bit tricky but sits better on shoulders and enclose the face !
Anyway I got a new camera thursday I should be able to lure my roomate into doing more detailled pictures of the full set !
-
Thanks for the advice ! I tried to use the same claps from the cloak and it seems okay for now (at least for personnal use before any validation ^^)
I understand your concern about the black bridge but i'm not sure how to fix it without completely redoing the top armor. (still possible with some time though :p)
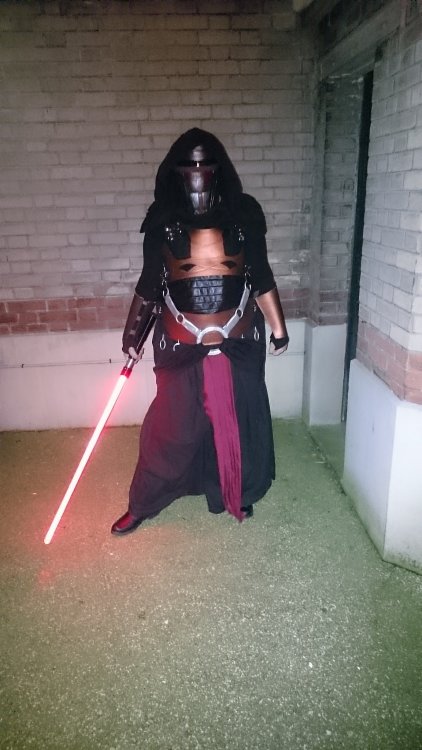
I finished the Oring belt and fabric attached to it and finally sewed the hood altogether (would have been the first piece I started and the last I finished ^^
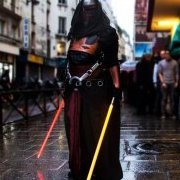
We took some pic outside (at night, and with a cell phone, not the best ^^).
http://ibb.co/d1LLUb
http://ibb.co/fEgc9b
http://ibb.co/f7jx9b
http://ibb.co/cJWNaG -
OK Quick and important question !
I'm working on the back armor and I'm trying to figure how to attach back and front together. I have 6 more mucles (same as the one that attach the cloak to the armor and I'm wondering if I can use the same system to attach the sides together ?
I've tried to glue them but it doesn't hold the pressure so I may have to use them externally or sex them with leather technic.
Any tips ? -
So here are some pic of my progress

At the moment, the cape is done,
Vambraces are done
Hakama is done
Boots are fitting nicely ^^
Big O RING is great but I need to finish the belt that attach it to the armor ^^
Top armor and belt armor are done (front and back) I just need to add a fixation system.
I'm rebuilding the ab armor cause I want more flexibility and then I'll do it a bit wider. I still need to figure out how to attach it to the leather armor, stay tuned
The mask has been delivered and it's wonderful The vision is a bit hard to handle at first but it's great to wear !
Hood is still in progress (can't believe this is what bother me the most xD) I'll try to finish it by this week end. -
Welcome !
We are several aspiring members building our Revan costume right now so it'll be nice to see how you manage it

Good luck !
-
Updating faster than the speed of light (because I'm not really sure where I'm going...)
Tonight I did one test vambrace and the belt with holes for the little rings. Not sure how I will attach them but it's a work in progress ^^
The vambrace hold with an elastic band glued and it holds nicely for the moment ^^
https://ibb.co/mfbRV6
https://ibb.co/jNfWxm
https://ibb.co/kJ09iR
https://ibb.co/gwRh3R -
Aaaand another question.
Is the shape of the armor mandatory ? I need to adjust it for my body shape and I'm wondering what could be approved/validated ? I'm not talking "boob armor" but curving the chest armor to be comfortable.
We don't have a clear side view of the chest and the MWA version is clearly male-designed so I'm a bit lost on the subject.
-
So I'm back with the first layer of paint on the ring, I chose a pewter color that I was adviced to pick since its darker than plain silver or chrome.
It will obviously be needing several layers but Im a bit concerned with the lines and holes that risk to be filled with paint and love their depth. Any advice in the matter ?
-
Yesterday we made with a friend the O-Ring from "pate à modeler auto durcissante" (Google translate says : "self hardening modeling clay") and it was a nice first try imo !
The ring is not too heavy and is the perfect size (we got lucky to find a plastic ring the exact size I wanted).
We also used to "plastic film and scotch" to create a 3d pattern of my chest (got to make room for these breast to not suffocate or deform your Armor
 )
)
I also made some tries of paint over leather (also new technic for me who usually practice the traditional colouring with dye)
I wanted to use a first layer of chrome then a layer of copper to make the weathering more effective (could do some rays with a metallic look) but it seems the painted acrylic doesn't hold well on sprayed acrylic.
I also did some "darker" copper tries to find the ring Colorado. I live this copper paint it's really shiny and metallic

Pics still on the drive but I also managed to upload some in imgbb

https://ibb.co/fZ2foR
https://ibb.co/dU2foR
https://ibb.co/kPT38R
https://ibb.co/dm838R
https://ibb.co/cykGTR -
https://drive.google.com/drive/folders/1Fj02hdtmweervFOLevfZZocHB35k8Rzu?usp=sharing
Pic on a google folder until I can properly upload them ^^ -
Hi folks !
This is my work on Darth Revan, the mighty Sith. I'm eager to work and a bit terrorised to fail so my life is full of emotions theses days
I started it on the 13th of November and plan on finishing it on the 13 of December for a special screening I want to attend with two friends (who will be also in costumes ^^)(so I created a google folder to stock the pictures cause my upload rate in absurdly low right now ^^ : https://drive.google.com/drive/folders/1Fj02hdtmweervFOLevfZZocHB35k8Rzu?usp=sharing )
I found a nice fabric in a big fabric market in Paris that seemed okay for the hood and I bought a bunch more to try and to the hakama because why spare a challenge when you can (barely) afford ?
I also baught some raw leather to make the armor, and thinner black armore for the middle part of the armor. I also find a nice pair of boots (kind of cheap)
First I started with the hood, because it seemed the easiest part.
Spoiler alert, it wasn't. I started with a prototype in another fabric to try and see how things went and how I should assemble the parts and it gave me this.
That looked okay so I decided to cut in the real fabric and managed to do something like this : (bonus cat)
The problem is that the pleat ar not really straight and the pleat don't cover nicely the one below, andthey aren't narrow enough for my liking.
Long thing short I'm gonna redo this as soon as possible.
I followed with the cloak and it was better, easier. I did a litlee bit of math to get sure I got enough fabric, pin it together, sew and it I like the look of it.
I took some pictures of the first Hood with the cloak and it seems fine for nw but I'll change the hood.
I follow with the hakama and followed this tutorial : http://thecosplaychronicles.blogspot.fr/2010/11/how-to-cosplay-making-hakama-simple-way.html
It wasn't so hard once I get used to make the pleat so I managed it quite okay
Now what's left ?
Armore (back and front) : in hard leather
Belt, in hard leather
O ring in wood ?
Gloves in thin leather or to buy
Arm protection in hard leather
Mask, probably to buy I really don't have the skill for this stuff
Anyway this is it for now, I'll keep you folks up to date as soon as I make progress !-
 1
1
-
-
Thanks a lot for the welcome, I've already located the Darth Revan part and will quickly settle in ^^
-
Hello folks

I'm Malt, 27yo coming right from France and wishing to join the 501st French Garrison !
My first ever cosplay was Starkiller in Jedi Ceremonial Dresses from The Force Unleashed (created for TFA realease !).https://ibb.co/jxL4tR
https://ibb.co/f7cTL6
https://ibb.co/j3pm7mI'm currently working on a Revan costume for a special screening of The Last Jedi (sooo, yeah 3 weeks remaining, no worries :D)
I'm not absolutely sure I'll go straight to validation (because, it seems a bit out of my reach and finances) but I'll try my best and hope some of you can help me on tricky bits =)
See you on the forums ^^


Making of Mother Talzin costume
in Mother Talzin
Posted
Great challenge I'm eager to see more !