
-
Announcement
Welcome to the forums!
If you are a newly-approved member, make sure you check out the New Member Checklist!
If you are a Detachment member and can't see the member-only area, post here for access.
-DV

TheMirroredUs
-
Posts
32 -
Joined
-
Last visited
-
Days Won
7
Content Type
Profiles
Forums
Gallery
Events
Posts posted by TheMirroredUs
-
-
Thank you Keith
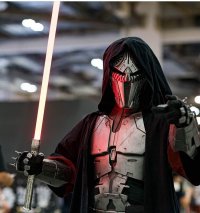
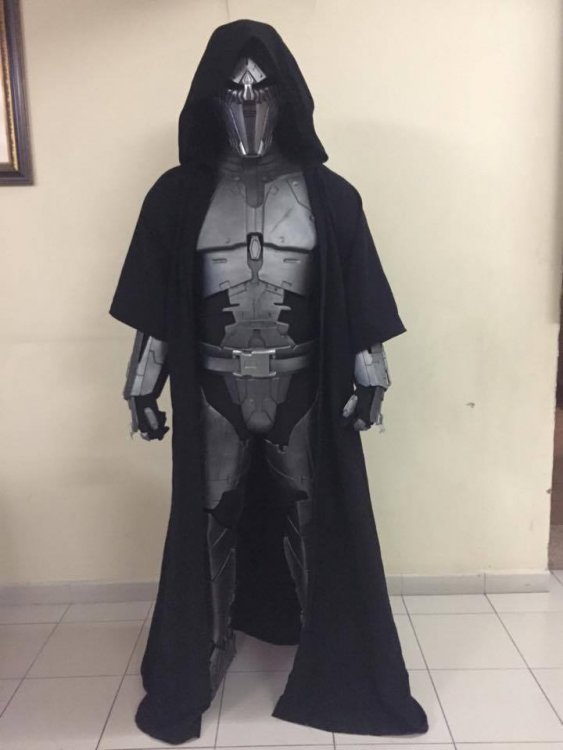
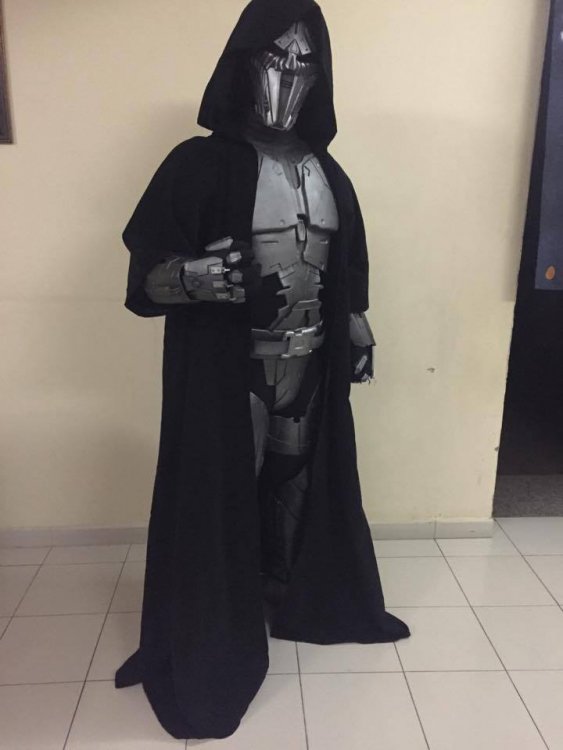
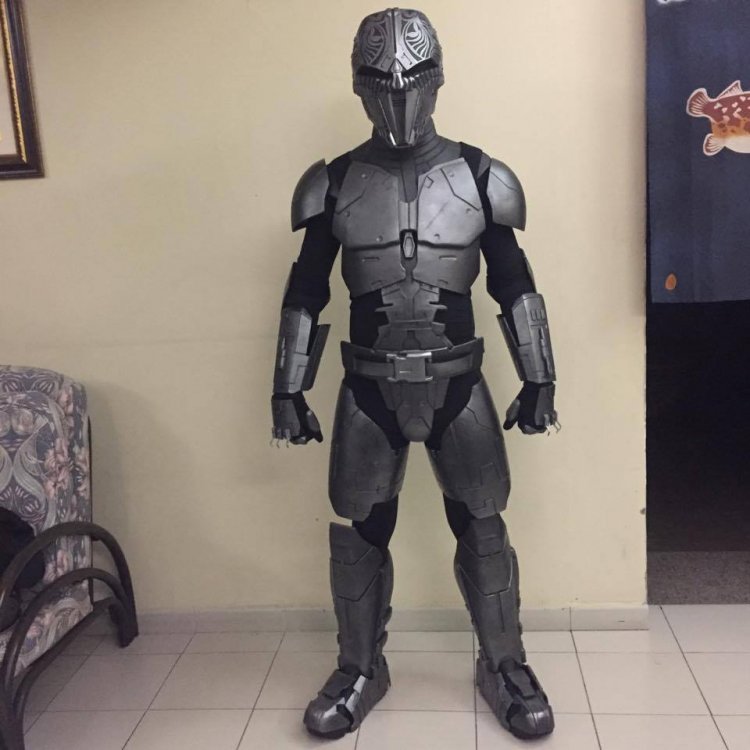
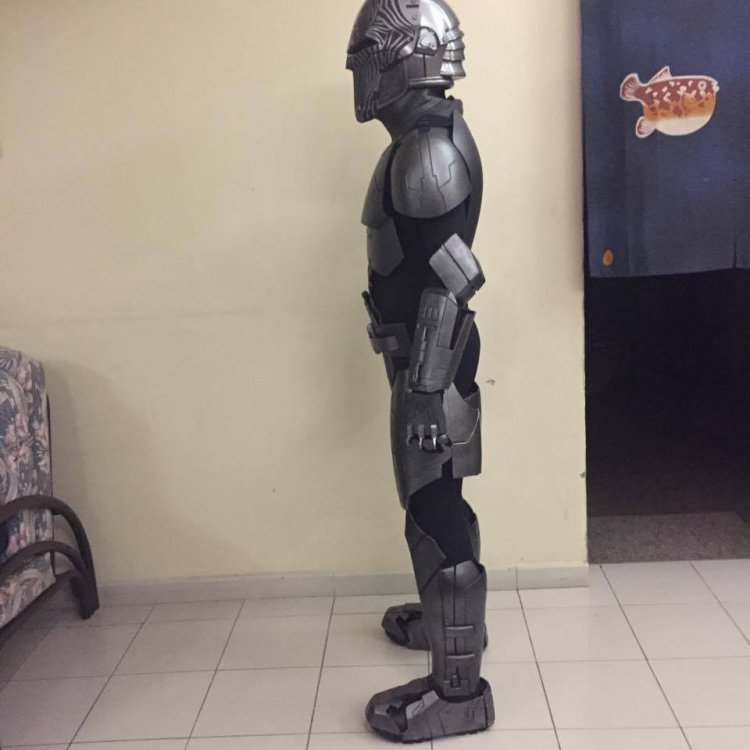
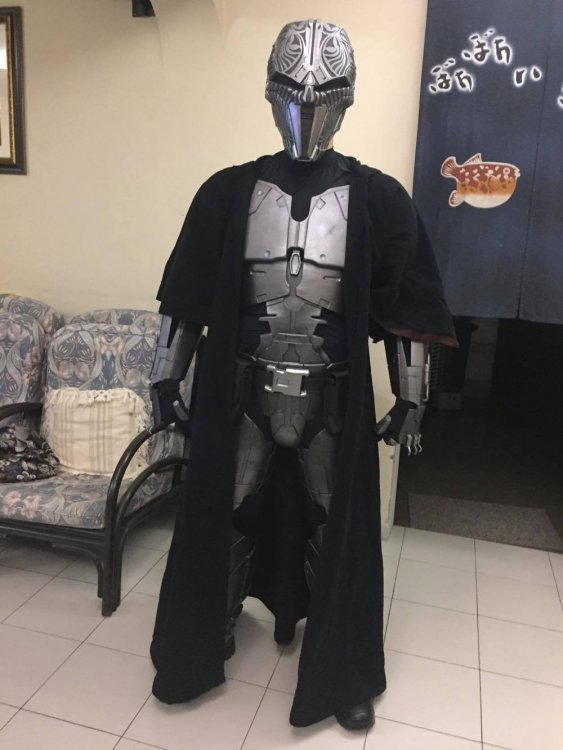
I have finally been approved SL 71428
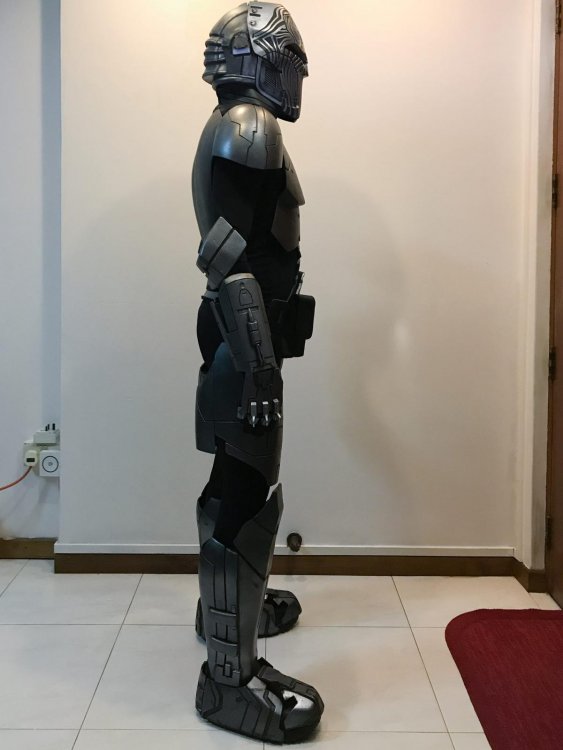
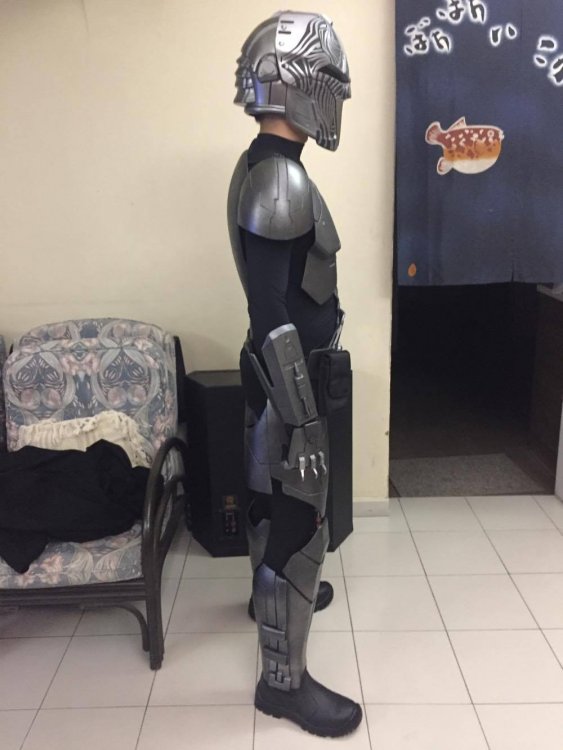
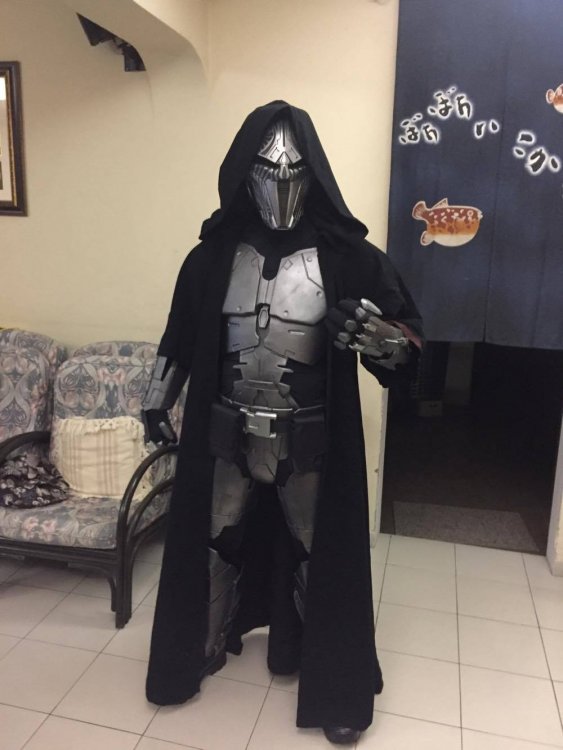
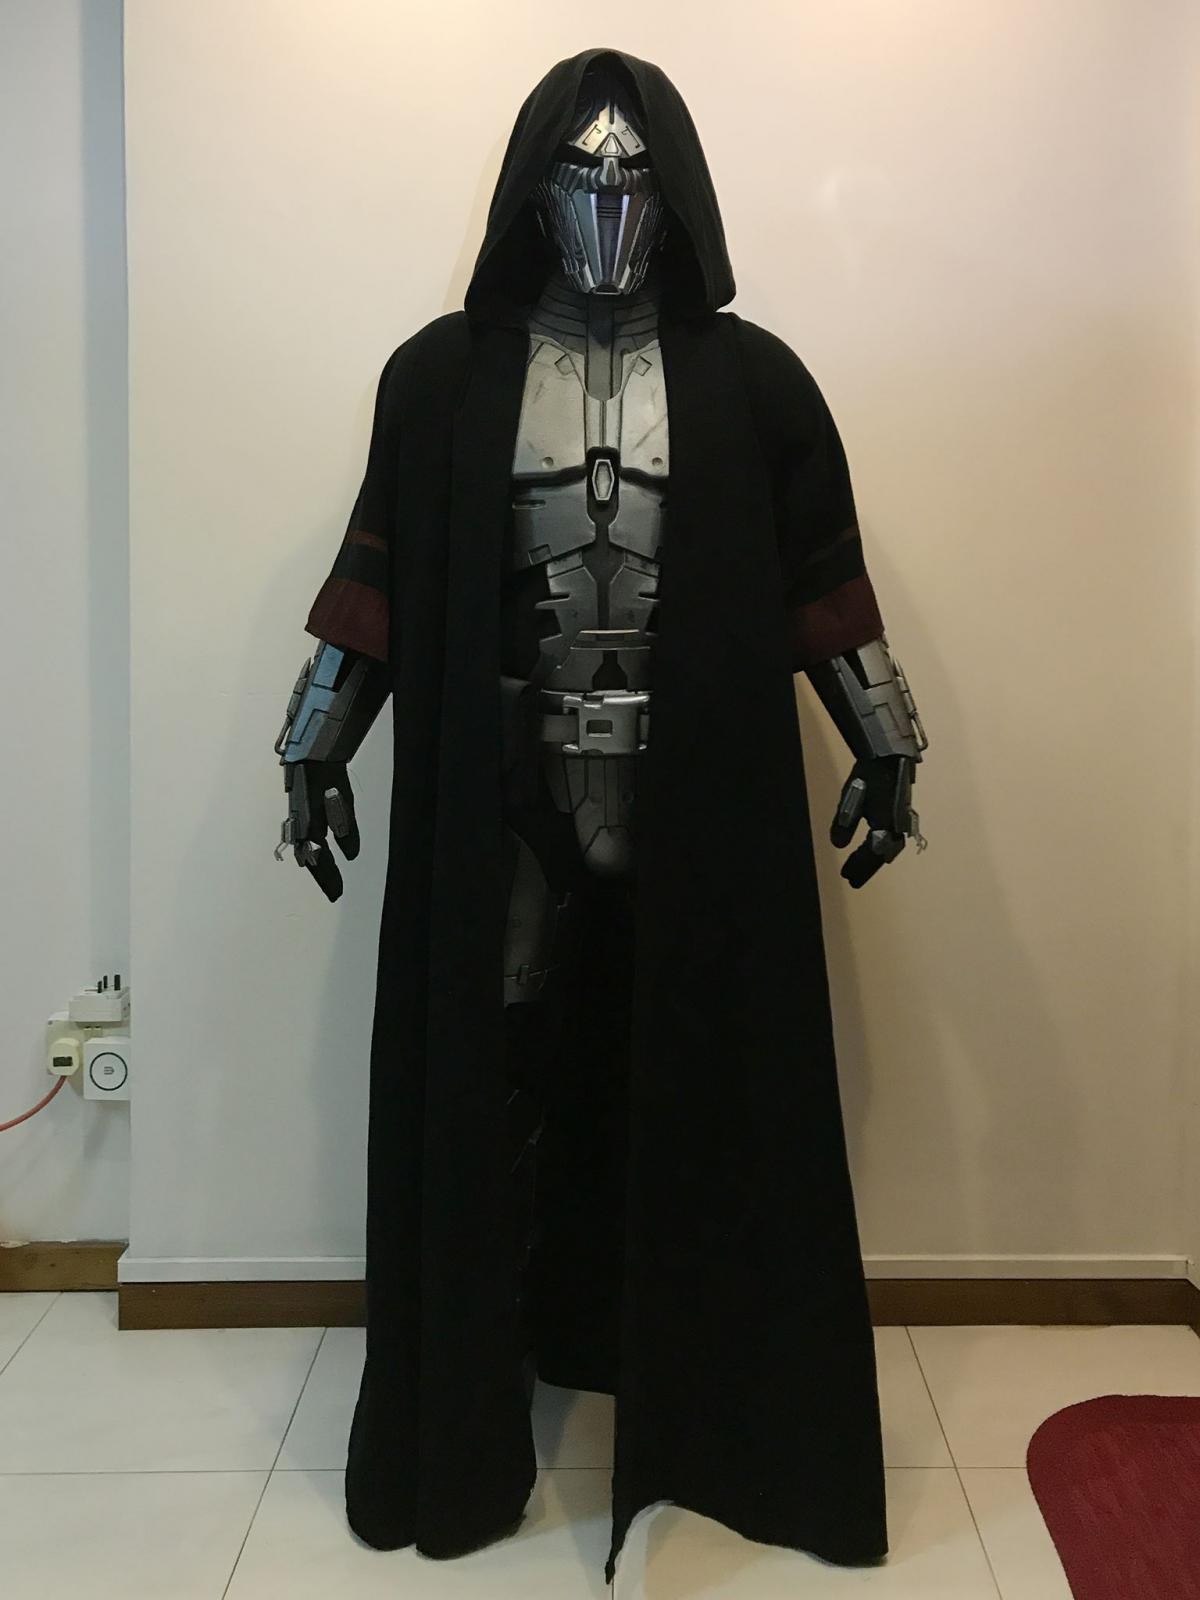
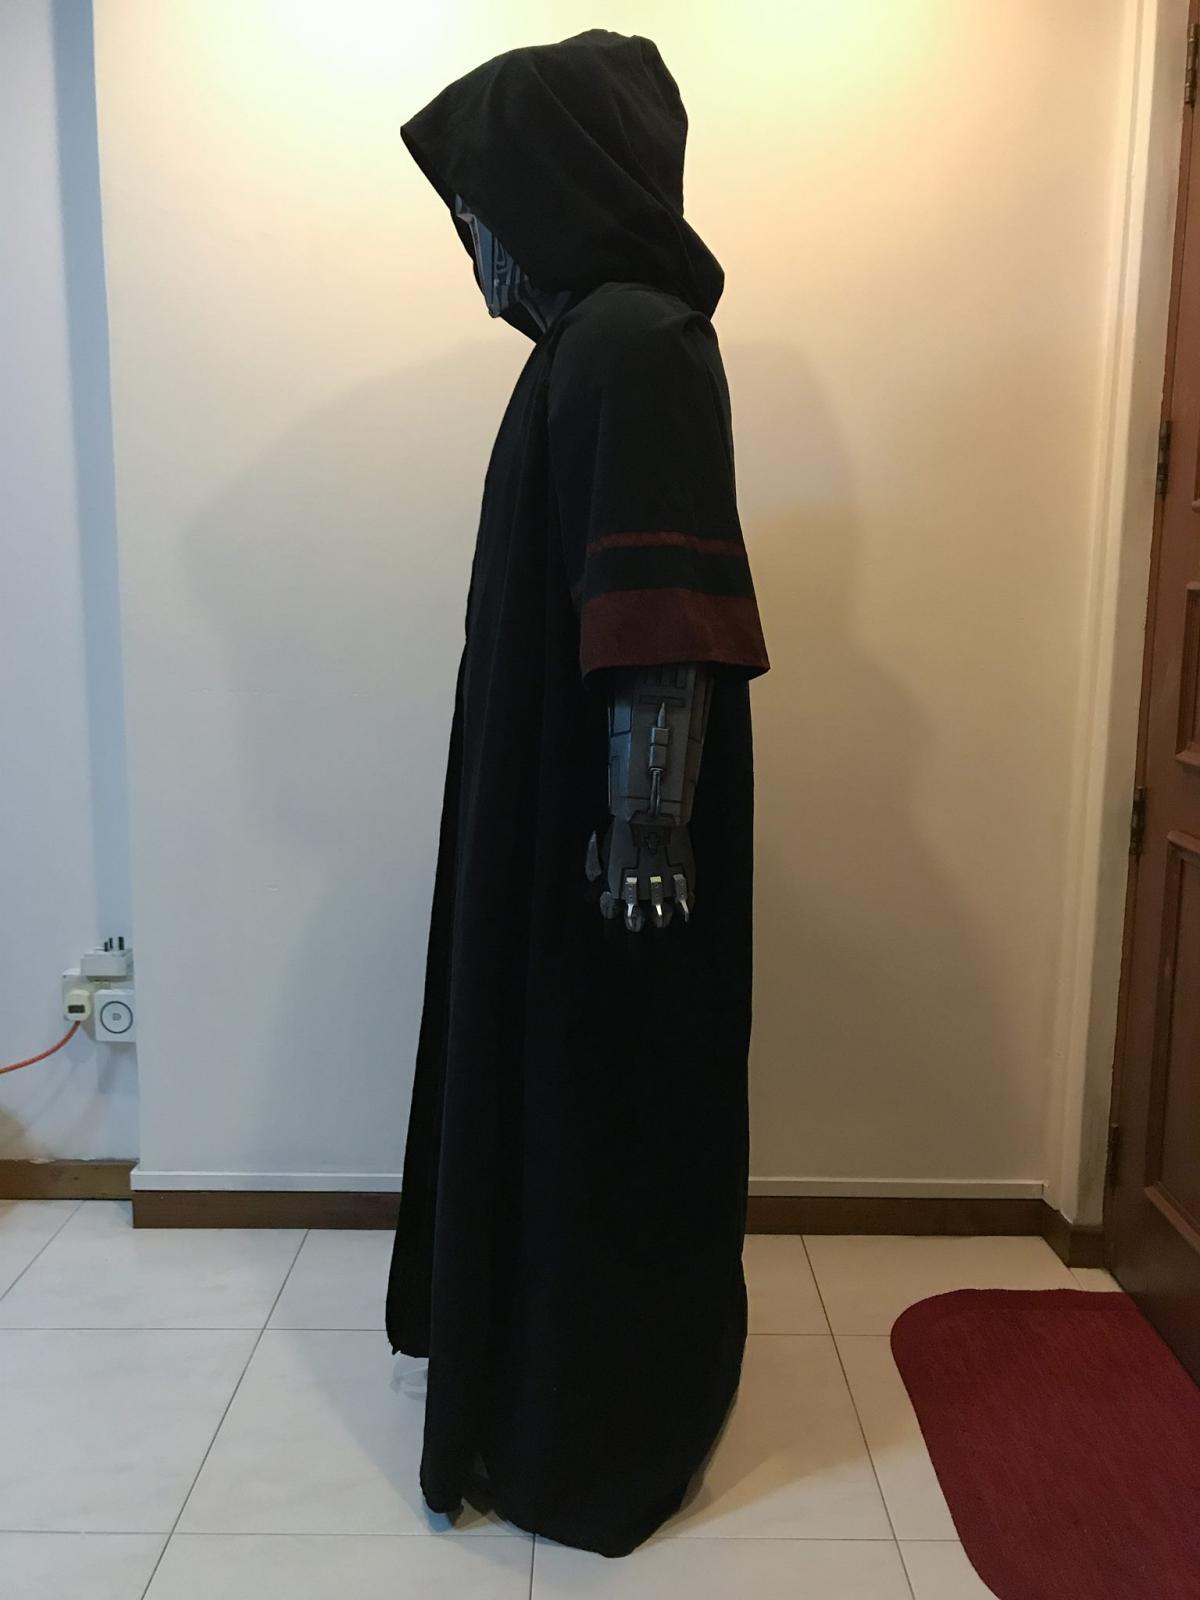
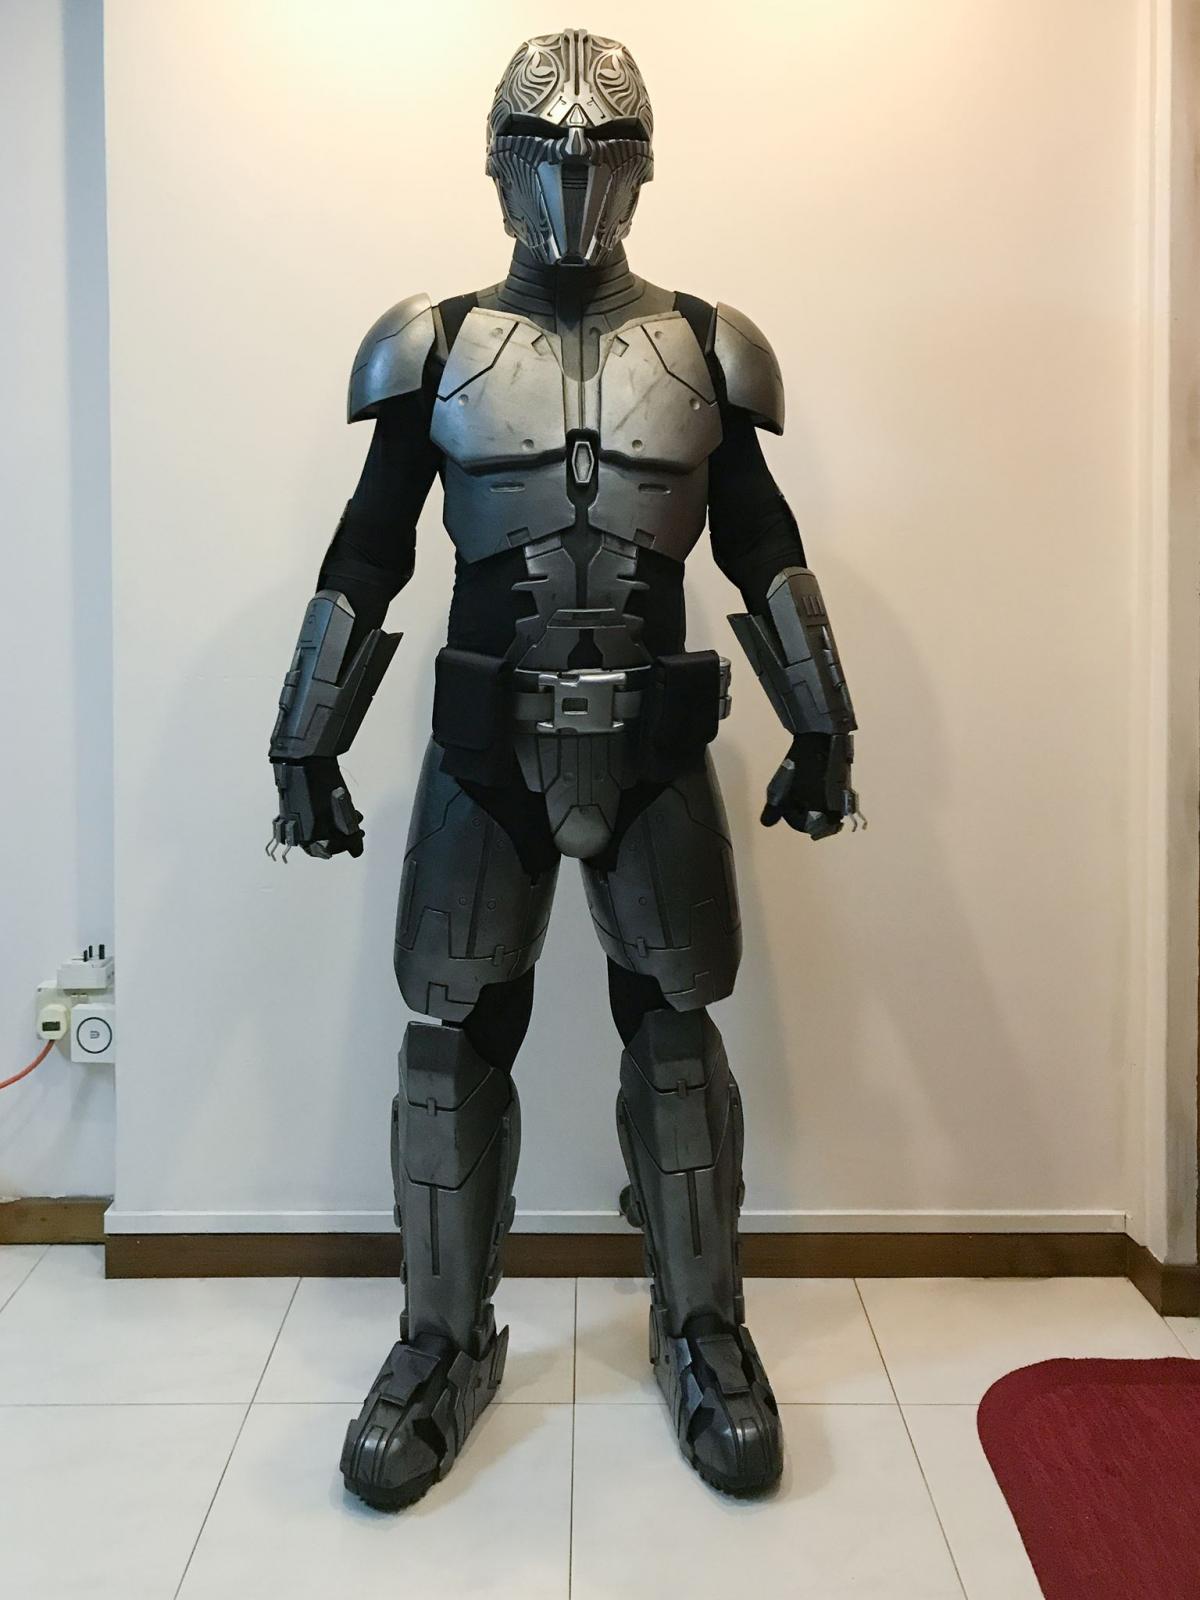
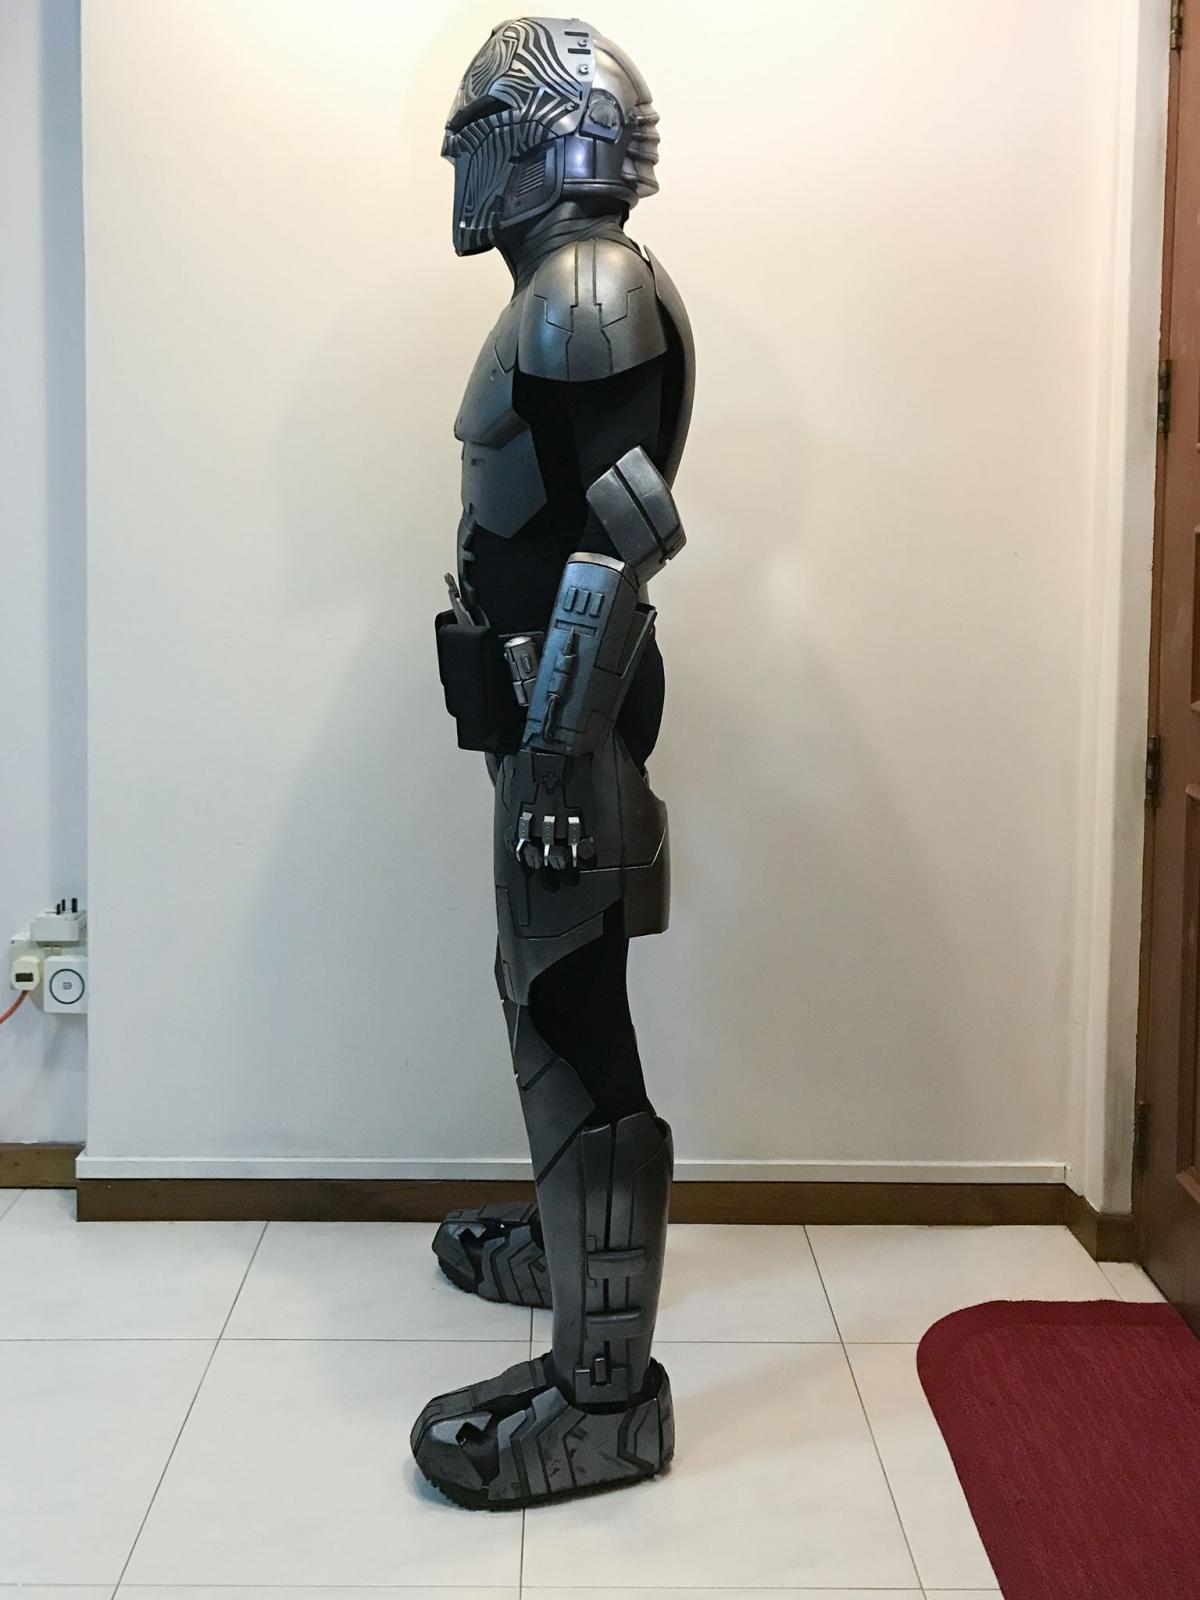
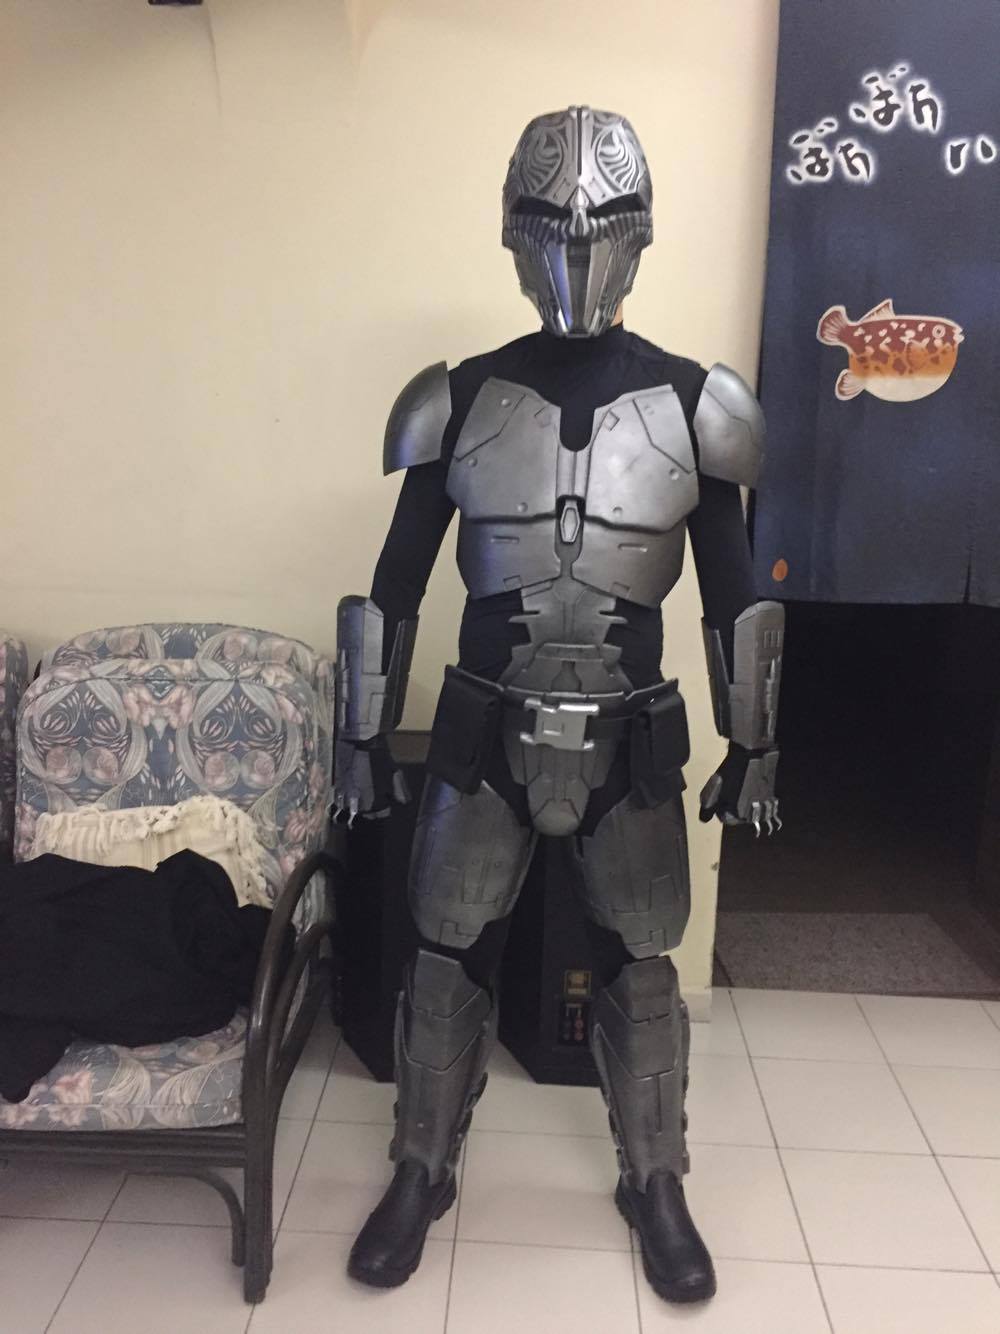
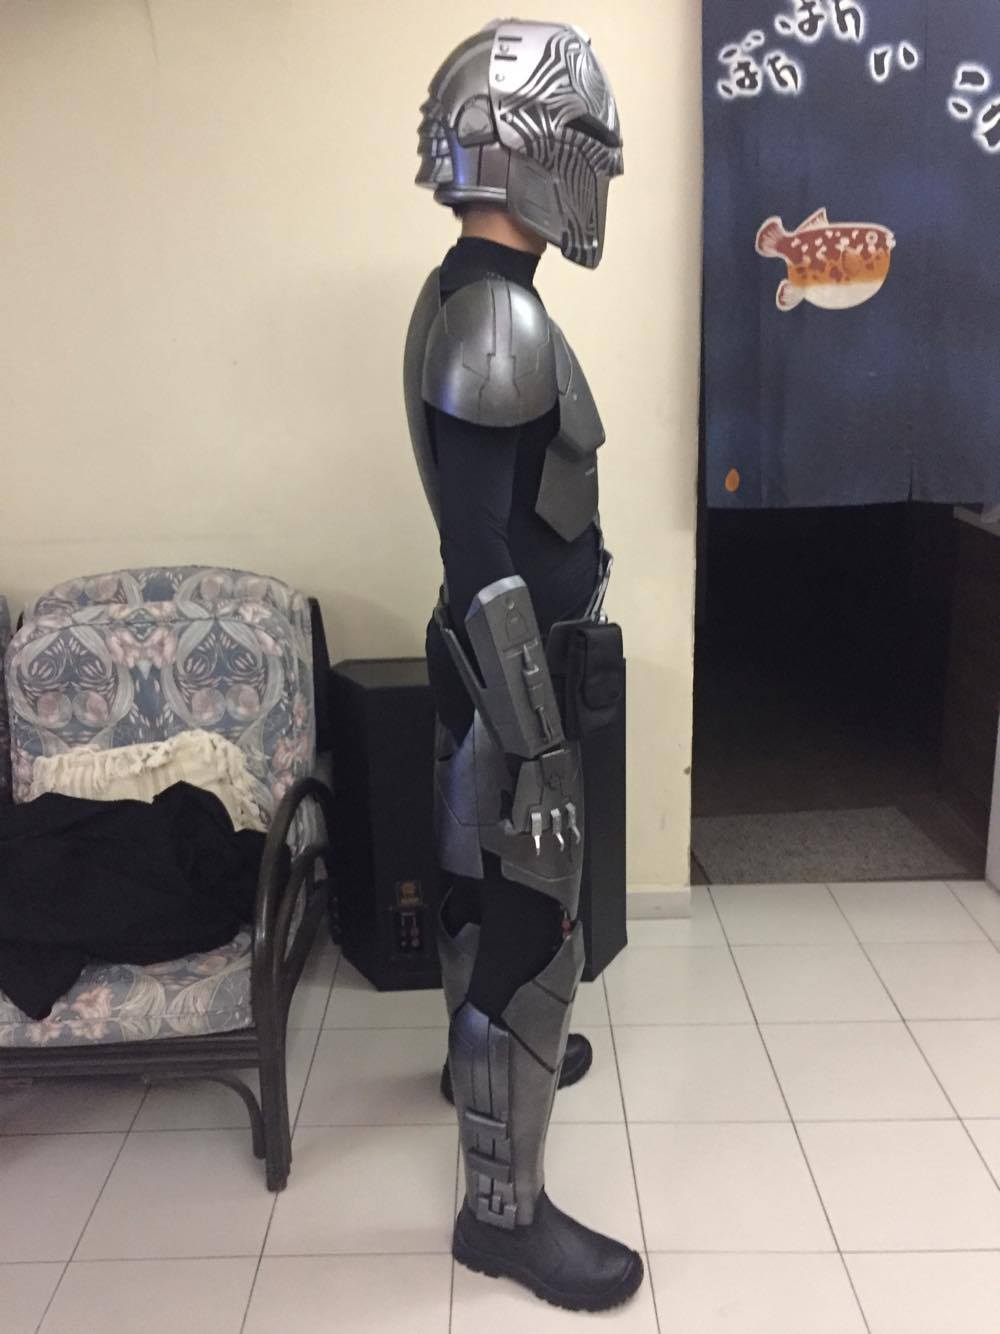
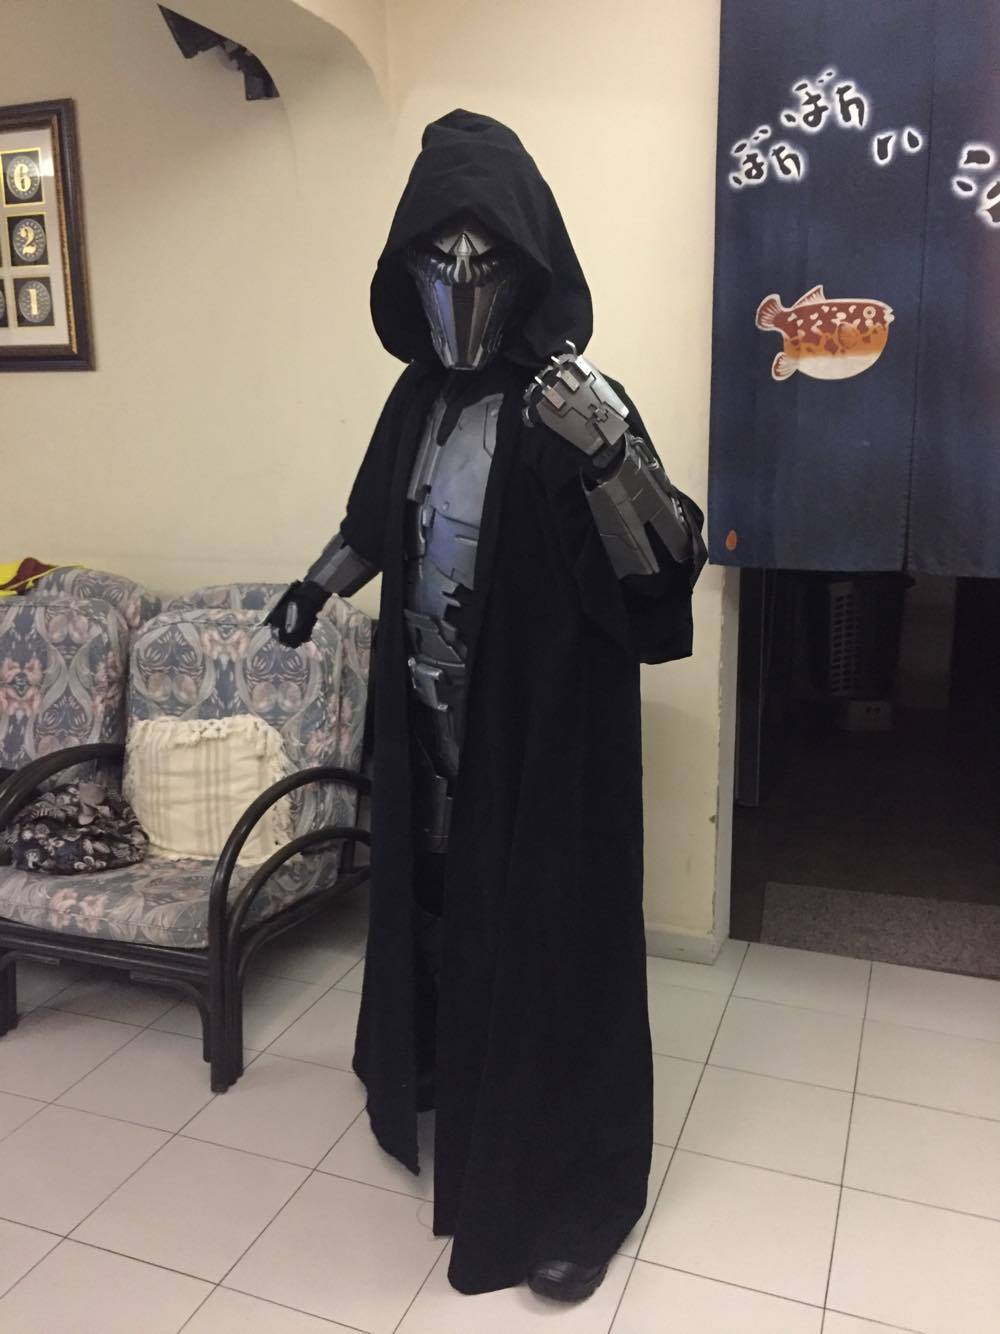
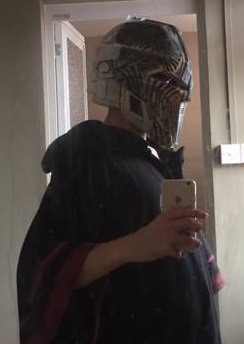
Super in love with the acolyte, very comfortable to wear only I have to trim the neckseal shorter for comfort and maybe add some silver weathering here and there , vader's vault saber compliments this costume beautifully and it's totally awesome saber.
-
 1
1
-
-
This is beautiful!!!!!
Thank you sir
-
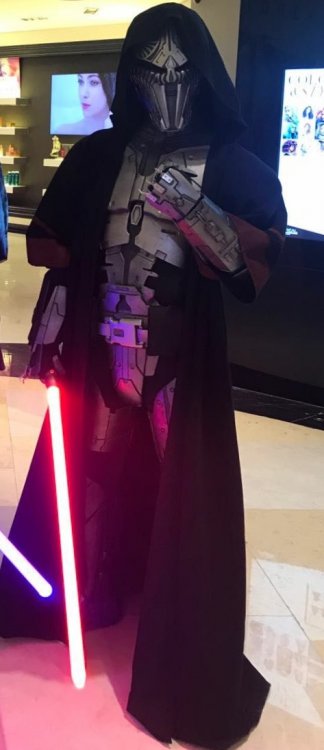
Approval pics taken and send, hoping will be look into soon, gml told me having issues with photos now since photobucket drop such a bomb on us


Really loving this sith, cant wait for my saber to arrive!
-
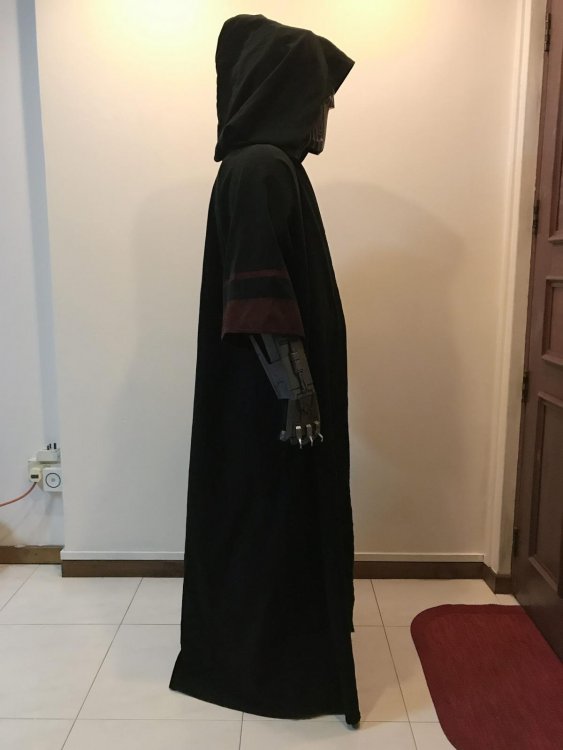
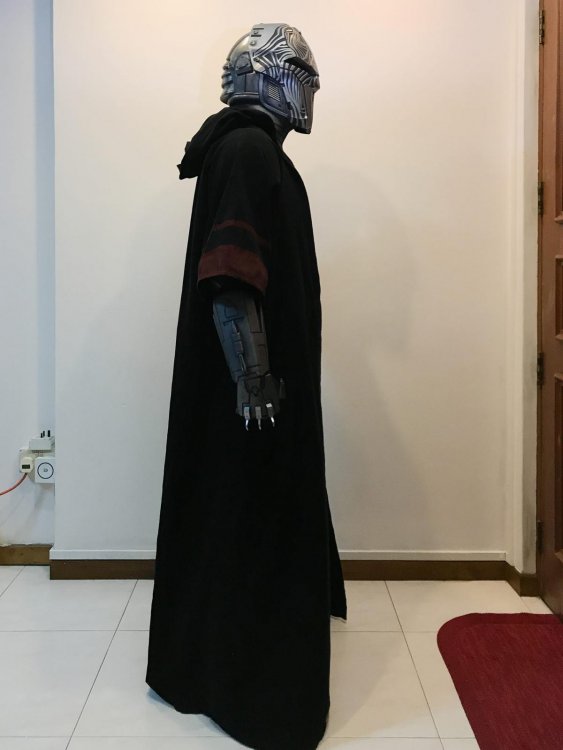
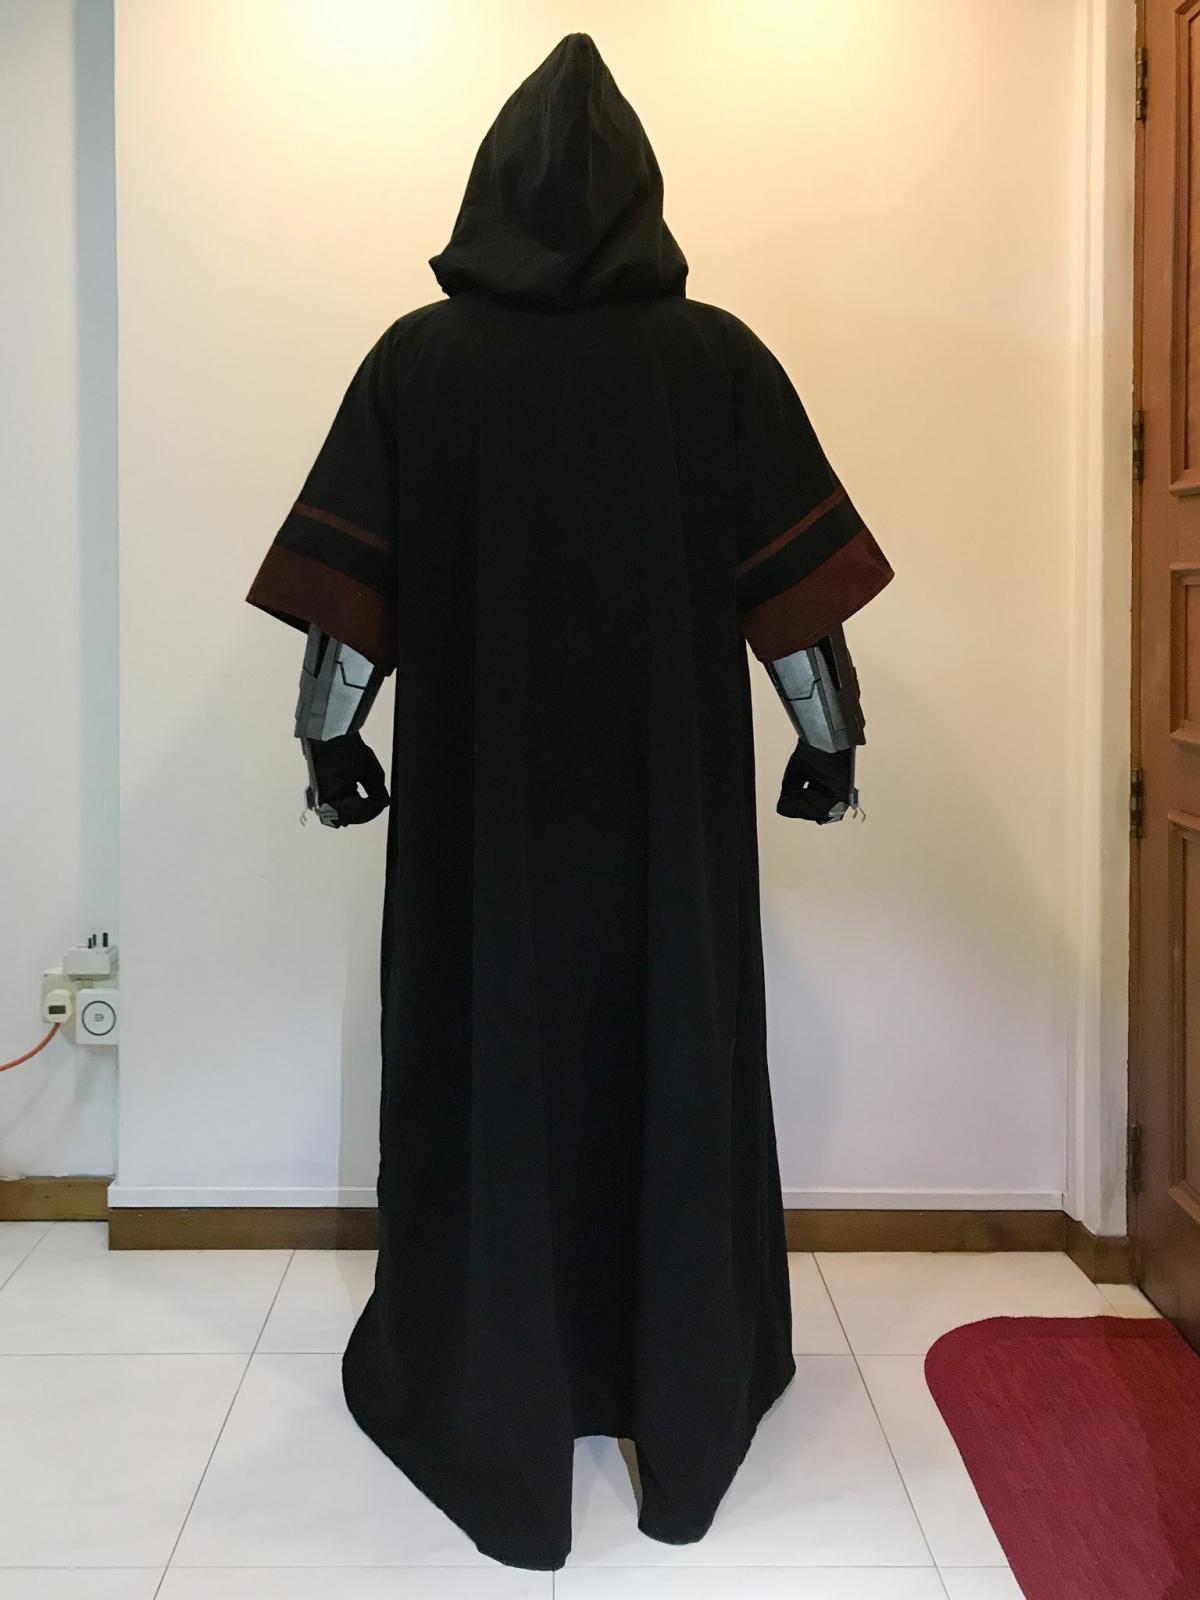
Test fitting with the robes that just came back from the tailor
I think i have to go and alter shorter the length of the robes, a little too long, causing me to step on it sometimes when i walk.
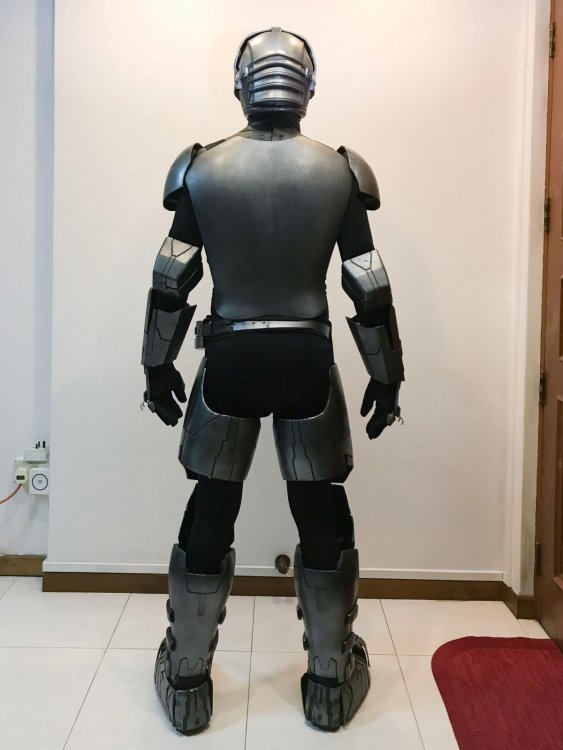
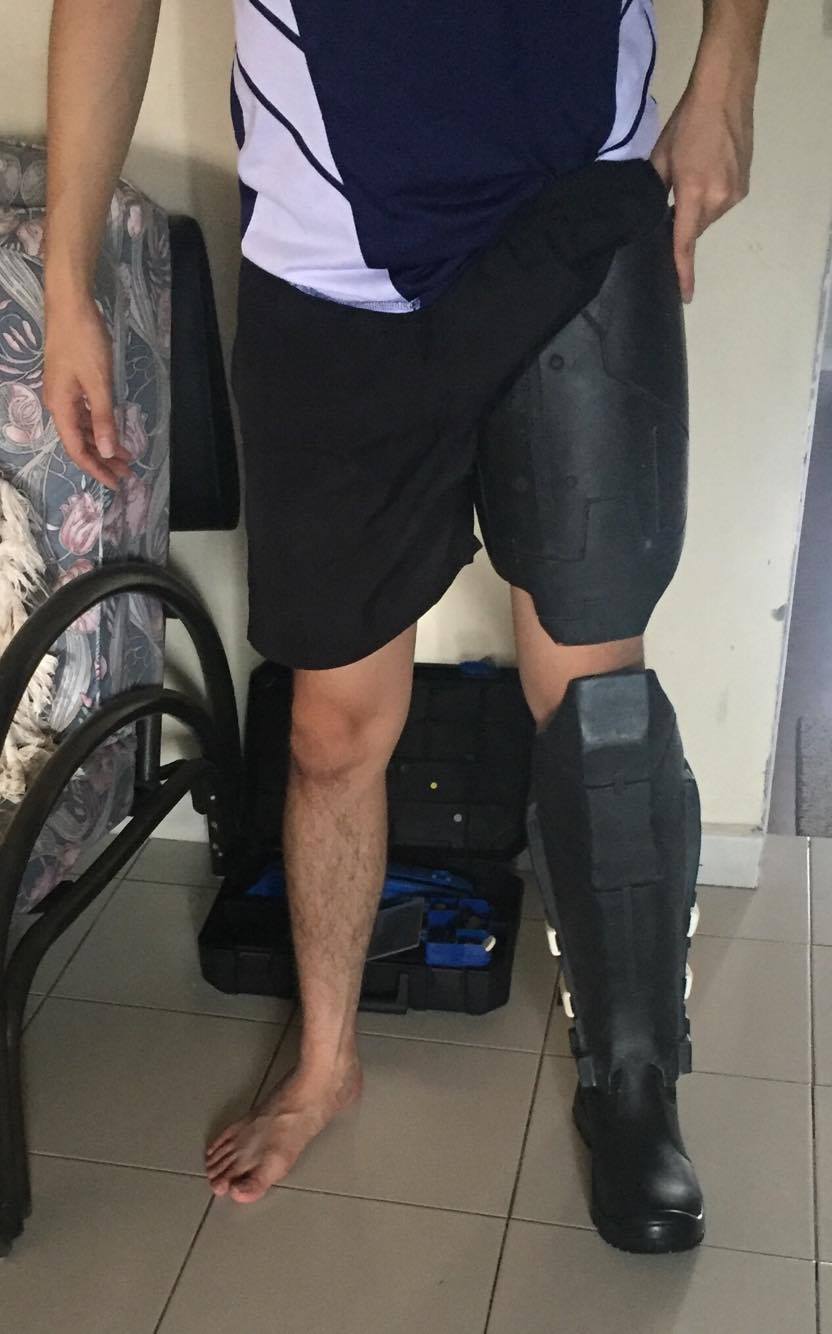
Test fit of all the armour parts

Quite happy with the armour colour, has some weathered look already, will go to weathering small details and darkening recessed areas.
-
A small update.
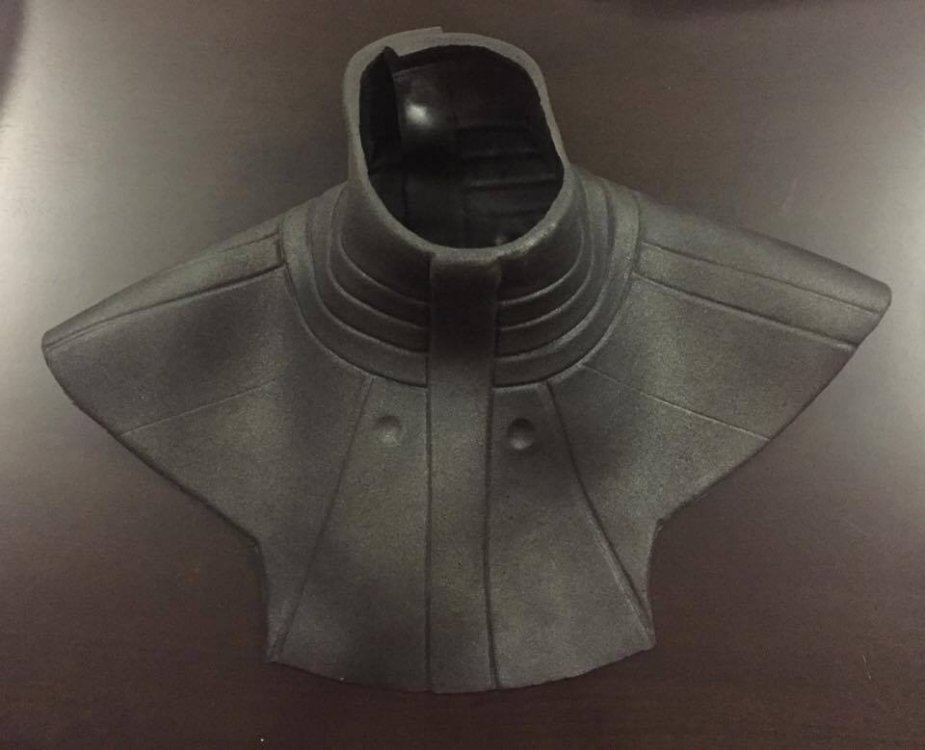

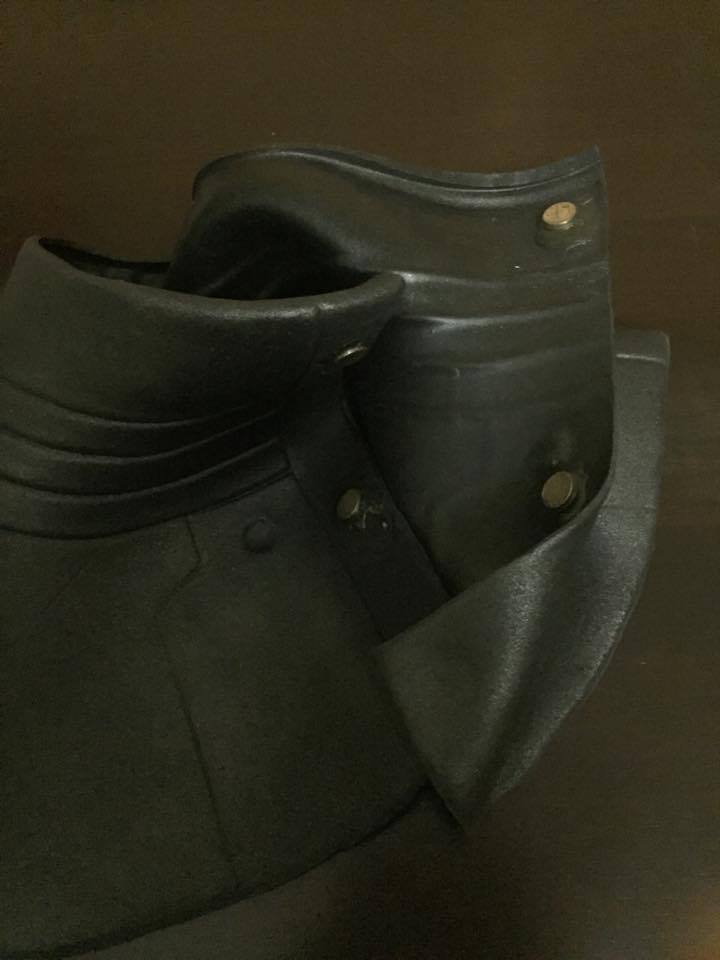
Painted the Neck seal and clear coat with 3 thin coats hoping that it will make the paint hold on to the latex better.
I used magnets to hold the neck seal better, E6800 was used to glue the magnets. I used this method so that it will be easier for me to put on the neck seal independently as the rubber can be quite hard to get the accurate position as it tend to stick on the inner suit a little. This way all i need is to swing it back and it snaps on.
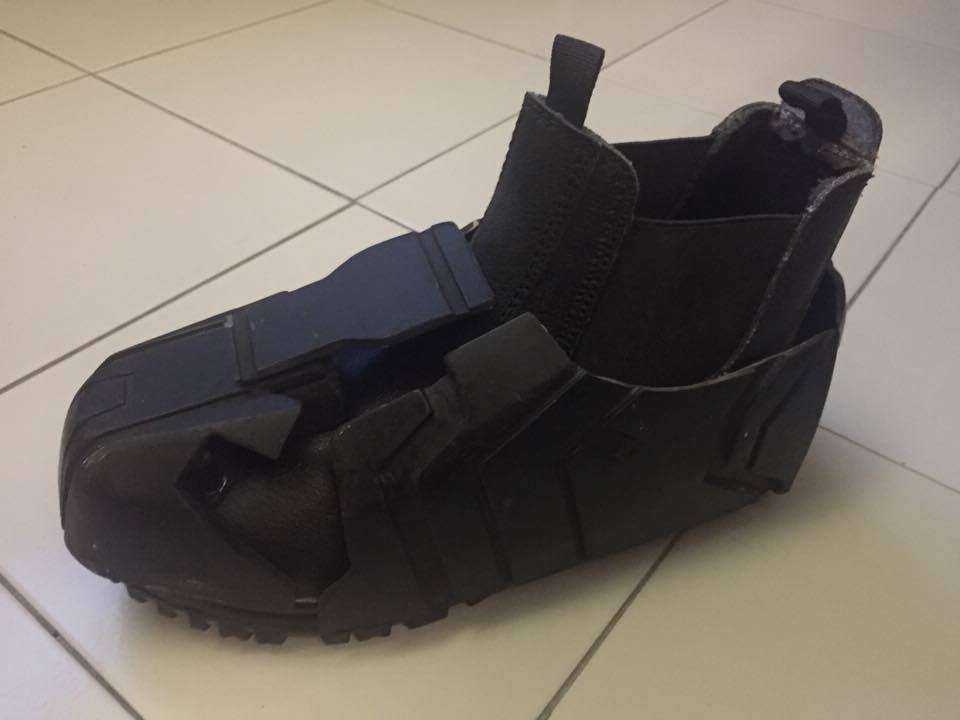
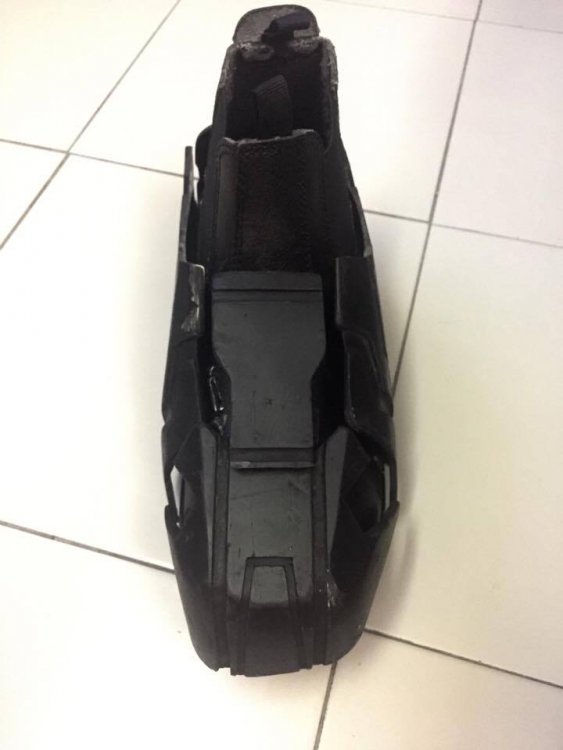
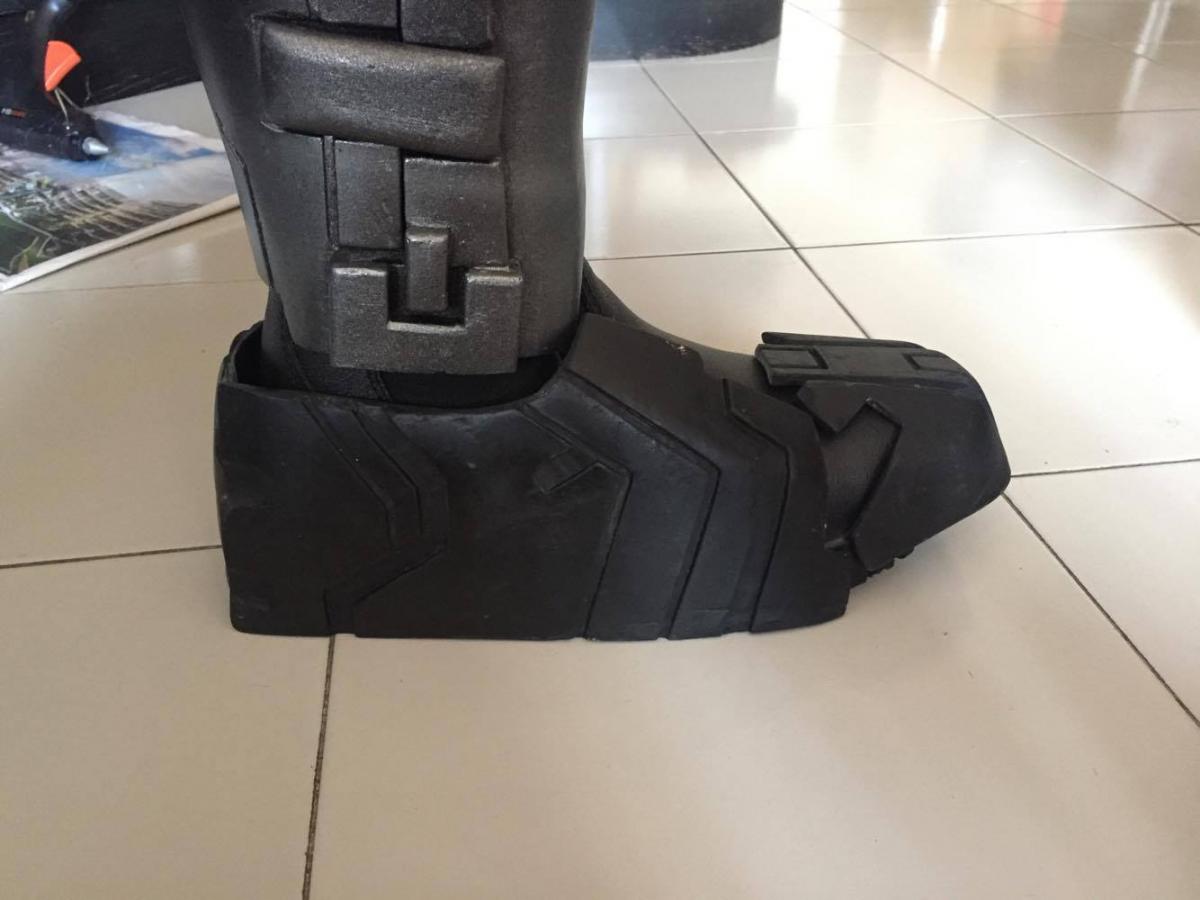
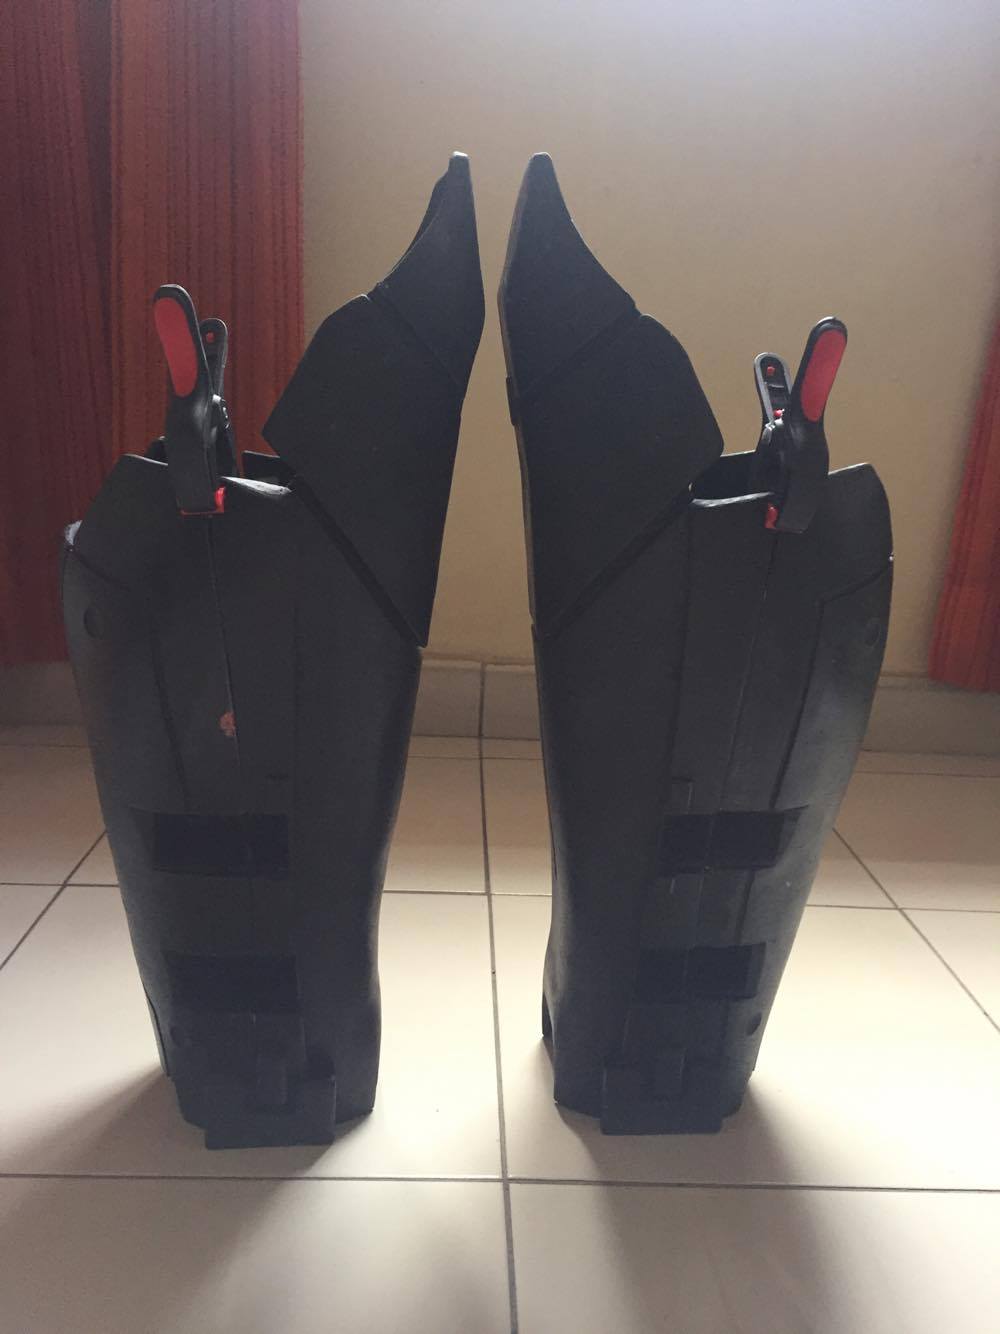
Finally i work get the boots armor on to the boots with velcro and use of hot glue, had to do a few times of trimming to get the desired position that i wanted as the original size of the sides of the boots armor was way too big and would be clashing into my shin piece and the floor.
Below is a pic of the original size.

Now all that is left is to paint the boots armor and wait for my robe to come back from the tailor. Hopefully the robe will be perfect this time and i can paint the sleeves and go for approval pics.
-
1
-
-
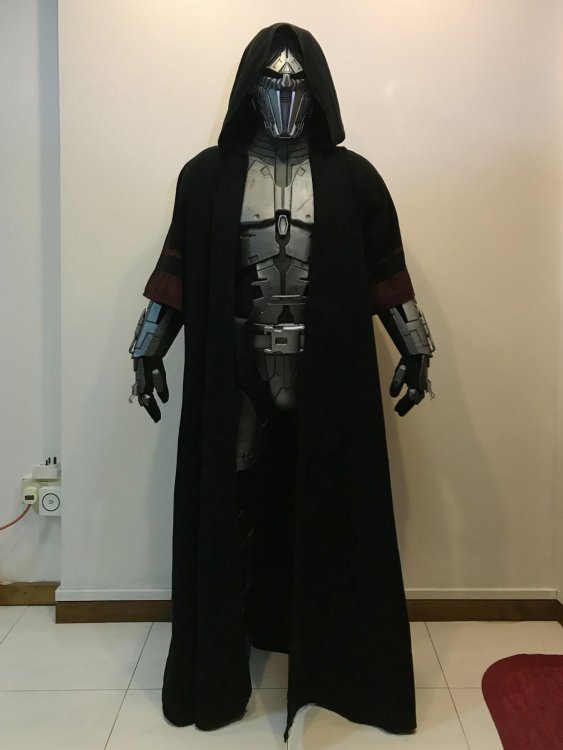
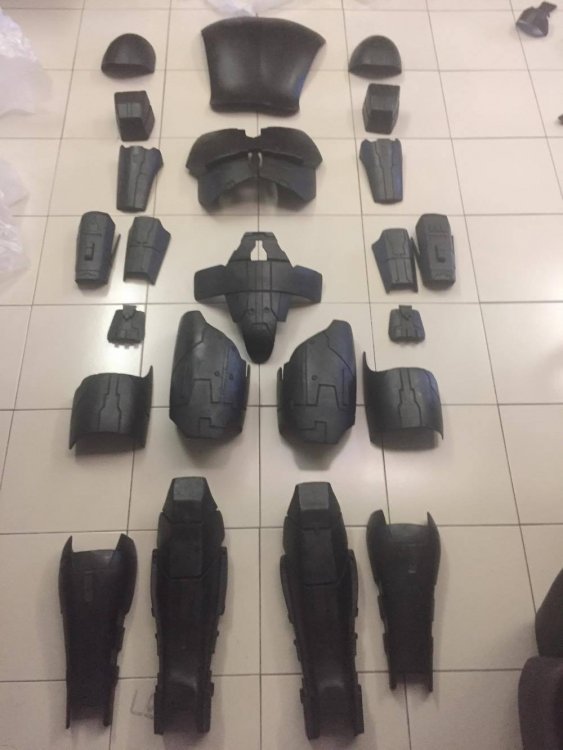
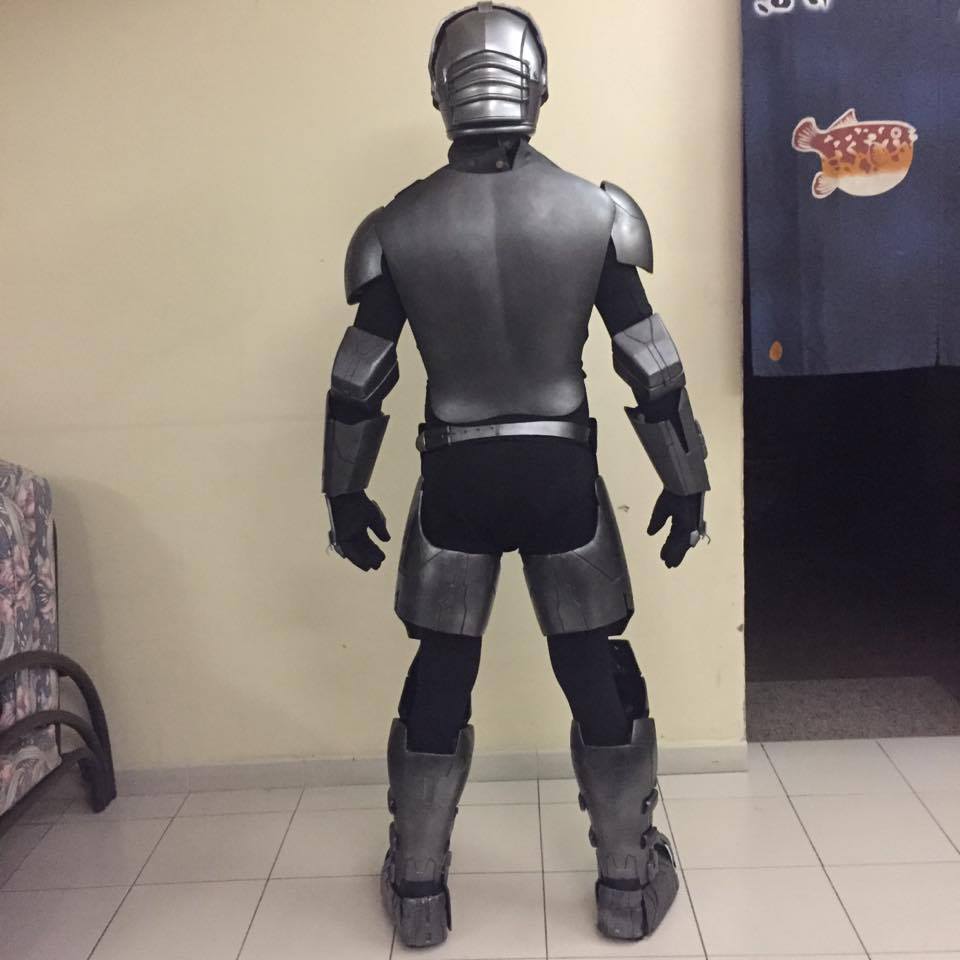
Most parts have been painted and did some strapping to hold the pieces together, jsut some basic strapping, and then after confirming the positions of the armour pieces then make any mods if i have to. Pretty happy with the way it looks now, the robes have been sent to alter some parts to the right measuremnts, for now this is waht i have.


Almost there, just left the neck seal and elbows to paint and the boot amour, have not figure out how i want to attach the boot armour.
-
1
-
-

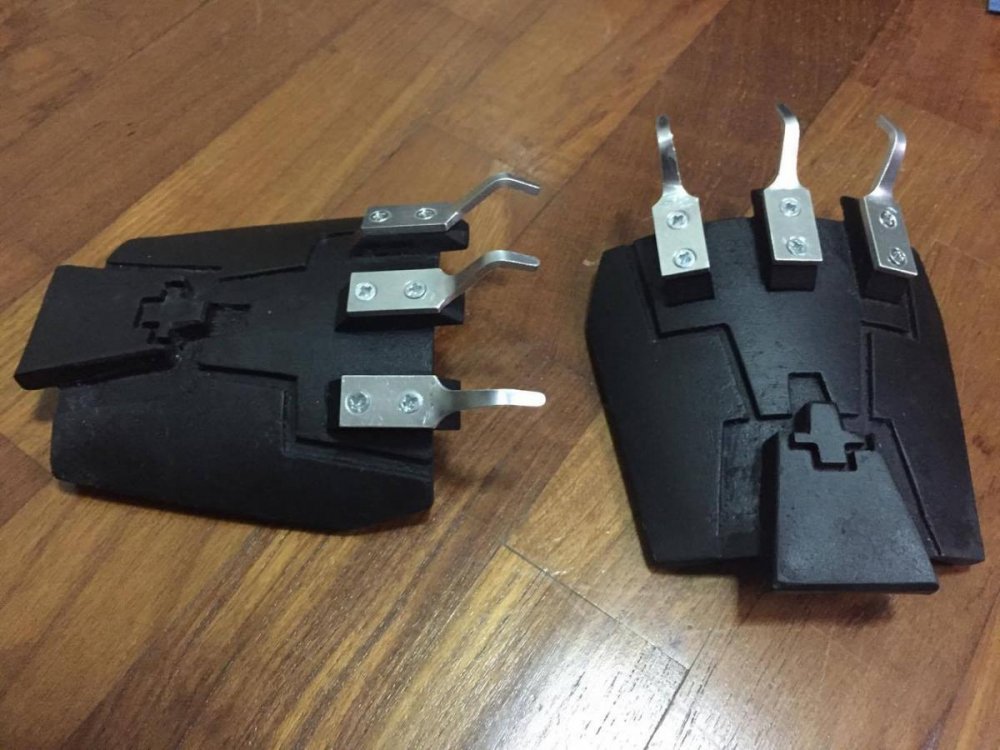
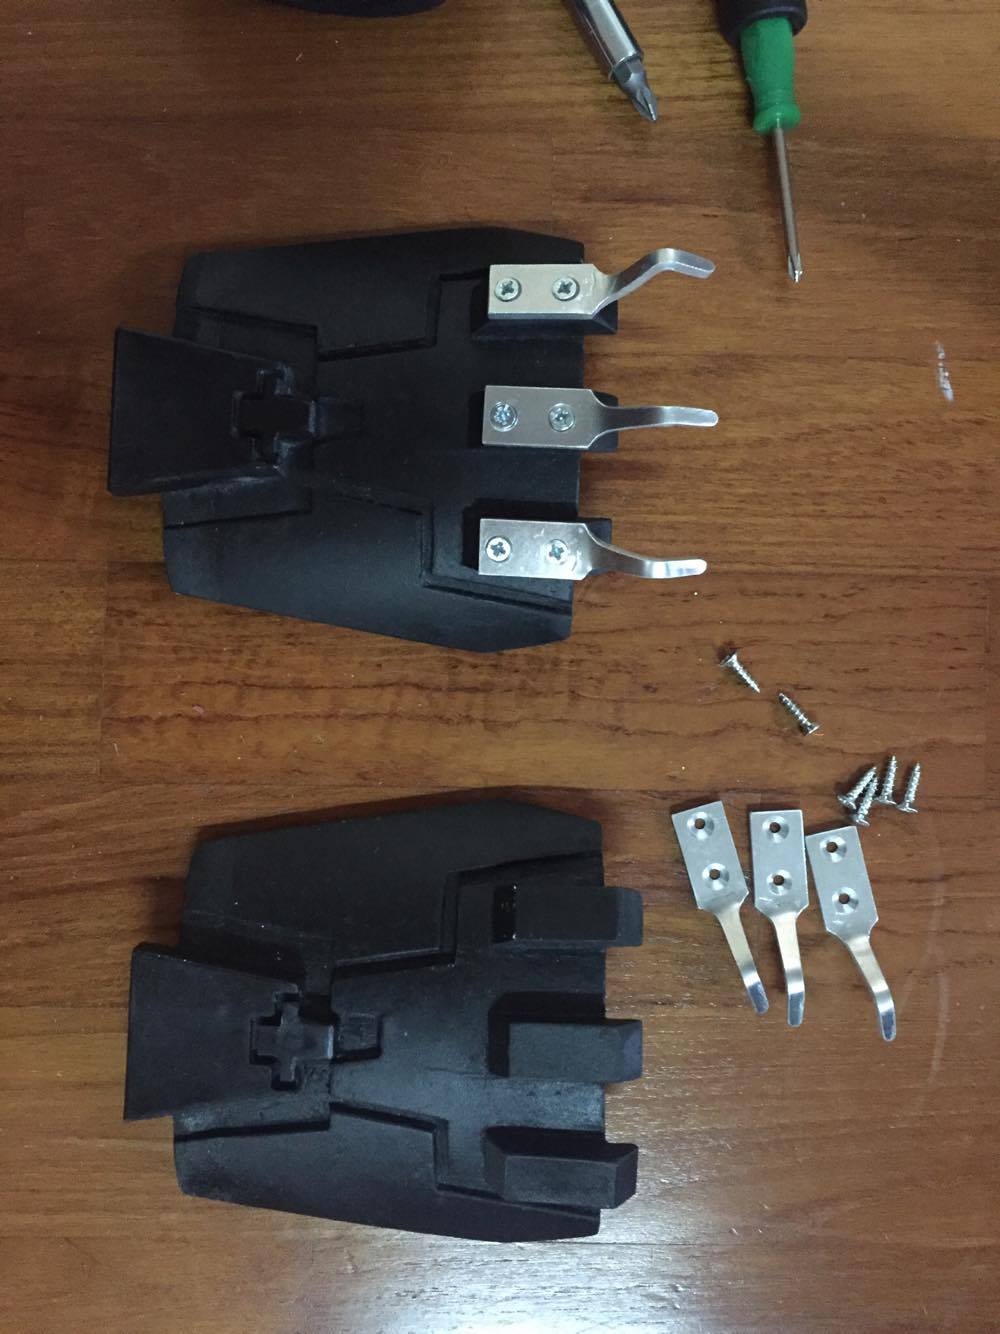
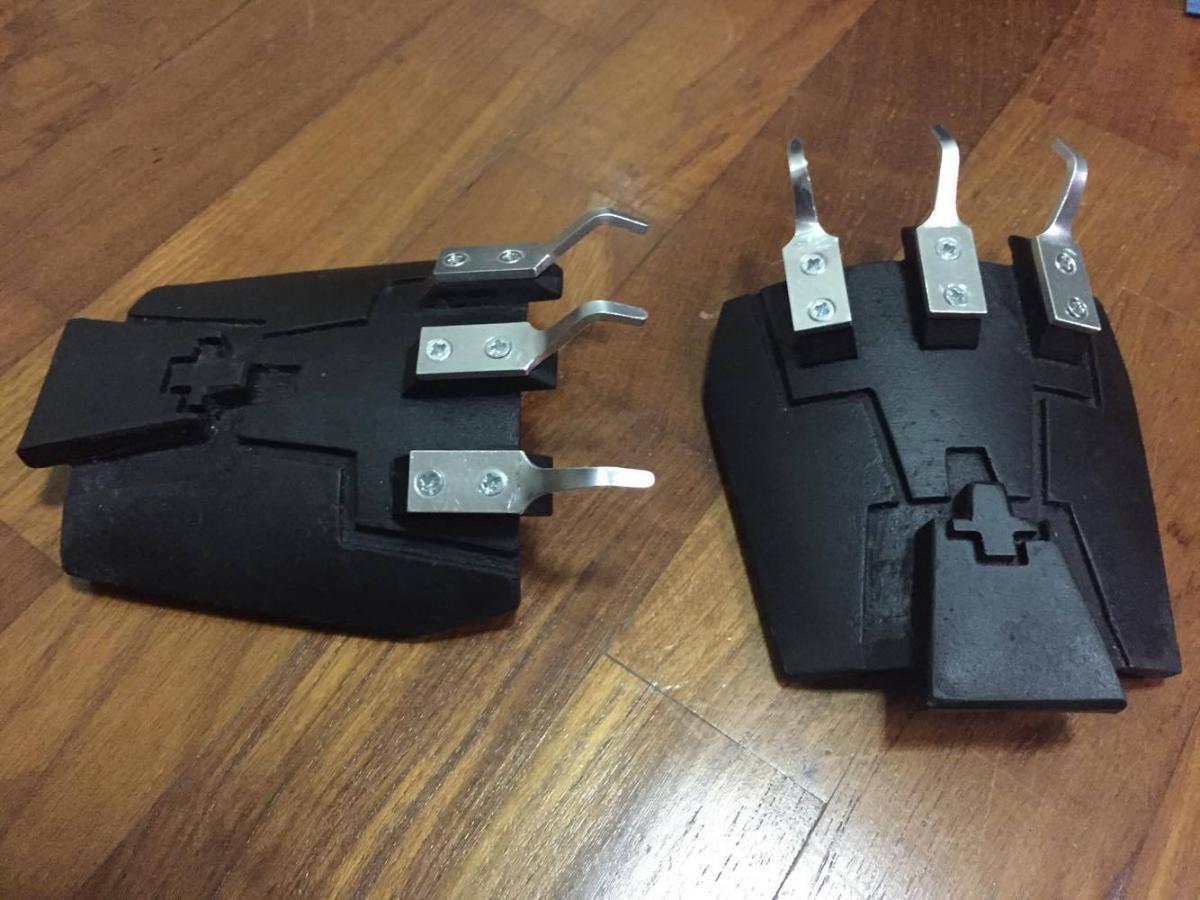
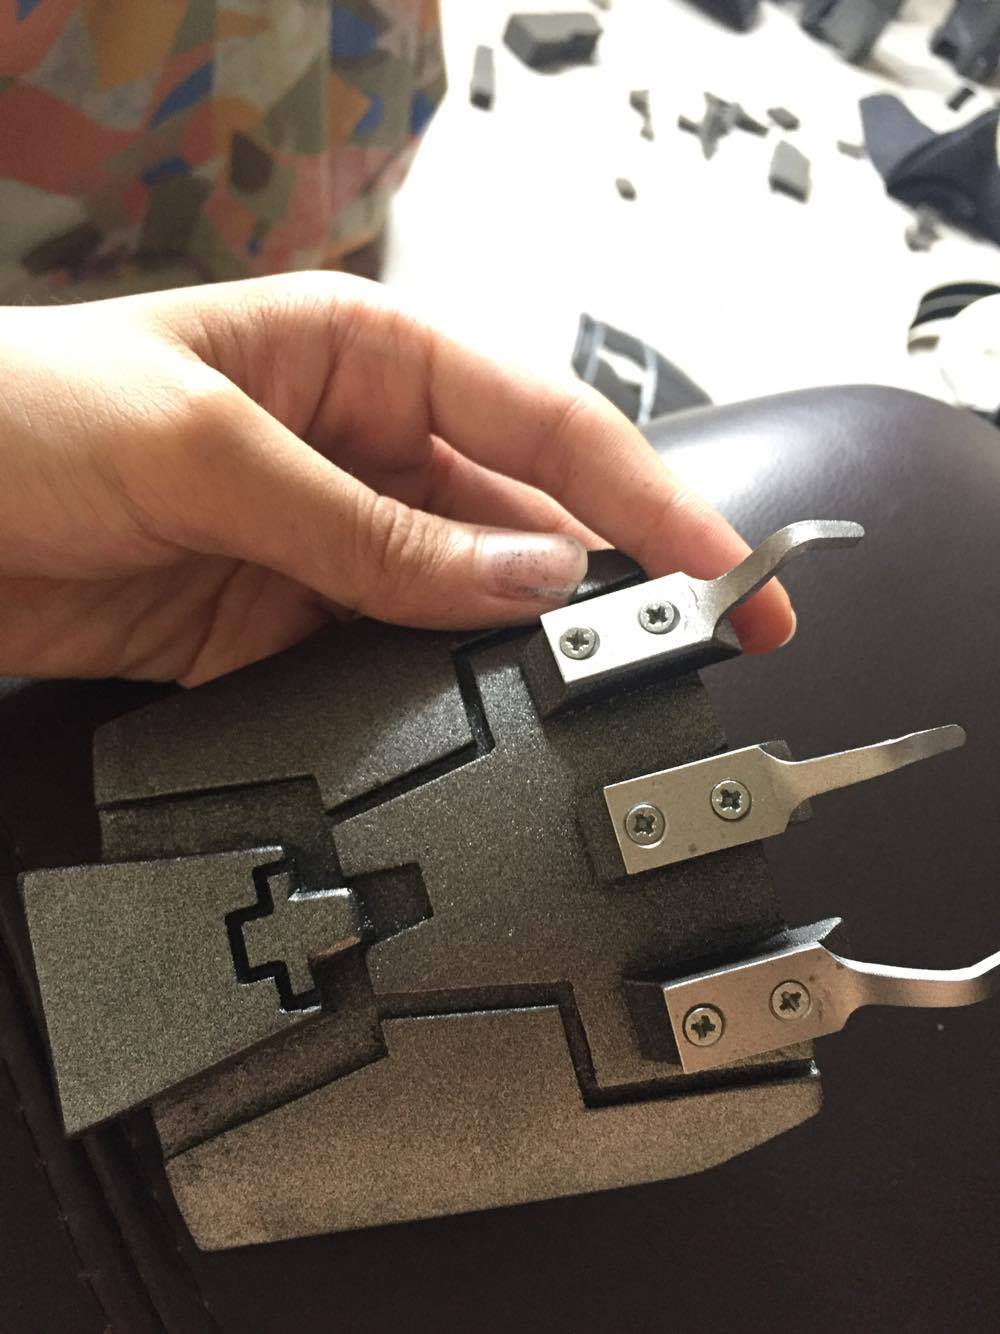
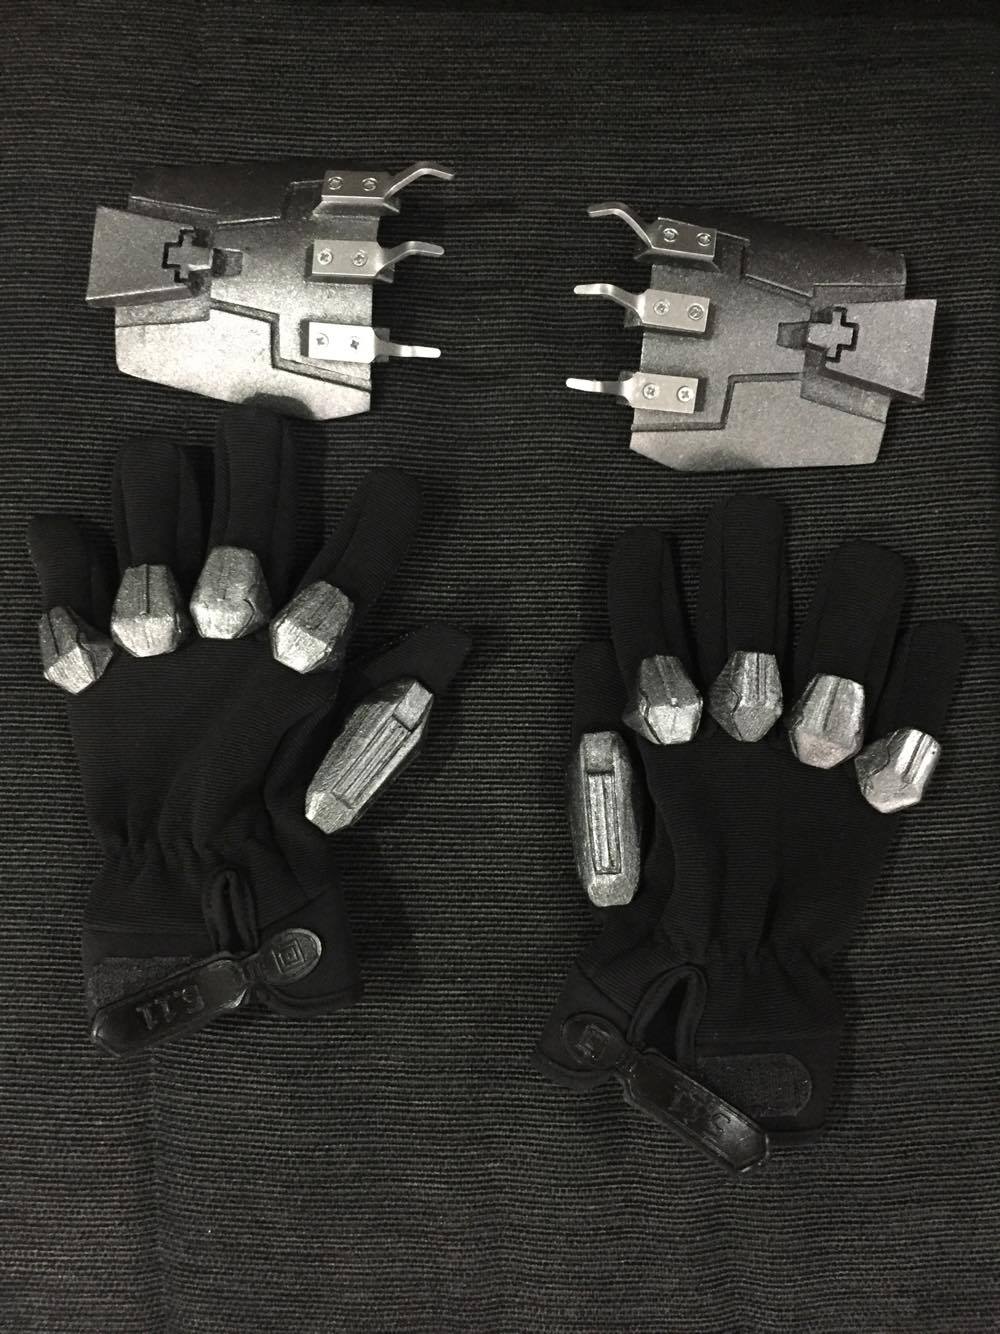
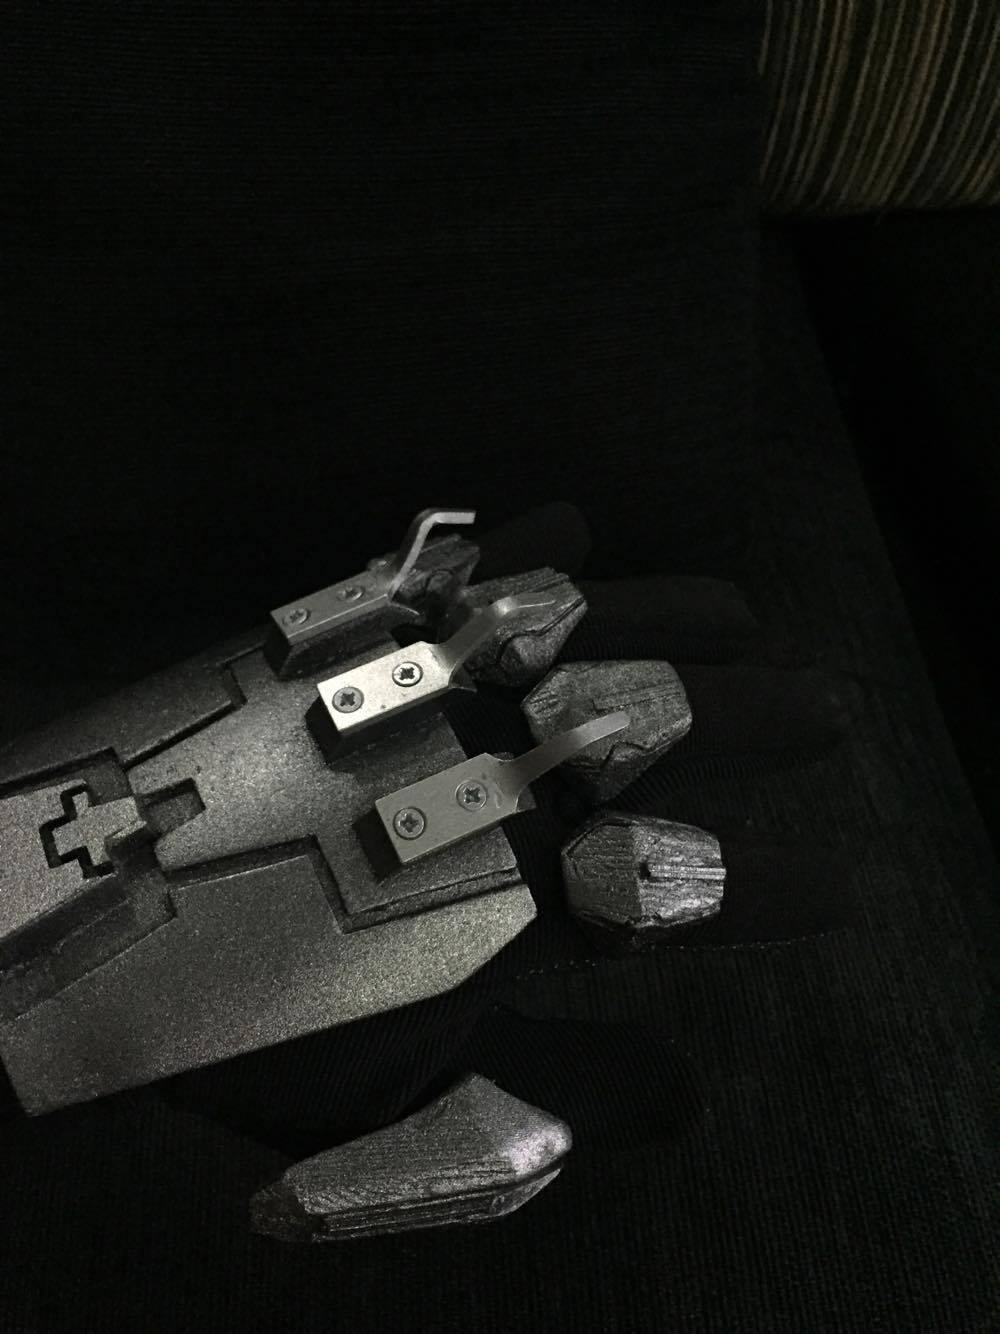
Time to become Wolversith, drilled holes into the hand plates and attach the provided claws onto the hand plates and wala! awesome looking! Really love this Sith so much badass armor pieces.
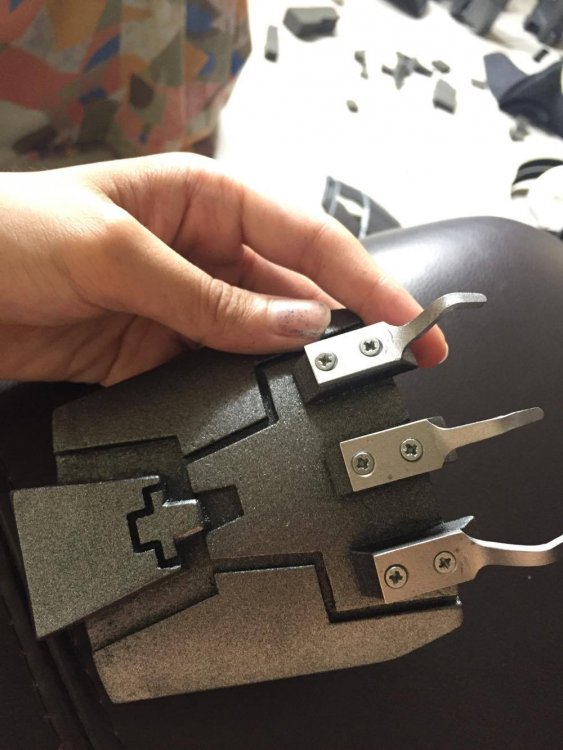
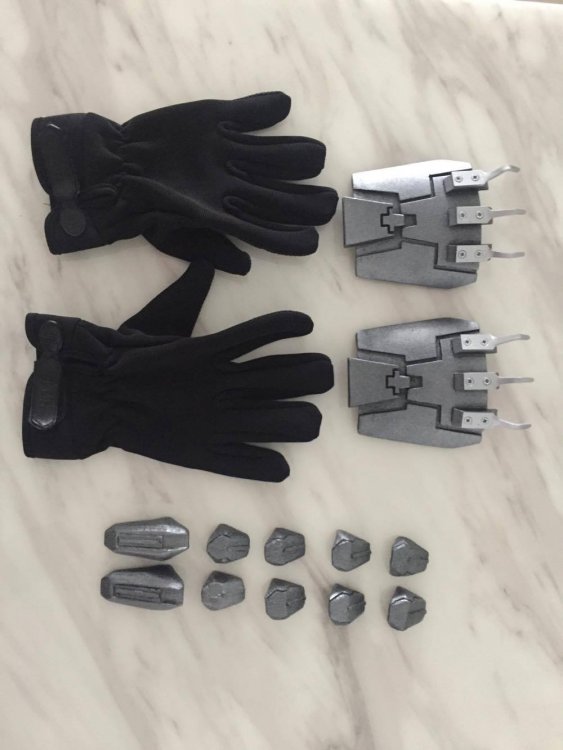
Painted the hand plates and the finger armor.
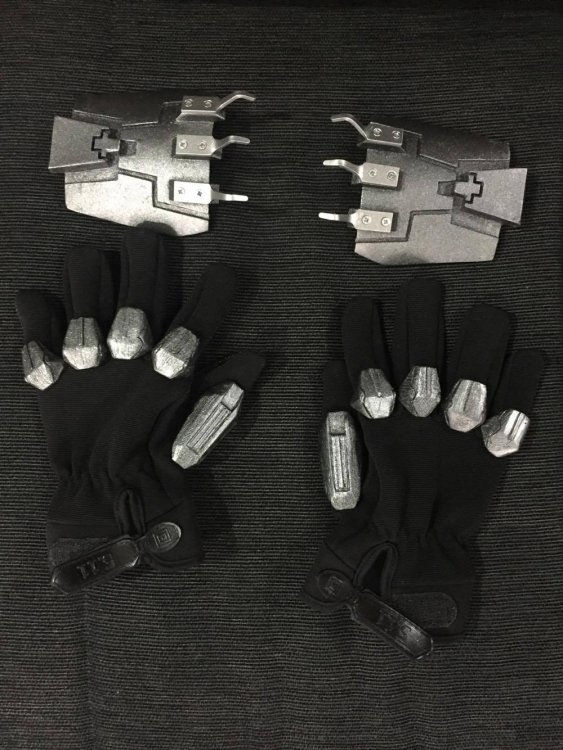
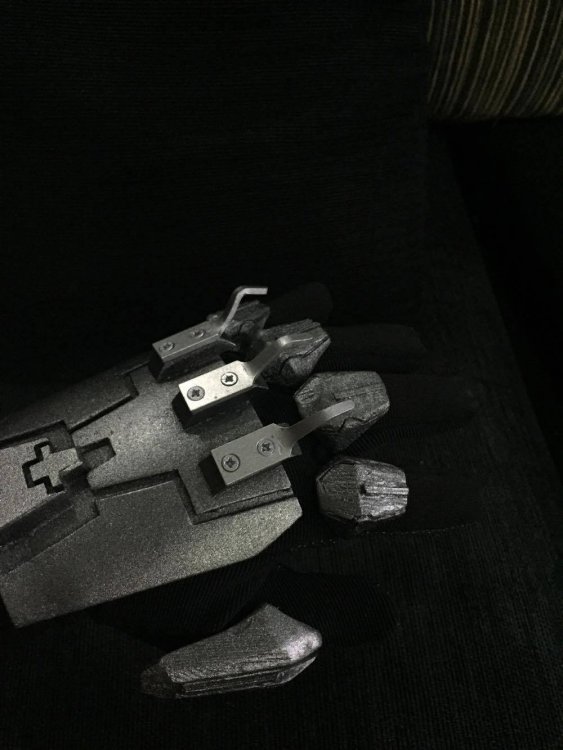
I hot glued the finger armor onto the gloves and use Velcro to attach the hand plates to the gloves
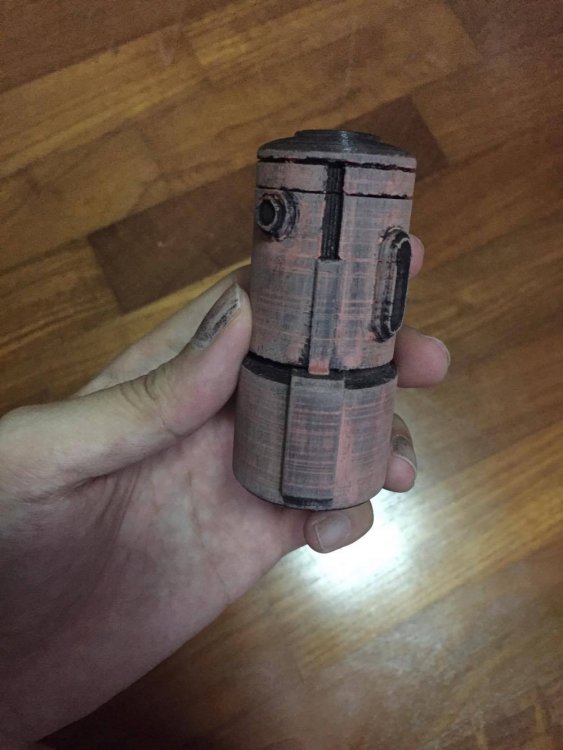

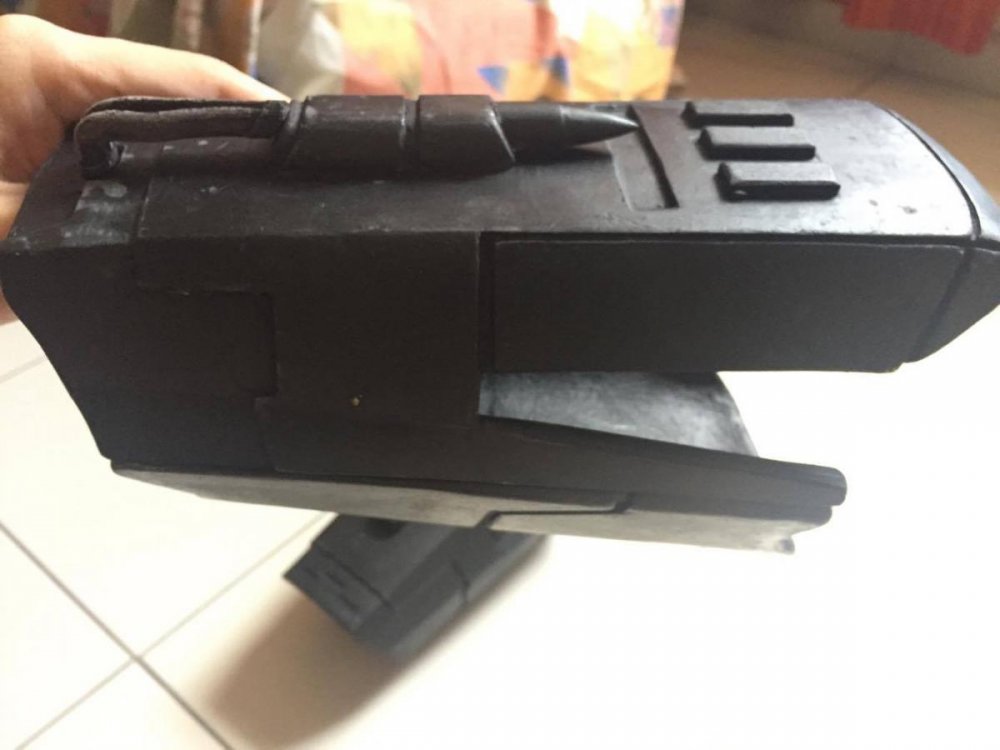
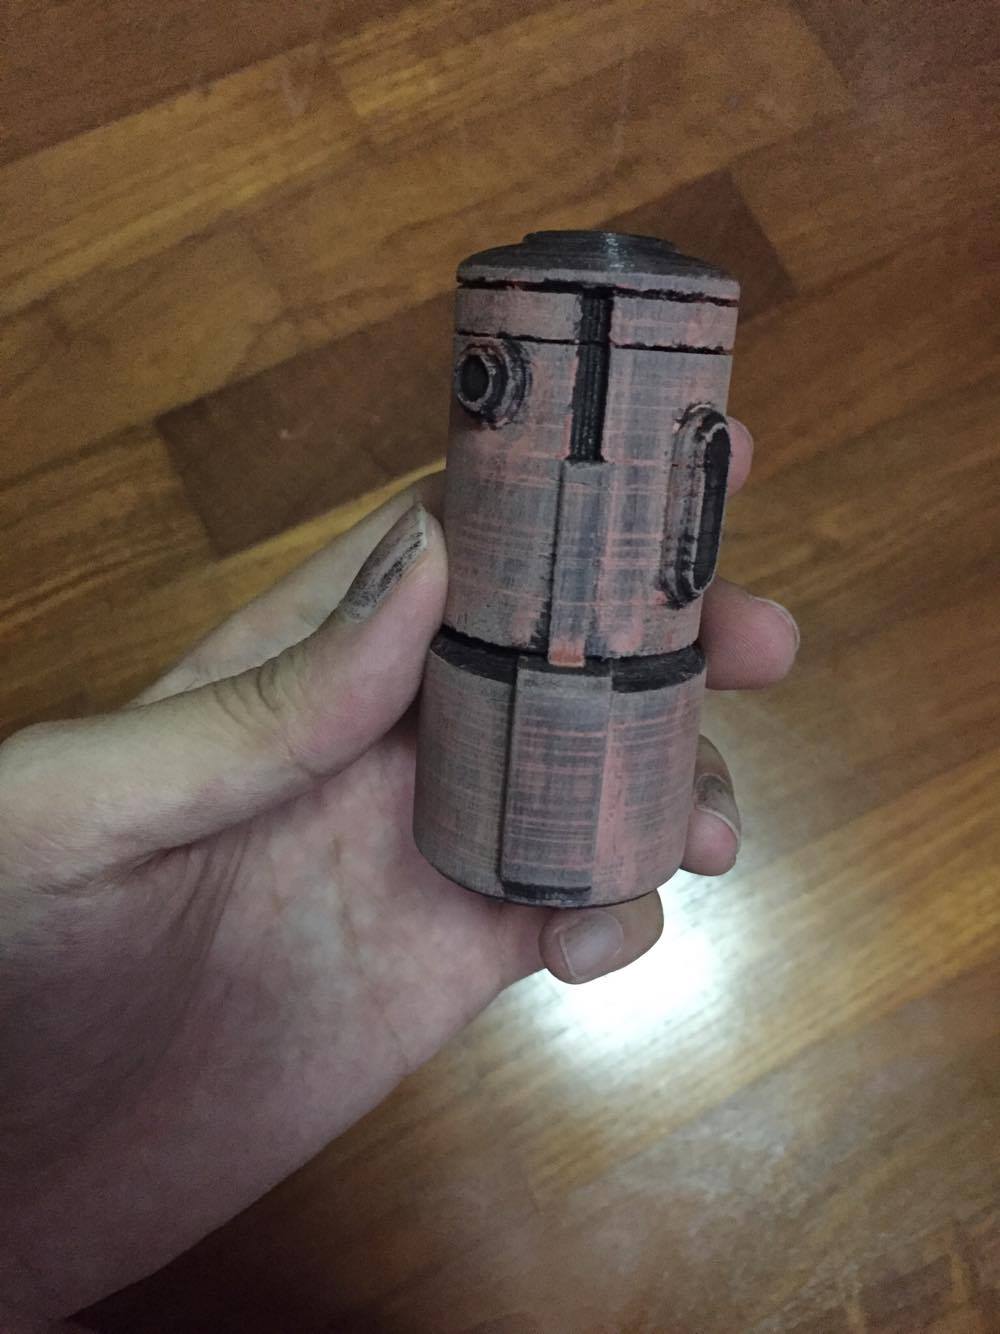
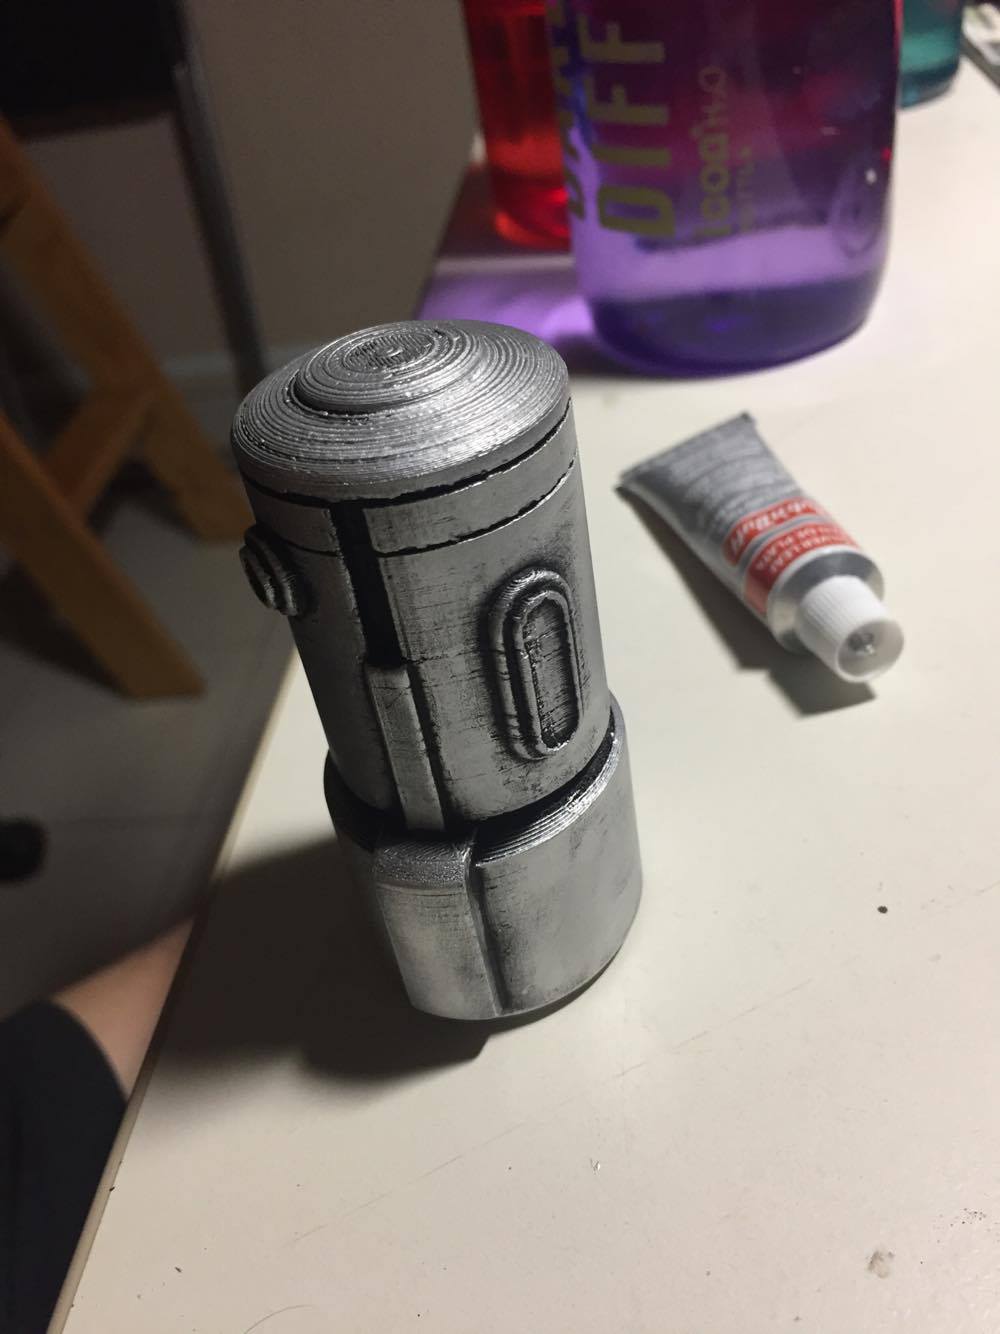
3D printed the canister that will be attach to the left side of the belt. Painted with silver leaf rub n buff, bought this wax paint thinking i will use it for the whole armor but decided to take another color for the whole armor, so just to try this paint for fun, used it on this canister for fun.
Painted some armor and will let it dry then take a few pics with some basic strapping to see the test fit with the robes.
-
Finally my Armour has arrived in good condition, nothing is damage only some pieces with bubble wrap prints which some sanding will fix easily. It arrived on 17 June and i was engross in getting straight into doing it up, so i am updating only now.
So far these is what i have done

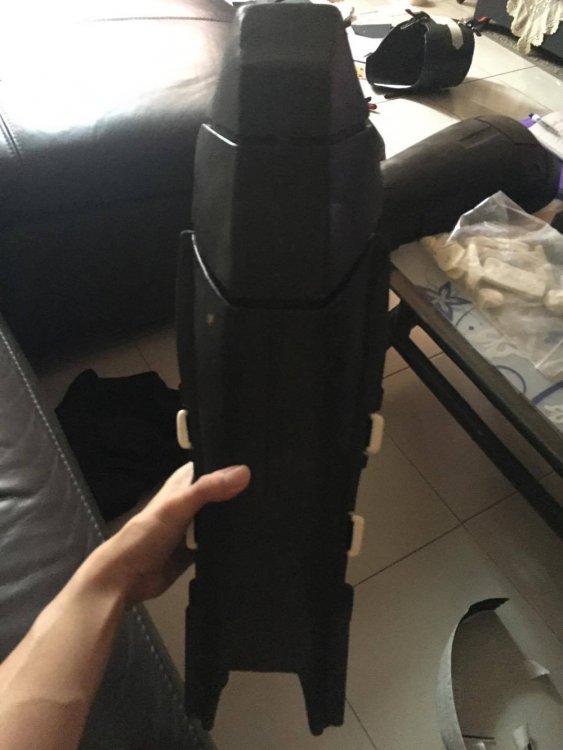
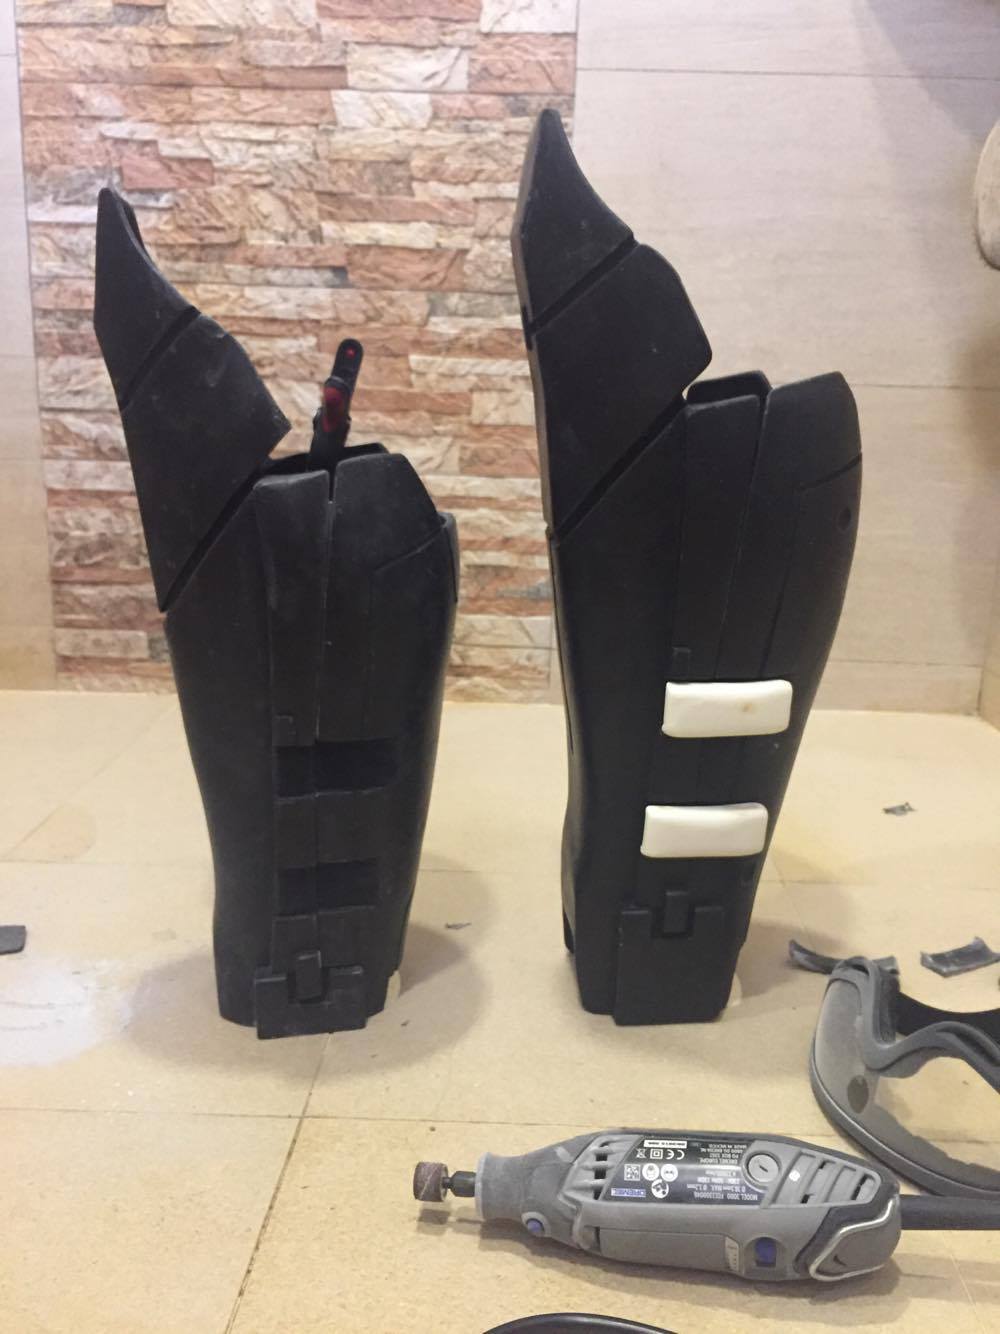
I attach the shin side greebiles with velcro as those will play a part in holding the two piece shins together, i will be using magnets to hold the shins together along with the velcro.
First two parts i put together is the shins and the thighs, the thighs are glued together so it wont be able to open when im wearing it, has to be slip on like a pants.
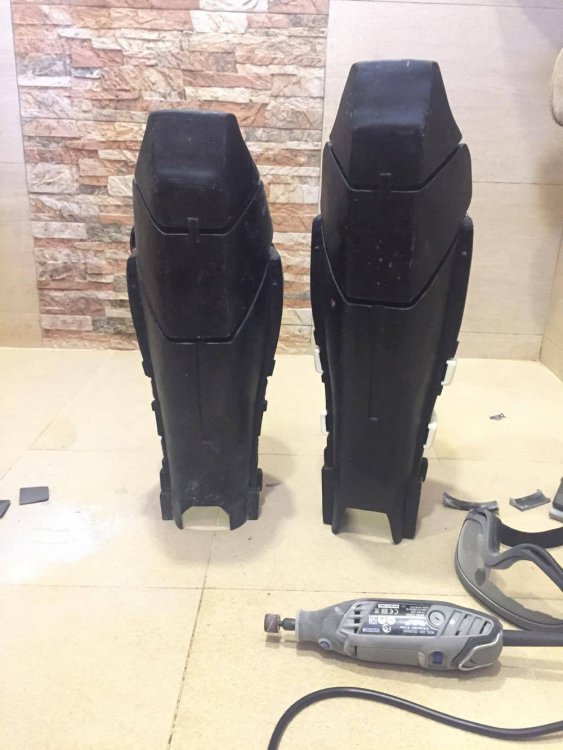

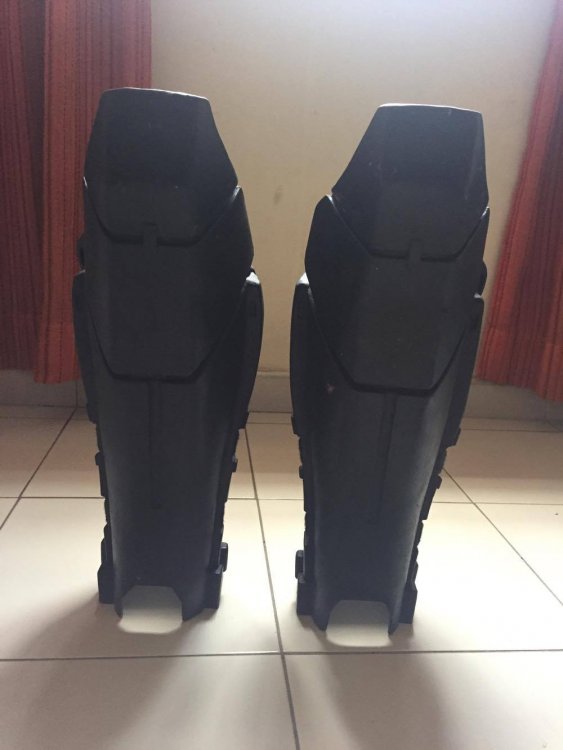

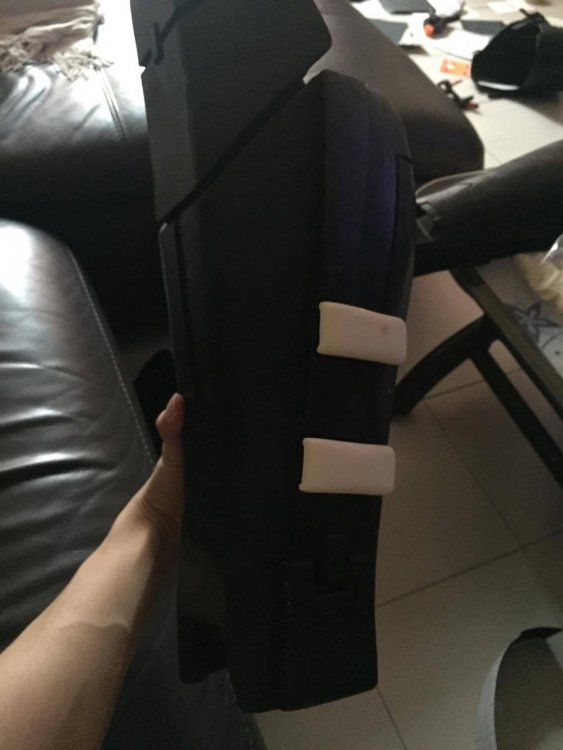
Sadly i am on the short side so i had to trim down the shins as it was way too long for me, it will cause my thigh to clash into it and likely also the boots armour. Using the dremel on resin and fibreglass is super dusty, first time experiencing trimming this material.

This is how the fitting is, better now.
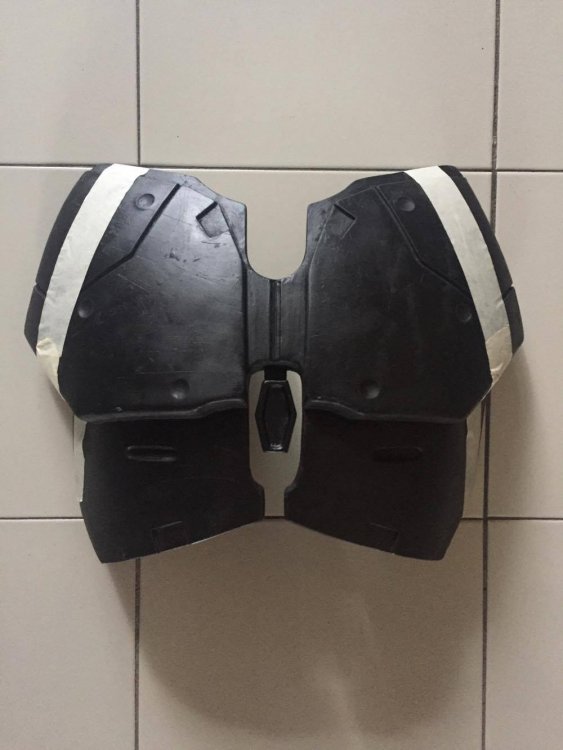
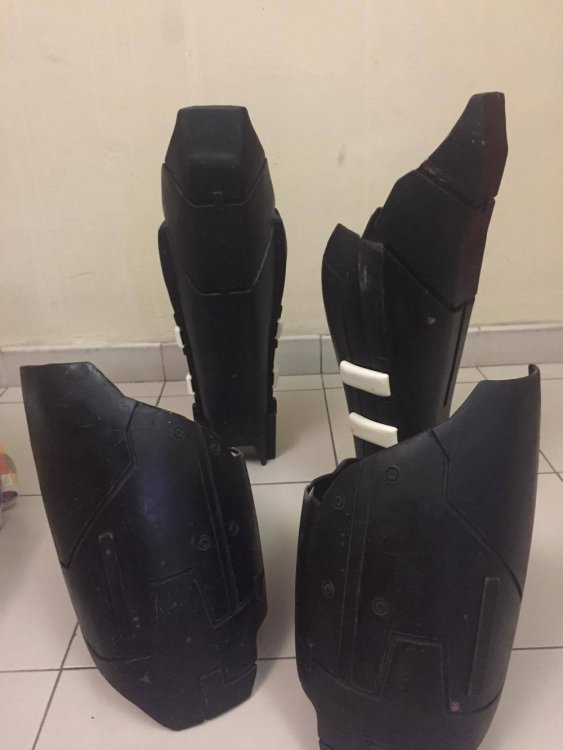
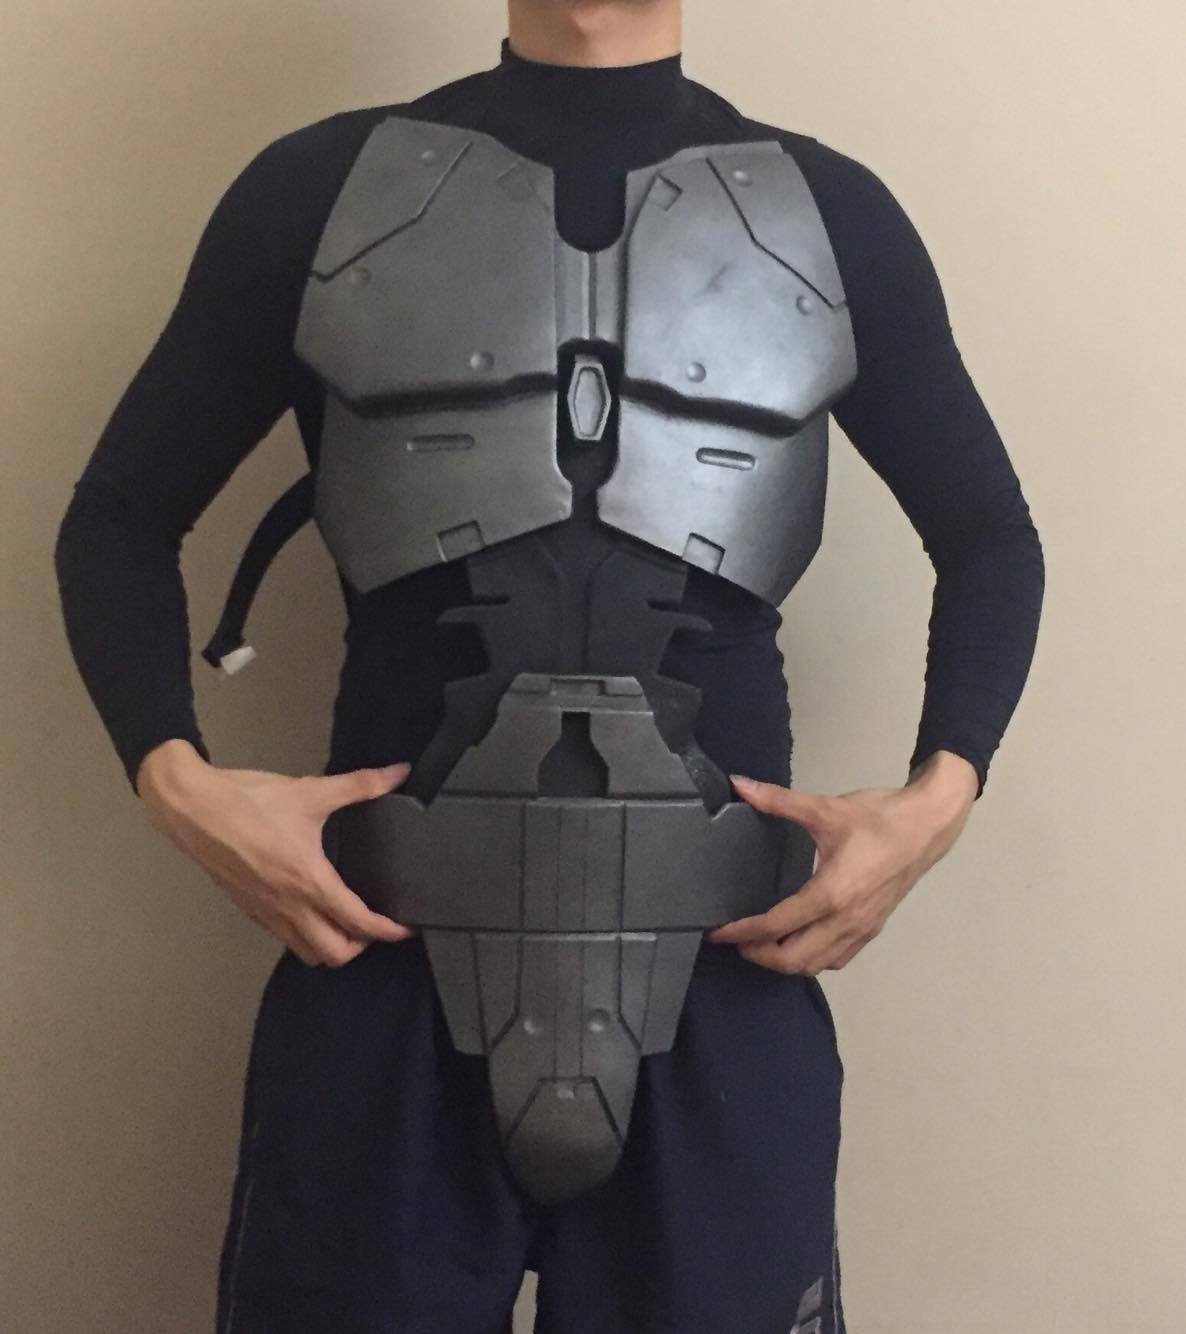
I trimmed the chest piece too, it was way too big for me and it would be hindering my movements when i bend my arms, cut more than i did in the picture actually as after trimming i was still unsatisfied with the sizing. By the way i am only 64 kg and 172 cm tall. This armour was made for a person 180cm to 190cm.

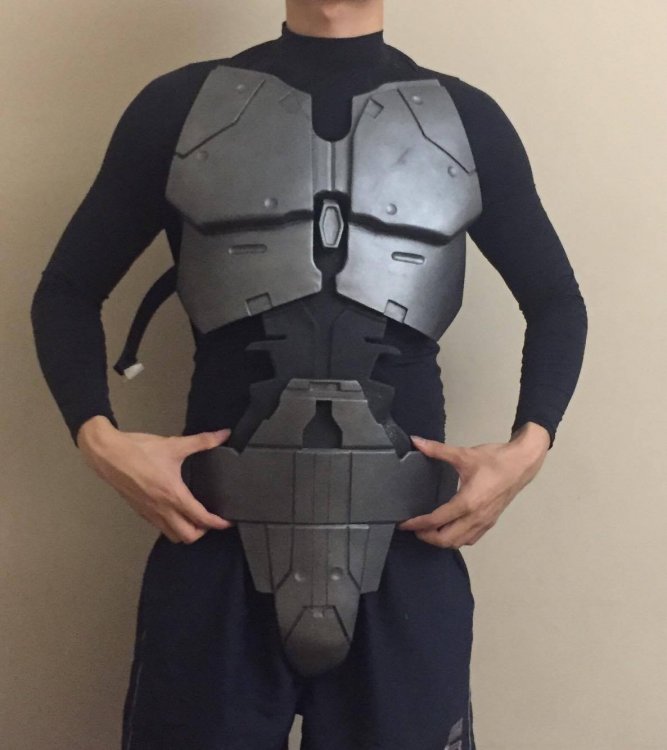
i did some painting on some of the pieces too after the trimming.

Did some modification to the Gaunlets, didnt like the emptyness on the top side of the guanlets, so i got my friend to 3D print a pair of rockets and pipe looking thing. I have a friend that is also working on a acolyte and he bought his 3D files, he was kind enough to let me print this two small greebiles.
Very happy with the look of it now, brings more life into the gaunlets.
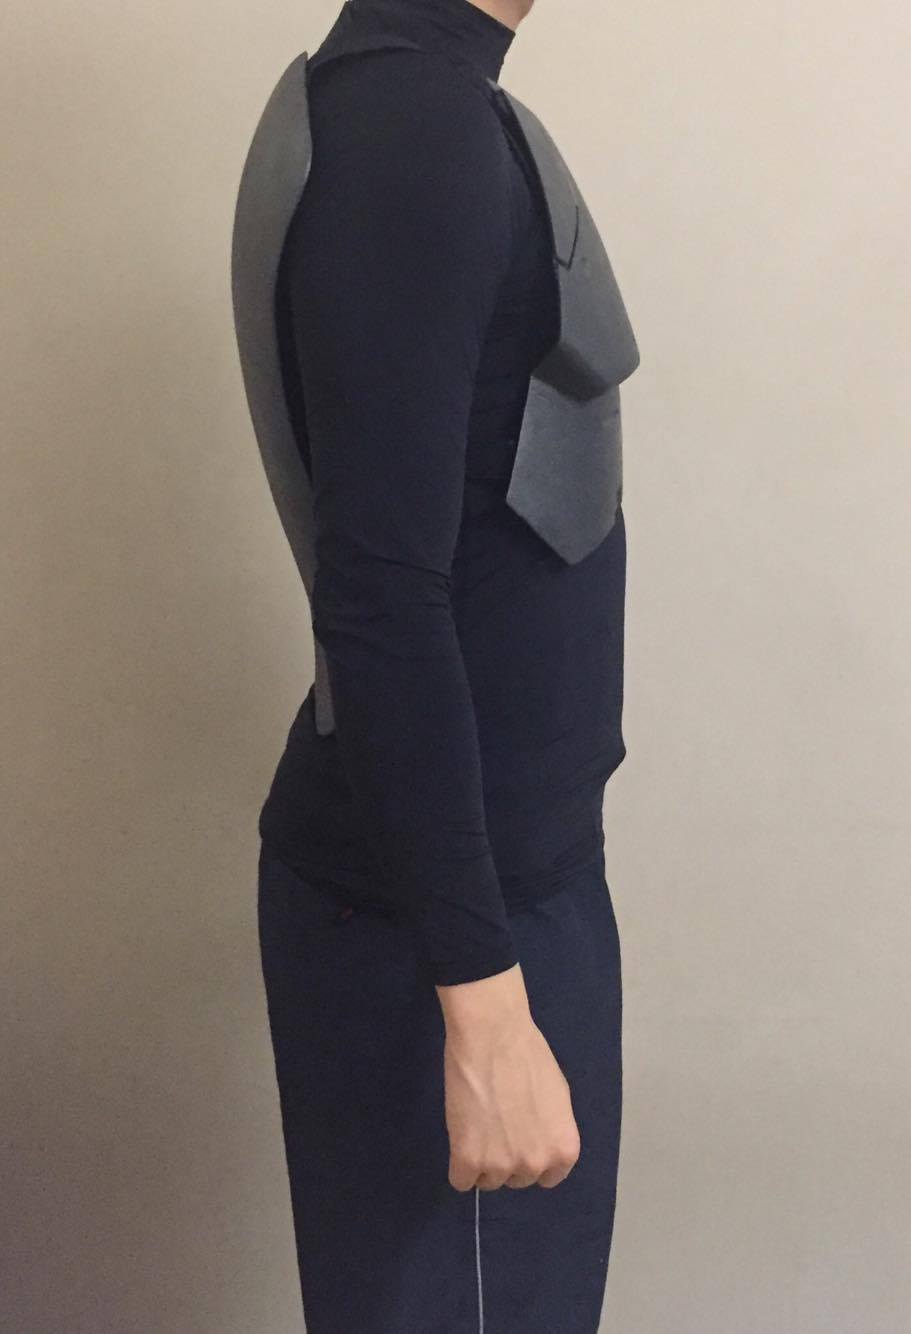
Most of the parts are just fitting together or independent parts such as the back piece, shoulders, elbow, so i will be spraying most of the armour pieces the next few days. Will update this post again in a few days.
-
Great job. What kind of 3D printer do you have? Final came out really good!
Sent from my SM-G950U using Tapatalk
sorry for the late reply, my friend used ultimaker and n2 plus printers
-
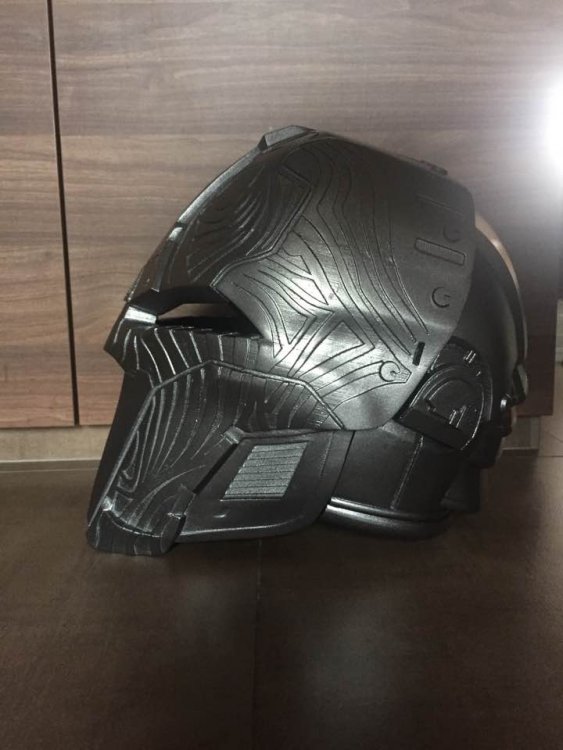
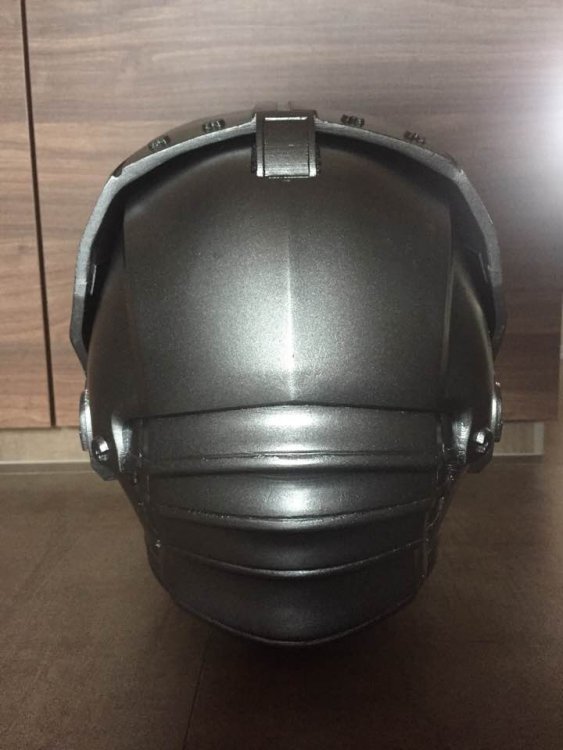
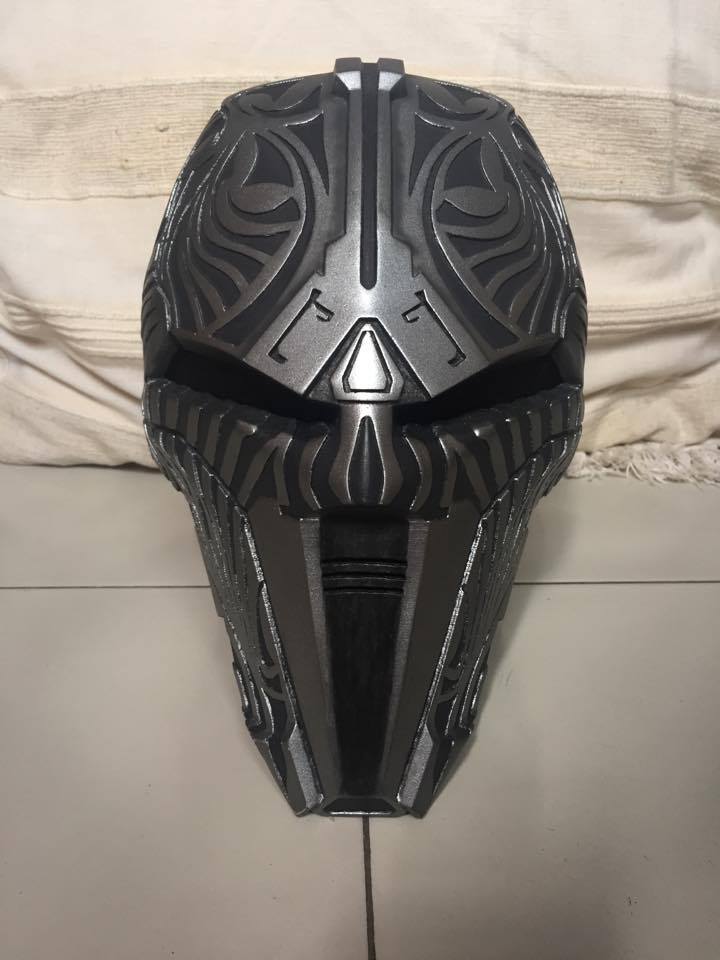
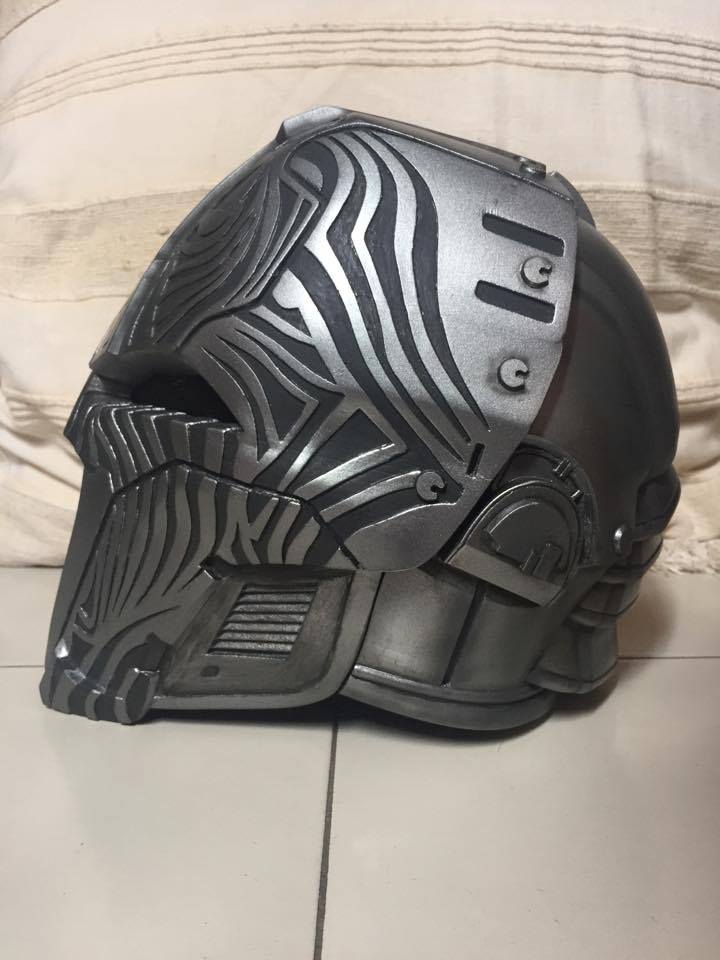
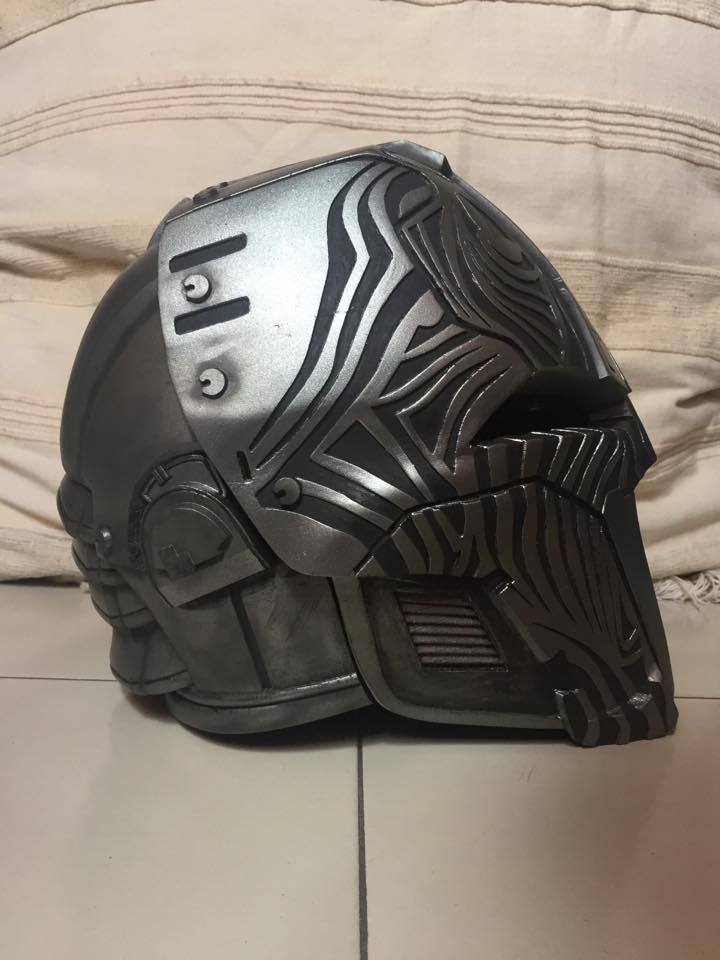
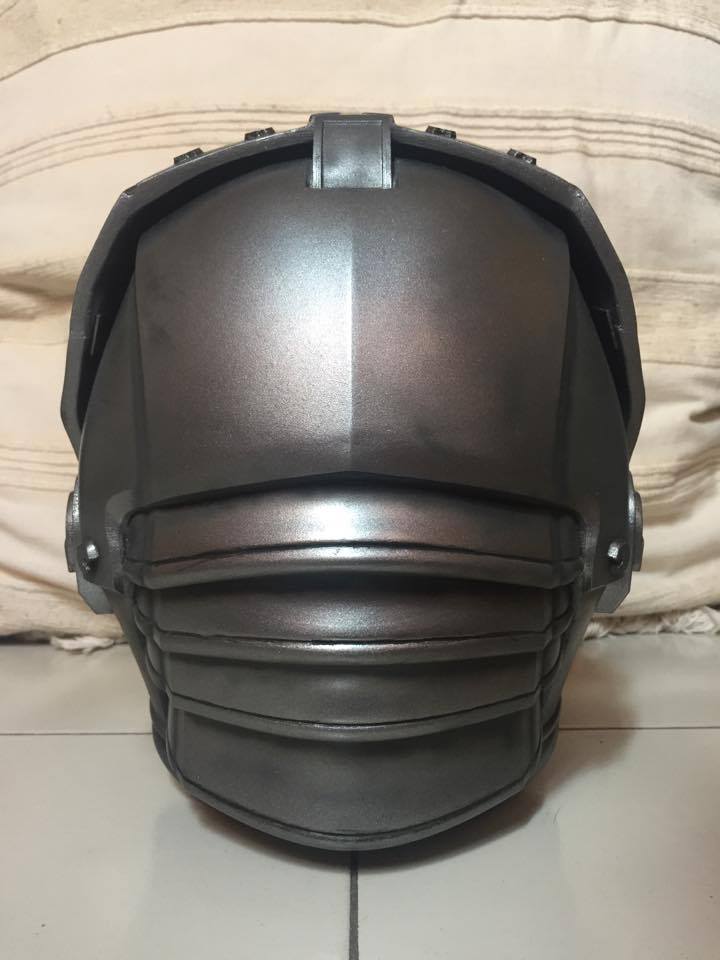
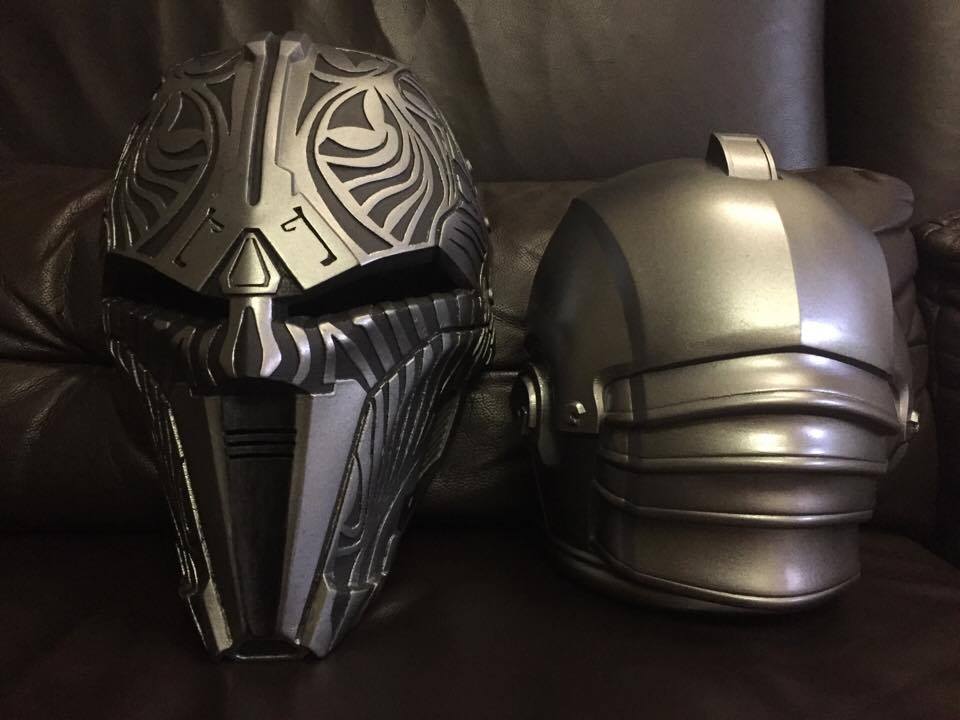
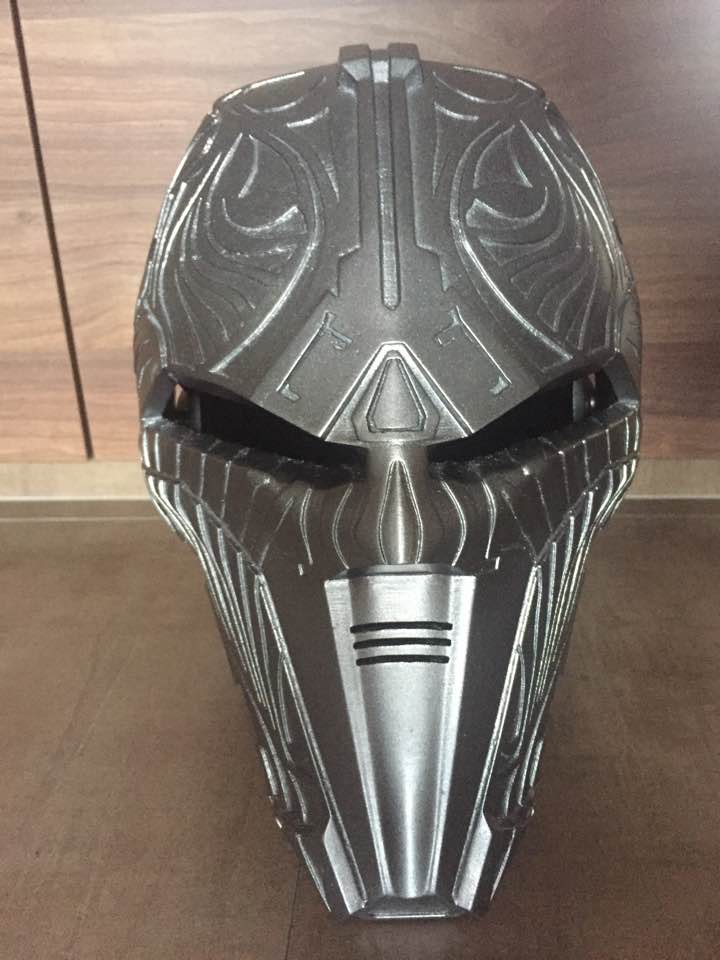
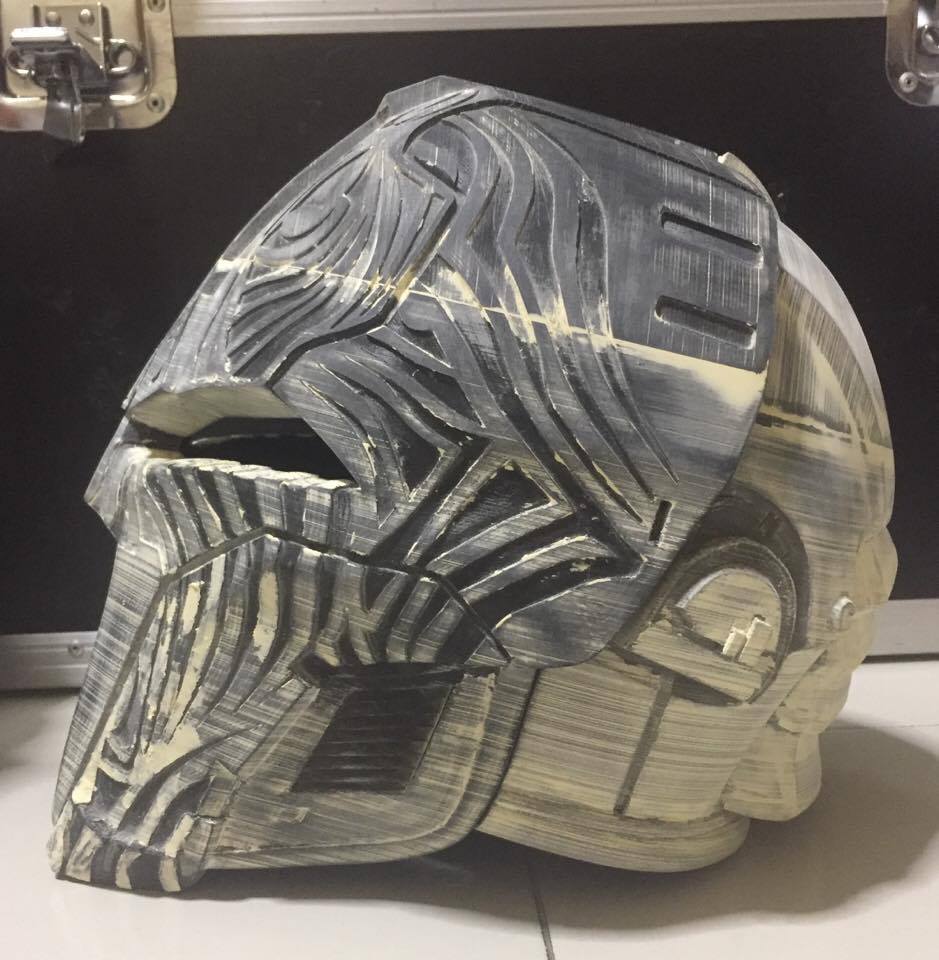
Finally the helemt is more or less done, just need to add some weathering to it


-
2
-
-
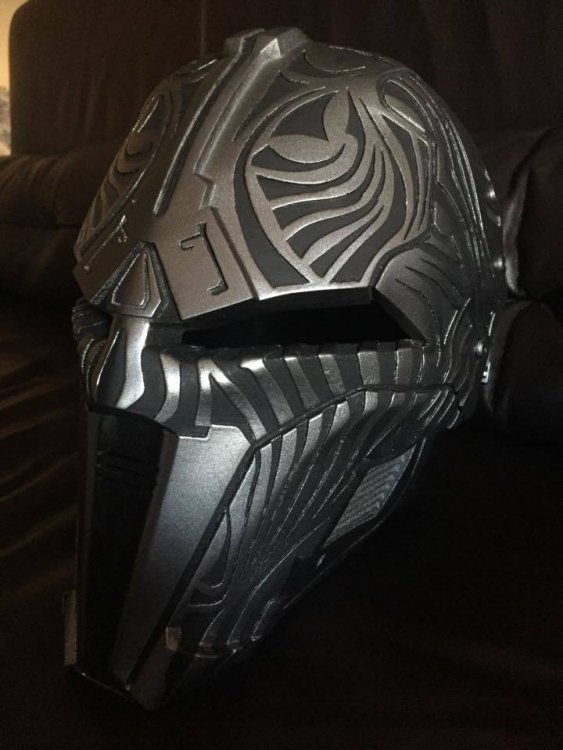
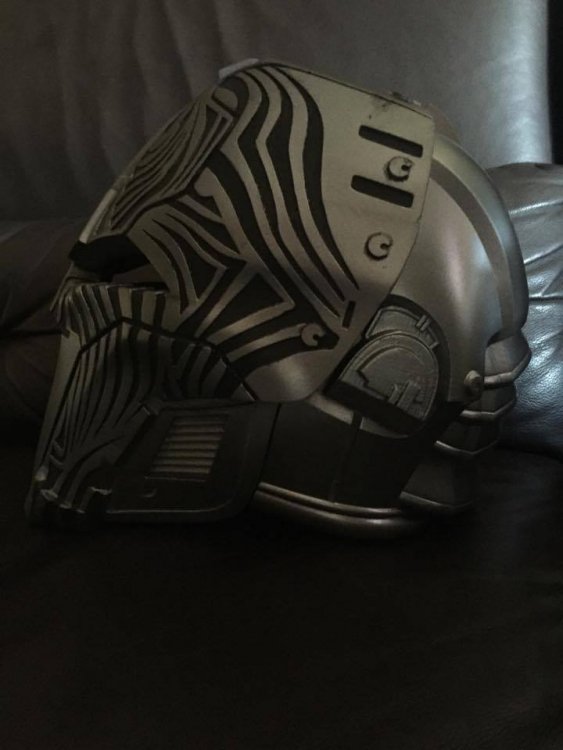
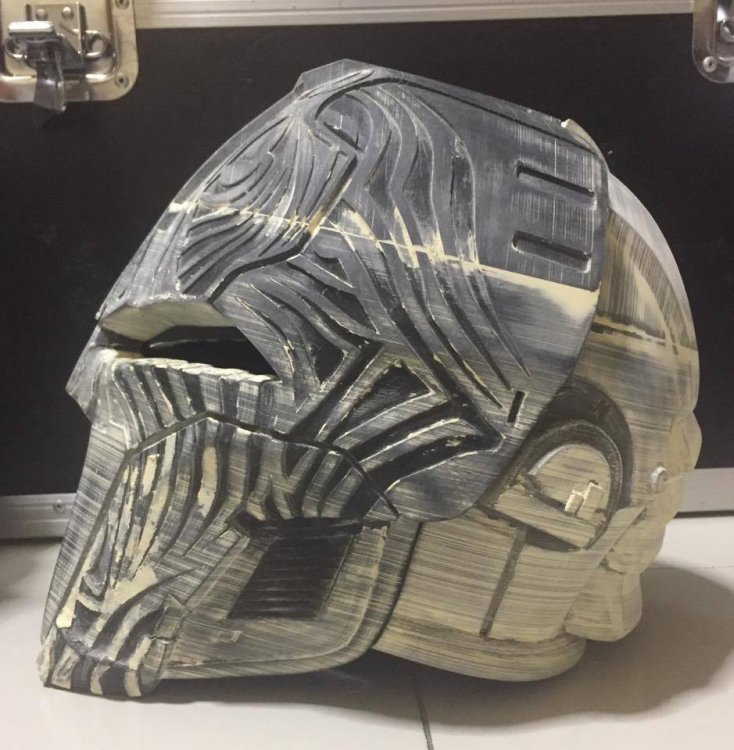
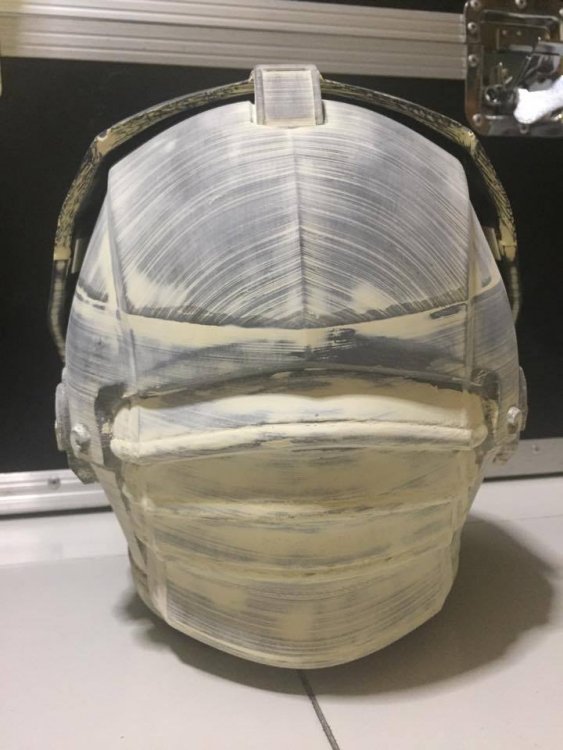
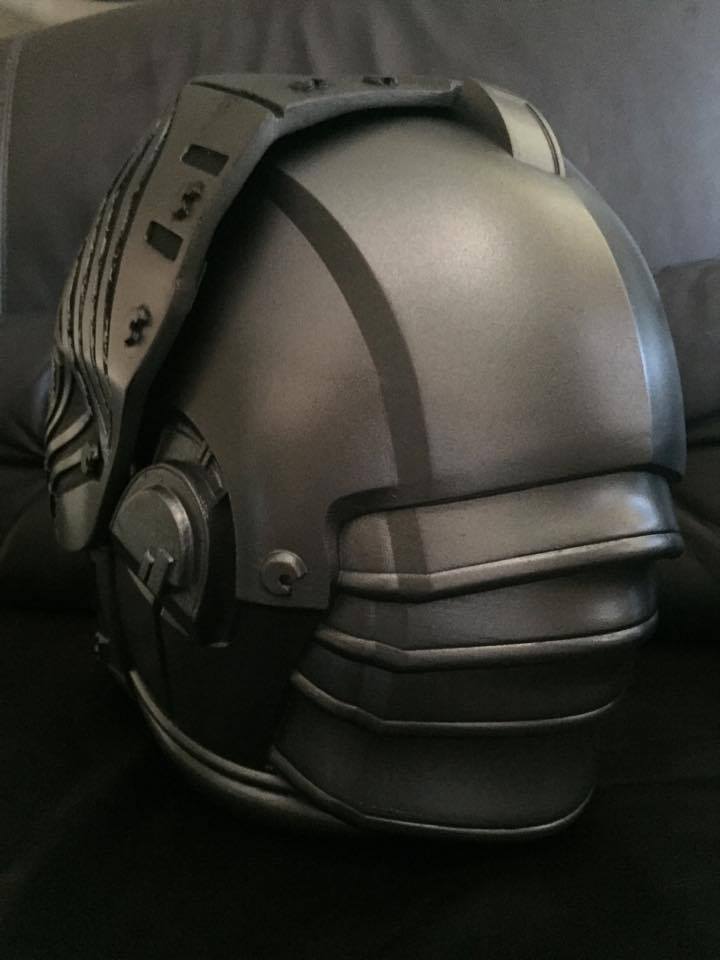
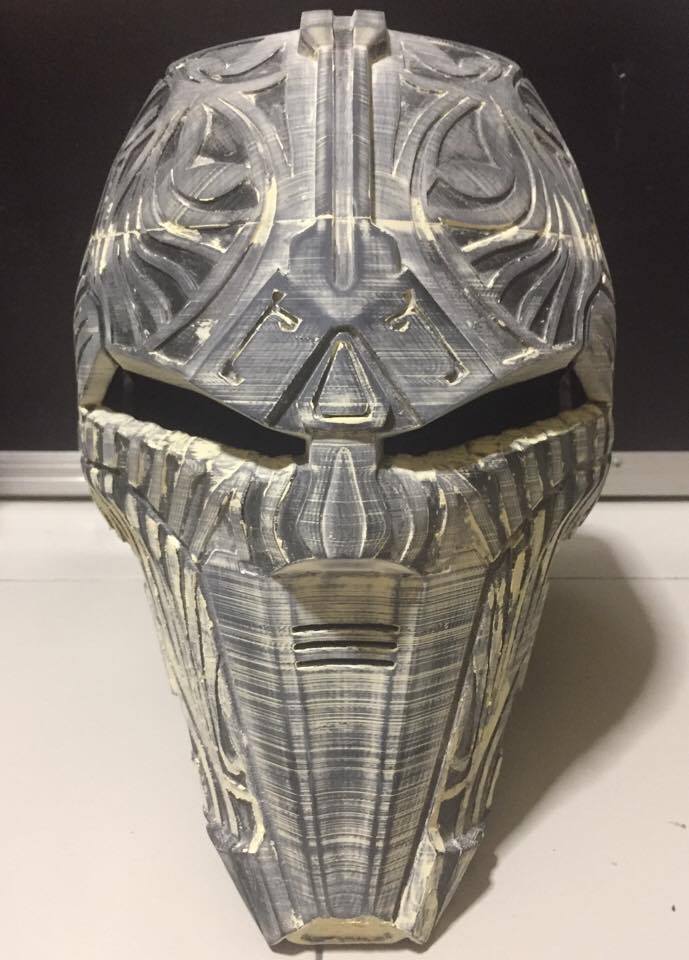
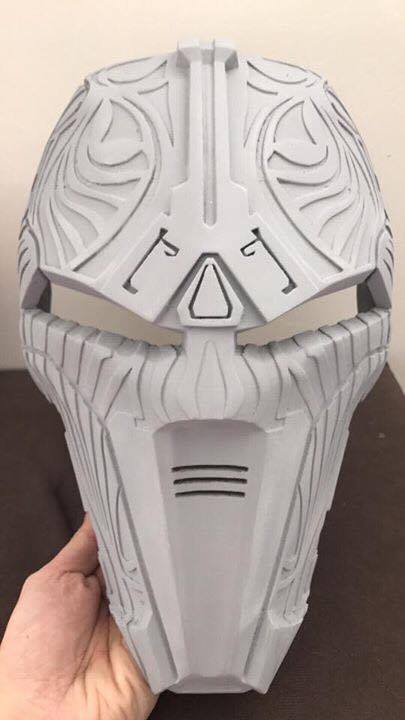
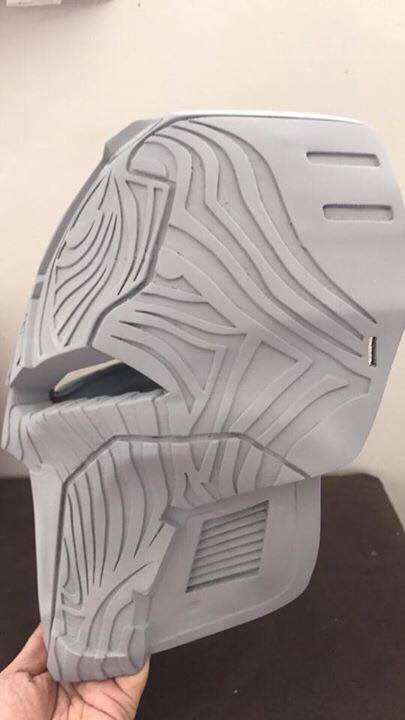
Finally got this helmet painted
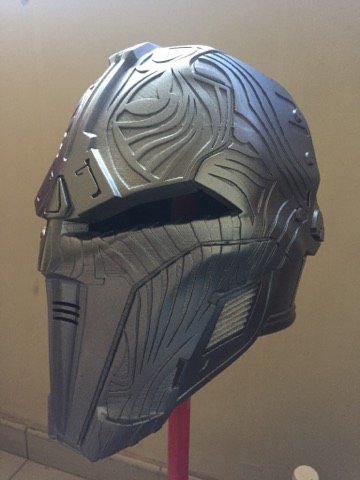

Will start hand painting the recessed lines with acrylic paint next
-
Hi i have decided i am going to build a Sith Acolyte after having two Stormtrooper costumes.
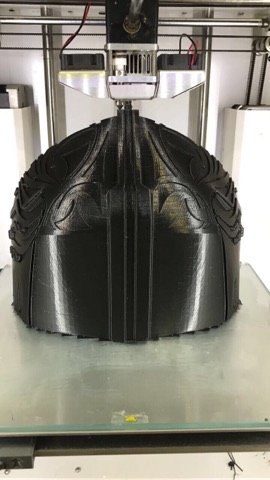
So far i am working on my helmet which is 3D printed locally and here is the progress so far.
As for the Armour im still waiting on it same as my vv Acolyte saber.
Robes are done but need to bring back to the tailor to be altered smaller for me and pain the sleeves once i get it to the right size.
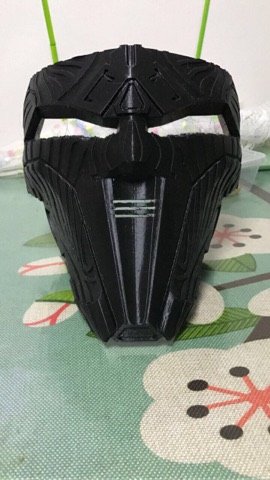
The mask
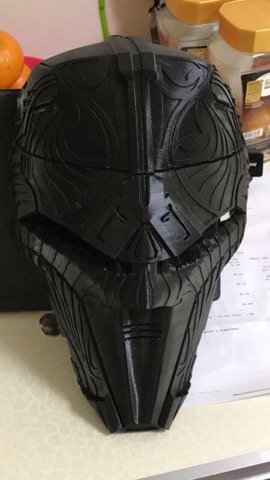
The back piece
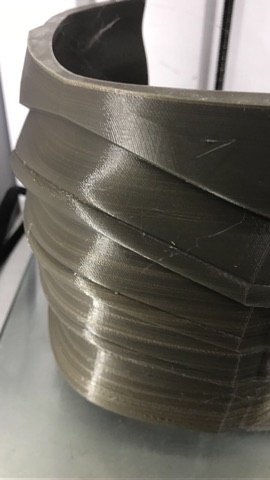
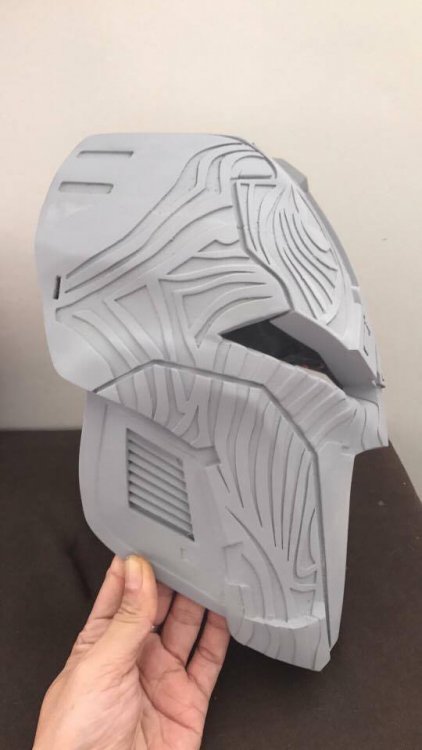
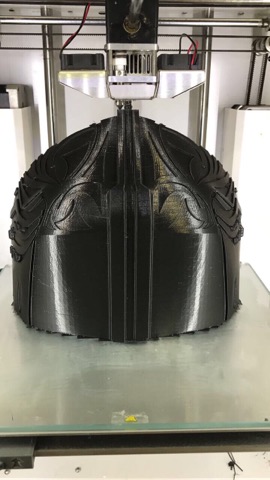
The print was not good due to some nozzle issues but those can be filled

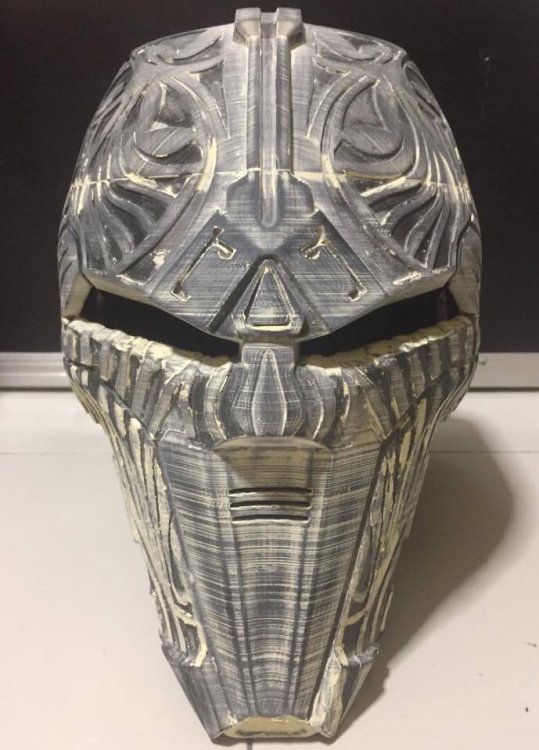
Wood Filler to cover major print lines after rough sanding the whole thing

A test fit for fun with my friend's robes

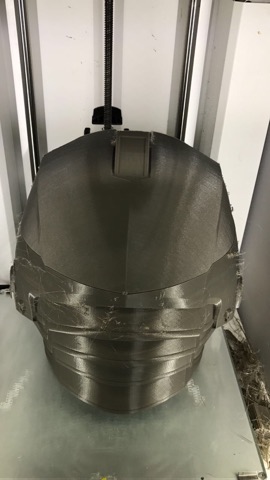
After filling with wood filler and bondo, the recess lines and some parts of the raised parts still had alot of visible lines so i used filler primer


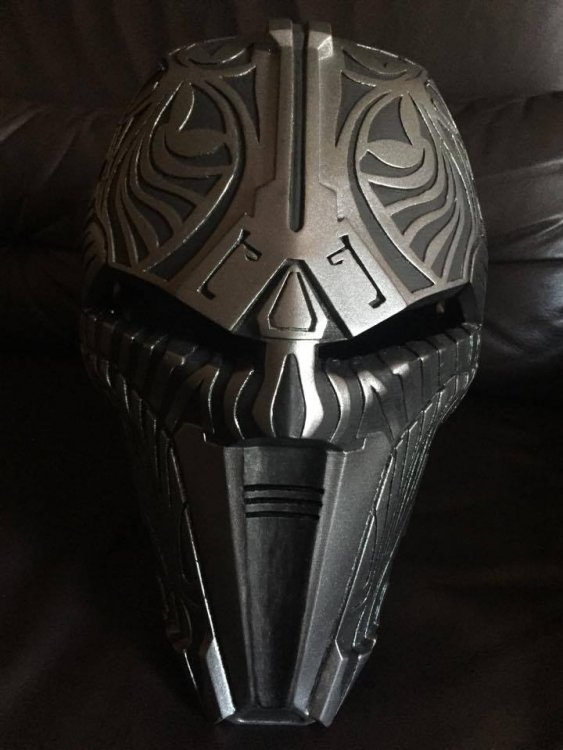
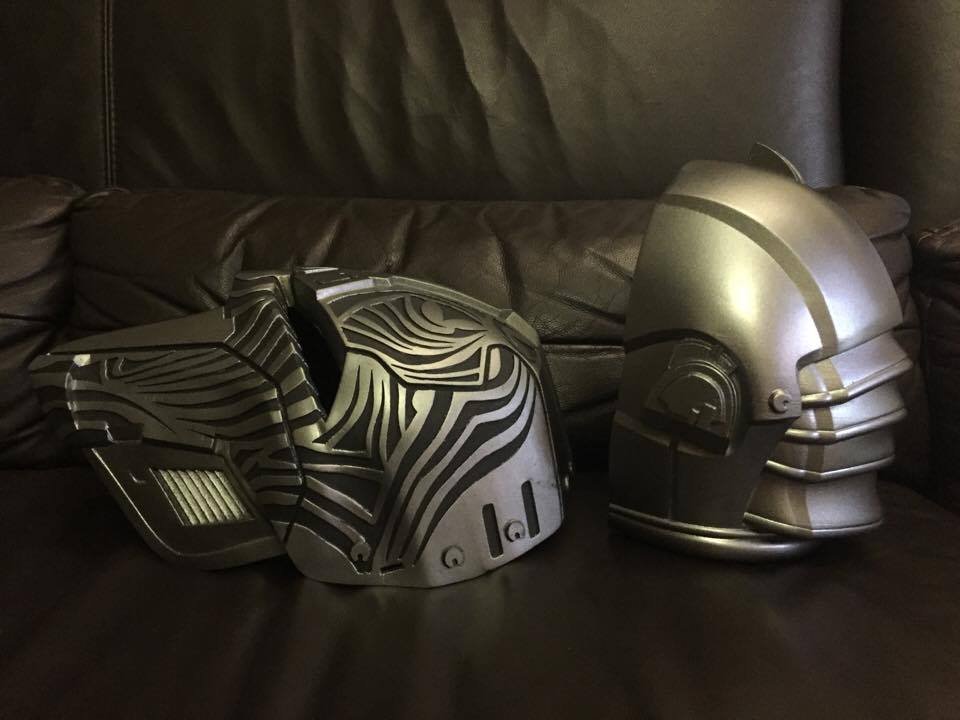
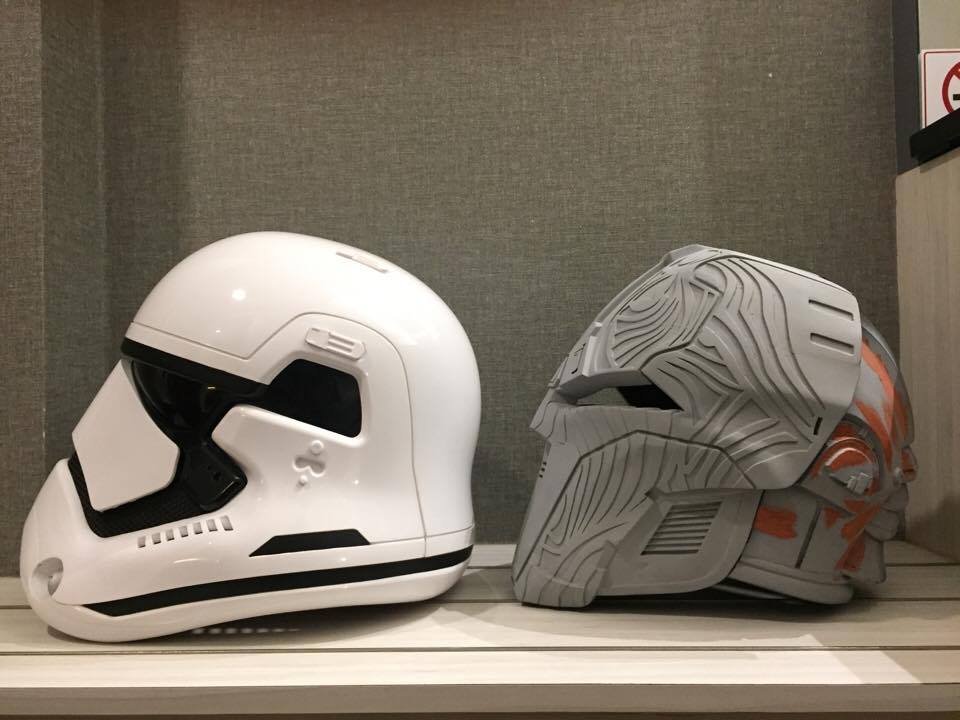
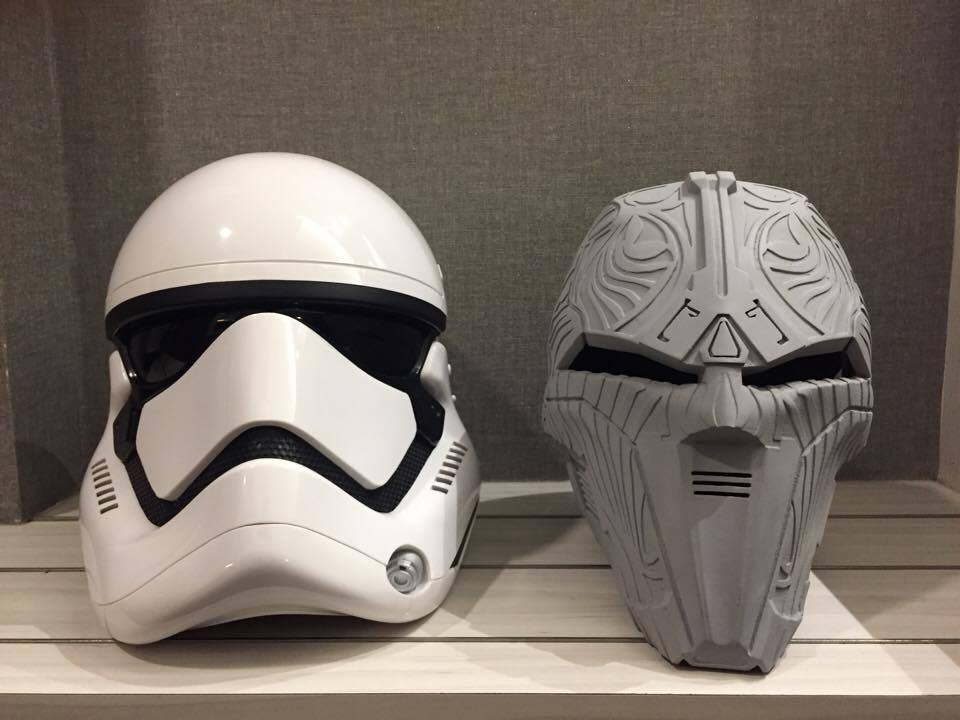
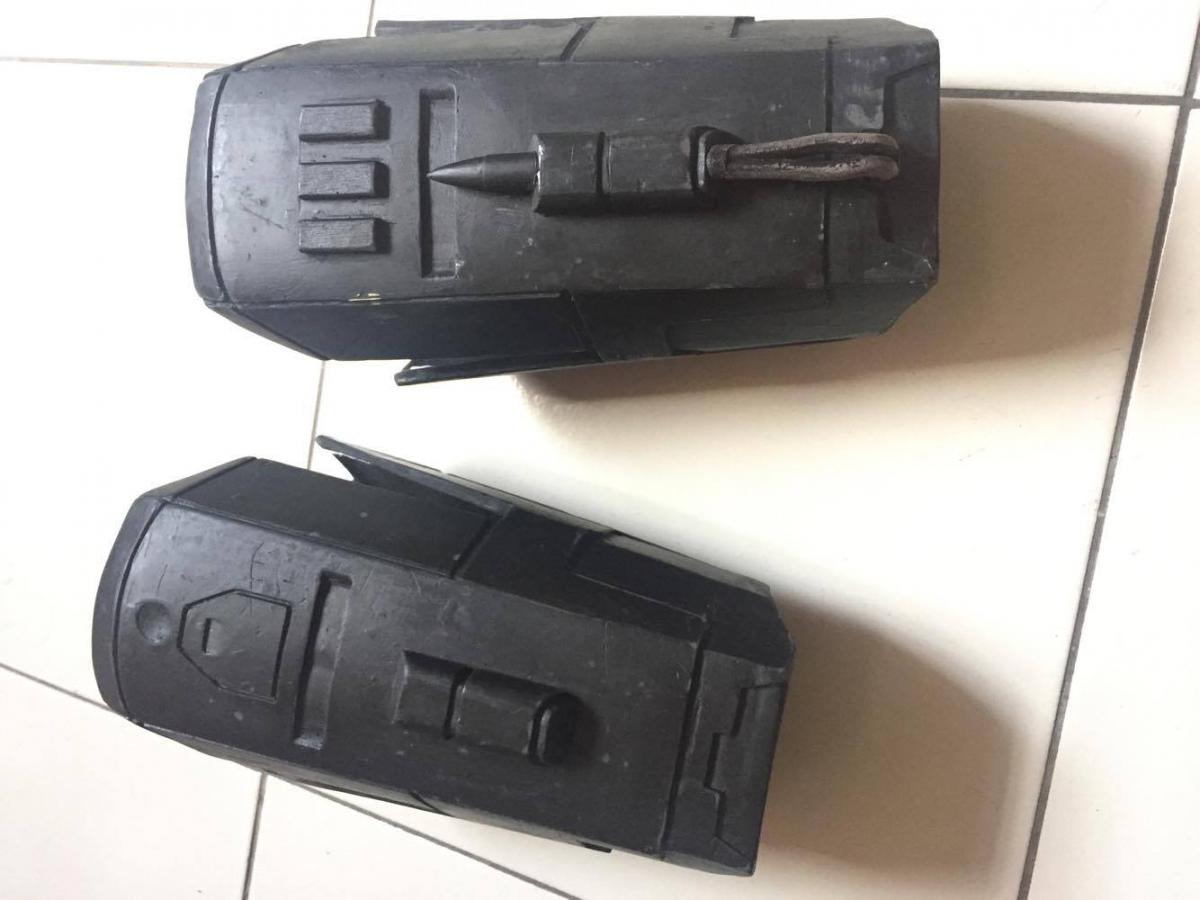
For size comparison with the Anovos helmet
Will be Painting later on.
-
1
-
-
Hi im Jun Liang from Singapore Garrison, have a original trilogy stormtrooper and a first order stormtrooper. Looking to make a Sith Acolyte and get it 501st approved. Always been a stormtrooper and now finally i have found the sith i want to become.
-
1
-
-
http://www.501st.com/members/displaymember.php?userID=17520&costumeID=124
Requesting 501st access.Singapore Garrison
TK 71428
Thanks.


501st/SLD and/or TFE Detachment Access Requests
in Welcome Area and Forum Help
Posted · Edited by Yankee71
Requesting 501st access
https://www.501st.com/members/displaymember.php?userID=17520&costumeID=124
XO Edit: You already have Detachment Members Status, That is the highest it goes, unless you are part of the Detachment Staff.