
-
Announcement
Welcome to the forums!
If you are a newly-approved member, make sure you check out the New Member Checklist!
If you are a Detachment member and can't see the member-only area, post here for access.
-DV
Zoomi
-
Posts
103 -
Joined
-
Last visited
-
Days Won
5
Content Type
Profiles
Forums
Gallery
Events
Posts posted by Zoomi
-
-
Have you taken approval photos yet? I'd love to see the final costume put together!

-
Greetings!
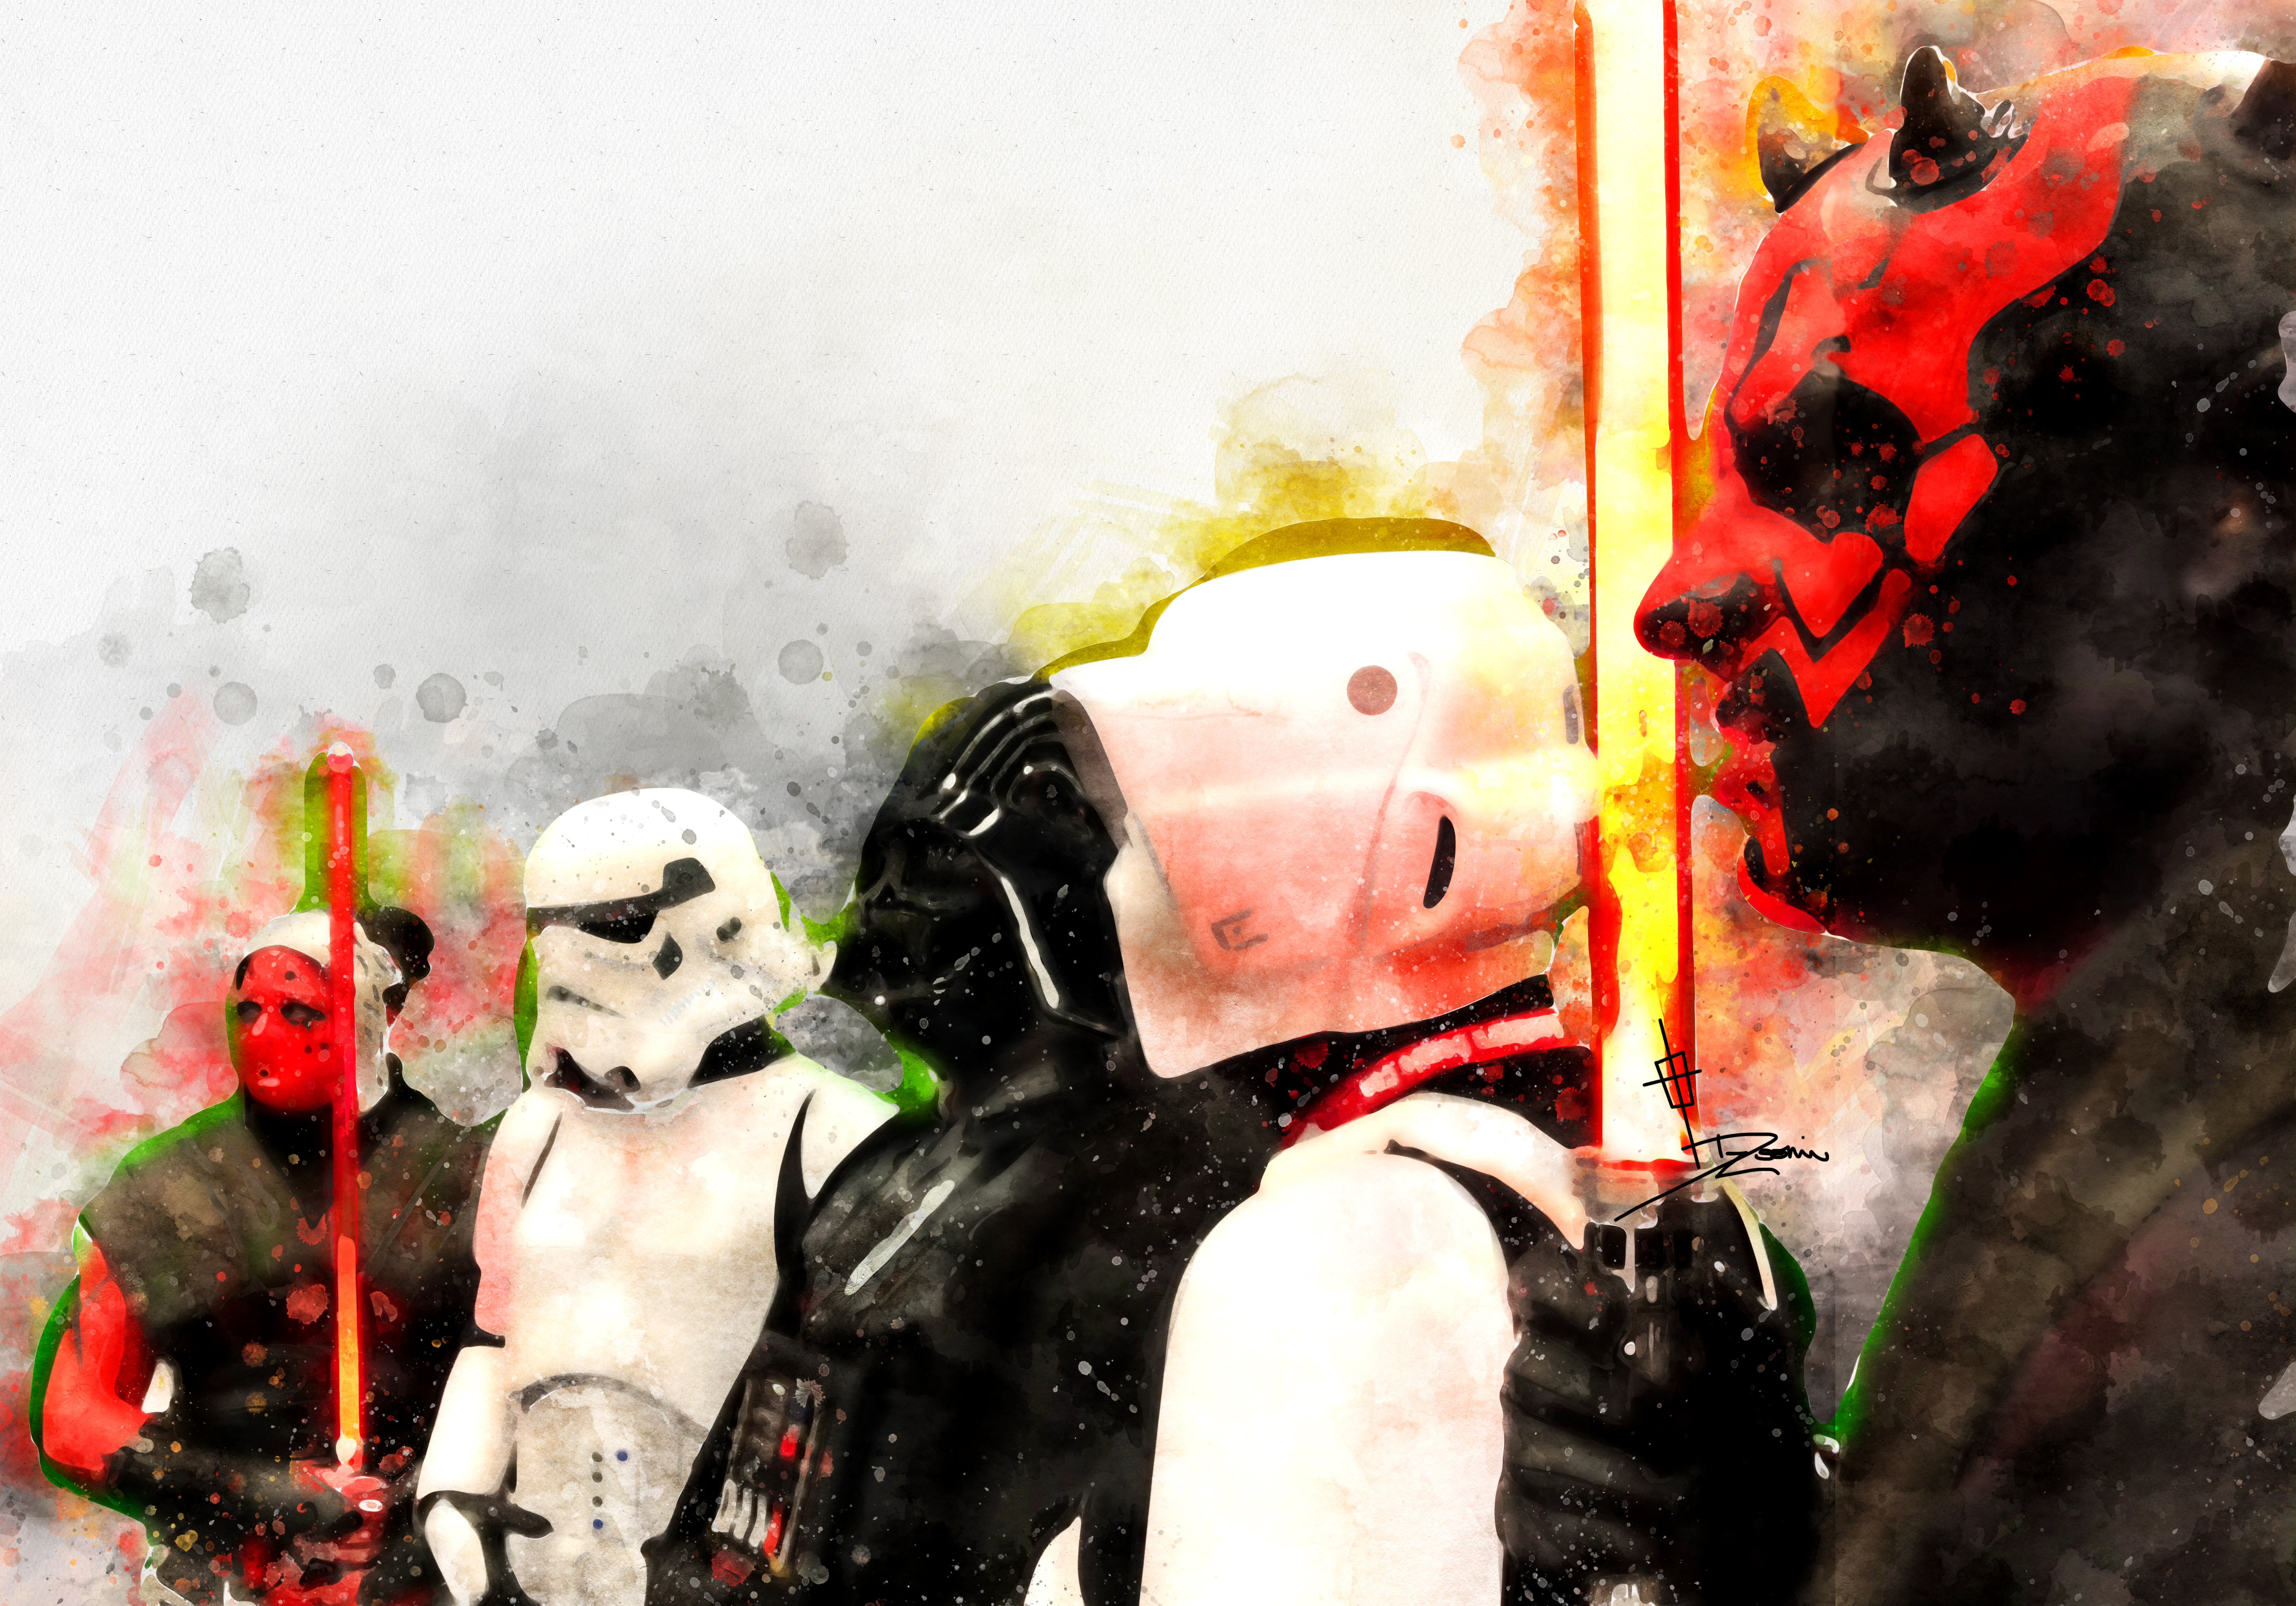
Figured I would cross post between my garrison and here for my Darth Maladi build. It was a rather long road to approval for this costume (my first), with a few life hurdles getting in the way, along with some local discussion about the matchup, or lack thereof between the CRL and reference images.
All up, the build took over a year, with multiple parts being re-made. To say I learned a lot along the way is a bit of an understatement.
I chose Maladi after a few months of browsing the 501st CRL's. I knew I wanted a female sith, and I wanted something comfortable to troop in. I picked Maladi because I believed she was 'simple' enough to construct, with limited resources of experience, while I saved up to purchase a TK.
Sure ... "simple" ... we'll go with that.
Full image directory for Darth Maladi can be found here: http://imgur.com/a/Wd3nt
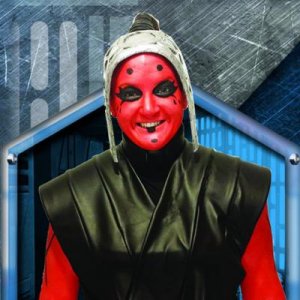
Head Piece
Original head piece was made with foam, silver paint, glued to a head-band. Luls. This one didn't cover enough of the front of my head, so ... time to make a new one!
Second headpiece was made out of leftover vauform plastic, heated and sculpted to the shape of my head. Slow process, lots of test fits, heat resistant gloves were a must, but eventually it was shaped well enough to not require any clips or fasteners to my hair / head. 2mm foam was then cut in to shape, and the pattern stencilled on before being cut with a scalpel. Bondo was used to smooth out the front of the head piece, and then the headpiece was painted silver and detailed / weathered.
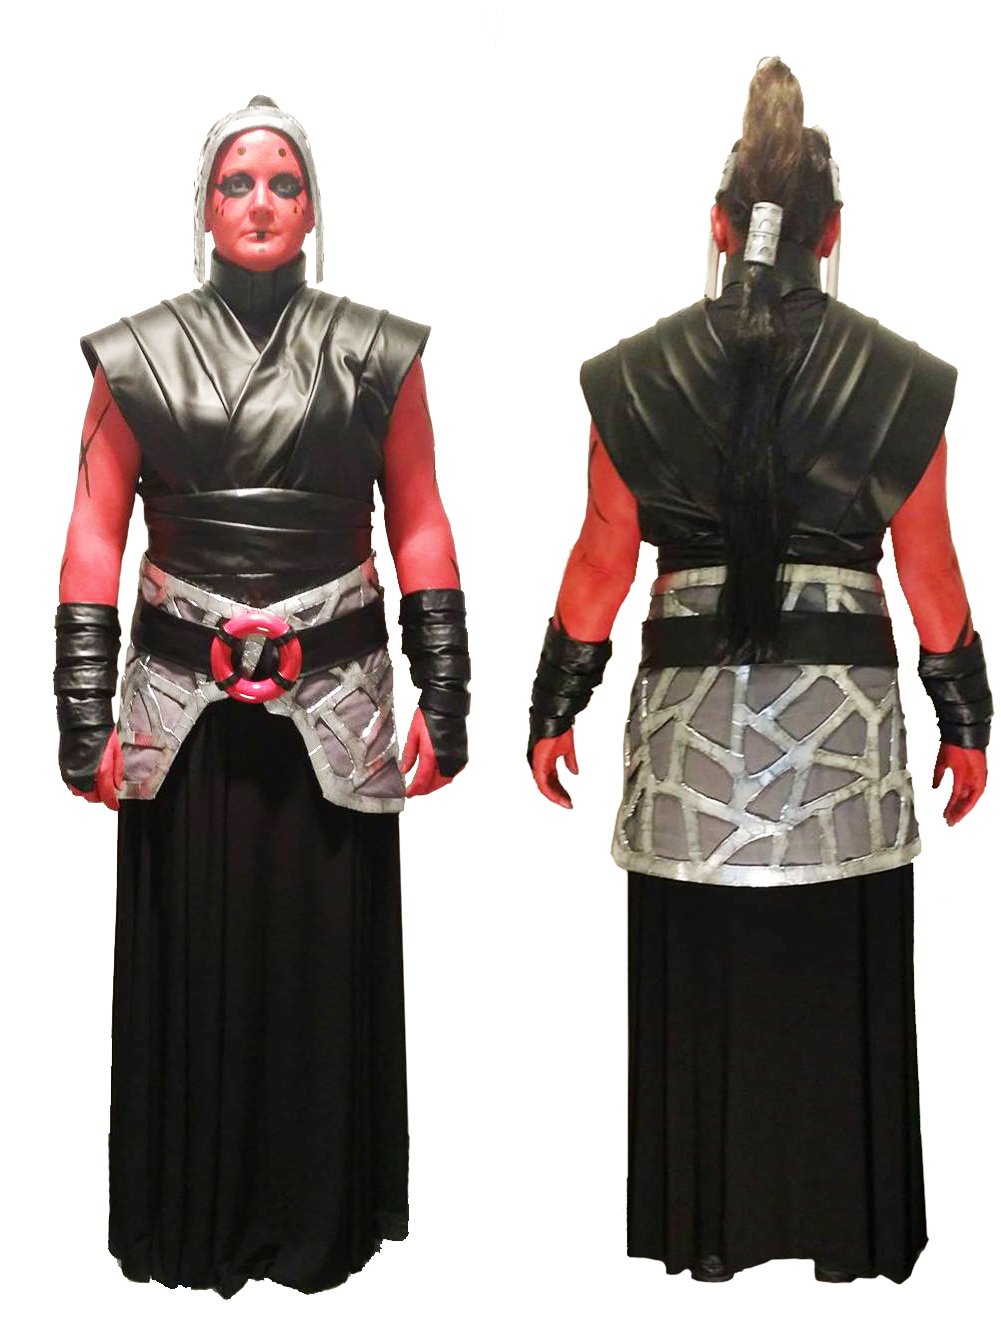
Hair Wraps
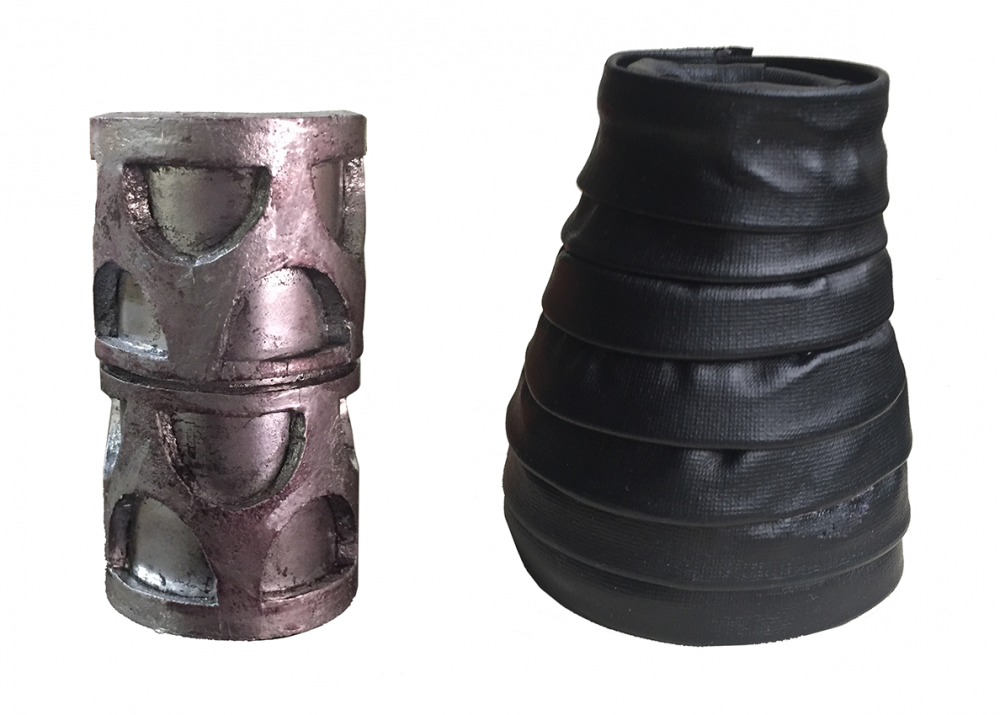
Two hair wraps were crafted; one in silver as the clip near the back of the head. This clip also holds in place my black hair extensions. The other, a the top of my head, was crafted out of foam, and covered with PU Leather. There was a lot of debating over this - some comics, the top wrap appears silver, others, leather. Opted for leather, and supplied enough reference photos to pass
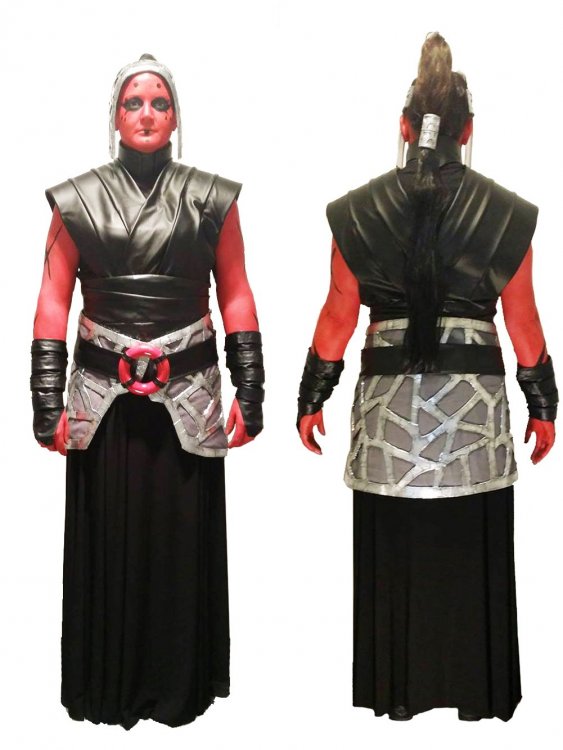
Leather Wrap Shirt
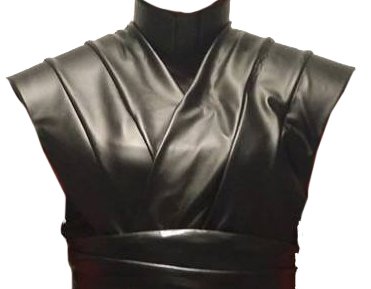
I originally made the shoulders with 5mm foam, covered in pleather / PU Leather. After screwing up the placement of the seams, I had a fair amount of trouble getting replacement fabric which set me back time wise, but eventually I found a new shop and purchased a few extra meters just in case.
First round of the shoulders - scrapped to the bin.
Second round of the shoulders, was a rush job in time for a con, so they were simply sewn to the correct 3 panel width, but had ZERO rigidity.
They lasted maybe 3 pre-approved troops, before they received a 2mm foam re-enforcement, but even then, I was still not happy with them.
Third round I completely re-sew the three panels, backed them with new 2mm foam panels, and then provided another cover on the underside. I slit off the foam on the inside, to taper down, so that the wraps were more comfortable over my chest. Subtle placement of velcro has allowed me to secure the shoulders high enough, per the CRL, with the right side overlapping at the front, and left over the back.
The shoulders are actually cinched in place with corset, that is then covered with a wrap that I made out of multiple, off centre strips of PU leather.
Inner Shirt
For the inner shirt ... I found a super cheap black turtle neck, long sleeve top, and cut the arms out. The turtle neck was originally used as part of the ribbed collar, but in the end I opted to try and make the collar appear to cover the ribbed shirt, when in fact, the collar had a bibbed panel ... more on that next.
Collar
After originally fixing a ribbed panel to the outside of the inner shirt, a template of the collar was made in paper, cut to foam, and then covered in PU Leather. The smooth collar comes all the way around the neck, and fixes at the front over a ribbed insert - which is also fixed to the collar.
Skirt
I used an A-line pattern, and chose to use an elasticated band at the top. The fabric (from memory) was a lightweight, nylon / polyester blend, that allowed me to be comfortable in the Aussie summer. This is the ONLY part of this costume that I made once, and done right. Hahaha.
Boots
I had a pre-existing plain pair of low heeled boots that worked perfectly for this costume.
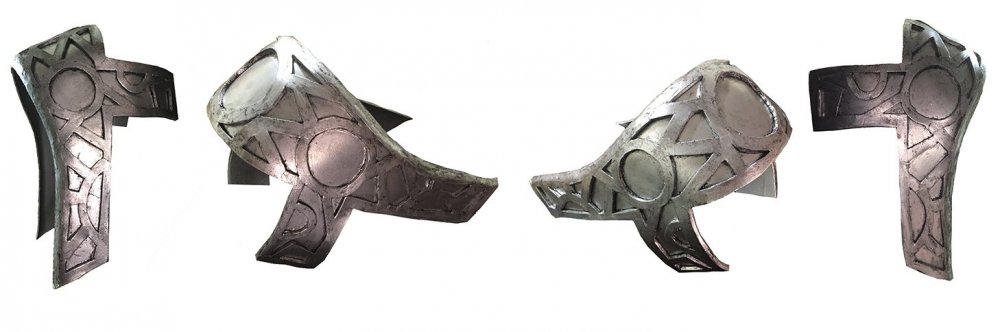
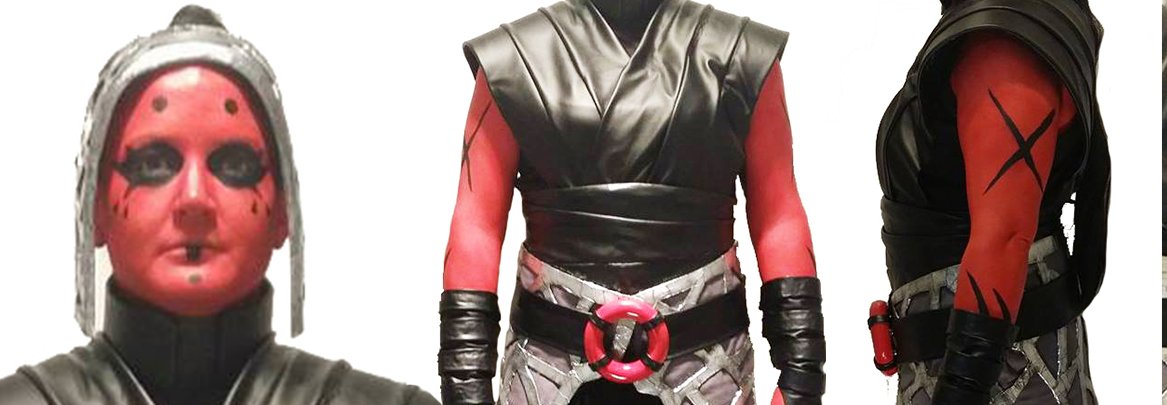
Forearms Wraps
These are going to be re-made, but I used off-cut PU Leather to create two wraps from mid-arm, to over the top of the back of my hand. The wraps were then bulked out with 4x additional bands of PU leather, which have since fallen off in troops (hence needing to be re-made). These bands are not necessary per the CRL, but against the comics, again, enough resources and it was passed.
Silver Hip Wrap
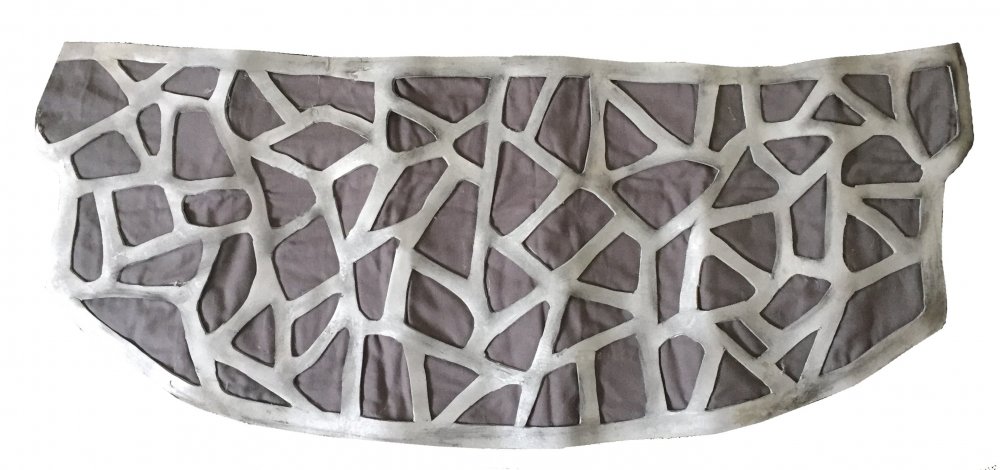
First hip wrap was made out of grey fabric and silver paint.
Second wrap was made out of grey fabric, and a 2mm foam overlay, painted silver.
Third wrap was made out of grey fabric, darted at the back to prevent gape, with 2mm foam overlay covered in aluminium tape, weathered back to a dull metallic.
Will need to construct a fourth wrap, as the aluminium tape - while it looks phenomenal, it has cracked to show the foam underneath.
Belt
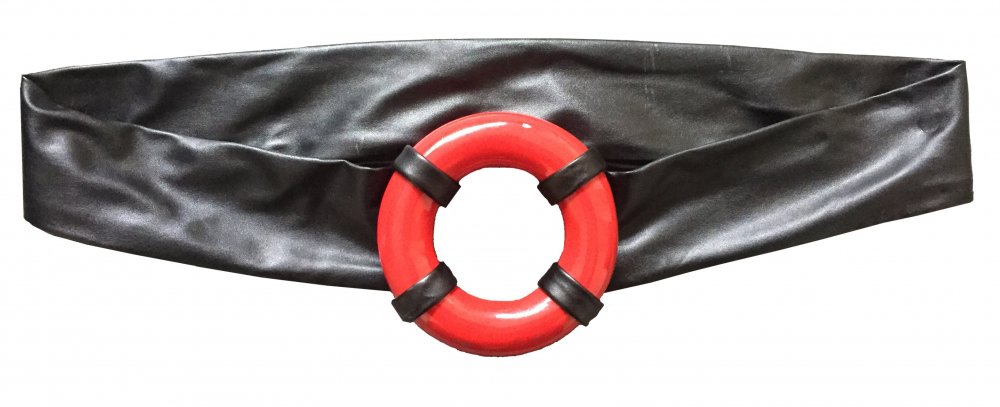
The same PU Leather was sewn into a 7cm tube, and a red buckle made out of foam, wrapped in red ribbon.
The second buckle, was made with wood and bondo, rounded and shaped to be a lovely red donut. Press-studs are used at the back of the belt to secure it, and four trims of leather were used to make the belt appear to be connected by them (they aren't. It's all totally the press-studs).
Body Paint
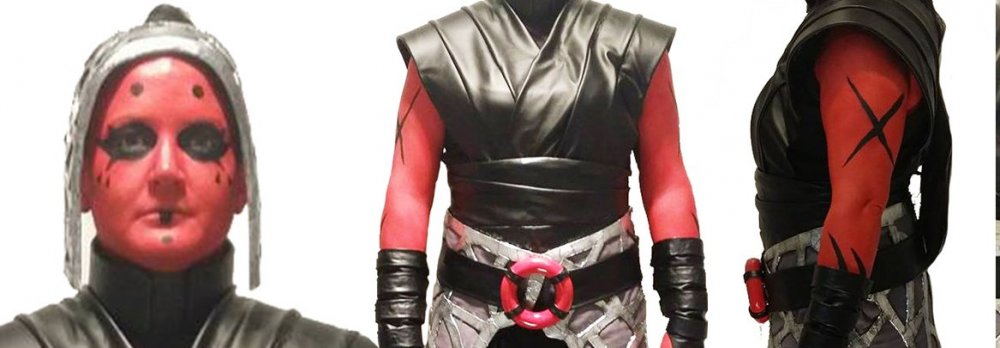
Initially, paint was a water based body paint. And dear lord it's horrible. While easy to apply for quick troops, it goes tacky at the slightest hint of moisture, cracks around any movement (elbows, mouth) and it is just, in general, uncomfortable to wear.
I heard about Reel Creations - and subsequently found it too expensive, and too much of a nightmare to ship to Australia.
My Garrison's local Maul was on the hunt for a local supplier as well, and largely thanks to his efforts - a new paint was found, called Fionair. And wow ... what a difference. Applied with an airbrush, I can easily get about 8 hours without ANY touch-ups. I use black water based face paint for the tiger stripes, and face marks - while I am tempted to make templates, I really enjoy the final part of detailing the black over red. It's my final part of kitting up, and I think I'll keep enjoying it for a while to come
Optional Items!
I use contact lenses, and if the troop allows for weapons, one half of the maul sabre. Doubt I will ever go for the pointed ears.
So there we go! A very quick, rough talk through of my Darth Maladi! Happy to answer any questions. Just have faith that while some projects might not be the fastest of builds - you can get there in the end!
********
I've opted to keep this build thread without pictures. If you would like to read the painful process unfold - you can head to my garrison's website and view the complete build thread and check out a bunch of progress photos as well as individual items were upgraded along the way.
I owe a lot of thanks to my garrison for helping me over the final line with this costume. I burnt out a little towards the end, and remaking so many pieces over and over got old, and if it weren't for someone hijacking and helping me finish off some items - I doubt I would have made it to approval.
Thanks for reading!
-
Greetings! I'm Debs, from Sydney, Australia and I'm a member of the Southern Cross Garrison- 501st Legion.
I had a pretty laborious build with this costume (my first), as the CRL vs references was a tad problematic. Several re-builds and upgrades for various reasons, but overall really happy with how it turned out! I now have an approved Darth Maladi, and I am looking forward to joining the Flagship Eclipse Detachment!
In my spare time I train MMA, and work in the industrial rope access industry.
I have a TK build on the go, and I'm also working on sourcing all parts for a Bazine Netal costume.
Cheers!
~DebsSL-21872
501st - SCG
http://www.501st.com/members/displaymember.php?userID=21489&costumeID=191


Darth Zannah
in Comic Characters
Posted
A member of my Garrison has been researching Darth Zannah and has been unable to find enough resources, even after purchasing the comics. She said that there was not enough description about her outfit, neither were there enough drawings - only headshots.
I would love to see this character created into costume, and given a CRL! So if you find anything substantial references to create a CRL please post about them!