
-
Announcement
Welcome to the forums!
If you are a newly-approved member, make sure you check out the New Member Checklist!
If you are a Detachment member and can't see the member-only area, post here for access.
-DV

Mynock
-
Posts
85 -
Joined
-
Last visited
-
Days Won
2
Content Type
Profiles
Forums
Gallery
Events
Posts posted by Mynock
-
-
I need to retire my Jawa after 4 years of wearing it. I've grown out of it a while back and just need to fit into something new. Since 2011, I've wanted to build an Acolyte. Where would you recommend I start? I already purchased the mask from Slave1Pilot a couple years ago.
Are you looking to build your own Acolyte completely from scratch, or purchase an already available kit? If completely from scratch, there are literally hundreds of different ways you can go about it, and I'd gladly answer any questions you may have. If you are looking to purchase a kit, there are several makers on here including me, who offer Sith Acolyte Armor. I'm still working on getting everything together in my build, but whatever pieces I have made and displayed here I'm able to offer. Send me a PM if you require more information.
-
Yep. Just pm me with what you are interested in and I'll send you some info

-
It's been a while since the last update, so here I am!
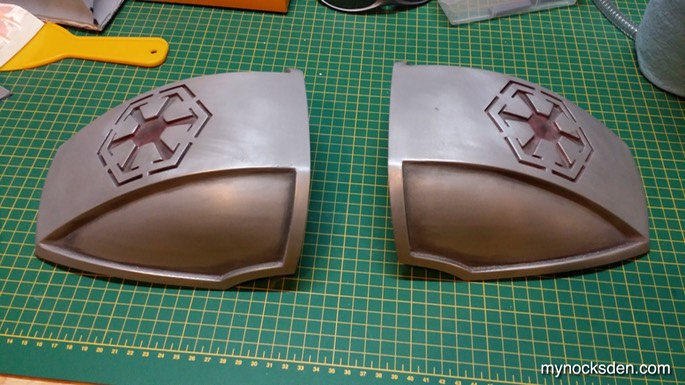
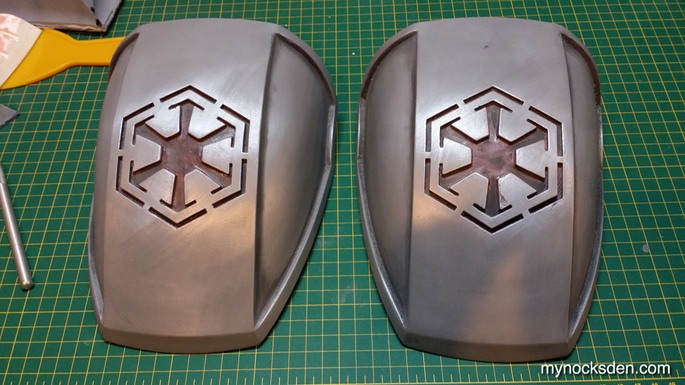
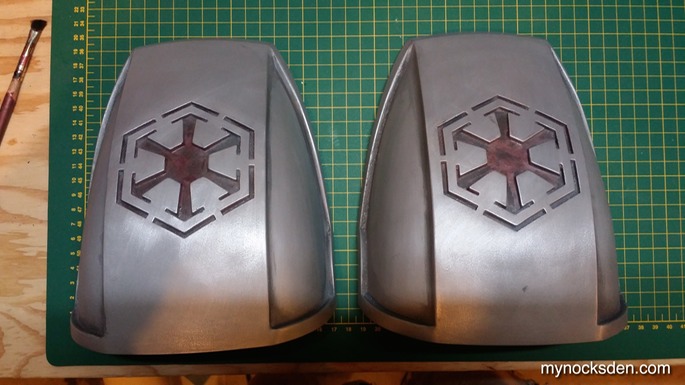
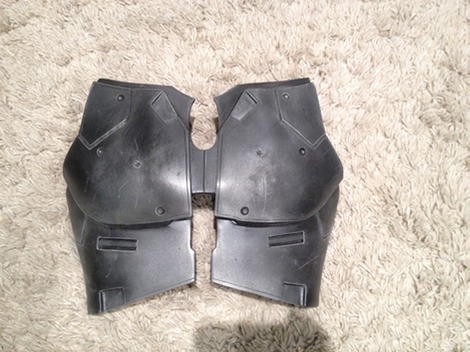
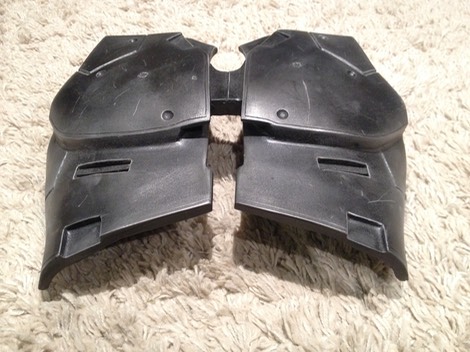
Since I can't sit still and be satisfied with what I make once I make it, I decided to redo the pauldrons completely from scratch. Both Jedi and Sith appear to have wide shoulders, and some Jedi reference material I have clearly shows that there are indeed pauldrons under the robe. My oroginal pauldrons are bell shaped, and do not give the same wide shouldered look under the robe. Besides, I'm slighly fat these days, so the wider the shoulders, the less focus on the bulging midsection

Blur pretty much used Jedi armor for the Sith Acolyte model (with a few minor tweaks), the Acolyte has the same shoulder shape as the Jedi. It's safe to assume then, that the shoulder plates are the same (or nearly the same)for both characters.
Since the pauldrons are not fully visible, I took some artistic license once again incorporated the Imperial logo. I CAD modelled the pauldrons and 3D printed them in pieces. A lot of work went into these, considering they will most likely never show during cosplay.... but whatever! It's the principle!
I am almost finished the boot armor, which I should have ready in the next day or so.
-
I know you're busy with other projects right now, but is there any chance of an update on when you'll be starting on more parts for this build, such as leg & thigh armor? I'm drooling over your work so far! Forgive my impatience for wanting to see more! By the way, I sent you another PM awhile ago, but I'm not sure if you got it yet? Looking forward to seeing more from you soon!

Yes! My apologies! Cod plate/mid-section is being worked on as we speak, and should be done very shortly! I will be replying to your PM as soon as I am done typing this up!
-
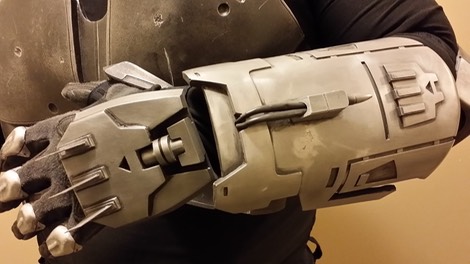
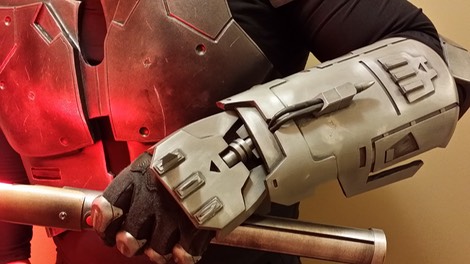
So, after many months, I'm happy to say the Sith Acolyte gauntlet assembly is finally completed! Made a few mistakes in trimming the two halves of this prototype, making the upper backward rail too short, but the overall fit is spot on considering the upper was done by hand, and the lower using CAD.
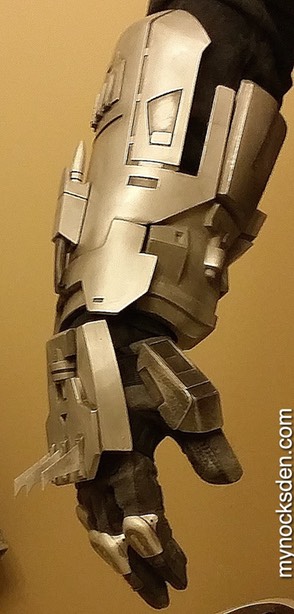
Now that the most crucial pieces of the armour are done, it's time to focus on the COD plate (which will be made of rubber...hopefully), and the legs.
-
Thanks guys for your constant words of encouragement! It's what keeps this build going!
Star Wars Celebration in Anaheim in April 2015 will be my very first ever costuming event (tickets bought and hotel booked!) , and even though it's still nearly a year away, I'm determined to get this build finished, and done right!
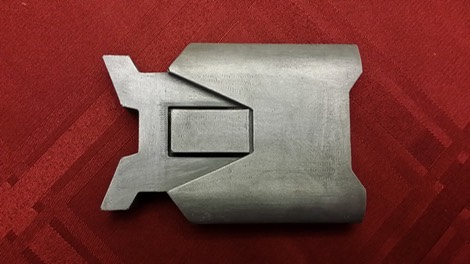
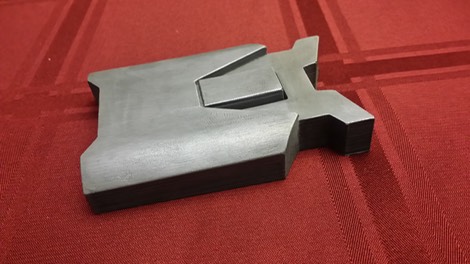
Here are some photos of the finished plug of the lower gauntlet ready for silicone molding! Very excited to cast this piece and finally complete the gauntlet assembly.
-
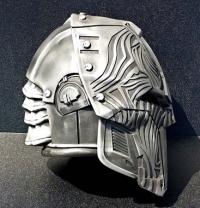
It's been a while since I've posted any progress on this build; that was mainly due to lack of progress which resulted from me getting distracted yet again with another project of mine that I just completed: the SWTOR Shae Vizla Exalted Mandalorian helmet.
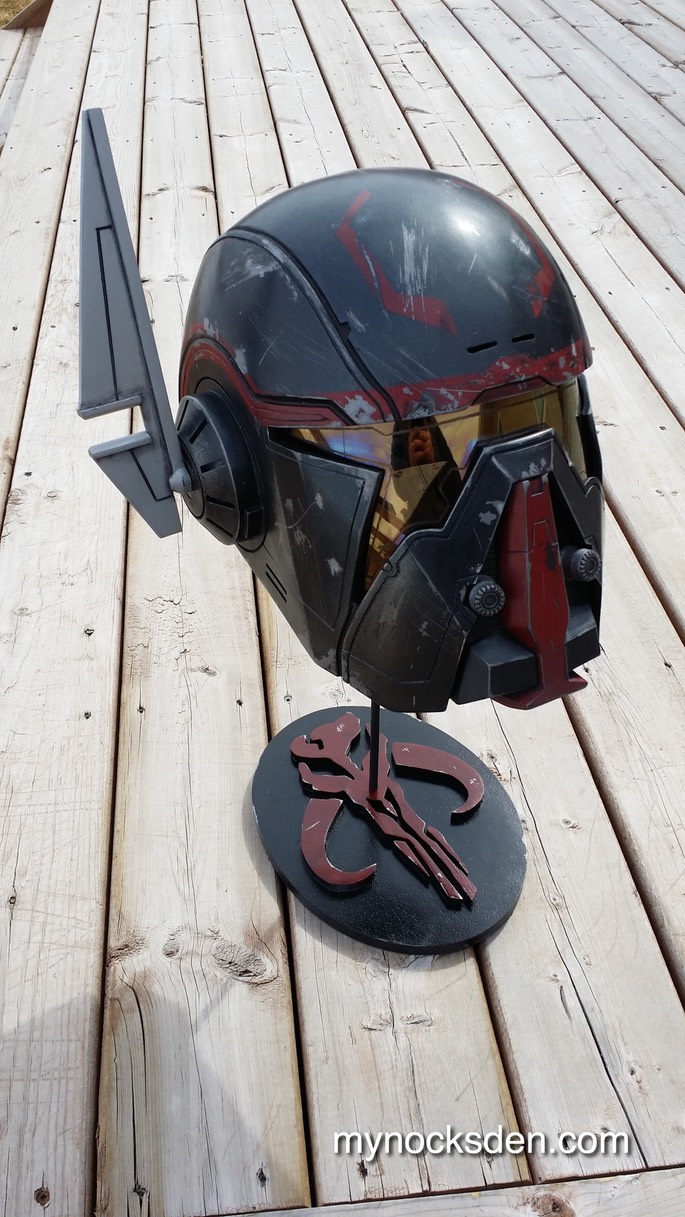
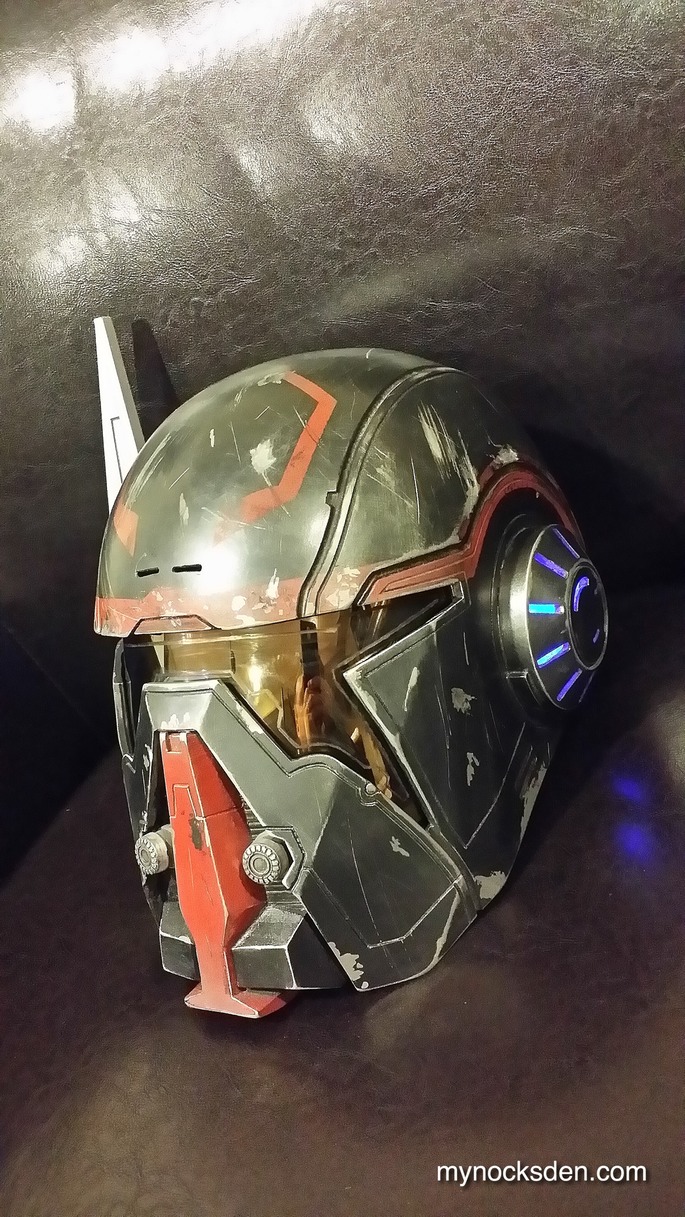
This was a beast of a project that took over 240 hours of work to complete! Approximately 100 hours went into CAD modelling, almost 100 hours to print all the pieces, and an additional 40 hours to touch up, mold, cast, paint, and complete the electronics. I then went on to make the stand for it as well, since it didn't feel right to just have it sit on a shelf by itself. As always, complete production notes are found on my website here: http://mynocksden.com/projects/swtor-shae-vizla-mandaloria.html
Now that that's done, I'm back on track with my Sith Acolyte build!
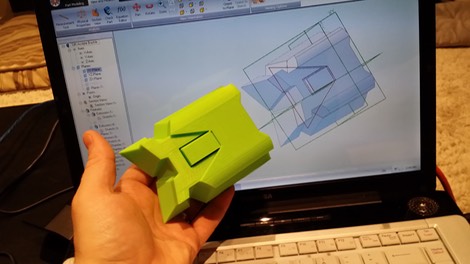
I just finished modelling the lower gauntlet, so the plan is to have the part 3D printed and ready for molding by the end of this week! Here is a sneak peak at the model.

Stay tuned for more updates!
-
Very nice work indeed!

Thanks guys!
-
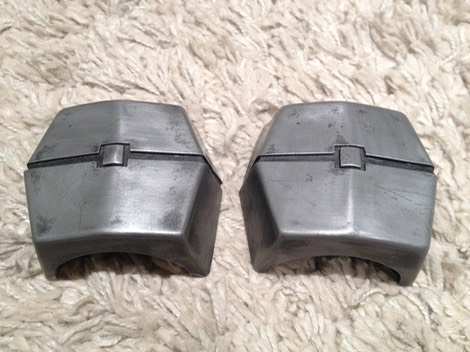
Hey guys. Just cast a few pieces, and ended up with a chest plate cast that is slightly warped. Basically, the warping happened because the rubber mold shifted slightly in the mothermold during casting, which ended up giving the top of the pecks a slight upward curve.
If anyone is interested, shoot me a PM and I'll give you a good deal on it. The plate is cold cast in aluminum (top layer), and would be as seen in the photo, untrimmed and unpolished. You have to look at this thing from the side to notice the curve, and with a robe on, it would not be a problem.


-
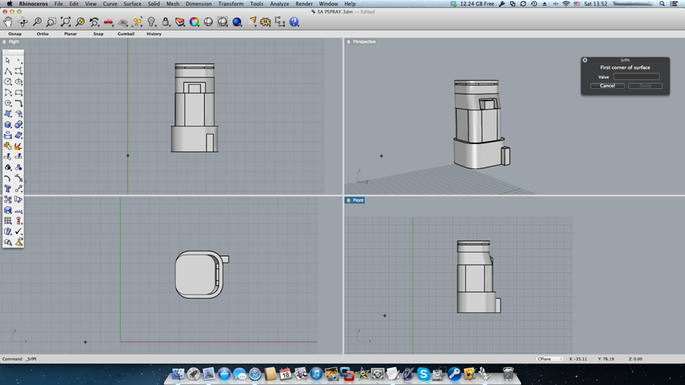
Another piece completed: the Sith Acolyte "pepper spray"-ish-looking canister.
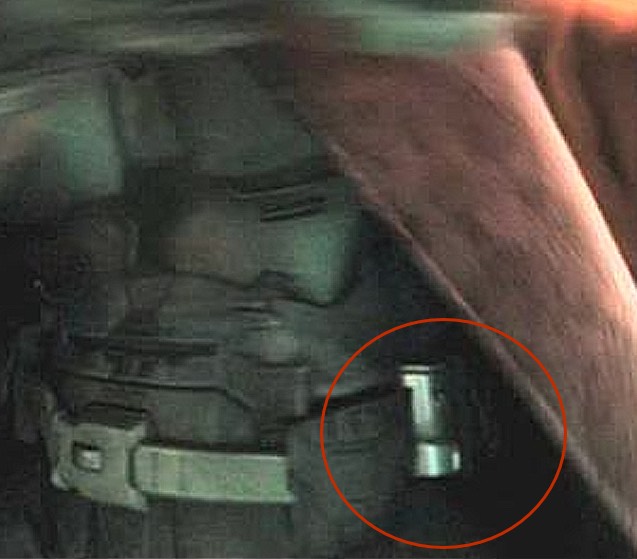
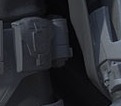
CAD-modelled,
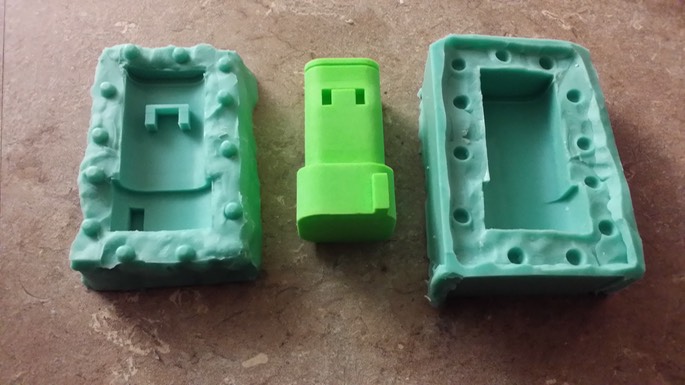
… then 3D printed, and molded,
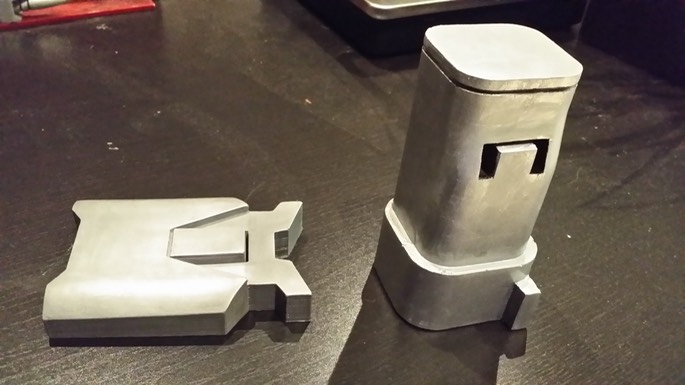
...and finally finished. This thing stands 9.5cm tall.
Seems like a lot of work and expense for such a minor piece, but it must be done if accuracy is the goal - which it is!
Since the pouches seem to be one of the most illusive parts of this costume, I may just CAD model them as well. This way, they will be accurate, albeit non-functional. We shall see.
-
Thank you!

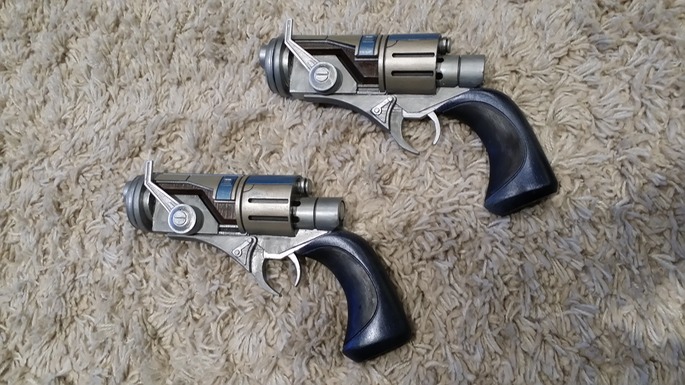
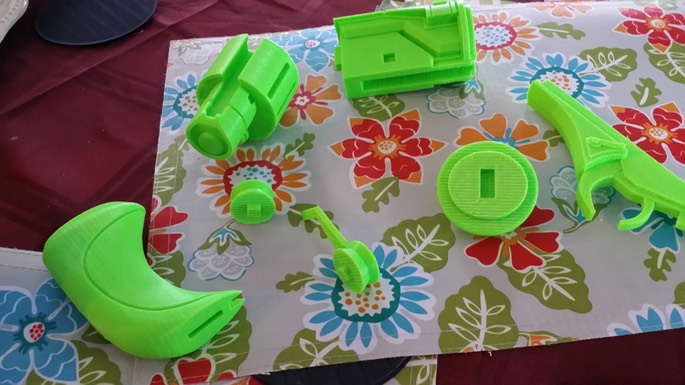
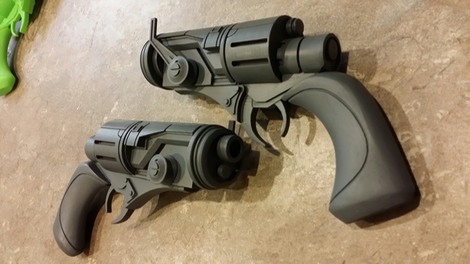
Today, I finished the blasters with a paint job!
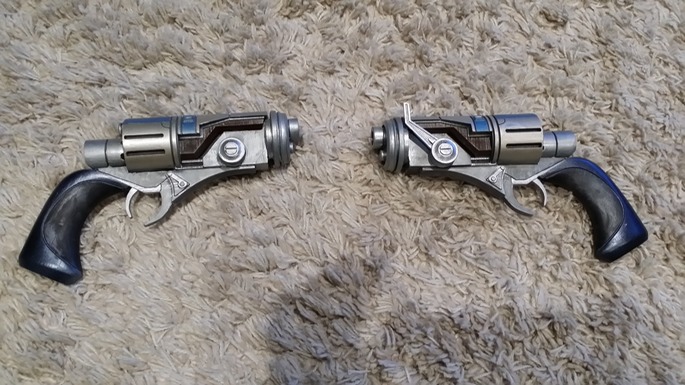
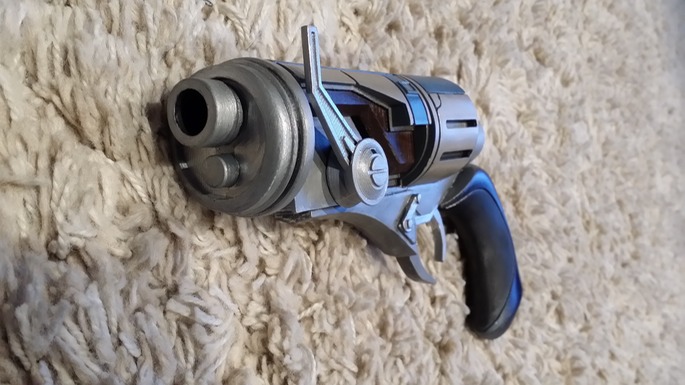
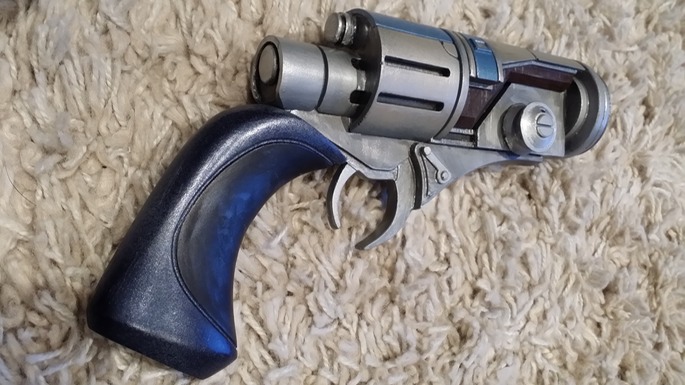
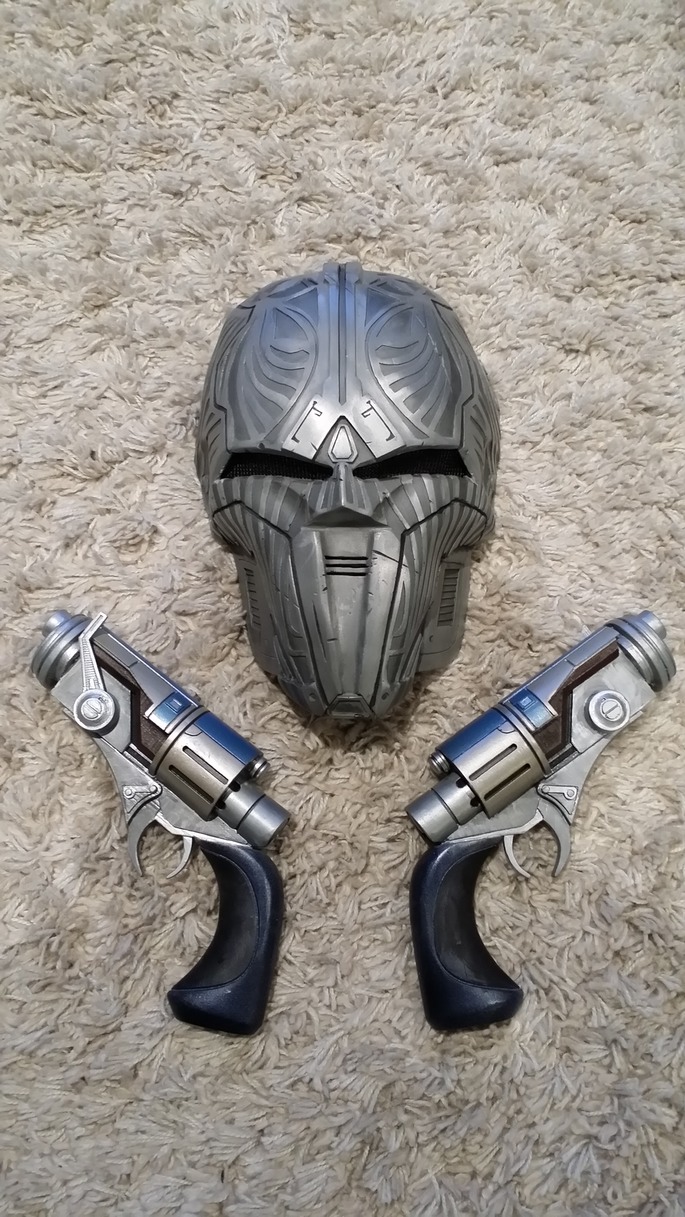
I will try to cold cast the blaster next, and see how that turns out!
-
 1
1
-
-
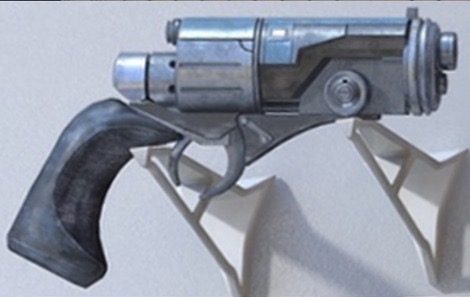
Update: I had to pause the Sith Acolyte build for a bit, because I got distracted by my 3D printer. After doing the Sith Acolyte belt buckle, and a few other minor components, I wanted to try my hand at something a little more challenging 3-D printing-wise. So, I spend the past few weeks doing my Eleena Daru SWTOR pistol. (I'm also working on a SWTOR Mercenary build, so I wanted to make something I could use towards that end)
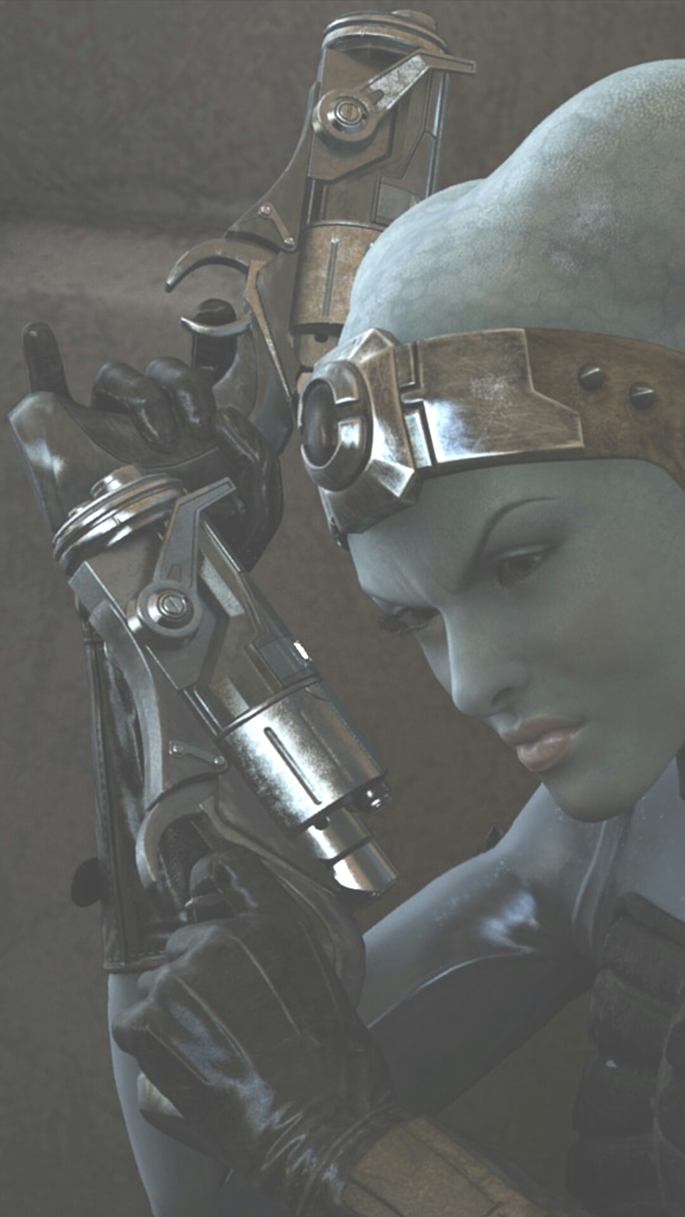
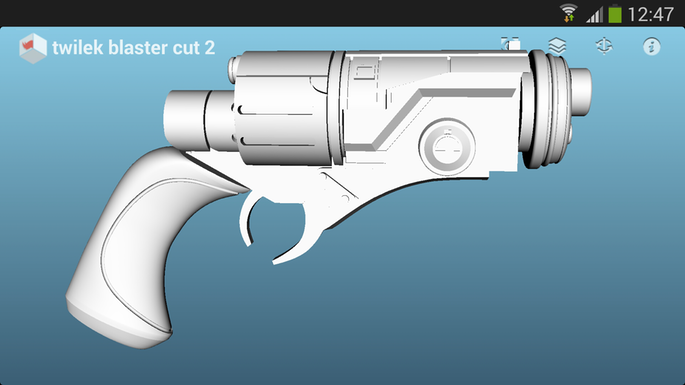
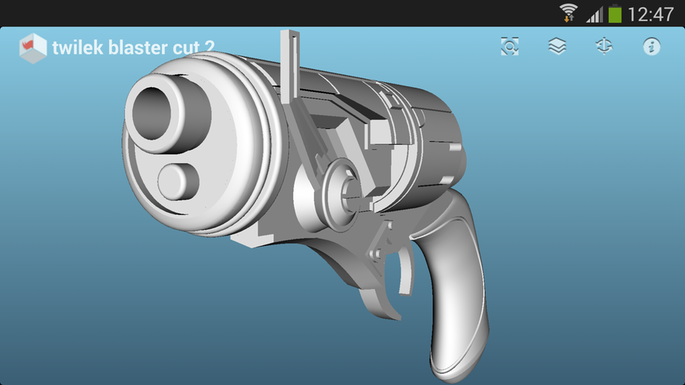
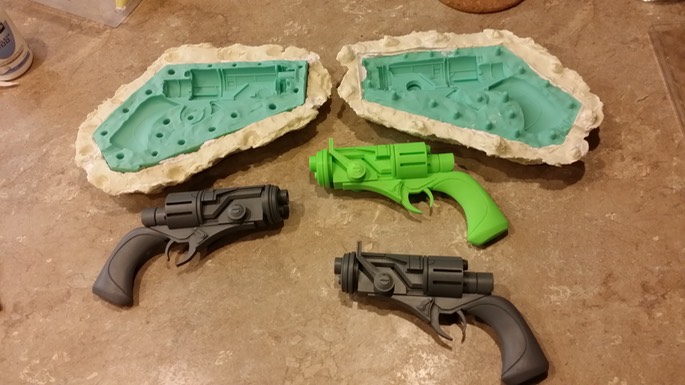
I modelled the pistol in CAD,
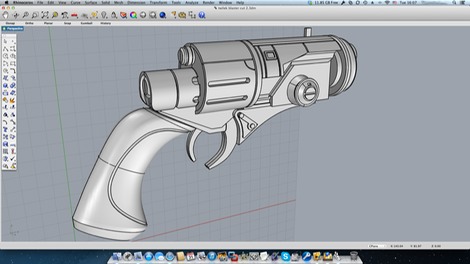
then, 3D printed the parts,
fit everything together, molded and then cast in 65D resin.
And here is the final product!
And now that I scratched that itch, I am back on schedule with my Acolyte build. Will be bringing you updates very soon.
-
Greetings,
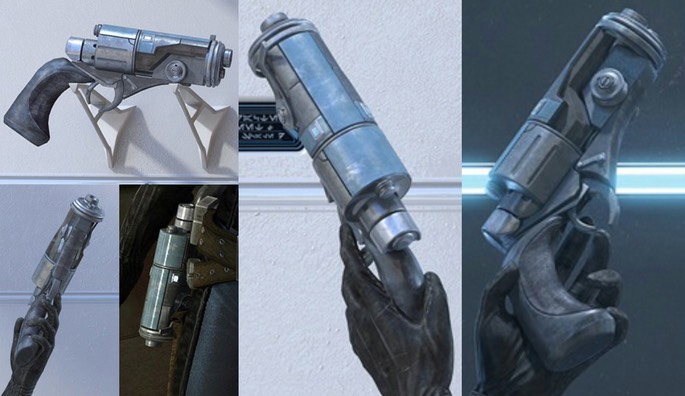
I am in the process of finishing up my Eleena Daru blaster pistol build that I will use for a SWTOR bounty hunter build I am currently working on as well. I CAD modelled the blaster, then 3D printed it in parts. Those parts were subsequently assembled, molded and cast in resin.
Blasters in the photo have been primed and are ready to be painted. I will update once the paint job is finished.
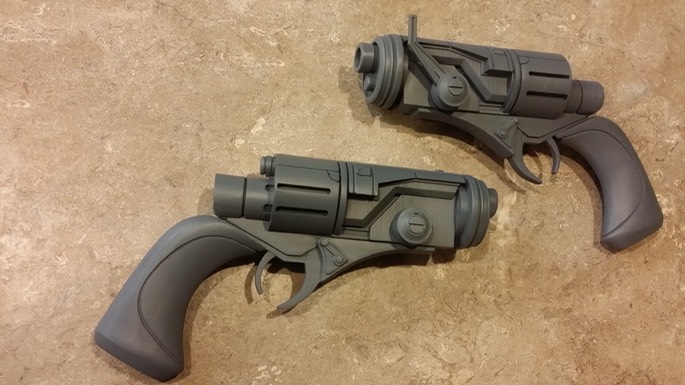
The complete build notes with a ton of photos can be found on my website, http://mynocksden.com
-
1
-
-
Not saying it's not worth it, Mynock...I'm just saying I can't afford the prices right now. You're time and talent is worth the price. I'm not saying you're over charging...in the least. Please don't take my post as any indication of that. I just realized this may not be the right hobby for me at this time.
With that said, you still have the best Sith Acolyte build going. It'd be a pleasure to own and wear one of your kits...would just take me a long time to accomplish that.
SteveO
Trooper Wraith
No worries at all, my friend. And thank you for the kind words!
I figured I'd make a general post and let people know what the plans are so far for making the armor available. -
Sith Acolyte belt buckle completed.
Amazing stuff...unfortunately it'll be out of my price range when all the pieces are added up.
Nice build though.
SteveO
Trooper Wraith
Thanks, SteveO.
Since I’ve had a few questions about my build from people via PM, I might as well post some of the answers I’ve given out here.
Yes, I do plan on making the armor available to those that are interested, giving people the opportunity to buy a full set, or just the pieces they want. I want people to be able mix and match with parts they’ve either made themselves or acquired from other makers. I will also be offering some options, such as cold casting (a more premium build), or having certain acceptable pieces vacuum formed as opposed to cast as a more of a budget option. As a matter of fact, one of the things next on the "to do" list is doing some test pulls of hands and buckle on the vacuumformer to see how they come out. In the end, I am hoping those interested in my armor will be able to get what they want based on what they can afford. I know that doesn’t really answer the question of definitive $$, but that's the plan.
This armor is incredibly intricate, and I feel that casting is the best way to achieve that kind of detail. For that reason, most major pieces will be cast. Unfortunately, unlike vacuum forming which is quicker (with the ability to form several objects on one sheet in one pull) and more easily trimmed, casting is much, MUCH more involved; it takes approximately half an hour of virtually continuous handling to cast one medium sized piece such as the forearm, and over an hour for a large object like the chest plate. And that does not include preparation time, cure time, trimming (which includes special tools), cleanup, etc. So, to produce even a few, quality raw casts can take a solid day, which makes it a vary costly (albeit much more high detail) endeavor for the maker.
Some pieces however, will ONLY be vacuumformed (legs) to stand up to the demands of cosplay, or be a combination of vac forming and casting.
I will know more and share more details as I complete more of the build.
-
Sith Acolyte belt buckle completed. After months of research I finally took the plunge and bought a 3D printer, and this was my first CAD modelling and 3D printing attempt ever! Honestly, it's so AWESOME. I have no idea how I've lived without one lol.
I've been learning the basics of CAD modelling for weeks now using a program called Cubify Invent, watching a ton of YouTube videos and generally just playing around. I chose to make the belt buckle as my first model because it is a fairly simple design with very basic shapes. Don't ask me to model a helmet or anything too complex for a while yet, but this, I feel is a good start!
(Reference shots used)
(my take on it)
As always, full production notes on my website mynocksden.com
Oh, and I made a short video about this build that summarizes everything in under 2 minutes here:
http://www.youtube.com/watch?feature=player_embedded&v=yKloCzWjfuo
-
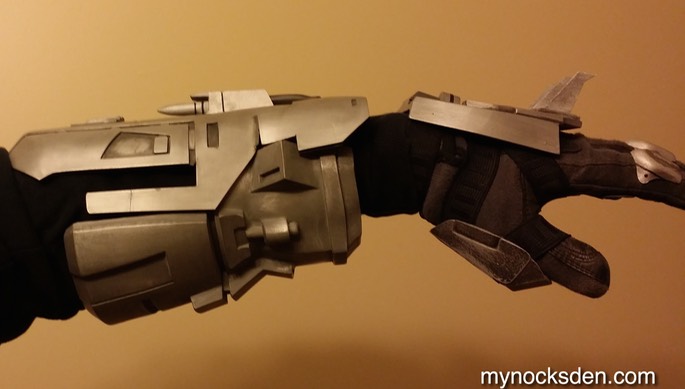
Here are some pics of the entire gauntlet assembly. Working on the lower half next.
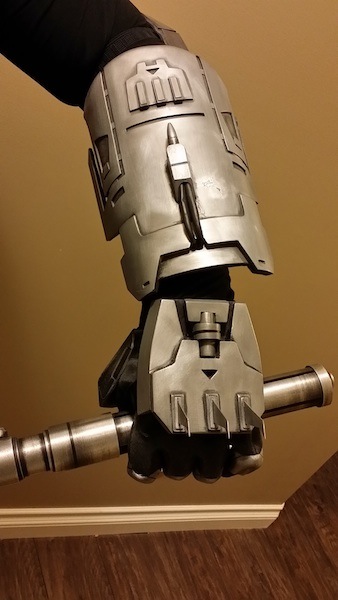
And here is a fun little shot of what I have made to date.
-
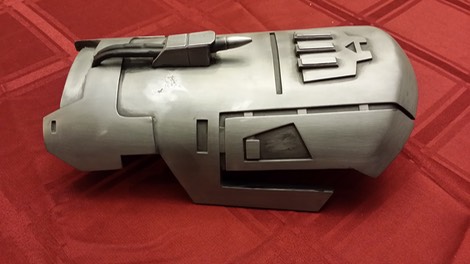
Upper gauntlet finished! As usual, cold cast in aluminum. Really happy with how this turned out. Going to put everything on and take a few photos shortly just to show size and how it all fits together. The, onto the rest of the armour!

-
I love how you made that awesome sculpting job for the aluminium piece, then made an even more awesome 3-layered ABS build... Those pictures make it look too easy. I hate you

Hahaha. Thanks! Honestly there is nothing more discouraging than working on a build for days on end and then discovering that the final piece did not turn out the way you were hoping. The realization that you won't be happy with it until you redo it almost from scratch just plain SUCKS Lol. Not to mention the work itself involved in rebuilding something you've already failed at once!
But, when it does finally turn out (which is in no small part due to words of encouragemebt from the community), it's an awesome feeling that fuels the rest of the build!
-
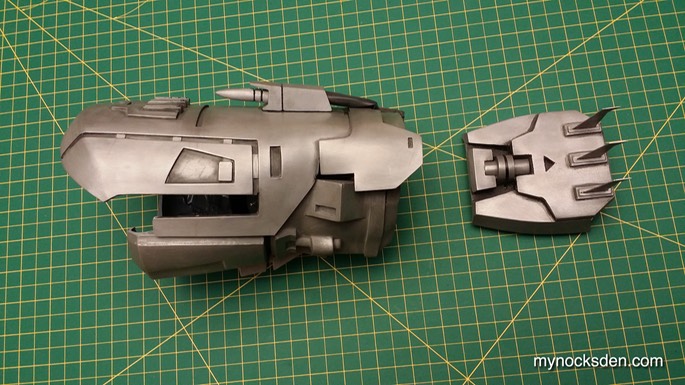
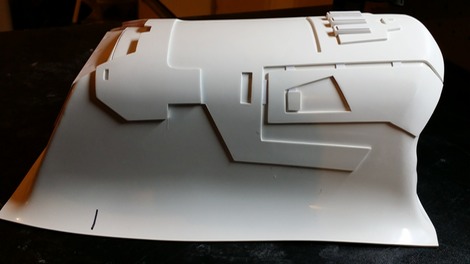
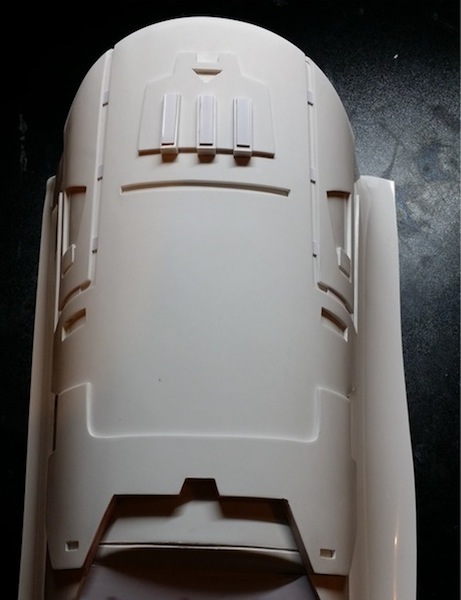
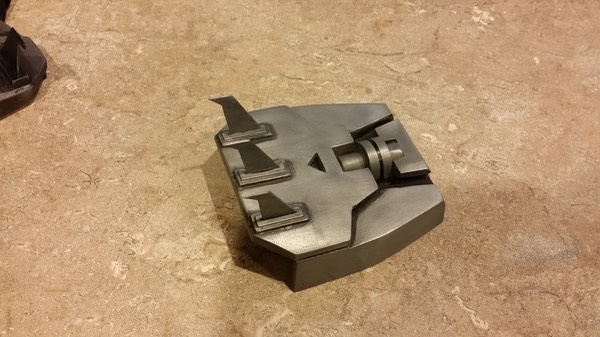
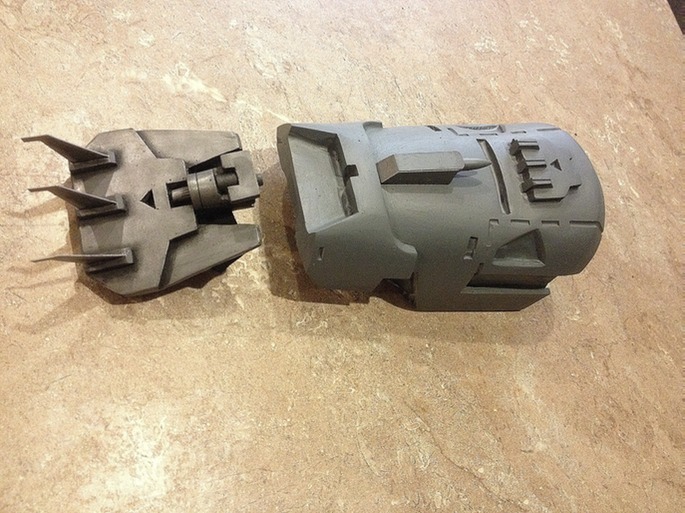
Dorsal gauntlet reworked and ready for casting. I wasn't happy with the original piece as I rushed the build, using the wrong materials for the job. As a result, the detail wasn't as sharp and symmetrical as could have been, which really bugged me, so I decided to go back to the drawing board and try to get this thing done right.
So, I took a page out of my Sith Acolyte mask detailing book and used ABS layering to make the gauntlet master. I used the original gauntlet mold to cast the old piece, then through a combination of sanding and Bondo filling made a buck for vacuum forming the general shape. I then vacuum formed two more layers, which I used for creating the detailing.
Here is the finished master ready for casting. The little rocket thingy on the top of the forearm will once again be cast separately. Larger photos and build notes are found here http://mynocksden.com/projects/sith-acolyte/sith-acolyte-forearm-armour/sith-acolyte-dorsal-forearm.html
-
The lines are definitely sleeker and much more accurate. Great job!!!
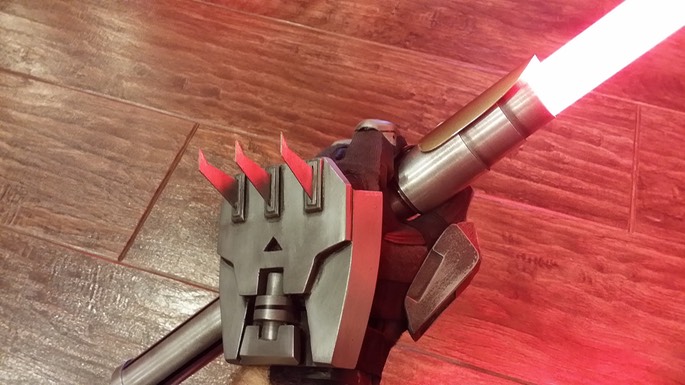
Those spikes look mighty sharp, though!

Thanks!
The claws are actually made from very thin .04 gauge ABS plastic and are really bendy for safety reasons. I had them made out of thick .08 ABS initially but those were extremely stiff and dangerous. I'll do a "stiff and dangerous" version for my display, but for trooping they will definitely be made thin and flexible. Wouldn't want to take anyone's eye out by accident.
-
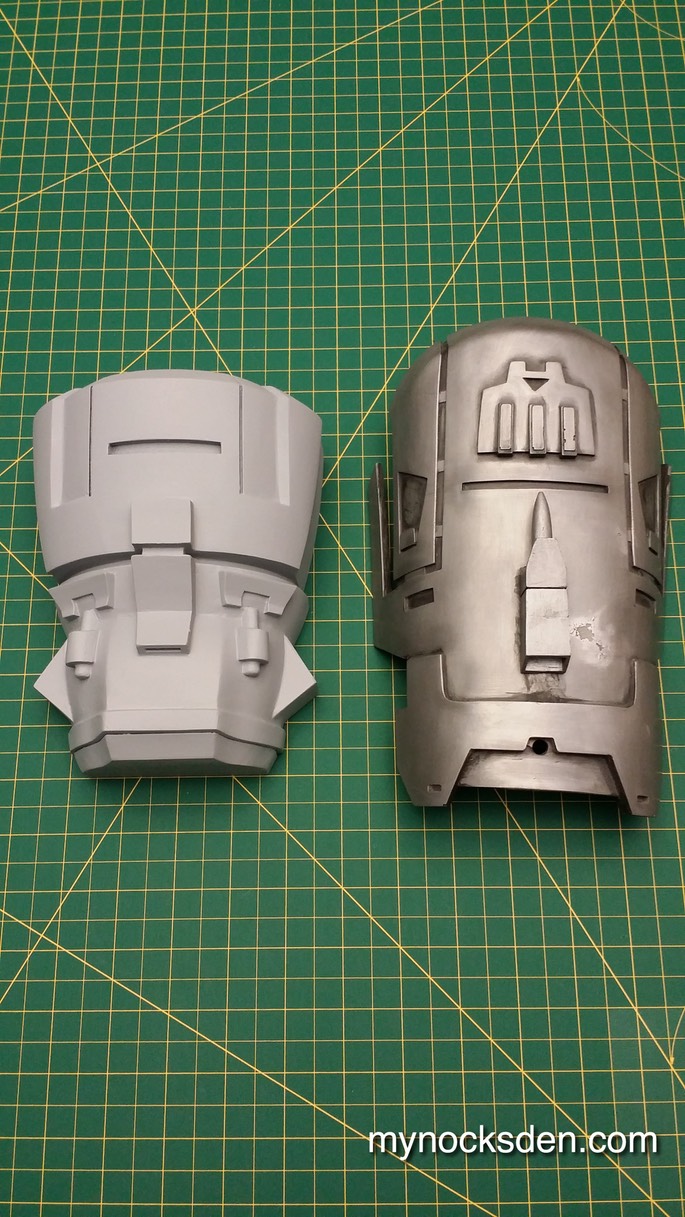
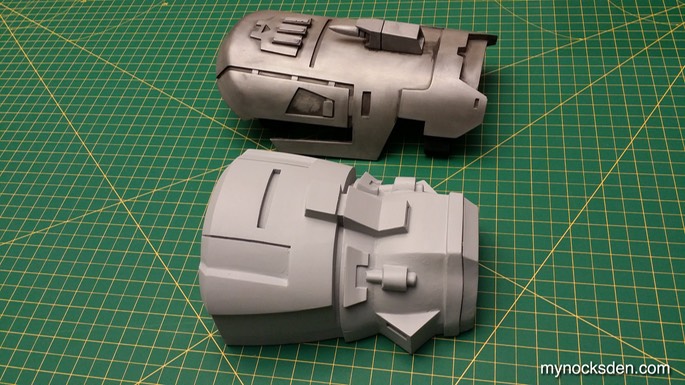
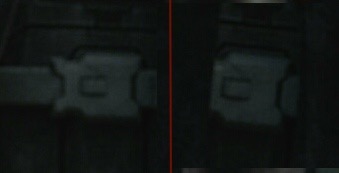
Decided to go back and redo the hand plates to make them more accurate in dimensions and detailing.
New hand plate now has sides so that it doesn't just sit on top of your hand, but wraps around it. It's also a bit smaller than the previous version.
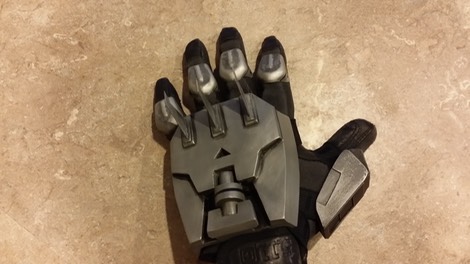
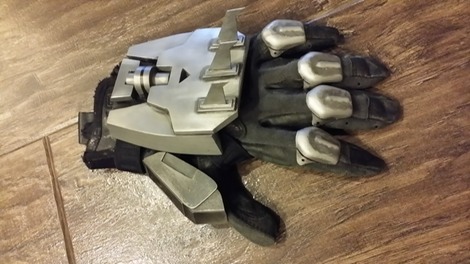
Here is a comparison shot between the new plate (left) and the original one (right)

Larger photos and build notes here: http://mynocksden.com/projects/sith-acolyte/sith-acolyte-hand-armor/sith-acolyte-hand-plates.html
Forearm being re-worked now as well, and should be done soon. Also, starting the stomach masters; the abdomen pieces will be cast in rubber (or so I hope); I've never used rubber before, so this will be an interesting experiment
-
For some strange reason, the forum will no longer allow me to link to my medium size photos from my website, which are now being deemed too large to post. Hopefully this is just a temporary glitch; larger photos can be seen on my blog mynocksden.com.
Anyway, elbows done. Initially thought about vacuum forming them, but decided to cast to retain sharpness of center ridge.
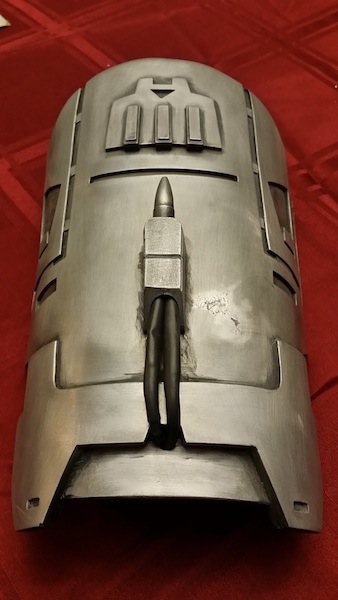
Dorsal forearm done. Cold cast (like everything else in this build), with the little bullet assembly being cast as a separate piece. This piece took me forever to build, and now that it's done, I don't like it because it's not sharp enough. I will rebuild it from scratch using slightly different methods; in the mean time however, this is the forearm.
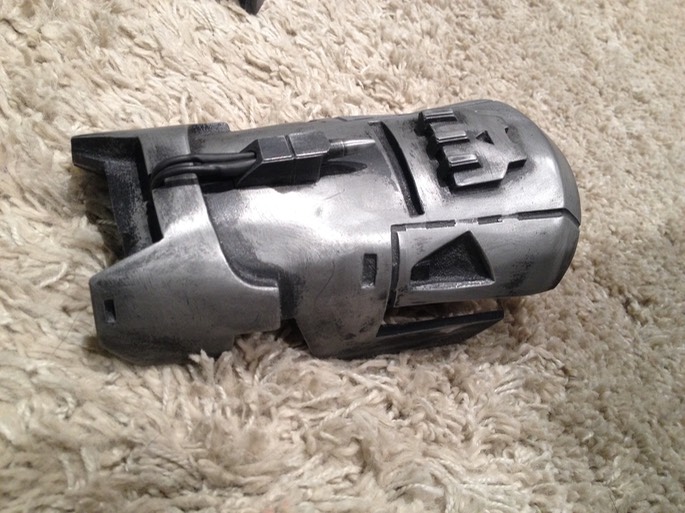
Chest plate shortened from the bottom a bit, weathered to an even darker colour.
Overall, the build is proceeding nicely. I'm out of province all of next week for work, so the build will resume after I get back.
-
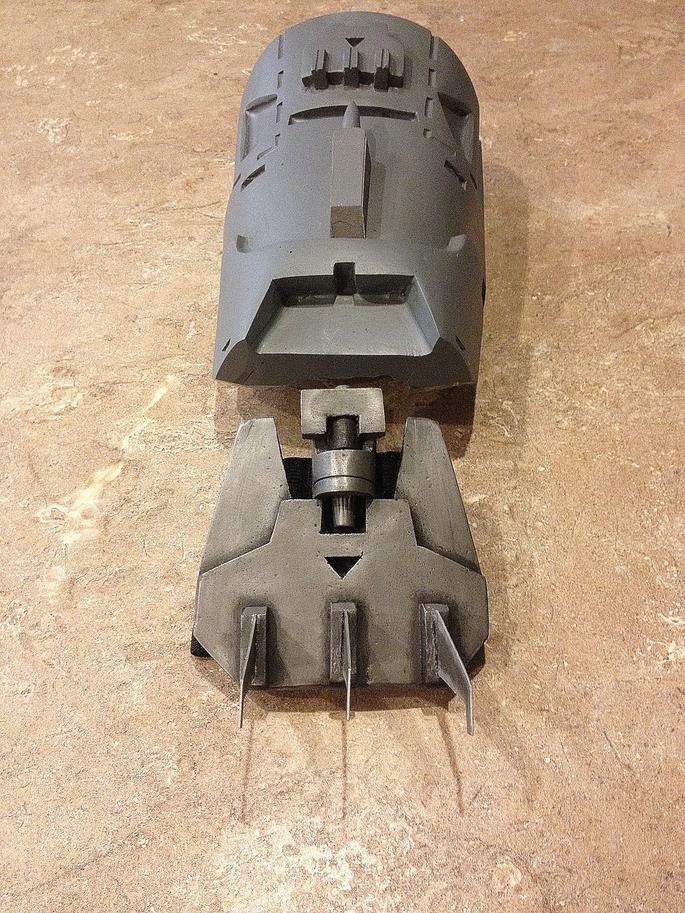
Top half forearm armour master prototype nearly completed. I should be able to cast this week once my new shipment of silicone comes in. This will be cast in two pieces: the main forearm, and the little rocket/bullet assembly. Funny story: I was actually thinking "what should I use to make the little bullet thingy?", when it dawned on me "duh! the answer is in the question!" So I raided my SKS ammo crate and used a live 7.62x39 round to make it! lol.
There are also two little cables that come out of the front of the rocket in the reference material, which i will do post casting, using 16 gauge wires wrapped in heat shrink tubing.
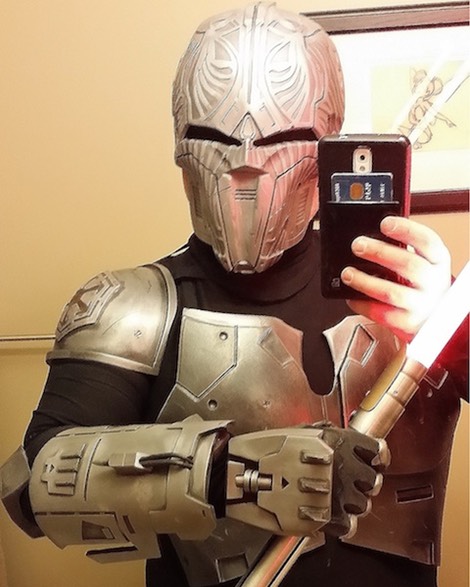
Sith Acolyte Armor - Mynock's build - Completed and 501st Approved!
in Sith Acolyte
Posted
Sorry. PM replied.