
-
Announcement
Welcome to the forums!
If you are a newly-approved member, make sure you check out the New Member Checklist!
If you are a Detachment member and can't see the member-only area, post here for access.
-DV


ToyHunter
-
Posts
10 -
Joined
-
Last visited
-
Days Won
1
Content Type
Profiles
Forums
Gallery
Events
Posts posted by ToyHunter
-
-
I do have that midsection tutorial here on the Revan forums! I find it best to sew the tubing into the vinyl pockets right away by using a zipper foot for your machine
 I've never used stretchy vinyl before but with any stretchy fabric you need to slightly pull it on one or both ends while feeding it through the sewing machine.
Your tutorial is awesome, but my sewing machine skills aren't
 I will get someone from my garrison to help me out with the soft goods..Did more work on the mask.There were still edges left from the pep file, so I started sanding it down by hand and got nowhere. I got frustrated and pulled out the grinder and went to work....I'm surprised I didnt destroy the whole thing, actually worked out pretty good.
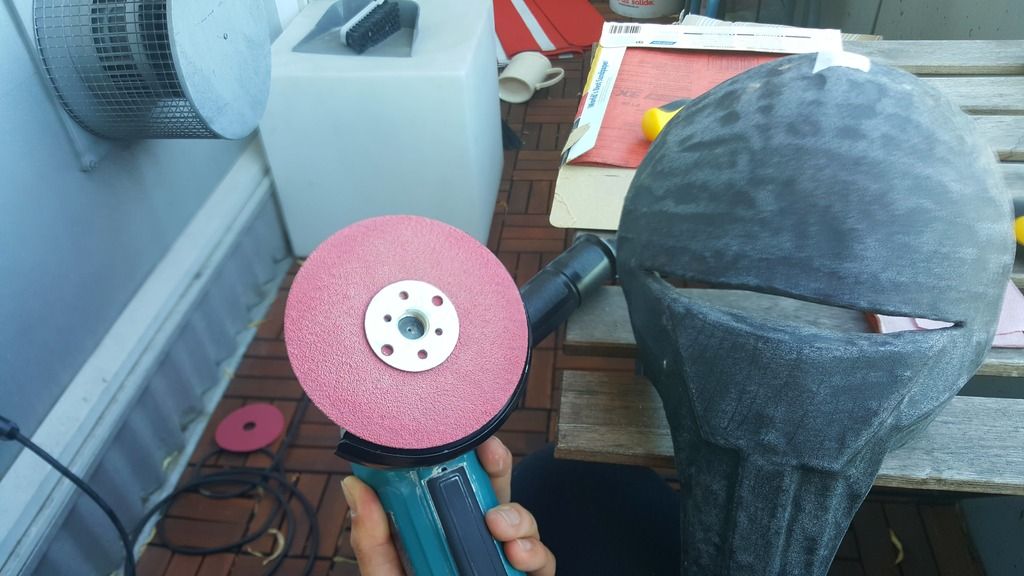
 I'm going to cover the mask in Mod Podge and start painting it over the next few days.
 -
Like that damn red strip of fabric under the armor! I didn't even notice it until just over a year or so ago.
You mean the one under the belt part?
-
Yeah, I did notice that as well. Some masks have a protruding brow too. The flat one seems most VG accurate, I'll attempt to make it stick out a bit. I'm excited start painting, see how much I remember from my warhammer days
Gave the midsection a shot today... Man do I suck at sewing. Stretchy vinyl is really hard to work with, and it doesn't help that I have to squeeze a tube in there. Will find a solution for the time being to emulate that half inch of padding under the armor until I figure out how to make this thing without throwing my machine across the apartment.
That said, I think the cloak might be a bit easier. Had some luck making Jedi robes in test runs so hopefully I can have that done soon.
-
Good luck to you, sir!
And yeah summer months are horrendous for getting anything done!Its already warm all day and night and then having a heat gun on for hours.. clothing definitely optional haha
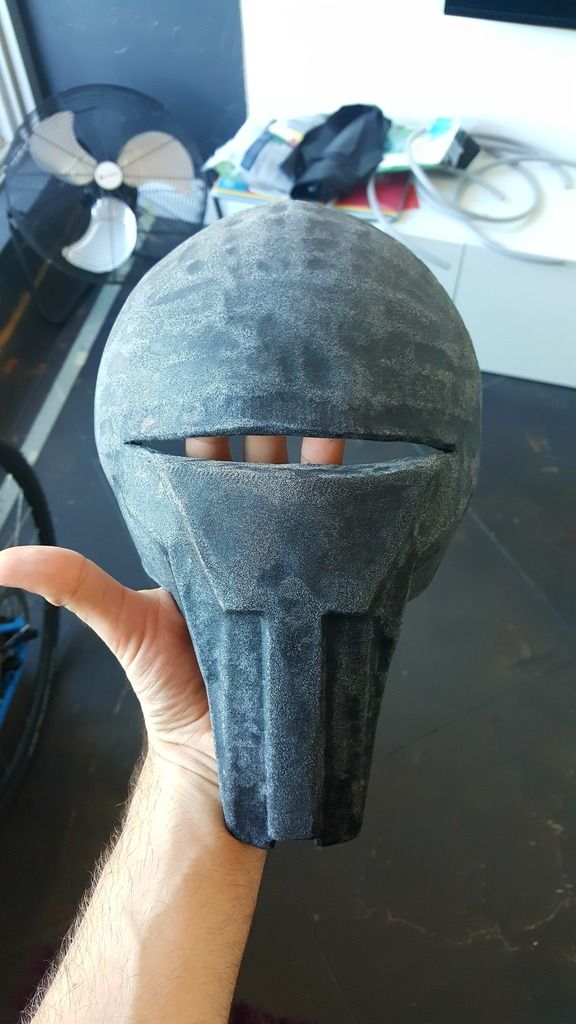
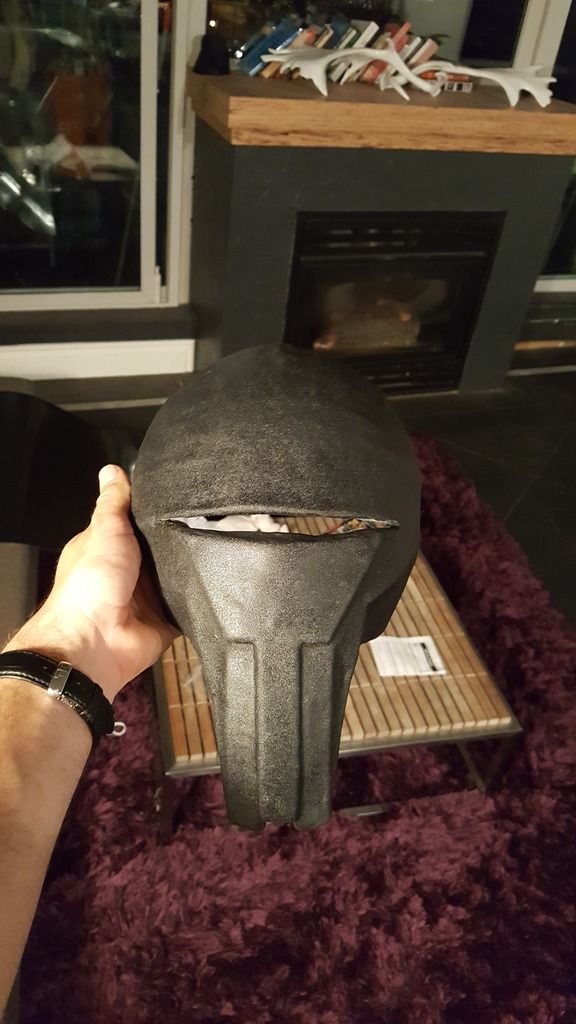
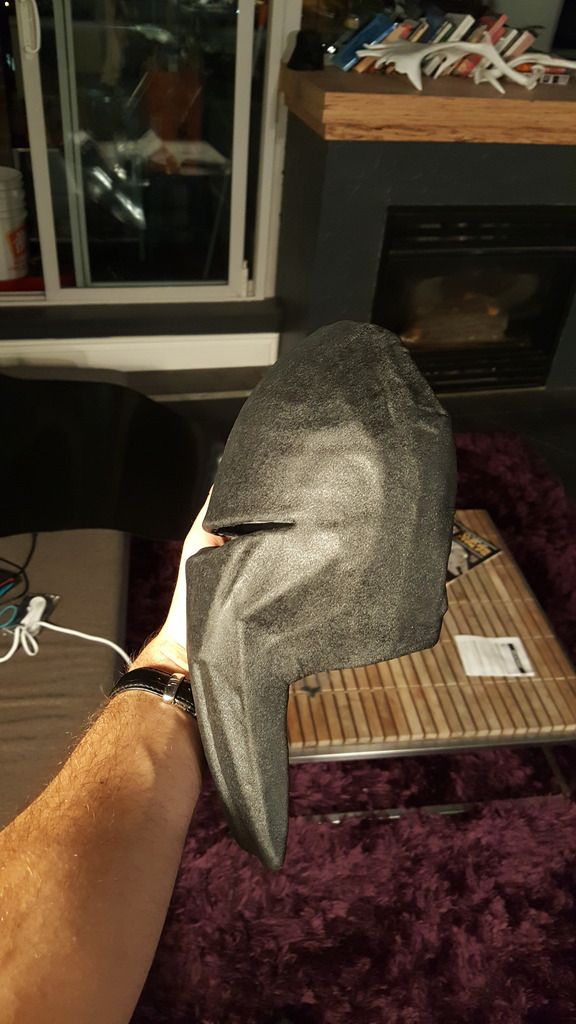
Got more work done on the mask! Unfortunately I only have photos of what it looks like now. I sanded the first layer of worbla a good bit, until most of the harsh ridges were gone. Also changed the bottom thingies to shorten the middle strip and added a foam sammich ontop of the strip and layer. Then I covered the whole thing in a last layer of worbla.

I now realize how important a perfectly executed pep build is. I really don't like pep files =P
I'm quite happy the way it looks right now tho. The right side needs some more bending (has a couple rough edges that shouldn't be there) and I'm noticing that the visor is small in comparison to other peoples masks, but I do have a large head.
I would probably give it another good sand and then start with the glue layers and paint. Maybe try and bend the upper brow a bit outwards. Anyone have any suggestions on what I could improve before I do that? Or in general what I can do to turn this into a decent first mask?
-
From what I remember, after initially forming the chest piece, any larger bubbles left I heated up (that specific area - so not the whole thing) and massaged it out by poking several small holes up and along the bubble. For example, you make a hole at the bottom, middle, and top of the bubble and gently press out the air up to each hole and proceed to the next one (this will also help prevent wrinkling that would occur by just making, say, one hole in your large bubble).
Yeah, I think I will try and fix it once the front is complete. That way I already have one solid side do provide support.
Pep is like building a machine, the more time you spend on the small details, the better the final result will be. This includes using a high quality stock paper, quality print, quality tools (brand new xacto blade every so many cuts), quality folds, quality adhesive and adhesion, and rather OCD connections, you will get the best form you can.
How about a pair of old scissors that are already covered in scotch tape?
Haven't been able to do any further work on it yet, damn you good weather for making me go outside.. But I hope I can find some time in the next few days to sand down the mask.
-
To avoid bubbles, you can lay it down onto the surface like you lay down fondant on a cake: start at one end and slowly put it on as though you are "reverse peeling" it off, if that makes any sense.
Damit, now I want cake!
For 'worbla warts' (as I like to call them lol) I just pop and massage them out with a sewing pin or needle (a pin or needle is still a big enough door for the air to be let out of and is a lot easier to clean up than a knife incision). Just be careful when poking a hole with the pin as the pin hole will still leave a mark -- you have to work verrrry carefully with massaging the air out. Honestly, this just takes practice! If you really wanted to you could take some scrap worbla and practice making and getting rid of air holes
To avoid the warts is really tricky and in a lot of cases are unavoidable. Best thing you can do is just work with the worbla quickly yet carefully -- ex. you get a lot of big warts when pushing areas in / out greater than a certain angle or degree (ex. like bending your chest piece inward). You could avoid more warts by pressing the plate in slowly (which, yes, with a material that sets very quickly this is difficult haha).
I dont think warts are my problem, they are big air pockets. Here's a couple pictures of the back. Looks like a war zone compared to the front

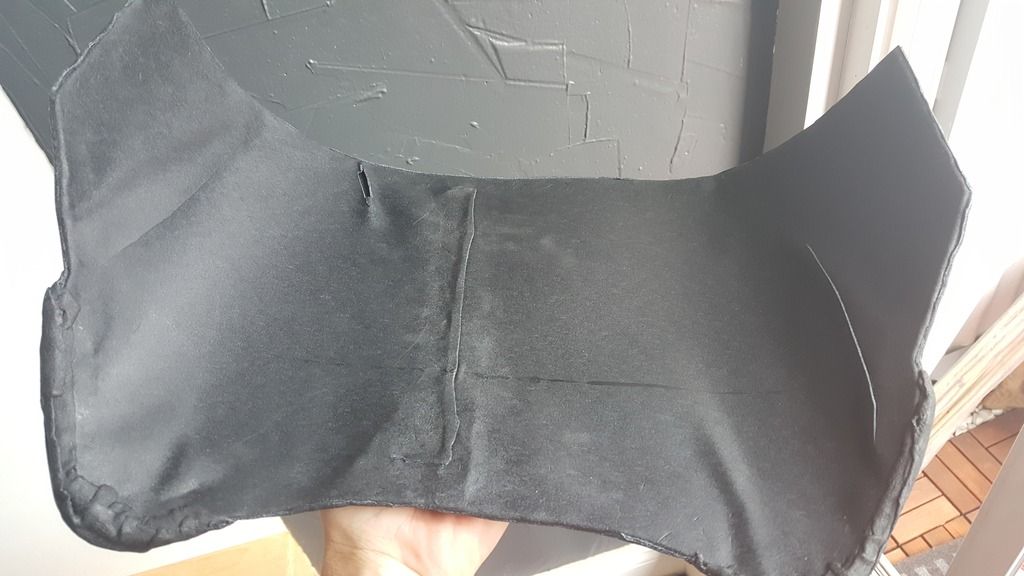
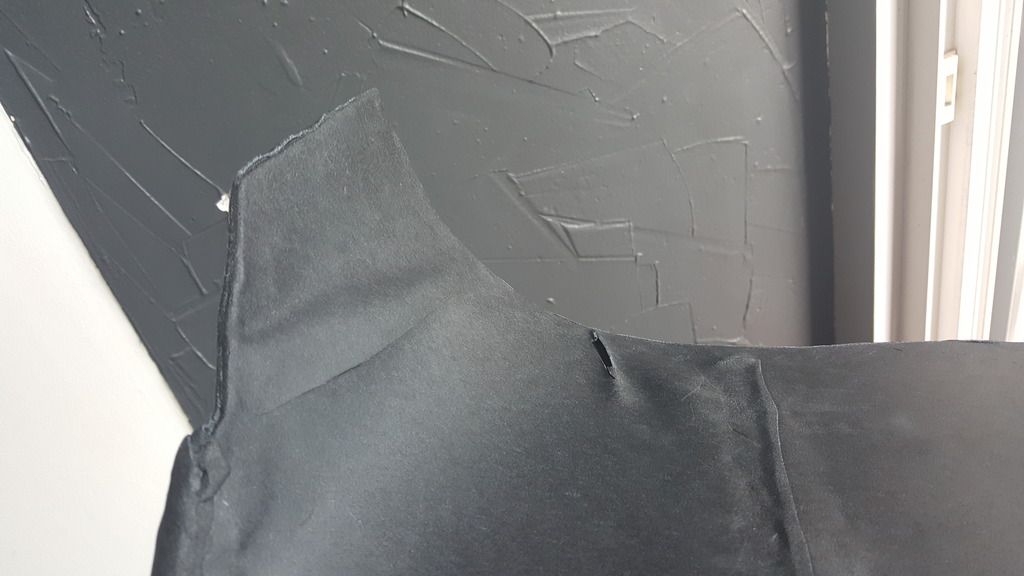
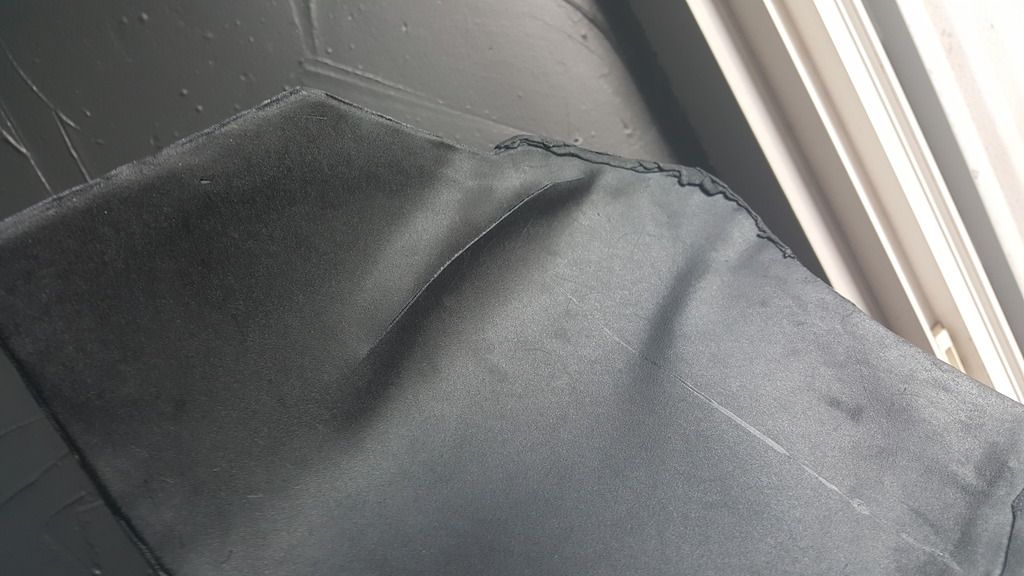
It happened when I bent the chest plate. I actually had a bit of trouble getting the sandwiching to work for me at first. I noticed that I either didn't use enough heat and the material wouldnt mould easily, or I used too much (which happened a lot) and air bubbles would form. I'm going to get the front to how I want it to look, then add another layer of worbla to cover the design, and then I'll fix the back.
Also, did you use black Worbla or is that just the foam??
I did use black worbla. Seemed like an easier way to go. Guy at the store said its the same as the regular stuff, just less prep work for painting.
As for the mask I also coated mine in Worbla with a pep file under it. The pep file I had used was a lot more complicated and therefor yielded a lot more angles and shapes that gave me a more intricate-looking face. To build up your shapes you could cut out thin pieces of foam and lay them over the desired areas (either glue them down or put Worbla over it -- if you were covering it with Worbla again). I could also give you the pep file I had used for my Revan mask! A friend gave it to me so I'll have to ask her where she got it again hah but restarting from a new base is always another option -- a scary one, yes, but I think we've all had to restart something. Up to you!!
The only thing I'd ask you to be cautious about is that the more Worbla you put on the heavier your mask will get, and if possible, avoid using Gesso as a primer over your Worbla! Although Gesso will fill in problem holes and areas, and be able to be sanded down for a clean surface, it will also make your mask hella heavy -- don't make my mistake lol my mask turned into a helmet haha (at least you can't tell in pics!)
Well, I've added pep files as one of the 18 layers of chinese hell. I got my files from fierfek, but unfortunately I bought the TOR files. So Im going to try and make the bet of what I have right now. Another option is a mask from a local guy: https://www.etsy.com/ca/listing/264872868/darth-revan-raw-cast-mask?ref=shop_home_active_1. Next thing I'll do is sand the whole thing to get a more rounded surface and then apply one more layer. That should be ok for weight. I'm torn on whether I should increase the height of the triangular thing and the middle rectangle, or the triangle and the two outer ones (like I've done already)
Eventually I'll make another armor but I'm going to see how far I can take this, maybe an approval..? Can't stay a recruit forever haha. After the paint goes on it will look a lot different I hope..
Back to holding my burnt fingers in a bucket of cold water

-
Thanks for the encouragement
Had my first go with worbla last night. Think it went ok. Need to do some more work on the pieces and then reevaluate.
Armour needs a couple more accents and another layer of worbla. The eyes need to be adjusted a bit as well. The backside has a lot of air holes so they will have to be corrected too. Any tips on how to avoid those big poackets of air? I sliced them open with a knife and pressed them down for now.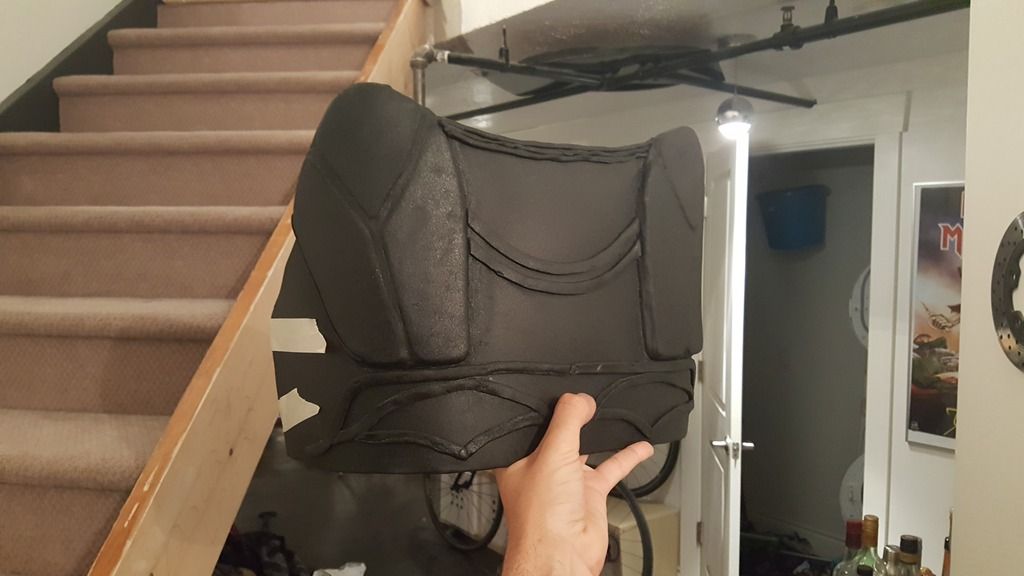 Mask needs a good sanding to smooth it out and another layer of worbla. Need to figure out how to correct the brim a little and add more accentuation on the triangular thingy and the side thingies.
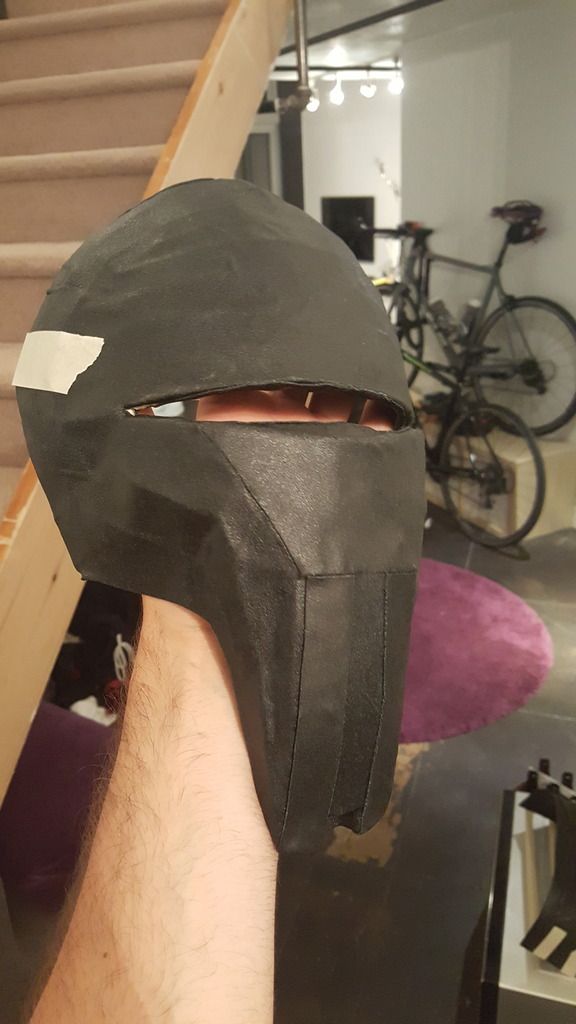
-
Weee, new project time!With my TK still halfway done, I decided to go against my better judgement and start a whole new build. Hopefully I'll finish this one in a more timely fashion...So, Darth Revan it will be. I've decided against buying the armor from Wicked Armour and instead building it myself with foam and worbla (whose existence I was not aware of until about two weeks ago). This might get interesting hahaThis is where its at right now:
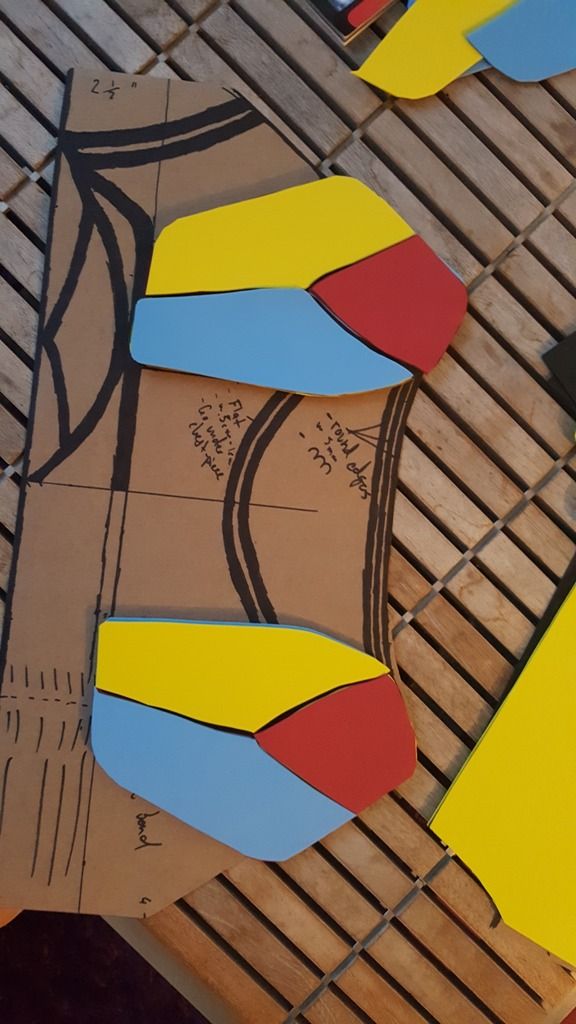
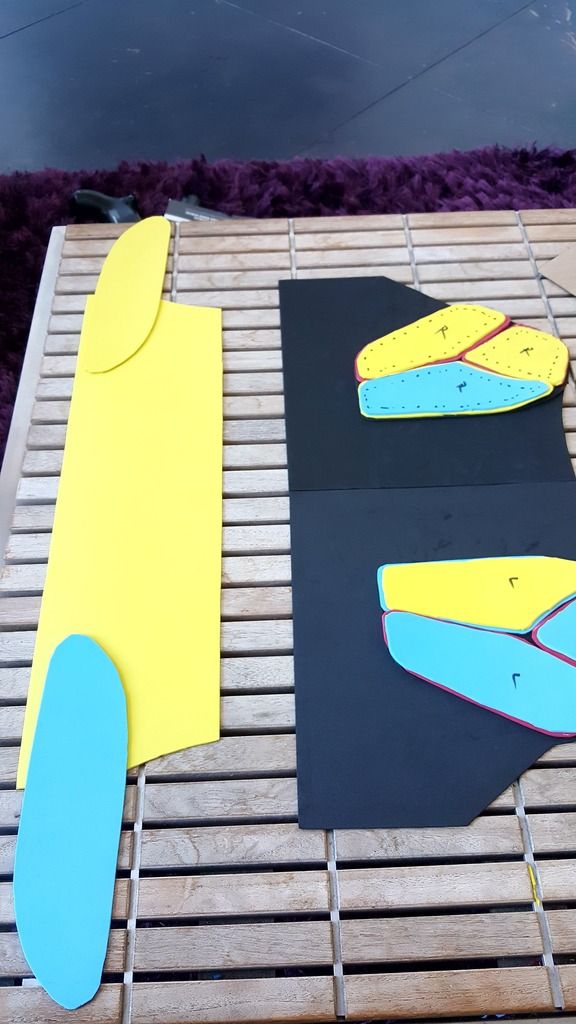 I've cut out all the necessary foam pieces and will start forming the chest pieces to create the ridges of the design (the black part in the reference photos).This is the design I am going to go on:
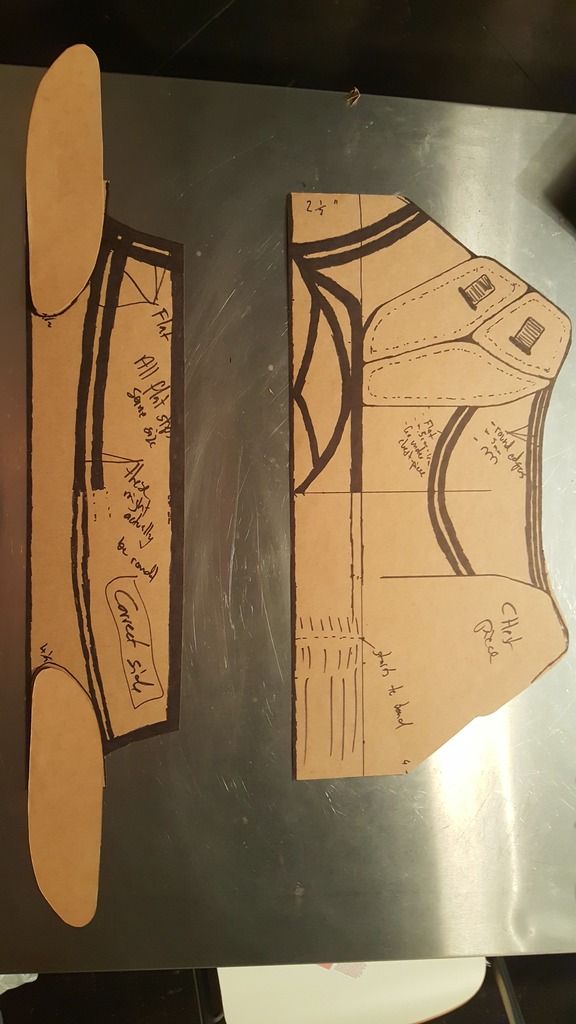 It differs a bit with armors I've seen but I'm trying to be accurate towards the game files.
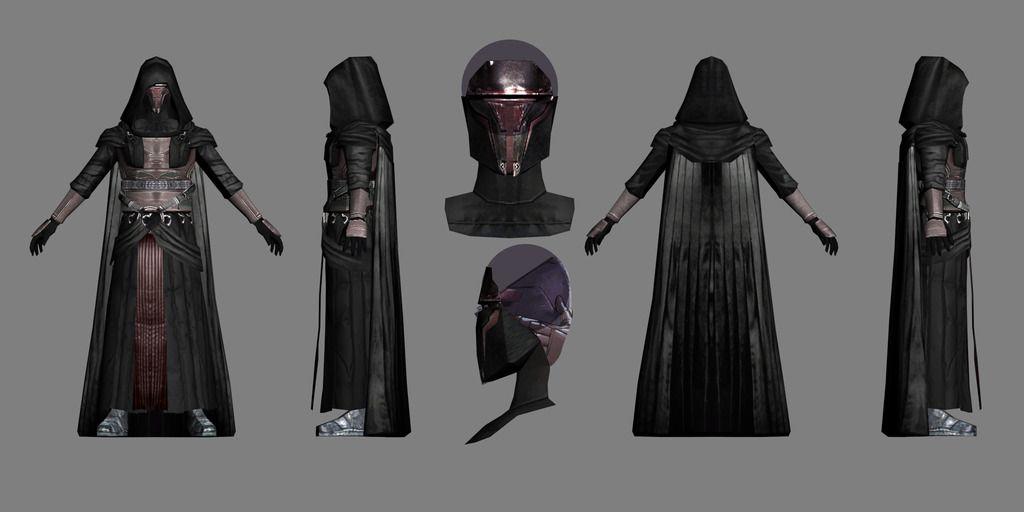 Pep time! Hands are cramping up but I'm done the mask. Or at least the paper part of it haha
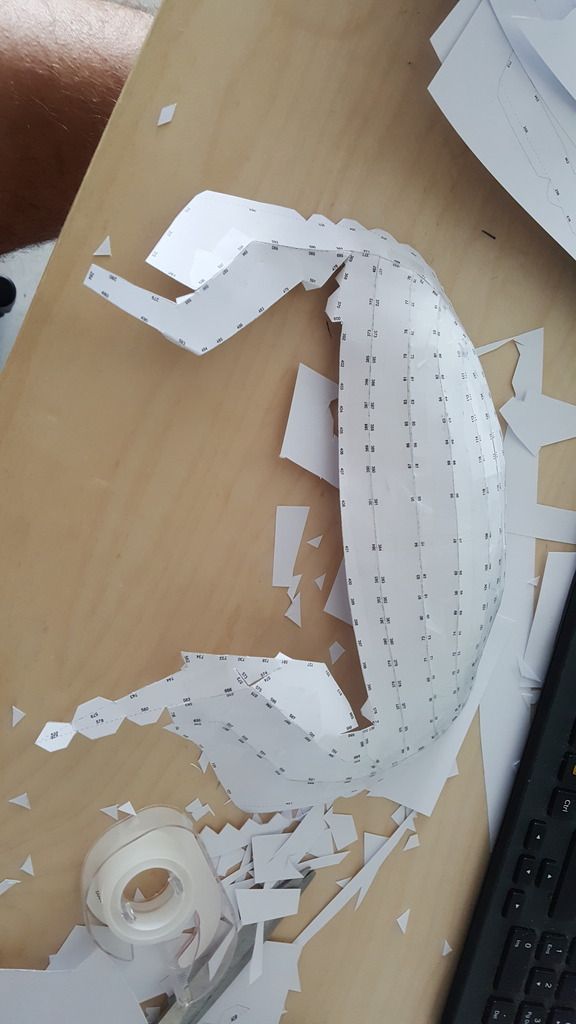
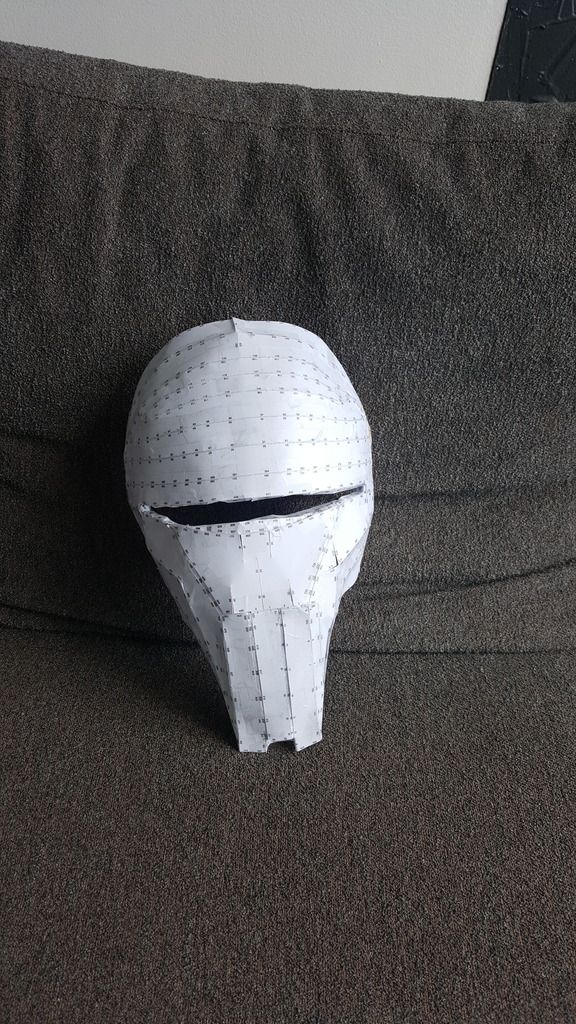 Should I go with a cheek pad or without one?With:
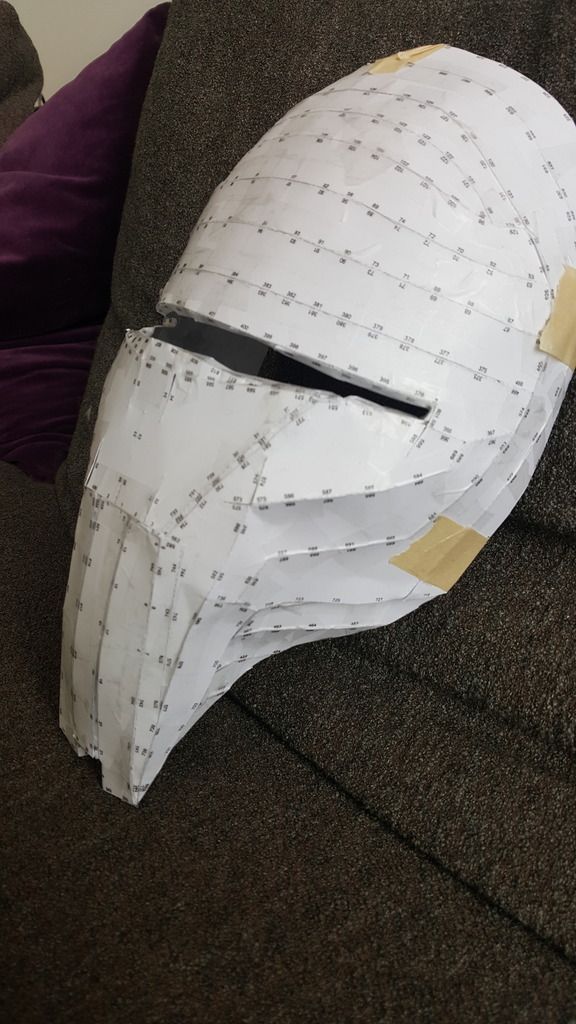 Without:
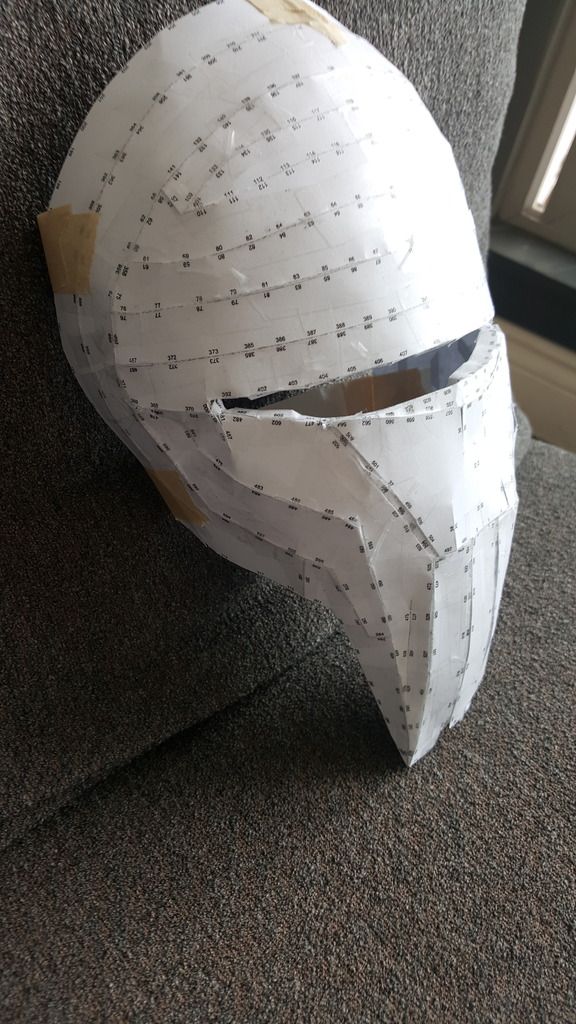 Off to get some worbla!
 -
Hey,
My names Felix, I live in Vancouver, BC but originally from Germany. Been thinking about joining the 501st for a while but I never gave it some serious thought. I was looking for ways to hide my wireless router and came to the conclusion that a Han in Carbonite wall mural would be necessary for that (as opposed to an ikea cabinet lol) and that got me researching into thinks I could make, especially with mould etc. I decided I wanted to make a costume and here I am
My first one will be Darth Nihilus. From there on, if I enoyed it, I will probably go on to make more (gotta have a trooper costume  maybe an exar kun)
Look forward to getting to know everyone and steal your knowledge!

Darth Revan, ehh? (May contain pictures...)
in Darth Revan
Posted
Update time!
So I had the mask at a pretty good point. After grinding it down and applying the first two of Mod Podge layers it looked good. Then this happened...
Yuck. That was bound to happen. I always go overboard at some point haha. Cleaned up ok tho
I first put a light and dark grey foundation color on to provide some backing for the different colors. Then I darkened the grey metal of the mask and painted the light grey parts red.
Then I added some basic wear and tear by darkening and watering down the paint and then dry-brushing silver over the metal to add a metallic look.
Need more work but I'm quite happy as it stands now. Minus that incredibly ugly priming job i did haha might have to make a second mask sooner than later
Any tips on adding scarring or different weathering effects?
PS sorry for the mess in those pictures