
-
Announcement
Welcome to the forums!
If you are a newly-approved member, make sure you check out the New Member Checklist!
If you are a Detachment member and can't see the member-only area, post here for access.
-DV

Rejean
-
Posts
162 -
Joined
-
Last visited
-
Days Won
4
Content Type
Profiles
Forums
Gallery
Events
Everything posted by Rejean
-
Painted the missed section and am now working on the axe blade again, sanding sanding sanding sanding, the word has now lost all meaning, but if I just keep at it, I will be happy I didn't rush it, (like before). This time around I will thoroughly prep before paint, thoroughly! 1. The first coat of paint will be the Dark Silver section (small sections between each fan of blades), after that dries (24) hours I will clear coat that section to lock in the Metalic shine. My mistake the first time around was due to placing the tape on the metallic (unclear coated) paint, when I removed the tape it ruined the metallic finish. 2. After the first stage of clear is fully cured, the second coat of paint will be the Light Silver section (the majority of the blade), after 24 then clear coat that. 3. The third and final paint will be the Gold center section of the Axe blade, 24 hours before the final clear coat. After this is all complete I will hopefully have a good time playing with some weathering ideas I have for one side. I am thinking one side to be weathered and one side to be clean. If all goes well and the weathering looks cool I may just do both sides weathered. the next time I post, hopefully, it is with pictures of a blade that is "flawless"! *knocks on wood...
-
So I finished painting the pole and brought it home. I placed the unfinished Axe blade onto the pole and fully extended the pole just to get a good idea of how it will feel and look..... WHAT!? awww no.. LOL i didn't fully extend one section of the pole before paint! LOL I suck at this, eeerrrk. ok so back to the shop with the pole to paint a 45cm section in the middle, should be done by tomorrow. OMG!
-
So as I mentioned I planned on bringing down my mask to hold it side by side to see if the color match was WAY off or if it could be passable. To my gleeful surprise i couldn't be happier! my only problem now is hoping that i have enough of this Defective paint in the can to finish the blade. Or that there is more at the store that's from the same bad batch.
-
so here is a pic of the paint can next to the "Gold" painted pole. you can clearly see why my initial reaction on the color was so bad. Right???
-
Started working on the axe blade again, not happy again! I finished sanding out all the imperfections and prepped the blade for its fist coat of paint... again. I was a little overzealous and impatient and I went to paint too quickly and after the paint dried I found a lot of contaminants left on the surface that caused blotchy bumps in the paint. Back to the drawing board.. So now I am currently sanding the axe AGAIN!!... lol. and I am going to leave one side with some of the imperfections, and totally clean the opposite side. this was I can have a weathered side and a clean side. if I don't like the clean side I can always dirty it up. In tandem I have also prepped the pole that the axe attaches to. I bought some paint at a local shop, I painted it yesterday With "Krylon - ColorMaster - Paint+Primer - Metallic - Gold - Brilliant" and the finished product looks more Copper than Gold. I'm a bit disappointed, but I'm going to bring my mask down to compare it side by side and see if it will be passable. I see myself redoing this whole axe in my future!
-
Thank you, I'm taking a break. will work on it in about a weeks time.
-
I was not happy with the mess-up with the previous paint. so i tried to cover it up, in doing so I messed up. I am now going to crap the silver paint job and chalk this one up to experience gained through errors made. I do lie the look of the edges but the center just looks like hell so repaint will happen.
-
newest paint work after removing the tape i got some lines created from the adhesive messing with the Silver paint. i let it dry over night and i guess ti was not enough wait time for the paint. I may have to either weather the blade to hied it or re paint at a later date. Left to do: -Add detail to the orb -add ring retails to the the "orb" on the pole. -Paint pole and then take pictures with costume. -perhaps put LED's on it just for fun.
-
First Layer of paint! I'm loving it!
-
thanks guys! I would like your comments but i cant for some reason I keep getting this message "You have reached your quota of positive votes for the day"
-
Thanks guys, and a big thanks to Rob at MWA. I forgot to post an idea i was playing with when i was sandwiching the two 3 mm sintra pieces together for the blade. What i had done was taken some led wire and ran it along the edge before placing the pices together. i was wondering if it would help it look like it was somewhat powered with something. but no pictures in the comics or anywhere as a reference show it like that so I chose not to . I am also attaching a photo of my latest update, it has been preped for paint and i am now fillinf in a large gap in the bottom to make it look more solid before paint.
-
-
I have these pics for submission of the armor thus far
-
Here are my initial cutout lines re-sized into my ratio. I cut out two of these as the sintra i have is only 3 mills and needed it to be at least 6 mill thick. i then found a wooden stick and cut a 5.5mill slit in it so i could slide the blade throught to hold it. i cut a mop handle off and attached the female end to the wood. i had an extendable flag pole that i was going to use for the staff of the weapon that fit into the female mop end. I then sharpened the top of the wood to a nice point and glued it together, i finished by adding the top of a flag pole that i cut to slide un into the bottom of the pole to lock the blad in. all glued together and then cut out the finifhing parts of the bottom of the blade. more to come....
-
The weapon is another challenge i am currently tackling i have everything done (pics to come) other then painting it. here is the initial design based off of the comic book renderings.
-
For the hand armout i used the cutouts form the boot guards. and glued them on flat gaurds that i thought were missing something. And Paint!
-
I got some coaching from the guys over at the bounty hunters guild and was told that my boot laces should be hidden. After scouring the referance pics i did notice that Mandalore does have "Boot armor"... i also noticed that he has armor on his gloves as well. so I stated creating them from sintra. and then painted them to match. And then started on the gashes and cracks! this was fun
-
Here is the mod to the mask i made to make it easier to put on. The two pieces seen here were together and glued to material under the mask. i cut them apart so they could swing independently from one another. i used snaps where the parts were previously glued so it was easier to take the mask off from the costume. in the above picture if you have a keen eye you will see that the top snap is incorrect.... oops wrong direction i have since removed it and replaced it with the correct directional snap.
-
here is the costume before mods... (picture to come) I have searched my entire computer and have not been able to find slew of pictures I know I have of it laid out on the table when I first got it. (Pictures to come, when they find me I guess) i could not wait to try it on, so i did with sneakers, shorts and a t-shirt on
-
And there are several weapons that hew has been seen with, my favorite one if the battle axe that was created out of the republic ship he destroyed.
-
I started to notice that the mask is constantly changing mostly the shape of the top of the T-visor, and assumed this was because of the artist rendering, and in situations perhaps they were trying to depict his mood by over exaggerating the "eyes" area. Here are some pics of the different versions \
-
And these are the pics of the entirety of Mandalore that i was able to find that are from the Old Replublic comic books.
-
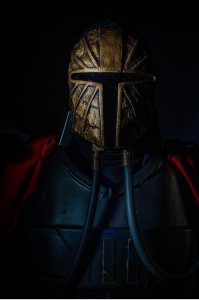
You may have seen the MWA if not here are some pics. Its a very nice costume.
-
I haven't posted anything here yet because at first i was not sure what he should belong to, (BH or EU). after deliberating it for a while i came up with.. Mandalore the Ultimate (MTU) was part of a time, before Mandalorians became outcasts who were then forced into mercenary work to survive and feed their need for battle. He did not die fighting for the best paycheck, he died fighting for supremacy for his people fighting for the glory of battle. Therefore I believe that MTU cannot be a BH, I would consider him part of the EU more than anything I feel that is his best fit. I am SL-12486 with my Darth Revan, and thought it was only fitting that I also have a MANDALORE THE ULTIMATE! I am not a master of crafting armour.... yet... I found that Rob at MWA must have the same infatuation with the Old Republic as I do because he has done a Mandalore the Ultimate already. So I got in contact with him and he agreed to send me one. will post pic soon,
-
I am currently looking into re doing my Cowl and am looking for soft patterns to use, anyone have any?
