
-
Announcement
Welcome to the forums!
If you are a newly-approved member, make sure you check out the New Member Checklist!
If you are a Detachment member and can't see the member-only area, post here for access.
-DV


Aglarwen
-
Posts
85 -
Joined
-
Last visited
-
Days Won
7
Content Type
Profiles
Forums
Gallery
Events
Everything posted by Aglarwen
-
Best advice I can give you is go to a salon with a picture of Mara and have a professional do it. I started dyeing my hair a year and a half ago for Mara, and do it this way to make sure my hair stays healthy through multiple dyes. It's made it so much easier for trooping and I absolutely LOVE the color, but want to make sure I don't fry my hair in the process!
-
Another thing she'll need to update is her cape. To match the CRL for approval, the hem will need to end at the knees at the longest, have the hood removed, add the cape clasp, and be a couple shades darker. Twilek Pam on Etsy sells a fantastic cape clasp for a few bucks! https://www.etsy.com/listing/530387354/mara-jade-cape-clasp?ref=shop_home_active_17 If she wanted to do the Decipher style shin guards, she can go to her local army navy store and special order a pair if she can't find anything she likes online. The ones you posted above wouldn't be approved as is. The top part would definitely need to be cut off, the holes would need to be filled in, and the red triangle would need to be painted black. Of course, the worbla/foam method would work just as well as long as you follow the advice of these other ladies! I personally prefer not to use foam or worbla because Florida summers will soften it right up!
-
Oops, completely forgot to add those! I edited the original post with links to in game references, they're at the top!
-
Hey everyone! I took the time to come up with a rough draft of a CRL for Vaylin's outfit from the Knights of the Fallen Empire expansion. Take a look through it and tell me what you think. Don't be afraid to tear it apart. This is my first time doing this, so I'm completely open to critiques! It's a bit long winded because there are sooooo many details to this costume. There were some parts I couldn't think of a simple way to describe it. I feel like some parts can be level 2 requirements instead. I just tried to get down every detail I could see. EDIT: Here's a link to several great references from the game, kudos to our wonderful DL Nina for taking these! https://drive.google.com/open?id=1UsKo6bG4AMebY5iSRlpfnFMSXpYIT5oz I also used this webpage that has a great 3D model of her https://swtor.jedipedia.net/en/npc/vaylin-5 Bodysuit For 501st Approval: - Bodysuit is black or charcoal grey in color with lighter grey side panels. - The bodysuit has a diamond shaped opening at the chest. - The middle front panel extends out in a rectangular fashion at the waist. - The side panels extend towards the middle by the neck to form the top half of the diamond-shaped opening. They angle down from the neck to the center of the sleeve seam in the front. - The top of the side panels is joined by black or charcoal grey panels. - There are two black rectangles located at the bust and the center of the extended portion at the hips. - Three lines of topstitching run up the center of the side panel and border the black rectangle at the bust. - The seams joining the middle front and side panels have three lines of top stitching on each side: one on the middle and two on the side. o The middle line of topstitching runs along the hem of the top half of the diamond-shaped opening. o The outside line of topstitching on the side panel runs all the way to the top of the side panel, and turns toward the sleeve seam. - There’s a rectangle of topstitching on each side panel between the top hem of the diamond and the top of the panel. o A small gold triangle sits in the bottom corners of the rectangles - There’s three lines of topstitching joining the side front and side back panels: one on the side front and two of the side back. - The back side has a middle seam and side seams. - The collar has two layers. Each layer has gold bias tape on the hem. o The top layer has a line of gold top stitching running along the bias tape. - The sleeves extend to cover the hand. The middle and ring fingers are the only ones covered. - There are two quilted ribbed panels on the bicep. o The larger panel has a flat bottom and curved top. The smaller is a rectangle shape. o The ribbing isn’t in perfect straight lines. o There’s topstitching around the outside of the panels. - One line of topstitching runs from the top of the larger ribbed panel on the sleeve - There’s a rectangle of topstitching just above the palm. - The legs have quilted ribbing at the knee and bottom half of the shin. o The ribbing isn’t in perfect straight lines. Hooded Cape: For 501st Approval: - The cape and hood are black or charcoal grey in color - The cape extends to mid-to upper thigh, and curves at the bottom. - Two lines of topstitching extend from the neck to just below the shoulders in the back. - Gold runes border the cape. Two gold lines run on the top and bottom of the runes. o Gold triangles sit at the front by the shoulders. - Gold bias tape hems the cape. - The hood has two side panels and a middle panel. o Two lines of topstitching run along the hem of the hood. o Gold lines border the side panels. The top corners expand into a triangle shape. Loincloth For 501st Approval: - The loincloth is black or charcoal grey in color. - The top sits just below the belt. - The front and back panels are hemmed in gold bias tape. - The front panel is long and narrow, comes to about mid shin in length. o There’s a gold triangle design at the bottom of the panel. - The back panel is the same shape as the cape. Pauldrons For 501st Approval: - The pauldrons are black or charcoal grey in color. - They are shaped to the costumer’s shoulders and come to a curved point at the bottom. - An angled line runs through the middle of the pauldron. - A trapezoid-like shape sits down by the point. There are three small rectangles in the shape, the top end meets with the top of the shape. - A line runs along the outer edge of the pauldron. Gauntlets For 501st Approval: - The gauntlets are black or charcoal grey in color. - A long rectangle-like shape runs from just below the elbow to the knuckles. - The gauntlet is curved to costumer’s arm. - The top edge by the elbow is curved. - A line follows the top edge down to the wrist, and then cuts across in a straight line. - There’s a gold triangle at top edge. The base of the triangle meets the line along the outer edge. There’s a line along the outside of the triangle. - There are two holes on either side of the triangle. - A line cuts across the gauntlet at the wrist. - There’s a square shape in the gauntlet on top of the hand. 5 evenly spaced lines run through the square. - A long gold diamond shape runs from the bottom edge of the gauntlet to just above the wrist. A V shape of black or charcoal grey cuts across the bottom half of the diamond. - The left gauntlet has a small rectangle-shaped control panel attached to it o Matches the gauntlet in color. o There is a circle in each corner of the base plate o A raised rectangle is attached to the base plate, leaving an extra exposed bit on the side. There is an irregular shape with 6 sides on the top with 3 rectangle strips in it at the widest spot. A red button sits in the adjacent top corner. Four strips branch out from the raised rectangle on the top and bottom edge to meet the edges of the base plate. o The exposed bit has 5 lines, one black button, and one blue button. Thigh Armor For 501st Approval: - The thigh armor is black or charcoal grey in color - The bottom edges in the front and back are straight, ending just above the knee. The edge curves up to mid-thigh. o The bottom back edge ends higher than the front edge. - The front edge at the top gently slopes down the inner side of the leg. The back edge comes down the inner side of the leg in a straight line. This leaves a gap in the armor in the inner thigh. - A line runs straight down the outer side of the armor. At the bottom, the line angles slightly toward the back. o There’s a small curved shape connected to the middle of the line. It has two holes in it. - A single line follows the outer edge from the side in the front at the bottom corner, along the top edge, down the side and bottom edges in the back, and up the curve until it meets the line running down the side of the armor. - A gold line runs along the bottom edge from the line down the side and along the curve to the bottom of the front edge. o A small gold triangle is above the gold line next to the line down the side. o There are two lines running through the gold line along the bottom edge. - There are two oval-shaped holes on the bottom outer corner in the front. Shin and Knee Armor For 501st Approval: - The knee and shin armor is black or charcoal grey in color. - The knee armor is a trapezoid shape, with the pointed end attached to the top of the shin armor. o The side and bottom edges are lined in gold. There’s a line running along the edge of the gold o There’s a gold triangle in the bottom point of the trapezoid connecting two of the edges. Another triangle is drawn in the gold triangle. - The front and back bottom edges are straight, ending just above the ankle. The bottom edges curve up to just below mid-calf on the sides, in the same fashion as the thigh armor. o The back edge ends higher than the front edge - A narrower trapezoid is etched into the shin armor just below the attachment of the knee. o There are two holes on either side of the trapezoid - A long trapezoid-like shape runs down from the top on either side of the holes all the way down to the bottom of the shin armor. - There’s a rectangle with diagonal sides on both sides of the shin armor. o The bottom diagonal side meets the top of the curved bottom edge. o The facing the front runs past the curve and ends halfway between the top of the curve to the bottom front edge. - The back has a shape with a curved top and flat base. There are two holes inside the shape towards the top. Shoes For 501st Approval: - The shoes are slip on style, black or charcoal grey in color. - A line curves from the toe to the arch on either side of the shoe. - A line on the inside and the outside runs straight up to the top edge of the shoe. - There’s a rectangle with a line through the center on the top of the shoe, midway between the toe and the top edge. - There’s a small trapezoid figure on the back of the shoe. Belt For 501st Approval: - Black or charcoal grey belt in black or charcoal grey. - Belt buckle is a trapezoid figure with rectangular indents in the top corners. o A gold star-like figure with 8 points is in the center of the buckle. A dragon is centered in the gold piece. - Two long rectangle shapes are carved into the belt extending from the buckle in the front. - The left side has two half-circle shapes carved into the belt. - The back of the belt has two diagonal lines with holes next to each line. Belt Accessories For 501st Approval: - Three silver food capsules sit on the left side of the belt. o The cylinder sits lower on the clip. o The clip is narrow at the top and widens slightly on the left side. - One circular piece sit in the middle of the half-circle shapes on the left side of the belt. o The circle piece is concave, like a satellite dish. A small rectangle extends below the circle in the front. o Another rectangle piece extends from the back and out to meet below the rectangle piece in the front. - One small rectangle clip sits on the right side of the belt o The base rectangle piece is black. o Two silver cylinders sit on the right and middle of the rectangle. They extend just above the top of the rectangle. There are two black stripes on the front half of the cylinders. o A spiral shape connects to the bottom front corner of the rectangle on the left side. o A long black rectangle piece sits on top of the rectangle. o In the front right corner of the rectangle, there’s two small square buttons. One is blue, the other is black. Sun Accessories For 501ST Approval: - Two gold trapezoid shaped pieces are glued to the bottom of the side panels in the suit just above where the belt sits. - There is a half sun shape with 5 points engraved into it. Head Gems For 501st Approval: - 3 grey oval shaped pieces are attached to the forehead. - One is placed in the middle, closer to the eyebrows. - Two are placed to the side and just above the middle one, at a slight angle. Necklace For 501st Approval: - A black trapezoid-like shape with a curved top sits in the center. - There are two long black rectangles on either side of the trapezoid piece. - The trapezoid and the rectangles connect with brown pieces. Hair For 501st Approval: - Medium-length, layered dark brown hair, parted on the right side of the head. Sith Contacts For 501st Approval: - Yellow contacts with red rim. - While encouraged to complete the look of this character, the contact lens requirement will be waived for 501st acceptance, if the applicant cannot wear contact lenses for health related reasons. All persons utilizing contact lenses are encouraged to first see their optometrist for a fitting.
-
 I'd say you're on the right track, these materials do look pretty close in color to the comic and CRL! And I don't blame you for not wanting to do a full undersuit. It gets super hot here in Florida! I think it should be okay as long as the sleeves and legs are there and visible.
- 16 replies
-
- 1
-

-
- Black Nebula
- Mara Jade
- (and 2 more)
-
For the Sister I've made in the past, a suiting fabric (similar to what is used for officer uniforms) has worked for the coat and pants. I lined it in a cheap red cotton fabric, since most linings are shiny and I didn't want the lining to have a sheen. I have also seen the pants made out of spandex with great success. I would say it all depends on the material that you would prefer to work with. As for gloves, I had to make them for my customer because I haven't seen a pair of gloves in that color combination. I am currently unaware of any vendors that do any of the soft parts for this character currently, but maybe someone else will know?
-
This belt she's wearing here seems to be a completely different belt. The side strap isn't there, and the buckle is a different shape. Every reference in the gallery with pouches is this style of belt and not the one currently in the written standards. So maybe if they want pouches, make this belt an option as well? Something they can only wear with the cowl and black wristband combo (since she's wearing that combo in every reference of the pouches in the gallery as well)? Unless we find more references of her wearing the pouches with her other belt/accessory combo, I think this would be the only way we could include the pouches in the CRL.
-
The blaster looks great! Excited to see how it looks printed out!
-
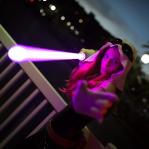
Hey guys! I took Vaylin out for a couple more test runs recently with great success. Shoes got finished, all of the 3D printed belt accessories are done, suns are attached to the suit at the hips now, thighs are attached with a garter belt. I couldn't be happier with the results. Have some shots taken by my talented friends! This one was taken at a mini convention at a baseball game. I was invited to judge the costume contest there, so they took me onto the field to help announce the winners. Also wore her to Metrocon for a brief moment in between shows and sewing costumes for customers backstage A friend also created a GIF showing the costume head to toe. Technically not finished yet because I fixed the neck hem, the holes you see along the border of my thigh armor, and added the suns to the hips after this event. https://imgur.com/a/mzfAr Only things I really need to tweak before I send in for approval is stretching the belt so it sits lower on my hips and shows more of the suns and attach the buckle a different way so it doesn't flop as I walk so easily. Feel free to point out anything else I should touch up before I send her in. I'm always open to feedback, an extra set of eyes can only help to improve it!
-
There's a lot of great choices for armor materials out there that will give it a nice rigid appearance. Vaccuumformed plastic (like stormtrooper armor), worbla, leather, EVA foam. Depending on what you feel comfortable with in terms of weight, if you're making it yourself, etc. I know there are places that make it to standards with some minor adjustments, but I'm not sure of the names haha.
-
Nihilus COTF update on CRL - what is a natural weave?
Aglarwen replied to Darth Waffle's topic in Darth Nihilus
That would be a great example of a natural weave. Linens are great choices for fabrics with a natural weave, and the weight gives them a nice drape. By far my favorite fabric to work with -
I definitely think grouping up the accessories in one section will be helpful to get the combinations right. It can be easily overlooked. My only worry is the pouches. While having pouches on our costumes would be SO helpful, we would still need to find official references of her wearing pouches for it to be an approvable addition.
-
Good job on that glove, it came out great!! Making gloves is no easy feat, I know from experience!
-
Angelus leather paints are also phenomenal if you need a paint rather than a dye. My boyfriend has been using it to paint a black pleather trench coat red and it's been working like a charm. It spreads and blends in with itself very well with very little brush strokes.
- 16 replies
-
- 1
-
-
- Black Nebula
- Mara Jade
- (and 2 more)
-
Awww you're too kind!! You're off to a good start! I will say you definitely will need darker bias tape. My friend's Lana has lighter bias tape like that and needs to darken it before she can get approved. I would recommend making your own. Dye a half yard or so of cotton fabric to the right color, cut it out yourself, and iron the folds in. And if you need a lighter wig color to look natural on you, then by all means. Lana's hair in game is a little more on the yellowish side, but not everybody has the skintone to rock that lol. Sent from my SAMSUNG-SM-G930A using Tapatalk
-
I wish you luck on this build, its by no means a simple build, as I've seen my friend stress over this for quite a while now. A cotton canvas would be a good choice for fabric, it'll have the woven texture that her outer tunic has in the game. I would try to find a pattern for the outer tunic without darts, since hers in the game doesn't have any. Even with the chest armor and tabards, I wouldn't want to risk those being seen and getting marked for it! If you feel up to it, sketching your own pattern out for this shouldn't be all that hard to do. As for the armor, worbla would be a great choice for this! I've also seen it made out of EVA foam and come out just as good, if the worbla fails you. The stuff can be pretty tricky to work with, and warps very easily, as I've learned the hard way. For glove patterns, I use Yaya Han's glove pattern and it works like a charm for me. The pattern for the left glove would just need to be altered to flare out at the cuff. Even with that pattern, it usually takes me some adjusting to get perfectly right. Gloves are just so dang tricky! I also approve of the choice of Arda wigs! I love their stuff, always my go to for my wigs! I would say the Magnum would probably work best, maybe in Fairy Blonde, and then sharpie dye the gradient into the ends? As a side note, 3D printing is the greatest thing to ever come about, especially for finer details on costumes! I've been keeping my 3D print artist super busy with my Vaylin details!
-
Been hard at work on my updates the last couple weeks. Armor is now 90% done. Everything is shaped and covered in the fabric, and painted with gold detailing. Just need to add Velcro and elastic in the appropriate spots for my thighs, gauntlets, and shoulders I also sewed new bodysuit legs the last couple days, complete with new ribbing. This attempt is just a little bit more uneven than the last time. I sewed stitches diagonally across first and then sewed straight down. It's subtle, but still cool looking. There's a quilt batting backing to give it a ribbed effect. I'll probably hate my life with that later, but the vinyl alone wouldn't give the 3D effect of ribbing that I wanted. All that's left to do is cover my new shoes with fabric, change the ribbing out on the sleeves with the new design, and wait for my friend to design and print the belt accessories and control panel for the left gaunlet. Completion is very near, getting excited! Sent from my SAMSUNG-SM-G930A using Tapatalk
-
Eliste put it pretty well here. It needs to be proportionate to the person wearing it. With that piece in particular, one size won't fit everyone. I do think yours is a bit short. If it's real leather, you can also try stretching it while its wet to get a bit more length, and then form it to proper shape while still wet.
-
I got some time last night to start working on my upgrades to Vaylin. This time, the shoulders were shaped in foam and covered with the same vinyl I used on the rest of the suit, and they turned out really nice! Much smoother and cleaner than the worbla version, with the perfect color to match the rest of the costume. Sent from my SAMSUNG-SM-G930A using Tapatalk
-
YAY! Congratulations!! So happy for you!!
-
No doubt this is going to be a very challenging build, especially for a costuming novice. As mentioned above, there is a question of their faction. Probably wouldn't hurt to post into Rebel Legion as well and see what they have to say. Depending on how you look at it, they could honestly go to either side. The fabric parts will take a bit of custom patterning, but are pretty straightforward, Would recommend linens for those for the natural weave. I used those for my friend's Arcann soft parts and they came out great! In terms of the armor, EVA foam or Worbla would be my first choices to make it out of, especially for those fine details. If you know someone talented enough, 3D printing armor has been a recent thing as well. Hell, you could even do it out of leather if you can handle the weight of it. But reaching out to Bioware for more references and design notes of the whole costume would be very helpful. I'm very excited to see the progress on this! I've been dying to see more of these come along!
-
Gorgeous photos! I wish you luck!!
-
We do have a long list of CRLs that need updating this year. I would urge your GML to follow the written standards and not the photos, as the written standards will not be changing.
-
Hey guys! Been a hot minute since I've updated this! BUT I did manage to bust my butt and get Vaylin finished in time for Celebration. However, there's a lot I need to do before I am ready to submit her for approval. The soft parts looked great! The cape, hood, and loincloth were made out of the same vinyl the suit was made of and lined with an apparel lining in a similar color. The gold lining was done in Yaya Han vinyl as well, and runes and front piece of the loincloth was painted with fabric paint. The light grey panels ended up being spandex. I tried painting the panels twice and it didn't work, so I had to find spandex in the next closest color. The legs of the suit need to be completely replaced. The neoprene doesn't stretch as much as it needs to, so it pulls the top half of the suit down too much. It's also much lighter than I had wanted. So I'm going to remake the legs in the same dark vinyl I used for everything else, and sew the ribs in with quilt batting. The shaping, smoothing, and painting of the armor took a while, especially etching all of the lines into each piece. However, the color was a shade darker than what I wanted. And the shins and thighs gave me lots of issues. I also had to add elastic to the gauntlets to make them stay, since the velcro alone wasn't doing the job. I'm going to reshape the armor in foam and cover it in that darker vinyl so it matches the soft parts like I wanted. I also need to get another pair of shoes, this time completely slip on. I bought laced shoes and covered the tops in vinyl that I painted. But the paint chipped off as soon as I started pulling them on. Sharpie was a quick fix, but they look rough. I'm thinking covering the new shoes in the vinyl as well will work just as well. Wearing her at Celebration was such a blast though! Vaylin and Arcann were so well received at the SWTOR cantina event and the con. We're very excited to fix them up and wear them again soon!
-
Wow! It came together so well!! I know the pain of leg armor. I had troubles with my Vaylin leg armor as well and need to go back to the drawing board with that. But I know you can make it work!