
-
Announcement
Welcome to the forums!
If you are a newly-approved member, make sure you check out the New Member Checklist!
If you are a Detachment member and can't see the member-only area, post here for access.
-DV

DarthBrute
-
Posts
281 -
Joined
-
Last visited
-
Days Won
7
Content Type
Profiles
Forums
Gallery
Events
Everything posted by DarthBrute
-

Sol's Darth Revan WIP (updated with Submission pictures)
DarthBrute replied to a topic in Darth Revan
You may be uncomfortable in a full turtleneck. I bought this mock turtleneck and it isn't as light as I would want it to be but lighter than the one I was using. Remember it is supposed to be a mandarin collar style so you will have to fold the turtleneck to the inside. As far as the boots, those look like they could be good to go. I am a little worried about them being imitation leather as far as trooping is concerned. Trooping is a lot more rigorous than just halloween walking around. And 911costume is pretty much just halloween stuff. Search google for German Jack Boots and look for full on leather ones. Look for ones that do not have the irons on the heel or the toe. -
The parachute cord I just picked up at a craft store. That is where I picked up 95% of everything I used. The other 5% was ordered online or a hardware store. LOL Replace the velcro that comes with Rob's with industrial strength velcro. Get that at Lowes. 1/2" elastic strapping and 1" elastic strapping. 5/8" snaps I will watch over your thread and help you out when you ask. Glad my build will help you out along the way. And I will post those pictures as soon as I can.
-
Ok. I will take some pictures of that and post them. It really isn't hard. Use plastic epoxy to secure the snaps. Be sure to scratch the hell out of the snaps with some 60-80 grit sandpaper before using epoxy. I like to use the two part epoxy and draw parallel lines with both parts and mix it as I need to so I can take my time. Worried? Nah, I am a complete noob to this myself. You just got to know what you want and how you feel about your armor. You will get out of it exactly what you put into it. When I first started my build I had a certain way I wanted to do it. But that changed with almost every test wear. I would see other costumes and how they were built and held together and change my mind. Without further ado, my final build post.... For whatever reason my phone has decided to stop uploading my pictures to my picasa albums. Anyway....This was after placing the elastic strap on the cowl and adding on new elastic strapping for the cuirass and the back plate. This makes it harder for me to put it on by myself as it makes it seem like the straps are shorter. In reality they are but since they stretch it makes it a tighter fit and I won't have to make it a point to stand up super straight to keep everything in place. Here are the new fitting photos: This one was before the new straps. You can see the old straps. Ok this was after the new straps. I moved the straps further from where they were. Now you can't even really tell where the straps are. The straps now rest just past the shoulder joint instead of between the joint and the end of the collar bone. And since the armor is light, there really is no difference in weight bearing. And this is just a back view after the strap was done on the cowl. And my shirts. One winter and one summer. It cost me friggin' $20 a piece to get done. Outside: A good straight bead going all the way across. Well one of them is almost straight. It kind of dips on the right side. D'oh! Inside - She used my idea of wrapping the parachute cord with cloth. She also cut open the shirt and sewed the bead so the stitching would be hidden. She also sewed the end of the cloth so it would not come unraveled. And a couple of views with it on. I decided to wait on the boots this past week getting done because I wasn't sure of the color he was showing me in the picture. I went to the store to pick up my stuff and it didn't look bad. So I am going to get that done after this weekend. But I am going to go ahead and call Revan done. Yes Ladies and Gentlemen, Darth Revan is finished. Months of working on this getting things just right and fitting right. Feels good man. So after tomorrow's troop I will be taking some pictures for LFL and then this week I will be submitting for Legion Approval. Time to finish working on the TKC!! My work is never done..... Build photos: https://plus.google.com/photos/101841473479732427661/albums/5807139823014000289 Event Photos: https://plus.google.com/photos/101841473479732427661/albums/5853514574074093313
-
I will post some pics in a couple of days but I sewed on new straps to the cape. Moved them out a few inches. I did that to help them stay out of view. I felt that with where they were, it wasn't do the costume any justice to have almost visible straps. I also moves the straps for the back plate. I replaced all straps with the elastic strapping for better freedom of movement. Also during a test fitting for the new cowl hook up, the inner snap fell off. I took it as weak fabric. So I cut off a small square of elastic strap wider than the snap (5/8 in) and put a new snap through it and the cowl cloth in the same spot. Seems to be a tighter more snug fit so that should hold better.
-
No. I just pulled it off. Be firm but slow. (heh heh thats what she said) Then sand off whatever glue may be left.
-
Sol's Darth Revan WIP (updated with Submission pictures)
DarthBrute replied to a topic in Darth Revan
The Custom Saber Shop has some excellent stuff for replicating Revans saber. And they do powder coating too. I will be turning my current saber into Revans second saber and building a custom saber from TCSS. -
There is velcro already on the hood. You should just be able to put a small square on the top of the mask to hold it.
-
Ok here is what it looked like. I hadn't sewn anything yet but it didn't feel right. Like it wouldn't hold up on a longer troop. So I did something a little different but similar. I looked at the webbed loops inside the cuirass that I wasn't utilizing for the cape (because that would have sucked to tie). I sewed on a longer strap that would go all the way through and used a larger snap than planned because there was no risk of it being seen. This will allow me to have that pull that will keep it tight around the shoulders and some down resistance to help it stay down on the arms. I am actually thinking about doing velcro on the upper sleeves of my shirt. But I think that might pull the shirt out of the greeves. Unless I add loops to the sleeves to go around my thumb inside the gloves. And this is for James D. I used the foam blocks purchased from trik toys and cut down to size. http://www.triktoys.com/shop/catalog/armor-foam-fitting-blocks-with-adhesive-backing-p-70.html Well the next troop will be the test for this. Next Episode: Securing the Red Sash!
-
Check out my post in my build thread. I got it figured out.
-
Hello? Any advice from Det Staff on boots? They are at the leather shop now. Trying to get them done before the next troop so I can do another test wear of the mods I have done. Thanks in advance.
-
Help my revan costume I want to be 501st approved
DarthBrute replied to en-zozallow's topic in Darth Revan
I actually think the way your cowl lays open is perfect. So I am not sure what your GML means. Your cowl around the shoulders should lay a little lower and flatter. I think the clips you ordered should do but it also depends on the size. You don't want the clips to be oversized in length or width. I have noticed that about a couple of Revans. I have shot off an email to a couple of FE staff. So hopefully the issue will get addressed. My GML is very detailed oriented. So my Garrison has some of the best costumes out there. -
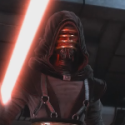
Alright found a leather store to do the strap for my boots. He sent me a picture of 2 different leathers to choose from:[attachment=0]leather colors.jpg[/attachment] One on the left is dark grey one on right is more metallic. Here is the guidance here for the boots: http://www.theflagshipeclipse.com/forum/viewtopic.php?f=7&t=985 Boots: * The boots may be black or dark gray in color. * The toes may be rounded or squared. * The heels should be low, and there should be no visible laces. * There may be be strapping near the toe in a dark metallic gray. And here is the CRL: http://www.501st.com/databank/Costuming:SL_revan Boots For 501st approval: The boots may be black or dark gray in color. The heels are low, and there are no visible laces. A wide strap may be included that goes over the top of the foot You probably don't need me to post the links but I figured I would anyway. So I need detachment staff to look at this and tell me which I should go for or if another color needs to be selected.
-
Help my revan costume I want to be 501st approved
DarthBrute replied to en-zozallow's topic in Darth Revan
These clips: http://www.buckleguy.com/b6915-5-8-nickel-matte-plated-swivel-lever-snap-solid-zinc/ You should get 4 of those. The rings however I found at a hardware store (Lowes) they are drapery rings. -
Help my revan costume I want to be 501st approved
DarthBrute replied to en-zozallow's topic in Darth Revan
I'm not sure I like what is going with the chest piece can you take a close up picture of your chest piece? I see the link on there and I am not sure what's going on there. I would change out the rings with clips, you can find the clips in one of my posts in my WIP thread. Also try to replace the 12 rings at the bottom. Also, if I'm not mistaken is there a zipper on your shirt in the front that goes up the collar? The picture is a little fuzzy so it is hard to tell. And do you have the bead line going across the shirt? Like I said the pictures are fuzzy and hard to see what everything looks like. If you can get higher definition pictures it will be easier to check out your costume for any deficiencies. -
Without Sound: Select the Arbiter Pommel http://www.ultrasabers.com/product-p/liberatorv3.htm With Sound http://www.ultrasabers.com/product-p/sound-liberatorv3.htm
-
Alright I fixed the cape. Epoxied the snaps to the cuirass. Those things ain't going no where. Currently trying to find a cobbler or leather worker that can add the strap to the boots. Cowl situation is ongoing. I am going back to the drawing board on that. Everytime I think about it I think how it will lay, where it will pull and how to keep it still. Also going to sew some velcro to both sides of the opening in the hakama in the front to kind of tack the red sash down a little better. Wind like to take it and whip it around and it gets pretty annoying. Just going to cut a flap into the leather on the back of the sash so I can sew it on rather than using sticky back velcro. Easier? Yes but eventually it will fail. Long term: Come up with a way to "buckle" the straps on the side to the back. So it looks a little better and to make it a more permanent placing and easier to put on without a squire to make sure it is all lined up. Ordering a mock turtleneck online that has a lycra collar. I figure that will help keep the balaclava inside. I do notice it has a tendency to slip out. Well. I feel like the farther I get with this the more solutions I come up with. I will be glad when this is all complete and approved.
-
Holy bantha poodoo. That is incredible!!!
-
Yea I have the Liberator V3 from UltraSabers. Link Below. I am with Tagion. Unless it is a short troop. I don't carry the saber. I always bring it to the event though just in case there are alot of kids. Kids love the Lightsabers! If revan had a covertec clip that I could hang it from, I would carry it more. But it gets heavy and ungainly after about an hour. Without Sound http://www.ultrasabers.com/product-p/liberatorv3.htm With Sound http://www.ultrasabers.com/product-p/so ... atorv3.htm
-
Revan Troop photos Ok above is the link to the albums. As you can see the cowl holds perfectly on the shoulders due to the velcro I sewed on to the straps for the chest plate and the seam on the inside of the cowl. Although due to the cowl ends it doesn't seem like it. After a fresh tuck every now and then it looks pretty good. But the problem still remains of the cowl ends that kind of don't lay right and come out ALL the time. Possible solution would be to measure out where the straps would go, cut a slit and sew up so it doesn't come unraveled there. Slip the straps through. If the slit is long enough it will allow the cowl to move around and hold it in place at the same time. My previous solution I was looking at wouldn't have worked well. The cape fell off after the troop today. I used hot glue to hold on the snaps for the cape and back plate. The snaps came completely off the chest plate. I guess standing in the hot sun doesn't bode well for hot glue. So I am going to epoxy the snaps on and then add some hot glue after it dries just for security. I still need to do the shirts. I need to find a thinner turtleneck and possibly a new balaclava. My and a friends sewing machine took a turn for the worse. Well I think thats about it for now.
-
Alright as soon as I get the HQ ones I will upload them to my Google Albums and link it on my thread. Boy am I going to be doing more to this thing. New tip....Hot Glue + Sun = Cape falls down. Luckily it happened at the end of the 6 hour troop. Epoxy then hot glue for security. Stay posted to my thread I will be possibly adding a FEW new modifications for comfort/wearability. Oh yea if you need a good winter shirt for Revan I can get you one. It is real warm.
-
Just to let you know, those stitching on the cowl will fall out. I pretty much guarantee it. I sewed the pleats in. You can't even see the stitching. You have to sew it from underneath, in the middle of the fold so as to not ruin the look. My mother in law sewed one of the pleats (my sewing machine is broken) in the front. You can't see it unless you are up close. So I am going to shoot for it. For the line across the chest I picked up some black cloth similar to the material of my shirt and some parachute cord. I am going to tear a hole in the seam of the sleeves of the shirt. Take the parachute cord measure out one inch past the width of my chest (to the seam tears) on each end. Wrap the parachute cord in the cloth, cut so I have about 1/4" over hanging past the cord. Use some wash out sticky to hold the cloth wrapped around the cord and also to the shirt. Insert ends into seam tears, sew it to the shirt, use a razor to trim off excess cloth, leaving only the sewed line. Parachute cord will act as the line and can be seen very easily. Once I get this started I will post more pics. Also I hand sewed on some velcro to the inside of the cowl seam and to the straps for the chest piece. Looked pretty good with a self pic but you know how this thing moves. Everytime I picked up my phone it moved out of place. Doing a troop tomorrow and this will be the third wear test. I will get some pictures taken and show everyone.
-
The trick is finding 3 references that offer the same look in detail. Darth Bane is depicted several different ways. Sad because there really are some great Darth Bane's out there.
-
I have been studying and studying game models, these pictures, etc. For all these details. This is one costume I am going to completely build myself. As far as the cape is concerned to keep that trianglular shape across the chest armor; I was thinking using leather as the padding underneath. Modifying the top portion of the Vader body suit to match the flak vest underneath. Attach the leather to the modified Vader top, place chest/neck armor, slide cape underneath the peak in the middle then attach cape to the outside and rear of the leather padding. In doing that I think I will achieve the best look for that top that will fall under the guidelines. This is going to be a lot of work but will be worth it. I have already drawn up some basic designs of the chest armor. I am starting with that as it needs to fit my body width and I can build around that to make the costume just a tad better.
-
These worked great for me. http://www.buckleguy.com/b6915-5-8-nick ... olid-zinc/
-
Looks good man. How does your nose feel? Mine hurt after a 4 hour troop.