
-
Announcement
Welcome to the forums!
If you are a newly-approved member, make sure you check out the New Member Checklist!
If you are a Detachment member and can't see the member-only area, post here for access.
-DV

DarthBrute
-
Posts
281 -
Joined
-
Last visited
-
Days Won
7
Content Type
Profiles
Forums
Gallery
Events
Everything posted by DarthBrute
-
To piggyback off of what Tagion is saying, My garrison would not allow me to troop Revan with a Vader saber. I do have a saber that looks LOOSELY similar to Revans Saber. They do allow me to use that. I did not submit that with my Revan submission. I am however building a new saber that will be closer to canon once TCSS gets their powder coating service started again. Each Garrison will be different and the best idea would be to ask.
-

Another costume i will be interested on making
DarthBrute replied to en-zozallow's topic in Starkiller
I would say Rebel Legion. -
Looking good man!
-
This costume is just amazing. I freakin' love it.
-
Awesome man keep up the good work!
-
Sol's Darth Revan WIP (updated with Submission pictures)
DarthBrute replied to a topic in Darth Revan
If you look on my thread I did a tutorial on how to extend the straps and replace the rings there as well. You will have to get some thin metallic silver leather or similar colored material though. I would go into it here but it is a long post. That is towards the end. -
WIP: Starting on a Darth Revan have MANY Questions
DarthBrute replied to Kylo's topic in Darth Revan
No problem. Sorry I swept past the hooks. Your armor will be key to these. Those of us with Wicked Armor Revan have tough time finding hooks that will fit. As I said in a previous post that since yours is a scratch build you have moe options available. But I think yhosee hooks will do just fine. Your o rings will need to be 1"-1.25" though. -
WIP: Starting on a Darth Revan have MANY Questions
DarthBrute replied to Kylo's topic in Darth Revan
I have to laugh at this and others who have done Revan will too. Should it? Yes. Will it? No. Its how it should look vs a real person wearing it. It will pull out, fall off/out, slip, slide, cinch, etc. It will take some work and some personal modding to get that comfort fit / costume standard balance. Check out some of the build threads to see what others have done to fix some of these issues. Just remember you may not have some of the same issues but you also may solve new ones!! Since you are doing your build from scratch you will have more options during your build to build for you. Good luck with your build and we will look forward to seeing it! -
Just looking for some input on which layout to go with. This has just its layout coding right now. Made it so it looks good for mobile too. Other than that it is not functional. Looking to add some social functionality, galleries, store front, etc. Give your thoughts too!
-
For a fee I'll build it for you! lol
-
Gotta chime in. LDM and Calvary are good looking sabers but hoo boy are they expensive. For those prices you could build 2 on TCSS with sound. I do hope they are worth the price for you guys!
-
I didn't submit my saber for approval. I just painted it to look similar. It would never pass for official approval but my garrison would see the effort and allow it at troops. I am in the process of getting different parts together from Ultrasabers and TCSS to build one as close to canon as possible. If you get 99.9% there it is likely to be approved as previously stated there really aren't any unofficial official Revan sabers out there that are functional. And why spend $60 on just a hilt when that is 1/3 of the price of a working saber just to get approved? After I am done with the build I will post. It will still be about 2 more months before complete though. I am dumping all of my money right now into my TKC build.
-
I would go with this emitter: http://www.thecustomsabershop.com/Screw-on-LED-blade-holder-style-18-P438.aspx You can get powdr coating done through TCSS. Also be advised that you will need to get a screw tap done as well for emitters off of TCSS. You can find powder coating and taps in the services section.
-
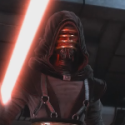
I like the different look that you bring. However, we have to go with the canon look. But there are a few things missing here. 1. Your shirt needs to be a mock turtleneck or mandarin collar shirt. 2. A bead line needs to go across the shirt just above the top of the armor. 3. The cowl needs to be wrapped around the arms showing the horizontal pleating. The cowl is what gets attached to the hooks on the armor. 4. The armor bridge will need to have horizontal ribbing going across the full length. I don't know what the black cloth is underneath that portion but it will have to go. 5. I don't know if you have the back armor but as I can only see the front I will just say that I I only see 5 rings probably because your arm is in the way. But the rings need to hang just under the bottom of the armor. 6. In the first picture your black belt on the big O ring (BOR)sits just right. In the second picture it seems to hang a lot looser. 7. The shoulder pads underneath the cape on your arms I assume you were going to use as part of the cowl. Those have got to go. 8. The lightsaber. Sorry that has to go to. You don't have to submit a lightsaber as it is optional but for submission I would leave it off. 9. The red sash also needs to be even with the bottom of the hakama. I would fix those things before submitting for approval. As I said I like the different take on the Revan but we have to go with what is canon. Please see the CRL and the image gallery for comparison: http://www.501st.com/databank/Costuming:SL_revan http://www.theflagshipeclipse.com/gallery/thumbnails.php?album=27
-
Well that seems a little long..... (That's what she said.) How about I just go with The Ultimate Revan Upgrade Kit! Well if you don't like the name pick your own! I want to get a feel here about this. What you get: *16 Satin Nickel Rings (12 with the links still hanging for attaching to the front and back armor) **2 Leather Straps (sized to you) and weathered to match the previous straps. ***5/8" snaps 1 pack of 8 (snap pliers not included but can be) 2 yards x 1/2" Elastic Strapping 1 yard x 1" elastic strapping 1 yard of Hook and Loop sew on velcro 4 x clips (to replace the rings at the top) See it is everything you need to do a full upgrade for your Dark Lord Revan. I know, I know. You are saying, "I just spent a butt ton of money on my Revan costume and a Saber. How much is this going to cost me?" Well after all the looking around and scrounging for all these parts you will end up doing. Your time is worth money too. So the precalculated cost is $48 plus shipping. So what are those stupid asterisks doing next to those items up there? Alright you ask and you shall receive: *The rings come 7 in a pack. You would have to pay for 3 packs. I am saving you about $5 there. I will rip off all the clips and straighten the pin so you can hot glue to the armor. **Measure the length of the strap between the rings. You will be ripping these off to replace the keyrings with the above supplied rings. Taking off the straps kind of ruins the old straps. ***This will add another $10 to your order. So that is it! I have already done all the finding for you. Also offered: E6000 3.7 fl oz tube $6.00 Clear Epoxy $6.00 Revan shirts with the sewn in bead: $50.00 Shipping will be estimated right now to most areas in CONUS at $10.00 International: $30.00 (I never ship international without some kind of insurance.) All packages will be delivered via UPS. So tell me what you think. Prices right now are estimated at current market prices. I will always do my best to get you the lowest price possible without sacrificing on the quality. If I won't wear it, I won't let you wear it. **EDIT** Price breakdown of the shirt. I am trying to get this below $40 1. Still trying to locate shirts under $10 2. Trying to locate a different tailor. Shirt: $16.00 Shipping (to my house): $4 Beading material: $5 Tailoring: $20 (expensive as cortosis ore! what the frack) Shipping (to you): $4 Profit: $1 =============== Total Price: $50
-
Thanks. It was a lot of work.
-
Well we did a photoshoot yesterday for LFL. I'm not posting those pictures until we decide which pictures we are sending in. But after looking at those pictures and then my submission pictures I noticed that my red drape hangs a little high. I did have it wrapped around the bar and safety pinned to keep it attached. So that was taking a couple of inches off of its length. So I took it apart. sewed velcro to the outside of it, folded it in and sealed the velcro. This created a nice stiff background for me to glue. Now the black pleather sewed on the back I kept off of the velcro. (Again sorry for not taking a ton of photos.) So with the top of the red drape folded inward I have the black pleather folded on the other side of the bar. I put E6000 all the way across the bar and then placed the red drape over it placed more E6000 on the other side of the bar for the pleather folded that over and clamped. Now seeing as Picasa is acting a fool again. I am setting up an ftp server via my phone to upload to my webserver. I am going to install Zen Photo to my server just because it is easy for people to use. So no pictures for a while until this is all straightened out.
-
Thanks man. Still going to keep my fingers crossed.
-
Well here they are: My Revan Submission photos!! https://plus.google.com/photos/101841473479732427661/albums/5865748645727615345
-
....................
-
The original straps were 5" so I made mine 7. That way I had a good sliding scale to adjust. I practiced on my scrap leather with the marker and acetone. I tried a really small piece first to see if the leather would react in any way. I am actually considering putting together a Revan upgrade kit to sell that would include leather, snaps, elastic, rings, etc.
-
The big O ring shall henceforth be known as BOR. Thank you. Now back to your regularly scheduled mod already in progress. Ok ladies and gents I will not promise this will be my last modding post. But I am thinking it will be my last mod post before approval. Phase 2 of 2 of the side rings and strap extension. Ok first off I just want to show a POV picture of the greeblies with the leather glued inside. The greeblies no longer rub on the armor. The leather will probably wear down the paint too but at a MUCH slower rate. Ok I was kind of a moron for not taking a picture of this. But I used E6000 to glue sew-on velcro to the reverse side of the straps. I cut two pieces of the hook side about 3/4" long and glued that at the end. Next I cut two loop side straps about 2 1/2" long and glued those about 1" away from the hook side. I left that to dry overnight. **YAWN** Goodnight Ahhh Good Morning! Ok. back to work. I then looped the newly created straps through the rings connected to the BOR. Then I used epoxy to secure them. TA DA! Ok now that those have set. Time test out this puppy! I asked my favorite costume helper (my wife) to make sure I got all connected properly. Then coached her through on what to do next. Looped the new straps through the rings connected to the cuirass and secured using the velcro. It took a tad bit of adjustment but I think it works really well and the new straps look great!!! Front view Right Side Left Side And for giggles here is a view of the back side. My wife says it's my best side. Now these new straps will be great for packing up too. I can remove the straps pack up and go. It will also prove to be good for making minor adjustments for centering the BOR. I just need to pinch the left side of the butt belt in the BOR so it matches the right side. meh. Quick fix. So all of my rings have been updated. The ring is lower like it should be. All is right with the world. Till we meet again! Huzzah!
-
Ah yes the red flap. I will be using velcro. I actually sewed that on the wrong side so I I have to fix it. LOL Standby for that.
-
Alright first up are those mods I posted about. This is the back plate with the new straps and strap position. I left some room at the bottom to extend them out in the future. Ok here you can see the wider strap length. I did this so the wider straps will help pull a little more down flattening the cape more. Works well too. Here you can see the "sew scar" from the other straps. I just cut them off and sewed on the new ones. You can also see the new placement of the new straps. Now on to the meat and potatoes! This is Phase 1 of 2 of upgrading the rings on the side and extending the straps. ======================= Ok I have needed to extend the strap down so I thought I would provide people a way of doing that. What you will need is Silver Leather, Acetone, permanent marker, optional small bowl, and E6000 Glue (medium consistency). If you go with pleather than this tutorial WILL NOT I repeat will not work for you as the acetone can dissolve the pleather. Do not use Acetone on fake leather. DO NOT USE ACETONE ON FAKE LEATHER. Did I get my point across? LOL Ok this is the leather after cutting it. My measurements were estimated. By my pictures I figured I would need an extra two inches to get the big O ring where it would need to be. If it needs to be shorter than I can always make it shorter. I will be doing a test fit before doing the final bonding of the straps. Ok I didn't take a side by side of the old straps with the post colored one. You are going to want to do this quickly. That way the marker doesn't have all the time in the world to dry. Poor a little acetone in a (metal) bowl and have a square of paper towel ready and folded up. Take the marker and make some marks width wise on the leather. Now get your paper towel and dip wipe the inside of your bowl soaking up the little bit of acetone and wipe the leather back and forth. The surface you do this on will need to be acetone safe and will get smeared with marker. This will create that aged metal look on the leather. The more marker you use, the darker it will be. Allow the leather to completely dry from the acetone. Now fold the edges towards the center and crease it with your finger. This will be very temporary but it will help. Using a stick or something spread the E6000 glue evenly down the center of the leather. Fold the edges inward and press together. I took the old straps from the back plate and placed those over the seam where the glue might come through. I then piled books on top of them to get them completely flat. Now you will want to take the books off after a couple of hours so the glue can dry properly. This is the O ring with the old rings attached. Also, as you can see the tiny foam pieces Rob glued on have pretty much fallen off. So in order to make a more permanent solution I peeled back the seam with the old ring and took that off. Placed the new ring and used Epoxy to glue that back down. Then I took 3 pieces of leather that fit inside each of the greeblies and epoxied those together. Then I used epoxy to secure that over the old seam and placeing the leather beyond the threshold of the greeblies. Now only the leather will rub against cuirass! New ring on the O Ring/Greeblie And this is the new ring placed on the cuirass. Now someone asked before but I didn't have the brand. But these are the ones I have used on the bottom and for the side.
-
Trooping update. The armor is definitely a little harder to put on. But it moves well and stays put. The cowl parts over the shoulders ride up a little and just need a quick tug by a handler but they stay put. No more full tuck ins after 20 min. Nope that new strapping I put in is awesome. The shirt does come untucked and due to the elastic the armor rides up. Those two things are probably related. Not a big deal really. A 2-3 hour troop it will be fine. Any longer and I am just gonna have to step off to the side and do some pulling. I am going to drop the big circle down some more as it does ride up. I am also going to glue leather to the inside of the greeblies so it doesn't wear on the paint job for the cuirass. Pictures from the troop and armor are coming! I promise!