-
Announcement
Welcome to the forums!
If you are a newly-approved member, make sure you check out the New Member Checklist!
If you are a Detachment member and can't see the member-only area, post here for access.
-DV
Leaderboard

.thumb.jpg.6767538d6131650e3b411b09ff9e4989.jpg)

Popular Content
Showing content with the highest reputation since 04/16/2023 in all areas
-
Just a quick update on what's going on with the detachment stuff since it's been a quiet period (not always a bad thing!). 1. We're actively designing merch for a racing shirt, patch, and coin themed for KOTOR 20th based on votes. These will come in the next few months. It is slow due to lack of artists available and, well, life. 2. We're working on 3 New to the Legion CRLs/costumes currently that we're hoping to be released before the end of the term in Feb after updates to the costumes are finished. 3. We were told by LMOs that we had to wait until the end of the season of Ahsoka before submitting requests for assignment of the costumes. But, after the short, "please don't spoil the episode for us" request time, we're submitting for Shin, Baylan, Morgan, Marrok, and all 3 Great Mothers to be assigned to TFE. 4. We're still looking for artists and a new Programs Officer if you're interested/able to assist the Detachment! If you have any other requests or ideas, please feel free to comment or message me!5 points
-
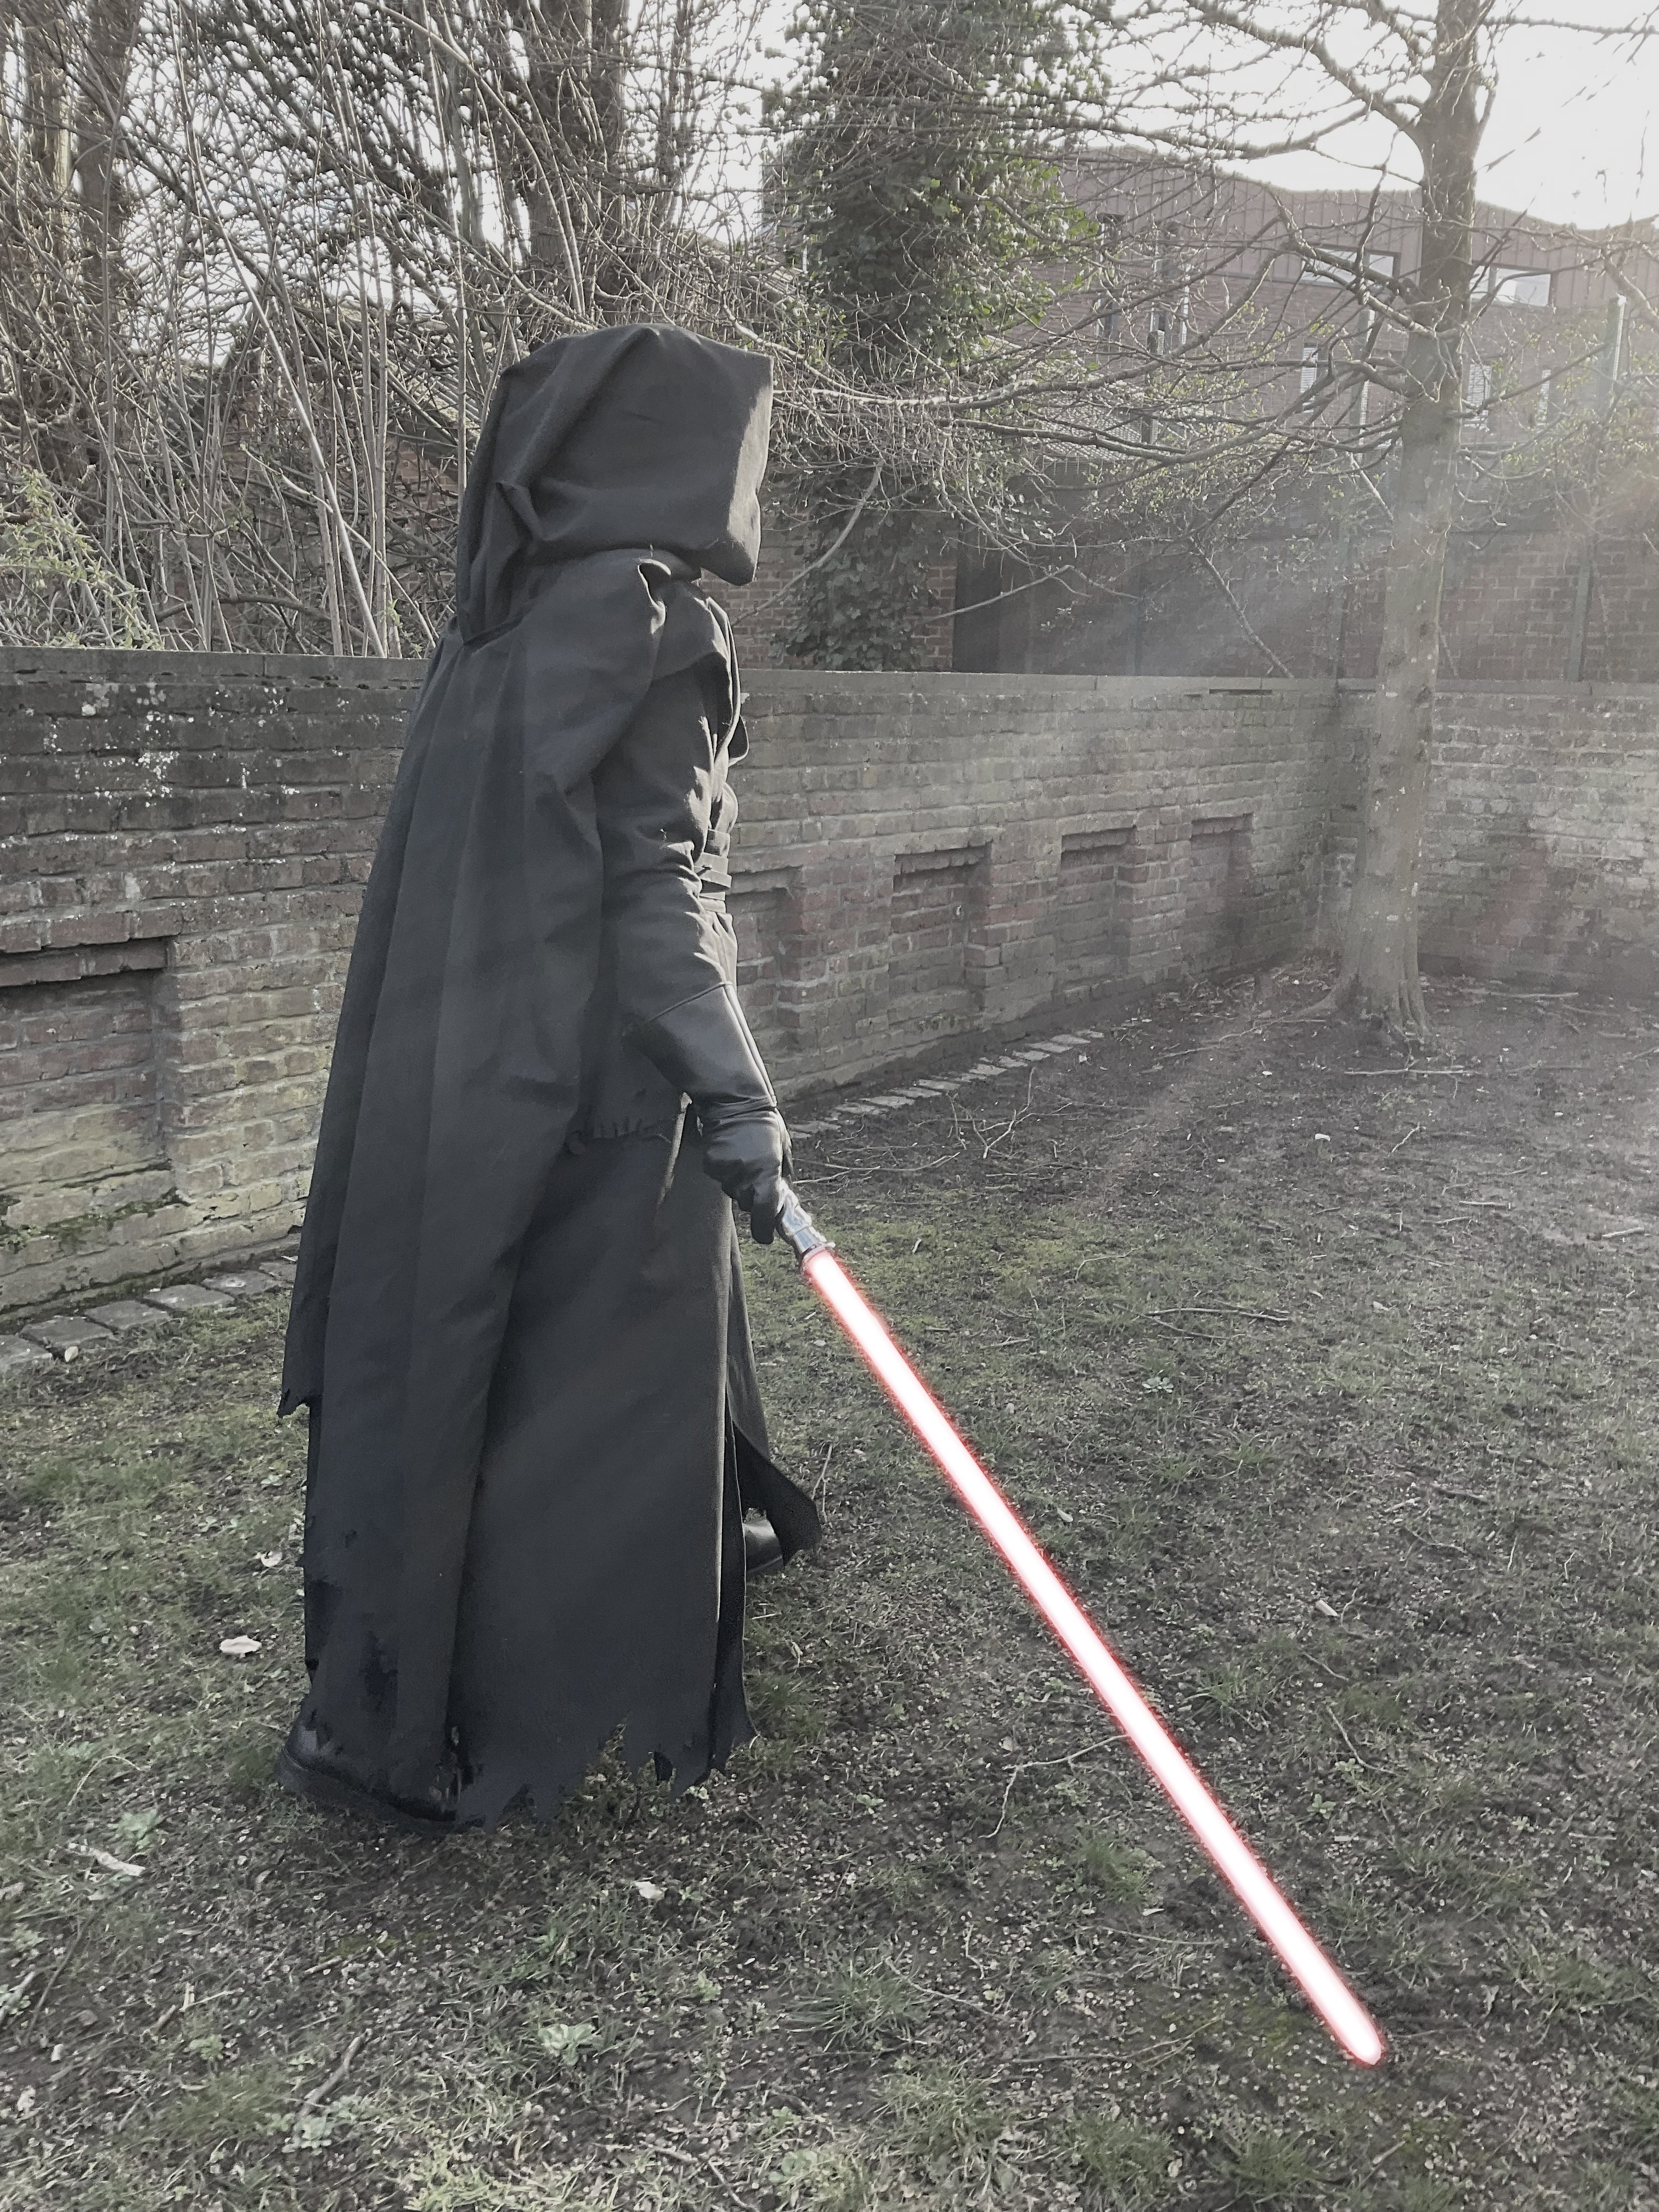
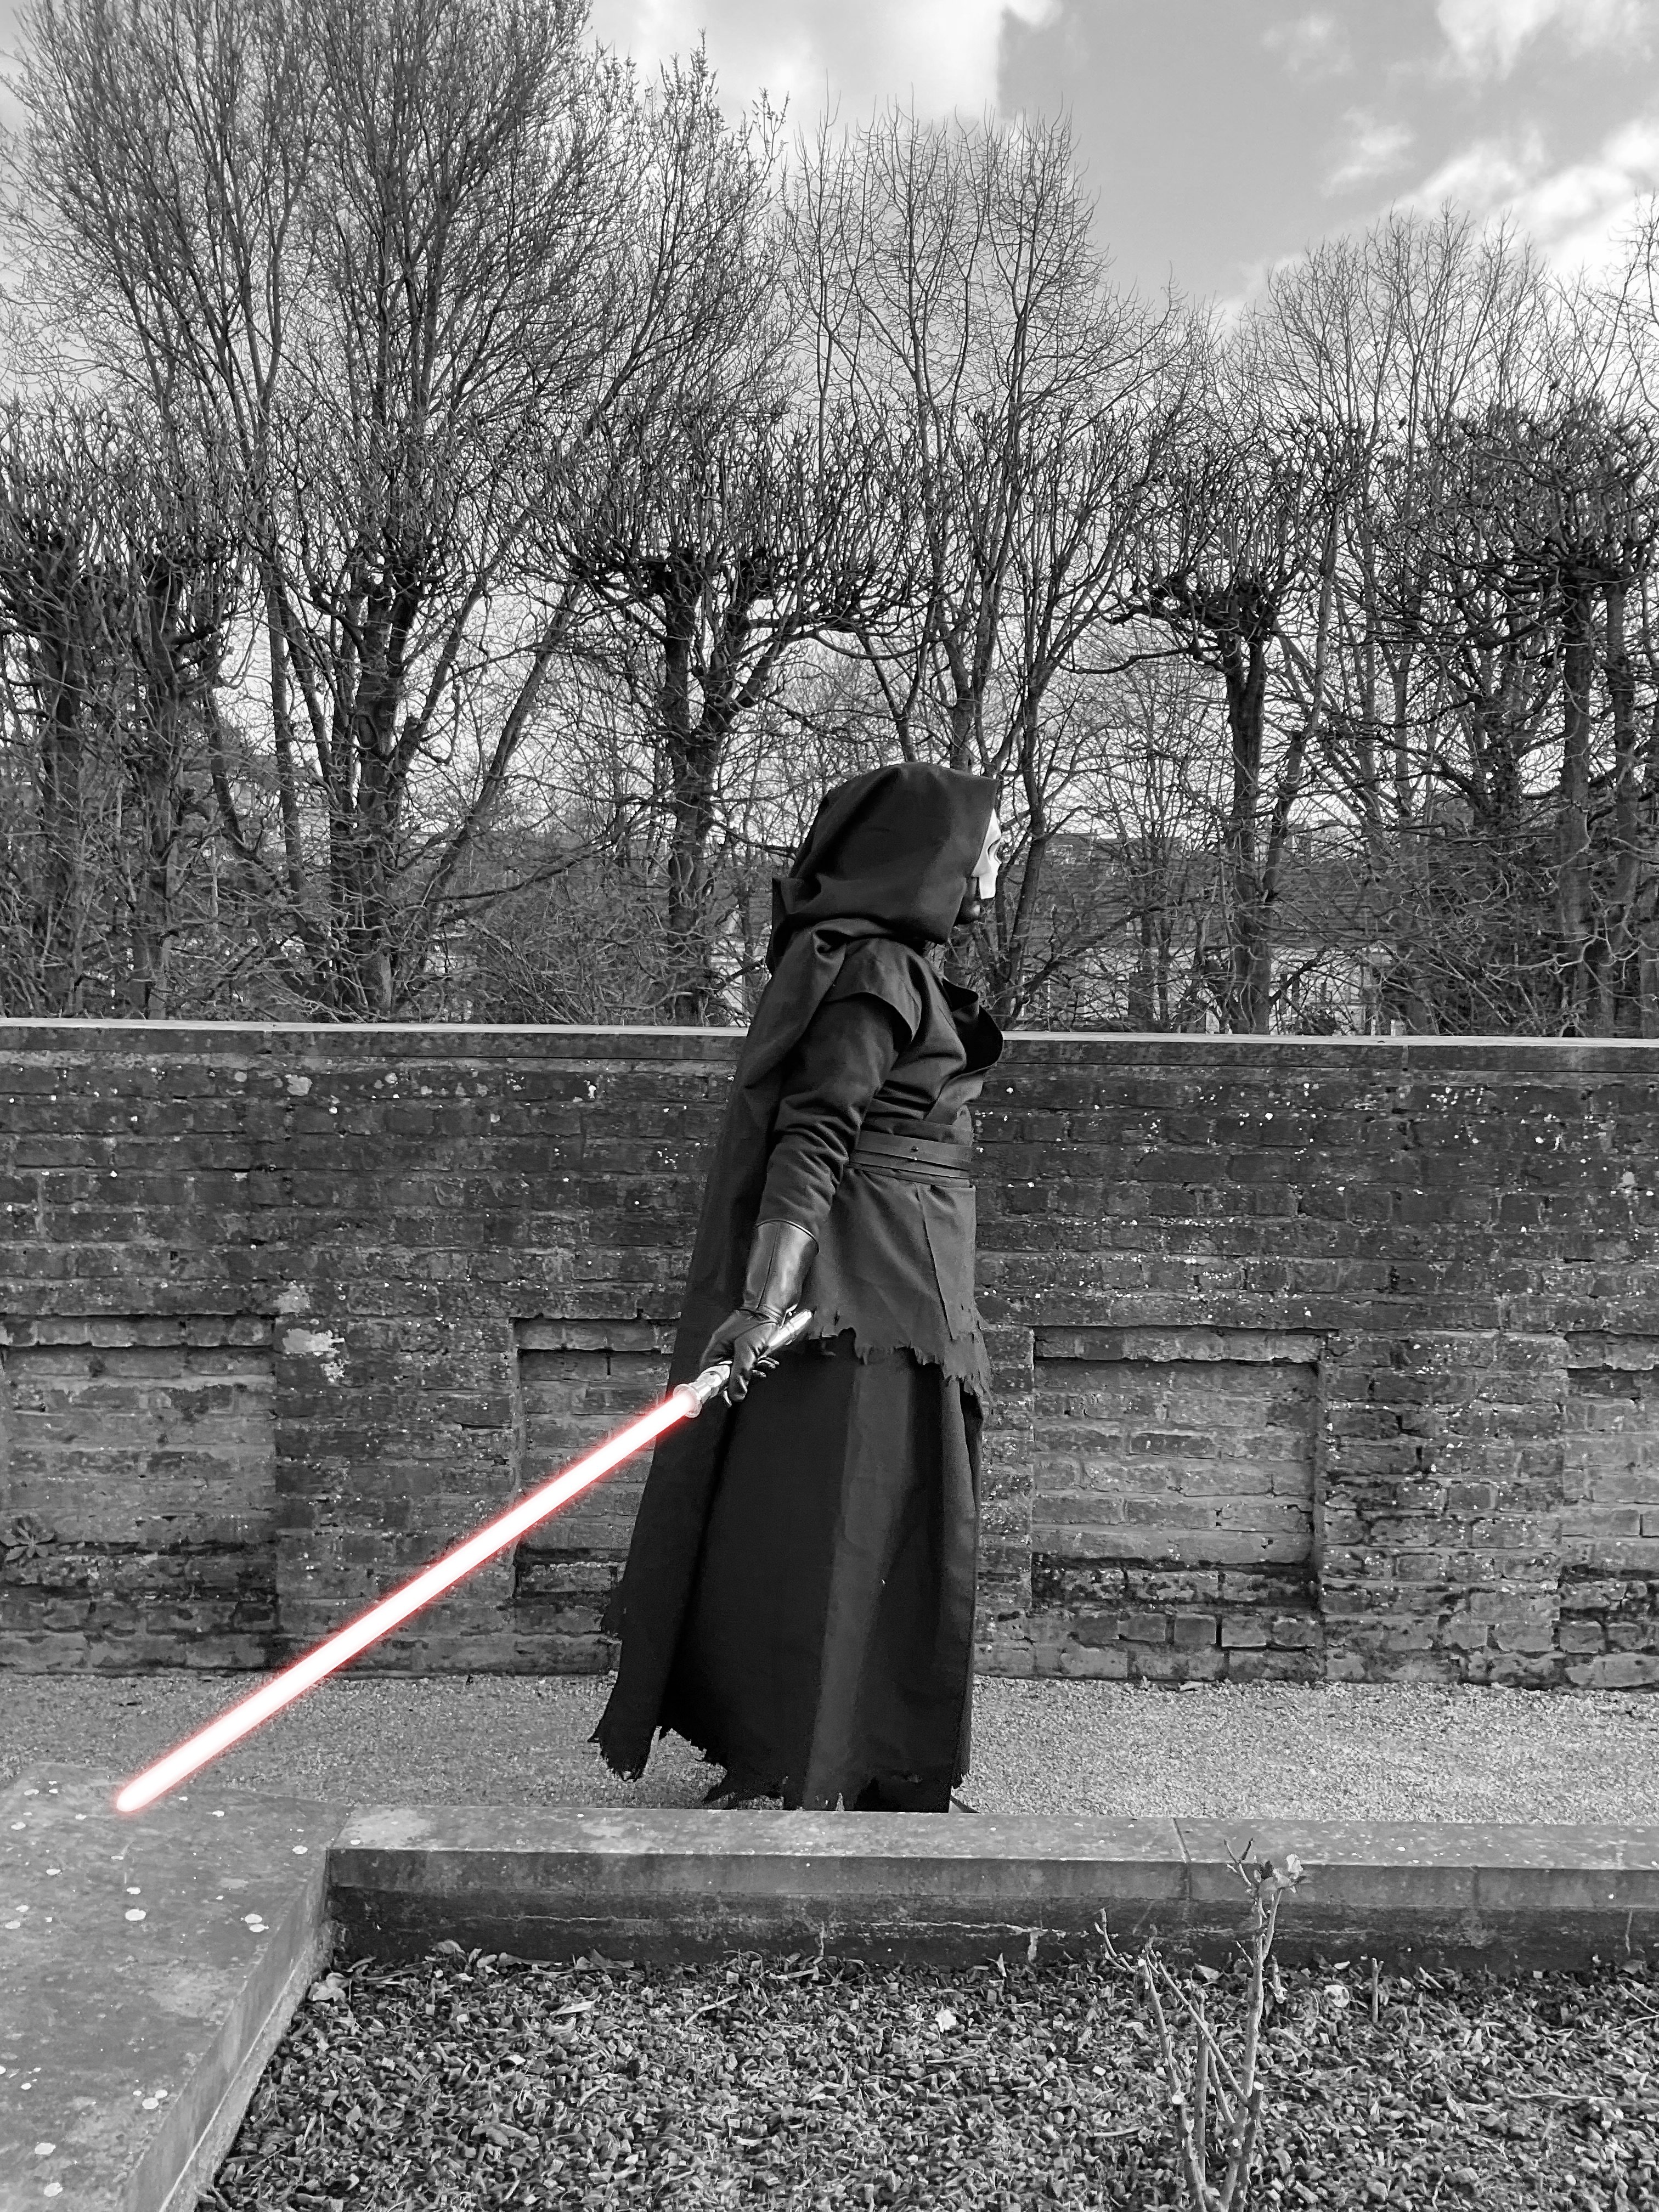
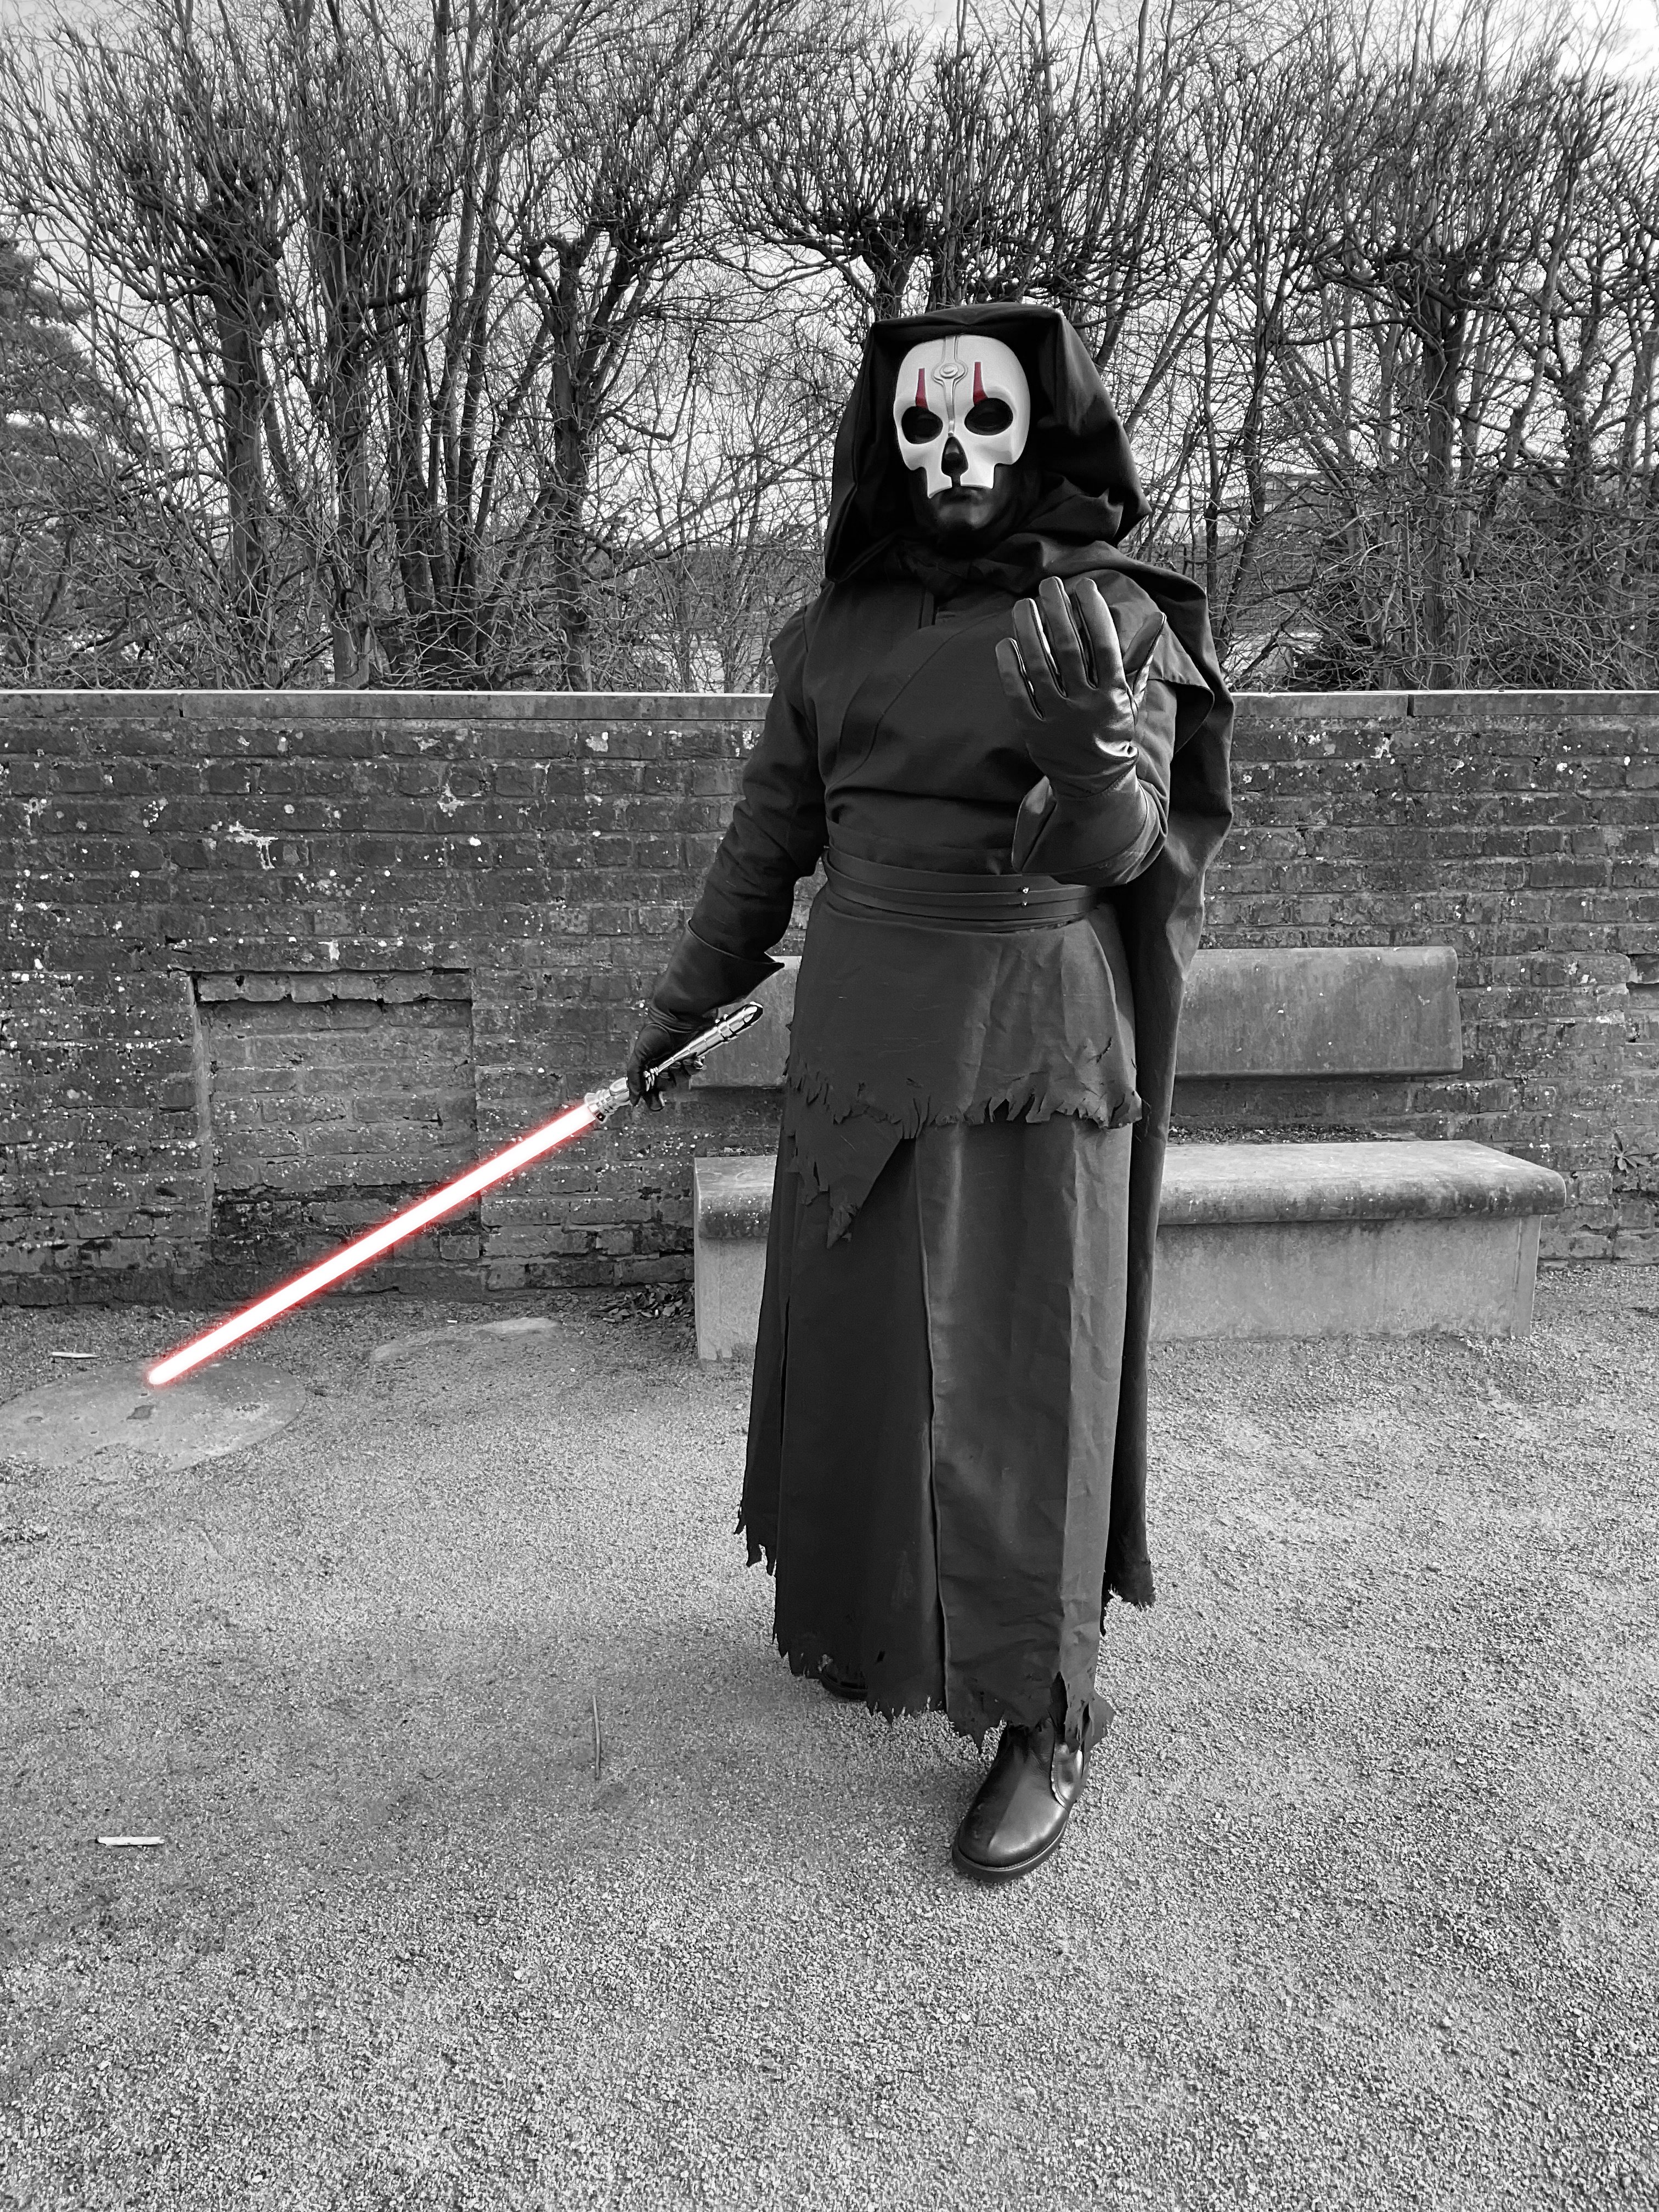
Hi folks, I just wanted to share some of the pics I took during my shooting at the Georges Henri park in Brussels

 3 points
 -
Korbanth has a Savage hilt for sale: https://korbanth.com/empty-double-sided-staff-the-oppressor3 points
-
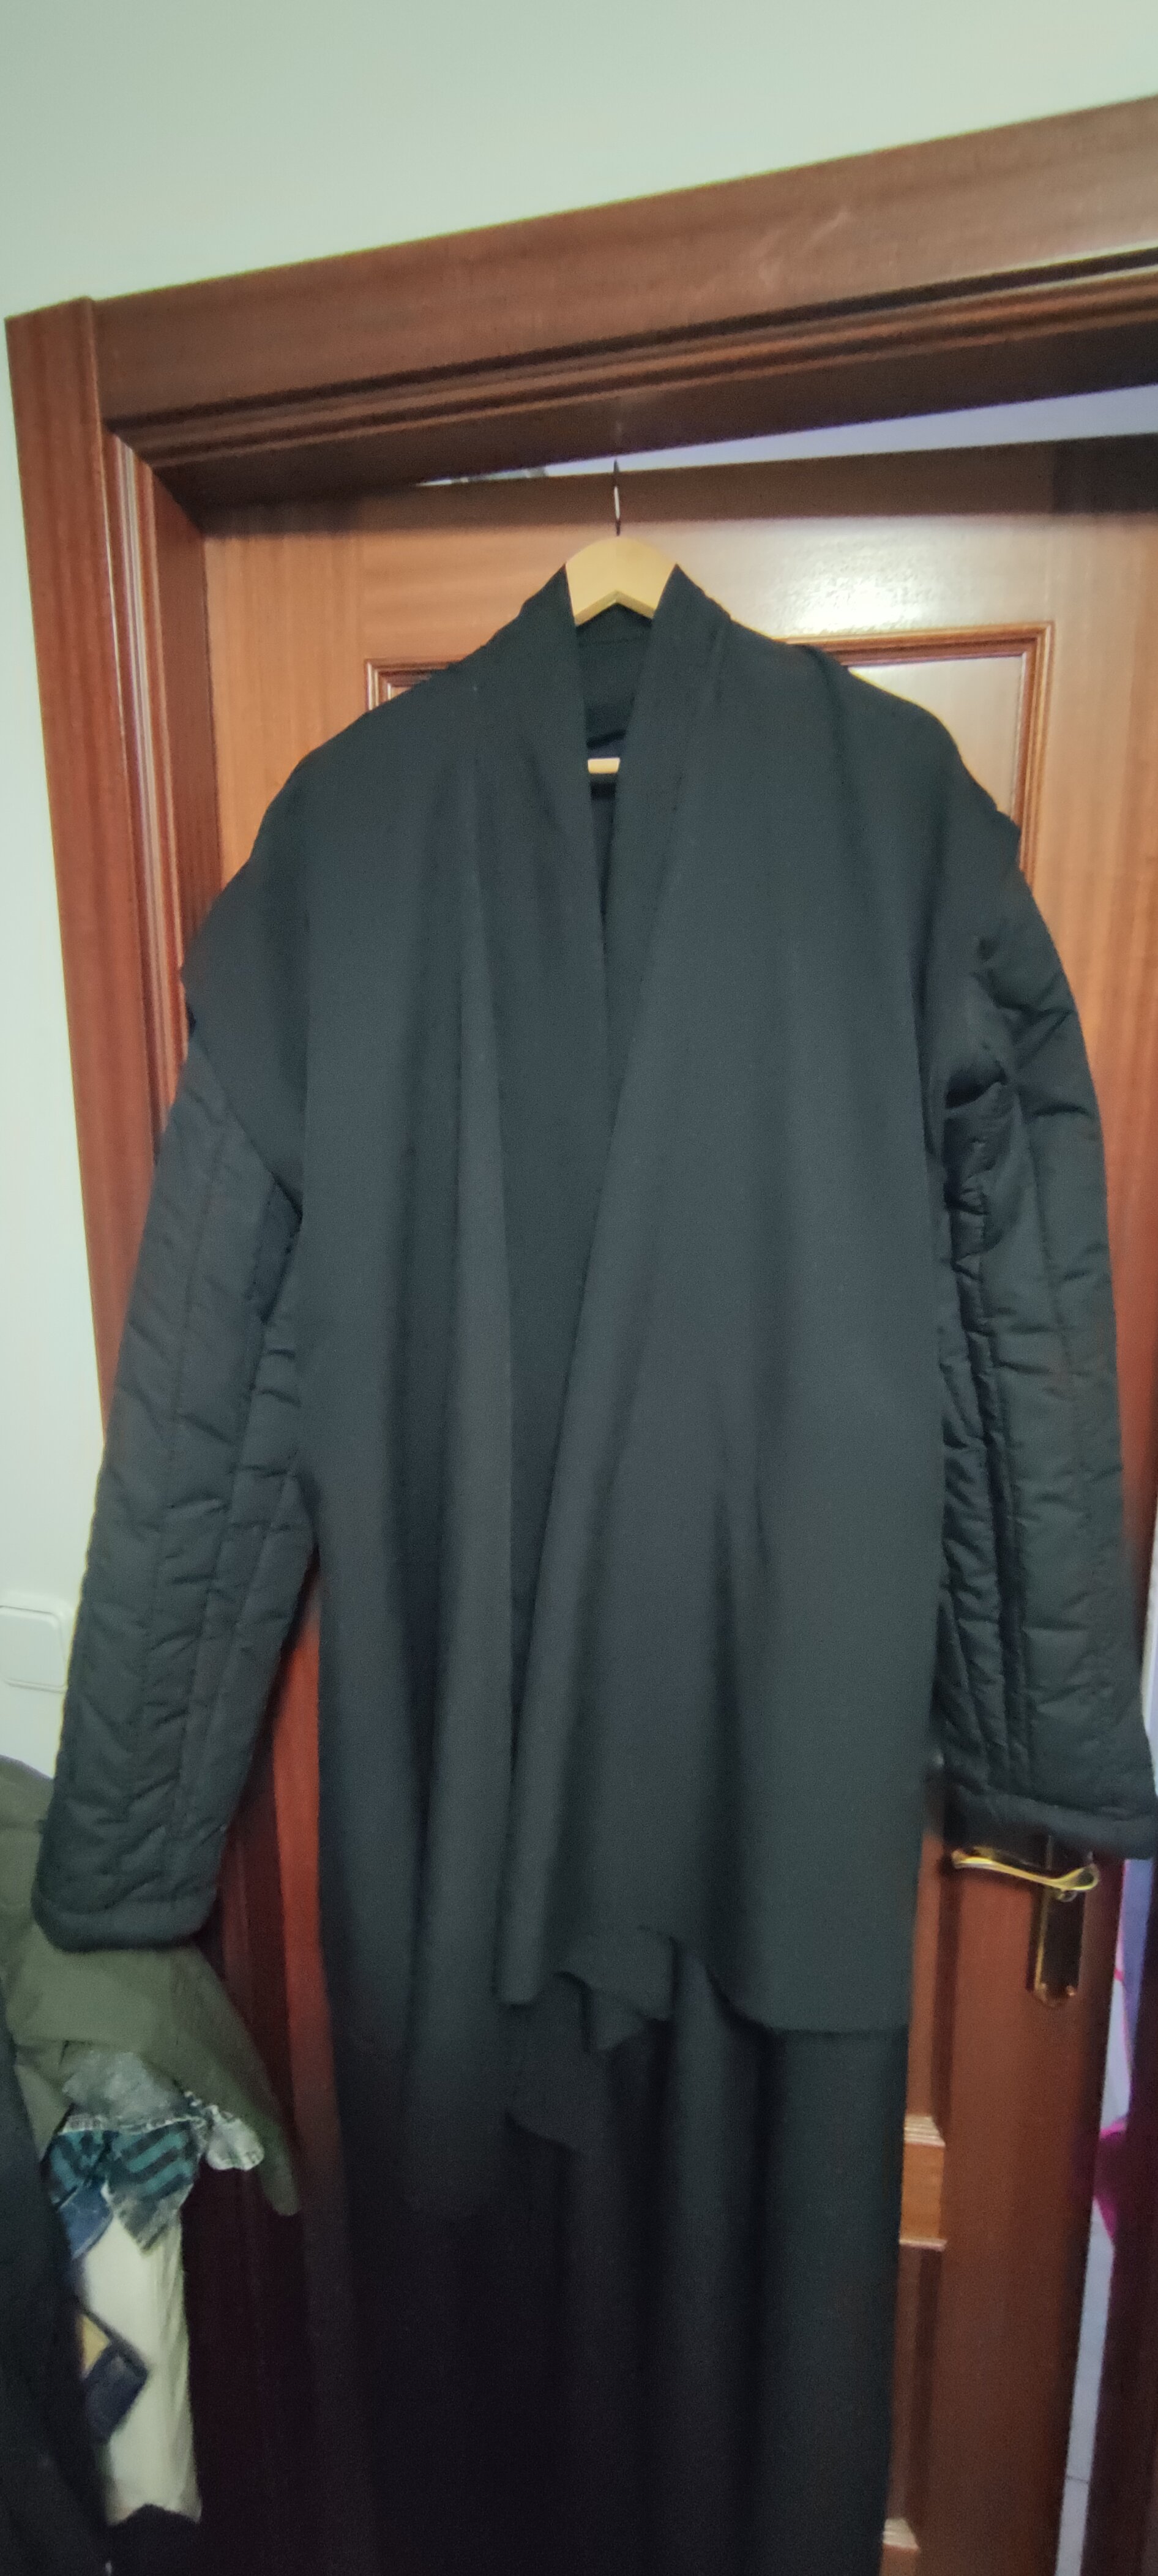
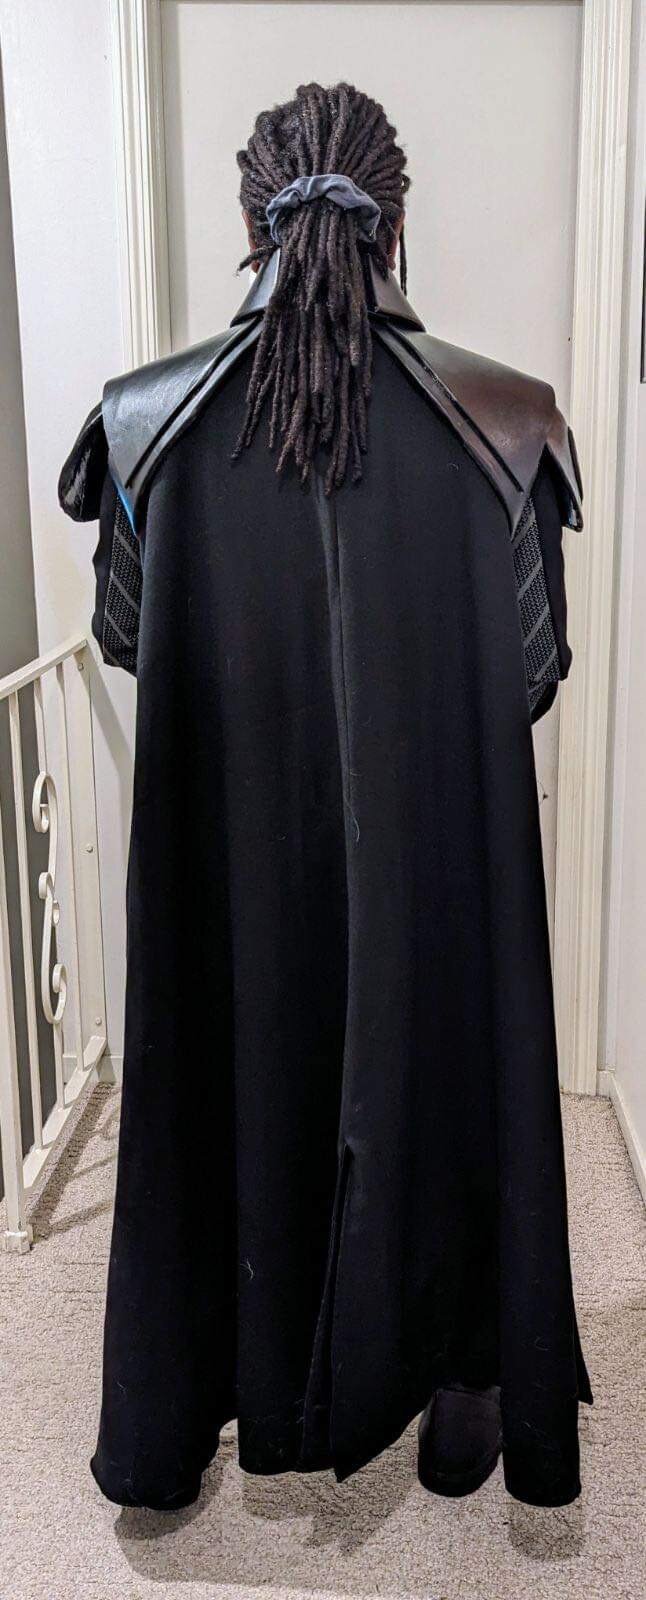
So close to being done. I need to redo the arm guards and chest armor and shorten the bottom corset pieces.
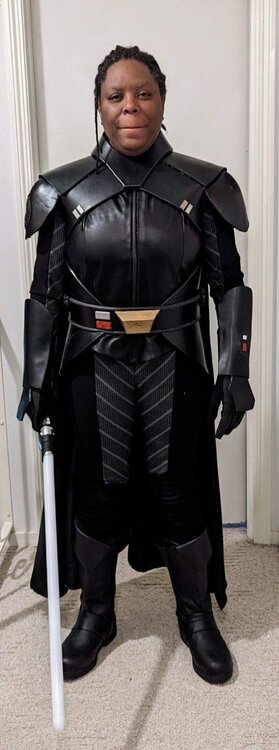
 3 points
 -
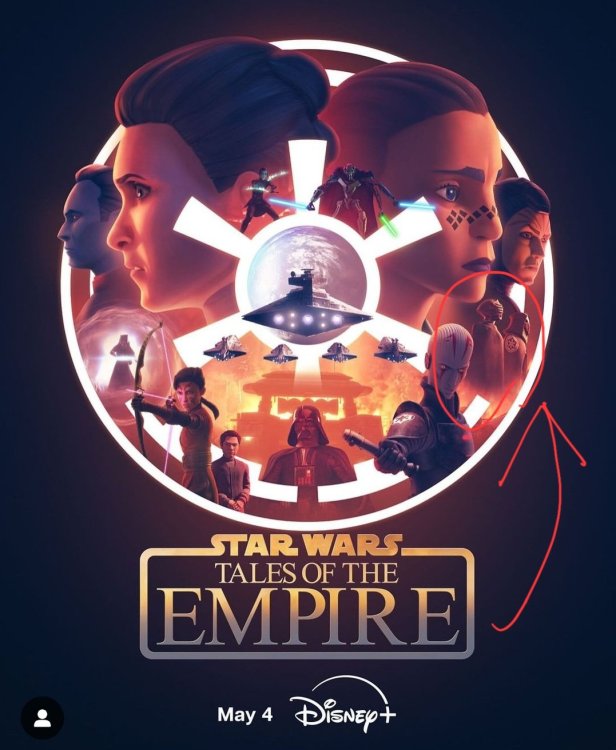
Hey people, LucasFilm and Disney just announced a new show coming named "Tales of the Empire"! And the unknown inquisitor is also in it! Hopefully this will help everybody to make the costume perfect
 2 points
 -
We're about 1.5 weeks away from all 501st elections! This means Legion level, Detachments, Garrisons, Squads, and Outposts! Make sure you are prepared for TFE Detachment elections by ensuring you are listed as the correct Detachment Member rank. Also check with each Detachment to ensure that you fulfill their specific requirements if they are different! For TFE directions, please see here: I will be doing the final update to the 501st roster for TFE on Jan 28th, so please make sure you are correctly listed (your name should be in orange if you are not part of command). Cheers and long live democracy!2 points
-
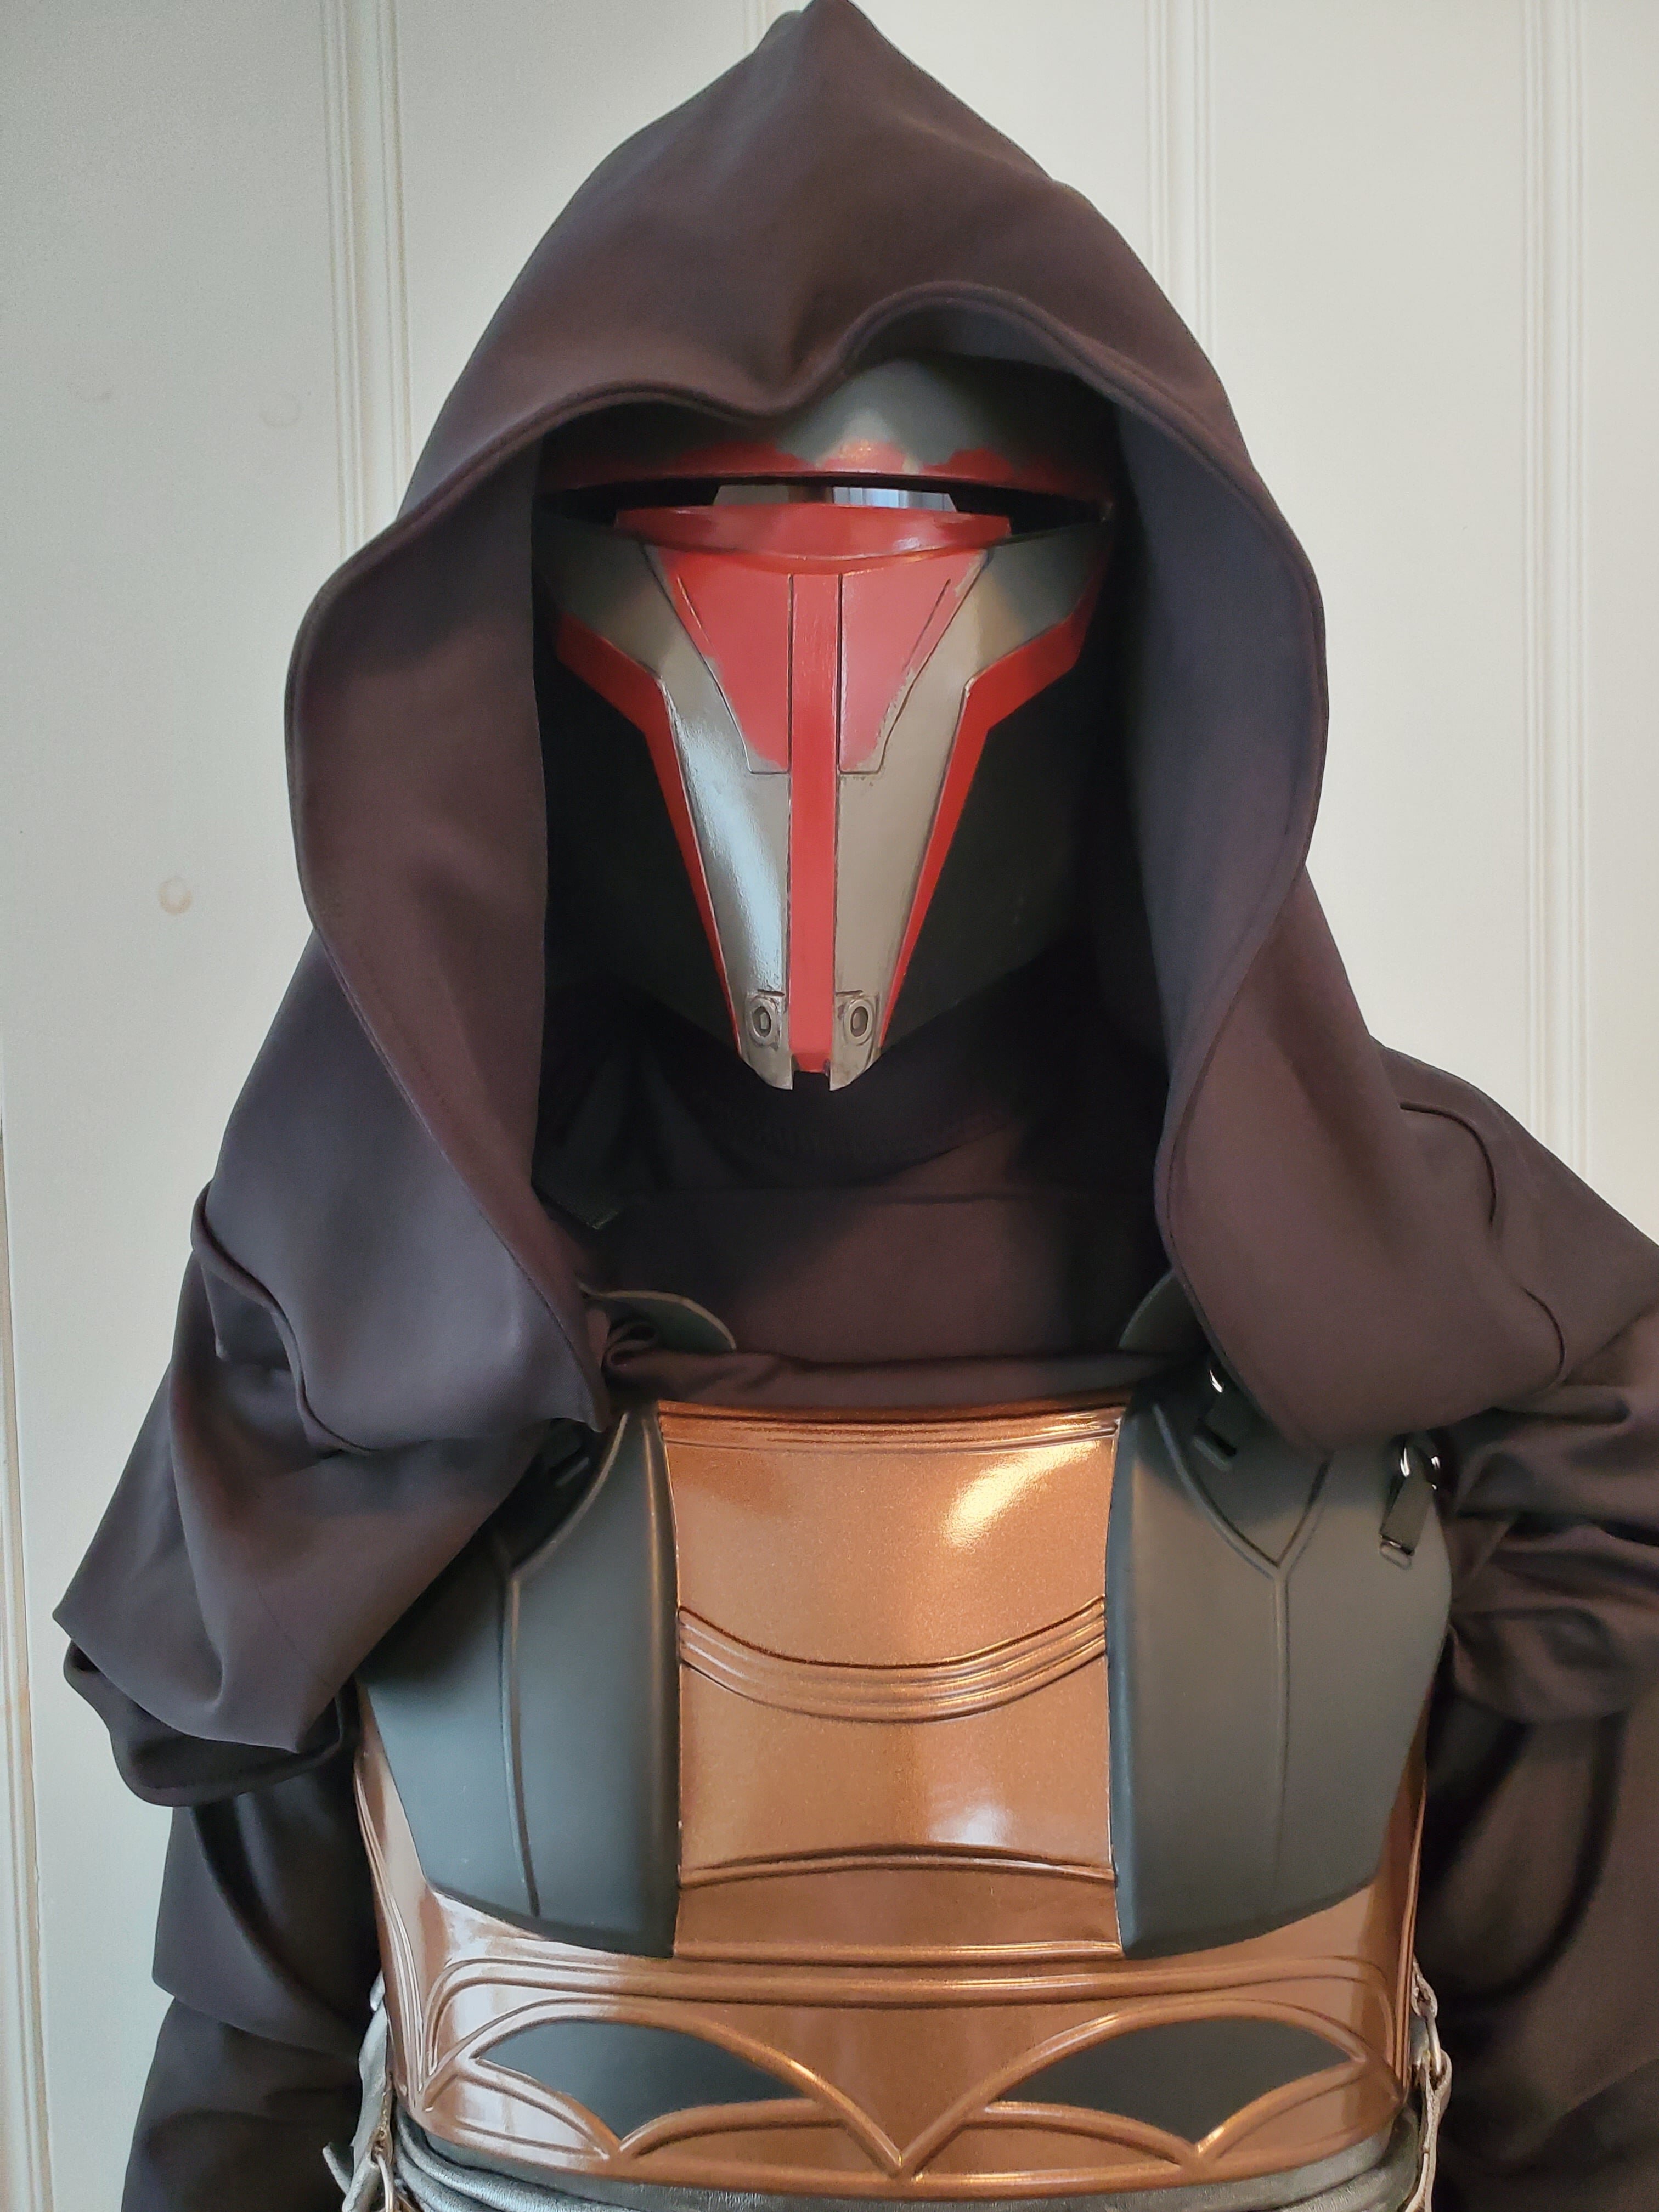
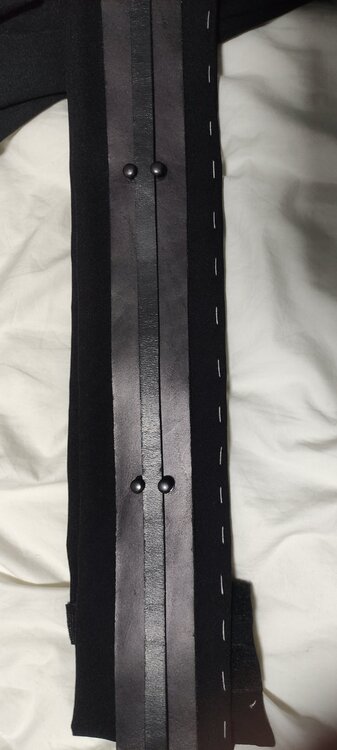
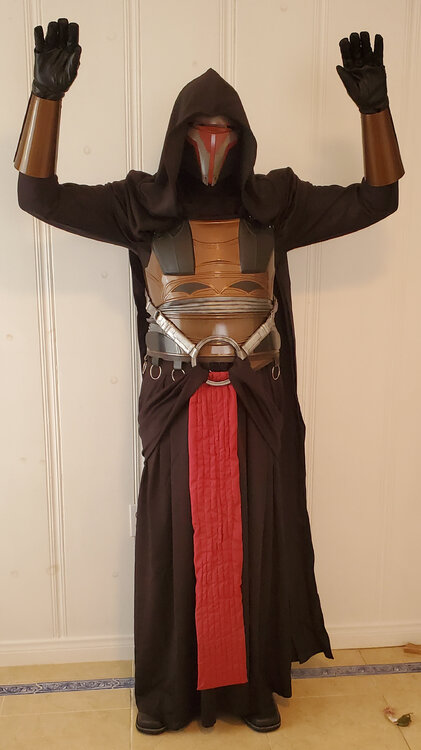
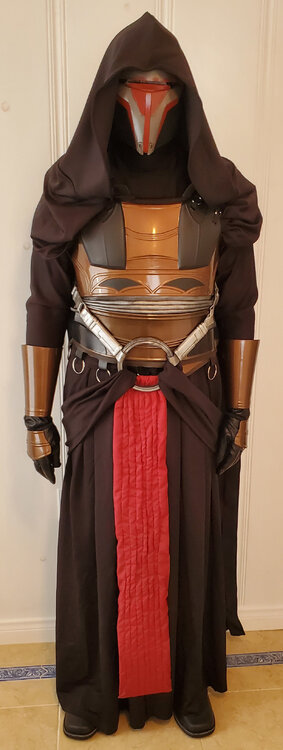
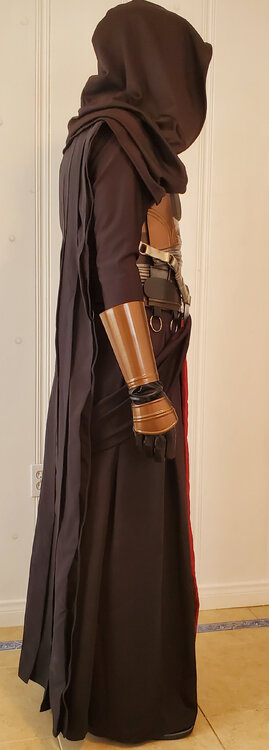
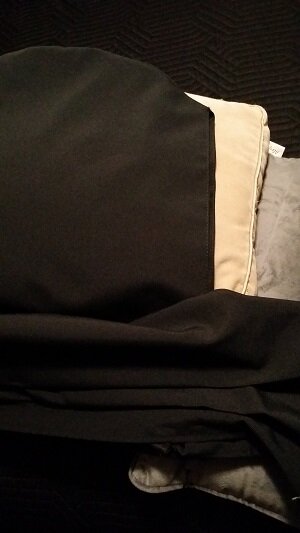
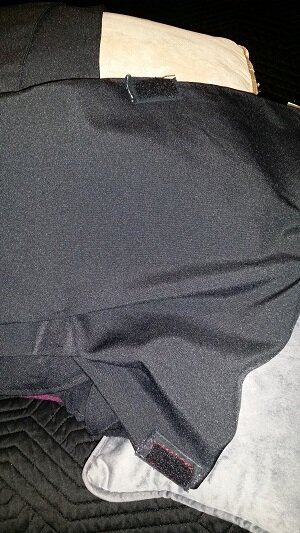
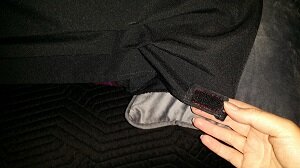
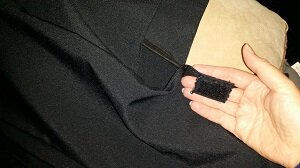
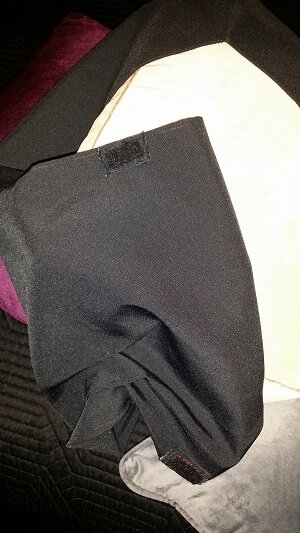
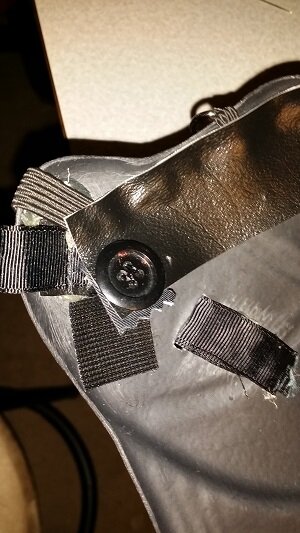
Started fitting this afternoon. Found this image incredibly helpful. Thanks for posting @DarthValkyria2 points
-
Racing shirt is in the works!2 points
-
There is no embargo on making a costume - if you can provide the reference pictures of the costume from all sides incl. details and such, it should be good to go. You can also message our DL @DarthValkyria and ask on how to2 points
-
@Derek 1) I personally used EVA foam clay and shaped and painted the horns the way I liked. Then I attached the dried foam horns to resin bases using Aves Apoxie Sculpt. 2) The CRL says "made of leather or a material that resembles leather". I'd ask your local GML about this. 3) The silver piping on my vest isn't even piping at all. It's simply leather folded in half and stitched onto the vest. 4) Lightsaber is optional, but so long as the length is believable, I don't think anyone is going to be busting out a measuring tape to call you out. If you have any questions, feel free to DM me or hit me up on Instagram @ozark_maul2 points
-
New forum member here and not yet 501st approved but building the clone wars CRL. I made this on a whim because I was so obsessed with the figure! Figured you might like to see. Would be so cool to have this approved. I even got a shout out from the guys who sculpted it!2 points
-
Thanks LordZedel for clarification - verification. For mine - I use the Etsy neck seal combined with a vest with a v-neck shape to it. Similar look to the bottom pict you reference.2 points
-
If a costume that you want to build is not currently in the Legion roster, you'll be coordinating directly with the Detachment. The order is operations for the process is as such: 1. Contact me with all the references you are able to grab to validate the details of the costume, and an excerpt describing why the character should be included into the Legion. The references will be tossed into a Google drive that we send the link to. 2. I'll take all of that and submit to the assigned TFE LMOs, who will take the info to the main LMO group for a 7 day vote on legitimacy. 3. If the vote passes, you'll want to start a build thread here and keep us in the loop as you build to the references. We do not do pre approval CRLs because we don't want you building to words, but to the actual references. 4. Once built, you will let us know so we can get everything uploaded into the drive folder to go through analysis by TFE DCAs. 5. If it passes DCA approval, it will move to LMO approval. Again, another 7-day vote will occur. 6. If approved, we will begin final work on the CRL, including getting CRL photos from you. If not approved, changes will be relayed and then start again at step 4. 7. Final CRL will go through LMO confirmation and approval, and then once published, we'll work with you to get the information with your GML to assign the costume to your profile. If there are any questions, please ask!2 points
-
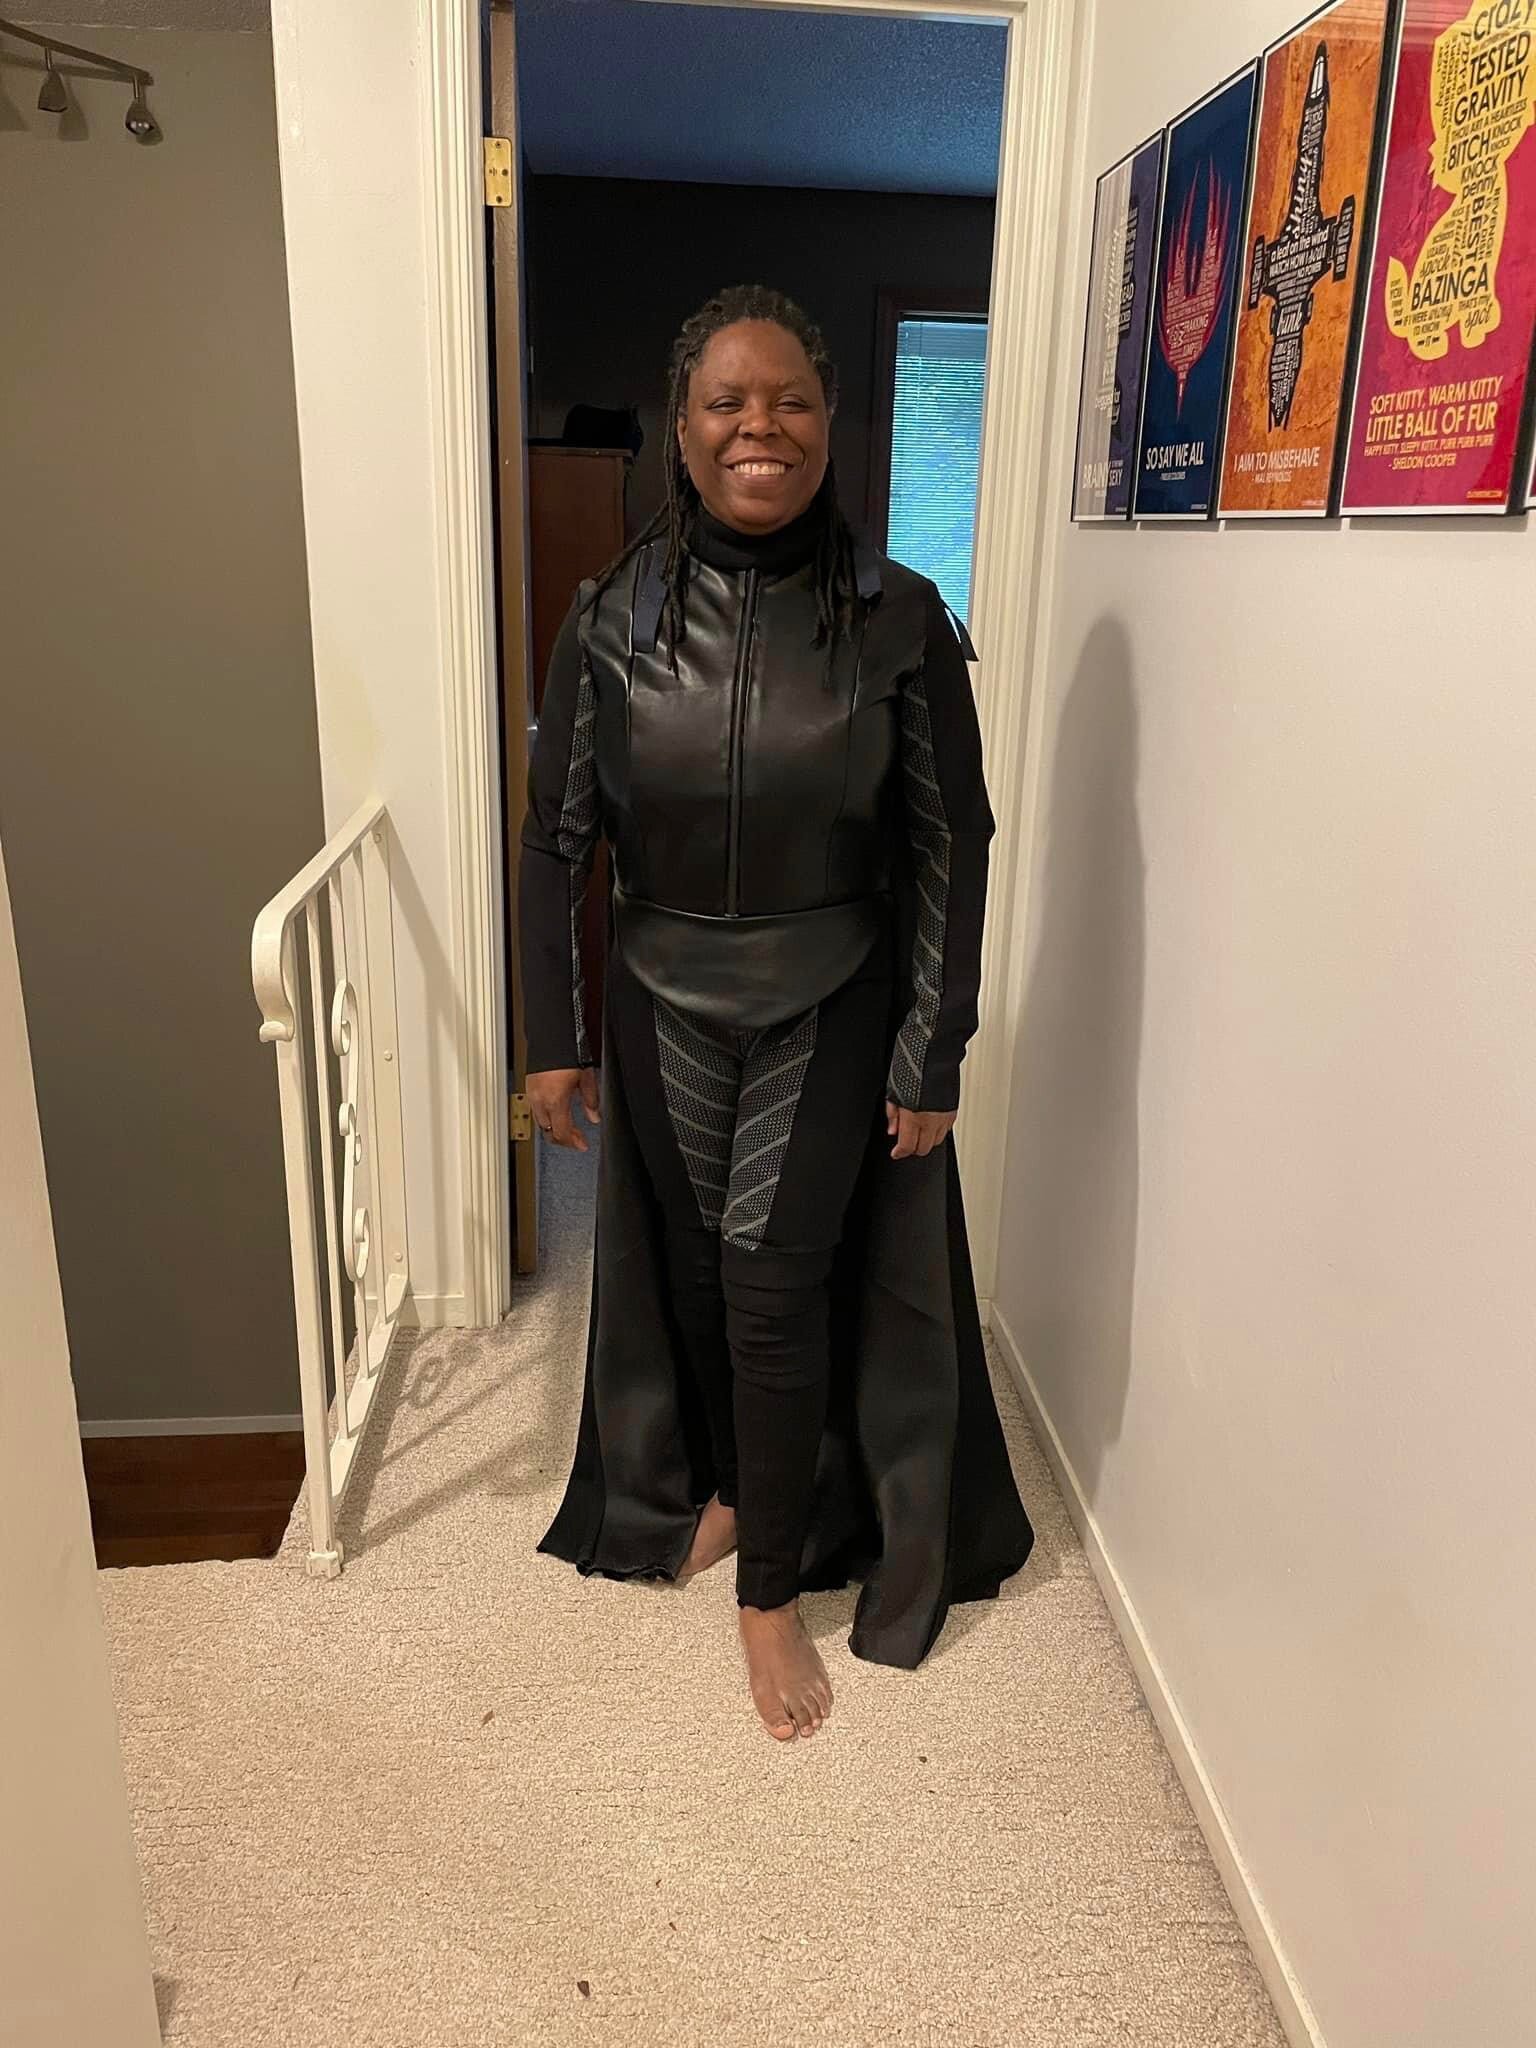
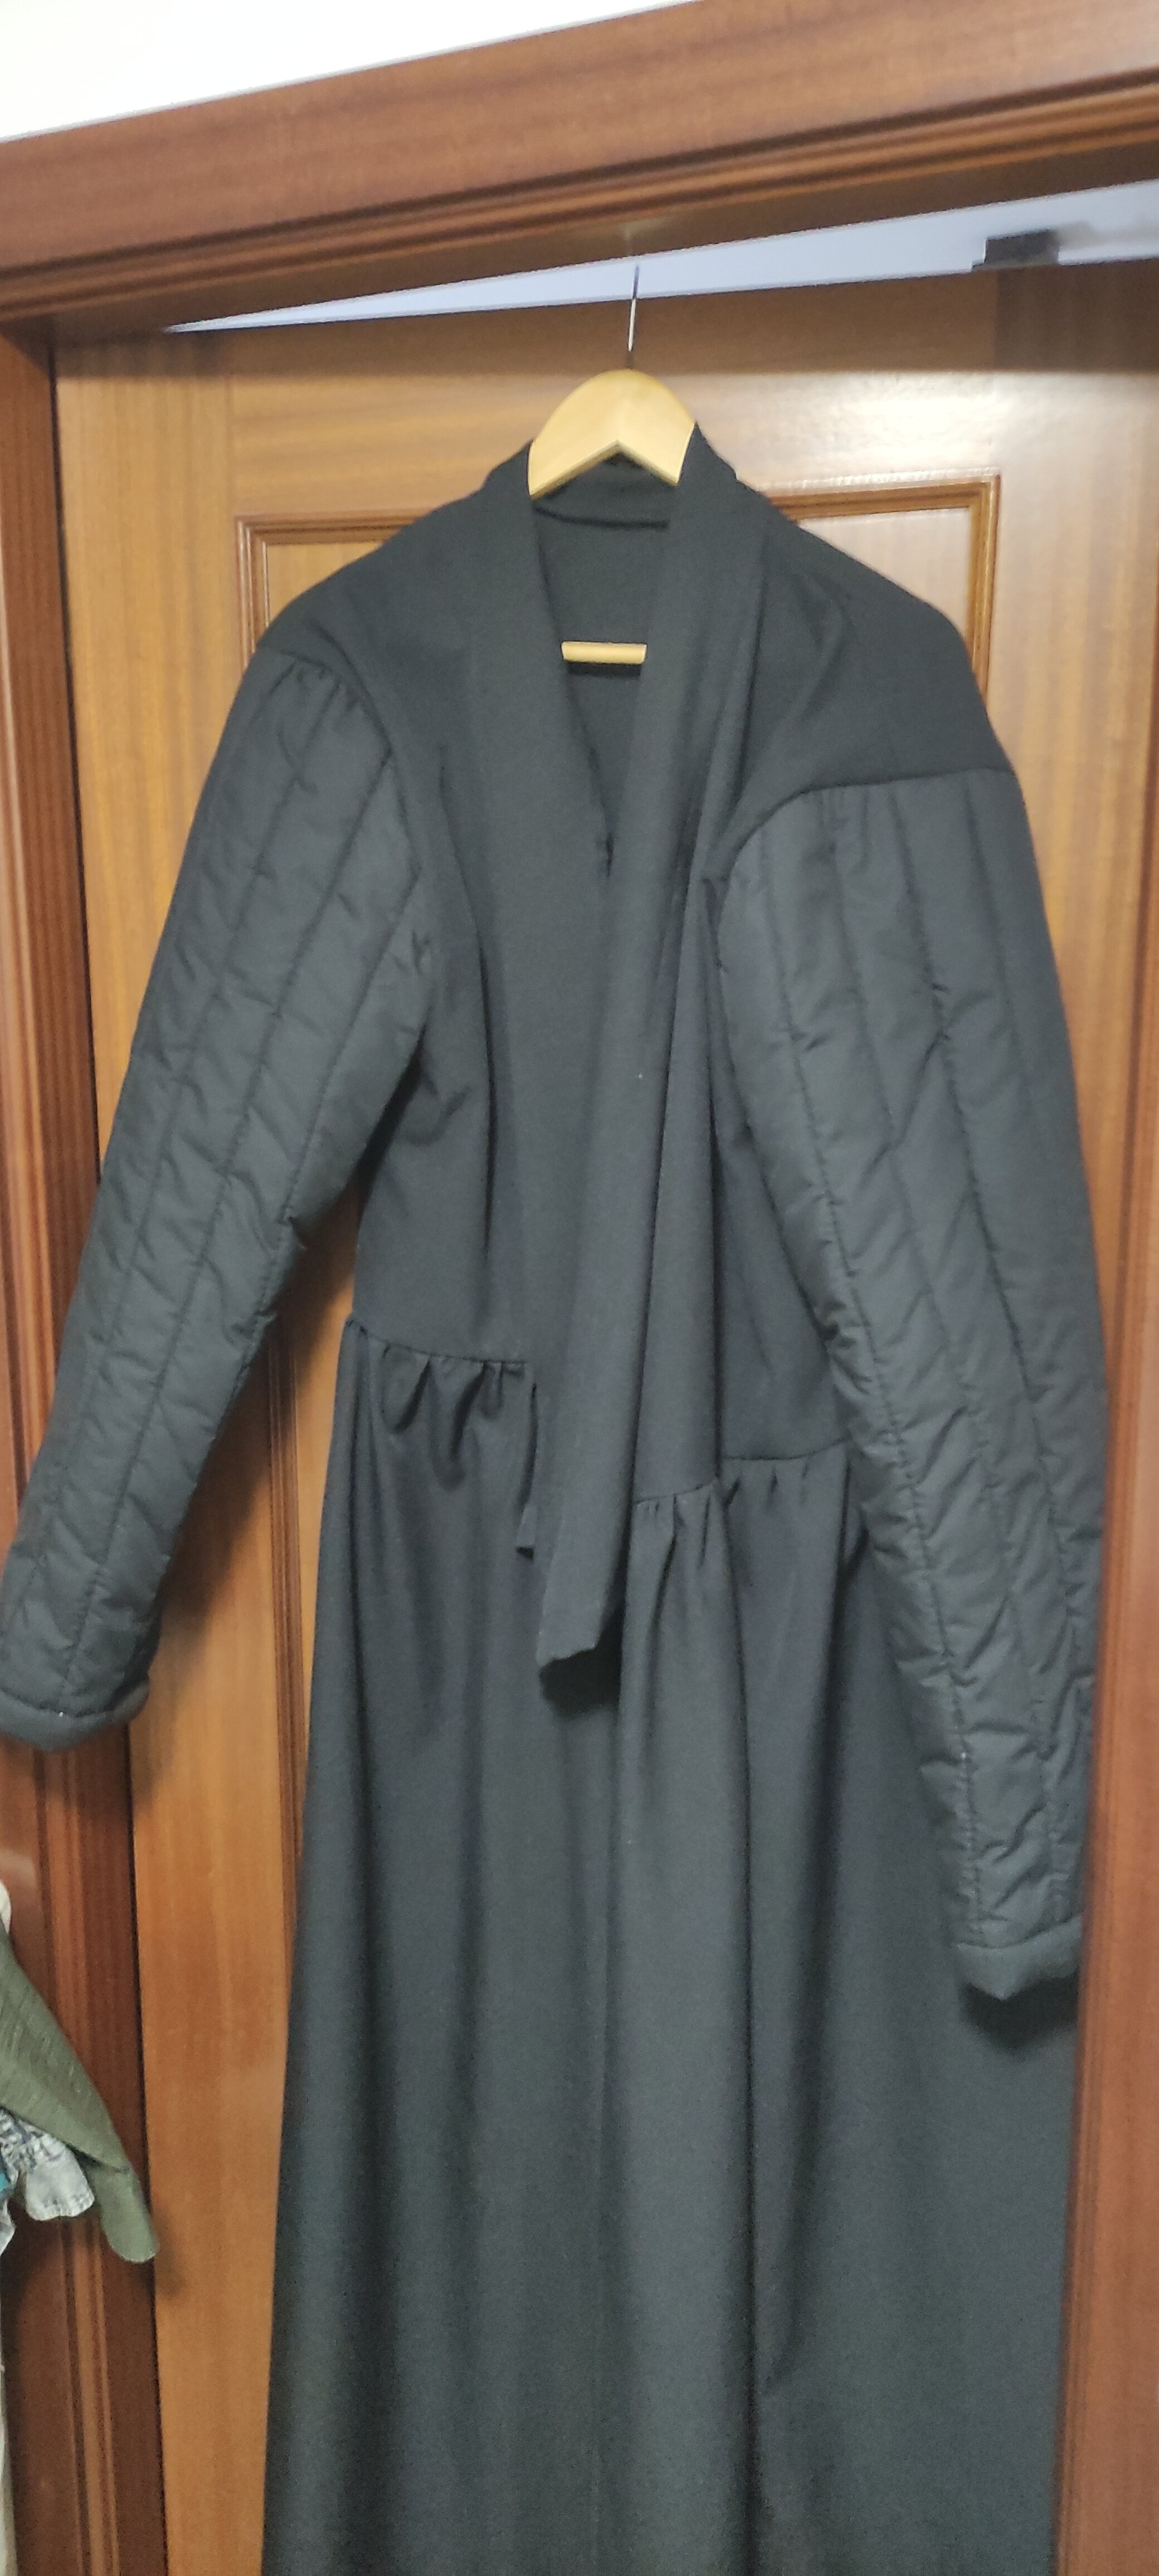
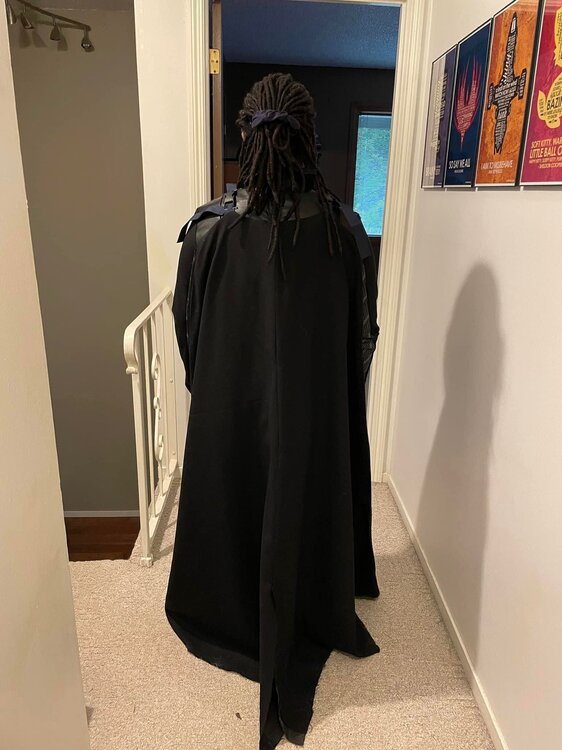
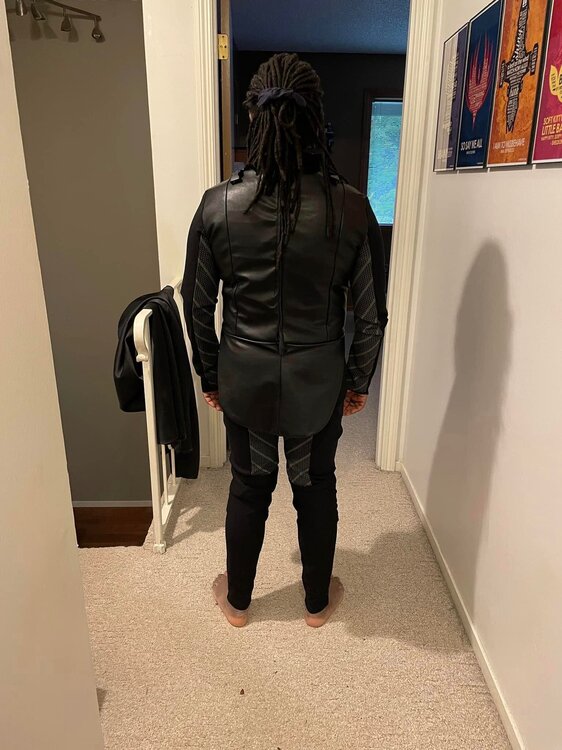
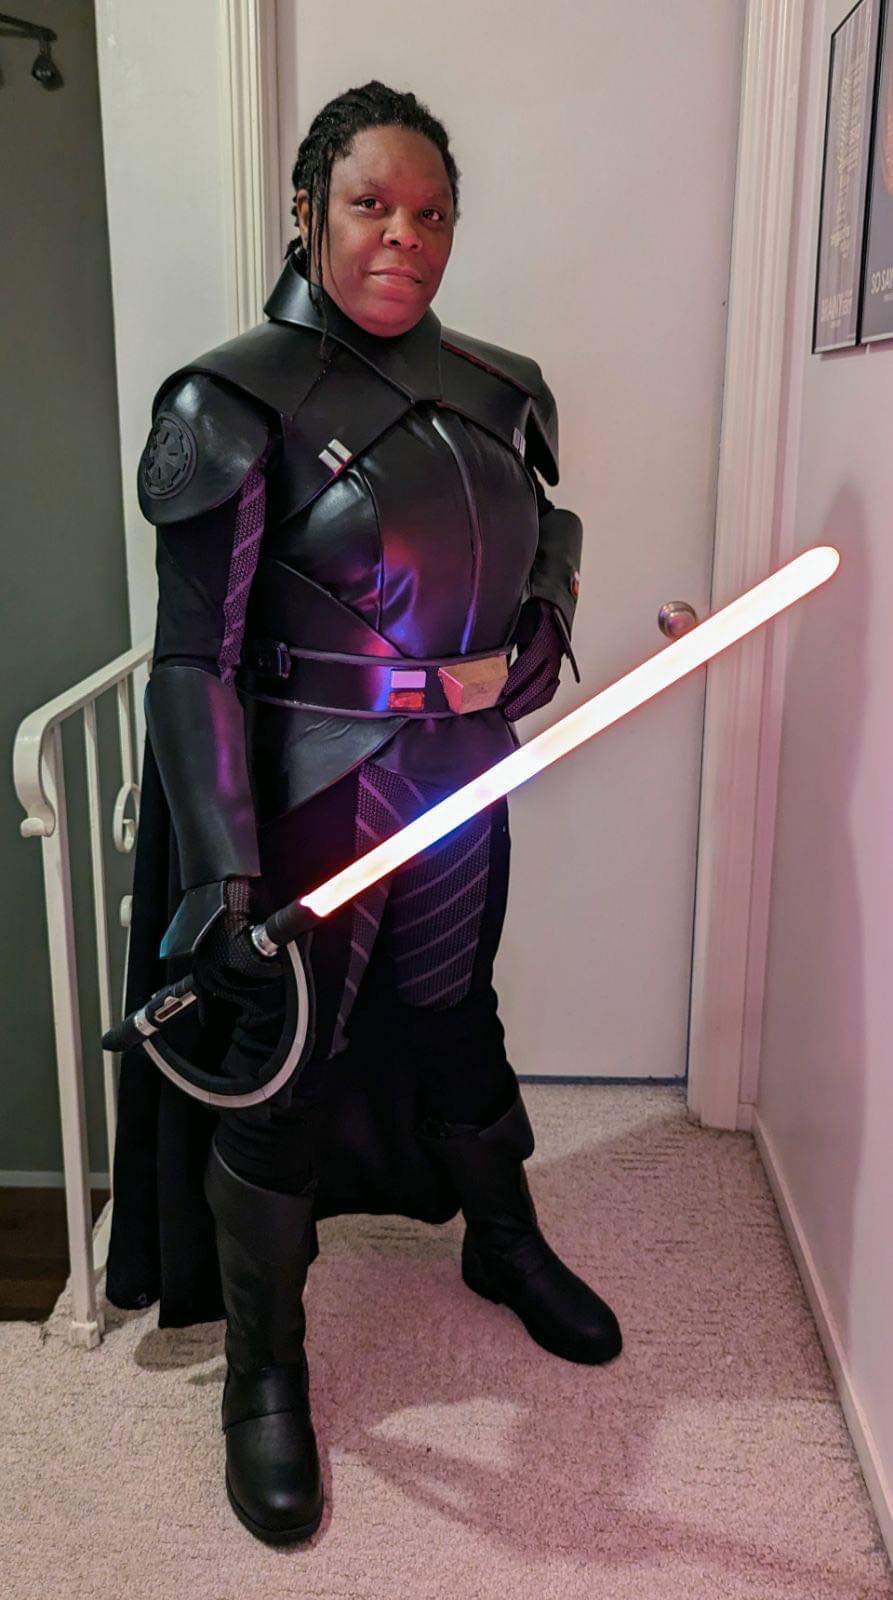
I’m skipping way ahead. I got a little hyper focused and just didn’t follow up with documentation. I have been taking pictures as I go. I have a photoshoot next Sunday and had to step up my game. Finished the bodysuit (sort of) and took some pics. The cape clips on to my shoulders. still to do: Place Velcro to hold armor in key locations Belt - cut to length, finish painting greeblies, wire LED Armor - apply Velcro, repattern collar, model greeblie for guantlets Boots - A friend is working on them for me cape - hem and shorten clip straps saber - all the things

 2 points
 -
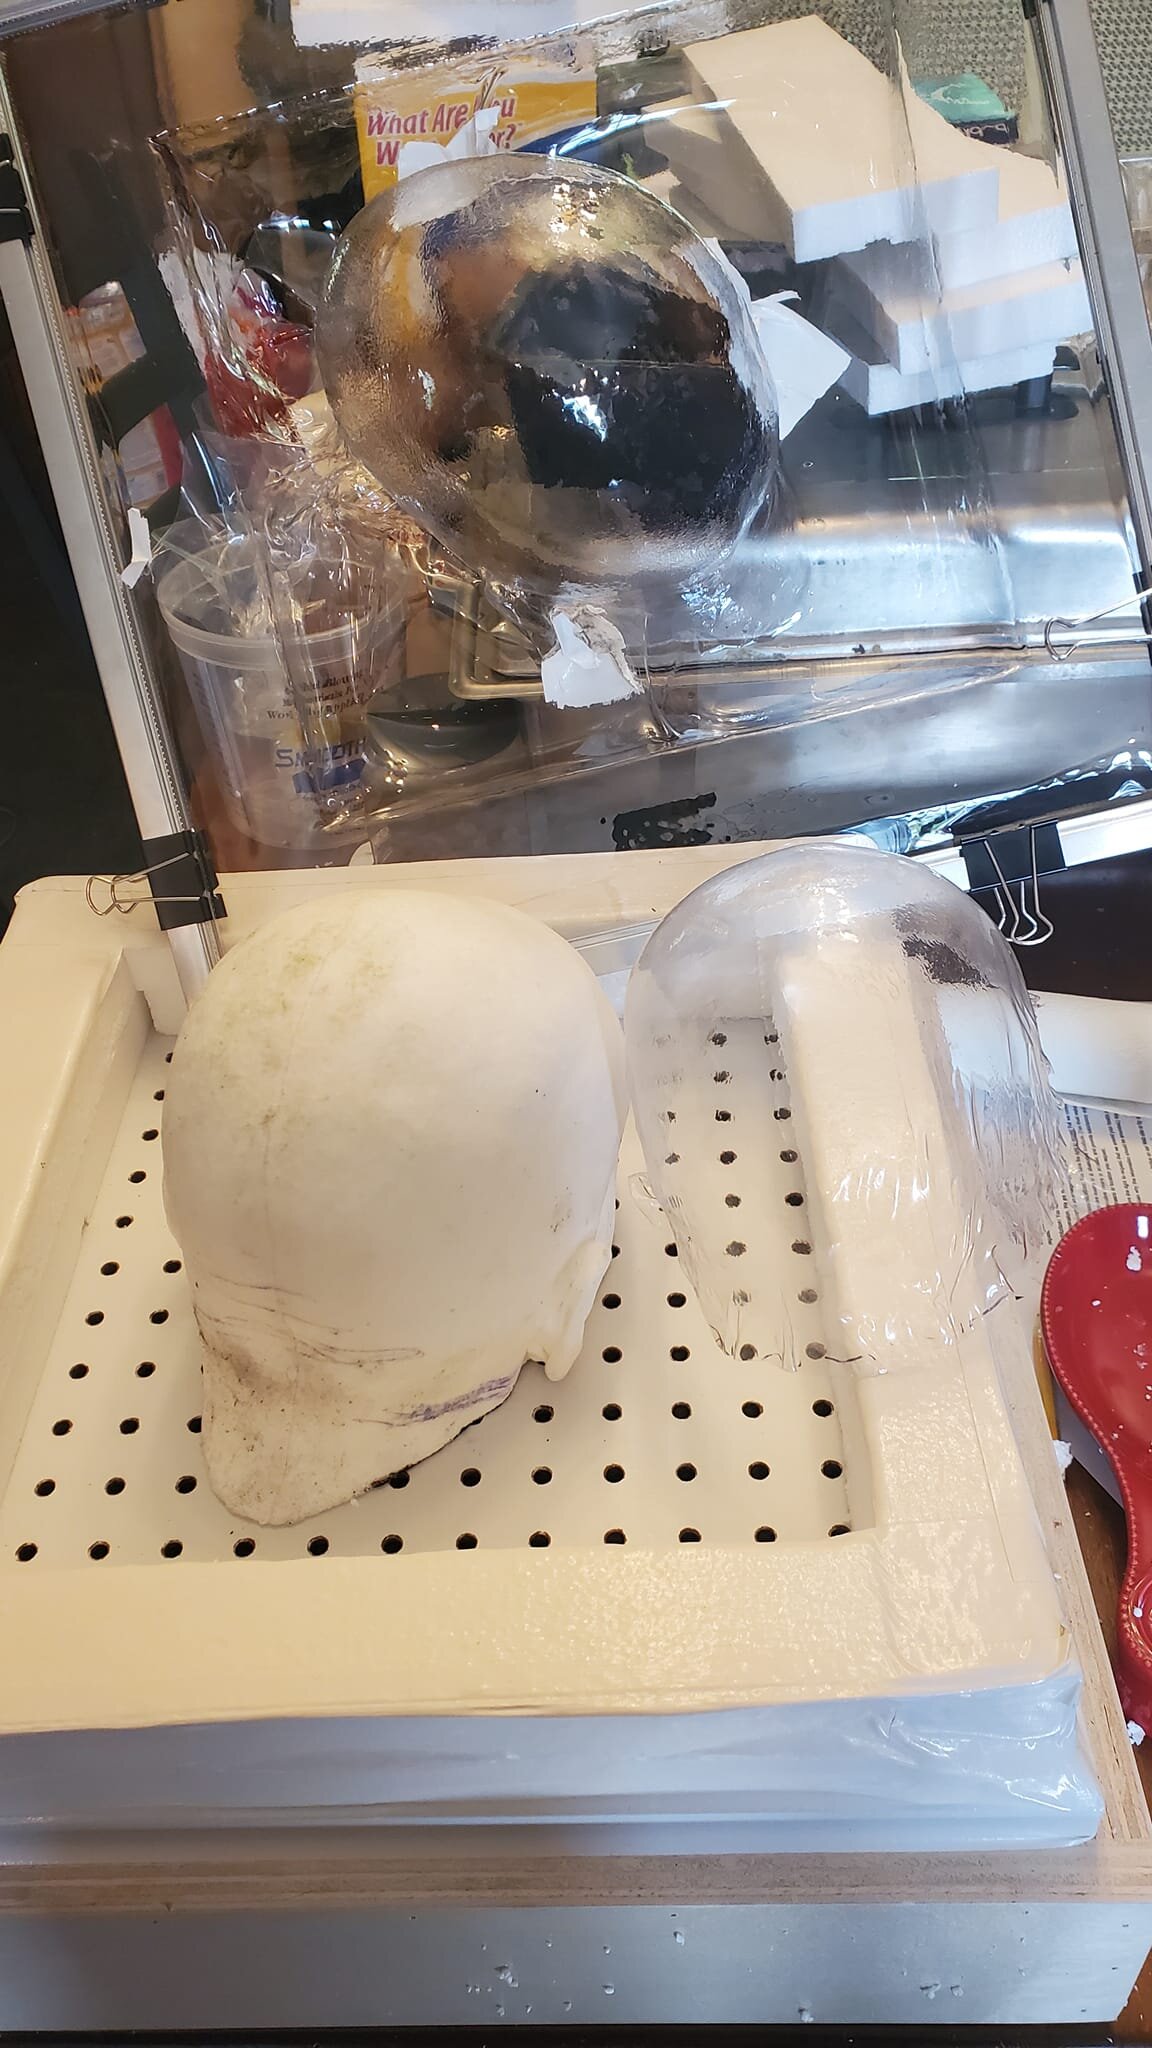
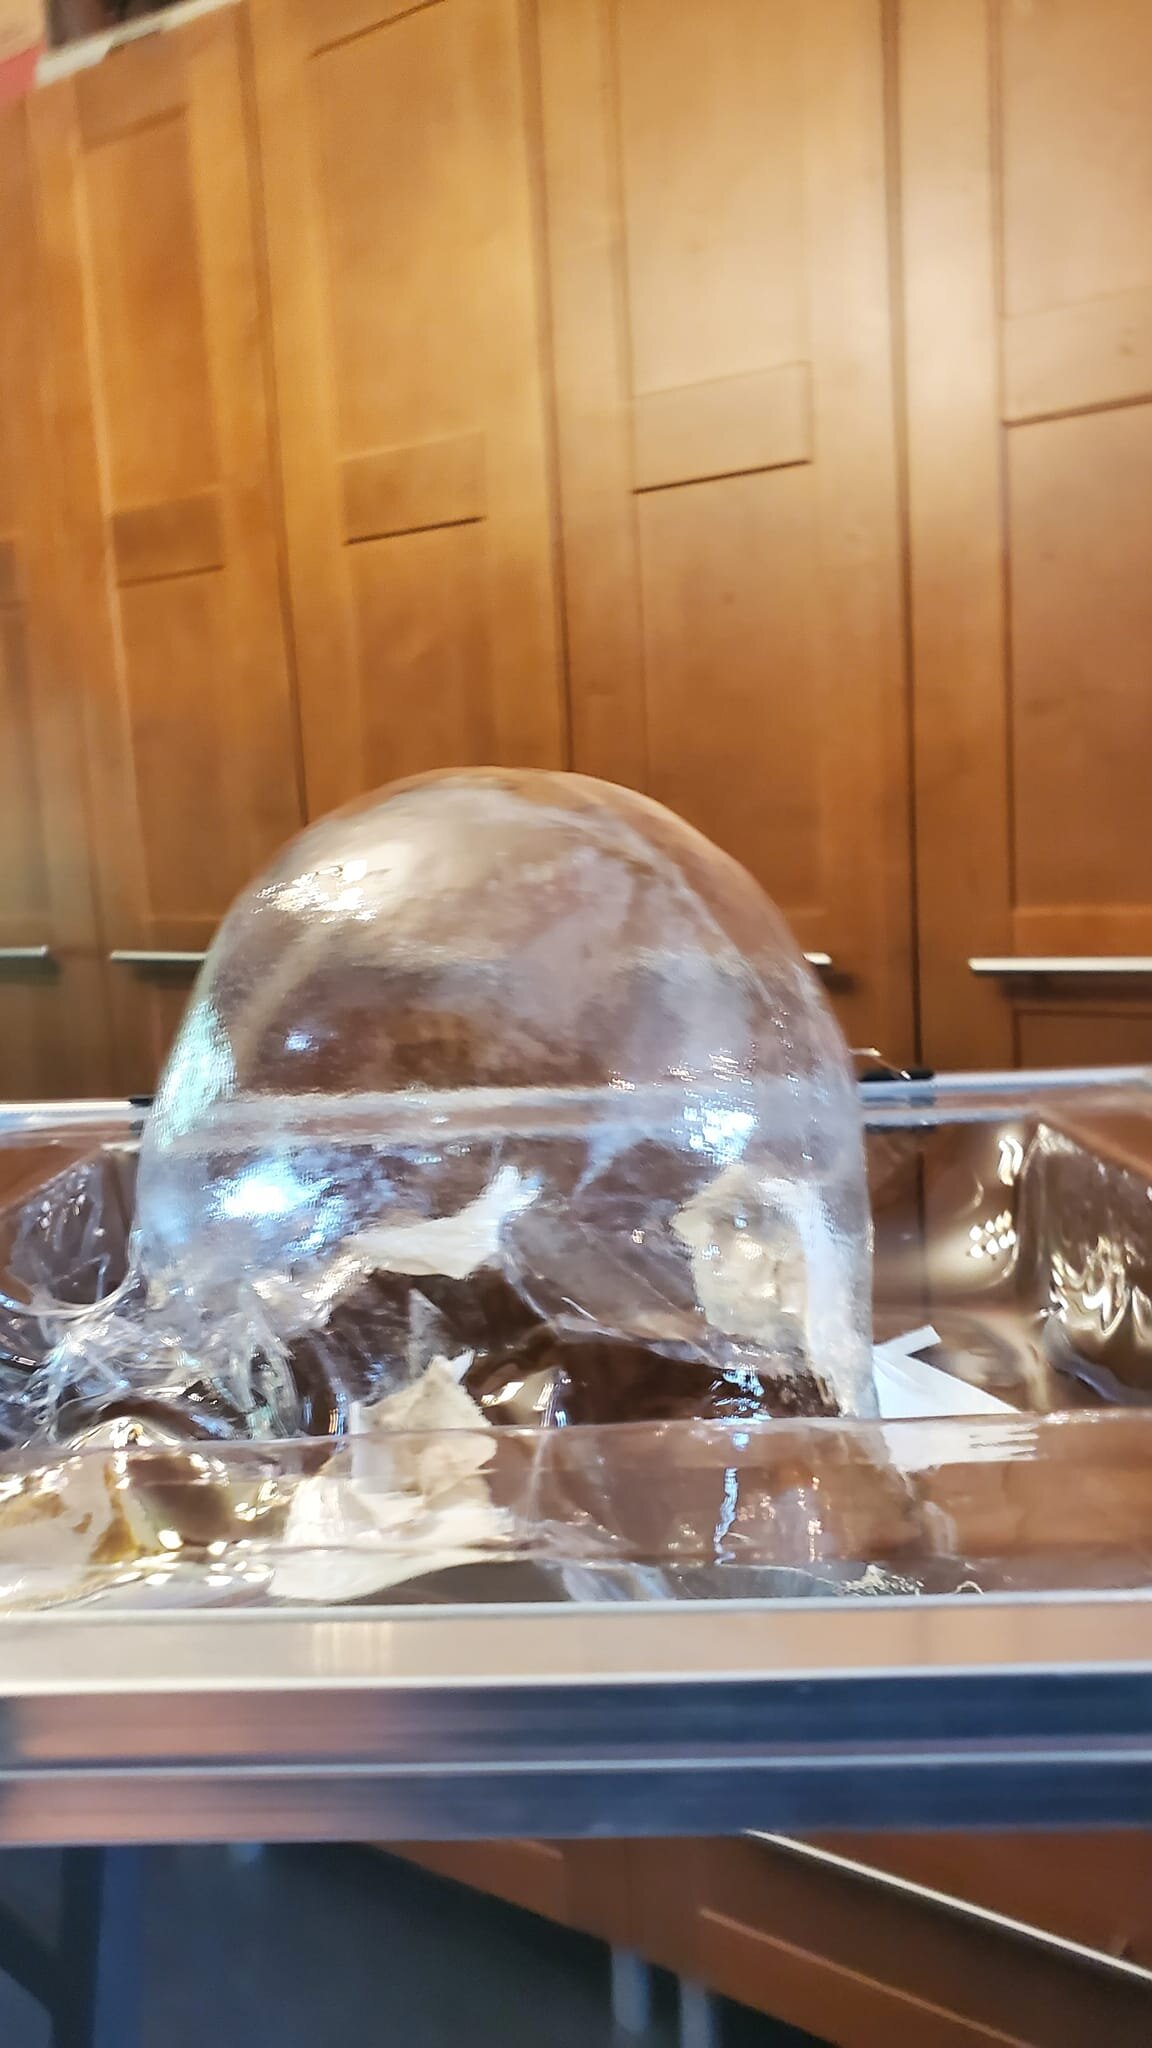
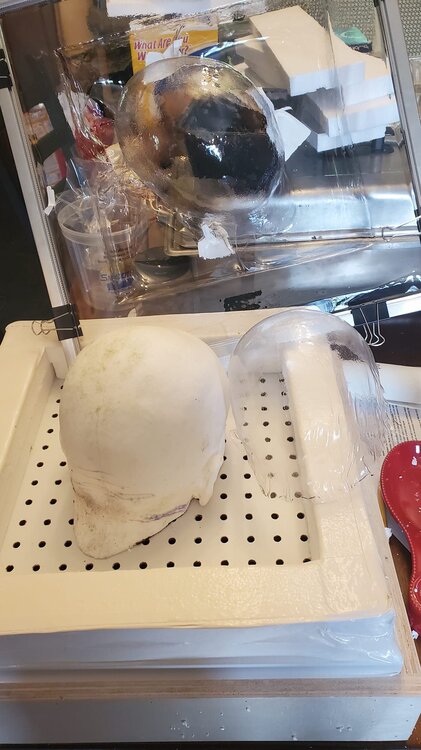
I will do a better write up of this in the next month or so. I will write more about how to make a casting of your head and such, but for now this is how to make the actual hard plastic re-usable stencil. Okay so this is going to be a bit of a long post. For my Ventress I have been planning trying to make a hard plastic stencil to use for airbrushing my Asajj Ventress tattoos on the scalp part of the head. I wanted something that is pretty much a continuous shape that doesn't have to have sections that need to be created every couple of inches. And would fit my head without large gaps. I have been using a Halloween bald cap that I tried to modify to fit my head, but because the material is flimsy the stencil shapes have to be cut into sections and then have to be connected when the bald cap is removed. I had my head cast. Which I did but I had to go to a place to get it done. Mind you I plan on doing other things with my head mold. The process for making this stencil can be done with just casting the scalp and ear area and doesn't have to include the face. I purchased a small (16"x16") Vacuum forming table. Got it on Etsy. Pm me if you want a link. You can also go on Youtube to learn how to make one. I used my house vacuum to create the suction. I also purchased a sheet of PETG from Amazon. .020" thickness. I also had a heat gun for this process. I made a cast from the mold of my head using Smooth-Cast 305 from Reynolds Advanced Materials. I made it a little bigger (deeper) than I had planned on. But I figured out a workaround without having to cut the head shape down. You can learn more about casting at the Smooth-On website. or you can search Youtube. I used the metal frame that came with the vacuform table and secured the plastic sheet I had cut down to the same size as the frame. I then put it in the over, raised a few inches above the metal wire shelf under my broiler (around 3-4") and let it sit for around 30-45 seconds. I pulled it out and pushed it down over the head form. My first try at molding the head stencil failed (mostly). When I first pulled the hot sheet down over the head form, it wouldn't stretch far enough down over the head form to reach the edges of the table to suction down the plastic. I tried using a heat gun while putting pressure on the plastic pulling it down, however this really didn't work very well. So, I tried again. This time I remedied the suction issue by building up walls of the vacuform table with Styrofoam I had in the house and then using duct tape to attach them to the table and seal the edges. This would allow the plastic sheet to come down onto the surface edge of the table to allow the suction of the vacuum to work on pulling down the extra plastic to the table. I repeated the steps like I did the first time with heating the sheet of plastic in the oven. I then pushed the sheet down over the head form onto the wall edges where it then started to suction down the plastic. The plastic cools quickly. When it does it will not stretch anymore. It still needed to form a bit more, so I used a heat gun (550 deg) in spots around the head form while the vacuum was on. Some spots I melted the surface and created holes where I had the heat gun to close to the plastic, so I patched them up with duct tape to create the suction again. I kept going around the head till I was happy with the results. I have cut the head shape out and will be drawing and cutting out the shapes of the tattoos that go on Ventress' head. The only thing I would like to do again differently is using a bit of a thicker sheet of PETG. I feel it would hold up better for future stenciling. For now, I will use this. But I am also currently ordering more PETG in a thicker sheet. I will be posting more pictures of the head stencil being cut tout and being used with the airbrush when I get there later today. If you do not know about Vacuum forming I suggest googling it to learn more. The first image is showing the vacuform table with the failed stencil to the right of the head form and the successful one still clamped to the frame for the vacuform table standing upright (you are looking at the top of the head). The second image shows how deep the forming of the plastic was made. You can also see the pieces of white duct tape I used to seal the holes where needed.
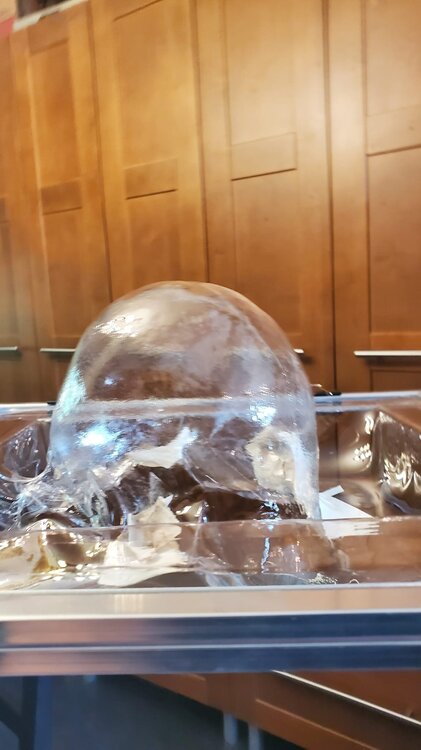 2 points
 -
Thanks! Finished now!2 points
-
So, I just started writing out a potential CRL today. My understanding is that the 501st won't be making this a regular CRL but could make it a Legion Level Approval costume. I have been in contact at the Legion level and was instructed to provide a serviceable CRL first.2 points
-
That looks so much better Good luck1 point
-
Your welcome Regarding the gloves, if you are satisfied that the gloves are not a nuisance in your elbow joint then it is not something that I consider a problem, was more if they went beyond the joint. LOL I think we've all tried to forget to put something on when we jump in our suits - I forgot one time to put on my knee armor on my scout, but luckily I noticed it before heading out, and I had put that armor on a million times 😂 I think you´ll need to put in new pics, as this costume will be approved by the Legion MLs and not by your own GML team, also if your cape on the pics are touching the floor, then it will be pushed back to your GML team for corrections. Looking forward to seeing the end result1 point
-
Thanks! I appreciate the feedback. I will find a way to use the Zoom pedal lol1 point
-
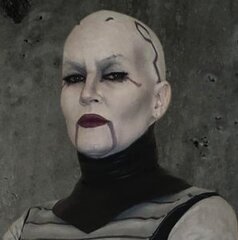
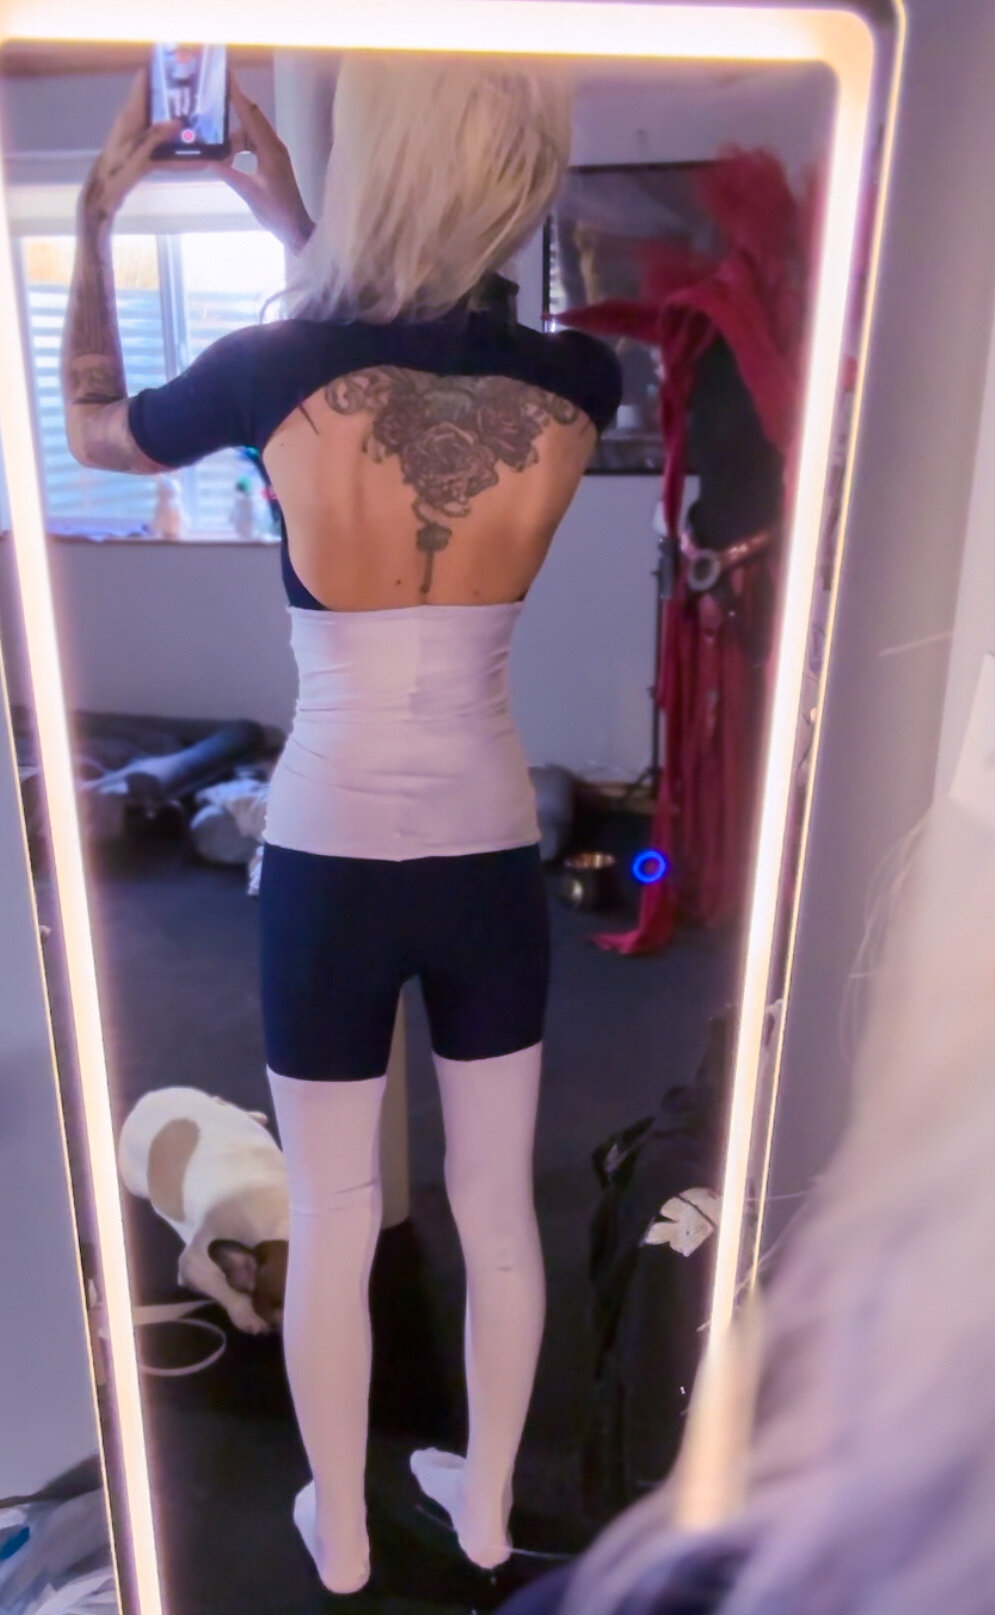
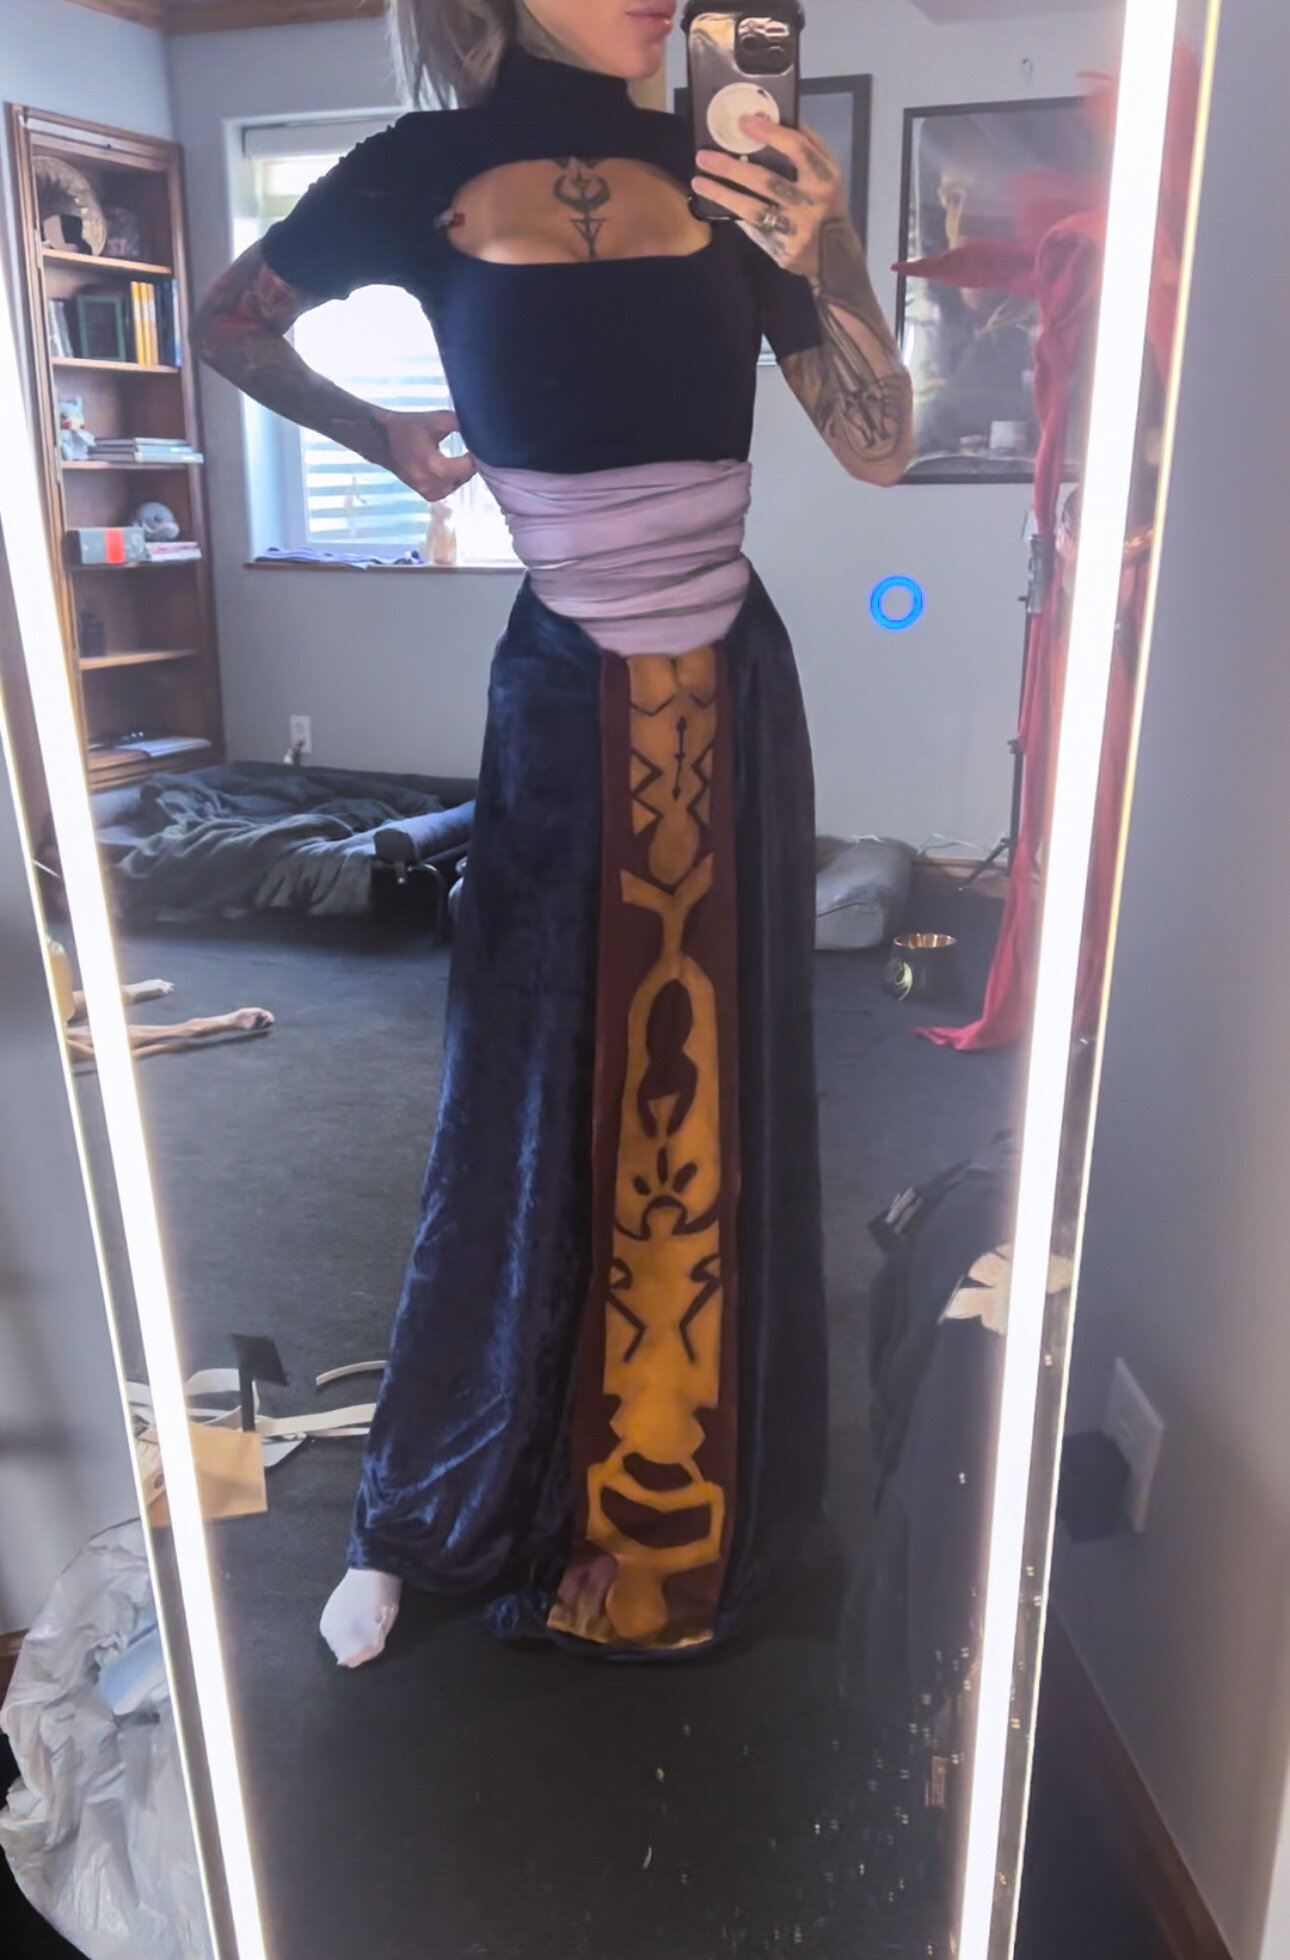
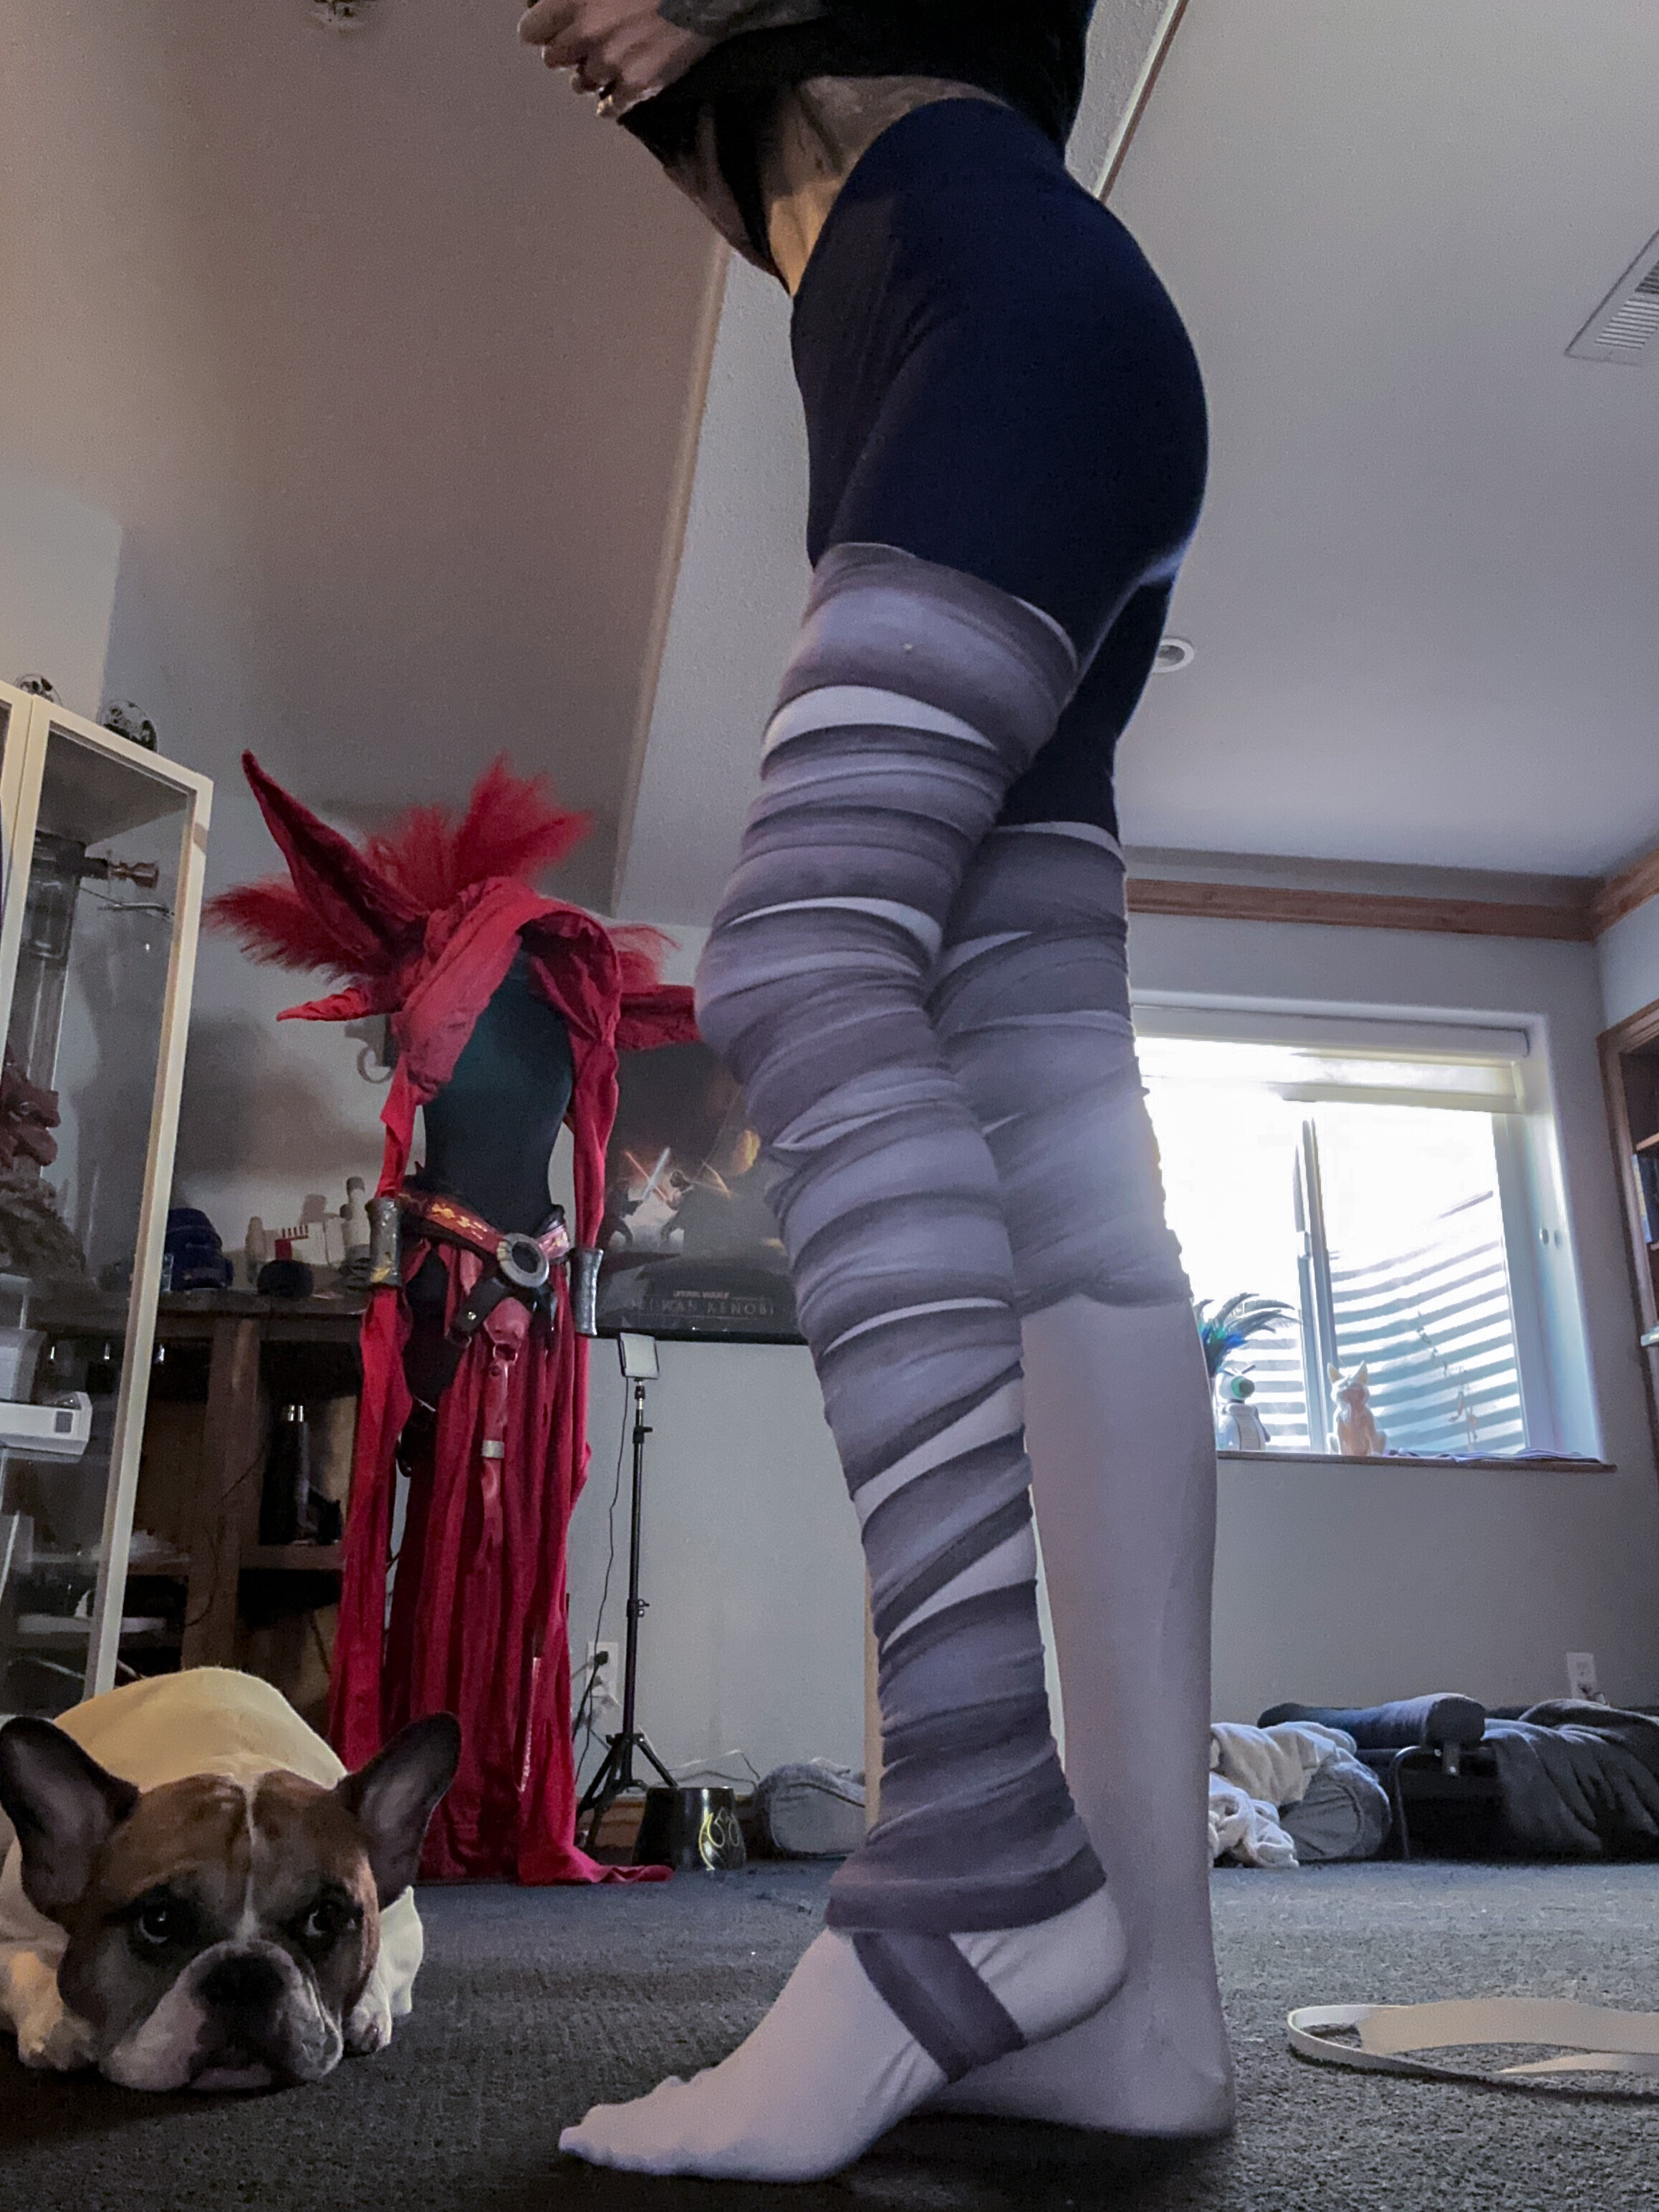
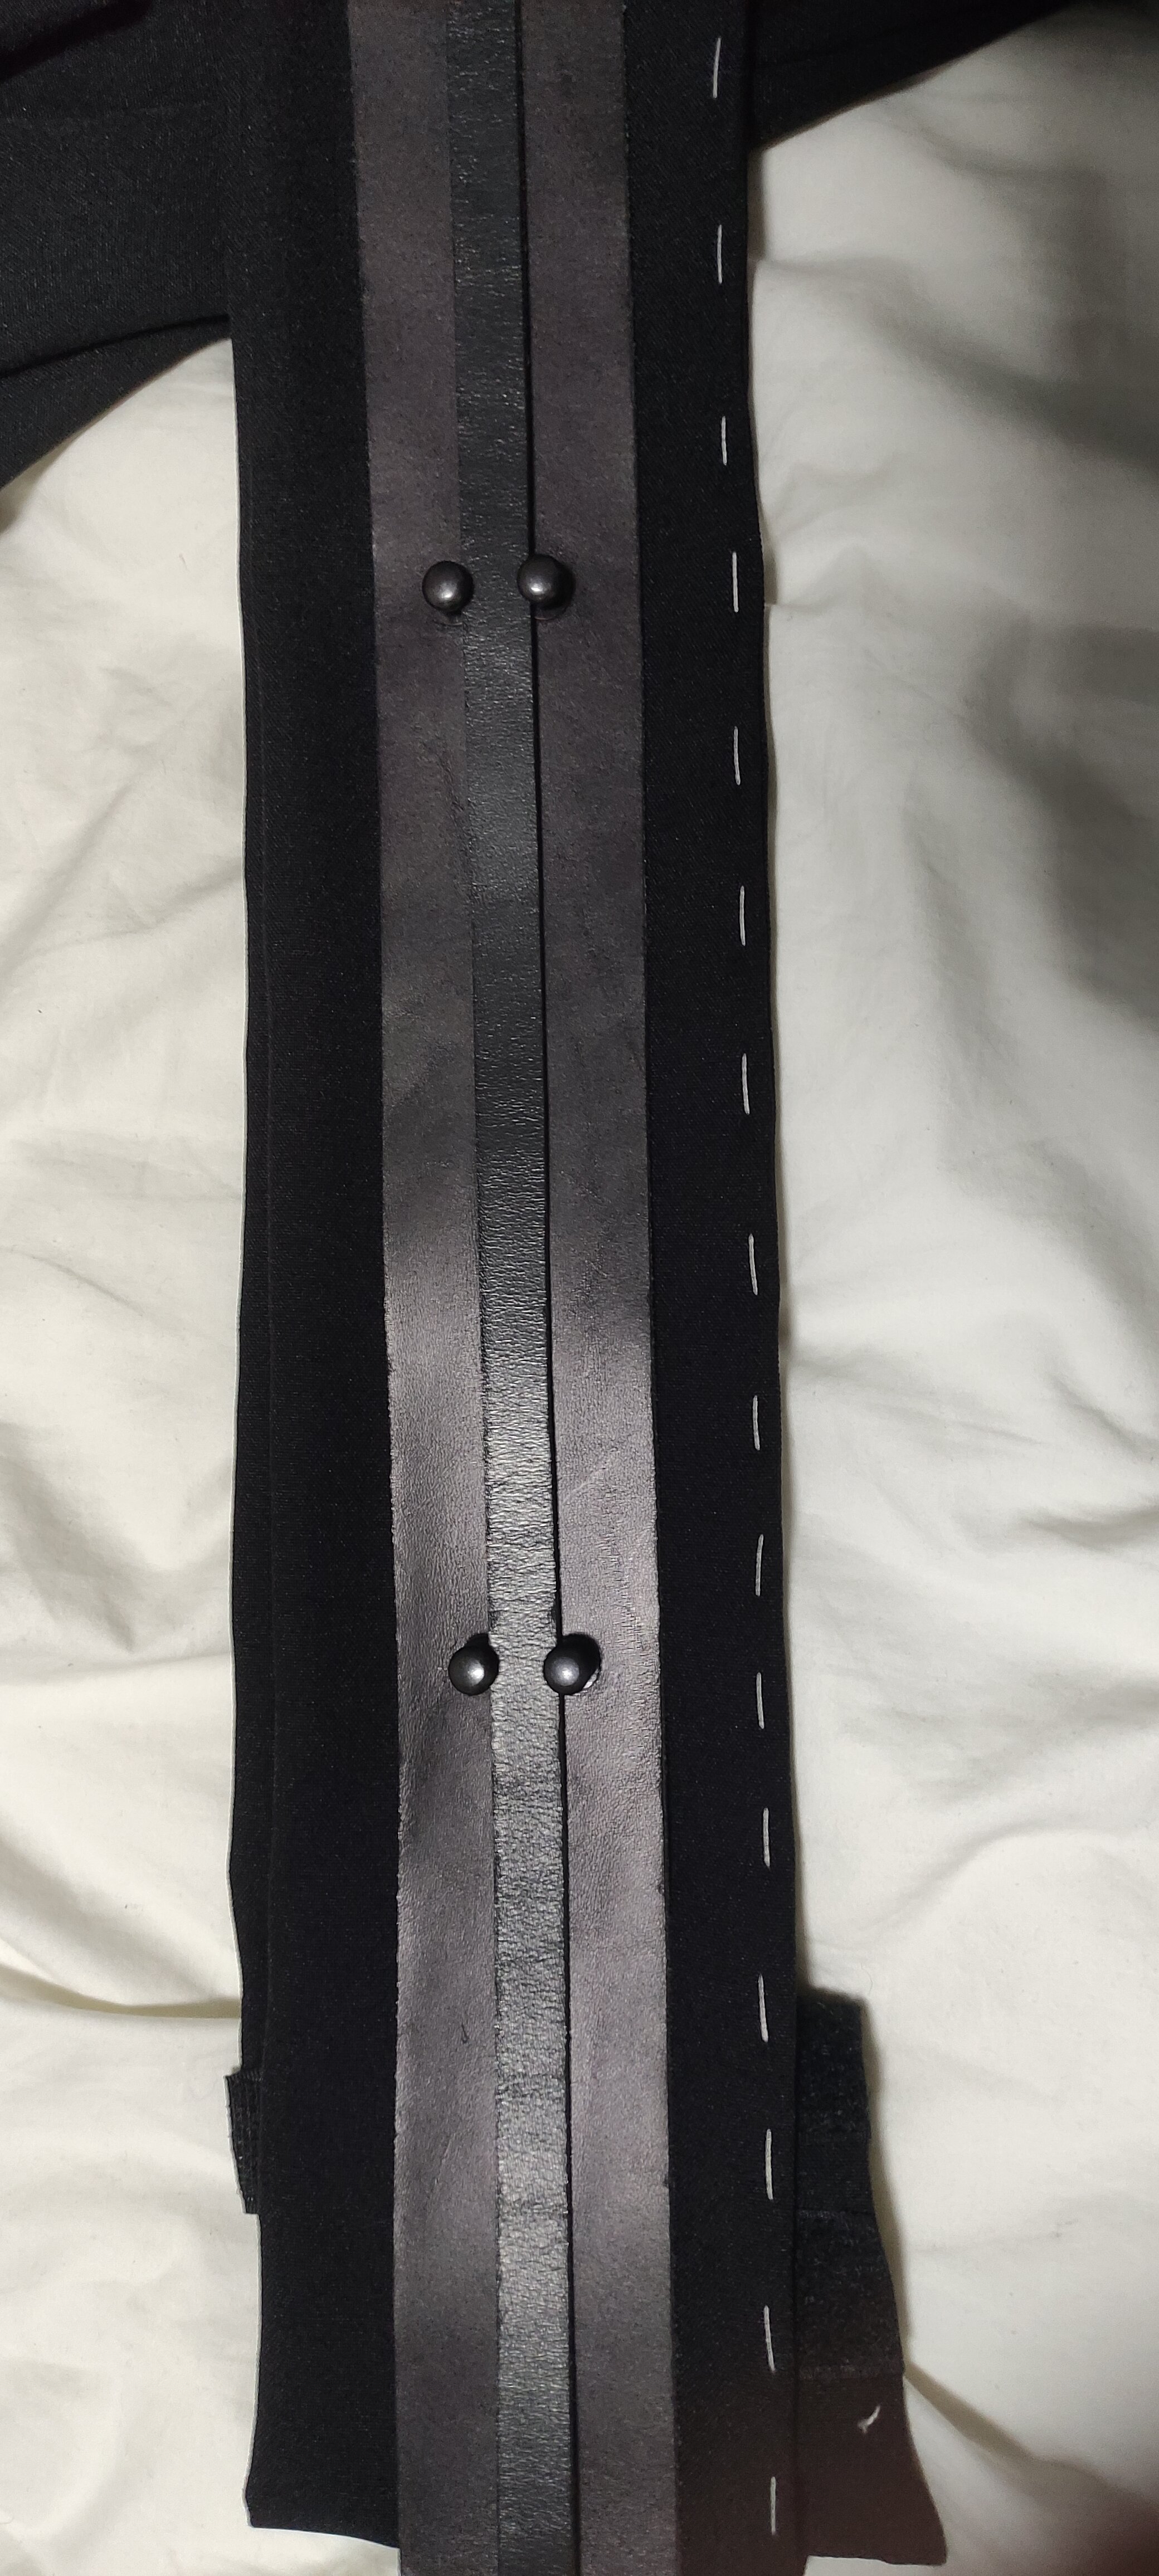
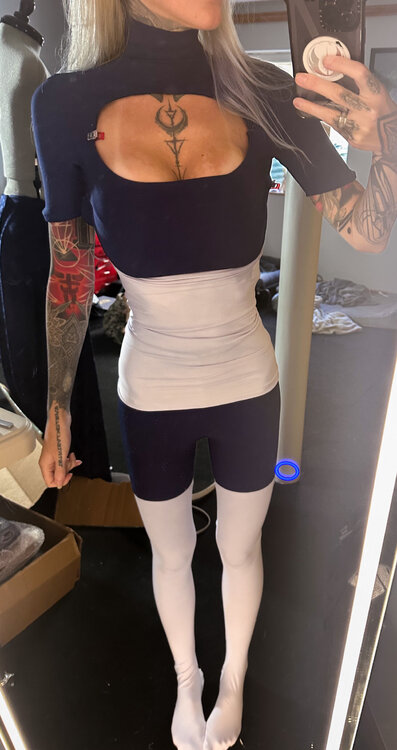
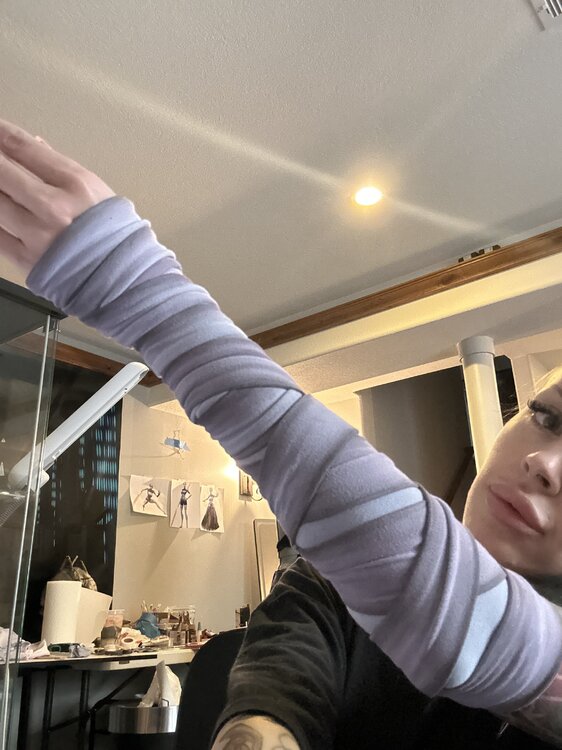
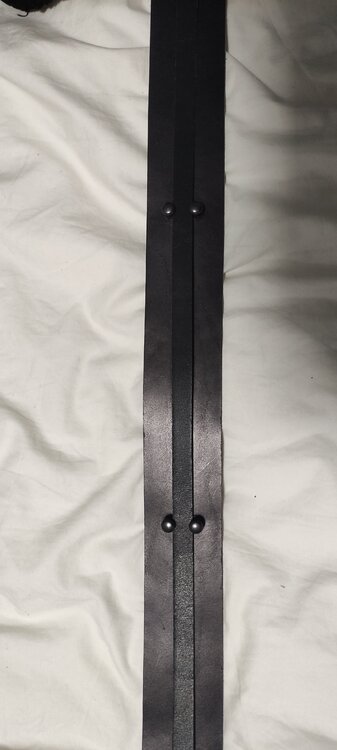
Hello there flagship eclipse peoples! 🔥🤍 Finally got some progress on my Asajj clone wars fit. The belt might kill me because leather work is the death of me and I’m determined to make everything myself hahah. Obviously the wraps aren’t fully on but just placed there to get the idea. The colors are a bit off in photos but irl they are pretty spot on from the promo photos of Asajj. base layer - few slight fit tweaks needed arm and leg wraps - leg wraps aren’t finished and obviously need to do the shoe part! featuring Eddie the bulldog being judgey 🤣 Skirt and tabbard just pinned on for basic fit- slight tweaking needed there lastly her cloak - my gosh was the color hard to find “grey purple?!” Hurt my brain hahahha. let me know what y’all think 🤍


 1 point
 -
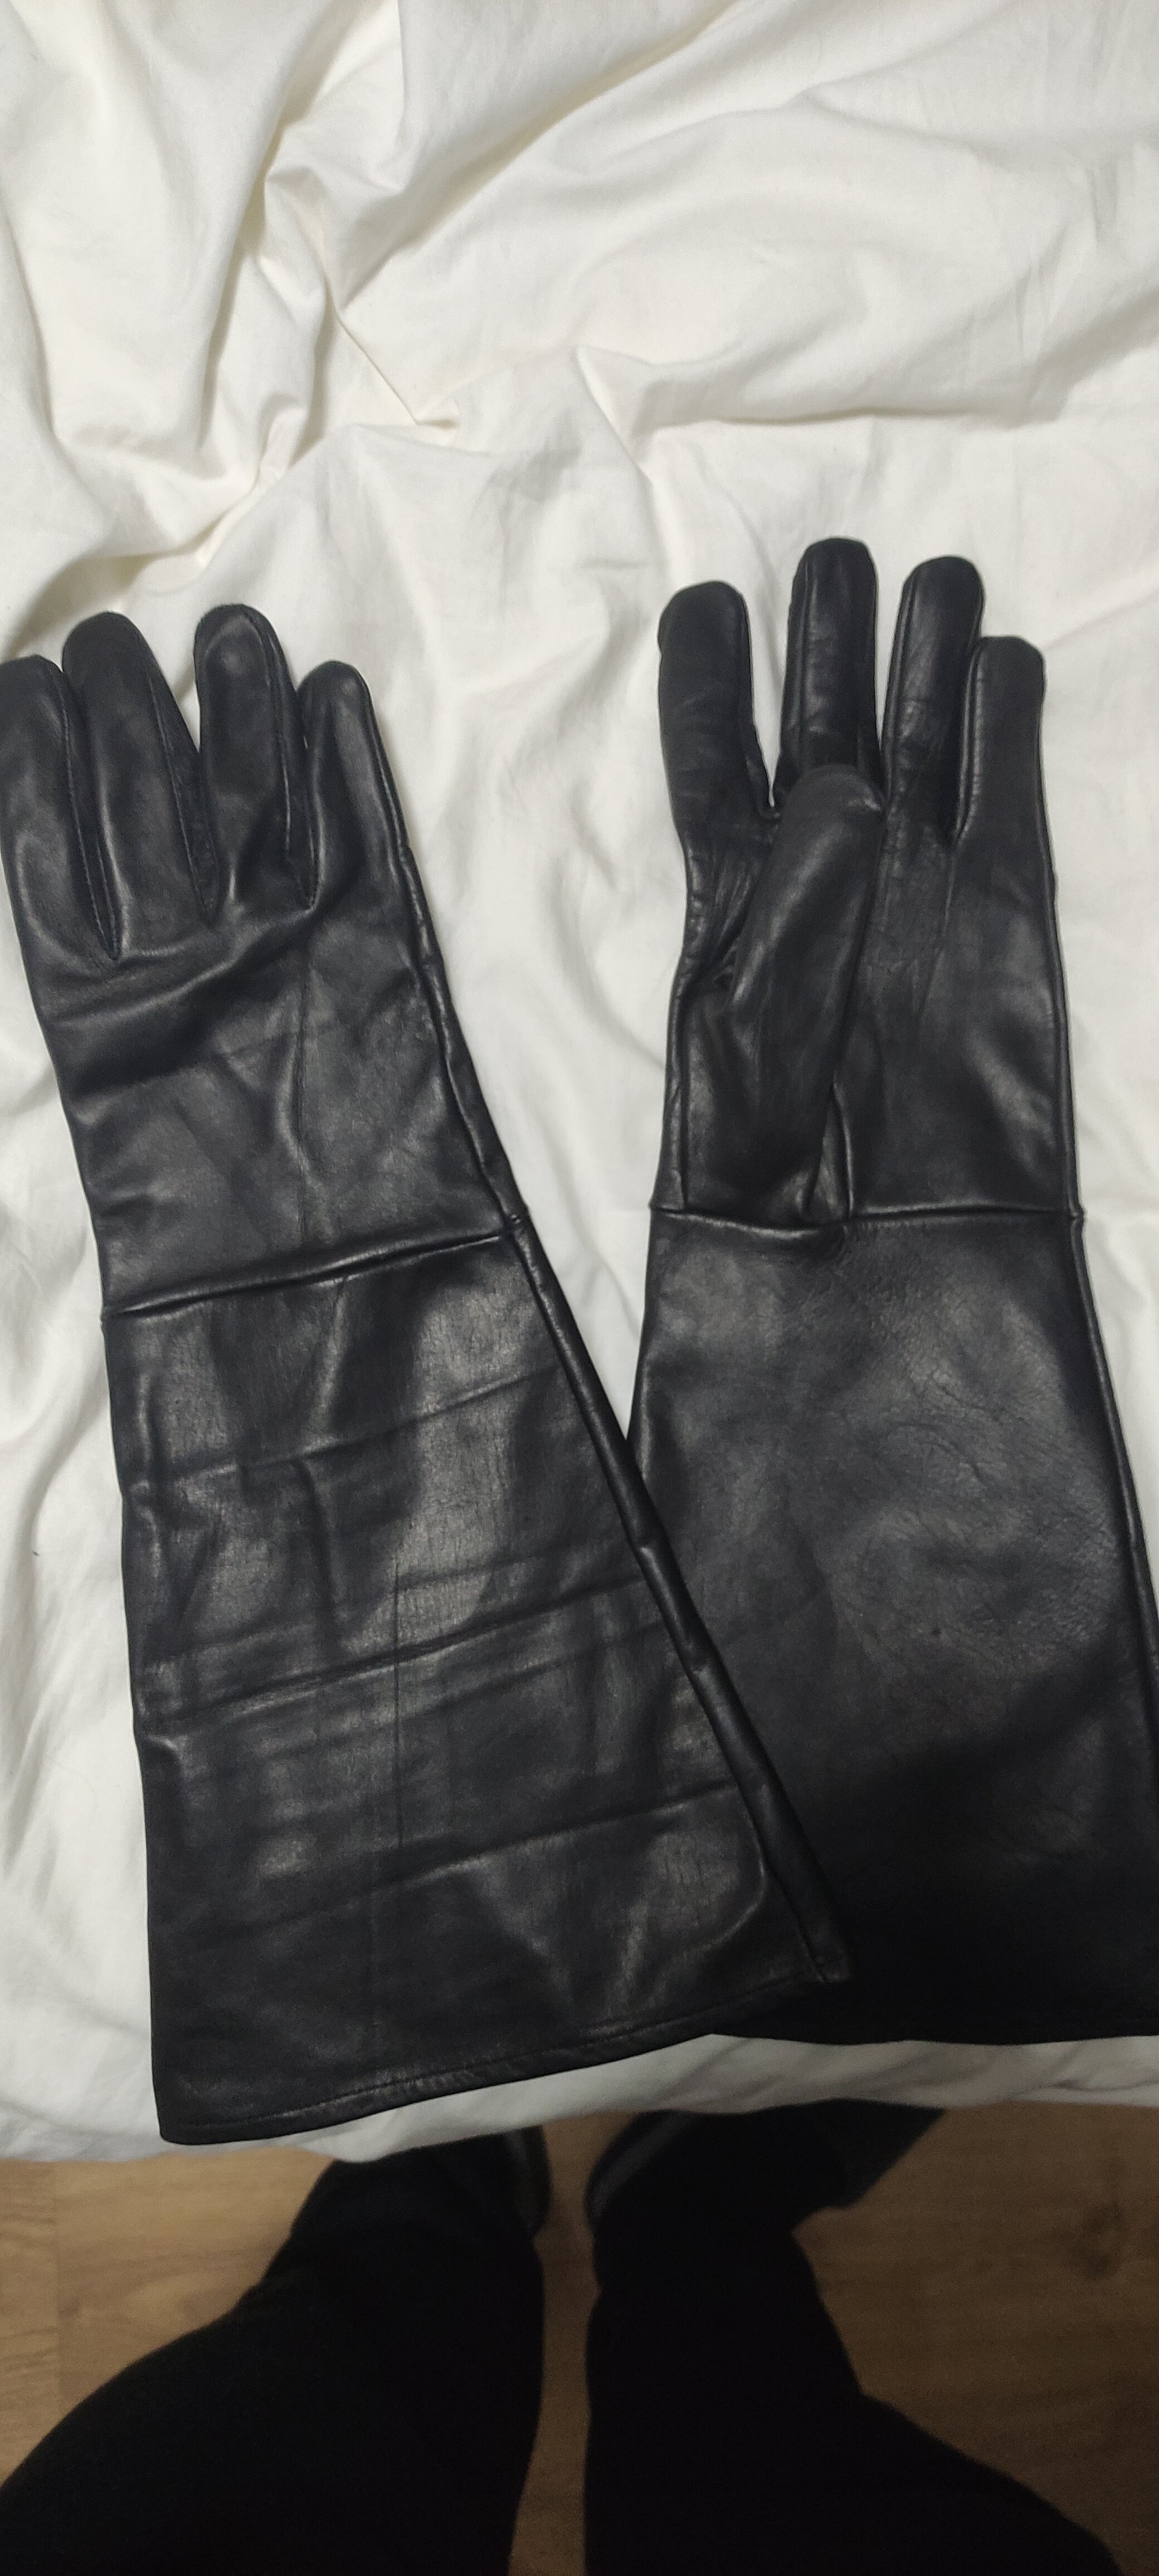
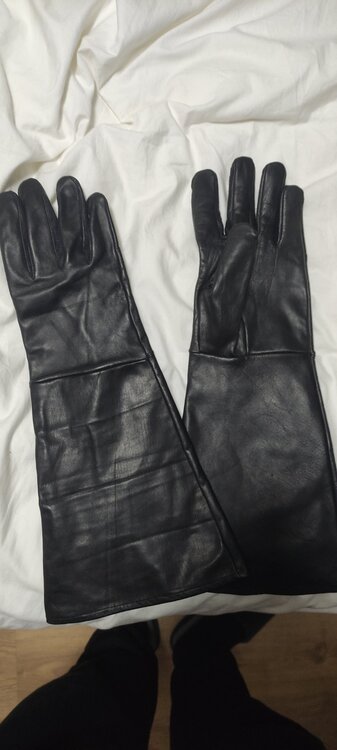
Hi again! As I promised here I show you the different parts of my costume: The leather gloves I bought were recommended by my friend: The leather belt with the right measure and those little black metal pieces: Here you can see the belt on the obi which is almost finished: And the inner robe with the skirt attached and the sleeves finished as the CRL details: Finally the outer shirt on the inner robe: And that's all for now, in a few days I will show you the skirt and the awesome boots, the same for my royal guard costume.

 1 point
 -
My sister and I make them and thank you for the link1 point
-
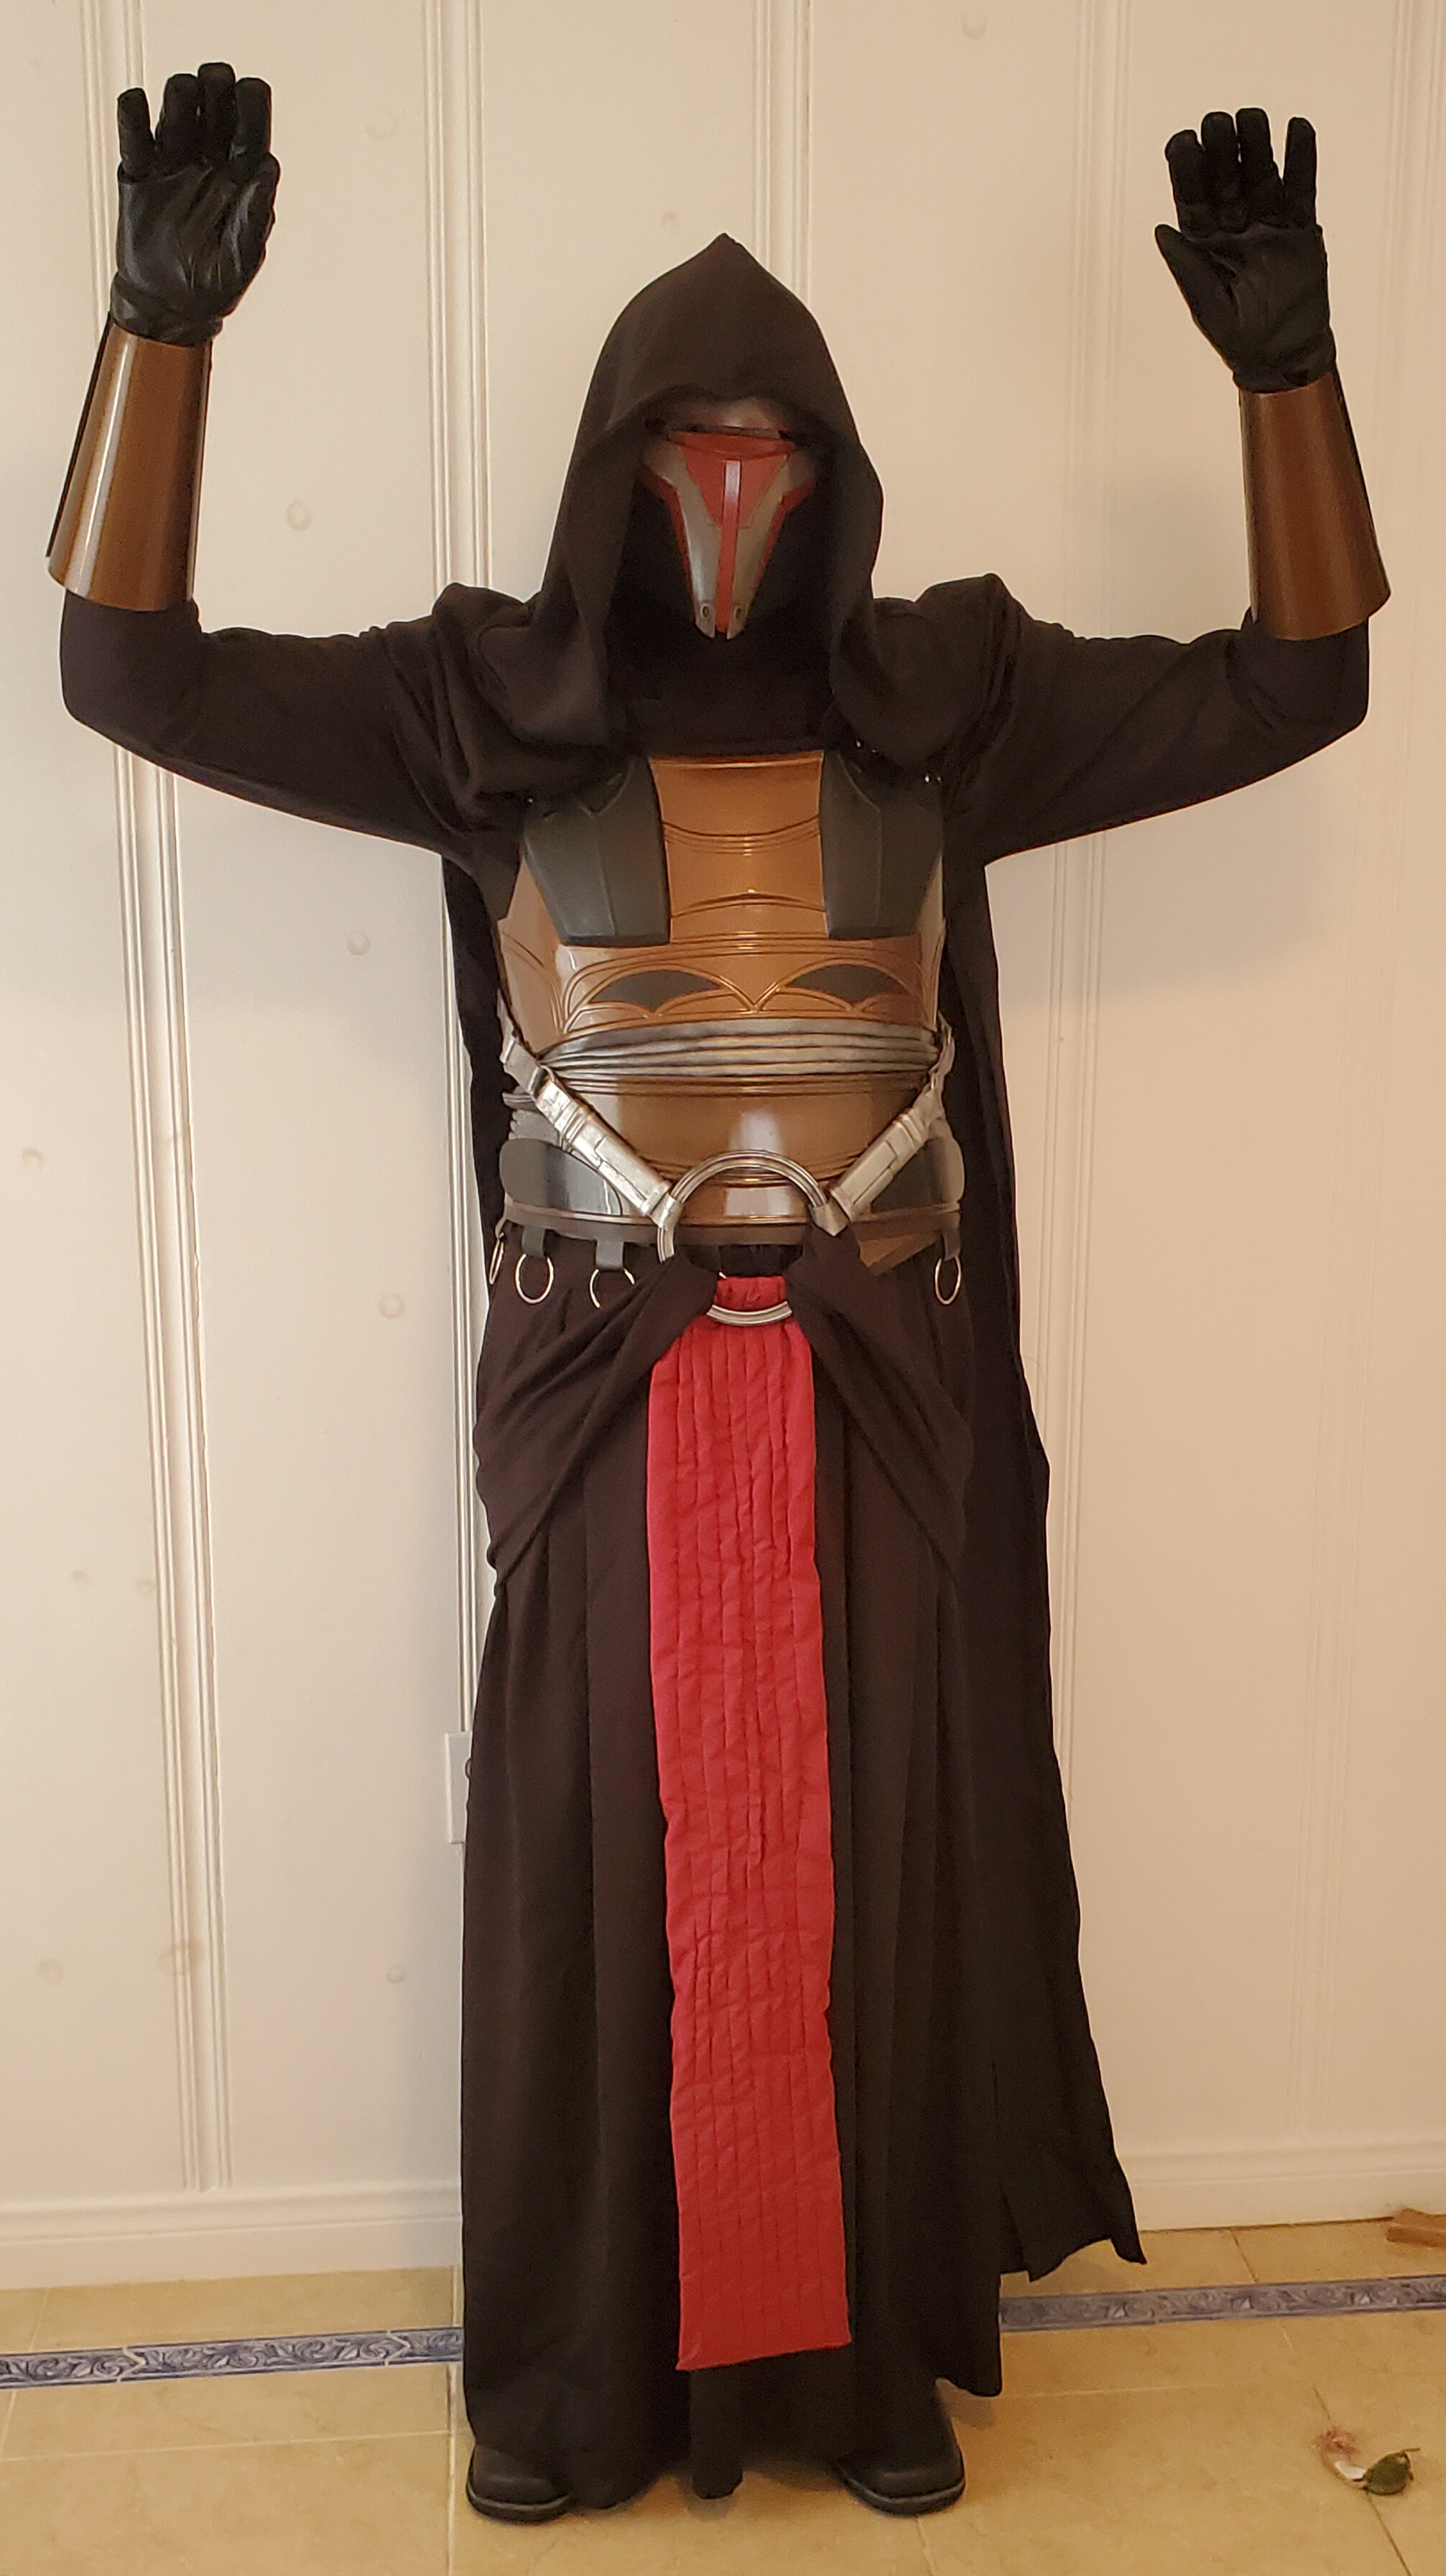
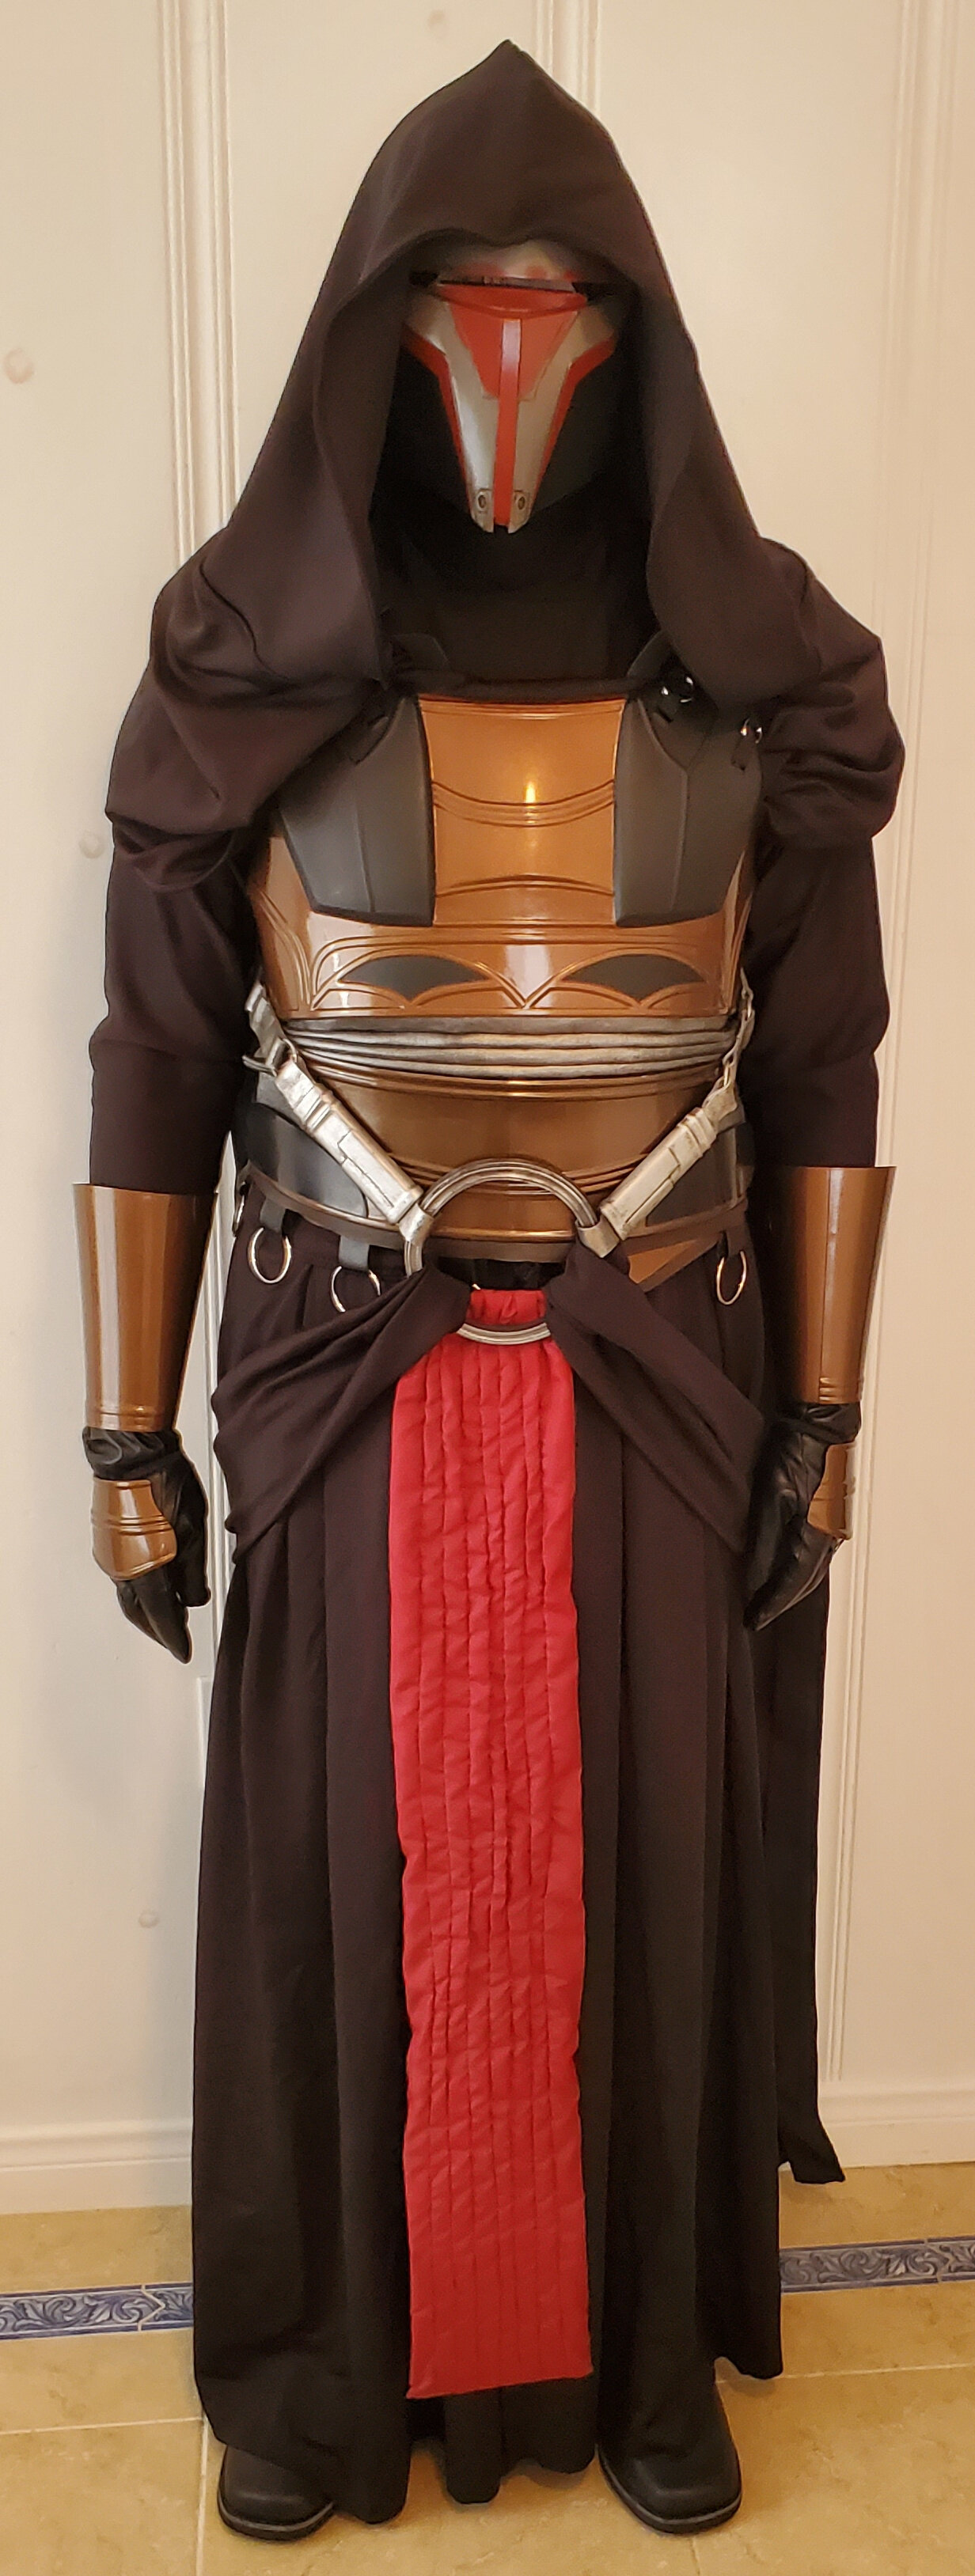
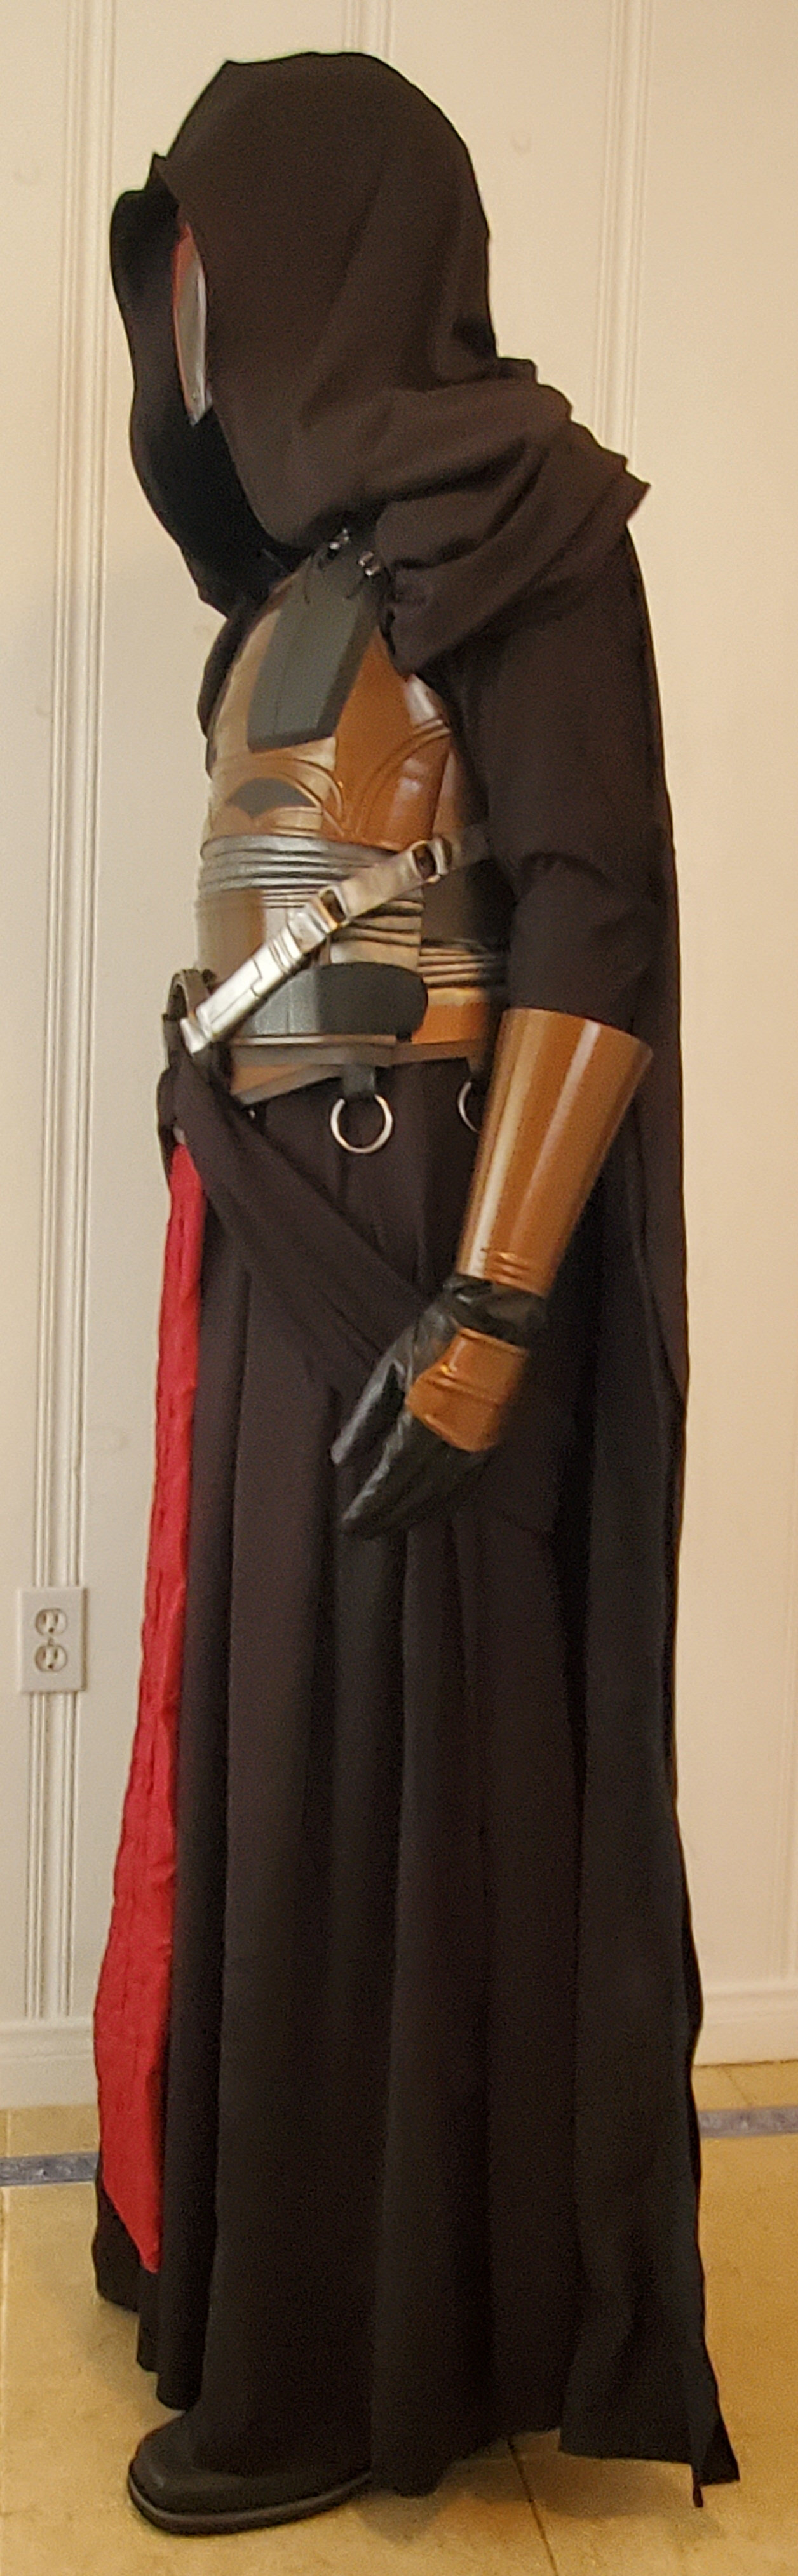
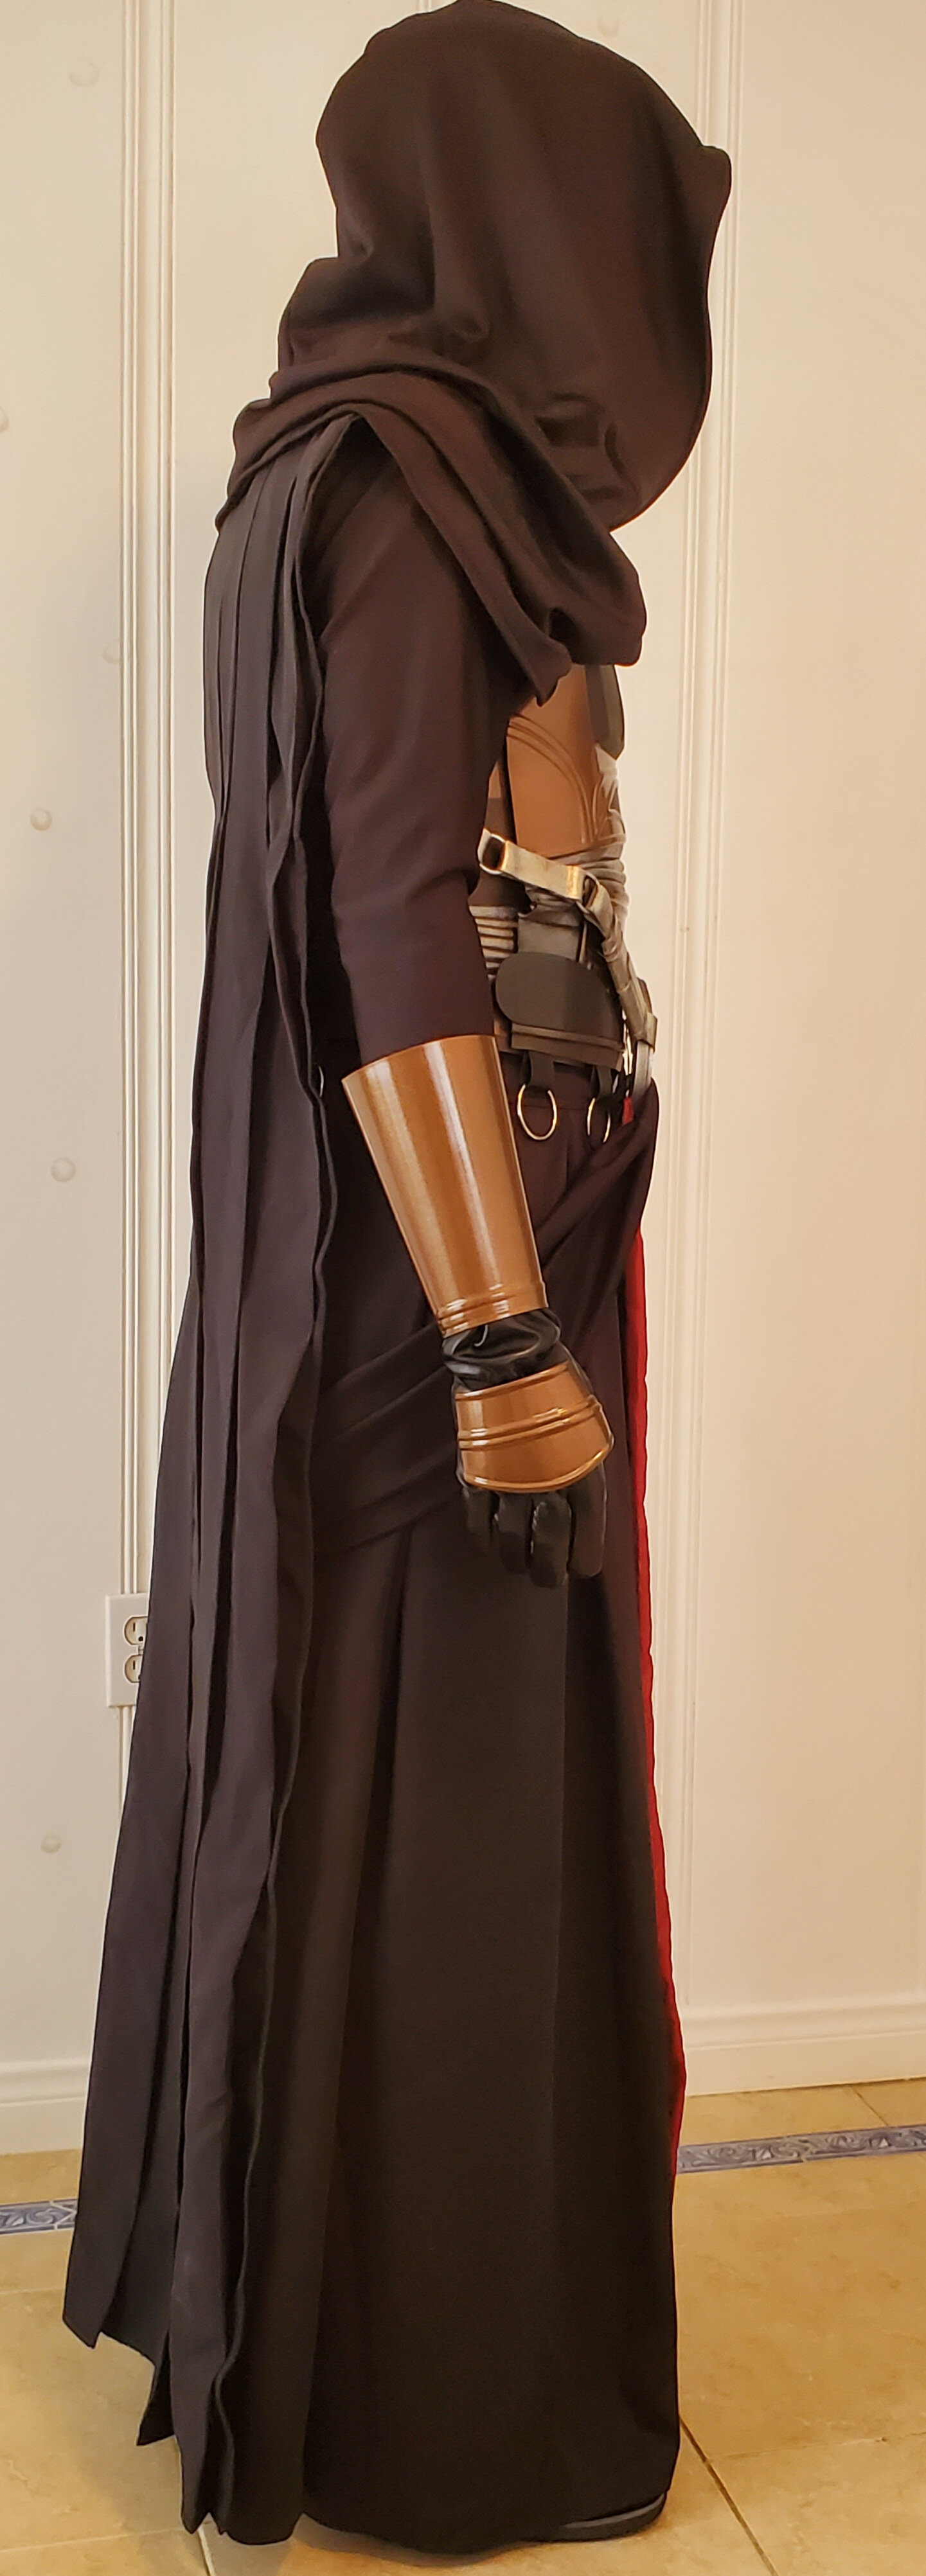
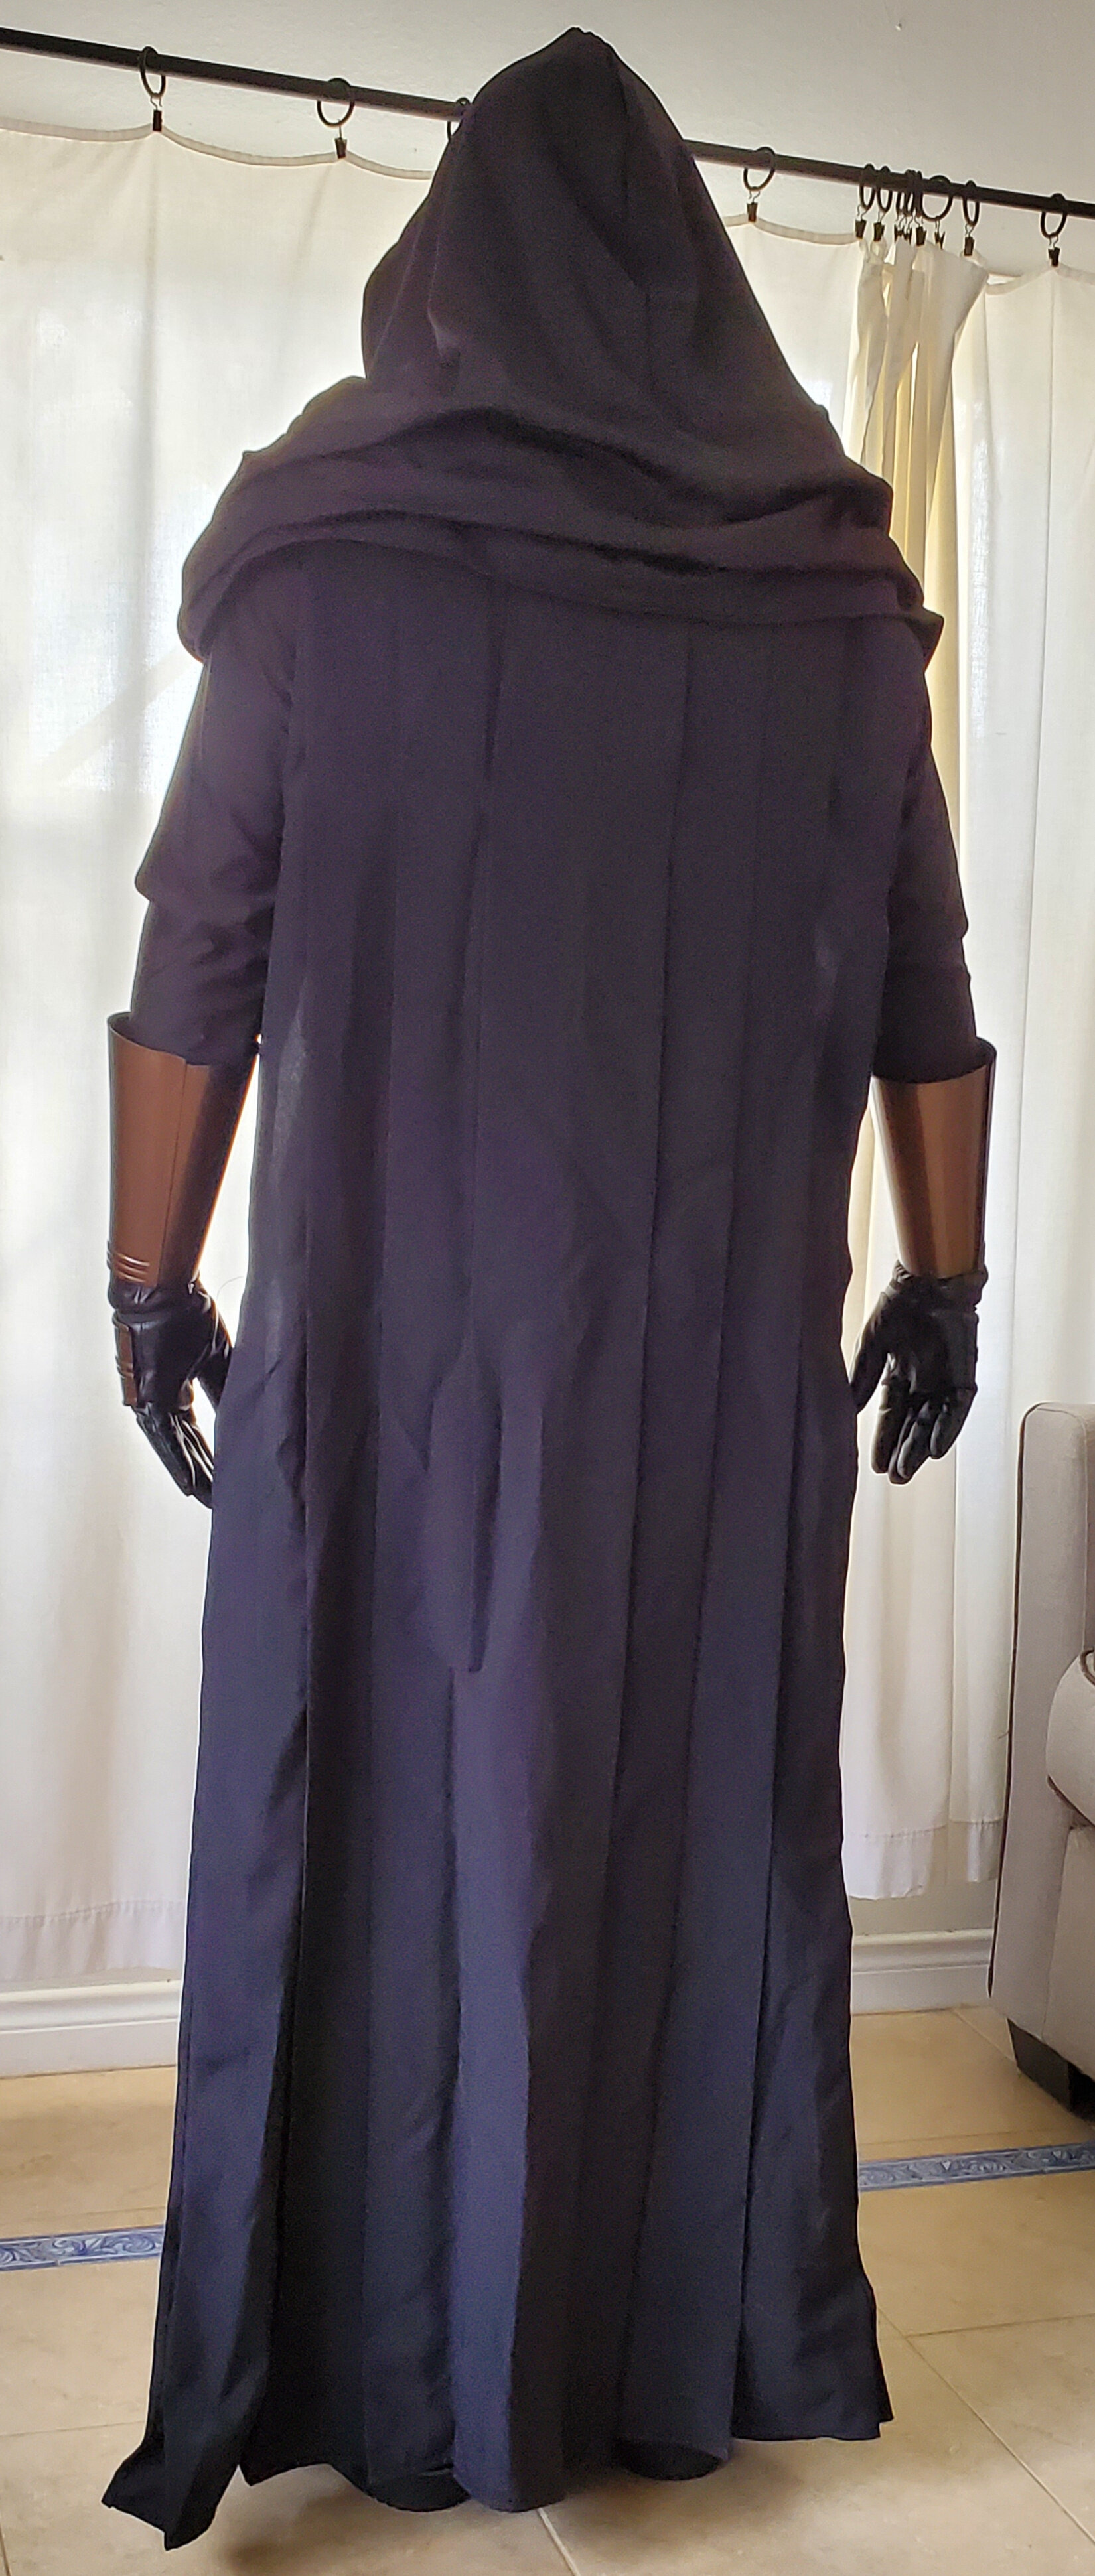
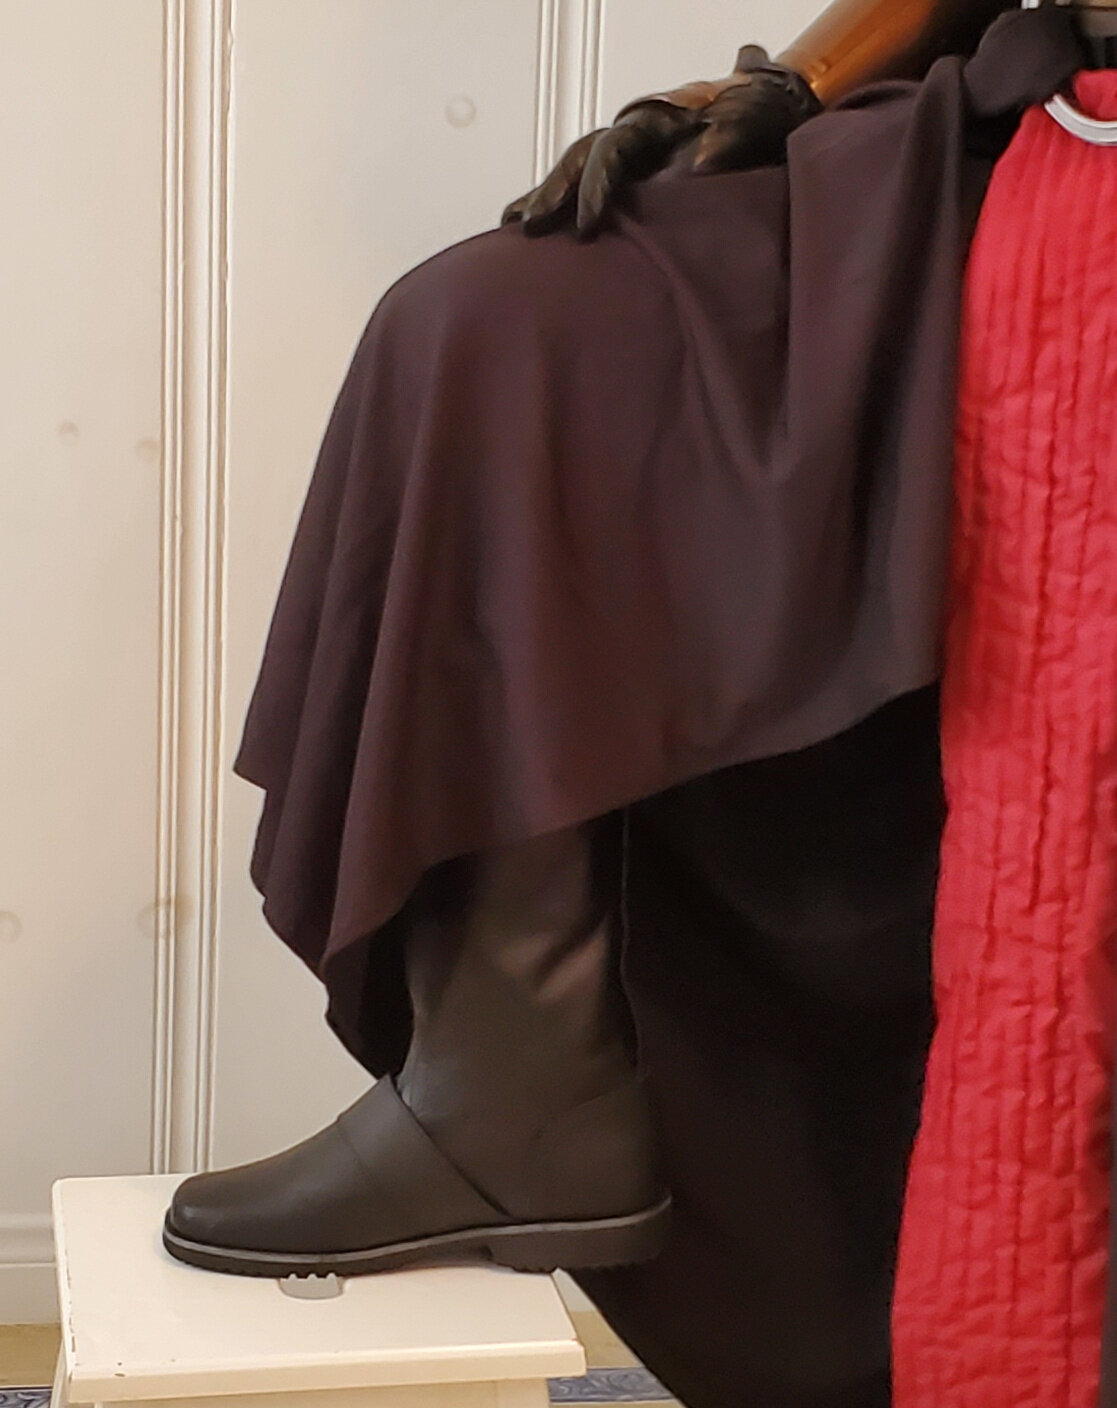
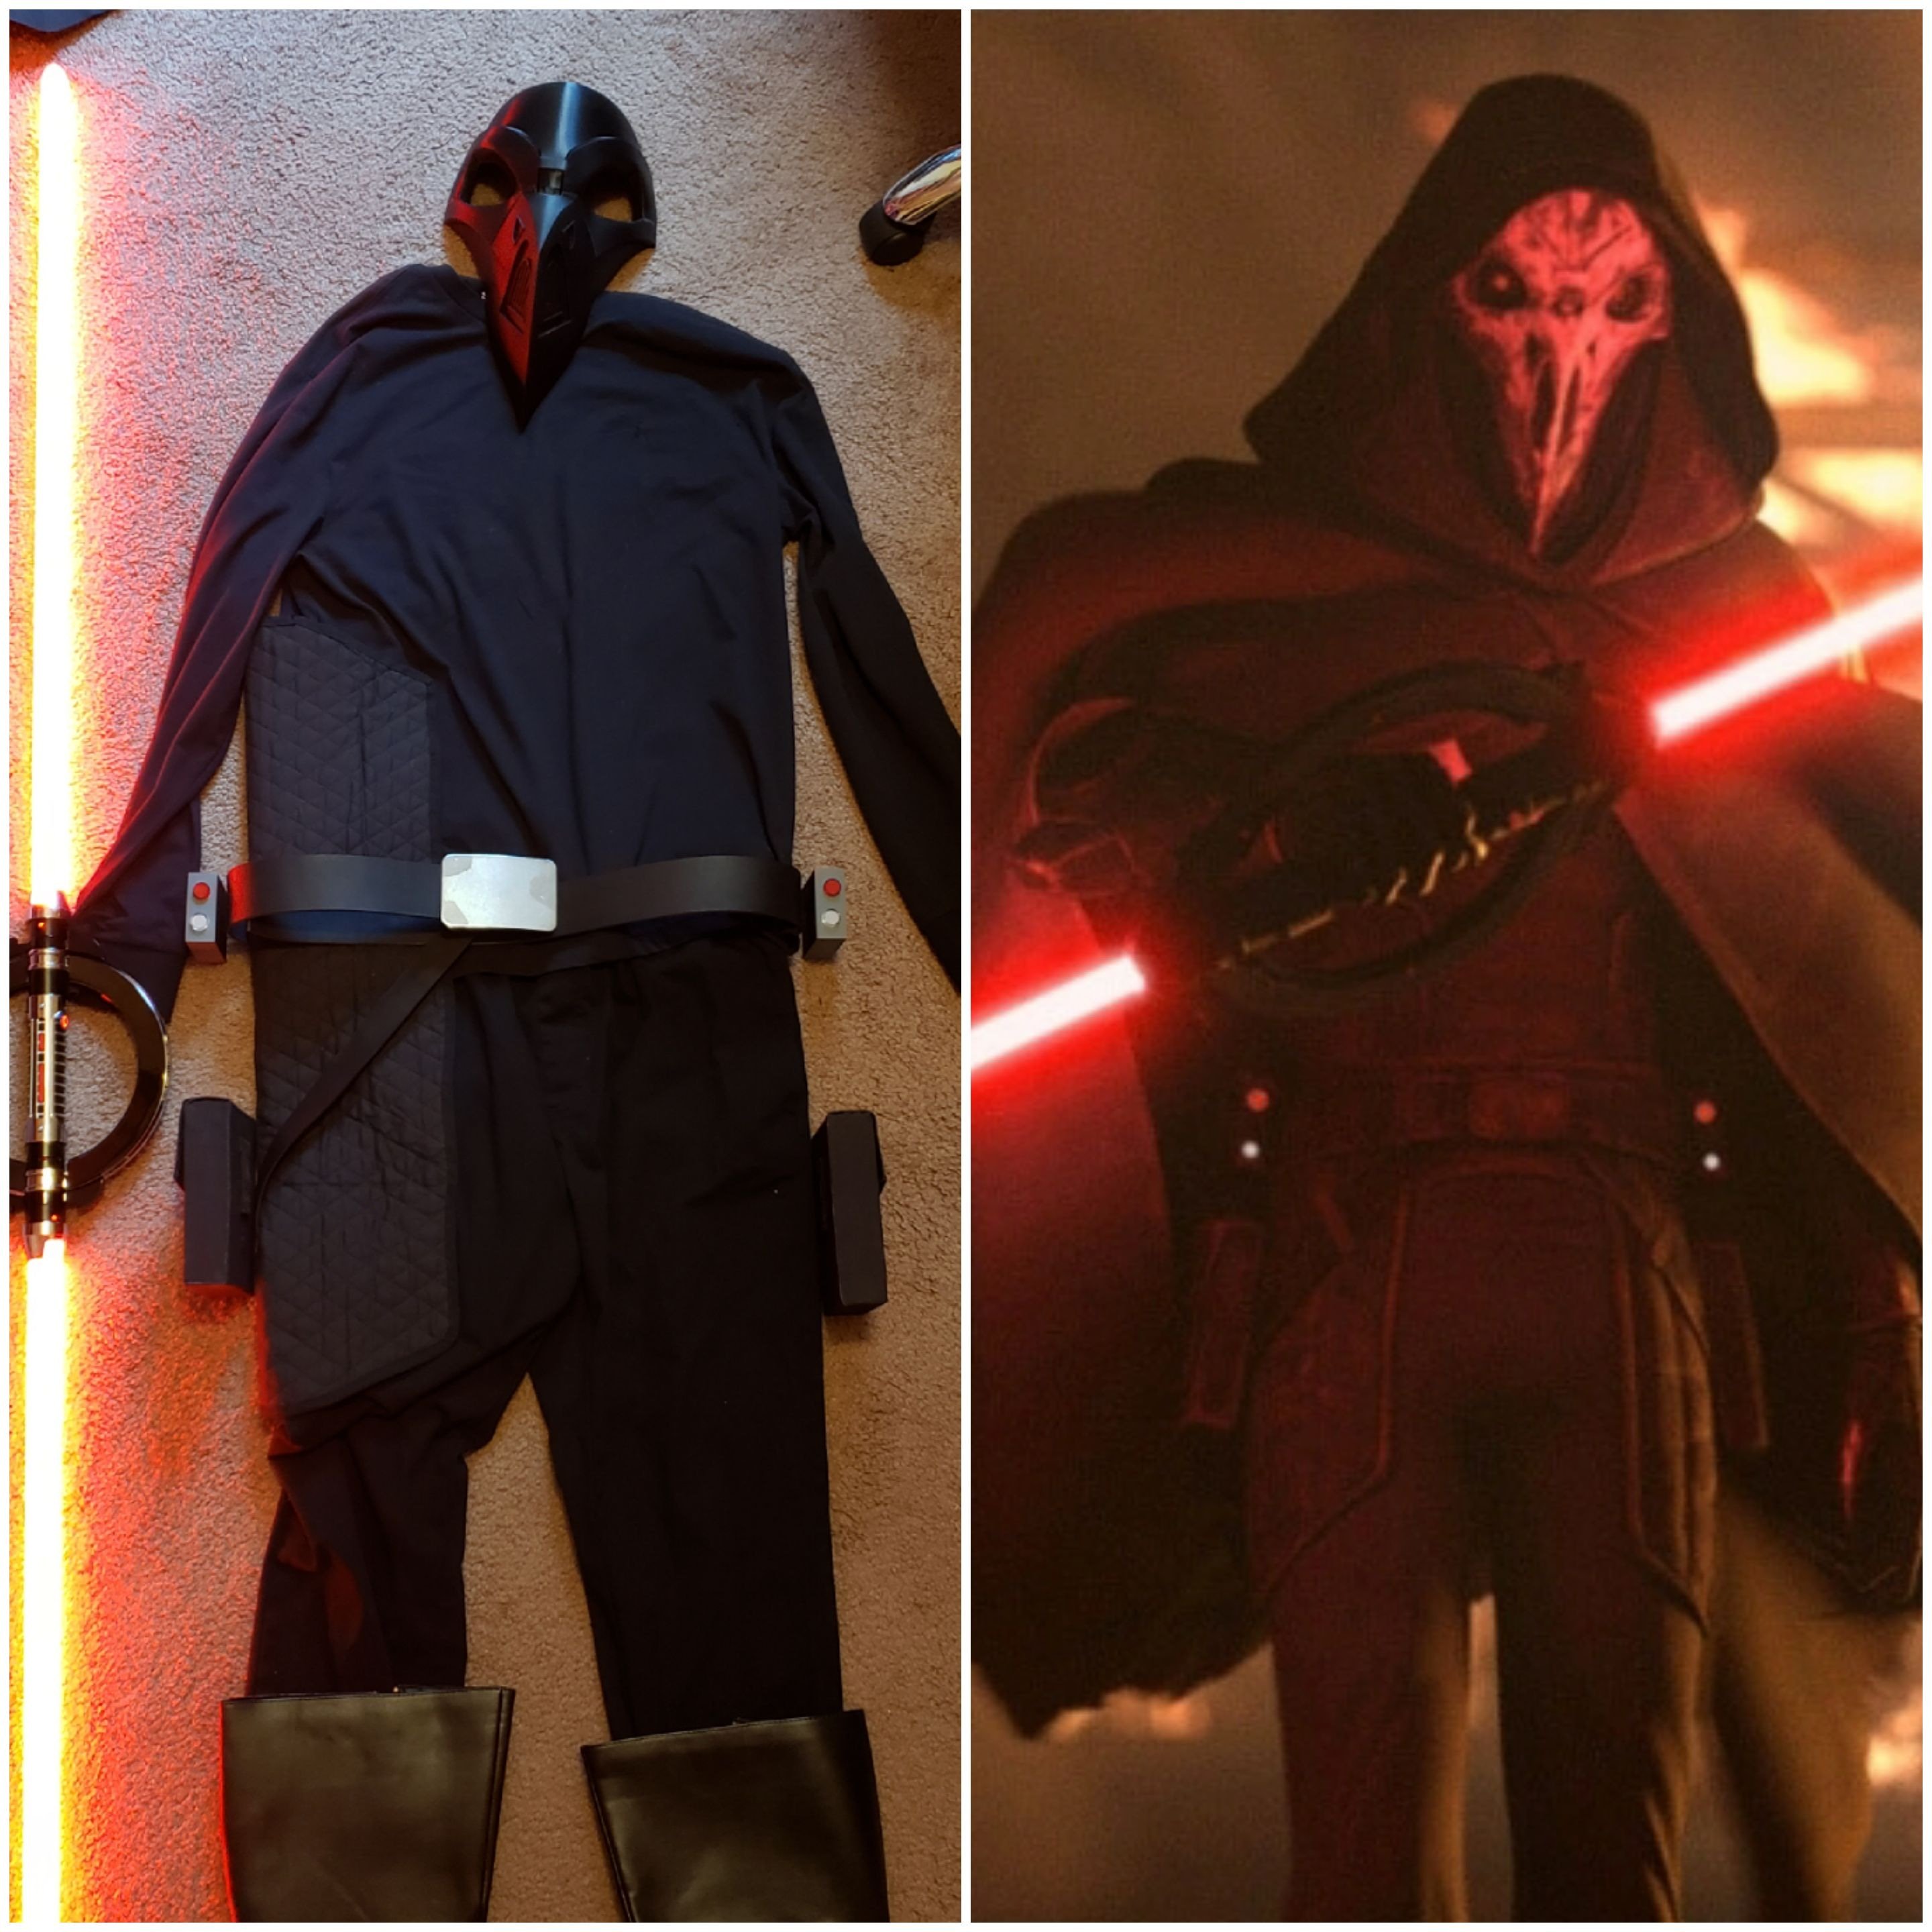
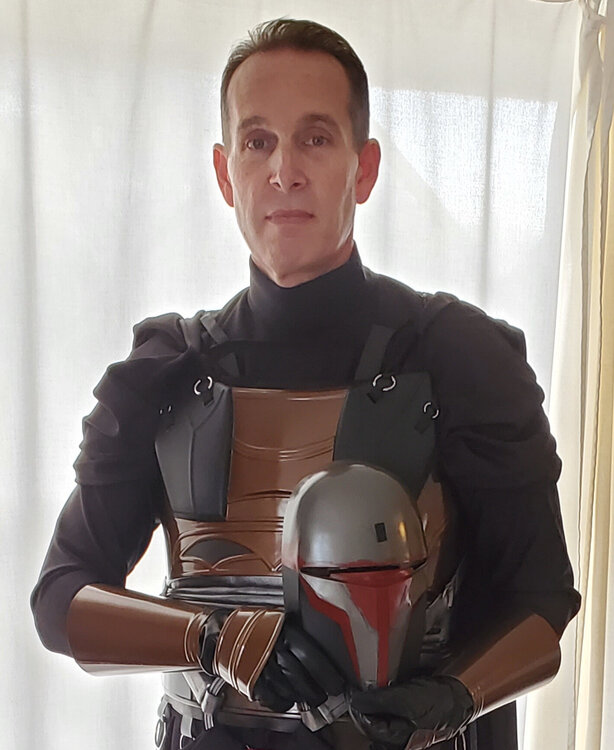
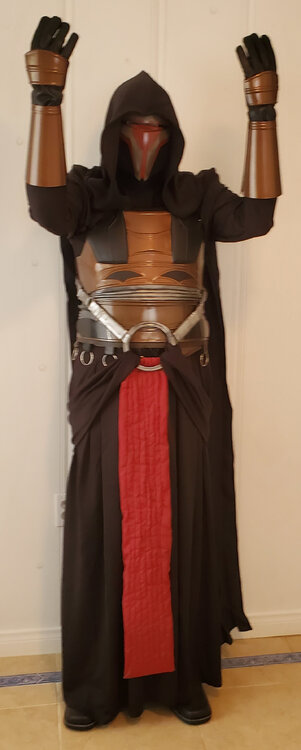
Hello, I am brand new at this but I have reviewed the forum and the costume requirements for some time now. I gathered all my costume pieces for Darth Revan and did a quick photo session to see if I need to make any changes. Please let me know if there is anything I need to do or if this is good to go so I can officially register with the 501st. Thank you in advance!


 1 point
 -
Here are the results for the last several costume request votes by LMOs for assignment to TFE: Darth Talon (Galaxy of Heroes) - pass Marrok - pass The Great Mothers - pass Morgan Elsbeth - pass Joorus C'Baoth - fail (not 501st eligible) Baylon Skoll - pass for 501st inclusion, still awaiting vote for TFE or SLD. Shin Hati - pass for 501st inclusion, still awaiting vote for TFE or SLD. This means that any future submissions for those that have passed will not need to go through another vote and will just need to be submitted for approval of the costume as a New to the Legion (NTTL). It is TFE policy to not start an official CRL of requirements until we have an approved costume as the intent is to get the costumer to build to the references with a WIP and guidance instead of building to text. Generally, CRLs have a habit of pigeon-holing people prior to a build. No matter how well you word a CRL, it will always be less accurate than the references, and it is my stance that we should build using the 100% accurate reference to get a realistic 90%+ accuracy first costume to use in the CRL. Strive for reference with realistic application. At some point, SLD and TFE will need to sit down and hash out what our designations and new character assignment details will be, as the definitions are becoming more and more hazy as releases come. Both Detachments will be working with LMOs over this, and I will keep you updated as to what that will mean/result in. Rest assured that the TFE team will do our absolute best to represent our Detachment and ensure that we are given equal stance in opportunity for new characters as your representatives.1 point
-
I would leave it to the group for now as we don't have assigned Det for them as of yet.1 point
-
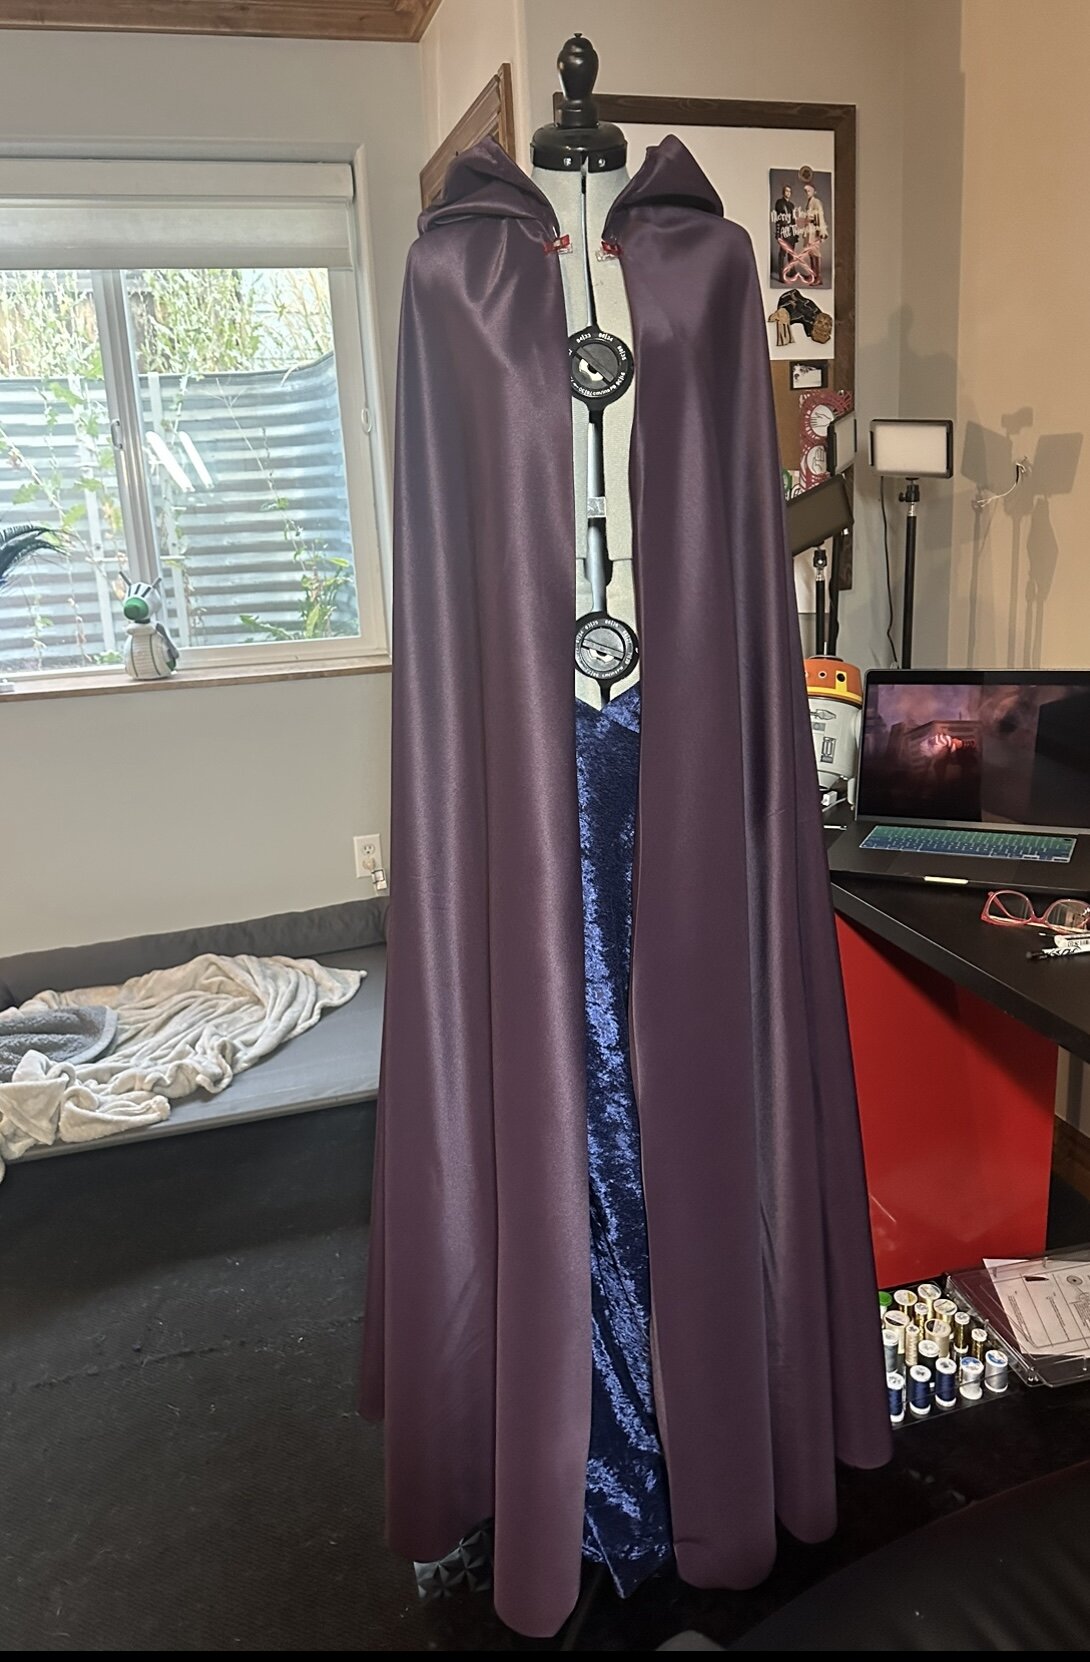
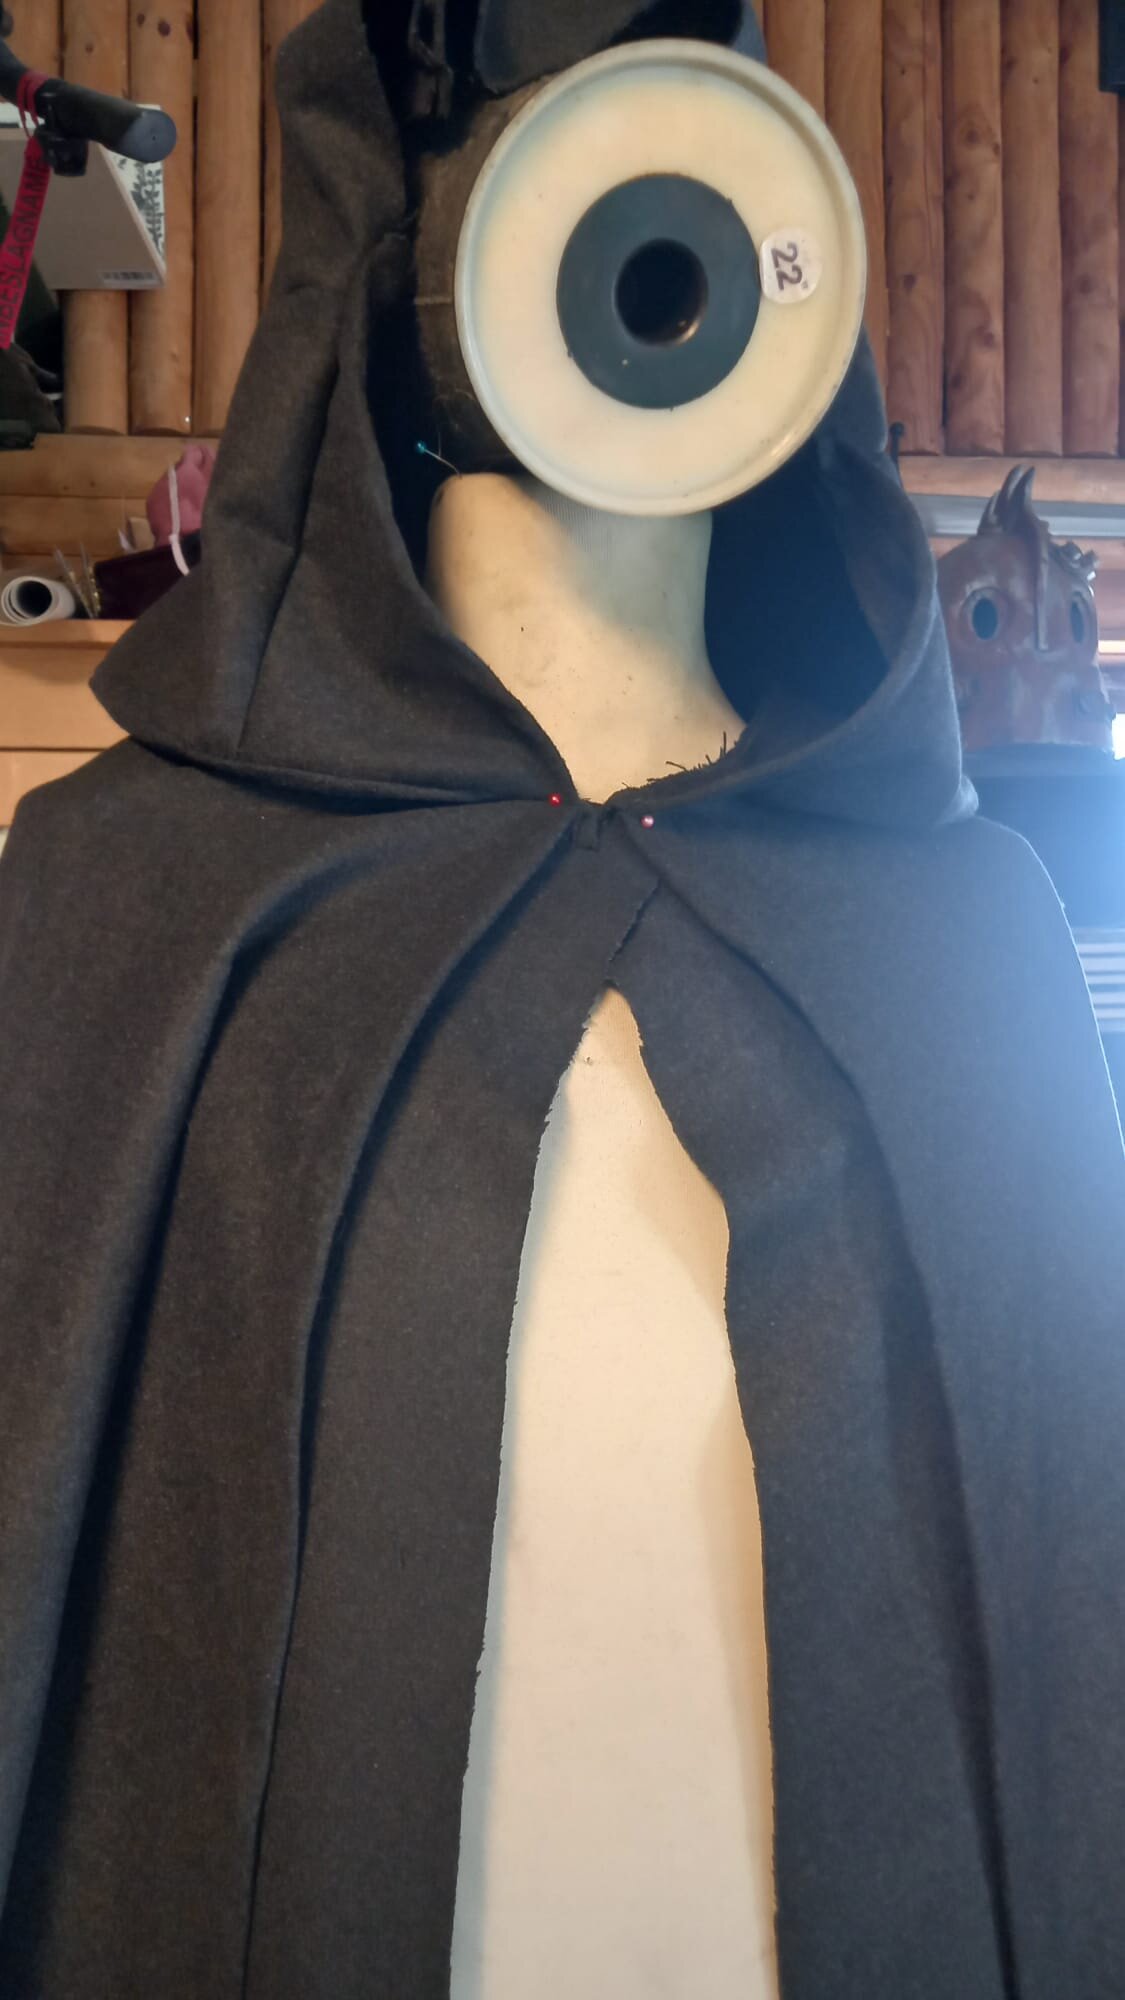
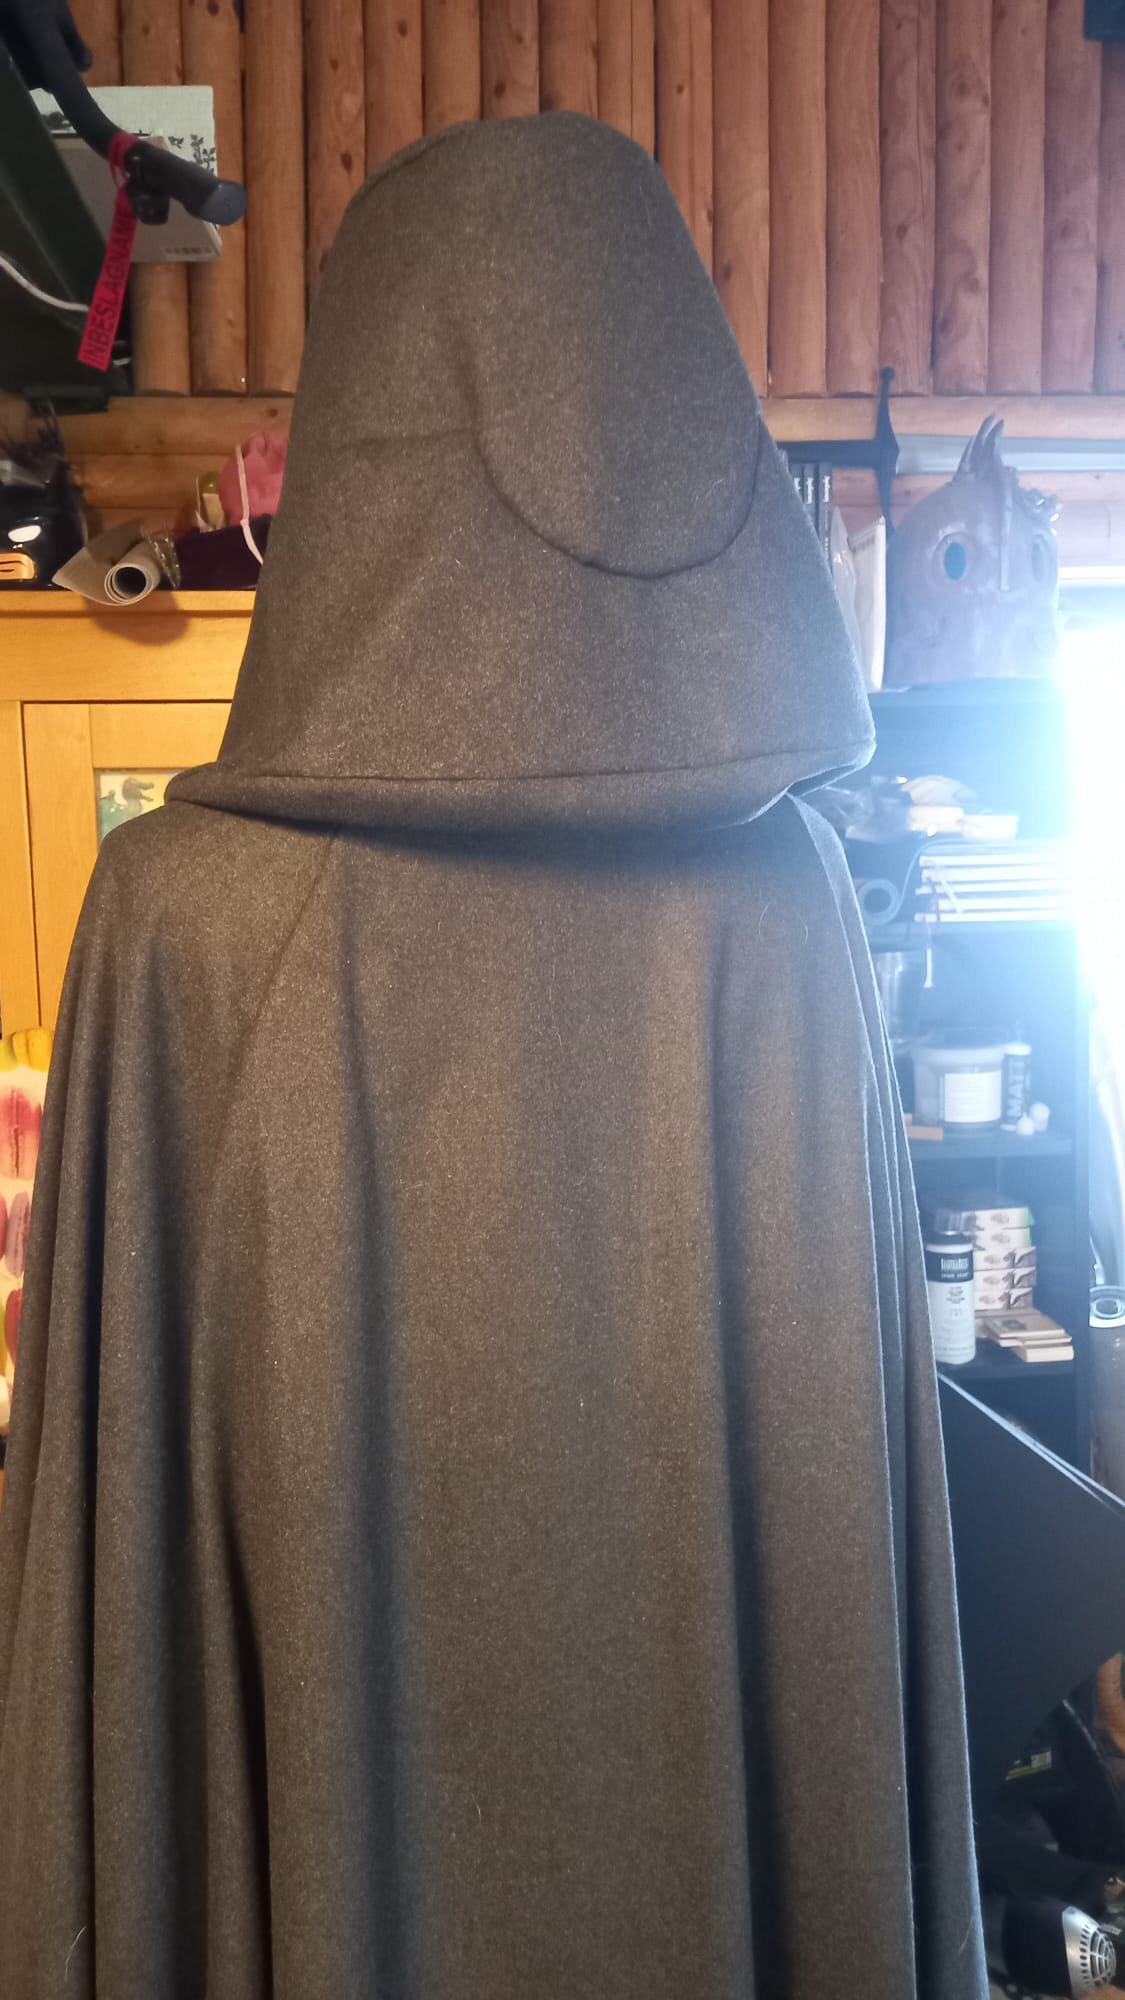
Progress so far on the cape

 1 point
 -
Hey! helping a friend work on her mara jade my GML claims that the shins need to match the CRL, do you have any source images with the shins shown above?1 point
-
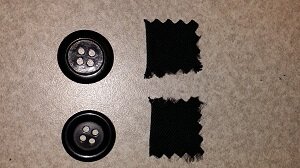
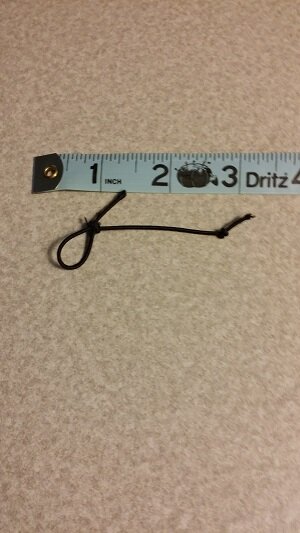
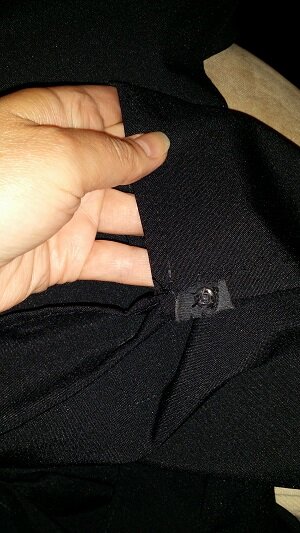
I ordered a Deluxe Darth Revan from My Wicked Armor. I modified my hood and capelet to tuck under the front armor plate and attach with Velcro. This same mod would work for magnets or other attachments. To check my measurement, I put on the chest and back armor and my cape. I put on the hood and capelet piece on and brought the fabric around the front of my front armor piece in place so I could identify where I would need to place the Velcro inside my armor. I have plenty of extra length, so I was able to use fabric clips to clip and hold the ends in place. I moved a bit as I would on a troop so the fabric wouldn't be too tight. I measured and noted where on my chest armor I could place small rectangles of Velcro inside where I would want to tuck and hold the top and bottom edges of the fabric in place. I inserted safety pins in the fabric to measure where I would attach the rectangles of Velcro onto the fabric. I didn't take photos of this, but since I didn't have help, I just stood in front of a mirror. I needed small fabric rectangles to place the Velcro onto the hood and capelet so I could easily remove the fabric to replace the Velcro if it wore out. I removed some wide belt loops from some cotton Dockers I had. These already had a seam in place to avoid fraying so this worked nice. I cut the soft part of the sew-on Velcro to match slightly smaller than the belt loops. I stitched the sew-on Velcro onto the loops. A bit sloppy by hand but they're holding. I made four, two for each side. I cut out the rough side of the Velcro roughly the same size for the upper part of the fabric. For the bottom part of the fabric, I placed slightly wider strips of the rough side of stick-on Velcro so I could have some flexibility if my weight changed, for fit, etc. I placed those inside my armor. To place the top part of the fabric, I placed a stick-on Velcro inside the armor where the top part of the capelet would wrap around in front and reach over the armor buckle, in and down inside to hold. I'll need to add a photo of that area. I didn't completely stitch the rectangles onto the fabric, but rather "tacked" them on into the seams, so I could loop my finger underneath to grab them and to make it easy to replace if I needed without too much puncturing of the fabric. I tacked them onto the fabric facing outward so they could attach inside the armor to the Velcro. The hood and capelet are laying with a side view here and the Velcro areas will follow. The upper and lower Velcro on the fabric: You can see here that I can reach behind the Velcro with my finger: Might be hard to see here, but I put the hood onto a pillow as if facing it being worn and wrapped the edges of the capelet how they go to show more of the Velcro. I added an extra attachment if I'm at an event with a lot of movement, a button and elastic loop to hold the hood in place as I move my head. I used small buttons on each side and cut out some cotton fabric with pinking shears to house them. I used round cord elastic to make the loop. I measured a small length of the loop for each side. I attached a button inside the Velcro, sewing it onto some vinyl reinforced with some cotton fabric and stitching in place into the existing housing. I stitched the loop into the seam of the hood. I tucked some of the extra upper fabric over and tacked it in place. You'll see I added a snap but found it wasn't necessary when using the loop. When putting on my hood and capelet, I wear a ball cap and let my hood drape and hold in place on the cap so I can see. I leave my armor belt unbuckled so I can reach inside the armor to find the other half of the Velcro. After I get the capelet secured, I then secure my armor belt in place. I leave my gloves and mask for last. Wearing the cap, I can simply bend over at the waist, reach in and remove my cap, put on my mask and attach the hood to the mask and then straighten up. Everything stays in place.
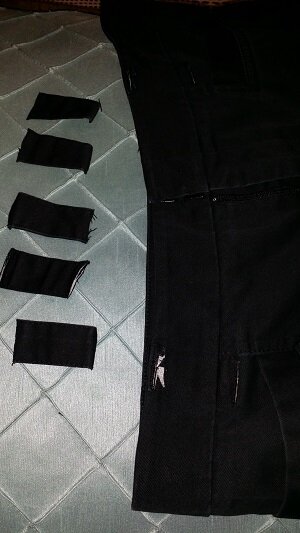
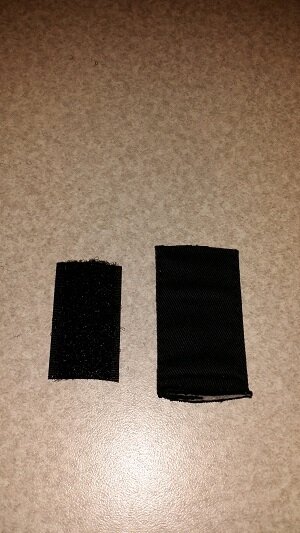

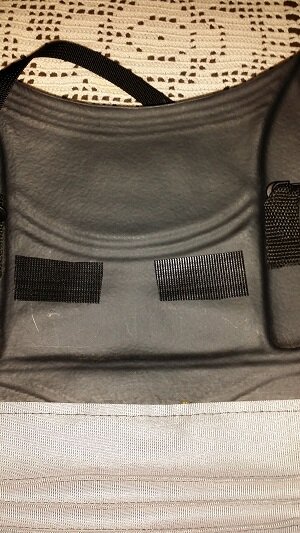

 1 point
 -
Ive completed my second model of rhe main vest structure in suedette, so worjed out construction method and sewing method, and been working on the painting of the armour pieces. Looking to start on the undershirt this week, finer detsil on the gsuntlets as some of the printed buttons are not correct on my print. https://www.facebook.com/profile.php?id=1000921594932641 point
-
This is good to know for future reference. I’m sure we’ll have more swtor acolytes wanting to submit in the future1 point
-
Hello all. Would this neckseal be approvable?
 1 point
 -
Hi Been waiting for approval for a while. Im based in UK and have been resesrching this since it was released at SWCE23. First off, I have had confirmation that Baylan costume is all suede. Ive started making mock ups to test stitching patterns, my main plan is to make a jacket from suedette to get the sewing right, and eventually commit to real suede. I have the armour pieces printed, prepped sanded and painted with metallic, and ive found a matt dark grey spray paint in UK from Montana called Wolf Grey. Il drop in pics here of my progress1 point
-
The sabers look awesome1 point
-
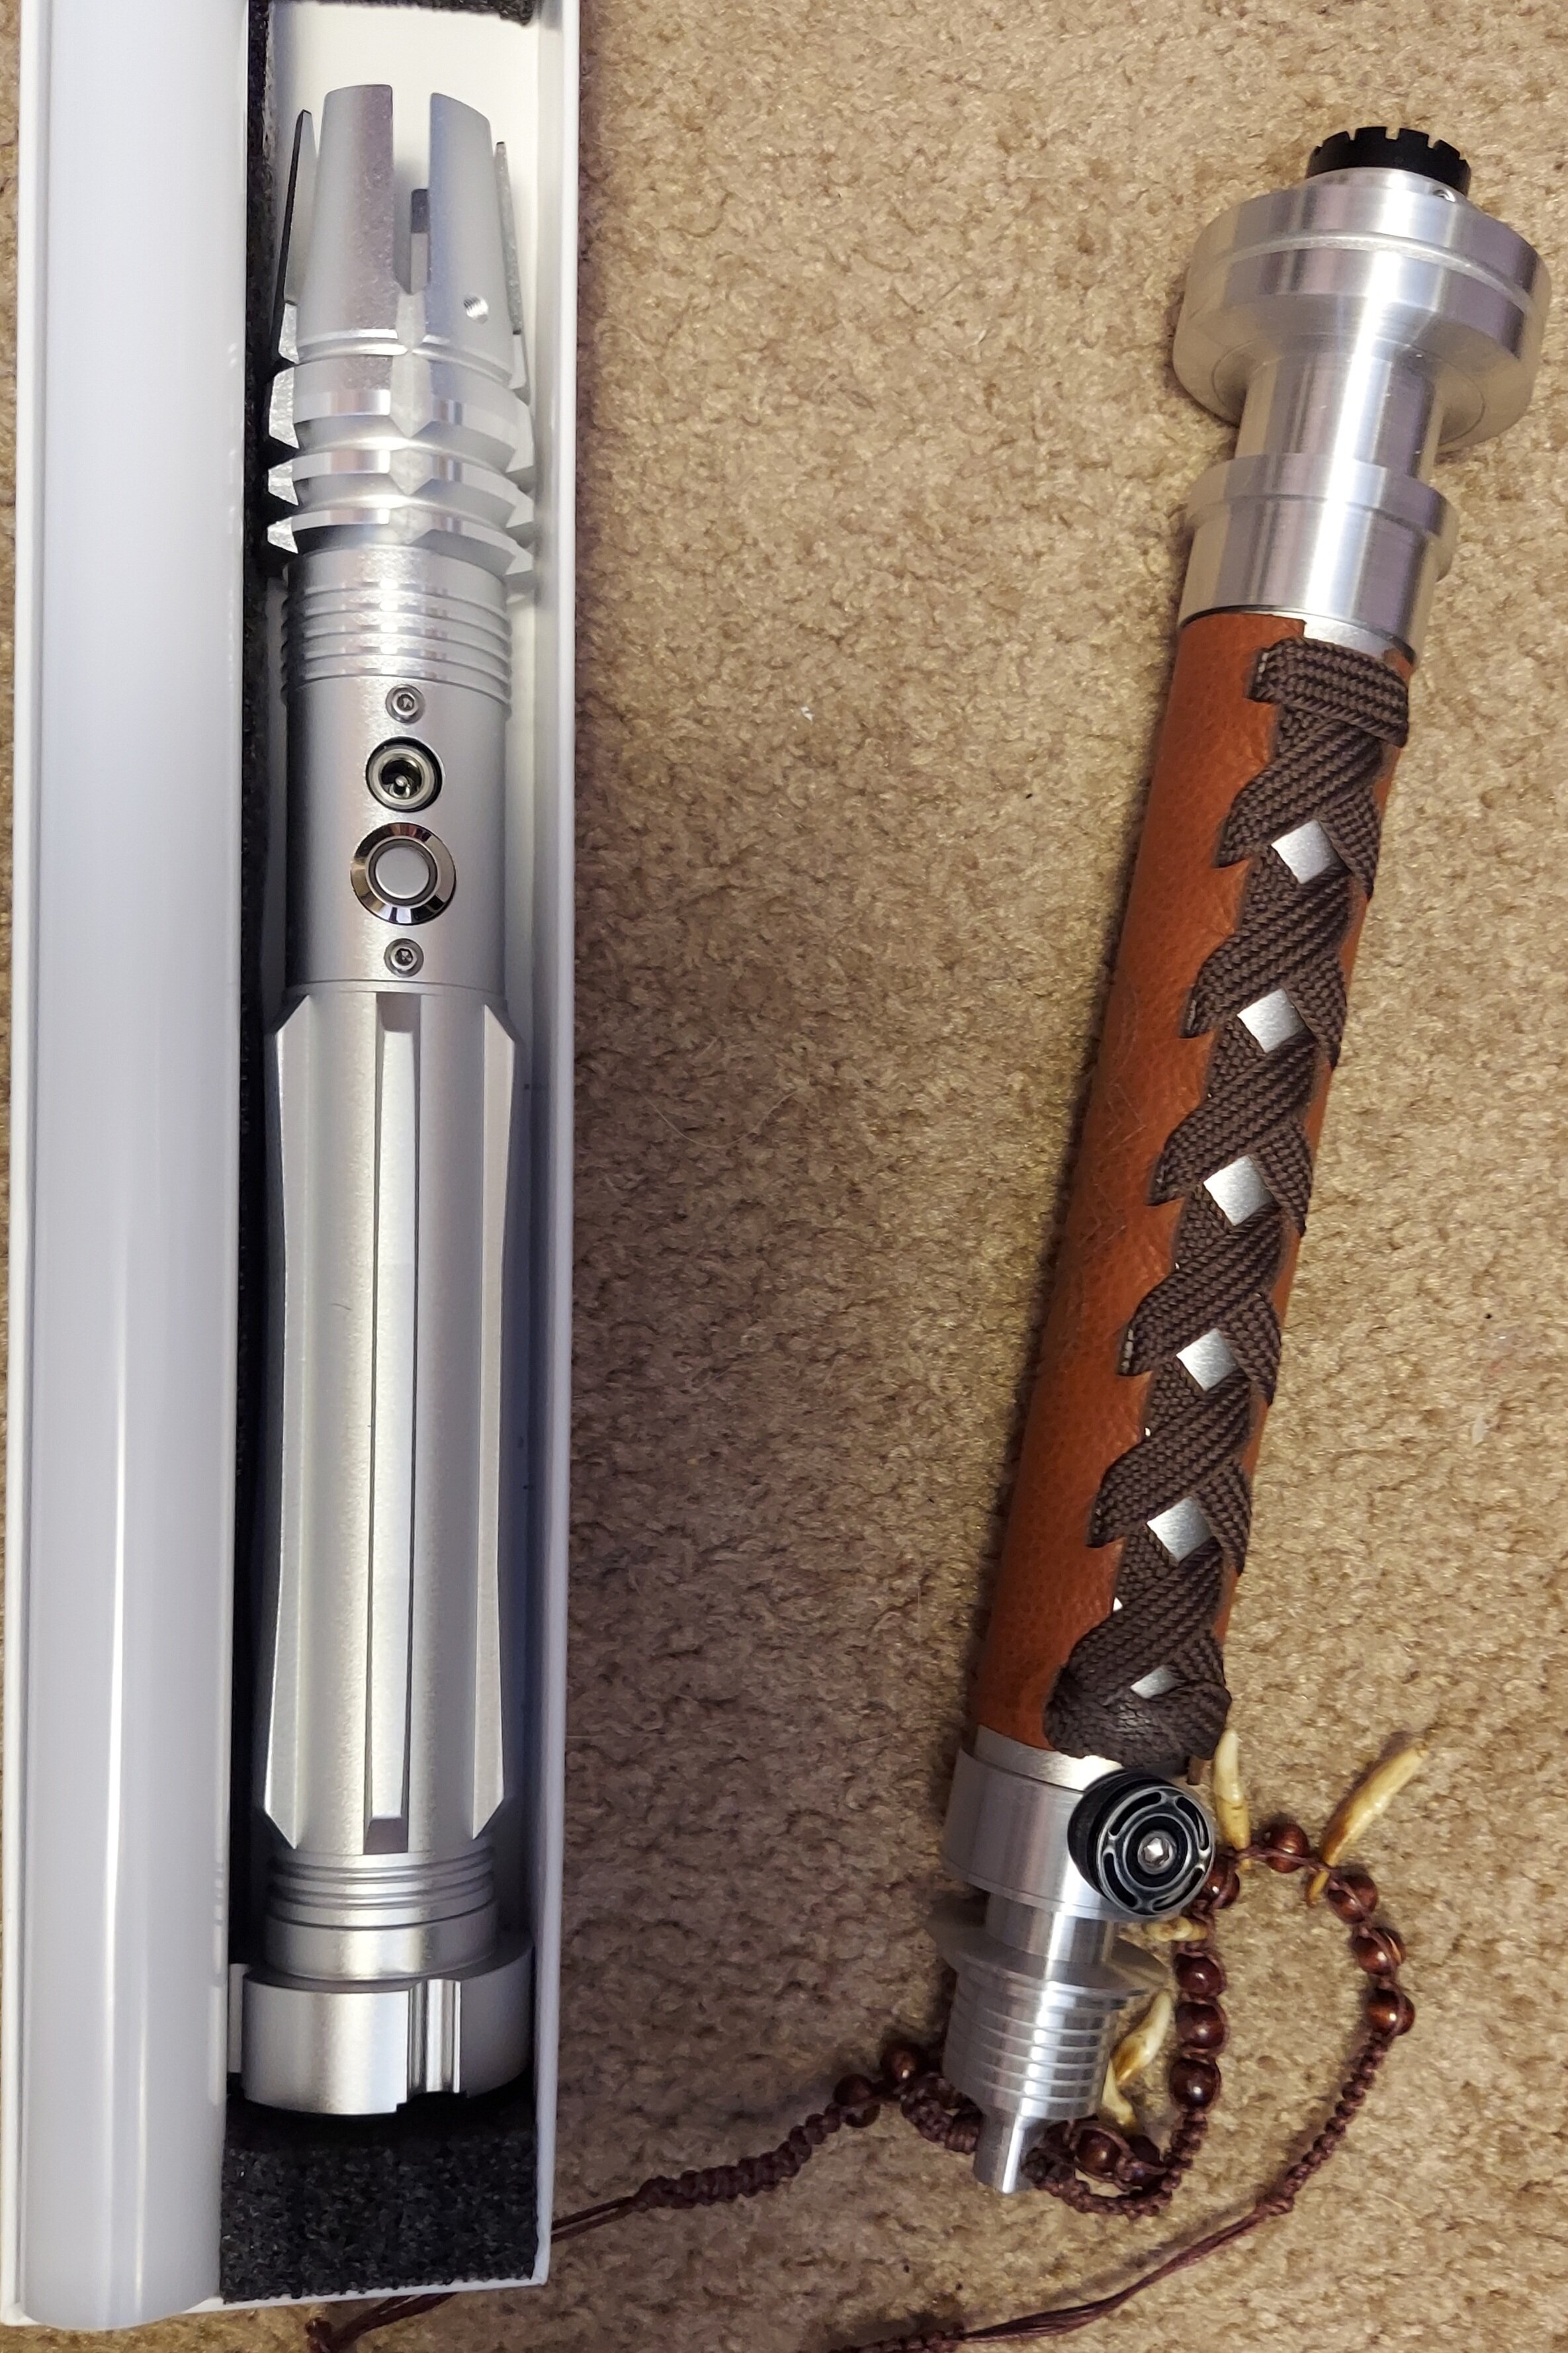
I have Asharad Hett Saber and his 2nd (father's) that I will customize.
 1 point
 -
As far as I'm tracking the hilt with the spikes is not approved at this point...I prefer the Savior hills anyway as they simply look more elegant. Sent from my SM-G991U using Tapatalk1 point
-
I've become approved with some help from my local garrison, but i would love your opinion.1 point
-
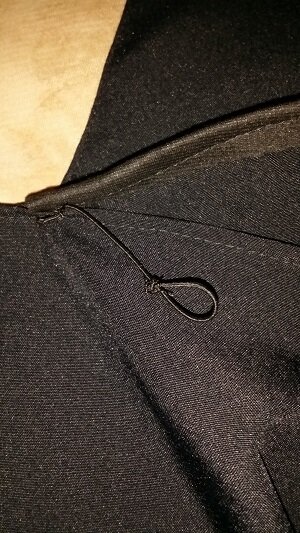
I posted an earlier thread regarding my modification to how the capelet straps attach to the front armor of my Darth Revan. I described changing the attachment so the capelet straps reach up out of the armor to feed through D rings attached to the capelet. This made it a lot easier to put on the capelet without help. I wanted to share additional images but was unable to add them in a reply to this earlier post: I tried this out on a troop and it was much easier. One could use snaps to hold the straps after they feed through the D rings, but I wanted the option of adjusting the height of the capelet when needed in case of wet pavement, grass, etc. or if I change boots or change armor fit. I wanted to add a stopper to prevent the capelet from loosening and lowering, but would still allow for me to easily raise the capelet. I put on the armor and attached the capelet. With help, I measured how much strap length was fed through. I then checked that measurement with the armor and capelet off to determine my stitch point for the stopper. Like in this belt example, I wanted to feed the straps so they were hidden and so the stoppers were against my body instead of facing out. I chose mushroom domed buttons that were small enough to fit through the D rings on the first feed-through, but would act as a stopper after the strap was fed through in place. I will black the chrome finish out on these: When I put the armor on, I make sure the straps are hanging outside of the front armor. I can reach up and grab the D rings to feed the straps. After feeding the straps through, I pull them forward to be hidden under the hood tuck. The mushroom buttons prevent the straps from loosening. I can also periodically check my fit without a mirror by feeling how close the buttons are to the D rings. I can also make quick adjustments to raise the capelet when needed without a mirror by measuring a finger width or two by feel.1 point
-
This is not a Detachment system, but a Legion-wide system.1 point
-
Late to it, but CONGRATS!1 point
-
I decided to get the Crowprops Revan boots made. As I normally have all sorts of issues with boots. Figured ones fitted to me, will solve that. I also normally have to use inserts and gel inserts in my shoes. I made mention of that to sales and I was pleasantly surprised they also included inserts with the order. I felt that was a neat touch. I have only tried them on and took a some practice walks around the house with them. Waiting for the rest of the costume and looking forward to going out with it.1 point
-
Just as way of an update, I'm working on uploading the reference pictures and will be taking submission photos of the costume soon. I want to make a couple of adjustments for accuracy as well as add a couple of pieces to the gauntlets(elbow guards), also for accuracy, before taking the pictures.1 point
-
Thanks! I had to scratch make nearly everything myself, including the belts and under clothing. The gloves are simple butler style gloves that I made bone templates for and then hand painted with fabric paint. At some point I'm going to pattern and sew some new gloves with fingertip extensions to better match the character, but making gloves is harder than I anticipated. I'm happy to walk though or show detailed photos of the tunic or any other pieces if it helps.1 point
-
The only one I know who might have one is Nyna Nythung on FB, or @Marina_D.-Hubscherhere on the forums. She is the CRL model for Talzin.1 point
-
to whom it may concern, regarding future build of any who wish to build this version of darth bane i highly recommend investing in a good dancers belt. the under layer of this is costume is a skin tight suit, that is covered by the belt loincloth. while not required i highly advise it. thank you1 point
-
Got it, thanks. Things got a little crazy at the end of the year but I should be ready for photos. Alterations are done and I cut the padding back.1 point
-
Costume is finished just need to take approval photos. Sent from my iPhone using Tapatalk1 point
-
Took this pic yesterday. The belt boxes need to be sanded and painted, but I finished the lights yesterday. This is everything I have up to this point. No laughing as its still really early! That's the version 1 mask from Galactic Armory. The correct version is finishing printing today. Not pictured is what I guess I will call the outer cloak that I've got from a previous kit. It also would look better on a person and not laid flat.
 1 point
 -
I have test fabric coming in tomorrow, and I just got the 3d print models I commissioned The-Heaven-Studio for! This is a complete 1:1 digital replica of the costume armor seen at Celebration recreated with over 250+ photos and references used to sculpt it. Everything is accurate according to photos with the exception of the back plate, the top is accurate but below the box, it's imaginative as we have not seen that yet.1 point
-
Hi everyone! I'm prospective member of Ukraine Outpost and I'm going to do Mother Talzin costume for approve me as 501st member. So I decided to create this topic to show my work step by step. There is no clear CRL yet for this character, so I'll better to show all process and correct possible mistakes during processing, it's much easier than remaking of finished costume. Also I hope that my research will be usefull to next people who will do this character. So firstly what exactly parts does it consist of. I analyzed Talzin's stuff and see there the next items: 1) Top with long sleeves. Red with pattern sleeves decorated with reddish brown stripe, other part is plain red. 2) Leggings. Red fabric with the main pattern. 3) Neck piece. It's rather collar of the top, but as my sewing experience shows, it's much easier to do it as a separate piece. Plain red, has thick bubbled ruffles. 4) Bodice. Reddish brown as sleeves decoration and the same matherial. V-shape neckline to the collarbone. I was thinking a lot about quantity of the stripes. There are only 6 visible, but seam lines on the bust part points that there are another pair covered with skirt. 5) Shoulder pieces. The same patterned fabric as on sleeves and leggings. The length of single piece is easy to determine according to arm length. It should be from shoulder to wrist. 6) Skirt. Made of red matherial similar to the backing color of sleeves/leggings/shoulders but with large dark red pattern. Underlayed with some tight matherial to keep shape. Consist of three pieces. Side pieces are 1/2 wide of the middle back piece on the hem line. The length could be determined according to leg length. In the original it's about 2/3 of hip to floor. 7) Criss-cross scarf (tabards?). Made of the same fabric as sleeves/leggings/shoulders. The left piece cross over the right one both at front and back. 8 ) Pleated sash with belt and decorative stripes. The sash itself fitted to body shape. It's made of plain red matherial and has 4 pleats over waist line and 3 under waist line. Brown belt is made of leather-like matherial few tone lighter that bodice and sleeves decorations. Two decorative stripes on the front (floor long, the same matherial as sleeves/leggings) and two short on the back (the same color and matherial as belt) 9) Back "wings" 10) Headpiece 11) Boots 12) Makeup About the fabrics. I did pattern based on the screenshots and printed it on a fabrics (polyester for most pieces and matte spandex for leggings). I also added weathered texture which also visible on the original fabric. Skirt pattern is in progress yet, but I will print it also on polyester. For the bodice I purghased reddish brown faux leather. And here are the fabrics itself. It's both looks allmost identical, spandex just a bit softer. (I need shoot it outdoor in daylight, indoor light "eats" the colors) And the bodice pattern unassembled/assembled on a dressform. About the back shape - I did it repeating the "wings" piece. That's I have at the moment. I will add new materials as I work on the costume. PS: my English is far from ideal, but I keep practice and I'll be really appreciated if you'll notice me about possible mistakes. PPS: and thanks to @romero4444 from this thread. He collected really great references base.1 point


.thumb.jpg.0d1684095db527b839cf5a8a14c59585.jpg)