-
Announcement
Welcome to the forums!
If you are a newly-approved member, make sure you check out the New Member Checklist!
If you are a Detachment member and can't see the member-only area, post here for access.
-DV
Leaderboard


.thumb.jpg.6767538d6131650e3b411b09ff9e4989.jpg)
Popular Content
Showing content with the highest reputation since 04/24/2023 in all areas
-
Just a quick update on what's going on with the detachment stuff since it's been a quiet period (not always a bad thing!). 1. We're actively designing merch for a racing shirt, patch, and coin themed for KOTOR 20th based on votes. These will come in the next few months. It is slow due to lack of artists available and, well, life. 2. We're working on 3 New to the Legion CRLs/costumes currently that we're hoping to be released before the end of the term in Feb after updates to the costumes are finished. 3. We were told by LMOs that we had to wait until the end of the season of Ahsoka before submitting requests for assignment of the costumes. But, after the short, "please don't spoil the episode for us" request time, we're submitting for Shin, Baylan, Morgan, Marrok, and all 3 Great Mothers to be assigned to TFE. 4. We're still looking for artists and a new Programs Officer if you're interested/able to assist the Detachment! If you have any other requests or ideas, please feel free to comment or message me!5 points
-
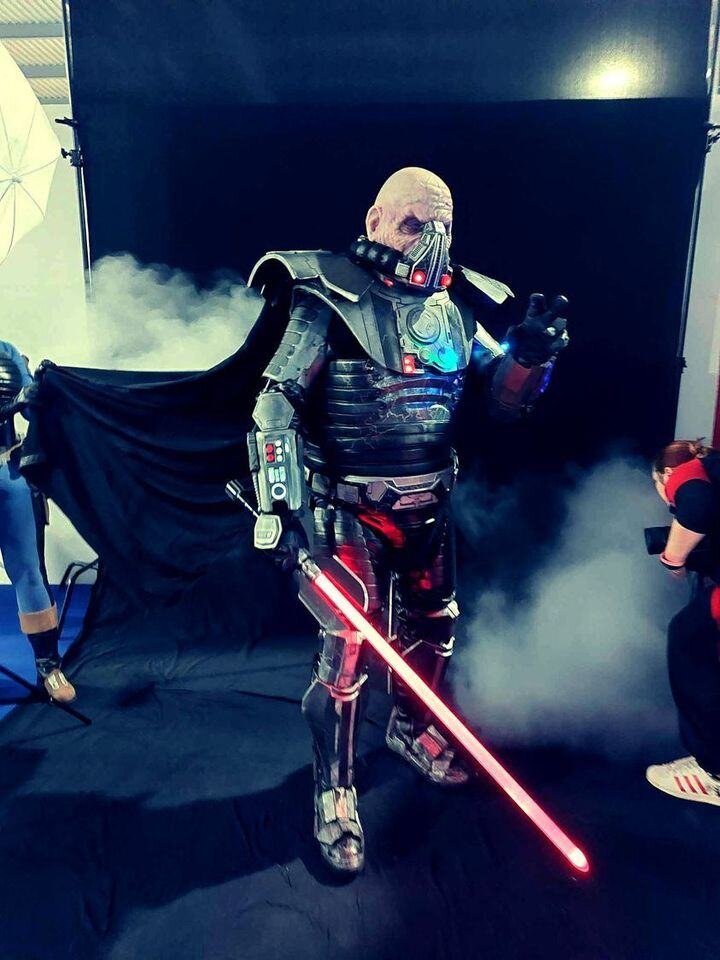
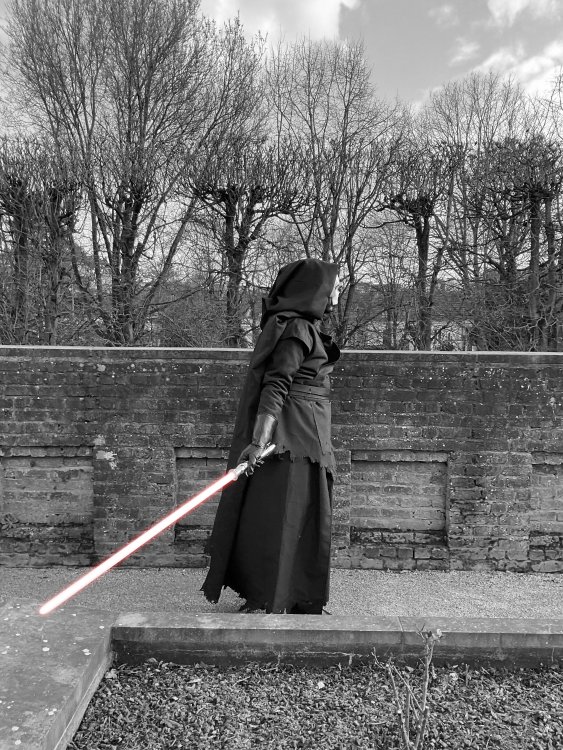
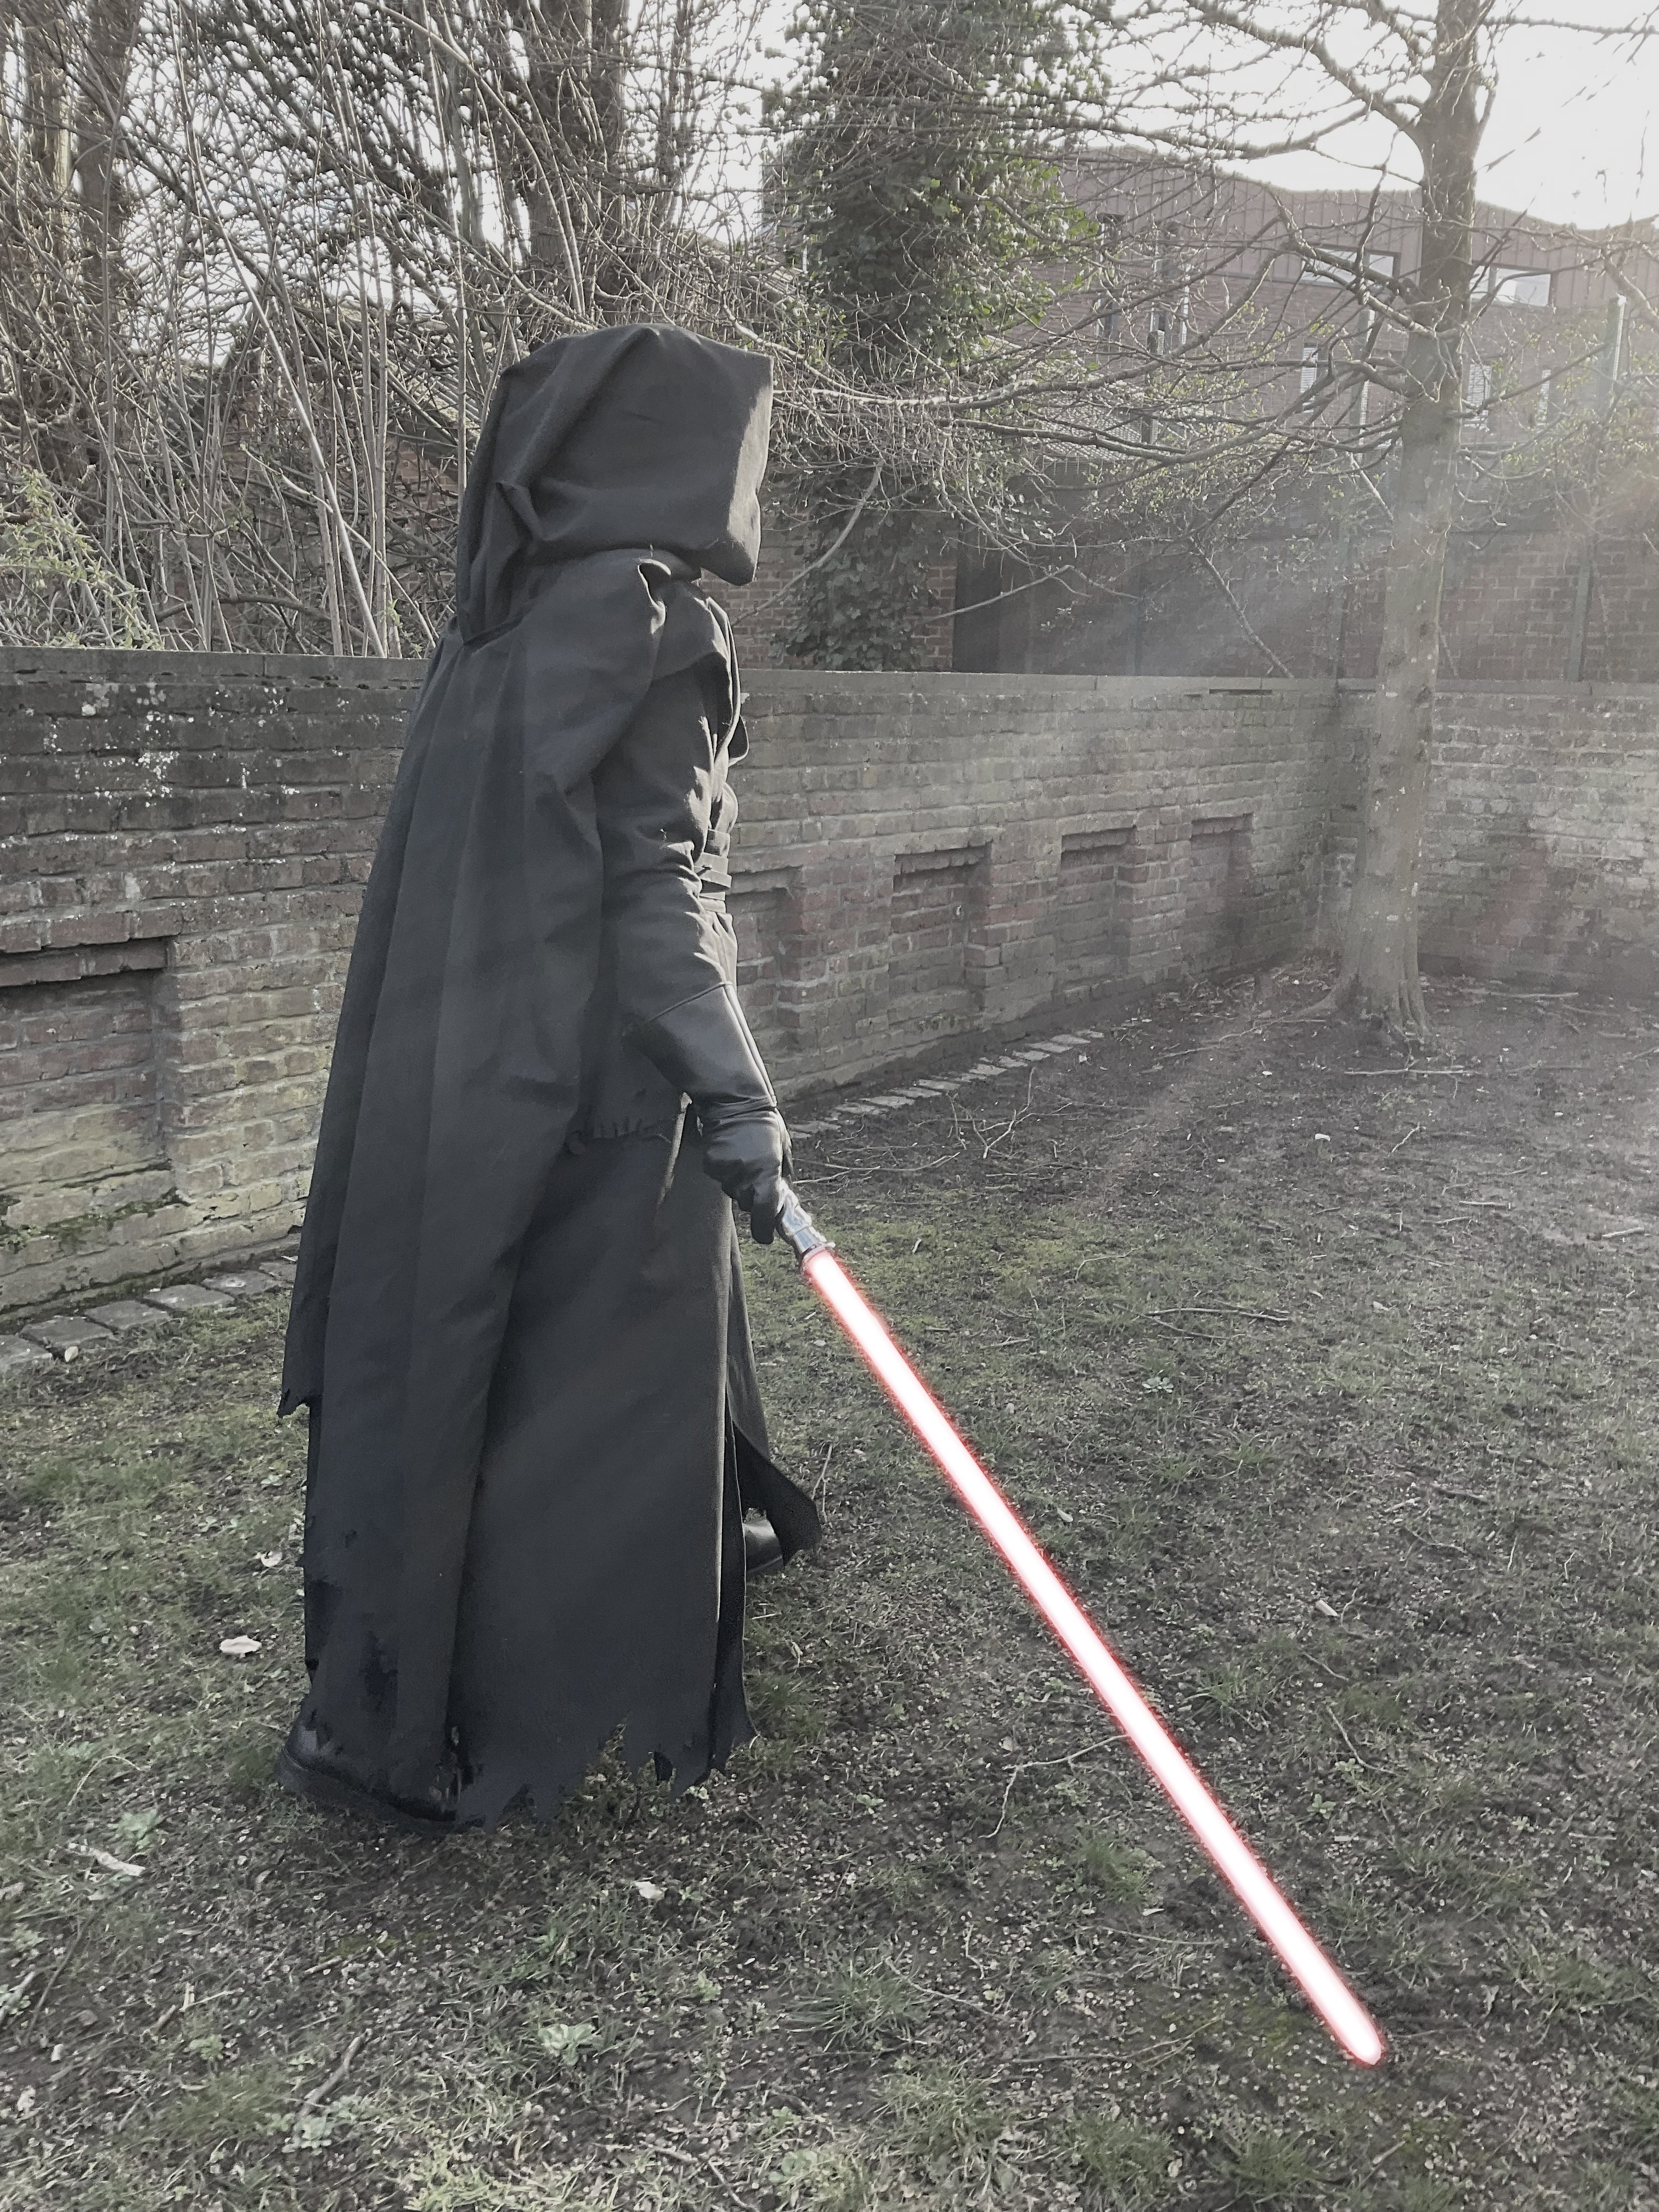
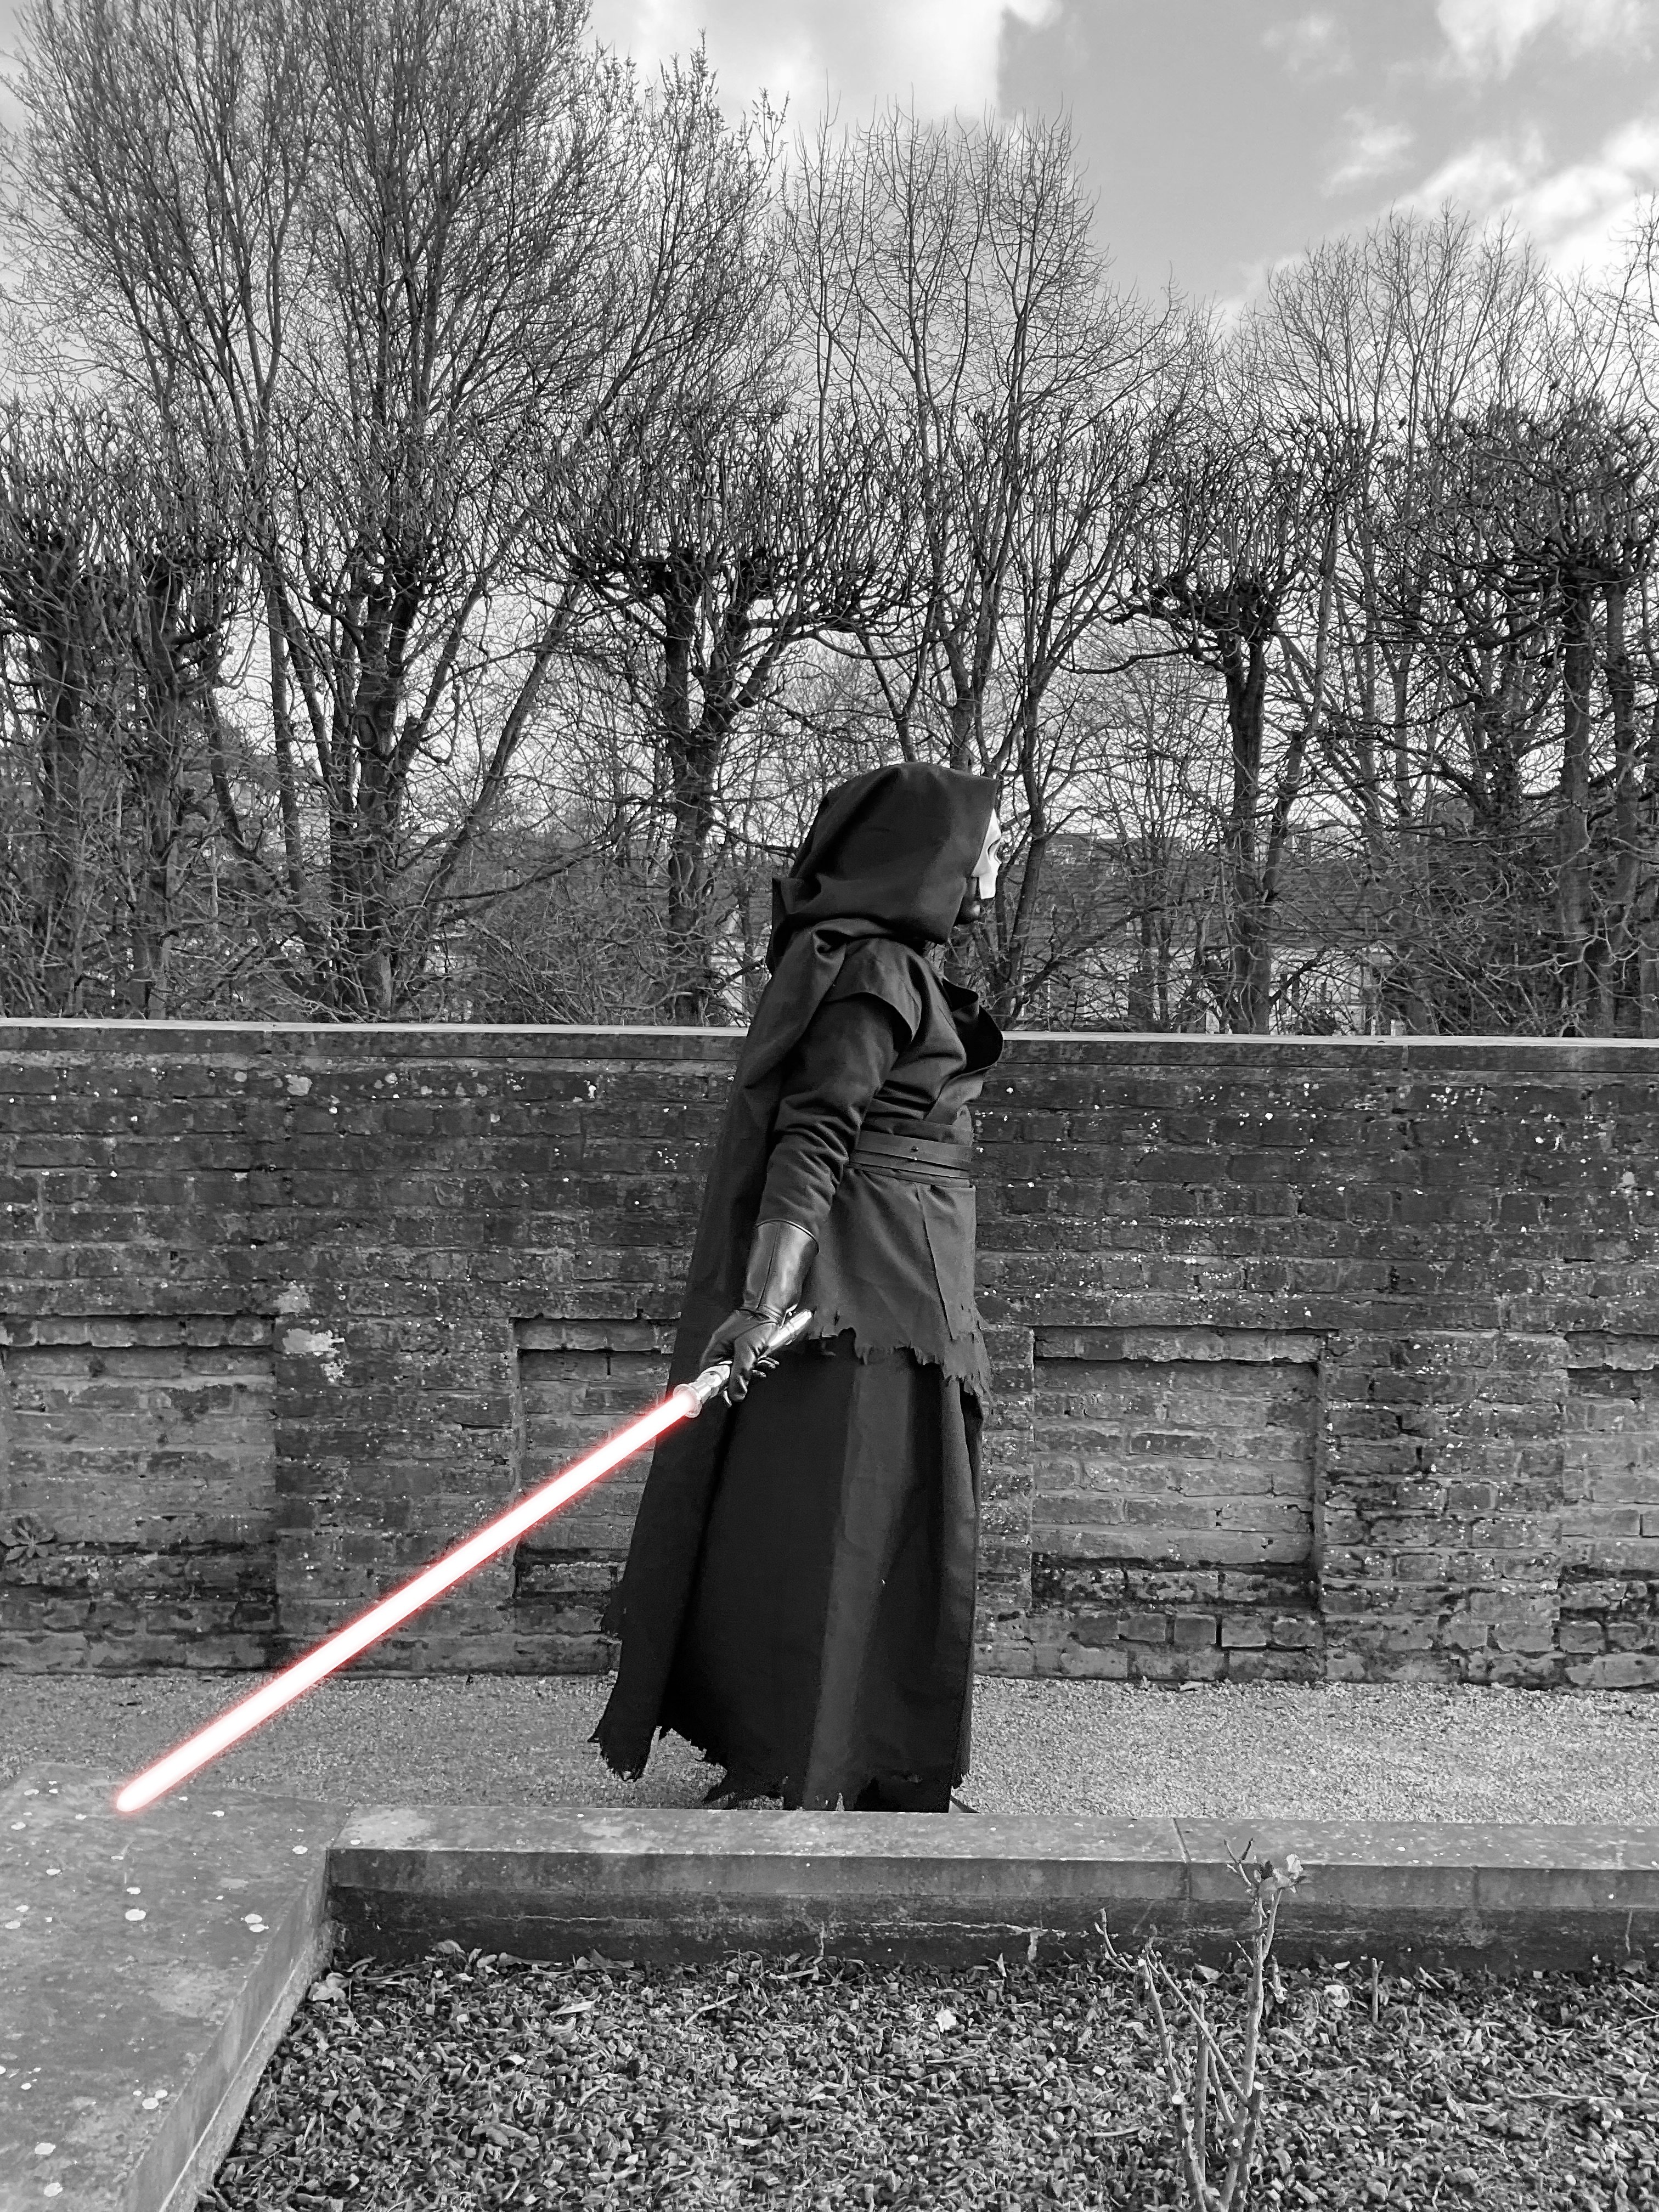
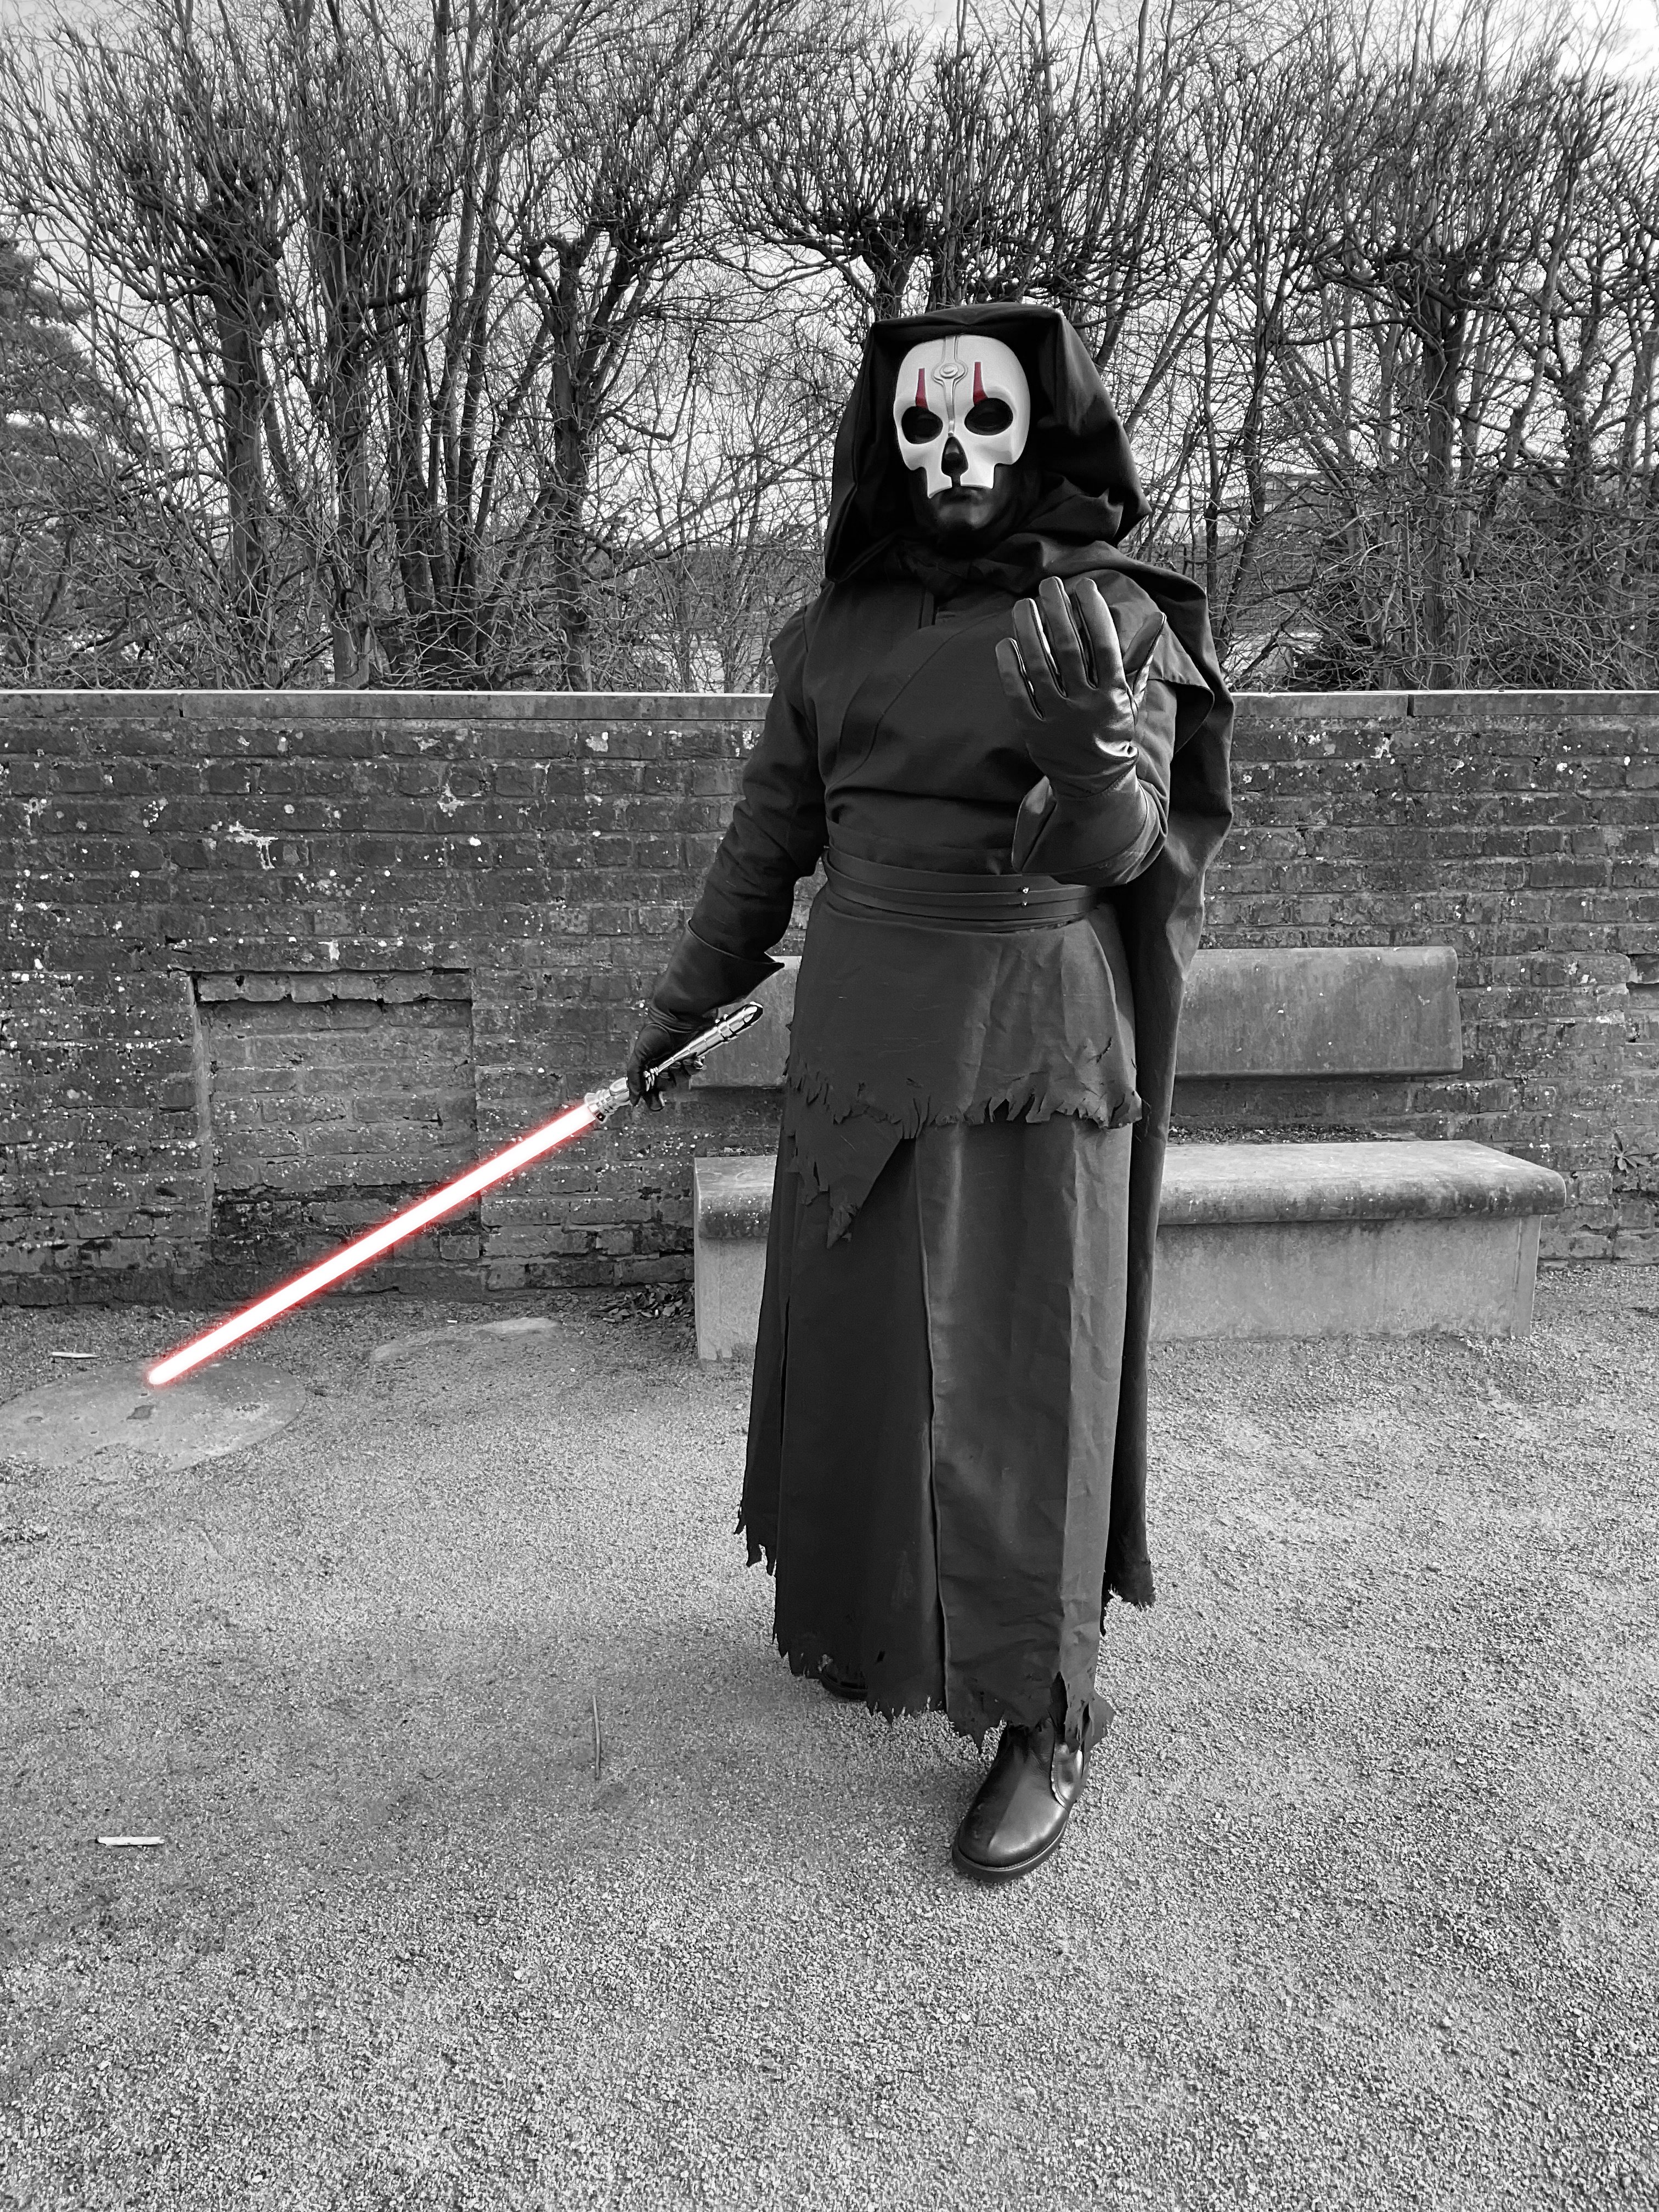
Hi folks, I just wanted to share some of the pics I took during my shooting at the Georges Henri park in Brussels

 3 points
 -
Korbanth has a Savage hilt for sale: https://korbanth.com/empty-double-sided-staff-the-oppressor3 points
-
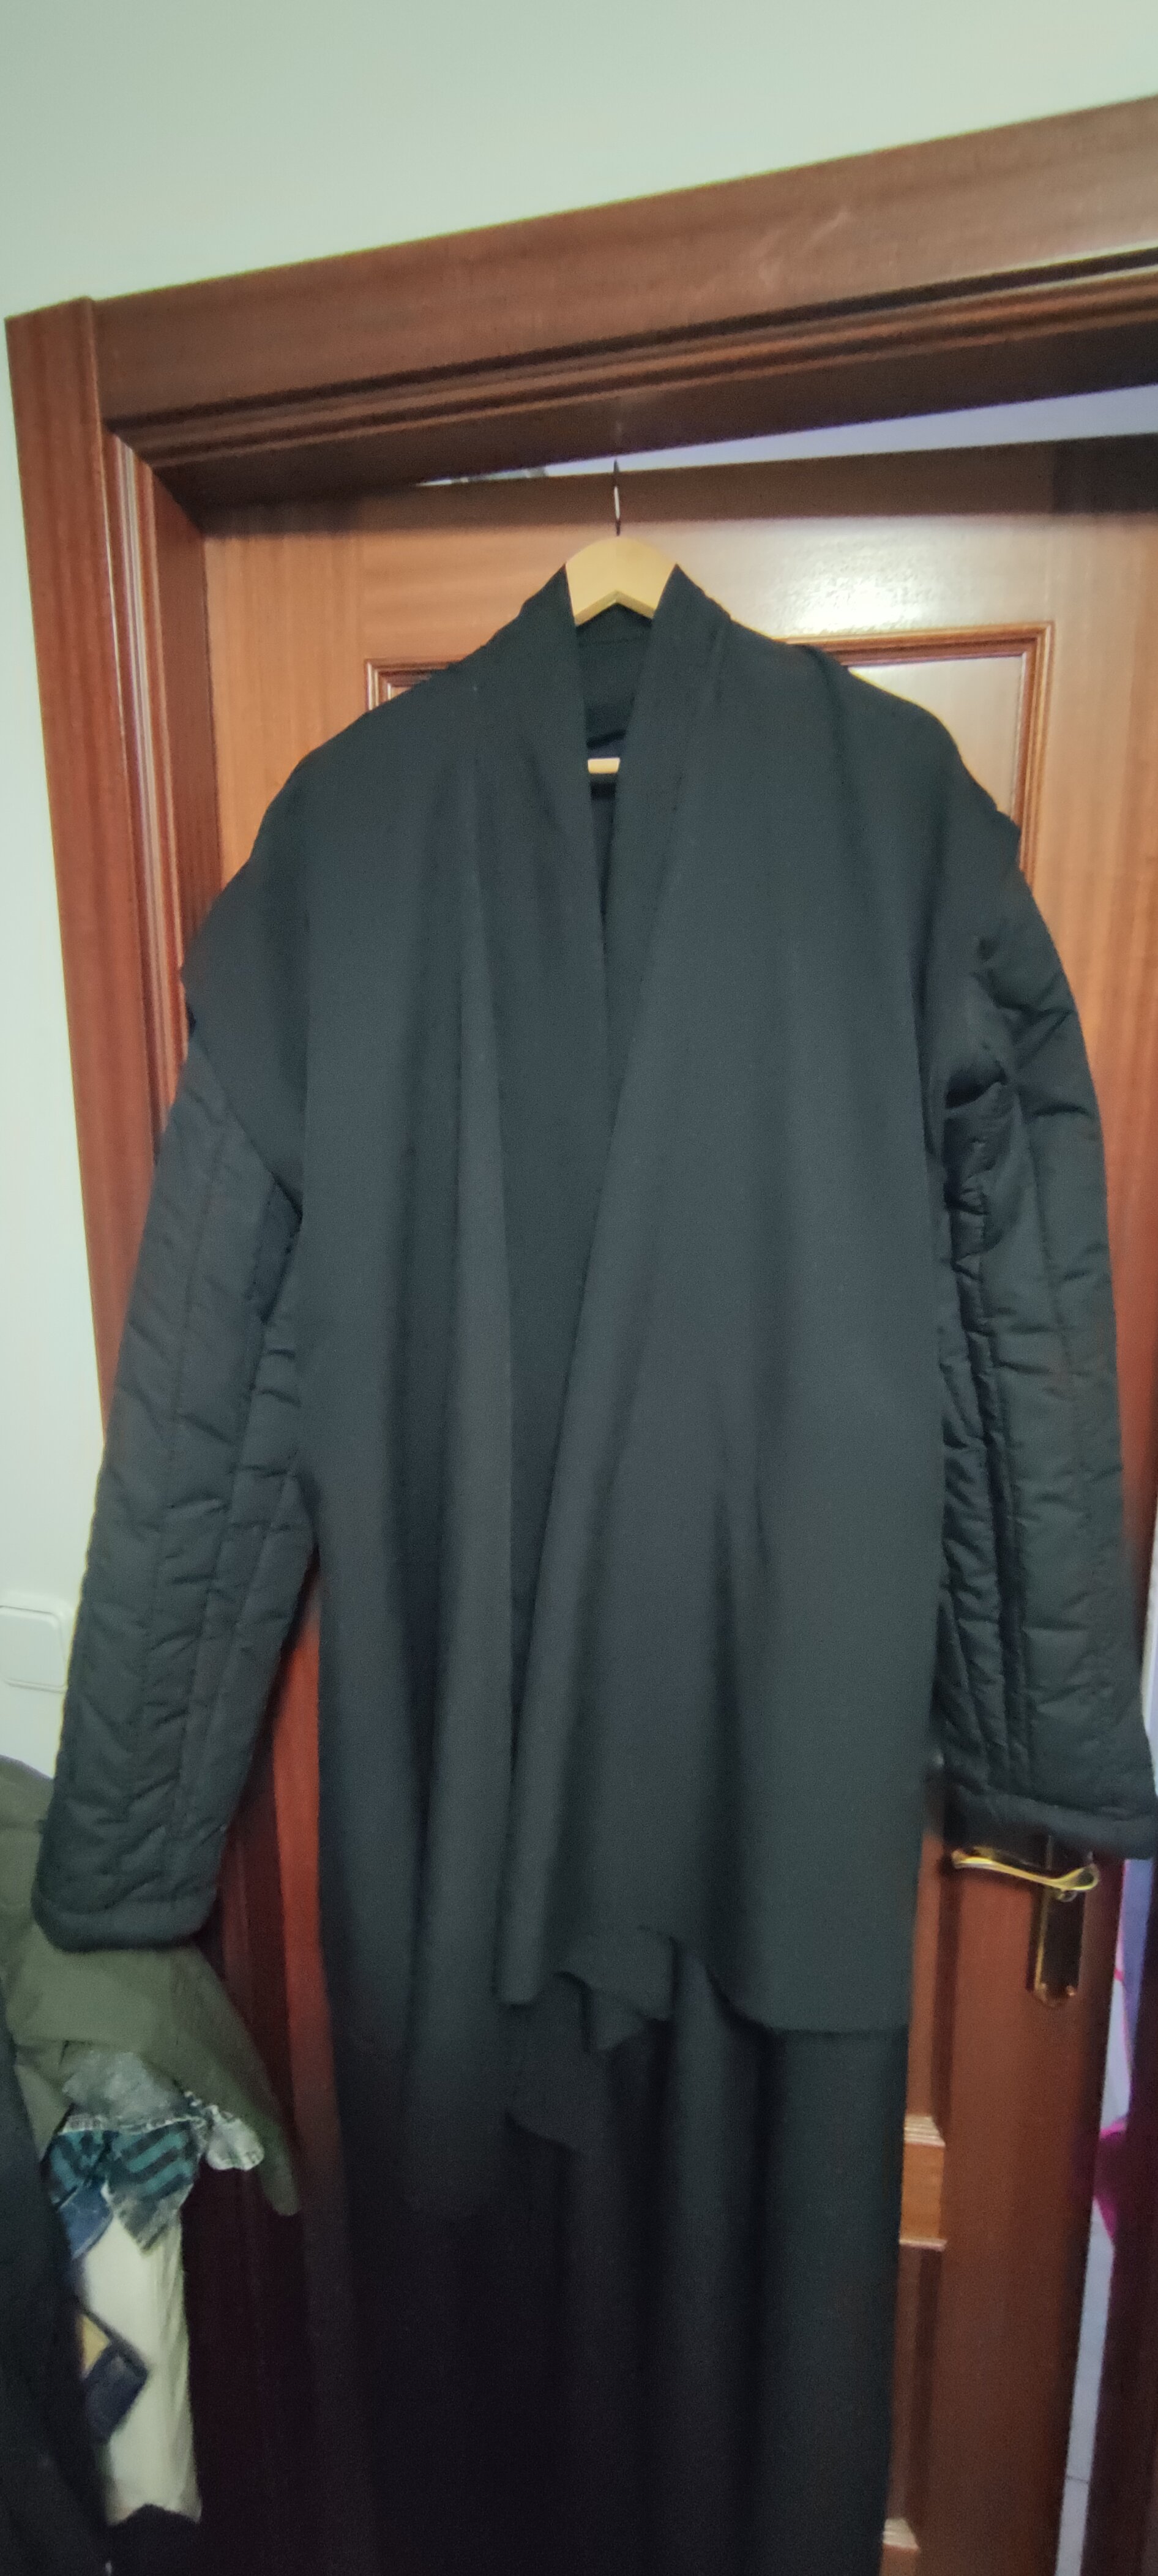
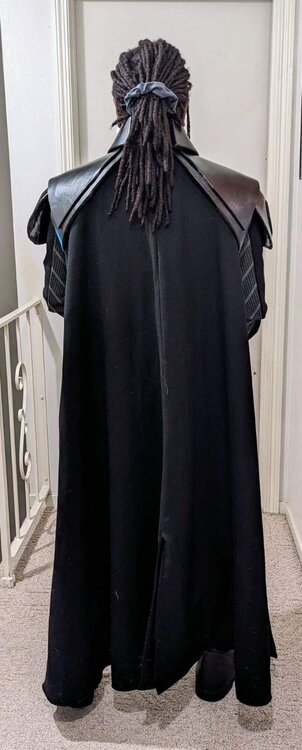
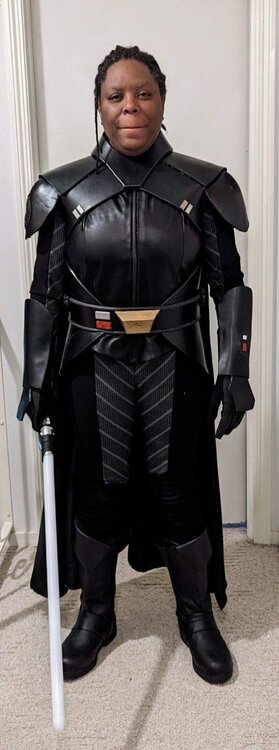
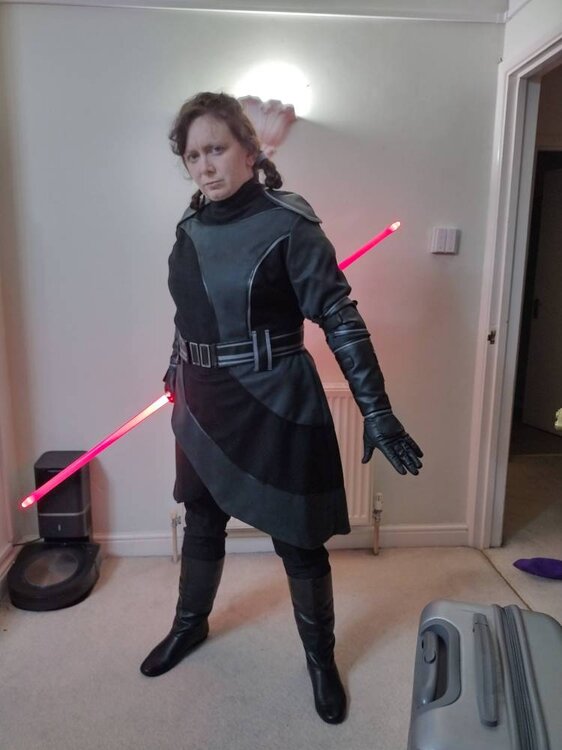
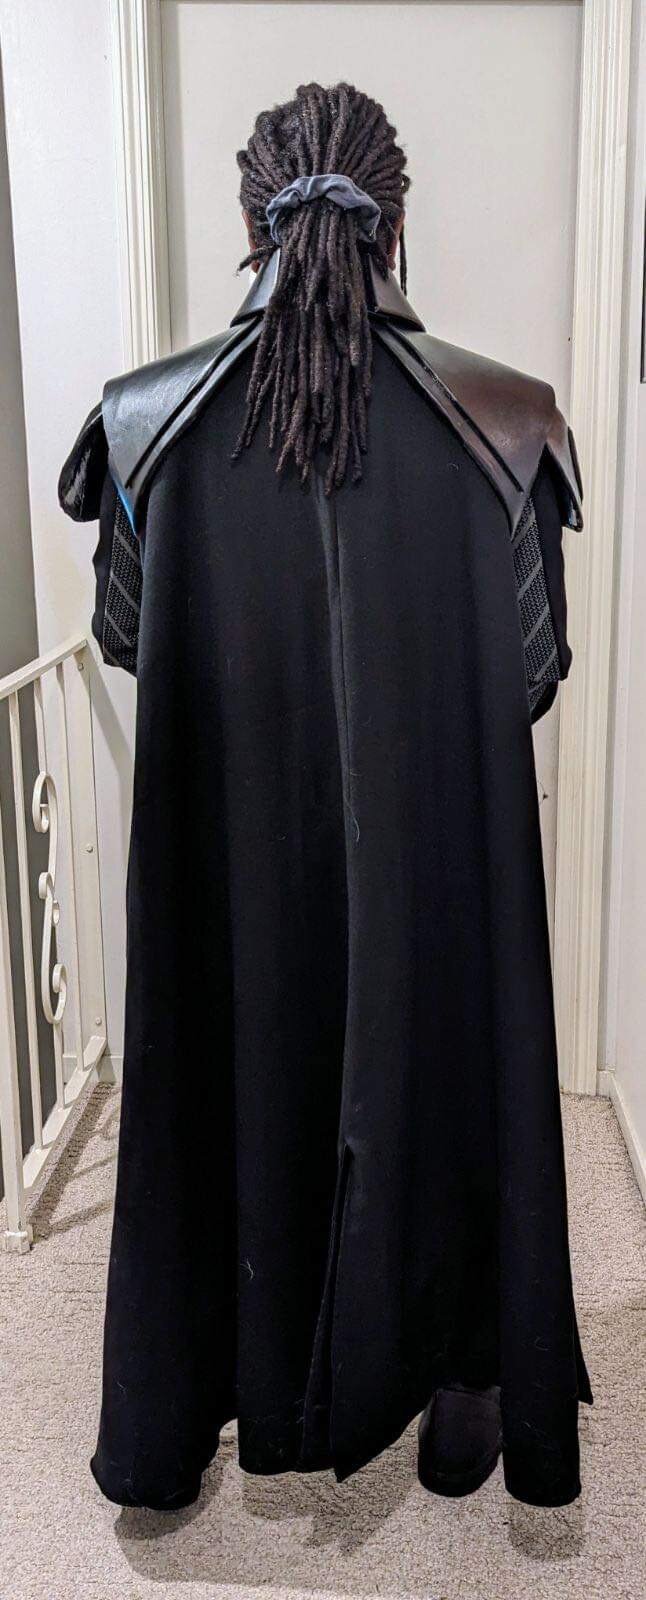
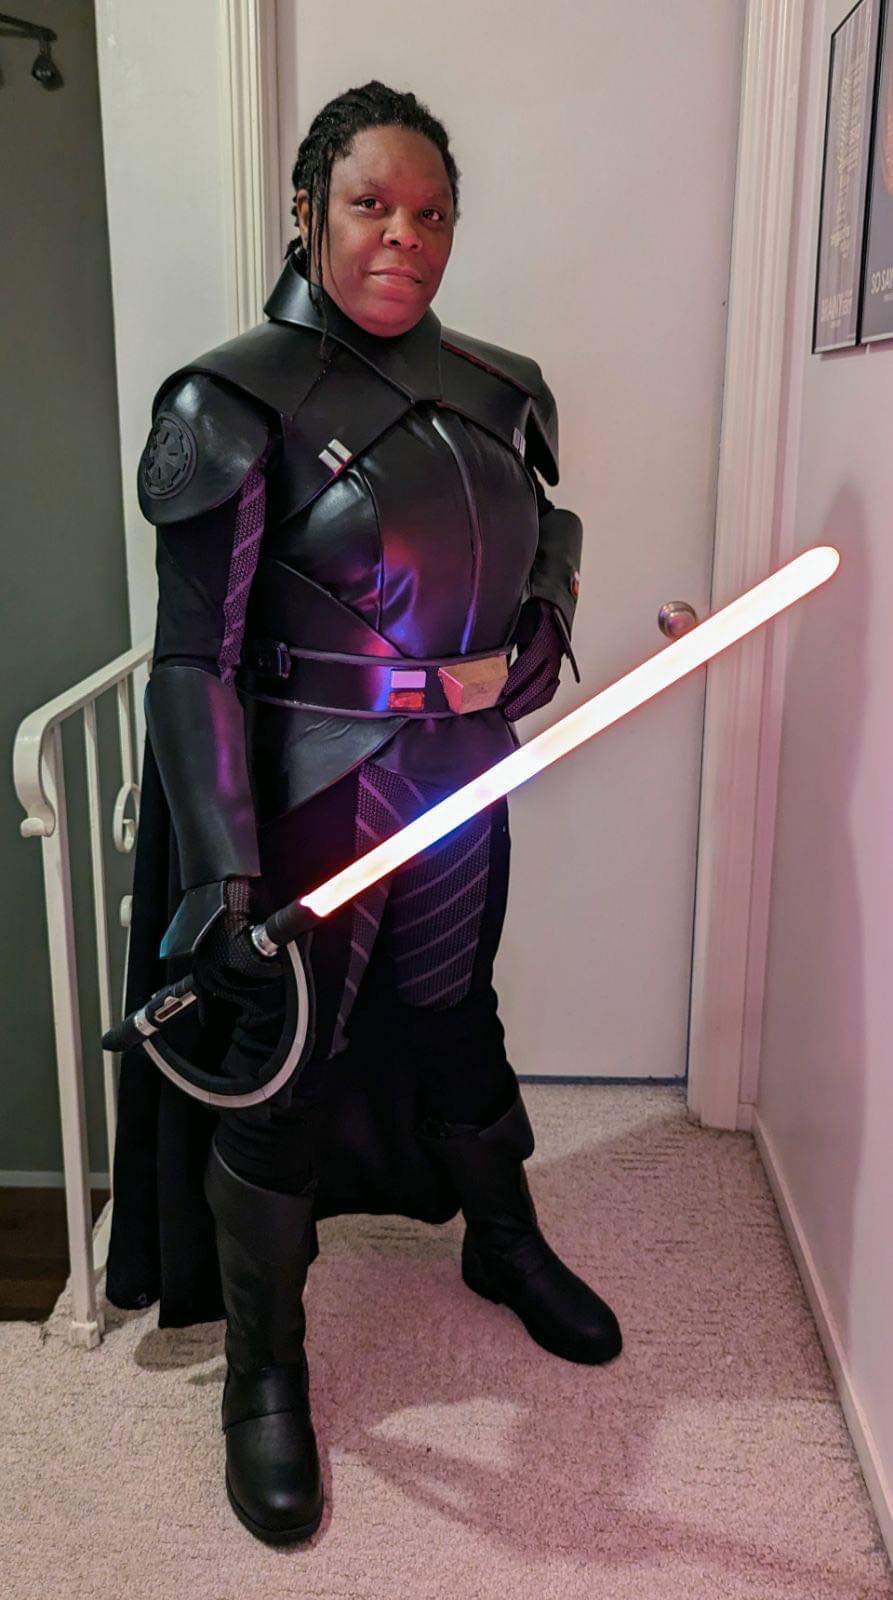
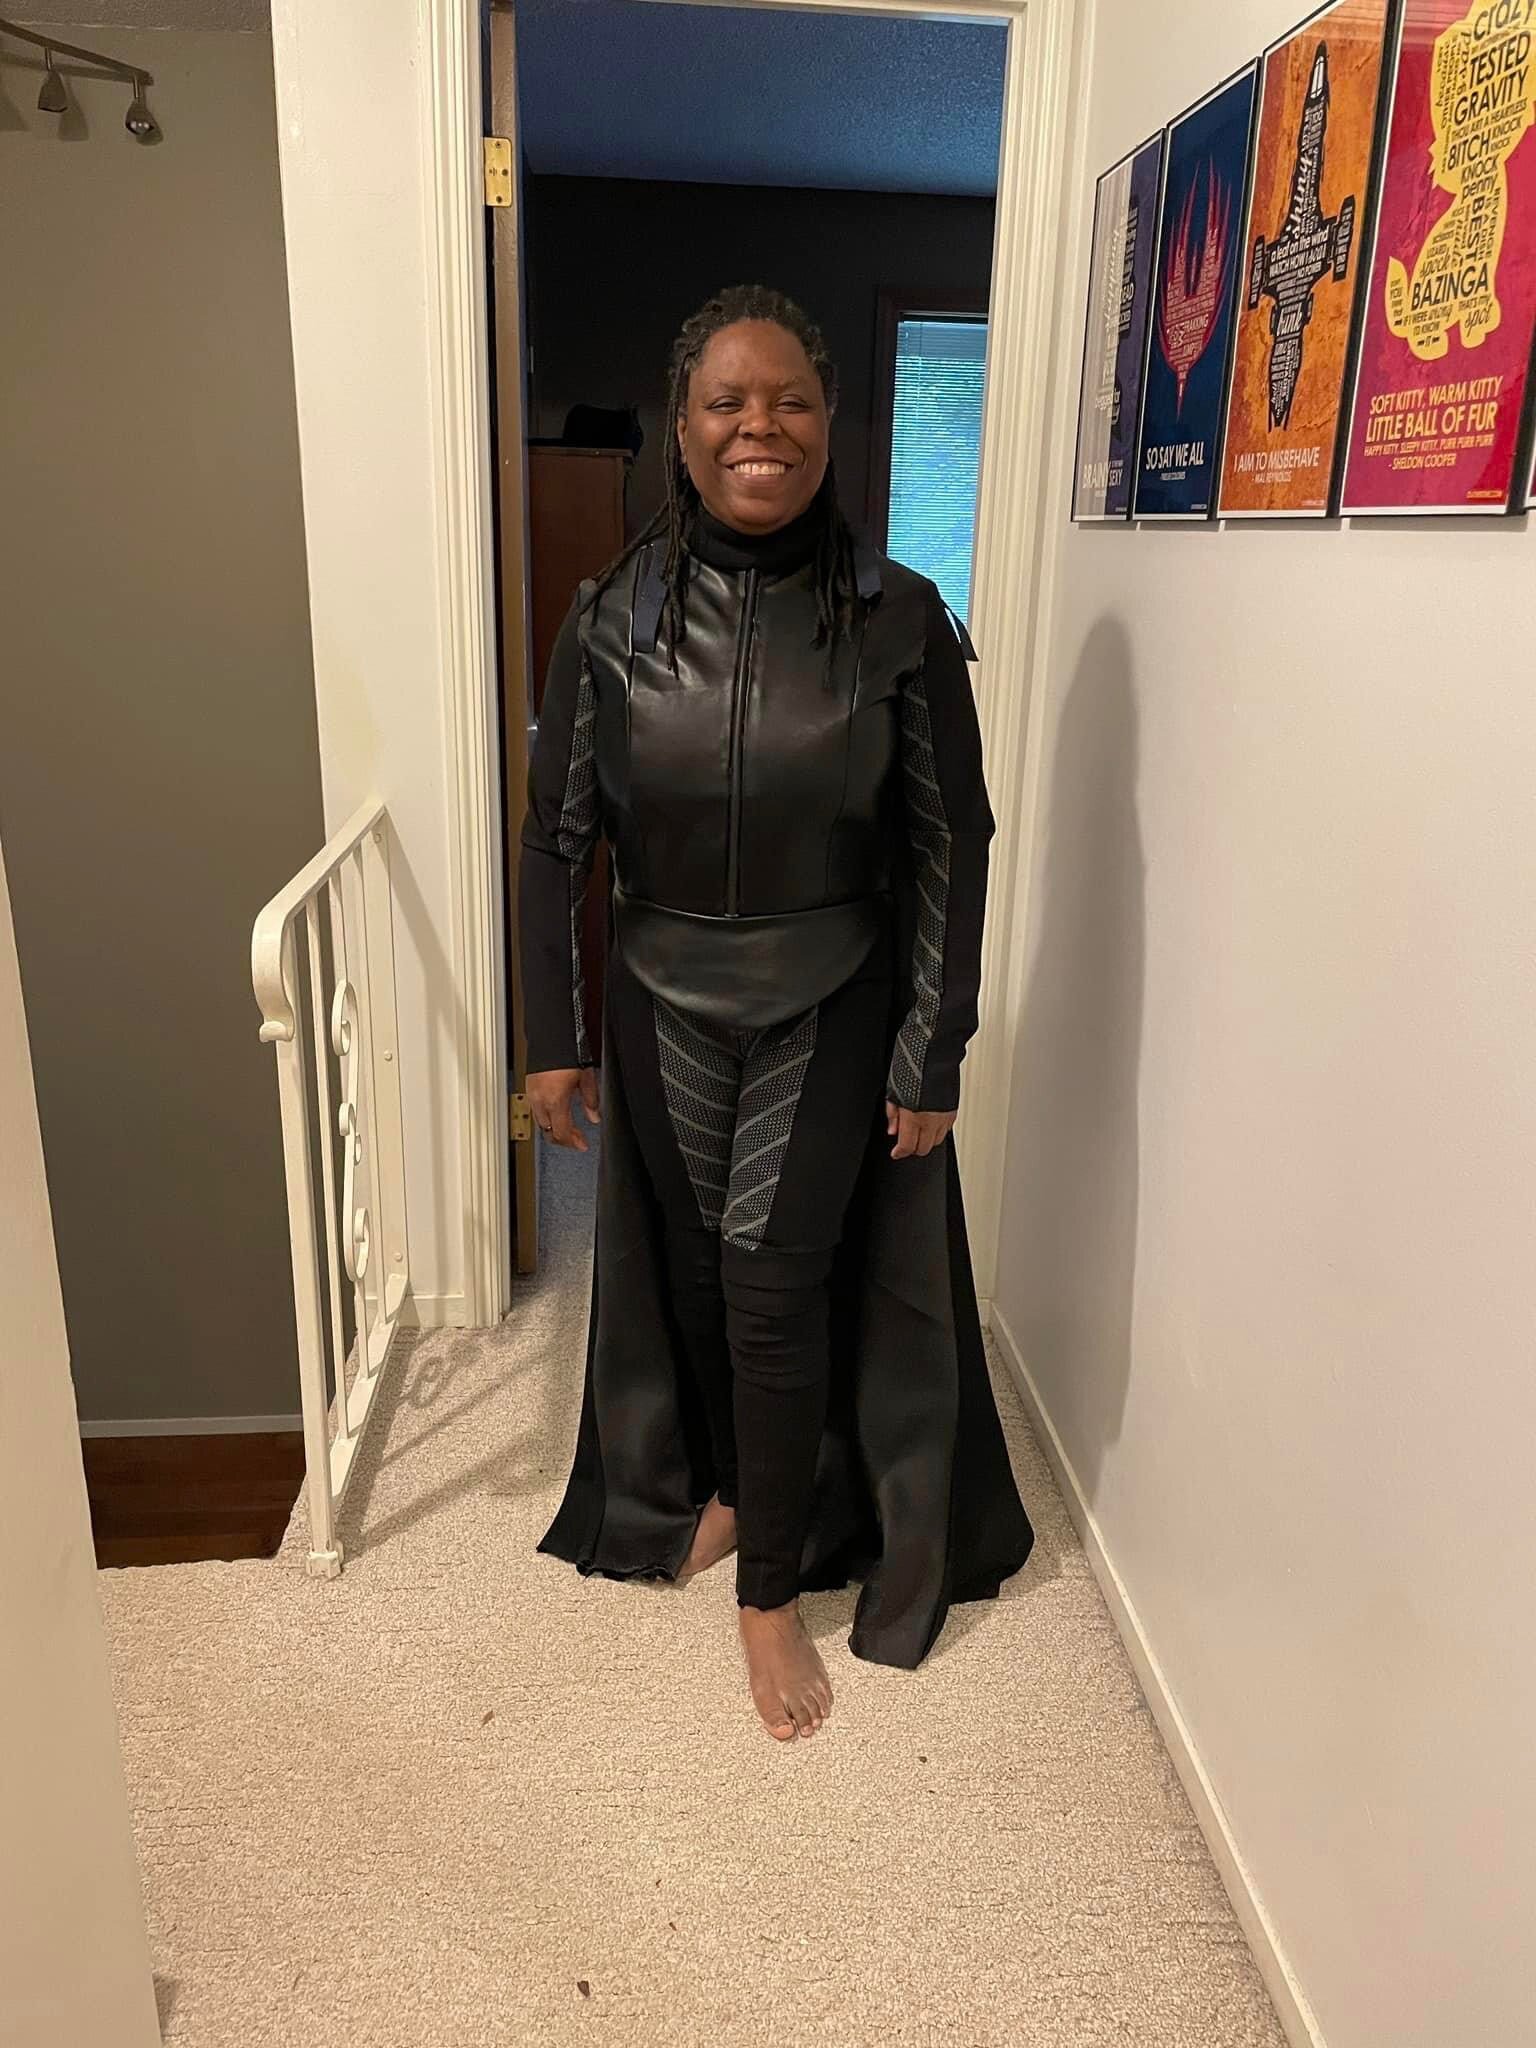
So close to being done. I need to redo the arm guards and chest armor and shorten the bottom corset pieces.
 3 points
 -
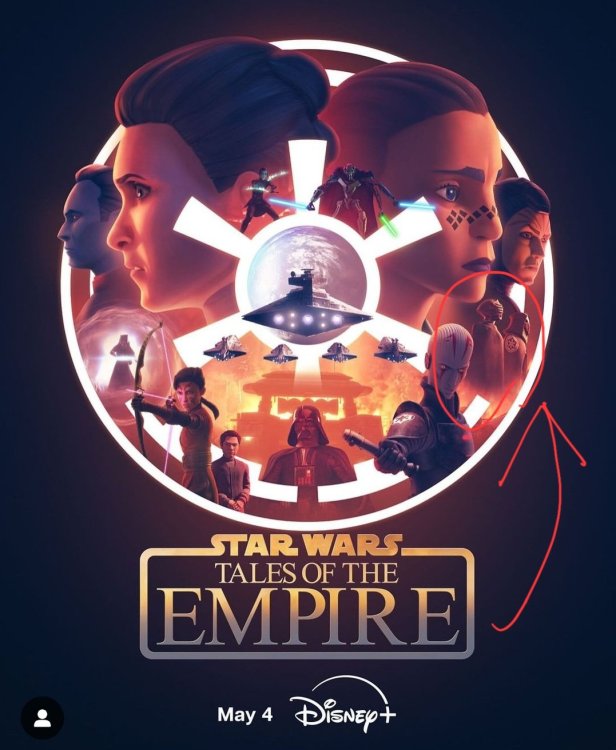
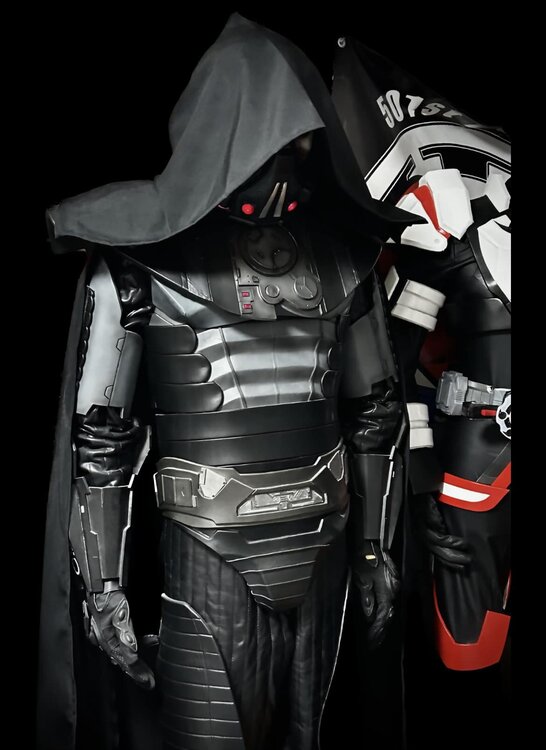
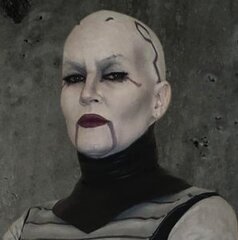
Hi Kyle, When I started doing some research into this costume, I messaged @Cookiedala for some advice, she mentioned this about color: " I would really go for a charcoal grey (almost black!) color and weather slightly on that." I would agree that a dark grey is the way to go with the capes and suit and leave the boots, gloves, and forearm bracers to be black. I know we will be getting some additional looks at this character in Tales of the Empire which releases May 4 and I just learned that there will be a limited series of comic books on the Inquisitors releasing in July! I am hoping we can get some additional images and hopefully a name/number for this Inquisitor in the comics. I am holding off starting my own Research/WIP thread until after those two new resources come out. I am excited to see that you are working on this costume!2 points
-
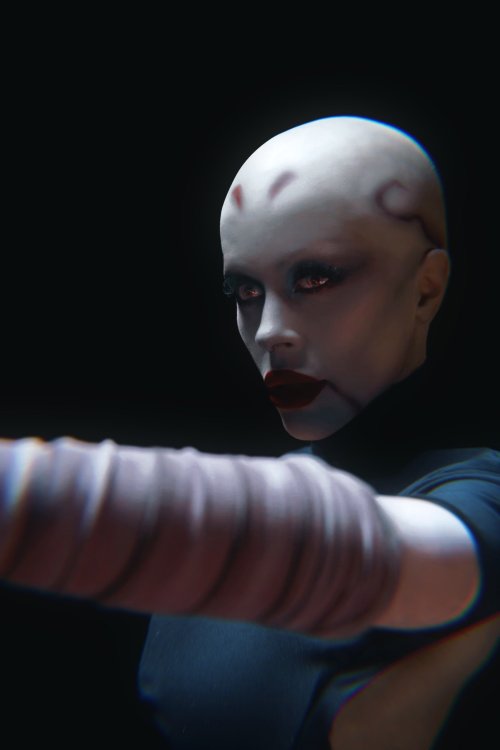
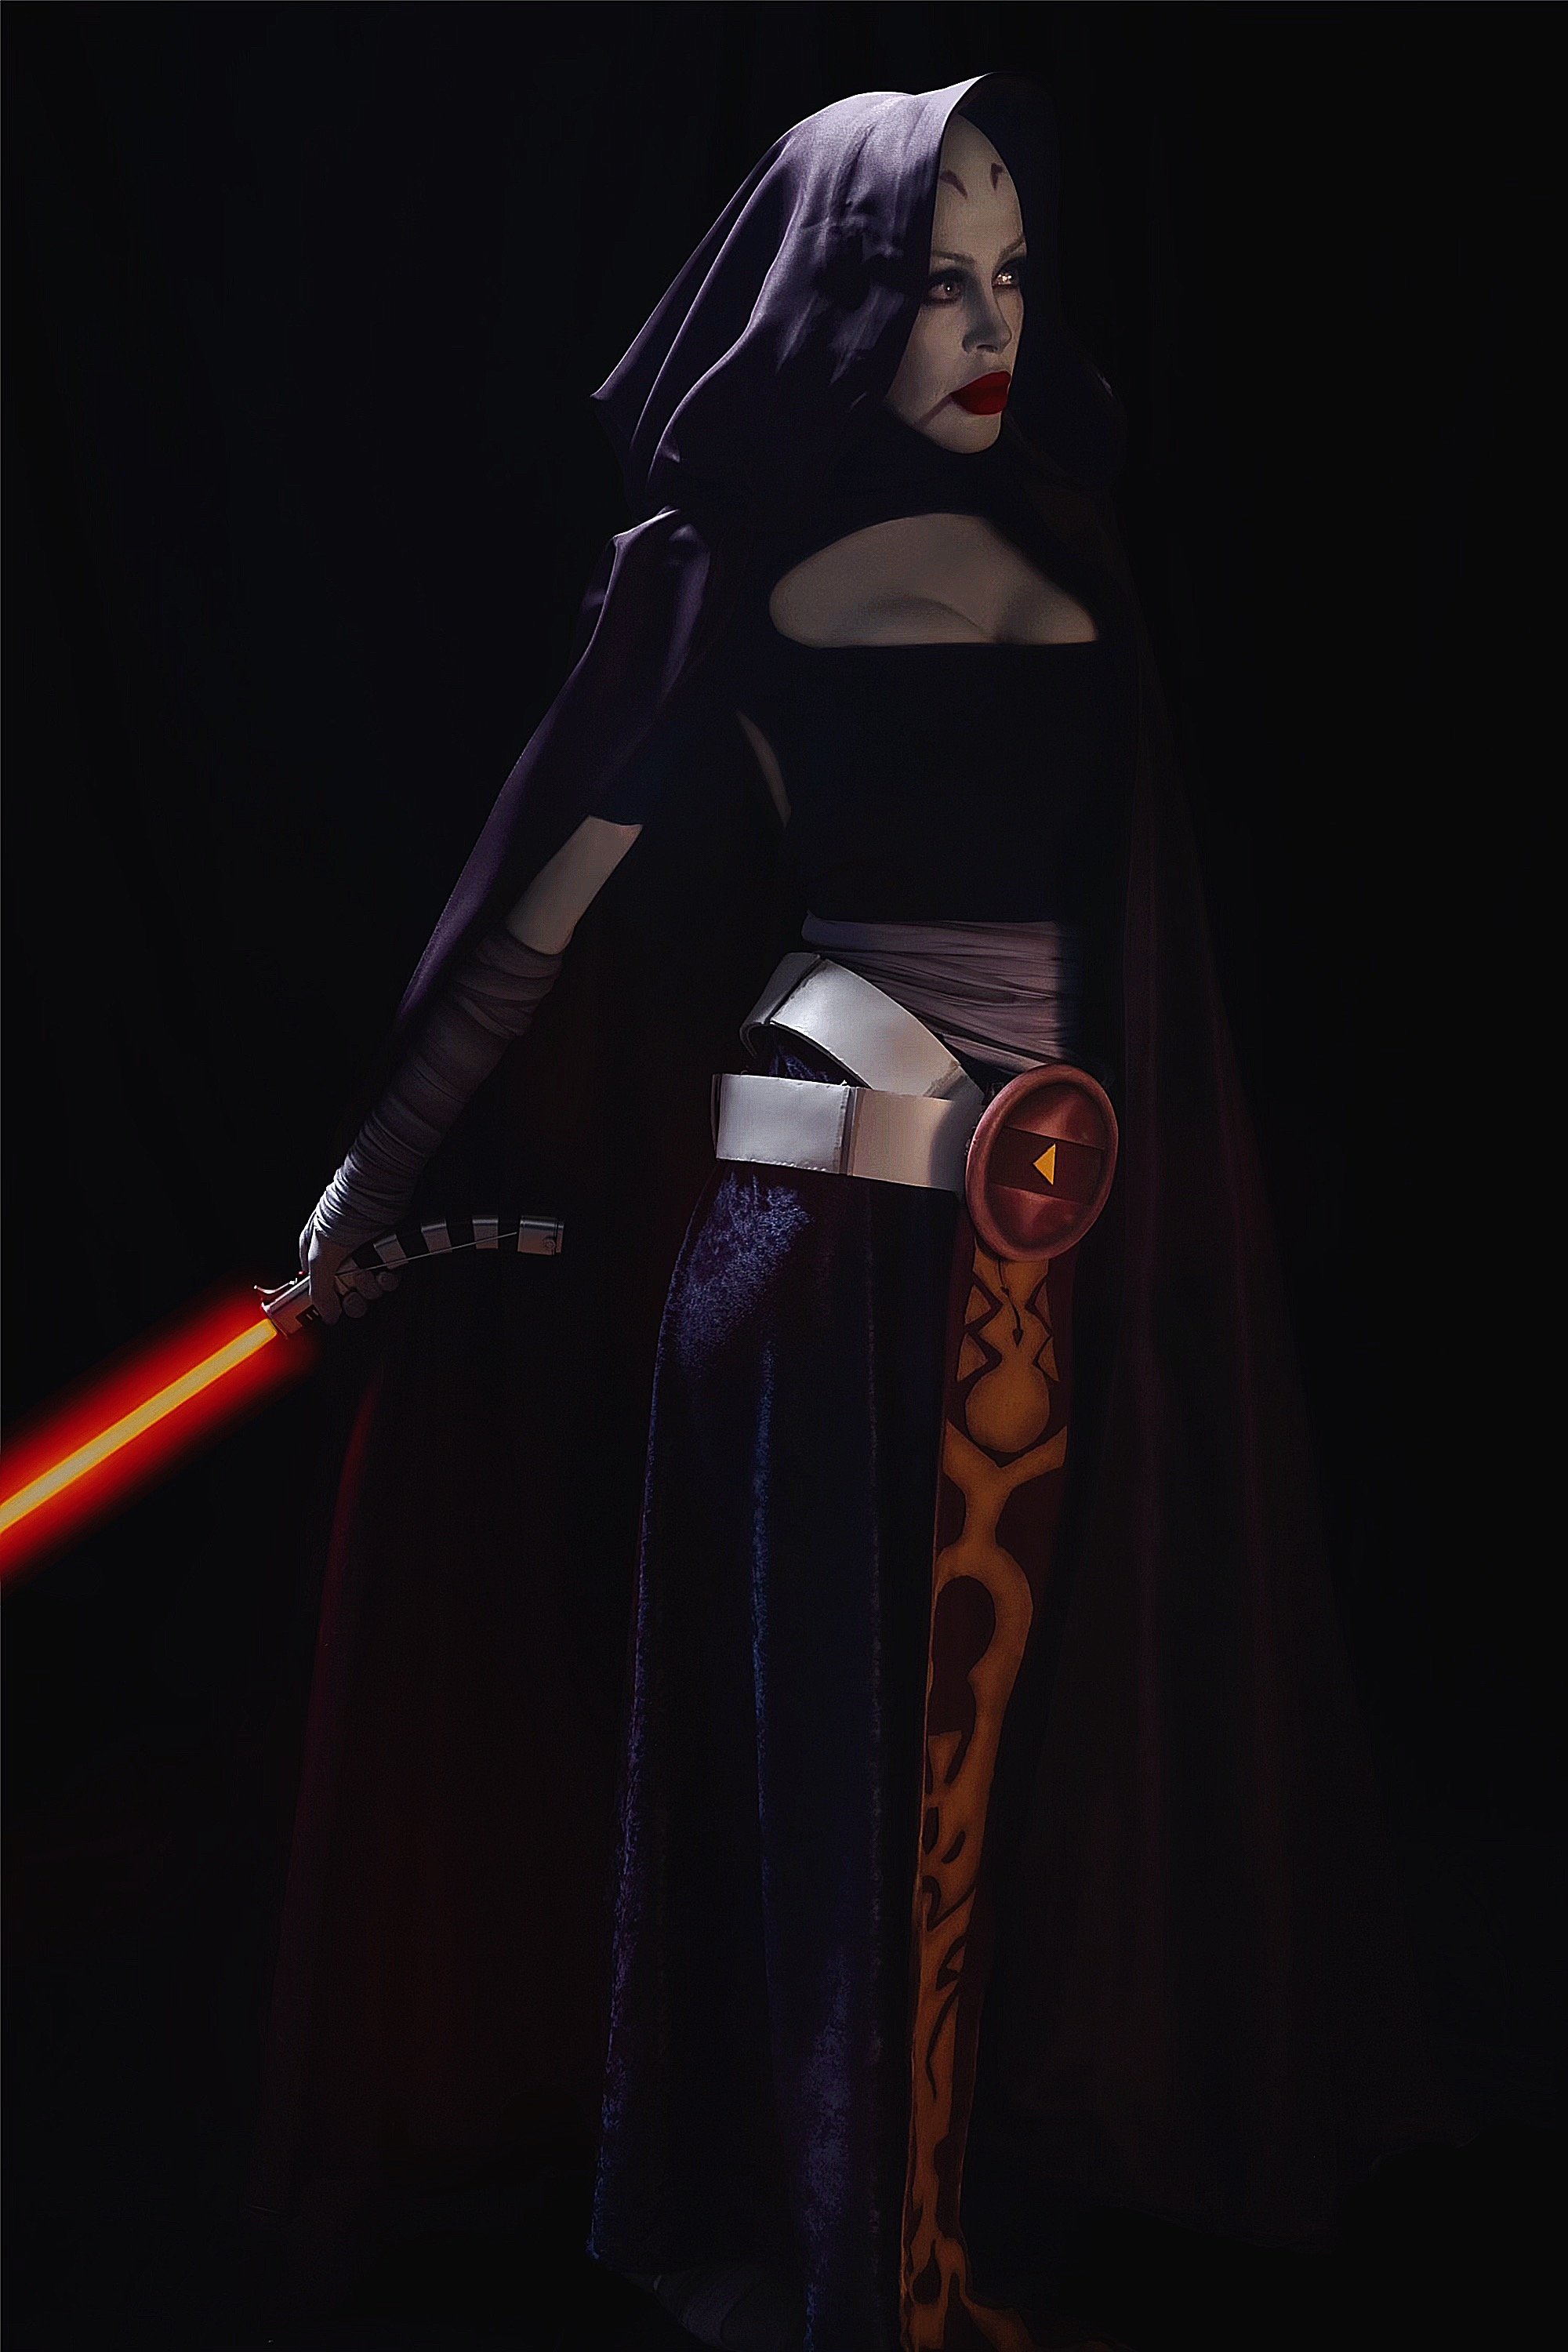
Hi everyone! Finally got my butt in gear and got my clone wars asajj approved and hopefully the first of many asajj approvals for me. I made every single aspect (except my lightsaber) from scratch without much experience before so I’m really proud of this one 😊🥰 I’m a brand new member of the pikes peak squad and the mountain garrison! Excited for all the new experiences to come 💕


 2 points
 -
Hey people, LucasFilm and Disney just announced a new show coming named "Tales of the Empire"! And the unknown inquisitor is also in it! Hopefully this will help everybody to make the costume perfect
 2 points
 -
We're about 1.5 weeks away from all 501st elections! This means Legion level, Detachments, Garrisons, Squads, and Outposts! Make sure you are prepared for TFE Detachment elections by ensuring you are listed as the correct Detachment Member rank. Also check with each Detachment to ensure that you fulfill their specific requirements if they are different! For TFE directions, please see here: I will be doing the final update to the 501st roster for TFE on Jan 28th, so please make sure you are correctly listed (your name should be in orange if you are not part of command). Cheers and long live democracy!2 points
-
Started fitting this afternoon. Found this image incredibly helpful. Thanks for posting @DarthValkyria2 points
-
Racing shirt is in the works!2 points
-
There is no embargo on making a costume - if you can provide the reference pictures of the costume from all sides incl. details and such, it should be good to go. You can also message our DL @DarthValkyria and ask on how to2 points
-
@Derek 1) I personally used EVA foam clay and shaped and painted the horns the way I liked. Then I attached the dried foam horns to resin bases using Aves Apoxie Sculpt. 2) The CRL says "made of leather or a material that resembles leather". I'd ask your local GML about this. 3) The silver piping on my vest isn't even piping at all. It's simply leather folded in half and stitched onto the vest. 4) Lightsaber is optional, but so long as the length is believable, I don't think anyone is going to be busting out a measuring tape to call you out. If you have any questions, feel free to DM me or hit me up on Instagram @ozark_maul2 points
-
New forum member here and not yet 501st approved but building the clone wars CRL. I made this on a whim because I was so obsessed with the figure! Figured you might like to see. Would be so cool to have this approved. I even got a shout out from the guys who sculpted it!2 points
-
Thanks LordZedel for clarification - verification. For mine - I use the Etsy neck seal combined with a vest with a v-neck shape to it. Similar look to the bottom pict you reference.2 points
-
If a costume that you want to build is not currently in the Legion roster, you'll be coordinating directly with the Detachment. The order is operations for the process is as such: 1. Contact me with all the references you are able to grab to validate the details of the costume, and an excerpt describing why the character should be included into the Legion. The references will be tossed into a Google drive that we send the link to. 2. I'll take all of that and submit to the assigned TFE LMOs, who will take the info to the main LMO group for a 7 day vote on legitimacy. 3. If the vote passes, you'll want to start a build thread here and keep us in the loop as you build to the references. We do not do pre approval CRLs because we don't want you building to words, but to the actual references. 4. Once built, you will let us know so we can get everything uploaded into the drive folder to go through analysis by TFE DCAs. 5. If it passes DCA approval, it will move to LMO approval. Again, another 7-day vote will occur. 6. If approved, we will begin final work on the CRL, including getting CRL photos from you. If not approved, changes will be relayed and then start again at step 4. 7. Final CRL will go through LMO confirmation and approval, and then once published, we'll work with you to get the information with your GML to assign the costume to your profile. If there are any questions, please ask!2 points
-
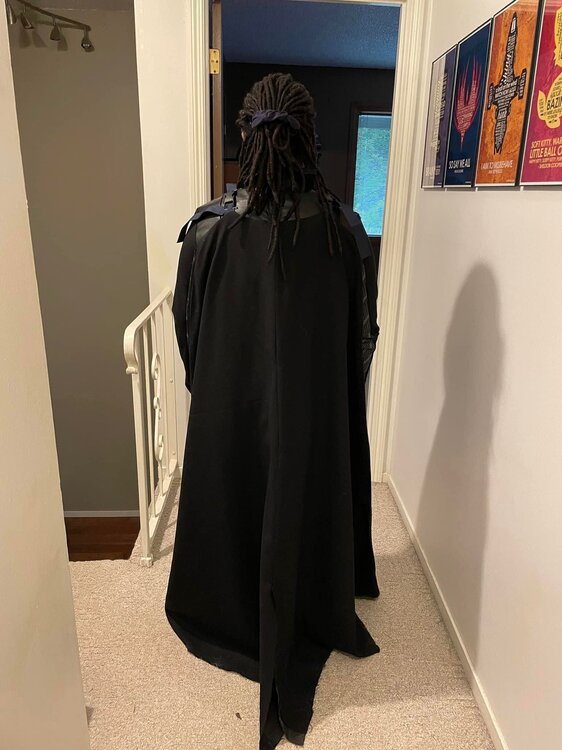
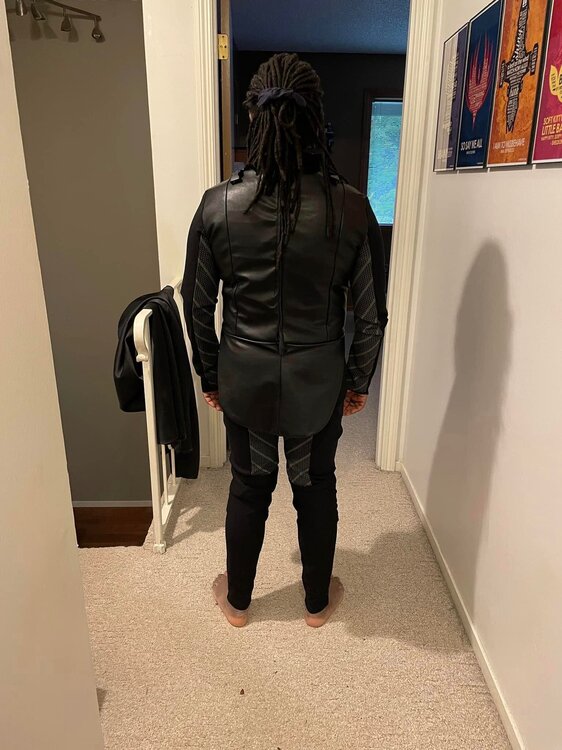
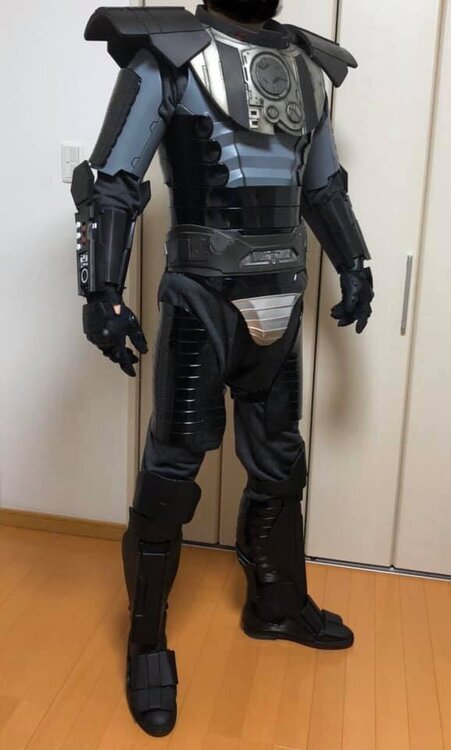
I’m skipping way ahead. I got a little hyper focused and just didn’t follow up with documentation. I have been taking pictures as I go. I have a photoshoot next Sunday and had to step up my game. Finished the bodysuit (sort of) and took some pics. The cape clips on to my shoulders. still to do: Place Velcro to hold armor in key locations Belt - cut to length, finish painting greeblies, wire LED Armor - apply Velcro, repattern collar, model greeblie for guantlets Boots - A friend is working on them for me cape - hem and shorten clip straps saber - all the things

 2 points
 -
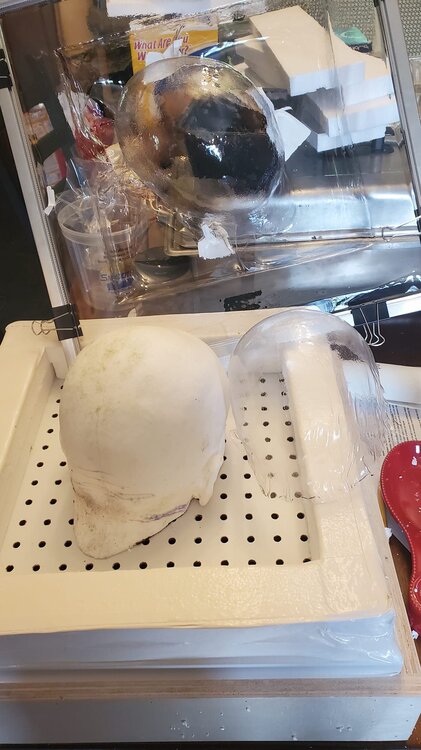
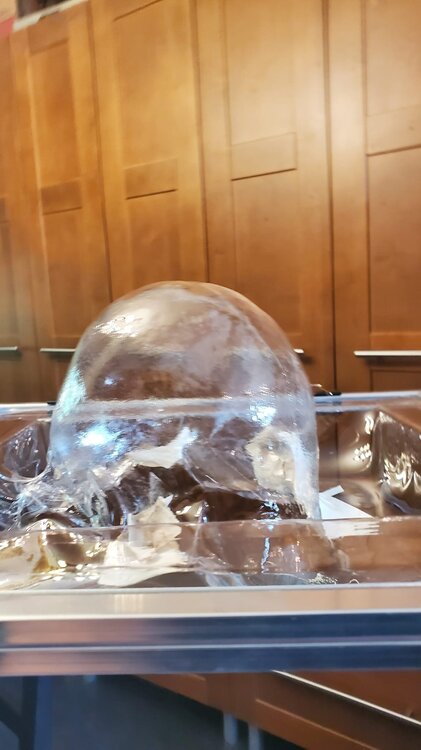
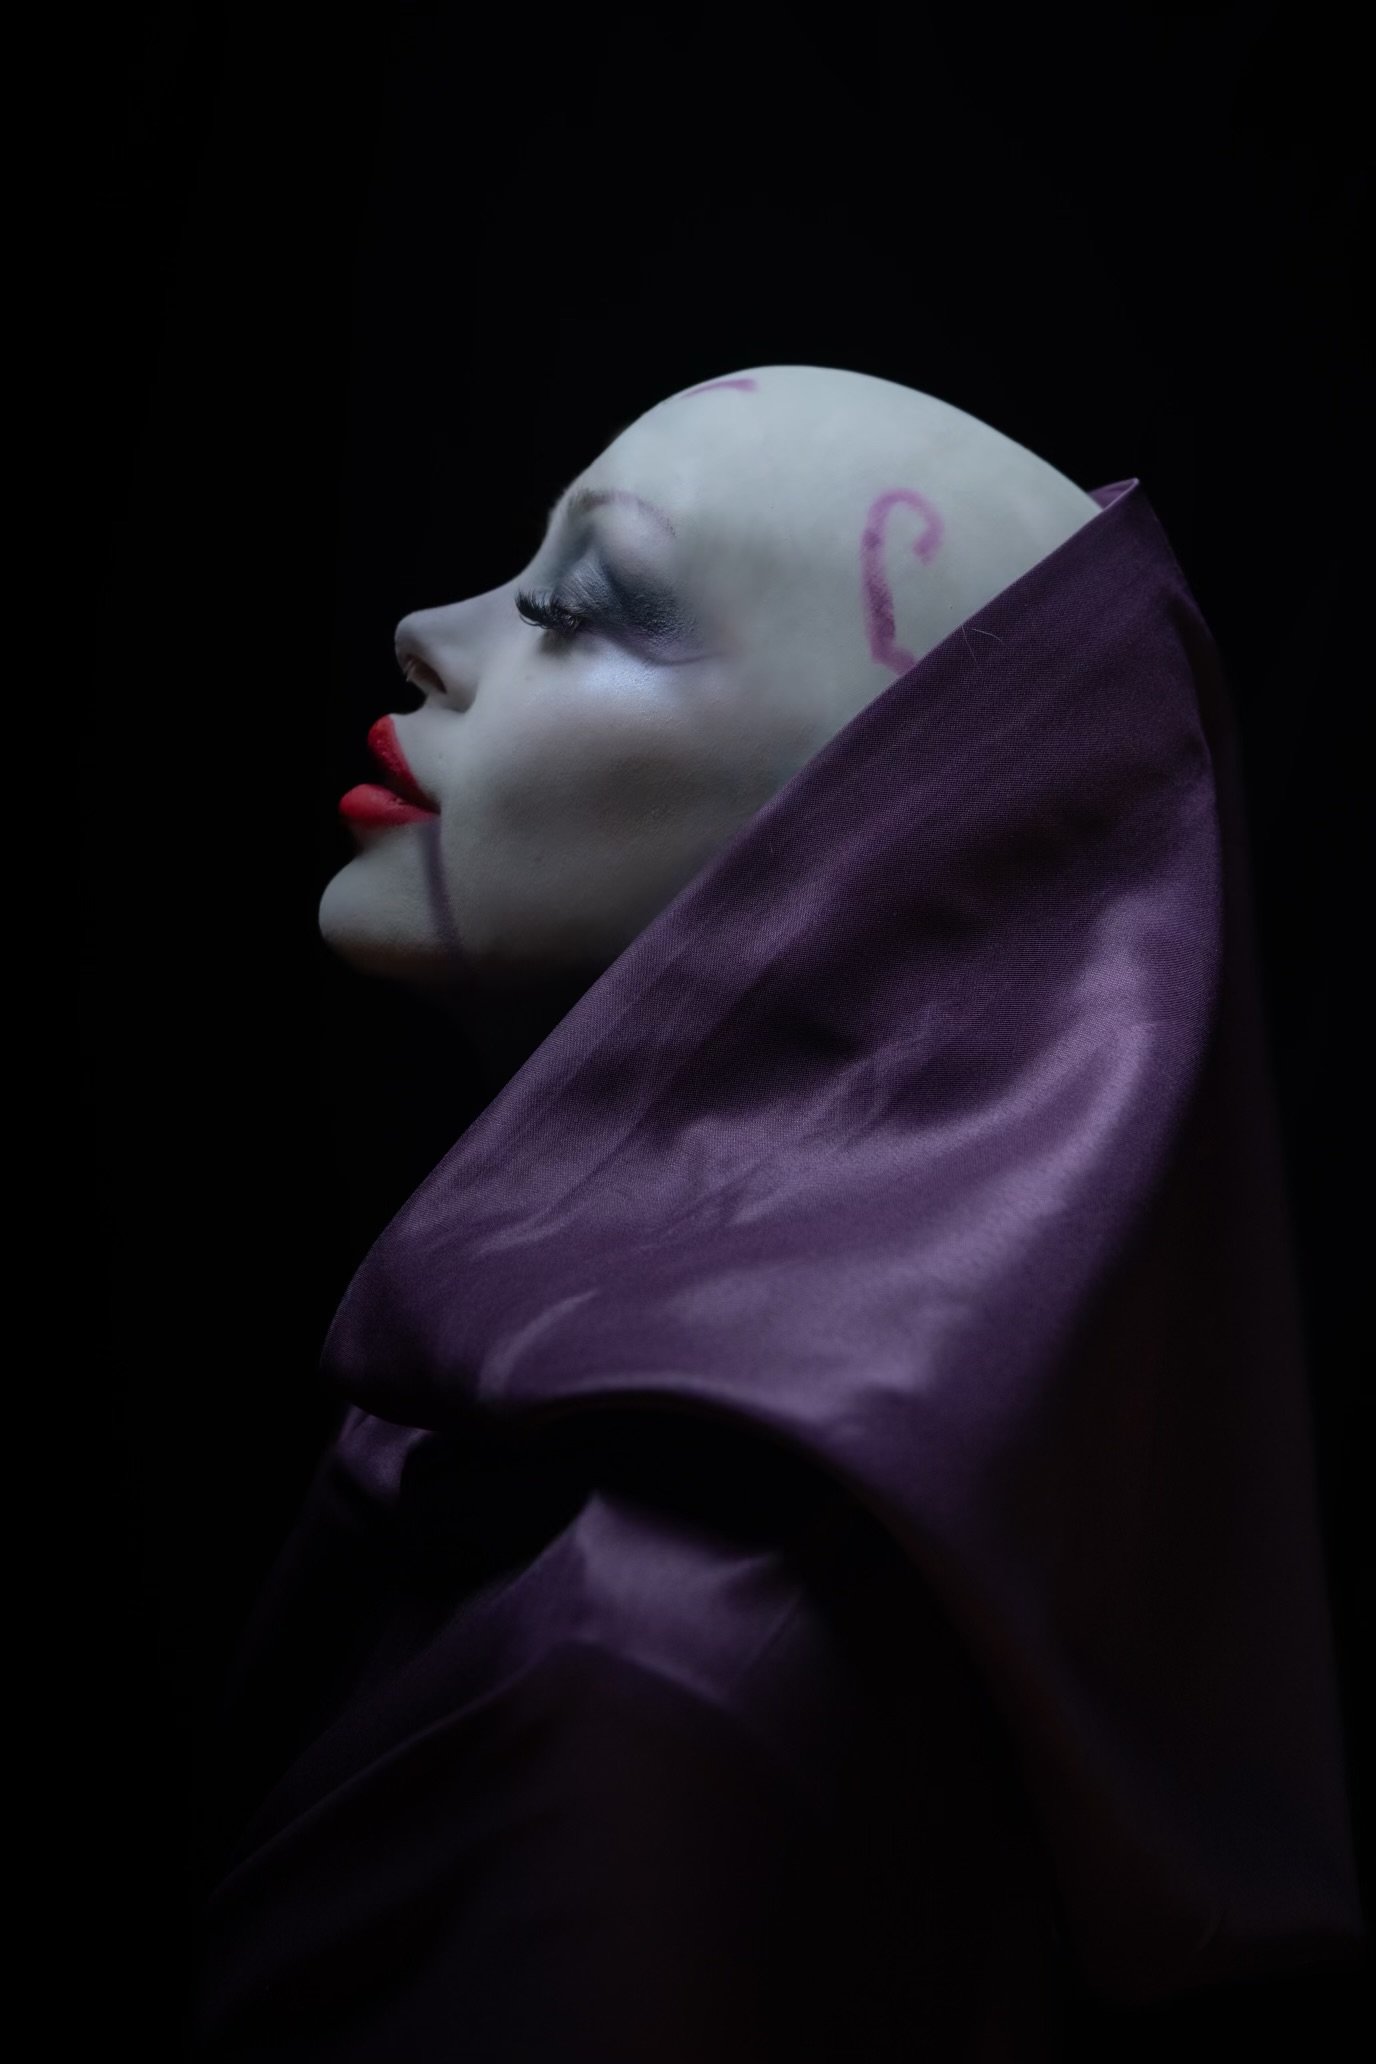
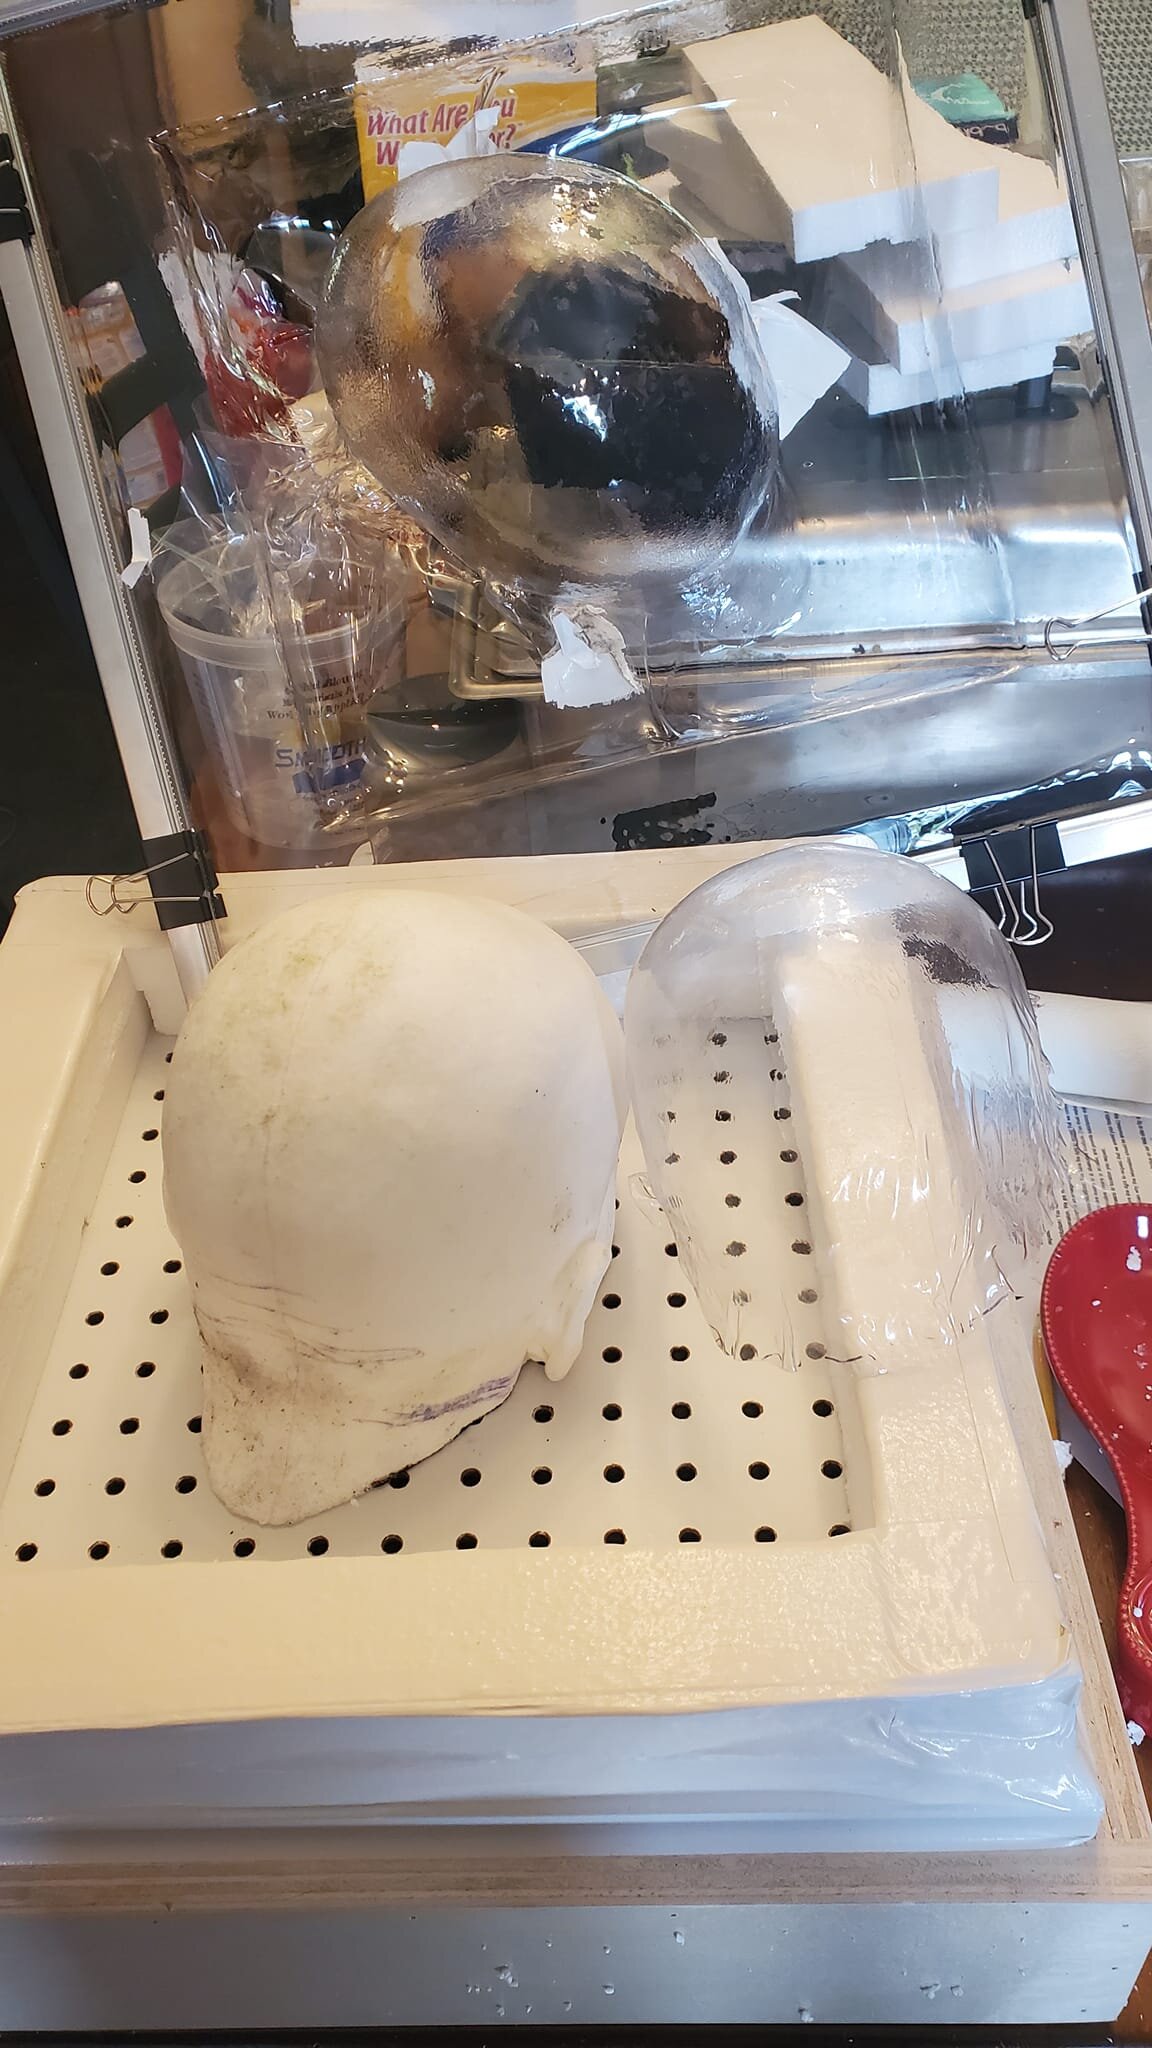
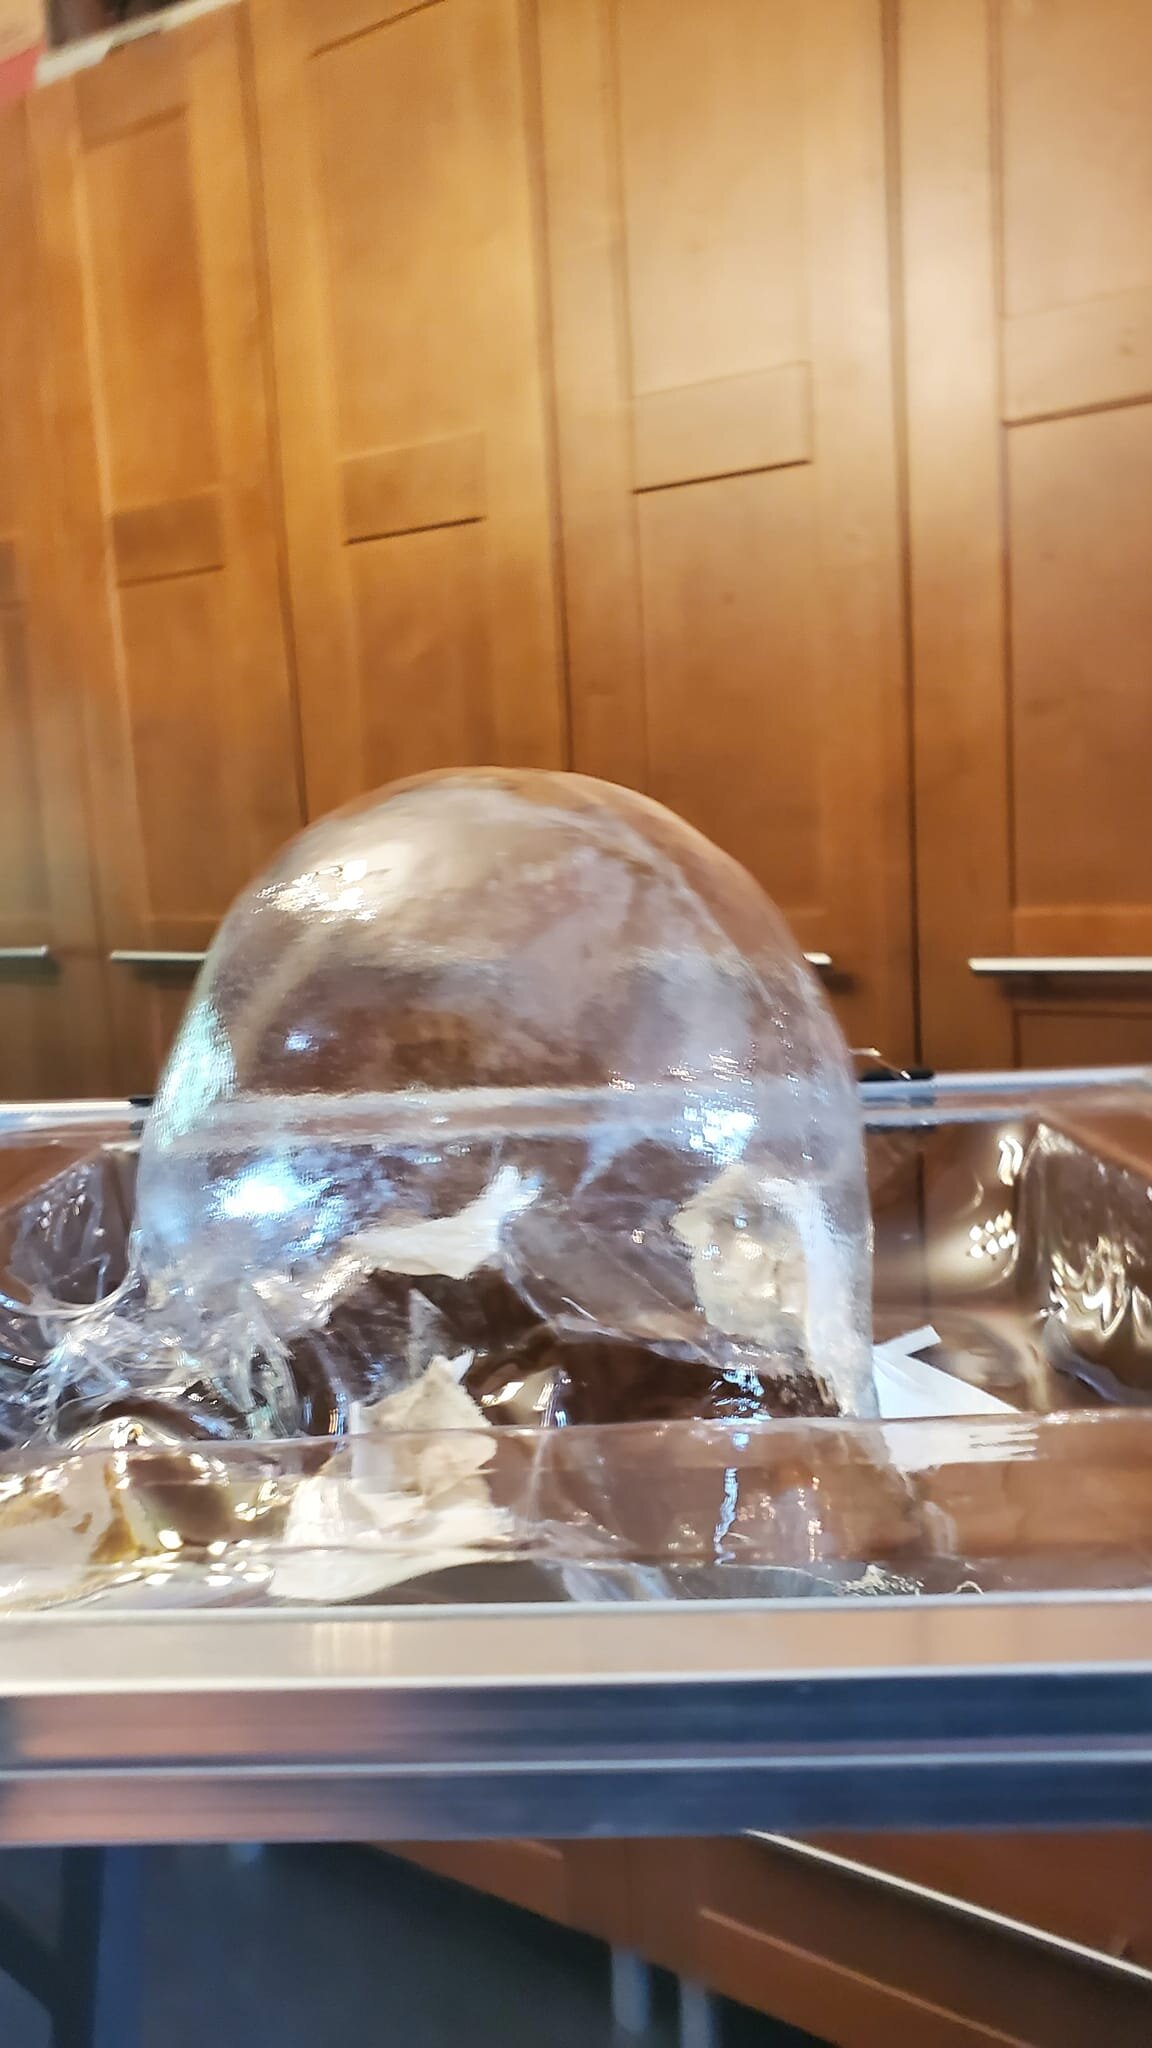
I will do a better write up of this in the next month or so. I will write more about how to make a casting of your head and such, but for now this is how to make the actual hard plastic re-usable stencil. Okay so this is going to be a bit of a long post. For my Ventress I have been planning trying to make a hard plastic stencil to use for airbrushing my Asajj Ventress tattoos on the scalp part of the head. I wanted something that is pretty much a continuous shape that doesn't have to have sections that need to be created every couple of inches. And would fit my head without large gaps. I have been using a Halloween bald cap that I tried to modify to fit my head, but because the material is flimsy the stencil shapes have to be cut into sections and then have to be connected when the bald cap is removed. I had my head cast. Which I did but I had to go to a place to get it done. Mind you I plan on doing other things with my head mold. The process for making this stencil can be done with just casting the scalp and ear area and doesn't have to include the face. I purchased a small (16"x16") Vacuum forming table. Got it on Etsy. Pm me if you want a link. You can also go on Youtube to learn how to make one. I used my house vacuum to create the suction. I also purchased a sheet of PETG from Amazon. .020" thickness. I also had a heat gun for this process. I made a cast from the mold of my head using Smooth-Cast 305 from Reynolds Advanced Materials. I made it a little bigger (deeper) than I had planned on. But I figured out a workaround without having to cut the head shape down. You can learn more about casting at the Smooth-On website. or you can search Youtube. I used the metal frame that came with the vacuform table and secured the plastic sheet I had cut down to the same size as the frame. I then put it in the over, raised a few inches above the metal wire shelf under my broiler (around 3-4") and let it sit for around 30-45 seconds. I pulled it out and pushed it down over the head form. My first try at molding the head stencil failed (mostly). When I first pulled the hot sheet down over the head form, it wouldn't stretch far enough down over the head form to reach the edges of the table to suction down the plastic. I tried using a heat gun while putting pressure on the plastic pulling it down, however this really didn't work very well. So, I tried again. This time I remedied the suction issue by building up walls of the vacuform table with Styrofoam I had in the house and then using duct tape to attach them to the table and seal the edges. This would allow the plastic sheet to come down onto the surface edge of the table to allow the suction of the vacuum to work on pulling down the extra plastic to the table. I repeated the steps like I did the first time with heating the sheet of plastic in the oven. I then pushed the sheet down over the head form onto the wall edges where it then started to suction down the plastic. The plastic cools quickly. When it does it will not stretch anymore. It still needed to form a bit more, so I used a heat gun (550 deg) in spots around the head form while the vacuum was on. Some spots I melted the surface and created holes where I had the heat gun to close to the plastic, so I patched them up with duct tape to create the suction again. I kept going around the head till I was happy with the results. I have cut the head shape out and will be drawing and cutting out the shapes of the tattoos that go on Ventress' head. The only thing I would like to do again differently is using a bit of a thicker sheet of PETG. I feel it would hold up better for future stenciling. For now, I will use this. But I am also currently ordering more PETG in a thicker sheet. I will be posting more pictures of the head stencil being cut tout and being used with the airbrush when I get there later today. If you do not know about Vacuum forming I suggest googling it to learn more. The first image is showing the vacuform table with the failed stencil to the right of the head form and the successful one still clamped to the frame for the vacuform table standing upright (you are looking at the top of the head). The second image shows how deep the forming of the plastic was made. You can also see the pieces of white duct tape I used to seal the holes where needed.
 2 points
 -
Thanks! Finished now!2 points
-
So, I just started writing out a potential CRL today. My understanding is that the 501st won't be making this a regular CRL but could make it a Legion Level Approval costume. I have been in contact at the Legion level and was instructed to provide a serviceable CRL first.2 points
-
Thanks! I appreciate the feedback. I will find a way to use the Zoom pedal lol1 point
-
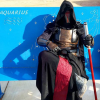
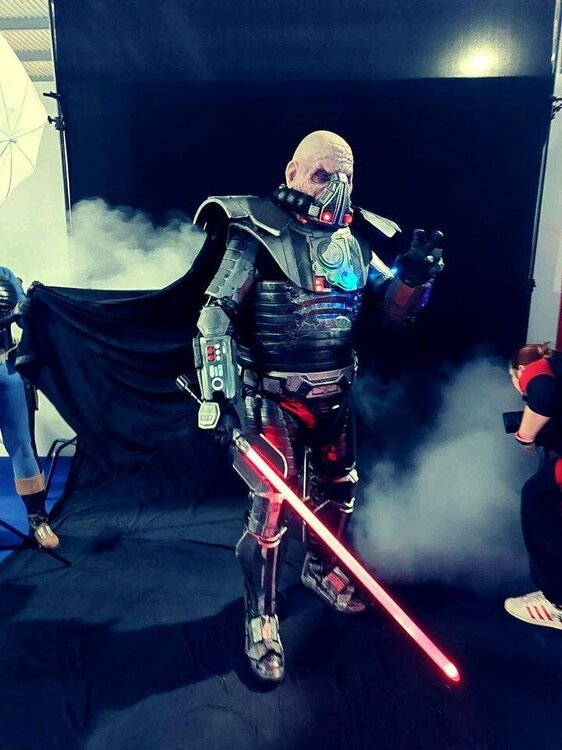
Updated photos will be posted in End of April / May for 2024. These are some pre pics from last year in Milan Italy Cartoomix 2023.
.thumb.jpg.090e48bdbb4ab9a03c0d868de1119bd1.jpg)
 1 point
 -
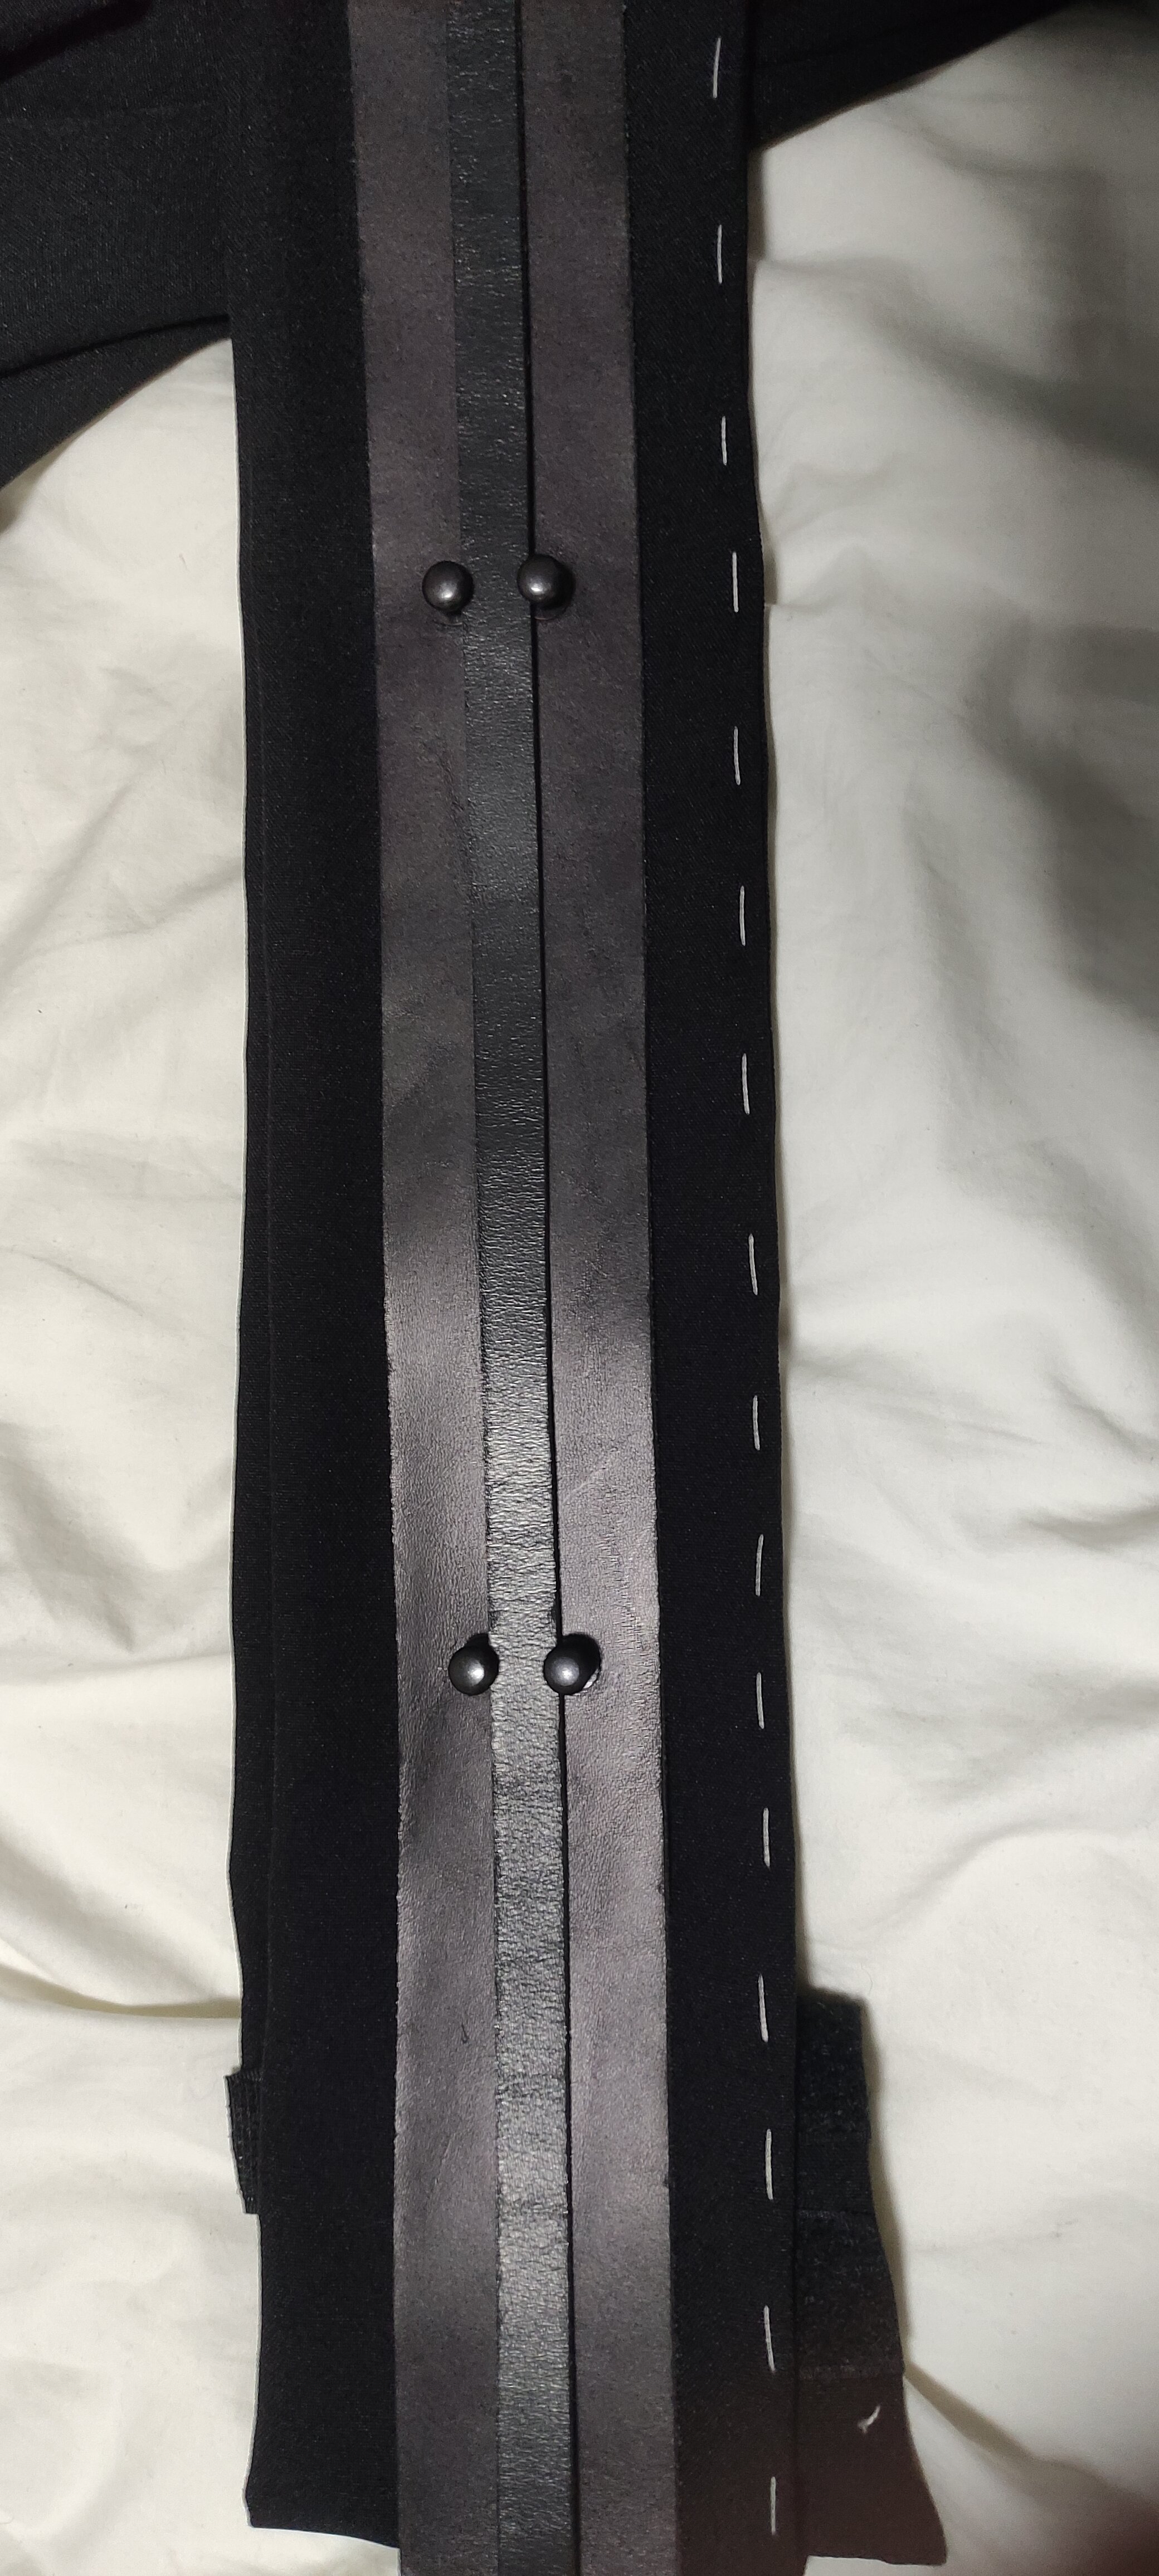
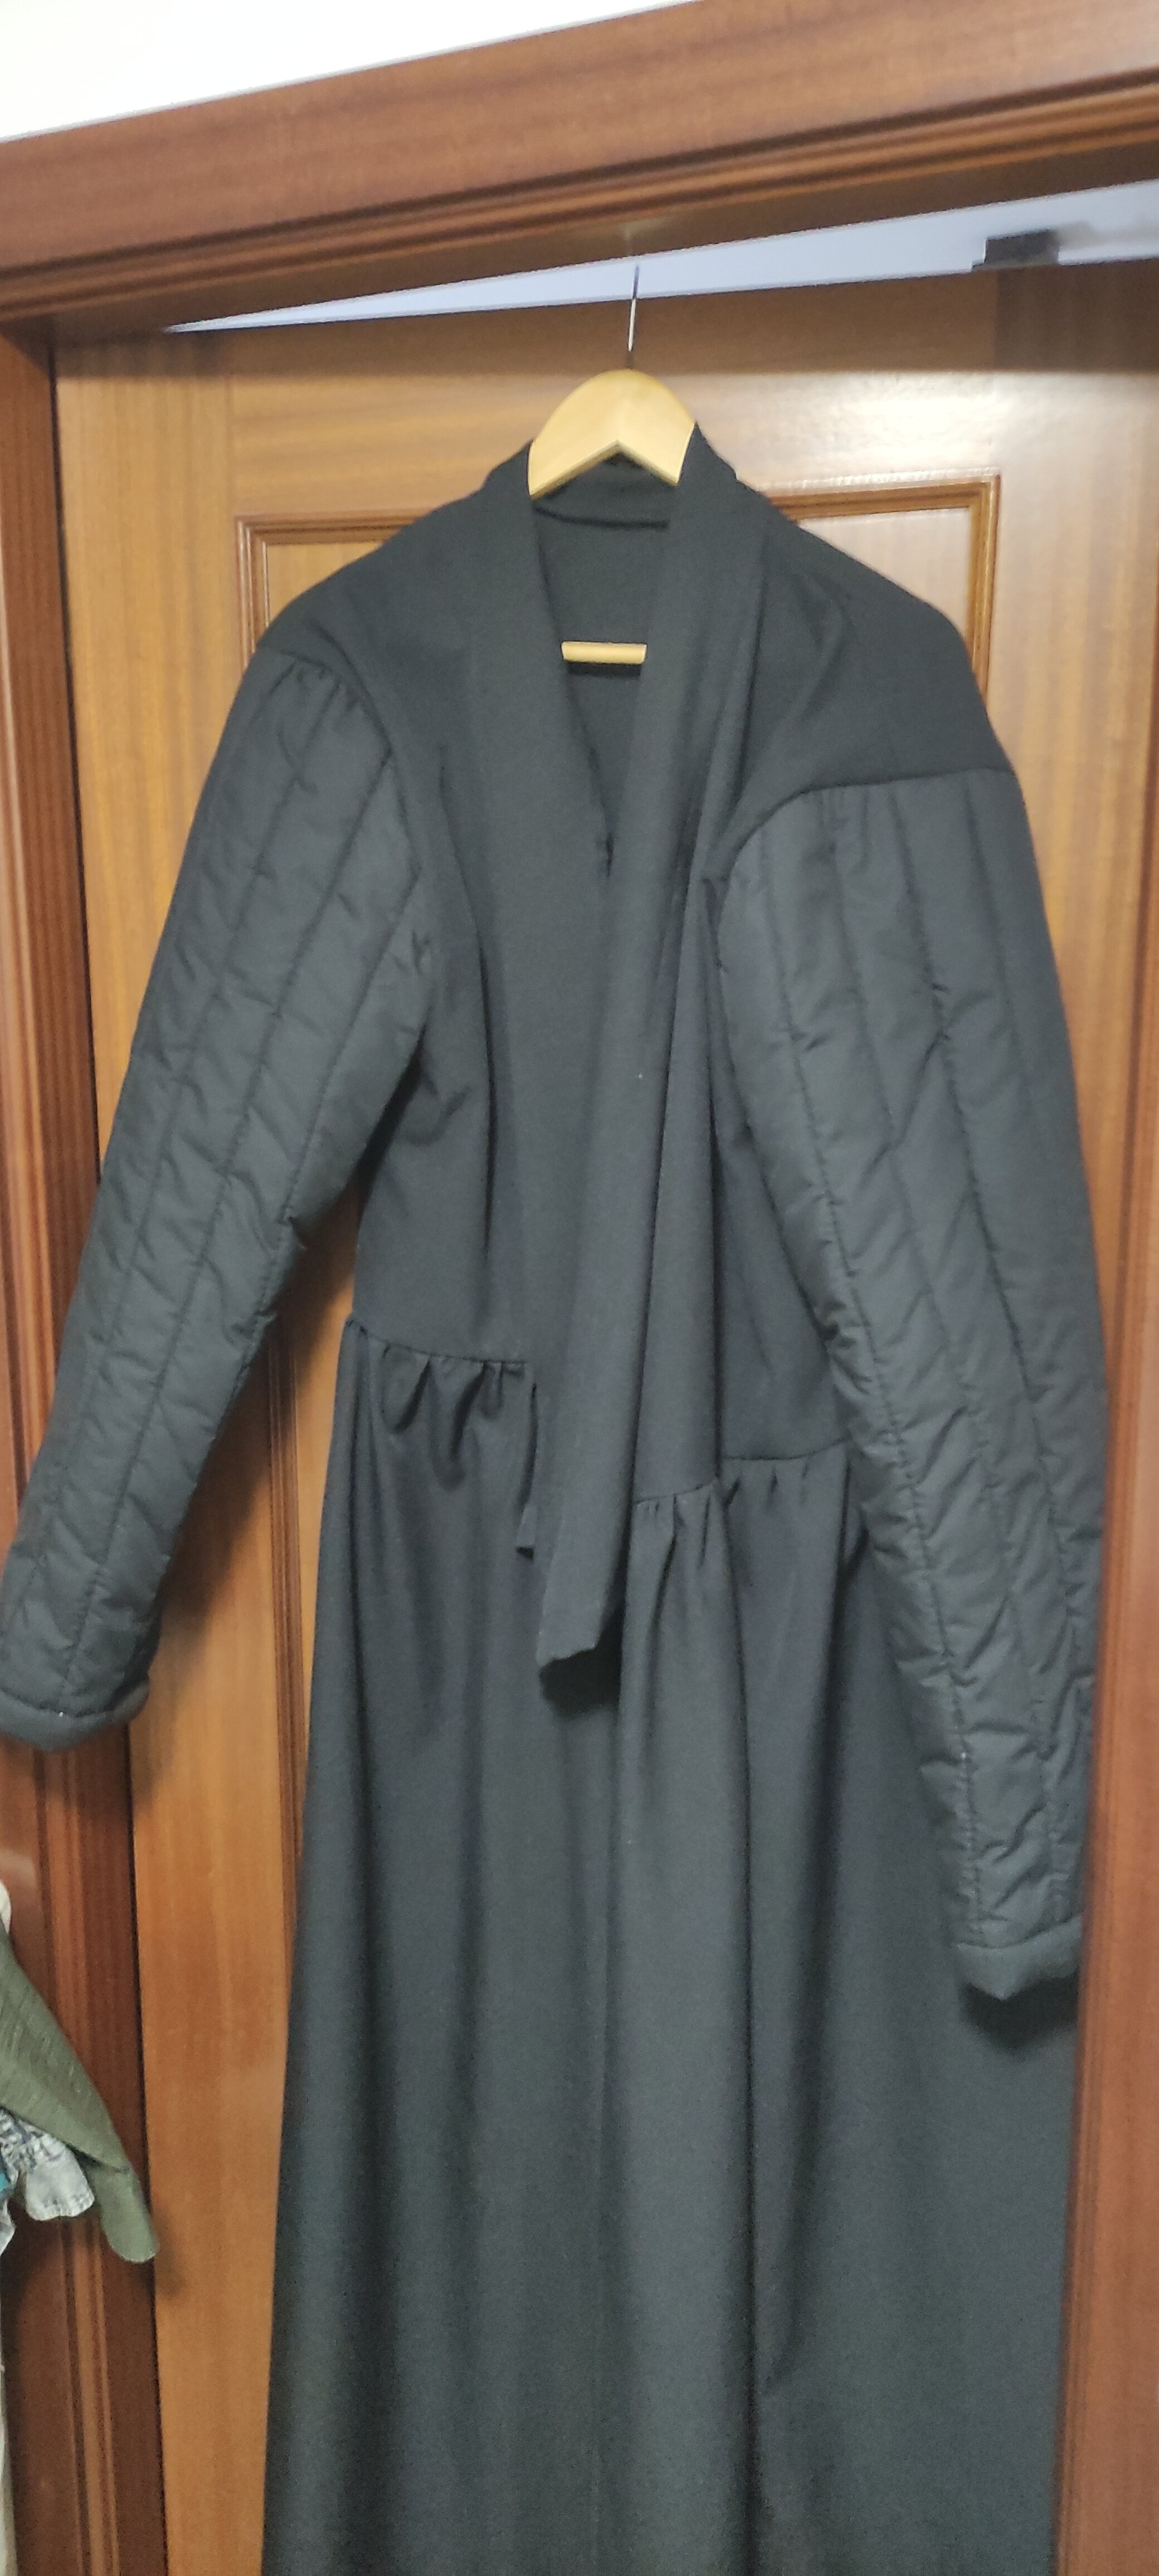
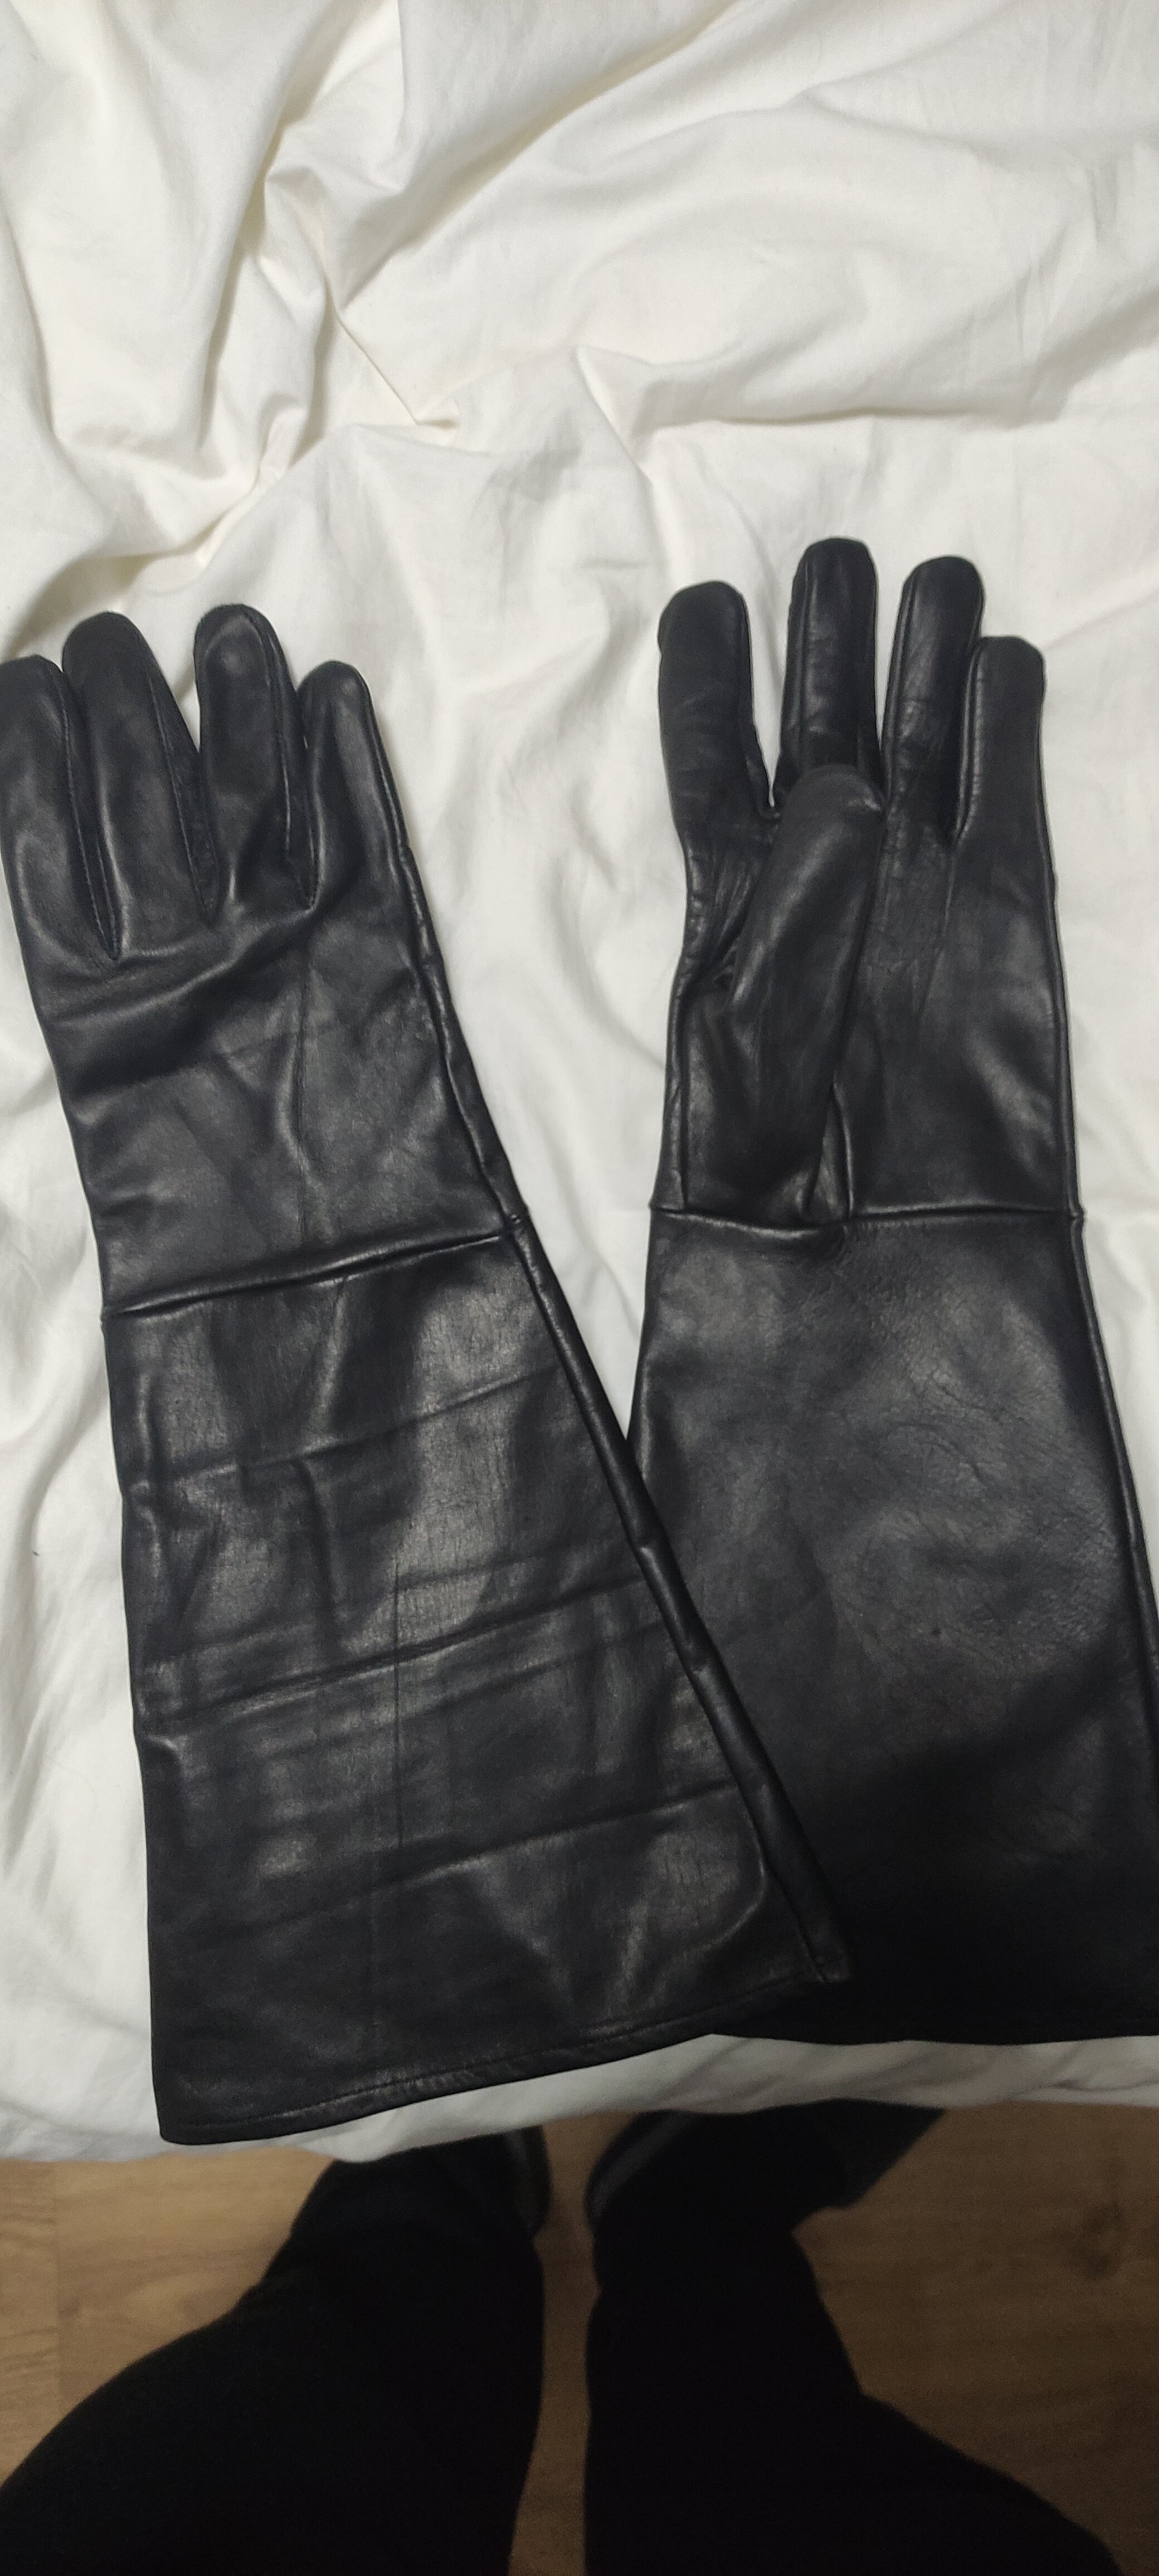
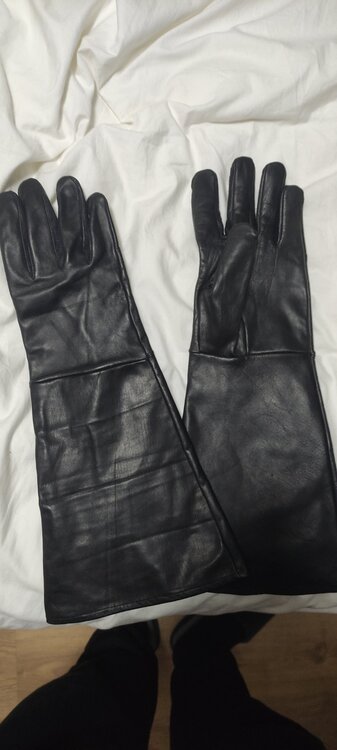
Hi again! As I promised here I show you the different parts of my costume: The leather gloves I bought were recommended by my friend: The leather belt with the right measure and those little black metal pieces: Here you can see the belt on the obi which is almost finished: And the inner robe with the skirt attached and the sleeves finished as the CRL details: Finally the outer shirt on the inner robe: And that's all for now, in a few days I will show you the skirt and the awesome boots, the same for my royal guard costume.

 1 point
 -
Here's a few of mine with the Darman neckseal. Also my cloak was made for me by a friend who could actually sew Was lucky to find one at the time. My kit is a first gen MyNock resin kit with 1st gen and 2nd gen MyNock masks...1 point
-
Good luck! Looking forward to good news!1 point
-
Working on a Level 1 Darth Revan (KOTOR I & II) Looking forward to your feedback! Component source is Wicked Armor unless otherwise specified. Ordered 5/23/23 - Received 8/31/23 ✅ Hood and Capelet Images - https://imgur.com/a/J3l3XN1 ✅ Cape Images - https://imgur.com/a/8JLI6ua ✅ Mask Images - https://imgur.com/a/wAydI5q ✅ Shirt Images - https://imgur.com/a/wP8NyAY ✅ Vambraces Images - https://imgur.com/a/fwuqXp2 ✅ Hand Plates Images - https://imgur.com/a/LesZZ8x ✅ Gloves Images - https://imgur.com/a/boWlP0r ✅ Cuirass | Chest Armor Bridge | Abdomen Armor | Belt with O-Ring Images - https://imgur.com/a/LrirOwk ✅ Fabric Drapes Images - https://imgur.com/a/5QgPOpo ✅ Back Armor | Back Armor Bridge | Kidney Armor Images - https://imgur.com/a/xI3RQwE ✅ Split Skirt Single Hole Cord Lock Ordered 11/15/23 - Received 11/17/23 Images - https://imgur.com/a/33R2vP5 ✅ Pants Amazon Ordered 5/11/23 - Received 5/13/23 Images - https://imgur.com/a/CO9UxZh ✅ Boots CrowProps Ordered 5/16/23- Received 6/9/23 Images - https://imgur.com/a/lBESk6N ✅ Lightsabers Vader's Vault REV-N Elite Ordered 07/21/23 - Received 08/22/23 Images - https://imgur.com/a/CJHBouu Vader's Vault Revanchist RTS Ordered 07/21/23 - Received 08/22/23 Images - https://imgur.com/a/CJHBouu ✅ Undergarments Balaclava Compression Short-Sleeve T-Shirt Compression Socks 12-inch Tummy Trimming Belt ============= Purchased but will not submit Korbanth RevanV2 "Dark" Ordered 08/01/22 - Received 08/03/22 Korbanth / Vader's Vault comparison images - https://imgur.com/a/jmD2Guk Korbanth RevanV2 "Light" Ordered 08/01/22 - Received 08/03/22 Korbanth / Vader's Vault comparison images - https://imgur.com/a/JiAaSzT Wicked Armor Resin Saber Hilt Ordered 5/23/23 - Received 8/31/23 Images - https://imgur.com/a/e8dgYge1 point
-
Hi Charles, I'm pretty sure I've already spoken to you on Facebook, but just in case...both Rahm's and Kasdan's sabers are fairly simple (aside from the tsuka wrap on Rahm's) and could easily be made out of PVC. The belt hangers for this kit don't really need to do anything other than sit on your belt and look pretty so you can go low tech for these. If you are looking to have them be functional, I highly recommend checking out The Custom Saber Shop, they have a HUGE variety of custom parts and I have had them do custom one-off pieces as well, so if they don't have what you're looking for, reach out to Tim and he may be able to help get you the part you need.1 point
-
Enjoy some photos.

 1 point
 -
My suit is the same type of fabric, and I had this start to happen below the zipper. I had some extra fabric (since I purchased some of the same fabric to make my gloves), so I cut a small rectangle patch to reinforce the area and used E6000 to glue it to the inside. It helps take some of the load off the stitch holes, which are weak points.1 point
-
For folks interested in the racing shirts: https://docs.google.com/forms/d/e/1FAIpQLSftQjCpTpwdv5rFwIxYS5yhUYW5L_7lkqQTrI71RSzPE2OXWg/viewform1 point
-
Yes I used Proton VPN. Right thats why I was getting the error. Anyway after disabling the VPN, I have no longer getting any error code while playing the game. Thank you for staying with me and help me. Have a great day Paisha!1 point
-
Hey! helping a friend work on her mara jade my GML claims that the shins need to match the CRL, do you have any source images with the shins shown above?1 point
-
Per the LMOs, we have to wait until the end of the season at least before the assignments are made.1 point
-
I was thinking about suspenders or straps like this https://www.amazon.com/YiwerDer-Adjustable-Fastening-Reusable-Organizer/dp/B0C68Z6ZQP/ref=sr_1_5 But your suggestion is much better. Thank you.1 point
-
I really appreciate the response, Max. 1. Great idea. I’ll see who I can get in contact with. 2. That is technically a motorcycle side, but the follicle structure is usually bigger and more noticeable. 3. If you find something, then I’d happily give it a look over. Otherwise, I’ll double check with my local rep to see if the “piping needs dimension or if it’s just a prominent edge that has to show. 4. I think the words “approximately” is what gives me hope, but also makes me nervous. I don’t want to invest a lot of time in a build, then have to start from scratch, or even worse, have to buy an expensive replica. I typically make my own stuff. When a local rep approves based on the CRL, then the build is official with 501st, or would a member of global leadership need to secondarily affirm that the build is approved? I really appreciate the help.1 point
-
Oh this is absolutely stunning. You just have peak Asajj vibes.1 point
-
I gave my Nihilus hood mold to a friend who has a vac table, but he isn't interested in selling the hoods so he sends them to me and I post them on my Etsy store for him. I let him know that I was out of stock, and he is planning to order more plastic and make another batch. When I get them, I'll renew the sales page on Etsy. Pam1 point
-
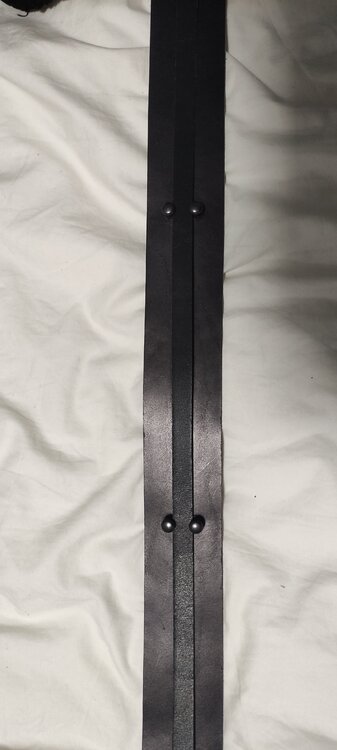
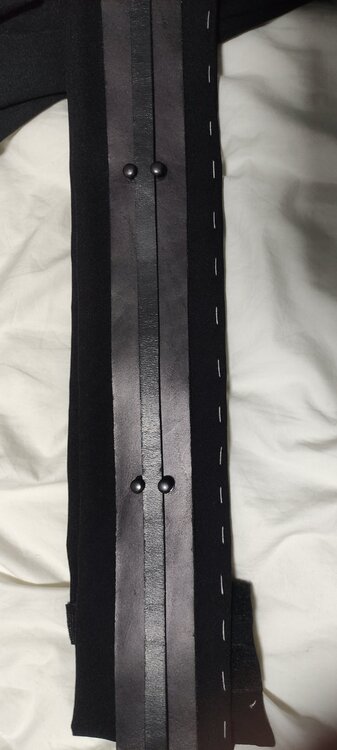
I posted an earlier thread regarding my modification to how the capelet straps attach to the front armor of my Darth Revan. I described changing the attachment so the capelet straps reach up out of the armor to feed through D rings attached to the capelet. This made it a lot easier to put on the capelet without help. I wanted to share additional images but was unable to add them in a reply to this earlier post: I tried this out on a troop and it was much easier. One could use snaps to hold the straps after they feed through the D rings, but I wanted the option of adjusting the height of the capelet when needed in case of wet pavement, grass, etc. or if I change boots or change armor fit. I wanted to add a stopper to prevent the capelet from loosening and lowering, but would still allow for me to easily raise the capelet. I put on the armor and attached the capelet. With help, I measured how much strap length was fed through. I then checked that measurement with the armor and capelet off to determine my stitch point for the stopper. Like in this belt example, I wanted to feed the straps so they were hidden and so the stoppers were against my body instead of facing out. I chose mushroom domed buttons that were small enough to fit through the D rings on the first feed-through, but would act as a stopper after the strap was fed through in place. I will black the chrome finish out on these: When I put the armor on, I make sure the straps are hanging outside of the front armor. I can reach up and grab the D rings to feed the straps. After feeding the straps through, I pull them forward to be hidden under the hood tuck. The mushroom buttons prevent the straps from loosening. I can also periodically check my fit without a mirror by feeling how close the buttons are to the D rings. I can also make quick adjustments to raise the capelet when needed without a mirror by measuring a finger width or two by feel.1 point
-
Congrats!!!1 point
-
Late to it, but CONGRATS!1 point
-
No mention of how to wear the saber in CRL. What is everyone using, Covertec Wheel or D Ring? If Covertec what color and how are you placing the clip on your costume?1 point
-
I decided to get the Crowprops Revan boots made. As I normally have all sorts of issues with boots. Figured ones fitted to me, will solve that. I also normally have to use inserts and gel inserts in my shoes. I made mention of that to sales and I was pleasantly surprised they also included inserts with the order. I felt that was a neat touch. I have only tried them on and took a some practice walks around the house with them. Waiting for the rest of the costume and looking forward to going out with it.1 point
-
CrowProps boots and pants ordered.1 point
-
I'm always down to coordinate for Cons and willing to travel1 point
-
That's looking nice!1 point
-
Thanks! I had to scratch make nearly everything myself, including the belts and under clothing. The gloves are simple butler style gloves that I made bone templates for and then hand painted with fabric paint. At some point I'm going to pattern and sew some new gloves with fingertip extensions to better match the character, but making gloves is harder than I anticipated. I'm happy to walk though or show detailed photos of the tunic or any other pieces if it helps.1 point
-
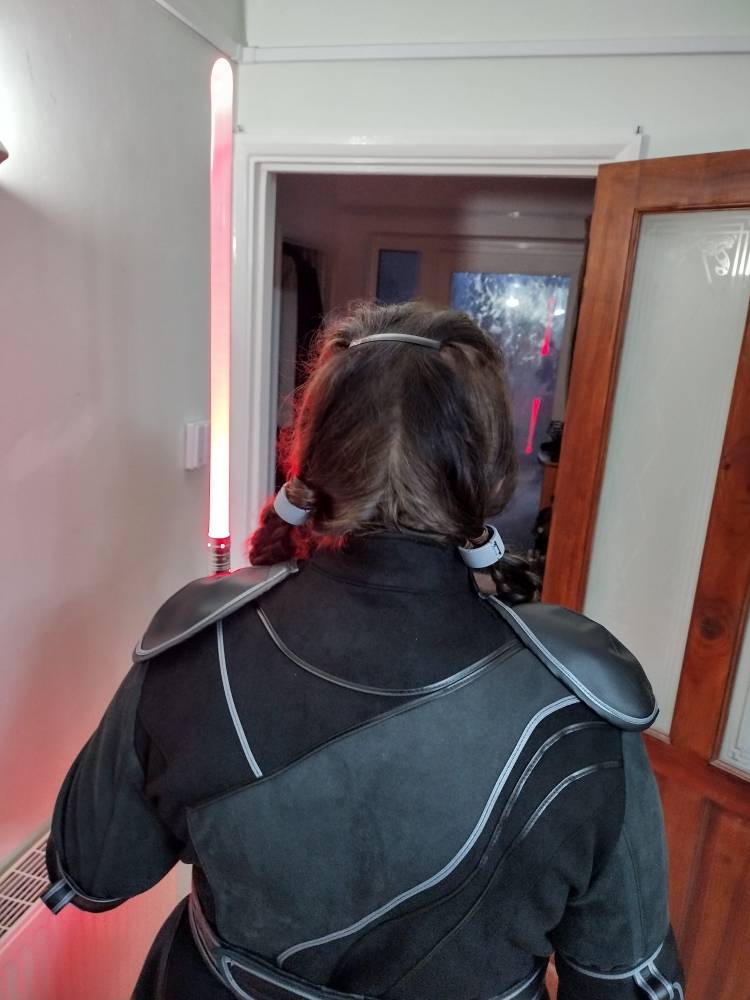
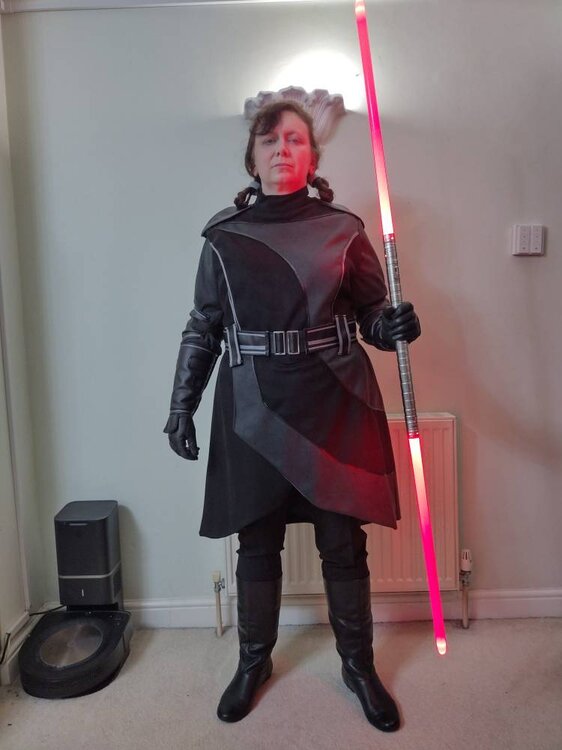
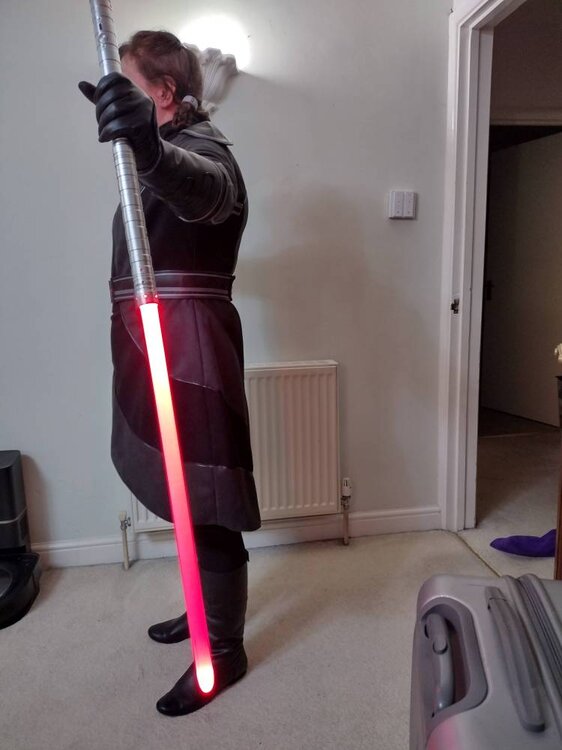
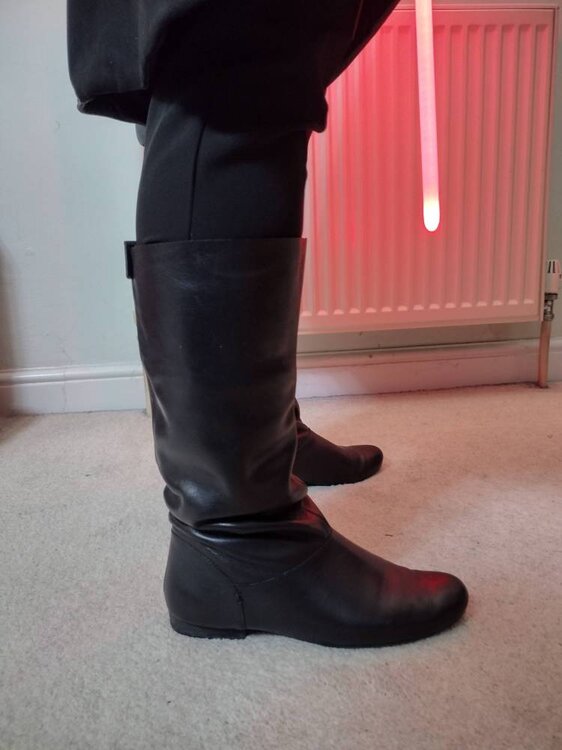
Finally I did it, boots have been altered and kitted up yesterday completely. I had a brain dump and couldn't work out how to do my hair. Of course, during the night I mentally worked out how I should have done it. Hopefully though it won't hold it up too much and require another full kit up. The boot clips have now been permanently attached in place, so that there is no way of losing them.

 1 point
 -
Horn sculpt in progress...1 point
-
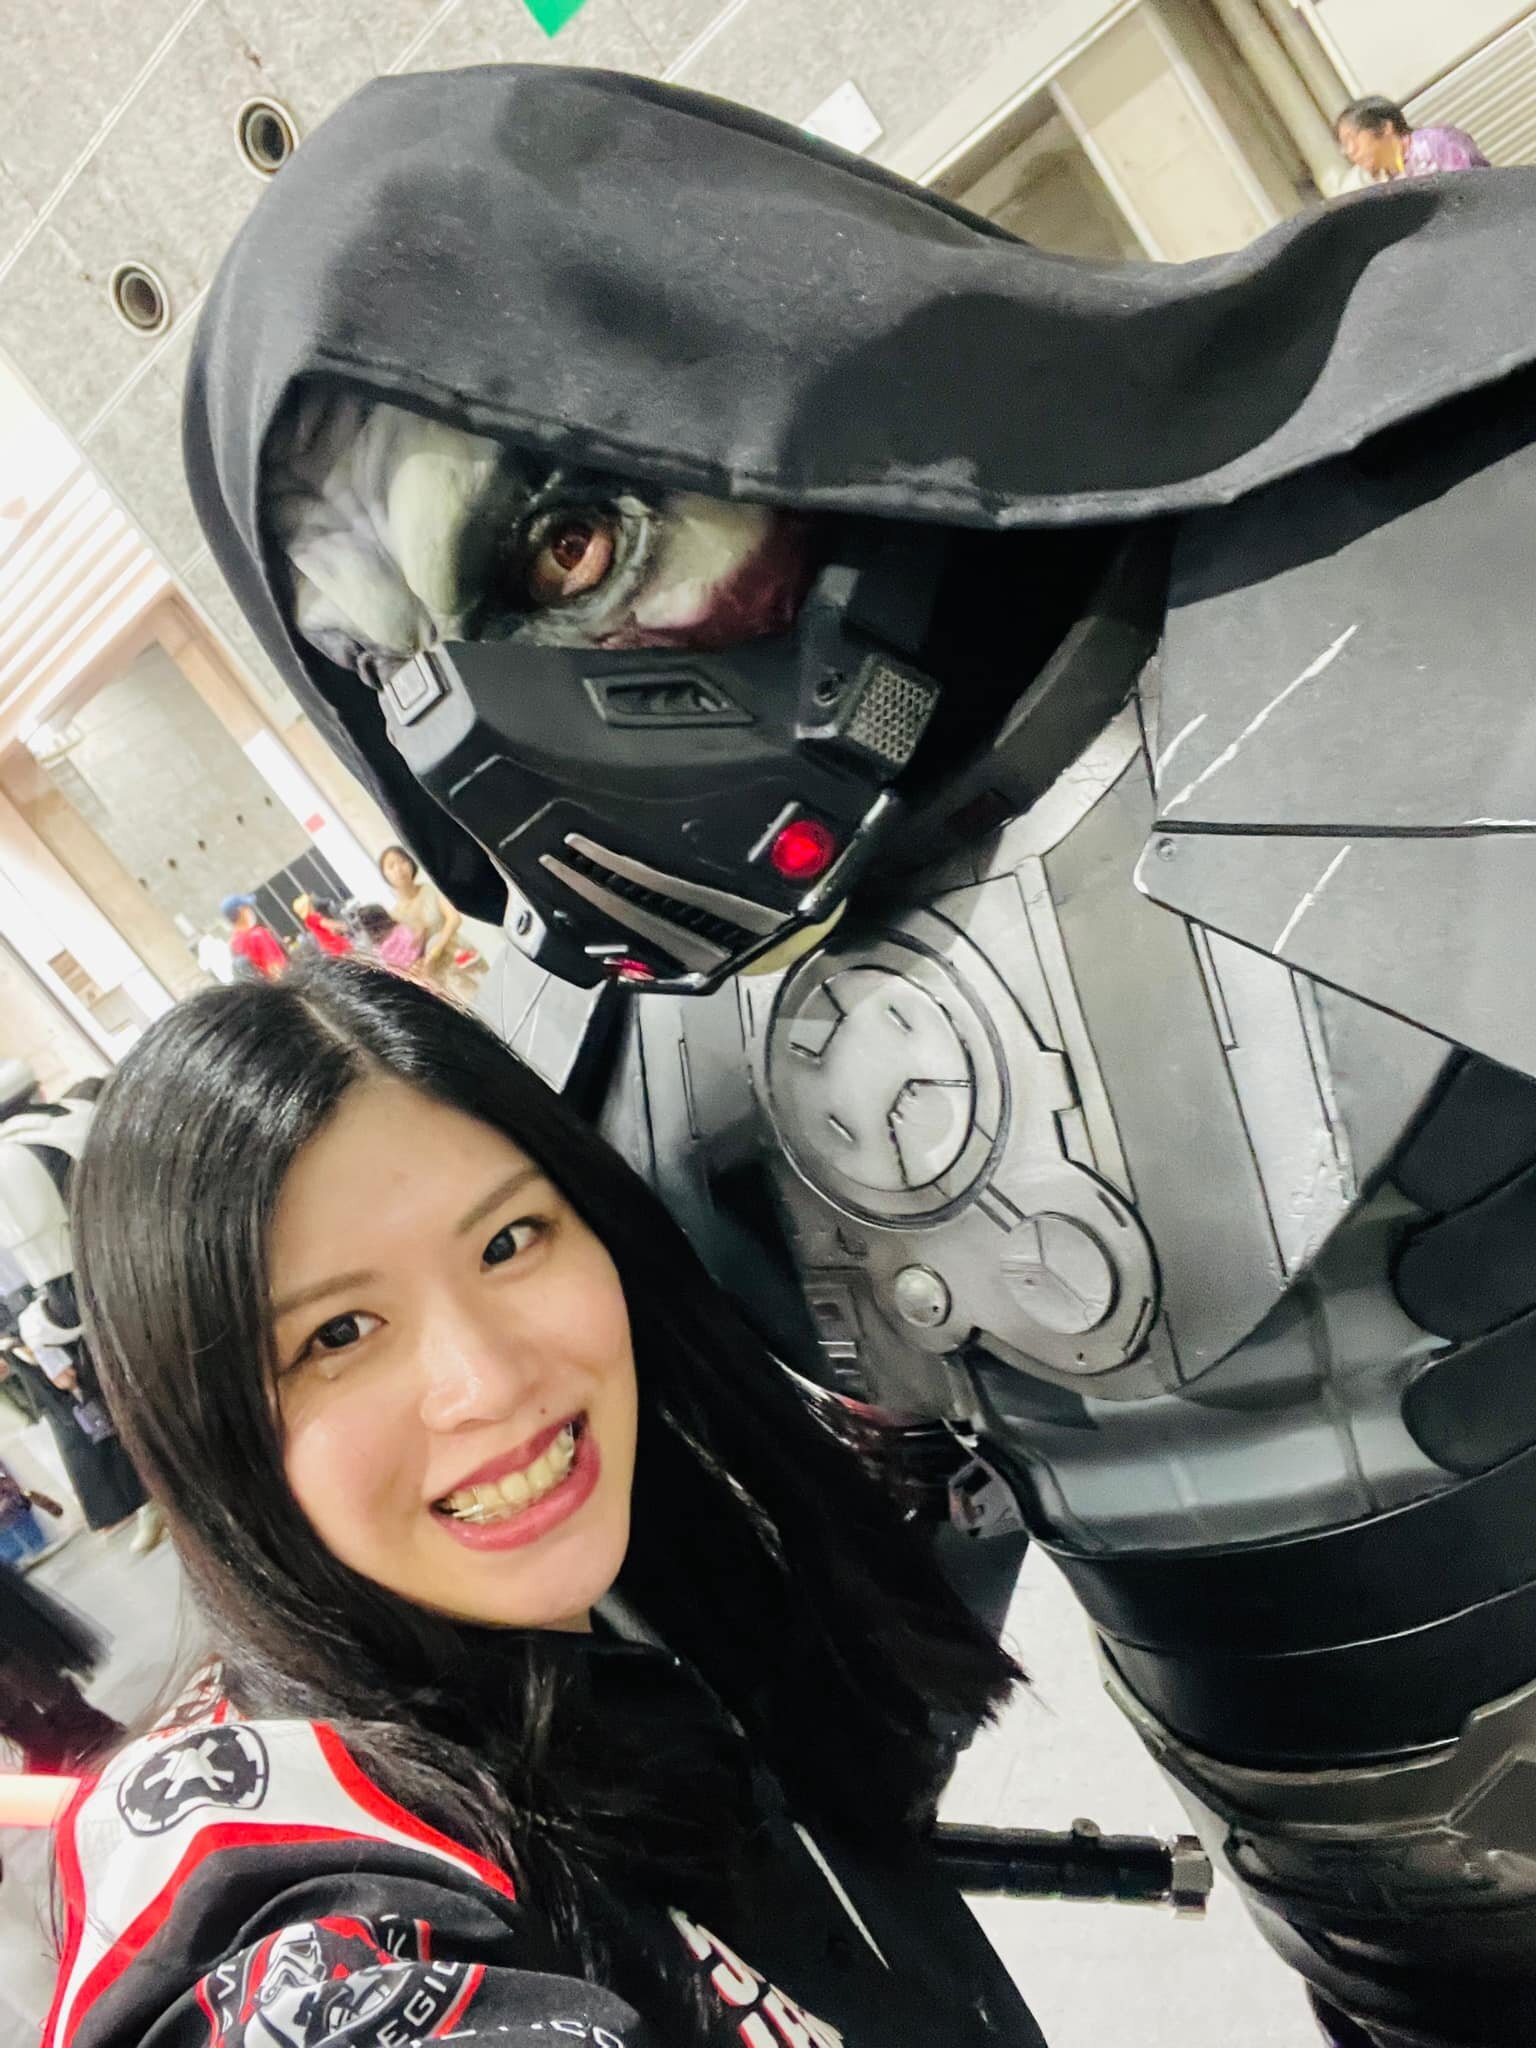
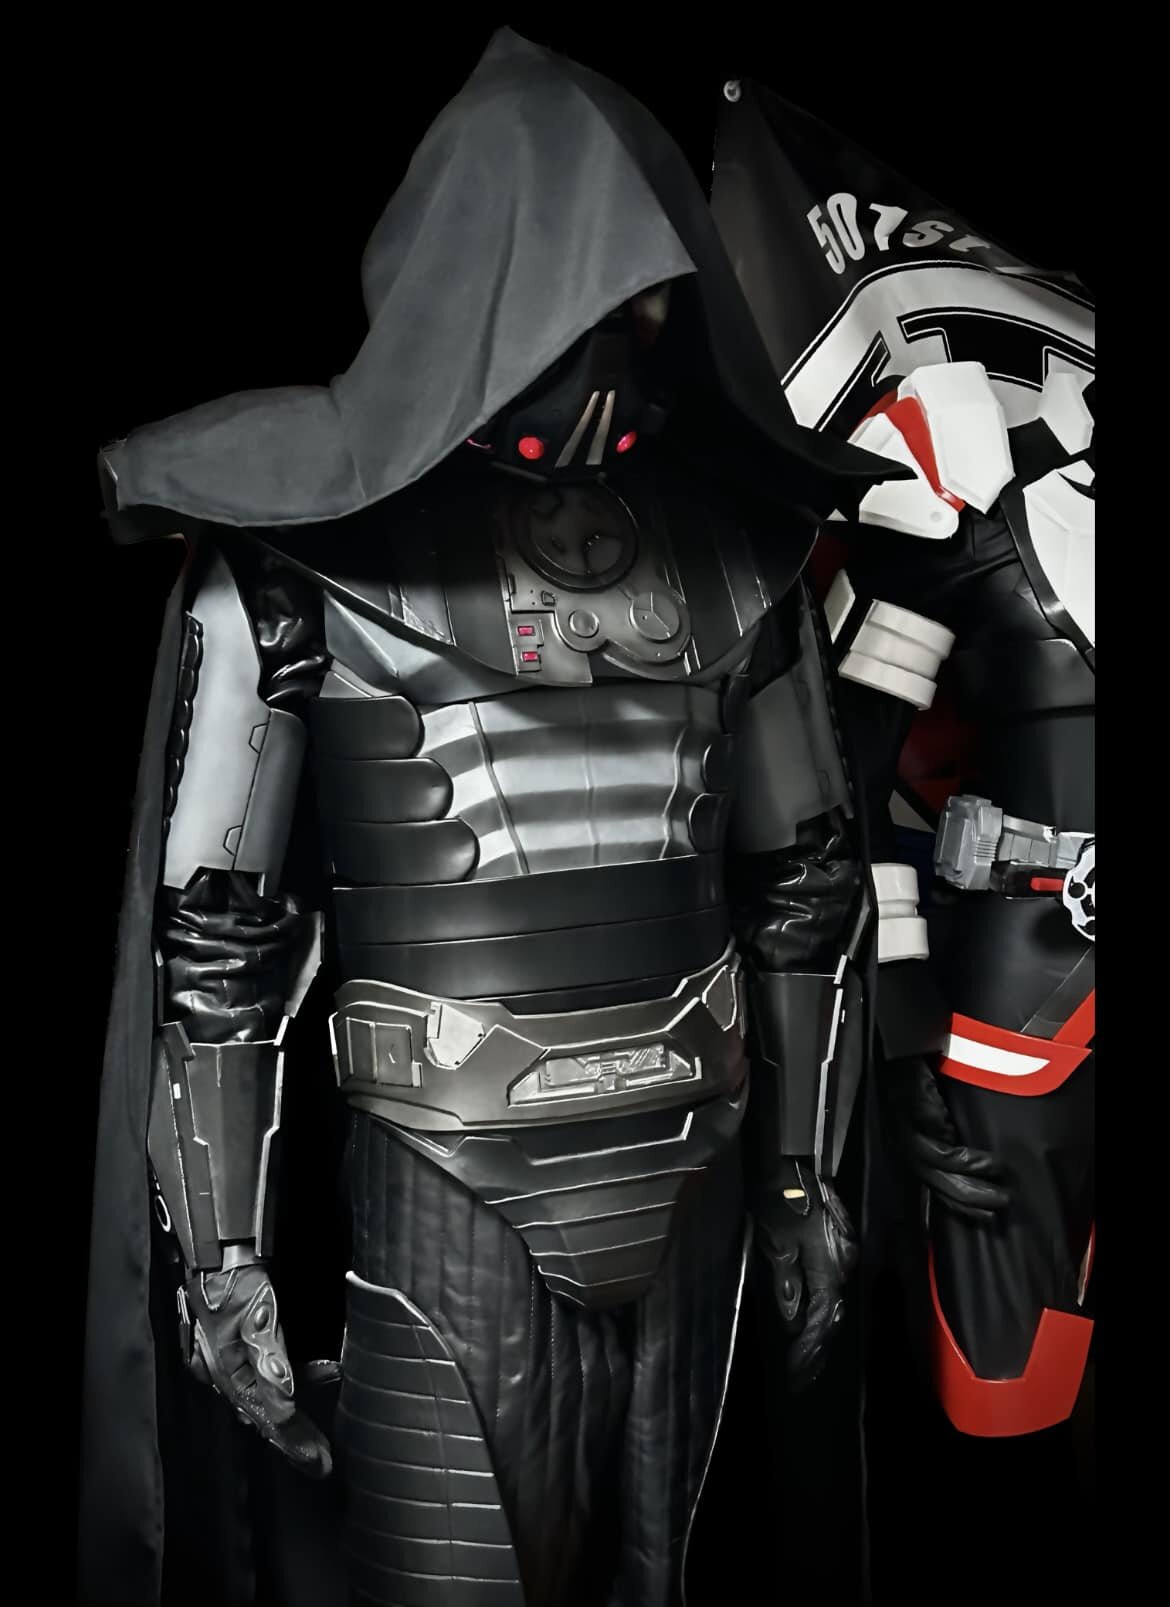
Was able to debut the kit at a convention this past weekend. Overall response was overwhelmingly positive! Also identified several fixes that will need to happen before the next outing.1 point
-
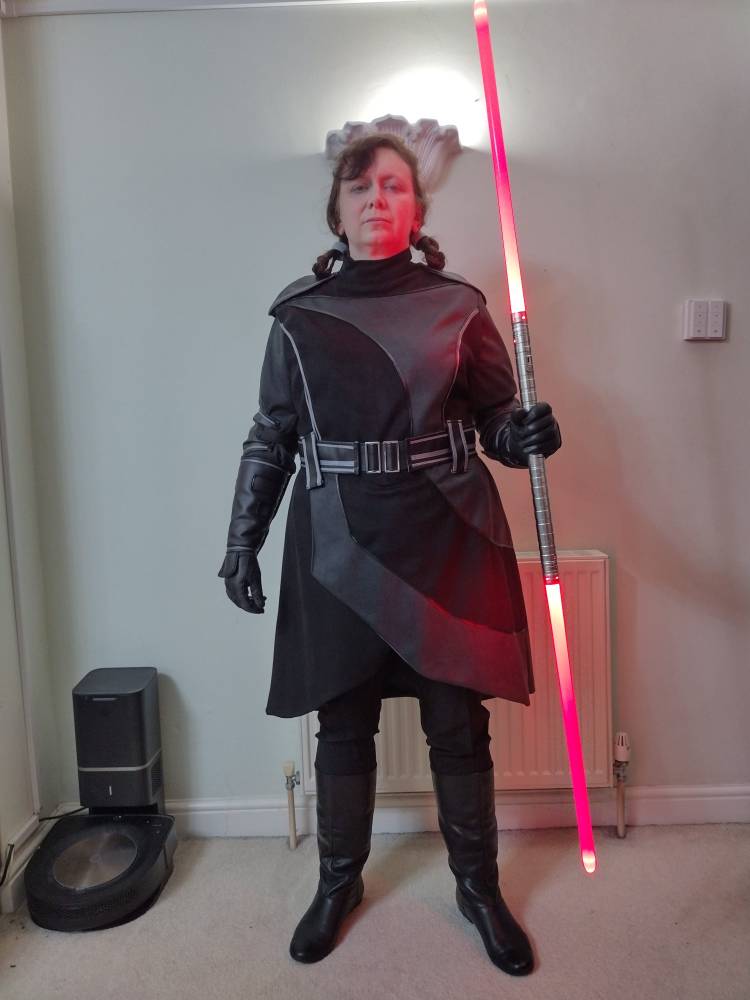
After a period of quietness, on my part I have been working away at this in the background. Unfortunately at present I can't move any further forward with this, as I need to work out how to alter the tops of my boots. I wore this, incompleted last weekend at an event. Please note however, this isn't submitted or cleared yet, as the boots need finishing. So instead I attended as general public. This may not be the best photo, however I forgot to get some proper pictures taken, so this is one of 2 photos that friends have found and sent me. Amazingly, the decoration on the boots stayed put, having printed them last week. I need to smooth and sand them, however once they are finished properly, I'll fix them to the boots.1 point
-
I wanted a way to disconnect it if I needed to to fit into the bin I have for it. I just reconnect the buckles and lift it on. In hindsight, connecting two D rings on each strap would have been better and I might change it to them later. Slipping the strap through D rings is really easy to adjust the fit.1 point


.thumb.jpg.0d1684095db527b839cf5a8a14c59585.jpg)


.thumb.jpg.71ffc70ada245148c97a2dd358072cec.jpg)
.jpg.191f8c449edb4fd9b34c22814ad44df9.jpg)