-
Announcement
Welcome to the forums!
If you are a newly-approved member, make sure you check out the New Member Checklist!
If you are a Detachment member and can't see the member-only area, post here for access.
-DV
Leaderboard
Popular Content
Showing content with the highest reputation since 07/17/2019 in all areas
-
Just a quick update on what's going on with the detachment stuff since it's been a quiet period (not always a bad thing!). 1. We're actively designing merch for a racing shirt, patch, and coin themed for KOTOR 20th based on votes. These will come in the next few months. It is slow due to lack of artists available and, well, life. 2. We're working on 3 New to the Legion CRLs/costumes currently that we're hoping to be released before the end of the term in Feb after updates to the costumes are finished. 3. We were told by LMOs that we had to wait until the end of the season of Ahsoka before submitting requests for assignment of the costumes. But, after the short, "please don't spoil the episode for us" request time, we're submitting for Shin, Baylan, Morgan, Marrok, and all 3 Great Mothers to be assigned to TFE. 4. We're still looking for artists and a new Programs Officer if you're interested/able to assist the Detachment! If you have any other requests or ideas, please feel free to comment or message me!5 points
-
It's finally here! Galactic Armory's V2 mask. Much more detailed and accurate than the old version. I figure I can fit red LEDs into the eye sockets to emulate the eyes.4 points
-
Just as a head's up to anyone interested in doing this costume: It has been agreed that so long as the visible parts of this costume match the references available, I am good with allowing the missing parts to be supplemented from Eleena Daaru's references. With that, I look forward to seeing a high quality submission soon!4 points
-
New guy here! I've been working on a spinning GI saber for a bit and it's starting to come along. I have a youtube channel documenting the build but I also wanted a build log for better documentation and thought 'what better place then with people who can give me some sound guidance.' So here I am! Looking forward to chatting with you grand folks. I'm pretty far along in the project, so I'll be updating this log until it catches up with progress.4 points
-
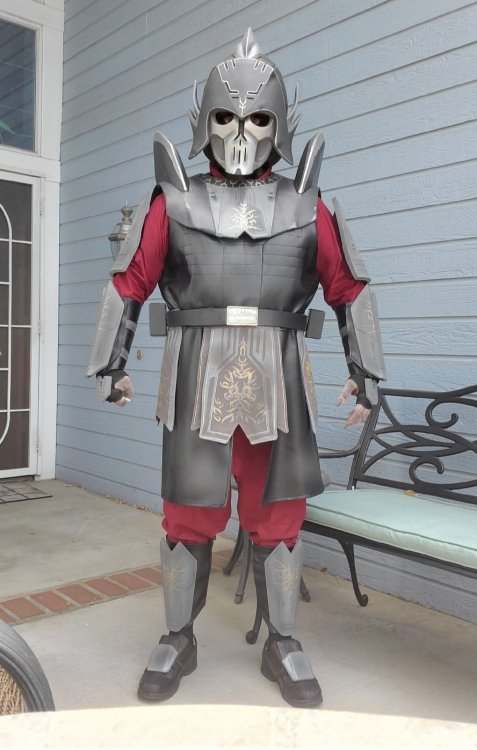
Try everything on Boots & gloves are from Crowprops And now I'm searching for armors4 points
-
3 points
-
Hello from Japan. I'm working on Darth Margas. Thank you for your opinion. Sent from my iPhone using Tapatalk3 points
-
Korbanth has a Savage hilt for sale: https://korbanth.com/empty-double-sided-staff-the-oppressor3 points
-
3 points
-
Hello everyone, I’m Daisy from the Dutch Garrison and together with Rikki I have been assigned as your LMO team for this term. About Me: My name is Daisy van Rijn, and this is my second term as a 501st Legion Membership Officer. I have eight approved 501st costumes, four in the Rebel Legion and I have a Seventh Sister costume that I'm hoping to finish this year. I have been sewing since I was 19 and love sharing that acquired knowledge with others. I'm excited to be able to assist you this year with the TFE Detachment as I have a large love for the Old Republic Era. What is an LMO? The Legion Membership Team is responsible for reviewing and processing applications for membership, and maintaining and updating member information in the Legion database. The Legion Membership Officers drives costume policies, including acceptable costume types for membership and setting standards for costume submissions, and are the final arbiter of member costume issues and approvals. The Legion Membership Officer supervises and advises Detachments, Garrison Membership Liaisons, and Garrison Web Liaisons on any questions or issues they may have with member’s costumes. Have a question about membership these are the folks to talk to! There are LMOs you can contact at any time at Legion Officers however Rikki and I are the ones who are assigned to the Imperial Gunnery Corps this term. Thinking of starting a NTTL (New to the Legion) Costume? Please message the Detachment and me here as well as send a link to your build thread. I love researching new costumes and helping. Worried a costume may or may not be eligible for the Legion approval? https://databank.501st.com/databank/Costuming:CRLGuide See Character Approval and New to the Legion Costumes (NTTL) sections for details. For “New to the Legion” costumes please also have a look here: Costuming Standards Have a question? Do not hesitate to message me. Get your references together and sent to LMO (at) 501st (dot) com.3 points
-
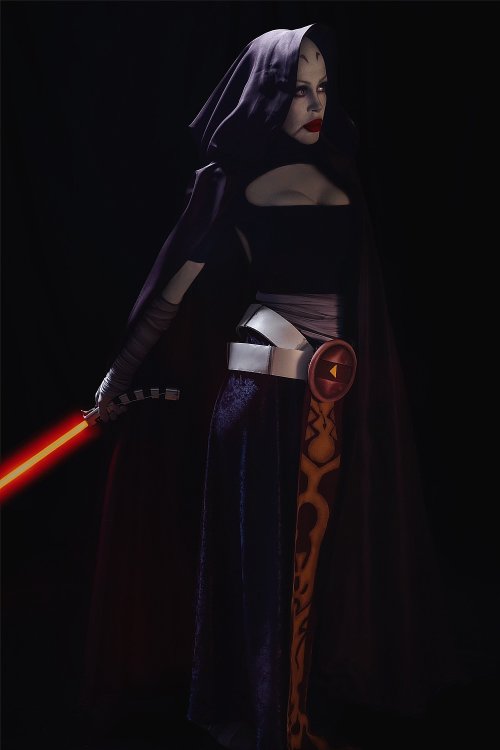
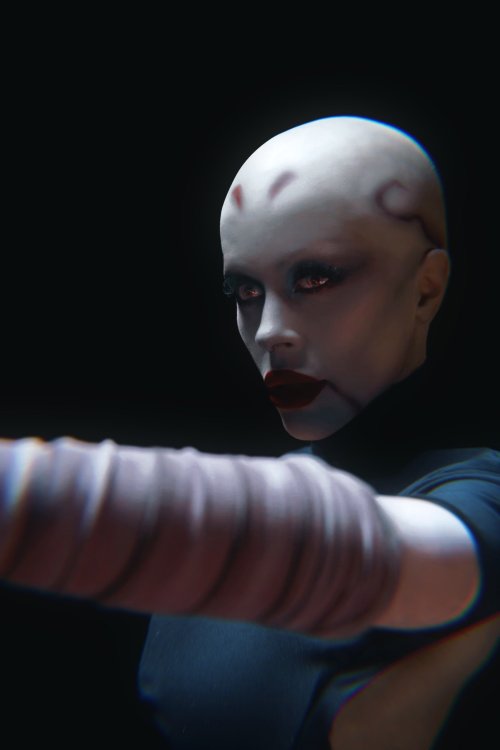
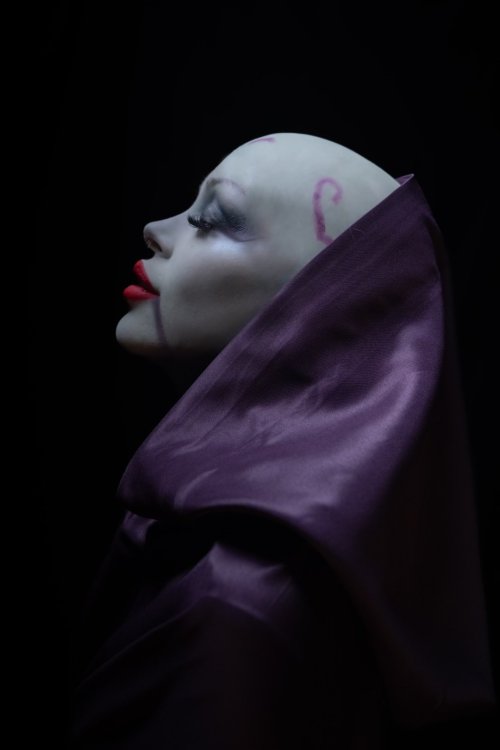
Today was play with makeup... I didn't get around to doing the back of the head tattoos. I do plan on making a stencil for that part. This took around 2 1/2hrs. Still learning the best way to work with the materials. I think I did a pretty good job.3 points
-
3 points
-
Galactic Armory has updated and revised their Inquisitor mask, and I'm helping them attempt to model the hard parts on the belt. Thankfully the Inquisitor wears the typical jackboots, so that'll probably be the easiest part of the build.3 points
-
Separate post: The mask from Galactic Armory arrived. It looks pretty spot on, we'll see how it holds up when the show comes out. As well, GA agreed to help me research the costume after the show airs and will help me develop any armor pieces or hard parts I may need.3 points
-
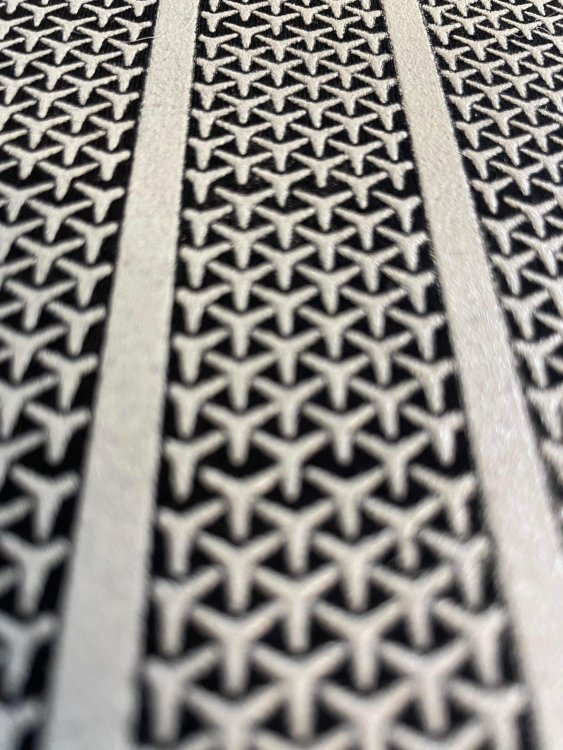
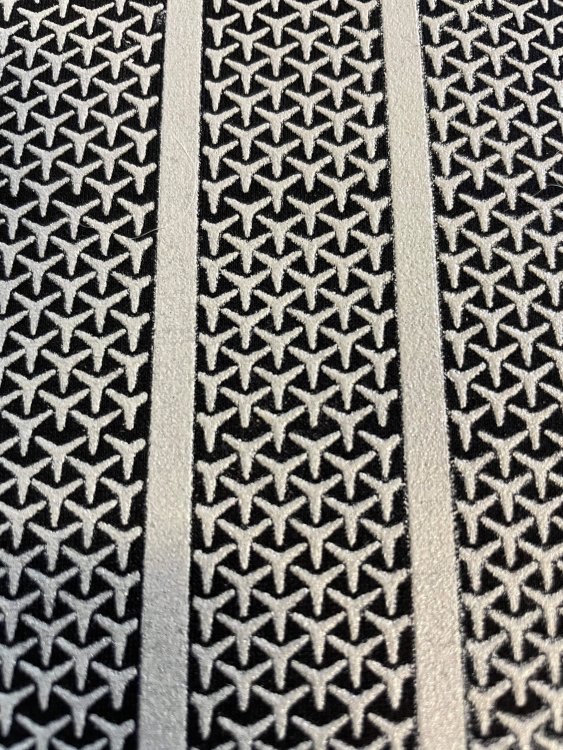
So have been staring like a crazy person at the pictures I have again and think that the rubber at the center front of her costume and on the gauntlets is a rubber window seal. I'm buying a few typs of S and V shapes to do some experiments with that as well. All of my printing supplies have finally come in. I hadn't planned to do it all myself, but paying to have the screens made wasn't cheap and I screwed up the scale of one of the patterns, so I decided to just bite the bullet and buy what I need. I purchased blank screens with the proper thread count for dense prints and but 2 types of emulsion to try. Both are made for high density printing. I found a supplier online that prints the film negative of the pattern for pretty cheap ($10 for my small one and $25 for the larger plus shipping). They arrived in a few days. My next step is to make my first attempt at high density screen today. I'll take pictures and share links and things later. I'm going to start with the glove pattern first since it's small volume. I've also got the pattern for the bodysuit, so I will be adapting that for what I need so I can pattern out the parts for printing. Going to be a lot more activity over the next few months! A friend of mine that loves doing leather work is helping me iwth the armor and she has one of my boots to pattern out the new shaft. I did some initial tests for aging the boot vamp and those worked pretty well. When I get the leather parts back, I'll share images and how I did things for that too.3 points
-
Big Update: My mask came in and it is gorgeous! I also have the armor finally smooth and ready to paint in a satin black. The soft parts are being worked on now, pleats for the sleeves were just finished recently and were a nightmare to do, the Kylo Ren costumers were right on how bad those were to sew lol.3 points
-
3 points
-
3 points
-
3 points
-
All the armor is in the painting phase now and assembling the weapons now. No pictures I wish to share yet except maybe this:3 points
-
Since I have been asked several times for different characters in GoH, both older and newly released, I'll make one post to hopefully help clear it up! 1. Yes, the current TFE Command and assigned LMOs for TFE support adding GoH versions of characters as eligible for TFE approval/new CRLs, SO LONG as there is a full 360 degrees of reference to show all the details. The view option in game makes that pretty much a non-issue, but we still need the highest resolution possible. 2. If the character in question already has an approved version in TFE, then a couple things can happen: a) If there are no differences between the approved version and the GoH version, then no new CRL is made and it is considered the same as the existing approval for said character. b) If there are differences between the approved version and the GoH version, then a new CRL can be made. In this case, it is considered a New to the Legion Work in Progress (NTTL WIP) and requires an entirely different approval process that includes the TFE Command Costume Staff and the TFE LMO directly. In this case (and any not already approved character, regardless of media source), it is recommended to contact the DL and LMOs directly so that the process can be set up and advisement can be given. In this case, you can contact the LMOs at LMO@501st.com and they will redirect to the proper folks, or email me directly at Nina501st@gmail.com and I can pull in our specific LMOs.3 points
-
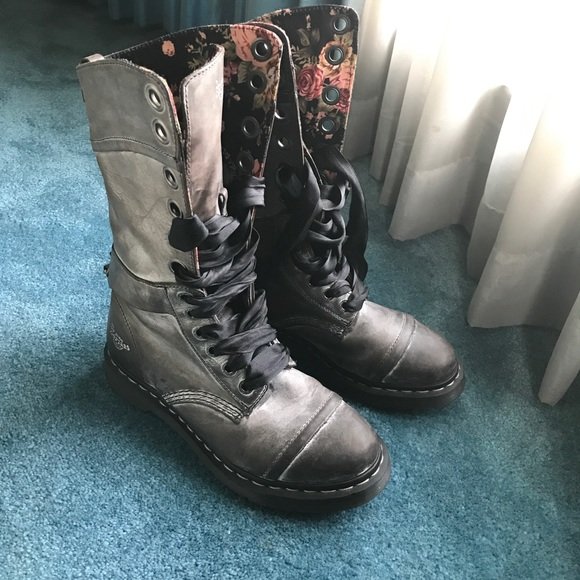
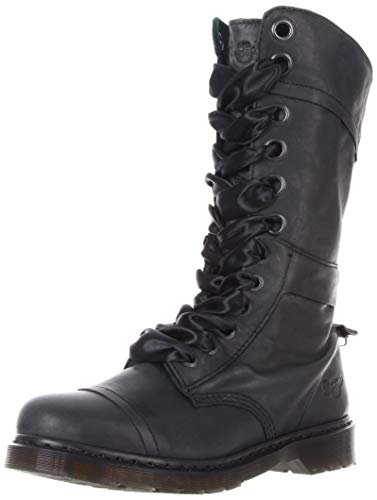
Here's the thing: these are animated characters. There isn't just one right answer because these are like art; the reference can support a handful of interpretations. The armor color is mottled, and is not just one color. I'll give an example of my favorite boots. These are black underneath, and the wax polish on top marked them look anything from grey to dark brown, but I know for a fact that the leather is black because I'm the one who put the polish on. It is the weathering that dictates how people interpret it, but these are what they looked like when I bought them: This is a real world translation of what the armor looks like in the cartoon. Now to the CRL. It is an animated cartoon, and just like 99% of the rest of our CRLs in TFE, the colors change as much as the number of times the character is seen. There is an accepted level of colors on a gradient that could be argued for the character's armor, but that does not make the CRL wrong. We only make CRLs for, "variants" that are approved, otherwise we'd have a 48 page long CRL for Aphra, alone, with all the Barbie dress up versions she has in the comics. So the correct statement isn't, "how can we make it not inaccurate?", but, "do I have the references to validate my interpretation for approval, which can then be ADDED to the existing CRL that already has done so?". The answer to that lies with the Detachment Leader, LMO, and your GML on how well you replicate the references to the real world.3 points
-
Making them turned out to be very easy for me. I used foam and Worbla. It was the first thing I made with Worbla, so even if you’ve never tried it before you might find it easy enough. You can read my blog about it here if it helps- http://withoutastitchon.blogspot.com/2016/04/mara-jade-knees-and-shin-guards.html?m=13 points
-
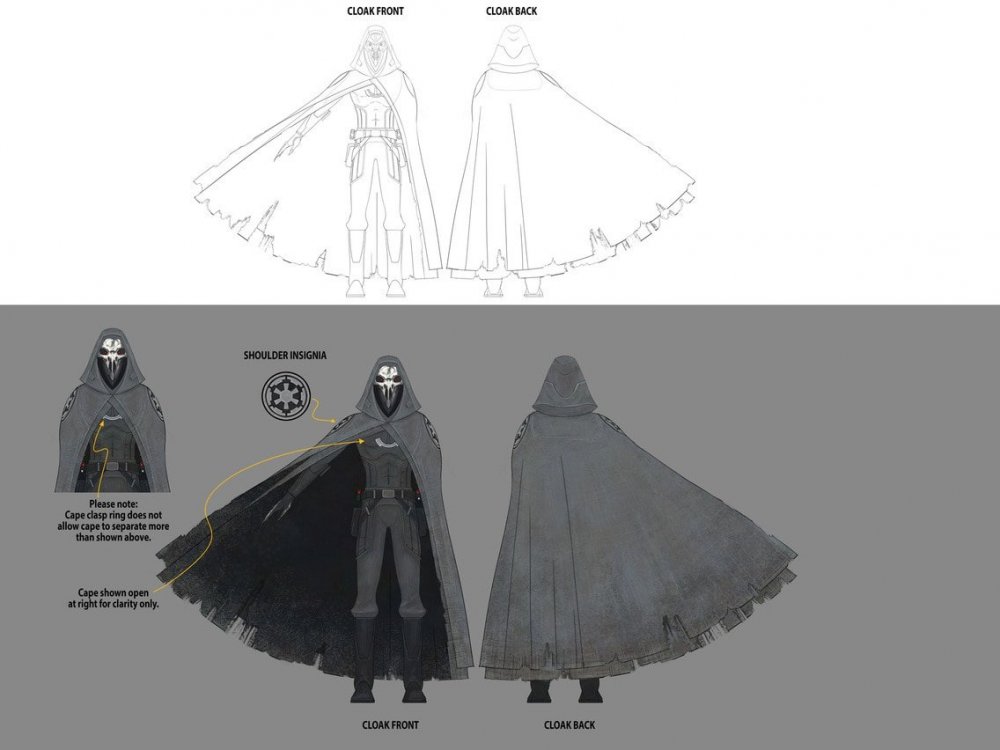
Hi Kyle, When I started doing some research into this costume, I messaged @Cookiedala for some advice, she mentioned this about color: " I would really go for a charcoal grey (almost black!) color and weather slightly on that." I would agree that a dark grey is the way to go with the capes and suit and leave the boots, gloves, and forearm bracers to be black. I know we will be getting some additional looks at this character in Tales of the Empire which releases May 4 and I just learned that there will be a limited series of comic books on the Inquisitors releasing in July! I am hoping we can get some additional images and hopefully a name/number for this Inquisitor in the comics. I am holding off starting my own Research/WIP thread until after those two new resources come out. I am excited to see that you are working on this costume!2 points
-
Hi everyone! Finally got my butt in gear and got my clone wars asajj approved and hopefully the first of many asajj approvals for me. I made every single aspect (except my lightsaber) from scratch without much experience before so I’m really proud of this one 😊🥰 I’m a brand new member of the pikes peak squad and the mountain garrison! Excited for all the new experiences to come 💕2 points
-
Thanks LordZedel for clarification - verification. For mine - I use the Etsy neck seal combined with a vest with a v-neck shape to it. Similar look to the bottom pict you reference.2 points
-
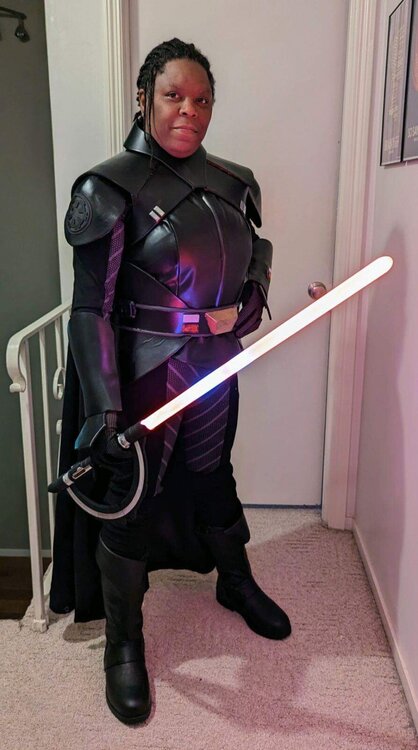
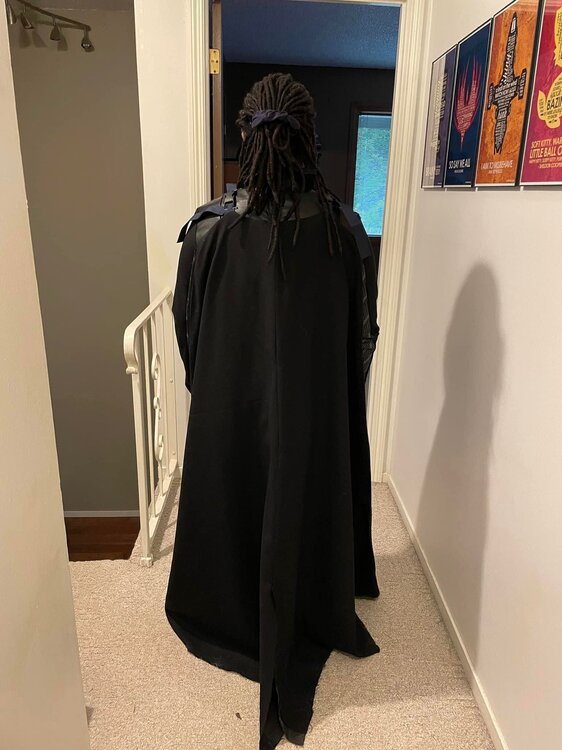
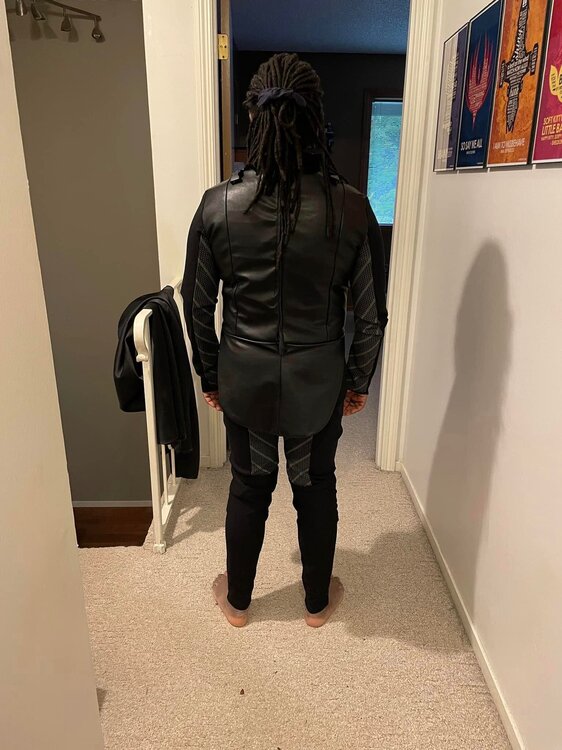
I’m skipping way ahead. I got a little hyper focused and just didn’t follow up with documentation. I have been taking pictures as I go. I have a photoshoot next Sunday and had to step up my game. Finished the bodysuit (sort of) and took some pics. The cape clips on to my shoulders. still to do: Place Velcro to hold armor in key locations Belt - cut to length, finish painting greeblies, wire LED Armor - apply Velcro, repattern collar, model greeblie for guantlets Boots - A friend is working on them for me cape - hem and shorten clip straps saber - all the things2 points
-
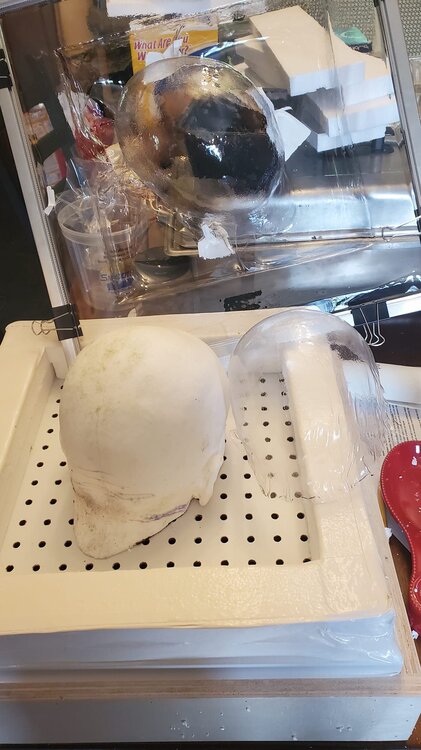
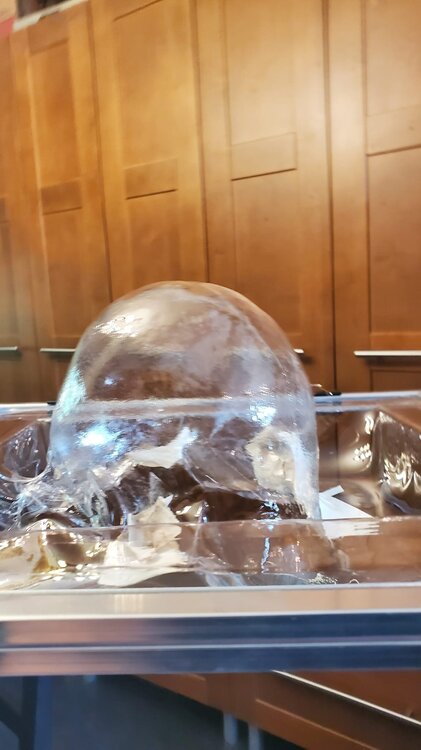
I will do a better write up of this in the next month or so. I will write more about how to make a casting of your head and such, but for now this is how to make the actual hard plastic re-usable stencil. Okay so this is going to be a bit of a long post. For my Ventress I have been planning trying to make a hard plastic stencil to use for airbrushing my Asajj Ventress tattoos on the scalp part of the head. I wanted something that is pretty much a continuous shape that doesn't have to have sections that need to be created every couple of inches. And would fit my head without large gaps. I have been using a Halloween bald cap that I tried to modify to fit my head, but because the material is flimsy the stencil shapes have to be cut into sections and then have to be connected when the bald cap is removed. I had my head cast. Which I did but I had to go to a place to get it done. Mind you I plan on doing other things with my head mold. The process for making this stencil can be done with just casting the scalp and ear area and doesn't have to include the face. I purchased a small (16"x16") Vacuum forming table. Got it on Etsy. Pm me if you want a link. You can also go on Youtube to learn how to make one. I used my house vacuum to create the suction. I also purchased a sheet of PETG from Amazon. .020" thickness. I also had a heat gun for this process. I made a cast from the mold of my head using Smooth-Cast 305 from Reynolds Advanced Materials. I made it a little bigger (deeper) than I had planned on. But I figured out a workaround without having to cut the head shape down. You can learn more about casting at the Smooth-On website. or you can search Youtube. I used the metal frame that came with the vacuform table and secured the plastic sheet I had cut down to the same size as the frame. I then put it in the over, raised a few inches above the metal wire shelf under my broiler (around 3-4") and let it sit for around 30-45 seconds. I pulled it out and pushed it down over the head form. My first try at molding the head stencil failed (mostly). When I first pulled the hot sheet down over the head form, it wouldn't stretch far enough down over the head form to reach the edges of the table to suction down the plastic. I tried using a heat gun while putting pressure on the plastic pulling it down, however this really didn't work very well. So, I tried again. This time I remedied the suction issue by building up walls of the vacuform table with Styrofoam I had in the house and then using duct tape to attach them to the table and seal the edges. This would allow the plastic sheet to come down onto the surface edge of the table to allow the suction of the vacuum to work on pulling down the extra plastic to the table. I repeated the steps like I did the first time with heating the sheet of plastic in the oven. I then pushed the sheet down over the head form onto the wall edges where it then started to suction down the plastic. The plastic cools quickly. When it does it will not stretch anymore. It still needed to form a bit more, so I used a heat gun (550 deg) in spots around the head form while the vacuum was on. Some spots I melted the surface and created holes where I had the heat gun to close to the plastic, so I patched them up with duct tape to create the suction again. I kept going around the head till I was happy with the results. I have cut the head shape out and will be drawing and cutting out the shapes of the tattoos that go on Ventress' head. The only thing I would like to do again differently is using a bit of a thicker sheet of PETG. I feel it would hold up better for future stenciling. For now, I will use this. But I am also currently ordering more PETG in a thicker sheet. I will be posting more pictures of the head stencil being cut tout and being used with the airbrush when I get there later today. If you do not know about Vacuum forming I suggest googling it to learn more. The first image is showing the vacuform table with the failed stencil to the right of the head form and the successful one still clamped to the frame for the vacuform table standing upright (you are looking at the top of the head). The second image shows how deep the forming of the plastic was made. You can also see the pieces of white duct tape I used to seal the holes where needed.2 points
-
So, I just started writing out a potential CRL today. My understanding is that the 501st won't be making this a regular CRL but could make it a Legion Level Approval costume. I have been in contact at the Legion level and was instructed to provide a serviceable CRL first.2 points
-
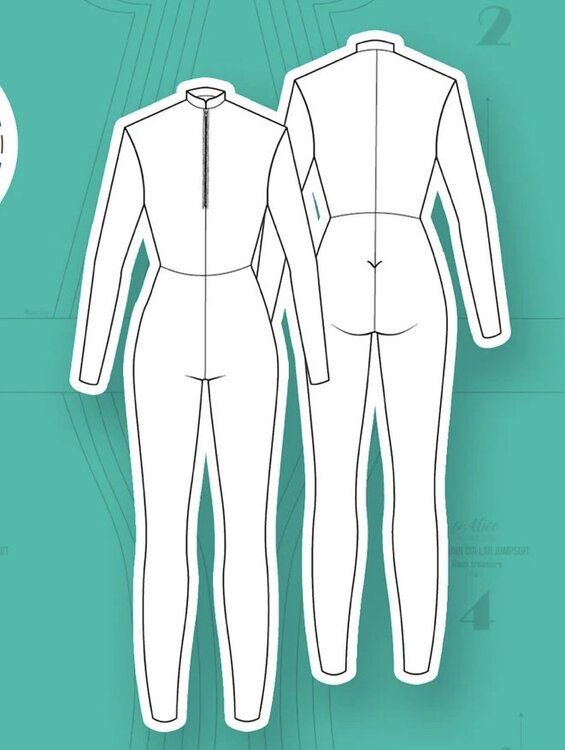
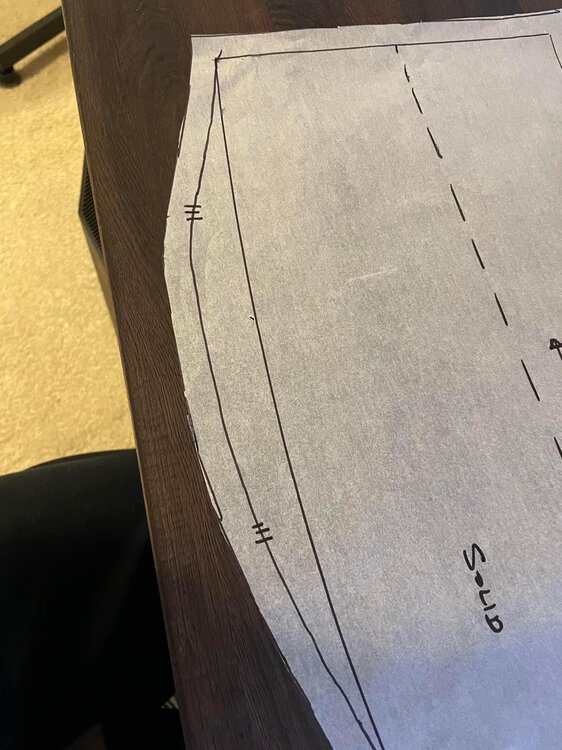
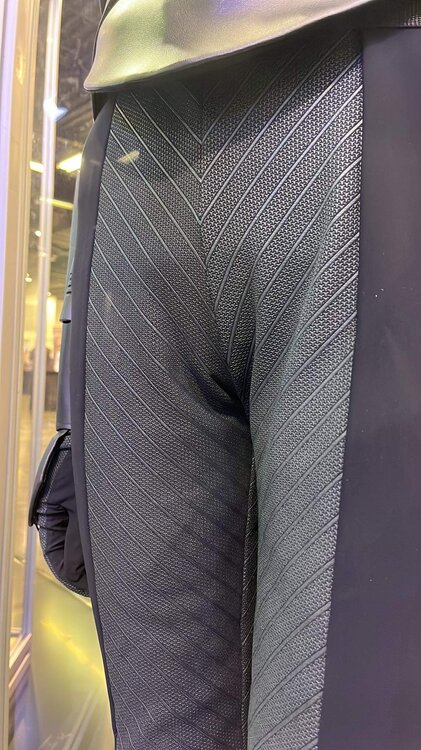
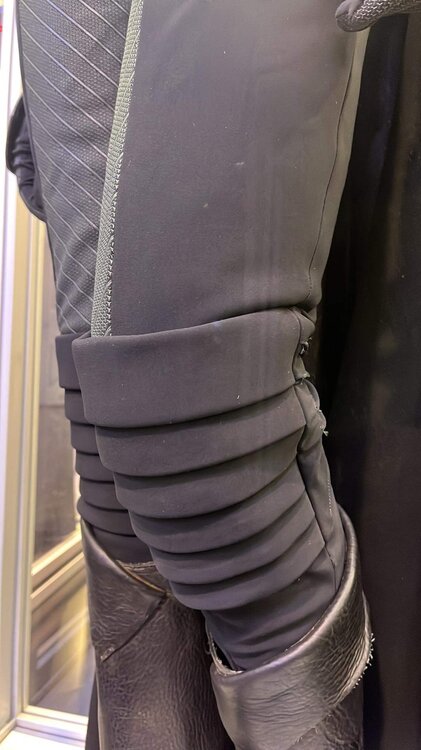
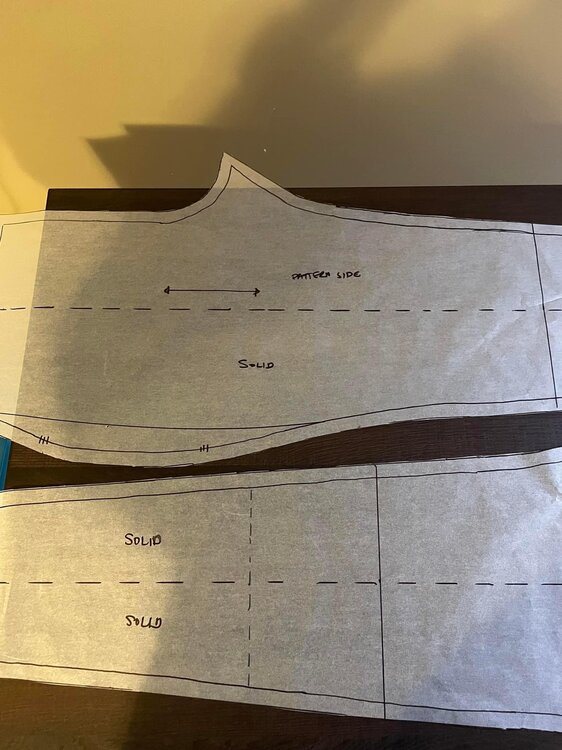
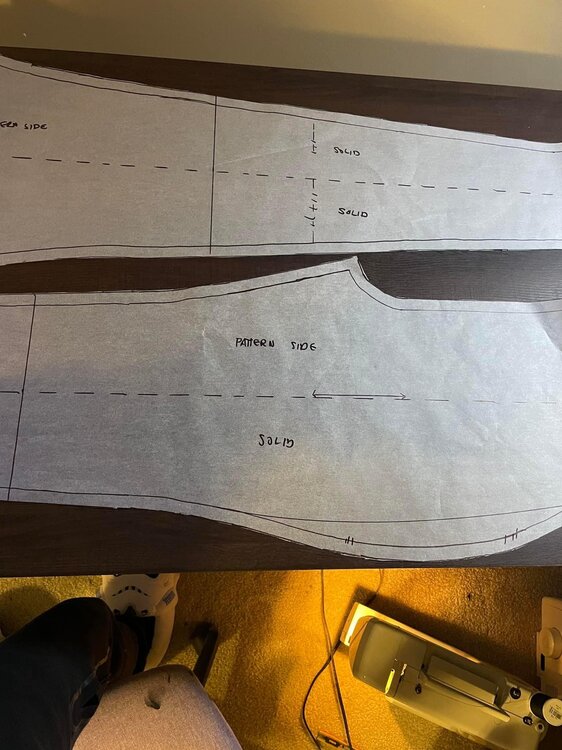
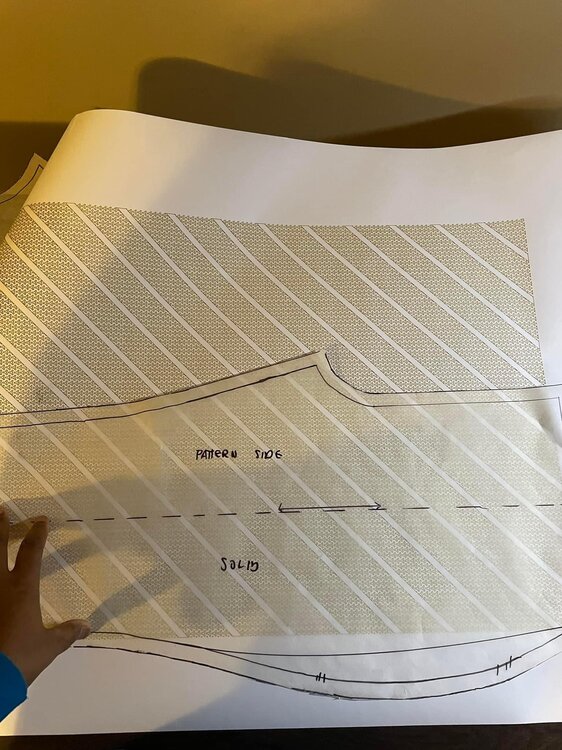
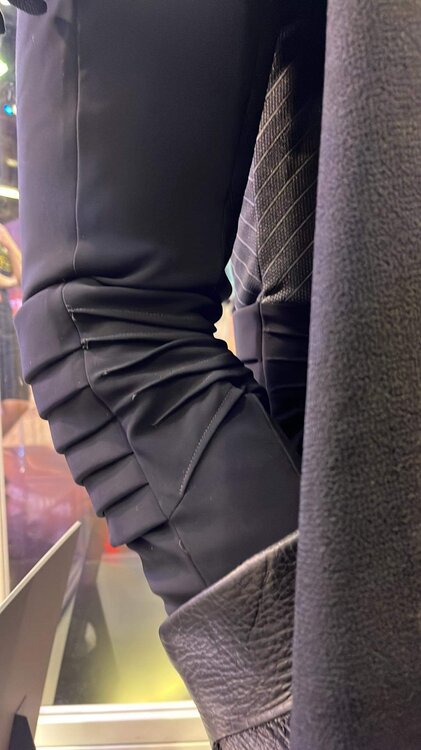
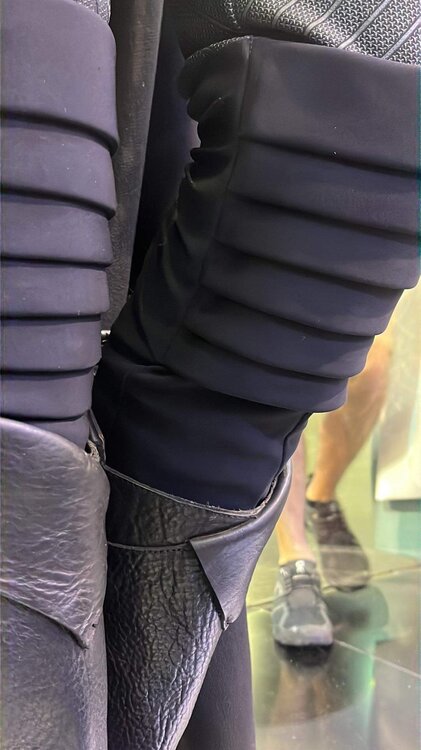
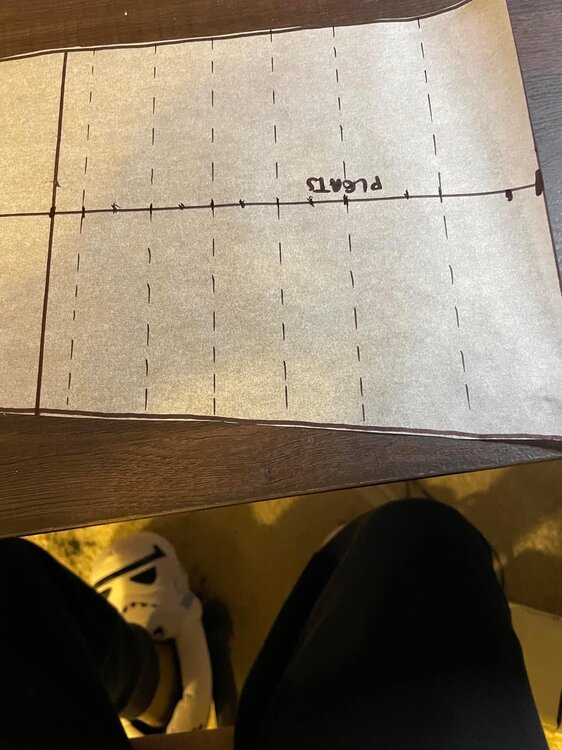
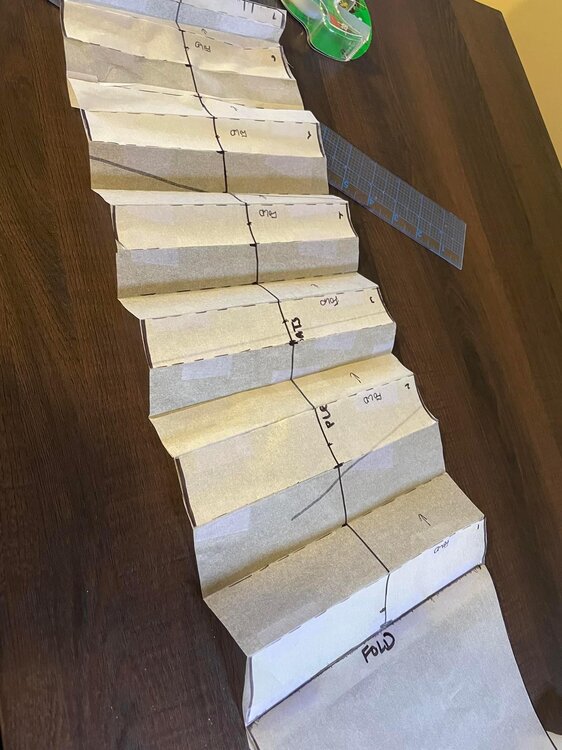
Did a lot of pattern work today. Mostly on the bodysuit, but I also did some work on the screen prints for the bodysuit (ordered a mirror of the one I already have so I don’t have to laser cut it.) I’ll try and explain what I did a bit. The bodysuit pattern is actually not bad. The sizing is true to what the packaging claims. The only thing I don’t like about it is the weird roundness at the hips. It’s not a natural curve and I had to edit out. I still highly recommend it. this is the pattern I’m using and a link https://www.etsy.com/listing/719618406/catsuit-with-long-sleeve-and-front?ref=yr_purchases I used a curve to adjust the side seam line and I was much happier with the fit. After I did a mock-up I had to cut the pattern into parts. There are 4 panels to the legs but I cut it again at the calf. The reason for this is because my screen size is only 17” x 24”. Doesn’t cover the entire leg and would look terrible pieced together. Since the pleated legging will cover that, I’m not worried about it. More to come on the legging bit. Both the internal and external seams can be seen clearly in the 2 images above. it was tough to get a good image since the pattern pieces are so large. I split both the front and back pattern in half. Then I measured up from my ankle to determine we’re to cut at the calf. I marked which parts will be printed fabric and then cut them all apart. I removed the seam allowance too. I don’t really need a 1/2” allowance and I’ll be serging and trimming the seams down anyway. I prefer to add allowances to the fabric with chalk after I’ve traced the pattern pieces on. The above image shows the vinyl screen I laser cut. It was good to see how things would line up. if you plan to make this costume keep in mind you’ll need 3 screens. One for the gloves and 2 for the bodysuit since there is a left and right slant to the pattern. After I finished this part of the bodysuit I tackled the leggings. Not sure what else to call them. Originally I thought it was all part of the bodysuit but I don’t think that’s the case now. After closer inspection there are a few things that stand out: 1. The stitched gathers at the back of the knee were to tighten the fit, but that wouldn’t be necessary if it was all one bodysuit 2. There is gathered fabric above the pleats which indicates a difference in fabric volume between the legging and bodysuit leg or at least enough pressure from the legging to squeeze the fabric underneath. 3. the calf side of the legging is really lumpy and looks like it’s layered over something else. 4. it is much much easier to make it as a separate part and slip it on. With all this in mind I patterned out a separate part for the leggings. I kind of eyeballed the length needed and made sure I had 6 pleats. I plan to use a doubled layer of fabric that will fold down from the top. That and the pleats themselves should give enough volume but I’ll find out tomorrow. I still have some pattern work to do for the torso and I need to model and mold the greeblies since I couldn’t find practical solution. I also need to patted the gloves. While perusing Etsy, I found a vendor selling patterns for this costume. It consists of the armor, belt, greeblies, and boot covers. So far I don’t have complaints. The sizing seems to be okay, but I’ll need to mock up some of the parts to be sure. I won’t be using the belt as I don’t agree that it’s something other than a straight black belt blank with embellishment. Everything I’ve found so far has odd shaping, but unless you have a hip tilt to accommodate the curve it’s not a good pattern option. I have a belt blank on order and will talk more about it when I have the parts printed. Here is where I got the patterns for the armor: https://www.etsy.com/listing/1255438991/third-sister-inquisitor-reva-costume?ref=yr_purchases2 points
-
So I’m back at it. Have 3 weeks of vacation and plan to get as much done as possible. I’ll document as much as I can. To start I am working on the bodysuit pattern. Used this one from Etsy. https://www.etsy.com/listing/719618406/catsuit-with-long-sleeve-and-front?click_key=a561c1118fd8fbc57a85f2c7e1c1efdf183cc41c%3A719618406&click_sum=1332445f&ga_order=most_relevant&ga_search_type=all&ga_view_type=gallery&ga_search_query=catsuit+pattern+pdf&ref=sr_gallery-1-9&organic_search_click=1&sts=1 It already has seams largely in the right places and has long sleeves. My plans for changing the parttern include: * re-draft the sleeves to move the seams * split the leg patterns into four parts * draft pleated knee pad section * create skirting pattern for lower half of bodice The pattern is printed in single pieces and I used translucent sketch paper to copy it. I highly recommend not cutting the original unless you’re okay with printing more copies if you mess up. I’ll put up the first step shortly.2 points
-
That looks amazing! I just got my led kit in a few days ago and installed them. They're bright so I'll have to dim them a bit. I don't have a cloak I can use to I used my hoodie and Vader cape. 😅2 points
-
I bought it! Been thinking about Nihilus for a while, so I couldn’t pass this up. Stand by for many questions!2 points
-
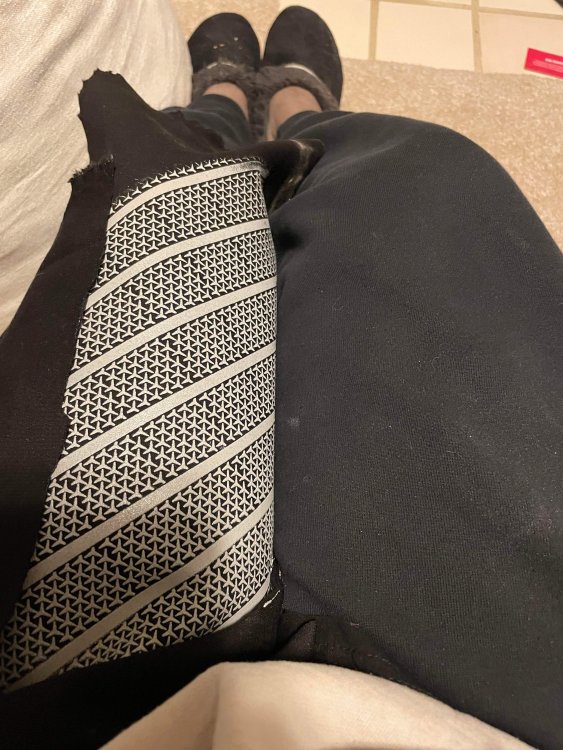
Had a productive day today. But I’m going to share a little of the drama. Originally I had a screen shop make 2 screens for me. It was expensive. Unfortunately one of the patterns was sized wrong. Since the screens were expensive I decided to make one myself. Cut sad music. Making a high density screen with emulsion is not done often for a reason. It takes a lot of skill. Usually a capillary film is used, but I just couldn’t justify the cost. The cheapest I found in a good size was over $100US. No thank you. Luckily I have some knowledgeable people at work. I finally have a screen I can burn (it’s drying as I type this) The screen that was the right size wasn’t very thick so I wasn’t sure what the result would be. Unfortunately the fabric I’m using shrinks significantly under the high heat used to cure the ink which made multiple passes impossible, but I’m happy with the result. The color in the images is washed out a bit. The ink is actually grey. Now I will get my pattern sorted and I’ll do the final prints.2 points
-
Boots came in. went with pirate boots suggested. They are big, but I’ll where my fuzzy socks.2 points
-
2 points
-
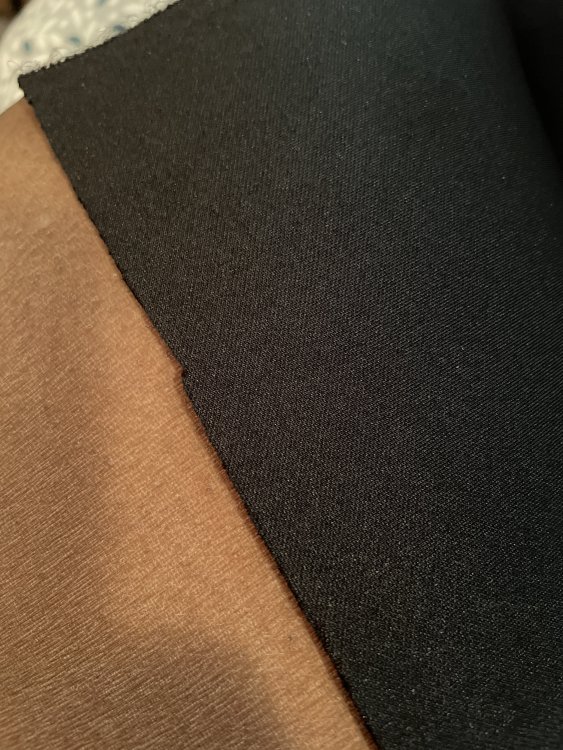
I’m back! Been a crazy summer. Bought fabric for my costume. I decided to go with 1mm neoprene because knit didn’t have the right texture or drape. Now I’m searching local print shops to find one that will make screens for me. I don’t mind doing the printing, but I don’t want to stock up on supplies for a hobby I’m not going to actually do. I’ll probably buy my boots next.2 points
-
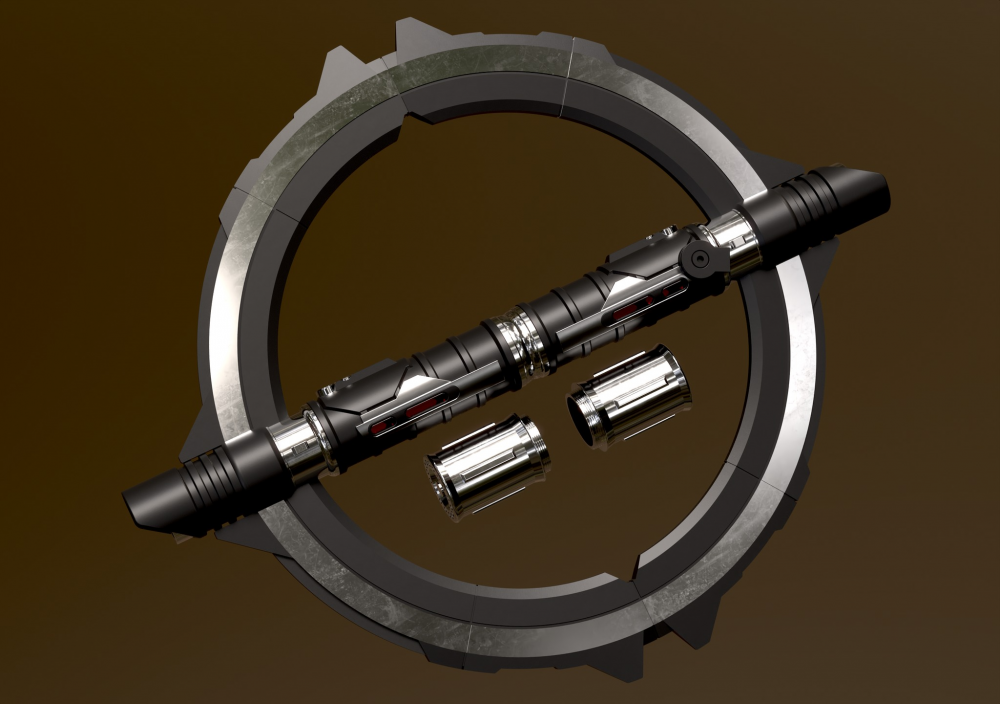
Lightsaber update By now I'm sure you've seen it on tic tok and instagram, the LGT Grand Inquisitor *inspired* lightsaber. I knew this would happen. I knew I'd finish this costume and then with the release of Kenobi someone would finally make the Grand Inquisitor lightsaber for real. I just thought it would be the live action version and not rebels version. But here we are. So surprise I bought it. Dark Wolf had the best price I could find for it at $650 for a xeno pixel. I still have no idea what the difference between a xeno and a proffie is but I wanted to save $100 and try it out. My opinions on this saber... It's cool but could be better. Not as much of a fan of the xeno pixel option vs the proffie. The effects are all the same like clash and tip drag and fonts are all the same pretty much, but the proffie does a much better job executing these effects. For example on the proffie for clash effect, hold the button and hit the blade and it will clash until you release the button, and the sound will resonate for an extra second like a thunder clap. With the xeno option the sound just stops abruptly when you release the button. Same difference with the other effects as well. Just seems to me like even with the price difference, it doesn't seem like the sounds should be this different especially with it still being expensive. The hilt itself I think looks very nice. It's not a replica but inspired so I know it looks different than the show. Mostly the polished aluminum shouldn't be a thing here. The hilt should be a gun metal, dark grey, not polished aluminum. Besides that, looks-wise, it's a nice hilt. It folds and has the red buttons (fake buttons) on either side. There is a squeak sound on mine that I can't figure out where its coming from. Either squeaking in the chassis or on the metal shroud around the grip, I'm not sure. There are several moving parts on this hilt so I guess that is to be expected. One concern I do have is for the battery life. I have not found an option on the xeno pixel that will tell me the battery percentage like the proffie does. And with this being two blades on a single battery I fear it will not last nearly as long. I've noticed after playing with it for a while, changing fonts over and over and playing music on it, the top blade tends to not light properly after a while. Like its too much to keep both blades going especially with the music also playing. Maybe its a connection issue to the blade but idk. Also have found that if opening and closing the rings this sometimes makes the blade connection go bad because of how it all screws together. So overall, it's a really nice one, but some things could function better especially for this price. And for it being the ONLY metal hilt Grand Inquisitor lightsaber, probably everyone in this group should get one.2 points
-
duuuuuuuuuuuuuuuuuuuude. this is epic!!!!! great job building such an amazing costume. further to the hand make up thing. spray the barrier spray before and after makeup application and it will "sandwich" the make up in, preventing smearing and transfer to other surfaces. cant wait to see trooping photos of this costume2 points
-
Similar to the BHG Greedo CRL that is being grandfathered in 6 months due to inaccuracies and lack of member desire to correct them, we have decided, along with LMOs, that the Starkiller: Dark Apprentice Robes CRL will be grandfathered 6 months from today (October 1st, 2022). There is only 1 member approved with this costume, and they have previously responded that they do not intend to update the costume to better suit the references. Given this, if any other members want to work with the Detachment to improve the costume, then the CRL can stay published. Once grandfathered, any new costumes of this CRL must go through a full NTTL process.2 points
-
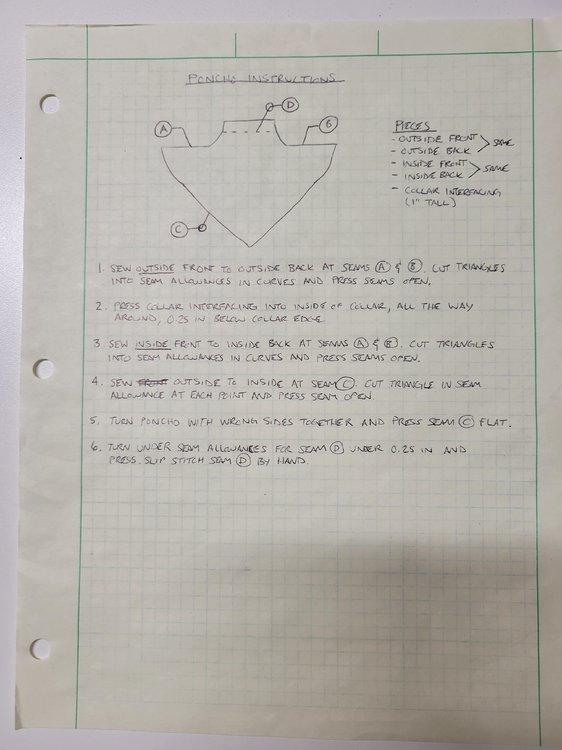
Yay! You're welcome for the help, and I'm excited to see this build happening and that my creation of this CRL was an inspiration! Here are some more answers to your questions: -Make sure your poncho color is lighter and less blue than the arm inserts. I had a *really* hard time correctly capturing the poncho color via photos. When in doubt, try to match the comic book color over the photos in the CRL 🙂 -Yes, there is a little bit of blue in the arm insert color. I noticed this in the comic book and added a tiny bit of denim blue to my dye bath to get it to match. -I'm attaching a photo of my poncho instructions I made for myself, so hopefully this will answer your questions on this topic. Sorry if the stitch callouts look confusing - I did them like weld callouts since I'm an Engineer and I was writing this for myself. 🤓 But if you come up with a construction that works for you, go for it! I opted for this to minimize visible seams and make it look as comic booky as possible. -For the small blaster, my husband modeled it from scratch in CAD (he's an Engineer too!), and we have 3D print files that you (or any other TFE members or prospective members reading this) are free to use if you wish! I just have to find them and will add them to this thread when I do. I would think a piece of orange tape on the end would suffice where orange tips are required, but I don't know for certain, as I never needed to do this. -For the bag, there is a frame in the comic book that I'm pretty certain is in my build thread with Mara's hand over the side of the bag. That's what I used for scaling. I made a bag out of paper and tape to check the porportions before cutting leather. As for the leather, I bought a 5 oz (I think) veg tan shoulder from Tandy a while ago that I've been using for several things, so that's what I used for the bag. You could certainly go thicker though! Let me know if you have any other questions, or free to reach out!2 points
-
2 points
-
I am approved with both versions of the wicked armor Nihilus. You have to add to both a bit to do it. The KOTOR2 mask they make would probably be approvable, but I changed the center detail to match the CRL better. You will also need to add the chest padding. I used a sheet of open cell foam, cut to fit. I recommend a different obi, but the one they sew into the skirt is approvable. In all cases, the wicked armor will give you the materials to do it, but go through the CRL and make it match up once you have it in hand.2 points
-
2 points
-
2 points
-
Here are front and back pics of tunic, pants and cape the I made. I hope this will help you guys. Tunic Pants Cape2 points
-
Hi I used a normal shirt pattern for the tunics and moded it so it fit - the same with the skirts, and just winged it, so sadly I don´t have an exact pattern for them.2 points
-
I have wanted to make this version of Mara Jade for quite awhile. My only current approved Mara is the Arica disguise and can't really wear that to troops. My main issue was the bodysuit. I can sew but I don't have a serger and knew to get the proper fit, I would need one. I also was extremely confused on the diamond pattern and how to make it work properly. My last issue was budget. I can't afford to commission this so I knew that if I wanted to do this costume, I would have to make it myself, with help. I was very fortunate that my friend offered to assist me in my build and yesterday we were able to make and complete the bodysuit and it works great! We used the YaYa Han McCalls bodysuit pattern as a base. I am a very visual person so I try to sketch out what I want with my rudimentary art skills before I actually attempt any actual cutting etc. The main changes needed to the pattern are on the front. The shoulder princess seams and piping needed to be added in as well as the diamond on the front and the quilted stripes on the inside of the thighs. We ended up going with View D. The first step was cutting out the pattern. This pattern is RIDICULOUSLY oversized. With my measurements, it put me at a size 20. We cut the pattern at a 10. I used a 4 way stretch spandex I found in LA at Shavali Fabrics. Although I had purchased 4 yards, we ended up only needing around 2. The pattern calls for 1 3/8 I believe but that was inaccurate. The quilted area needed a bit more fabric and we removed the collar and the sleeves from the pattern accordingly. After the pattern was cut out, I taped it together including the 5/8 seam allowance as I went. Once this was done, the real work began. We traced out the new seam lines that would need to be added and then cut those out and retraced the entire pattern on pattern paper. Here is the revised pattern with necessary pieces put in. This is what the front of the bodysuit looked like with the modifications. We also eliminated the stirrup component and cut it straight down to end like a regular legging instead. The longest piece has the new princess seams and a reduced shoulder so it fits the CRL requirements. The crotch portion became a separate piece as did the quilted areas. The back princess seams are not a requirement and since I for one don't particularly like how those seam lines look on me personally, I omitted them and kept the back portion of the pattern as is. Here are all the pattern pieces laid out and ready to be cut. Only 2 pieces needed to be cut on the fold. That was the center panel piece and the crotch. I also ended up cutting 4 of the quilted area section and then cut an additional 2 for the batting for that. For reference, my fabric was 60 inches wide. You may need to adjust accordingly if you are working with less fabric. I ended up purchasing 2 packages of Wright's black piping and basted it to the side panels before beginning to attach everything together. The quilting was simple once I figured out how to get the minimum six panels I needed and drew in the lines with fabric pencil. The crotch was, again, the trickiest part but since I was using a 4 way stretch, it worked well enough and actually shaped quite well once we tweaked the pattern slightly. The diamond is more defined than in this picture but here is a closeup of the side panels and the piping. We added the preferred invisible zipper and added the hem to the pants and the collar and sleeve area and it was done. I'm so very happy with the fit and can't thank my friend enough for her assistance. Please excuse my dirty mirror. This is my "Swarm Wars" Mara but the pieces are the same so I plan on using them for this look as well. I had leftover leather from a prior build so made the belt/holster/harness with that. My friend 3D printed the harness buckle for me and I purchased the silver buckles needed for $2/each at a military surplus store. The buckle was $2 at Tandy Leather. My boots are my Jedi boots but should work for this. I bought drum major gloves off Amazon for $5 and plan on giving them a dip in tea dye so they can have the off white color required. I found a cheap pair of goggles on Amazon. I plan to paint over the logo and then they should be set. I already have the saber although it is not a requirement as well as a wig in the proper color. I found great Motor Cross shin guards off Amazon for $14.99. Even though they are kids sizing, all reviews say they fit adults well and have the proper circle over the knee etc. Shin Guards They should need little to no modifications. The last thing I need to make is the cowl. I have a general idea of how to make it as it looks like a wide infinity scarf so I am going to take some leftover fabric from my stash and attempt it today. I'm very close to completing and submitting for approval and I can't wait!2 points
-
This is my breakdown write up from the Second Sisters Build Group on facebook. The community has put the microscope on the details and we came to these conclusions for material and accuracy. This is so very near the final version of what we have discovered. Anyone is free to use what is provided for their own use. One of the few things remaining is the description for an unmasked version which the community wanted to hold out for a couple weeks due to potential game spoilers. I have a bunch of hi-res reference images to organize and contribute as well. Those will be posted or have an available public gallery link posted within a few days. Updated: 9:05am (CST) 6 JAN 2020 Nearing final version for details - edited for clarity, and continuity to other CRL descriptions. This still has more detail than a typical CRL. Second Sister Materials Jacket • Black material that has a distinctive rib texture. rib-knit or quality Calvary twill lined in red rib-knit or quality Calvary twill material. • Red material of same rib texture for arm stripe, sewn in. Cape • Black canvas-like woven material, single stitched channels with dimensional padding • Lined in red gabardine or twill material • Yoke is a plan black fabric. Pant • Black rib-knit same as Jacket Gloves • Leather or leather-like material, black back, red palm. Boots • Black Leather or leather like material Helmet/Pauldrons/ Arm Bracers • Plastic or similar hard surface with satin finish & weathering where appropriate. . . DETAIL BREAKDOWN Helmet: • Outside and inside of the helmet is black • The back as a slightly bulbous round with a turn out aventail at the bottom • The sides of the helmet arch out at the bottom edges. • There is an under collar of the helmet design. • The cheeks have row of inset openings with mesh covered vents. • No skin is visible around or under the helmet. • Eye slit is shaped across the helmet and red in color. • Eye slit can be lit up (optional) . . Neckseal: • Smooth material with ribbed back piece, two side seams. • Back has several rows of padded where the ribs disappear under the helmet and under the collar. • No skin is visible around or under the helmet. . . Jacket: • Made of a black fabric with a ribbed texture. • Jacket is lined in red fabric with a ribbed texture. • Jacket is form fitted. • Sleeves have red strip on the outside also of ribbed material. • The jacket front is fitted with princess seams from shoulder to bottom seam - does not extend past the peplum. • The jacket folds left over right. • Jacket has a squared standing style collar with a small gap in the front. The rib is shown vertical and is stiff to stand on it's own. • Front of jacket has a sewn vent/dart at center front. • Jacket has two metallic silver rectangle bars on both left and right upper chest. Same light metallic silver tone as the belt buckle. • The top and bottom of the jacket are separated by a visible seam that is a few inches below the belt and in conjunction with the ending of the front panel. • Back of jacket has princess seam that ends an inch above the belt and aligns with insert panel. Princess seam is curved from the armhole then to straight line to the insert panel. • Back of jacket has an insert panel that starts at 1 inch above the belt and ends 1 inch below the belt (small of back). • Back of jacket has a center seam on the upper part. Insert does not have center seam. • The peplum is split in the back with a slight iverlap. • The peplum has a wide fold on each side of the split. • The peplum has side dart that stops at the lower hip and is in line with the jacket side seam. • The bottom back of the jacket is straight across and extends to mid thigh. . . Cape: • Yoke is a plain black material (not leather). • Yoke back is square from shoulder to shoulder stopping at the top of the arm. • Yoke front is angled from neck out to the Jacket’s overlap seaming. • Yoke has 3 stitches of narrow width apart at the outside edge with another 4 rows of stitches of a wide width apart. Neck edge has a single stitch. • Cape is made of black fabric with canvas-like woven texture. • Cape material has vertical single stitching from yoke to hem and the vertical lines look quilted with slight dimension. • Cape is mid-calf in length. • Cape design does not cover the front, and drapes off the shoulders sweeping to the sides. • There are white imperial “cog” symbols painted on fabric on both biceps, weathered to show weave texture. • No visible front clasp. • Lining of cape is red with a gabardine/twill texture. • Cape consists of two side panels and one back panel. . . Pauldrons: • Two armor plates extend from neck to just past the shoulder. • Black finish with no decoration or lines. • Does not have any visible straps or fastener. • Some mild weathering revealing silver underneath. . . Pants: • Made of same ribbed material as coat • No visible pockets • Has front fly closure • Pants are slim fitted • Pants have a crease down the front and the back starting from lower hip down. • Pants are tucked into boots . . Belt: • Made with leather or leather-like material approximately 1.5" • Grove on the top and bottom of the belt. • Trapezoid shaped silver belt buckle with two rectangular insets in the upper left and beveled edges. Slightly curved to the body. • Same light metallic silver tone as the silver bars on the jacket. • No other visible greeblies (except when a covertec clip is needed for wearer to hold the lightsaber hilt) . . Forearm bracers: • Constructed out of the same material as the pauldrons. • Black semi-gloss sheen • Form fitting to the wearer’s forearm. • Arm bracers start at the wrist and end just below the elbow. • Two black adornments are attached to each of the bracers at the lower forearm. The design is a rounded rectangle raised with beveled edges. It has two raised buttons and one slightly raised red lighted panel (light up optional) • They have a back seam with appropriate design insets. • They have an inner wrist adornment on each of the bracers. It is a rectangular inset with beveled edges, It has two shaped cylindrical objects positioned nearest to the wrist. It has a small side pipe extending from the cylindrical objects to the side of the inset. It has a round protrusion on the upper part of the inset. • No visible clasps or attachments. • Arm bracers are identical in detail and are a mirror of each other. . . Gloves: • Black leather or leather like material on back • Red leather or leather like material on palm. • Gloves tuck into forearm bracers. • Palm has thumb seam, double stitched • Back has thumb seam, no top stitching • Thumb and Forefinger tips have separate piece. • There are fourchettes between each finger. • Gloves have no extra stitching or detail on back. . . Boots: • Black leather or leather like material • Shaft of boot ends just below the knee • Boots have no more than 1.5” heel • Boots have no visible zippers (hidden zipper on outside of boot) • A small tab covers the zipper pull on outside of boot. • Boot has a thin red line visible on the top of the boot, and the side tab is lined in red. • Sole of boot is black • There are three rows of “V” stitching on the upper shaft of the boot. The point of the V is in the front center of the shaft. The “V” has a slightly padded look. • The lower boot has a strap across the ankle area. • No buckles or other decoration is visible. . . Light Saber: • 1st option: no blade and is attached to the hip with the half curve situated to the front. • 2nd option: half circle single blade • 3rd option: full circle double blade. • Circle part of the blade has a inset/cut out shape with writing along the inner bevel. • The blade, if used, is red in color. I don't know if the legion will require this to be exact like they do for other prime characters, but they might? .2 points
-
Definitely aiming to have 2 versions in the hood with the shoulder and boot addition, then the normal version.2 points













.thumb.jpg.0898387227ca0ff33c8dabbc994035fe.jpg)