
-
Announcement
Welcome to the forums!
If you are a newly-approved member, make sure you check out the New Member Checklist!
If you are a Detachment member and can't see the member-only area, post here for access.
-DV


L Kamino
-
Posts
65 -
Joined
-
Last visited
-
Days Won
9
Recent Profile Visitors
919 profile views


.thumb.jpg.6767538d6131650e3b411b09ff9e4989.jpg)


L Kamino's Achievements
22
Reputation
-

501st/SLD and/or TFE Detachment Access Requests
L Kamino replied to DarthBrute's topic in Welcome Area and Forum Help
Requesting full detachment member access, please. I've been part of the detachment since 2015. Thank you! https://www.501st.com/members/displaymember.php?userID=18757&costumeID=105 -
Becoming Darth Revan: Part IX, The Hood and Capelet
L Kamino replied to L Kamino's topic in Darth Revan
I had some technical issues adding photos but that is now fixed. -
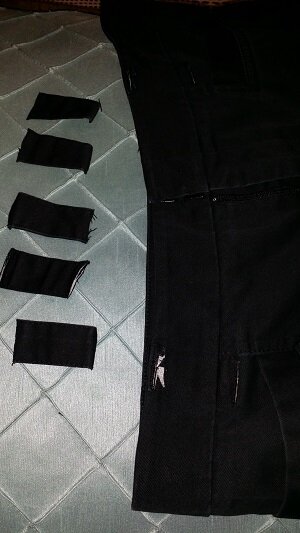
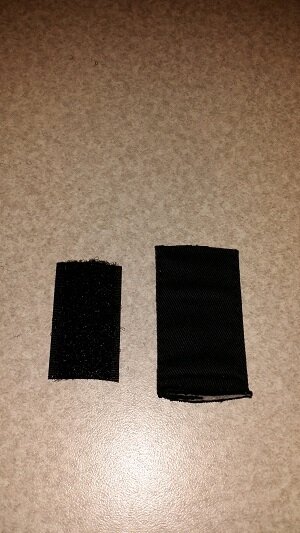
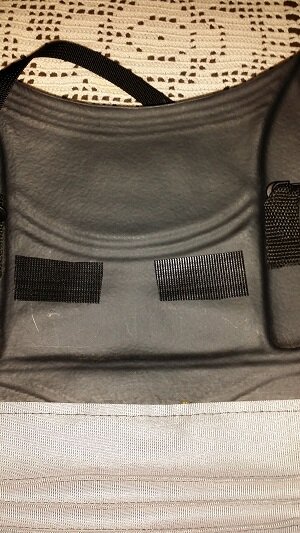
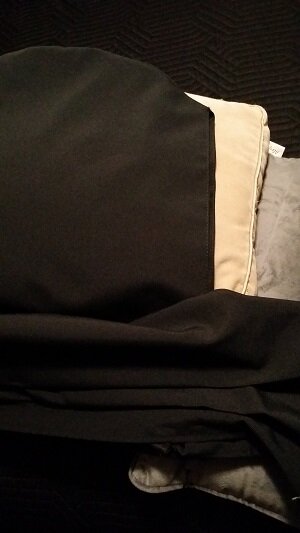
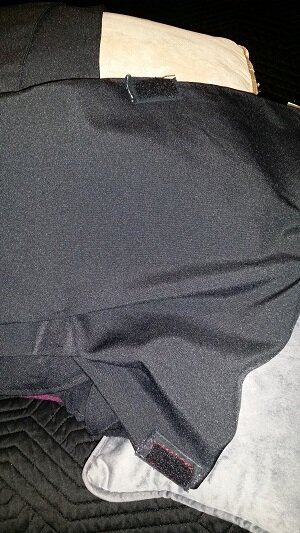
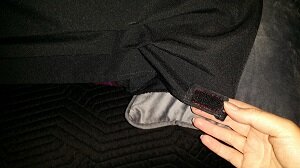
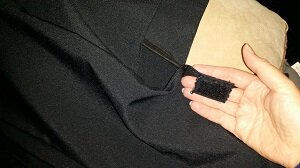
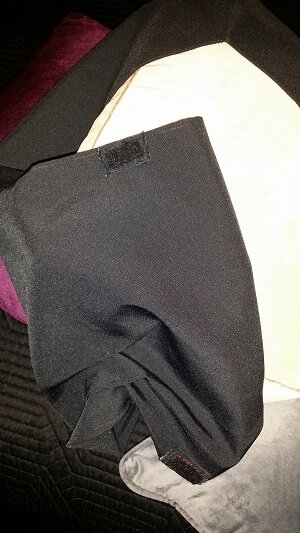
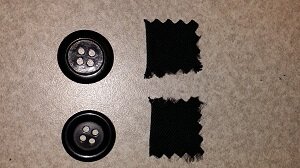
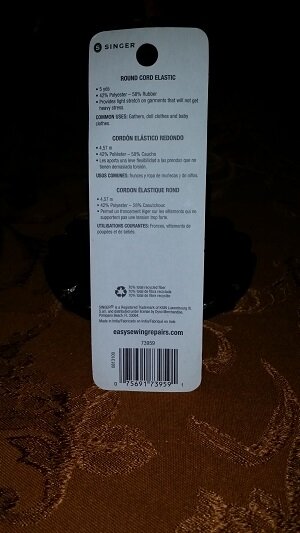
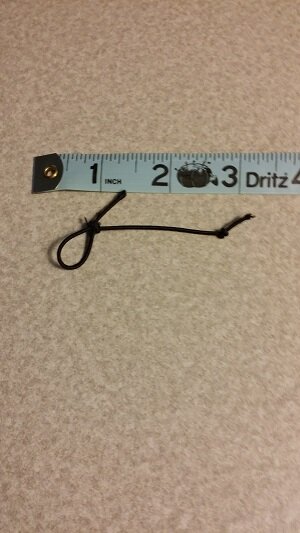
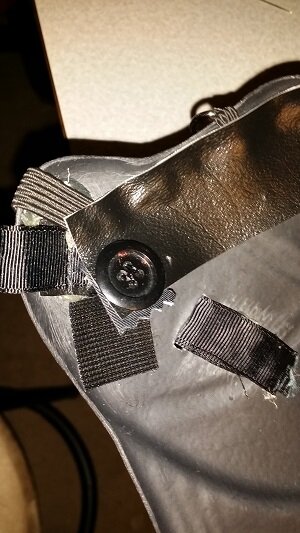
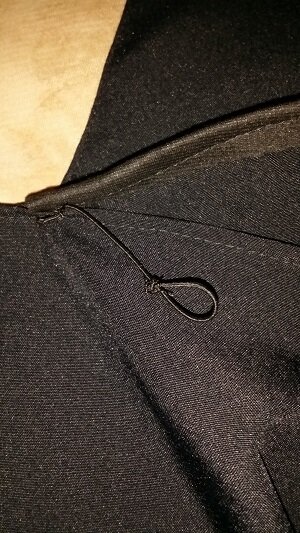
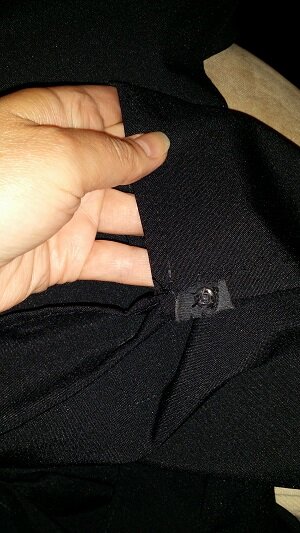
I ordered a Deluxe Darth Revan from My Wicked Armor. I modified my hood and capelet to tuck under the front armor plate and attach with Velcro. This same mod would work for magnets or other attachments. To check my measurement, I put on the chest and back armor and my cape. I put on the hood and capelet piece on and brought the fabric around the front of my front armor piece in place so I could identify where I would need to place the Velcro inside my armor. I have plenty of extra length, so I was able to use fabric clips to clip and hold the ends in place. I moved a bit as I would on a troop so the fabric wouldn't be too tight. I measured and noted where on my chest armor I could place small rectangles of Velcro inside where I would want to tuck and hold the top and bottom edges of the fabric in place. I inserted safety pins in the fabric to measure where I would attach the rectangles of Velcro onto the fabric. I didn't take photos of this, but since I didn't have help, I just stood in front of a mirror. I needed small fabric rectangles to place the Velcro onto the hood and capelet so I could easily remove the fabric to replace the Velcro if it wore out. I removed some wide belt loops from some cotton Dockers I had. These already had a seam in place to avoid fraying so this worked nice. I cut the soft part of the sew-on Velcro to match slightly smaller than the belt loops. I stitched the sew-on Velcro onto the loops. A bit sloppy by hand but they're holding. I made four, two for each side. I cut out the rough side of the Velcro roughly the same size for the upper part of the fabric. For the bottom part of the fabric, I placed slightly wider strips of the rough side of stick-on Velcro so I could have some flexibility if my weight changed, for fit, etc. I placed those inside my armor. To place the top part of the fabric, I placed a stick-on Velcro inside the armor where the top part of the capelet would wrap around in front and reach over the armor buckle, in and down inside to hold. I'll need to add a photo of that area. I didn't completely stitch the rectangles onto the fabric, but rather "tacked" them on into the seams, so I could loop my finger underneath to grab them and to make it easy to replace if I needed without too much puncturing of the fabric. I tacked them onto the fabric facing outward so they could attach inside the armor to the Velcro. The hood and capelet are laying with a side view here and the Velcro areas will follow. The upper and lower Velcro on the fabric: You can see here that I can reach behind the Velcro with my finger: Might be hard to see here, but I put the hood onto a pillow as if facing it being worn and wrapped the edges of the capelet how they go to show more of the Velcro. I added an extra attachment if I'm at an event with a lot of movement, a button and elastic loop to hold the hood in place as I move my head. I used small buttons on each side and cut out some cotton fabric with pinking shears to house them. I used round cord elastic to make the loop. I measured a small length of the loop for each side. I attached a button inside the Velcro, sewing it onto some vinyl reinforced with some cotton fabric and stitching in place into the existing housing. I stitched the loop into the seam of the hood. I tucked some of the extra upper fabric over and tacked it in place. You'll see I added a snap but found it wasn't necessary when using the loop. When putting on my hood and capelet, I wear a ball cap and let my hood drape and hold in place on the cap so I can see. I leave my armor belt unbuckled so I can reach inside the armor to find the other half of the Velcro. After I get the capelet secured, I then secure my armor belt in place. I leave my gloves and mask for last. Wearing the cap, I can simply bend over at the waist, reach in and remove my cap, put on my mask and attach the hood to the mask and then straighten up. Everything stays in place.


- 2 replies
-
- 1
-

-
- wicked armor revan
- darth revan
- (and 2 more)
-
I've since moved over to Flickr and my Photobucket has been deactivated. I'm in the process of moving my images from my mod threads over to Flickr. This one is complete.
-
Many years later, the painted pieces have not stretched and are in excellent condition.
-
Photo links replaced with Flickr images.
-
Becoming Darth Revan: Part IV, Connecting Armor at the Shoulders
L Kamino replied to L Kamino's topic in Darth Revan
I've since moved over to Flickr and my Photobucket has been deactivated. I'm in the process of moving my images over to Flickr but this thread is done. -
Becoming Darth Revan: Part V, Connecting the Mask Straps and Padding
L Kamino replied to L Kamino's topic in Darth Revan
I've since moved over to Flickr and my Photobucket has been deactivated. I'm in the process of moving my images over to Flickr and updated this thread. -
Becoming Darth Revan: Part VI, Connecting the Cape Straps
L Kamino replied to L Kamino's topic in Darth Revan
I've since moved over to Flickr and my Photobucket has been deactivated. I'm in the process of moving my images over to Flickr and this thread has been updated with those links. -
Becoming Darth Revan: Part VIII, Attaching Revan Cape
L Kamino replied to L Kamino's topic in Darth Revan
I've moved over to Flickr and my Photobucket has been deactivated. I'm in the process of moving the photo links over there and this thread is complete. -
Becoming Darth Revan: Part VII, The Red and Black Sashes
L Kamino replied to L Kamino's topic in Darth Revan
I have been away from this forum for quite some time, and replaced Photobucket links with Flickr links. -
I use the Velcro system as well to secure the hood and wrap in place. I attached Velcro to small squares of fabric and tacked the fabric facing outward so it meets the other half of the Velcro inside my chest armor. I have photos of what I did for mine if you need it. I changed the capelet attachment so that the straps reach up from inside the front chest armor and attach to the capelet instead of the other way around. I shortened the capelet straps and attached D rings that I feed the long straps from the armor through. I added Velcro to the backside of the straps to give me an extra securing. I created a thread for the capelet but I'm having trouble pasting the link here. It's "Becoming Darth Revan Part VI: Connecting the Cape Straps. I wonder if you're having a problem with the ribbing because it's sitting too low?
-
I stitched Velcro onto strips of fabric and tacked the fabrics onto the backside of the sash. (I had to reinforce the foam with fabric to hold the stitch.) Now I can fold it over the bar when I'm getting ready. It holds well because I used the industrial strength. Just had to determine how much to fold so it hung in the right place.
-
I had Mozilla Firefox crash, and am stuck using Explorer, and can't paste links in here either now, but I could with Firefox. Your link works if I'm logged into Facebook first.
-
Looking really awesome! Great sheen on the armor in those photos. One thing to watch for is that your red sash stays behind the large O ring. I've learned that even after placing mine carefully behind it, walking, posing and kneeling caused the sash to bounce and slip in front. It took me a bit to figure that out. I'm going to stitch the black and red together to prevent it from moving. Love your Revan!